1
English
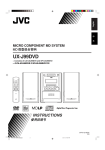
MICRO COMPONENT MD SYSTEM
CA-UXJ55MD
REV.MODE
STANDBY/ON
AUTO REVERSE
AHB PRO
MICRO COMPONENT MD SYSTEM
DISC LOADING MECHANISM
STANDBY/ON
1
2
3
4
5
6
8
¢ UP
MD REC
DISC
SELECT
0
0
AUX/DVD
SET
‹/8
CD
‹ /8
MD
¤‹
TAPE
10
0
9
+10
DISC UP
TITLE/EDIT
4 DOWN
VOLUME
+
FM/AM
ENTER
CD1 0
GROUP SKIP
GROUP TITLE
/EDIT
7
CANCEL
DISP/CHARA
7
UX-J55MD
CD2 0
CD3 0
CD4 0
CD5 0
GROUP SKIP
DISC DOWN
CD
MD
6
6
23
GROUP REC
ON/OFF
REC
TIME
REC
SPEED
–
TITLE SEARCH
TAPE
FM/AM
/AUX
CD REC
MODE
MD
REC
TAPE
REC
MD&TAPE
REC
FM
MODE
CLOCK/
TIMER
PLAY
MODE
REPEAT
REV.
MODE
BASS/
TREBLE
A.STANDBY
SHIFT
AHB PRO
5-CD
SLEEP
DIMMER
BEEP
5-CD CHANGER, PLAY&EXCHANGE
LP:
VOLUME
RM-SUXJ55MDU REMOTE CONTROL
PHONES
INSTRUCTIONS
GVT0104-002A
[UB]
Cover_UX-J55MD[UB]f.p65
3
7/1/03, 5:01 PM
Warnings, Cautions and Others
CAUTION—
button!
Disconnect the mains plug to shut the power off completely (the
STANDBY/ON lamp goes off). The
button in any position does
not disconnect the mains line.
• When the unit is on standby, the STANDBY/ON lamp lights red.
• When the unit is turned on, the STANDBY/ON lamp lights green.
The power can be remote controlled.
CAUTION
To reduce the risk of electrical shocks, fire, etc.:
1. Do not remove screws, covers or cabinet.
2. Do not expose this appliance to rain or moisture.
CAUTION
•
•
•
•
Do not block the ventilation openings or holes.
(If the ventilation openings or holes are blocked by a
newspaper or cloth, etc., the heat may not be able
to get out.)
Do not place any naked flame sources, such as
lighted candles, on the apparatus.
When discarding batteries, environmental problems
must be considered and local rules or laws
governing the disposal of these batteries must be
followed strictly.
Do not expose this apparatus to rain, moisture,
dripping or splashing and that no objects filled with
liquids, such as vases, shall be placed on the
apparatus.
G-1
Safety_UX-J55MD[UB]f.p65
1
7/1/03, 5:00 PM
IMPORTANT FOR LASER PRODUCTS
REPRODUCTION OF LABELS /
1 CLASSIFICATION LABEL ON EXTERIOR SURFACE
CLASS
LASER
1
PRODUCT
2 WARNING LABEL INSIDE THE UNIT
DANGER: Invisible laser
radiation when open and
interlock failed or defeated.
AVOID DIRECT EXPOSURE
TO BEAM.
(e)
VARNING: Osynlig laserstrålning när denna del är
öppnad och spärren är
urkopplad. Betrakta ej
strålen.
(s)
ADVARSEL : Usynlig laserstråling ved åbning, når
sikkerhedsafbrydere er ude
af funktion. Undgå udsættelse for stråling
(d)
VARO : Avattaessa ja suojalukitus ohitettaessa olet
alttiina näkymättömälle
lasersäteilylle. Älä katso
säteeseen.
(f)
1. CLASS 1 LASER PRODUCT
2. CAUTION : Invisible laser radiation when open and interlock failed
or defeated. Avoid direct exposure to beam.
3. CAUTION : Do not open the top cover. There are no user
serviceable parts inside the Unit; leave all servicing to
qualified service personnel.
Caution : Proper Ventilation
To avoid risk of electric shock and fire, and to prevent damage, locate the apparatus as follows:
1. Front :
No obstructions and open spacing.
2. Sides / Top / Back : No obstructions should be placed in the areas shown by the dimensions below.
3. Bottom :
Place on the level surface. Maintain an adequate air path for ventilation by placing on a stand with a
height of 10 cm or more.
Front view
Side view
15 cm
1 cm
15 cm
1 cm
15 cm
15 cm
15 cm
CA-UXJ55MD
10 cm
CA-UXJ55MD
G-2
Safety_UX-J55MD[UB]f.p65
2
7/1/03, 5:00 PM
English
Introduction
We would like to thank you for purchasing one of our JVC products.
Before operating this unit, read this manual carefully and thoroughly to
obtain the best possible performance from your unit, and retain this manual
for future reference.
About This Manual
This manual is organized as follows:
• This manual mainly explains operations using the
buttons on the remote control.
You can use the buttons both on the remote control and
on the unit for the same operations if they have the
same or similar names (or marks), unless mentioned
otherwise.
• Basic and common information that is the same for many
functions is grouped in one place, and is not repeated for
each procedure. For instance, we do not repeat the
information about turning on/off the unit, setting the
volume, changing the sound effects, and others, which are
explained in the section “Basic and Common Operations”
on pages 9 to 12.
• The following symbols are used in this manual:
Gives you warning and caution to prevent
damage or risk of fire/electric shock.
In addition, we put information here about
conditions which will prevent getting the best
possible performance from the unit.
Gives you information and hints you need to
know.
Power sources
• When unplugging the unit from the wall outlet, always pull
on the plug, not the AC power cord.
DO NOT handle the AC power cord with wet
hands.
Moisture condensation
Moisture may condense on the lenses inside the unit in the
following cases:
• After starting to heat the room.
• In a damp room.
• If the unit is brought directly from a cold to a warm place.
Should this occur, the unit may malfunction. In this case,
leave the unit turned on for a few hours until the moisture
evaporates, unplug the AC power cord, then plug it in again.
Others
• Should any metallic object or liquid fall into the unit,
unplug the AC power cord and consult your dealer before
operating any further.
• If you are not going to operate the unit for an extended
period of time, unplug the AC power cord from the wall
outlet.
DO NOT disassemble the unit since there are no
user serviceable parts inside.
Precautions
Installation
• Install in a place which is level, dry and neither too hot nor
too cold—between 5˚C and 35˚C.
• Install the unit in a location with adequate ventilation to
prevent internal heat buildup.
• Leave sufficient distance between the unit and the TV.
• Keep the speakers away from the TV to avoid interference
with TV.
If anything goes wrong, unplug the AC power cord and
consult your dealer.
DO NOT install the unit in a location near heat
sources, or in a place subject to direct sunlight,
excessive dust or vibration.
1
EN01-05_UX-J55MD[UB]f.p65
1
7/1/03, 4:29 PM
English
Contents
Location of the Buttons and Controls ..................... 3
Recording on MDs .................................................... 28
Front Panel ....................................................................
Remote Control .............................................................
Before You Start Recording on an MD .........................
Setting MD Recording Modes ......................................
Recording CD onto an MD
—CD-MD Synchronized Recording .......................
Recording Other Sources onto an MD ..........................
3
5
Getting Started .......................................................... 6
Unpacking .....................................................................
Connecting Antennas ....................................................
Connecting Speakers .....................................................
Connecting External Equipment ...................................
Putting the Batteries into the Remote Control ..............
28
30
30
32
6
6
7
8
8
Recording on Tapes .................................................. 33
Basic and Common Operations ............................... 9
34
34
Setting the Clock ...........................................................
Turning On the Power and Starts Playback ..................
Turning On/Off the Key-touch Tone .............................
Adjusting the Volume Level ..........................................
Reinforcing the Bass Sound ..........................................
Adjusting the Tone ........................................................
Changing the Display Brightness .................................
9
10
10
11
11
12
12
Listening to FM and AM Broadcasts ...................... 13
Setting the AM Tuner Interval Spacing ........................
Tuning in to a Station ....................................................
Presetting Stations .........................................................
Tuning in to a Preset Station .........................................
13
13
14
14
Playing Back Discs on the 5-CD Changer .............. 15
Loading Discs ...............................................................
Playing Back All the Discs—Continuous Play .............
Start Continuous Play while a source other than “CD”
is selected ................................................................
Basic Disc Operations ...................................................
Programing the Track Playing Order
—Program Play .......................................................
Playing at Random—Random Play ..............................
Repeating Tracks or Discs—Repeat Play .....................
Prohibiting Disc Ejection—Disc Lock .........................
15
15
16
16
17
18
19
19
Playing Back MDs .................................................... 20
Playing Back the Entire MD—Normal Play .................
Basic MD Operations ....................................................
Programing the Track Playing Order
—Program Play .......................................................
Playing at Random—Random Play ..............................
Playing Tracks in a Group—Group Play ......................
Repeating Tracks—Repeat Play ...................................
Searching for Tracks to Play—MD Title Search ..........
20
20
22
23
23
24
24
Playing Back Tapes ................................................... 26
Playing Back a Tape ...................................................... 26
Listening to External Equipment ............................ 27
Before You Start Recording on a Tape ..........................
Recording CD onto a Tape
—CD-Tape Syncronized Recording ........................
Recording onto a Tape ..................................................
Recording CD onto an MD and a Tape
—CD Synchronized Recording ...............................
33
36
Editing MDs .............................................................. 37
Guidance—MD Group Functions .................................
Introducing Group Editing Functions ...........................
Forming a Group—FORM GR .....................................
Adding a Track to a Group—ENTRY GR ....................
Dividing a Group—DIVIDE GR ..................................
Joining Two Groups—JOIN GR ...................................
Moving a Group—MOVE GR ......................................
Ungrouping Tracks—UNGROUP ................................
Dissolving All Groups—UNGR ALL ...........................
Erasing Tracks in a Group—ERASE GR .....................
Introducing Track Editing Functions ............................
Dividing a Track—DIVIDE ..........................................
Joining Two Tracks—JOIN ..........................................
Moving a Track—MOVE .............................................
Erasing Tracks—ERASE ..............................................
Erasing All Tracks—ALL ERASE ...............................
Assigning Titles to an MD ............................................
37
38
39
40
41
42
43
44
44
45
46
47
48
49
50
50
51
Using the Timers ....................................................... 54
Using Recording Timer .................................................
Using Daily Timer ........................................................
Using Sleep Timer ........................................................
Timer Priority ................................................................
54
56
58
58
Maintenance .............................................................. 59
Additional Information ............................................ 60
MD Disc Types .............................................................
ATRAC (Adaptive TRansform Acoustic Coding)/
ATRAC3 (
) .................................................
UTOC (User Table Of Contents) ..................................
Sound Skip Guard Memory ..........................................
SCMS (Serial Copy Management System) ..................
HCMS (High-speed Copy Management System) .........
60
60
60
60
61
61
CD/MD Messages ...................................................... 62
Listening to External Equipment .................................. 27
Troubleshooting ........................................................ 63
Specifications ............................................................. 64
2
EN01-05_UX-J55MD[UB]f.p65
2
7/1/03, 5:30 PM
English
Location of the Buttons and Controls
Become familiar with the buttons and controls on your unit.
Front Panel
REV.MODE
STANDBY/ON
1
2
3
AUTO REVERSE
AHB PRO
MICRO COMPONENT MD SYSTEM
e
r
UX-J55MD
t
4
5
y
DISC LOADING MECHANISM
6
7
8
9
p
4 DOWN
7
¢ UP
MD REC
AUX/DVD
DISC
SELECT
0
0
‹/8
CD
‹/8
MD
¤‹
TAPE
CD1 0
CD2 0
CD3 0
VOLUME
u
+
FM/AM
CD4 0
CD5 0
i
o
;
–
a
q
5-CD
5-CD CHANGER, PLAY&EXCHANGE
w
PHONES
Front panel
See pages in parentheses for details.
1
2
3
4
5
6
7
8
9
p
(standby/on) button and STANDBY/ON lamp
(10, 13)
Remote sensor (4)
Cassette loading slot (26)
@ # (play/direction) TAPE button (10, 26, 32)
• Pressing this button also turns on the unit.
0 (TAPE eject) button (10, 26)
• Pressing this button also turns on the unit if the cassette
is unlocked.
Multi operation buttons (13, 16 – 26, 31, 32, 34 – 36)
4 (reverse)/¢ (fast-forward), DOWN/UP, 7 (stop)
0 (MD eject) button (10, 20, 22, 52, 53)
• Pressing this button also turns on the unit if the disc is
unlocked.
DISC SELECT button (15, 16)
#¥8 (play/pause) CD button (10, 15, 16, 35)
• Pressing this button also turns on the unit.
#¥8 (play/pause) MD button (10, 20, 34, 35)
• Pressing this button also turns on the unit.
q Disc trays compartment—5-CD changer
(15, 17, 18, 30, 34, 36)
w PHONES jack (11)
e REV.MODE (reverse mode) button (26, 32, 35)
r AHB PRO (Active Hyper Bass Pro) button (11)
t Display window (4)
y MD loading slot (20)
u MD REC (recording) button (31, 32)
i AUX/DVD button (10, 27, 35)
• Pressing this button also turns on the unit.
o VOLUME + / – control (11, 12, 27)
; FM/AM button (10, 13, 32, 34)
• Pressing this button also turns on the unit.
a Disc eject buttons (10, 15, 16, 18, 19)
CD10, CD20, CD30, CD40, and CD50
• Pressing one of these buttons also turns on the unit and
opens the corresponding disc tray if the disc trays are
unlocked.
3
EN01-05_UX-J55MD[UB]f.p65
3
7/1/03, 4:30 PM
English
Continued
Display window on the front panel
CD
1 2 3 4 5
MD
REC
SP
LP 2 4
REC DAILY
AHBPRO SLEEP STEREO
TITLE SEARCH AUTO STANDBY MONO
TAPE 1 DISC PRGM
REC ALL A - B RANDOM
GROUP x 12 4 5
GROUP
Display window
See pages in parentheses for details.
REV.MODE
STANDBY/ON
1 CD operation indicators (15, 17 – 19, 34, 36)
• CD indicator
• Disc tray indicators
2 MD operation indicators
(20 – 25, 31, 32, 36, 39 – 45, 47 – 50, 52, 53)
• MD indicator
• REC (MD recording) indicator
• GROUP indicator
• Recording length mode indicators
SP, LP2, and LP4
• Recording speed indicators
x1, x2, x4, and x5
3 Tape operation indicators (26, 34 – 36)
• 2 3 (tape direction) indicator
• TAPE indicator
• REC (tape recording) indicator
•
(reverse mode) indicator
4 Play mode indicators (17 – 19, 22 – 24, 30)
• Repeat mode indicators
1, 1 DISC, ALL, A - B
• GROUP indicator
• PRGM (program) indicator
• RANDOM indicator
5 TITLE SEARCH indicator (24, 25)
6 AUTO STANDBY indicator (10)
7 AHBPRO (Active Hyper Bass Pro) indicator (11)
8 Timer indicators (54 – 58)
(timer), REC (recording timer), SLEEP, DAILY
9 FM mode indicators (13)
STEREO and MONO
0 Main display
• Shows the source name and other information.
AUTO REVERSE
MICRO COMPONENT MD SYSTEM
AHB PRO
UX-J55MD
DISC LOADING MECHANISM
When using the remote control, point it at the
remote sensor on the front panel.
4
EN01-05_UX-J55MD[UB]f.p65
4
7/1/03, 4:30 PM
English
Remote Control
See pages in parentheses for details.
STANDBY/ON
1
2
t
3
DISP/CHARA
1
4
5
6
CANCEL
7
8
9
10
0
+10
SET
2
3
4
5
6
7
8
9
p
q
w
e
r
DISC UP
TITLE/EDIT
ENTER
GROUP SKIP
GROUP TITLE
/EDIT
y
u
i
o
GROUP SKIP
DISC DOWN
TITLE SEARCH
;
FM/AM
CD
MD
TAPE
6
6
23
GROUP REC
ON/OFF
REC
TIME
REC
SPEED
CD REC
MODE
MD
REC
TAPE
REC
MD&TAPE
REC
FM
MODE
CLOCK/
TIMER
PLAY
MODE
REPEAT
REV.
MODE
BASS/
TREBLE
SLEEP
A.STANDBY
SHIFT
AHB PRO
/AUX
DIMMER
a
s
d
f
BEEP
LP:
VOLUME
RM-SUXJ55MDU REMOTE CONTROL
g
h
1 Number buttons
• 1 – 10, 0 and +10 buttons
(9, 14, 17, 21, 22, 25, 39 – 41, 47 – 50, 52, 55 – 57)
• Character entry buttons (A – Z, 0 – 9) (25, 52)
• MARK button (25, 52)
•
and
buttons (25, 47, 51 – 53)
2 TITLE/EDIT button (47 – 52)
3 DISC UP
button (15 – 17, 30, 34, 56)
4 Multi operation buttons
(9, 13 – 26, 31, 32, 34 – 36, 39 – 45, 47 – 50, 54 – 57)
• 4 (reverse), ¢ (fast-forward), GROUP SKIP 4
(reverse), GROUP SKIP ¢ (fast-forward), 7 (stop)
5 GROUP TITLE/EDIT button (39 – 45, 51, 52)
6 DISC DOWN
button (15 – 17, 30, 34, 56)
7 Source selection buttons
• CD 6 (play/pause) button
(10, 15 – 18, 30, 34 – 36)
• MD 6 (play/pause) button (10, 20, 22 – 24, 34, 35)
• TAPE 2 3 (play/direction) button (10, 26, 32)
• FM/AM/AUX button (10, 13, 14, 27, 32, 34)
Pressing one of these buttons also turns on the unit.
8 Recording mode setting buttons
• GROUP REC ON/OFF button (30)
• REC TIME button (30)
• REC SPEED button (30)
• CD REC MODE button (31, 32)
• MD REC button (31, 32)
• TAPE REC button (34, 35)
• MD&TAPE REC button (36)
9 CLOCK/TIMER button (9, 54 – 57)
p PLAY MODE button (17, 18, 22 – 24)
q BASS/TREBLE button (12)
w SLEEP button (58)
A.STANDBY (Auto Standby) button (10)
e SHIFT button (10, 23, 24, 30, 40 – 45)
r AHB PRO (Active Hyper Bass Pro) button (11)
t STANDBY/ON
button (10, 55, 57)
y DISP/CHARA (display/character) button
(10, 17, 21, 24, 27, 29, 31, 32, 35, 36, 52)
u CANCEL button (9, 18, 22, 25, 39 – 45, 47 – 50, 52 – 57)
i SET button
(9, 14, 19, 27, 32, 39 – 45, 47 – 51, 53, 54 – 58)
o ENTER button (25, 39 – 45, 47 – 50, 52, 53)
; TITLE SEARCH button (24, 25)
a FM MODE button (13)
s REV.MODE (reverse mode) button (26, 32, 34 – 36, 54)
d REPEAT button (19, 24)
f VOLUME + / – buttons (11, 12, 27)
g DIMMER button (9, 10, 12)
h BEEP button (10)
LP: (prefix addition) button (30)
5
EN01-05_UX-J55MD[UB]f.p65
5
7/1/03, 5:46 PM
Unpacking
Continued
To connect an outdoor FM antenna
After unpacking, be sure that you have all the following items.
The number in parentheses indicates the quantity of each
piece supplied.
•
•
•
•
English
Getting Started
Before connecting it, disconnect the supplied FM antenna.
Outdoor FM antenna
(not supplied)
FM antenna (1)
AM loop antenna (1)
Remote control (1)
Batteries (2)
Coaxial cable (not supplied)
If any item is missing, consult your dealer immediately.
A
NN
TE
AN
Connecting Antennas
AM
T
EX
FM antenna
AMP
O
LO
FM )
L
(75AXIA
CO
A
NN
TE
N
A
AM
T
EX
FM antenna (supplied)
AMP
O
LO
A 75 Ω antenna with coaxial type connector
(IEC or DIN45325) should be used.
FM )
L
(75AXIA
CO
1 Attach the FM antenna to the FM (75 Ω)
COAXIAL terminal.
2 Extend the FM antenna.
3 Fasten it up in a position which gives you the
best reception, then attach it to the wall.
About the supplied FM antenna
The FM antenna supplied with this unit can be used as a temporary measure.
If reception is poor, you can connect an outdoor FM antenna.
6
EN06-08_UX-J55MD[UB]f.p65
6
7/1/03, 4:29 PM
English
Connecting Speakers
AM antenna
To connect speakers
1
You can connect the speakers using the speaker cords.
1
2
2
3,4
ANTENNA
SPEAKERS
RIGHT
Vinyl-covered wire
(not supplied)
Speaker
cord
3
LEFT
Red
Speaker
cord
SPEAKER
IMPEDANCE
4Ω ~ 16Ω
Black
AM loop antenna
(supplied)
Right speaker
1 If the cords are covered with insulation, remove
a short section of insulation at the end of each
cord by twisting and pulling it off.
Left speaker
1 If the cords are covered with insulation, remove
a short section of insulation at the end of each
cord by twisting and pulling it off.
2 Connect the AM loop antenna to the AM
LOOP terminals as illustrated.
2 Hold the clamp of the speaker terminal.
3 Turn the AM loop antenna until you have the
best reception.
3 Insert the end of the speaker cord into the
terminal.
Match the polarity of the speaker terminals: Red cord to red
terminal ª and black cord to black terminal ·.
To connect an outdoor AM antenna
When reception is poor, connect a single vinyl-covered wire
to the AM EXT terminal and extend it horizontally. The AM
loop antenna must remain connected.
For better reception of both FM and AM
• Make sure the antenna conductors do not touch any other terminals or
connecting cords.
• Keep the antennas away from metallic parts of the unit, connecting cords,
and the AC power cord.
4 Release your finger from the clamp.
IMPORTANT:
• Use only speakers with the same speaker impedance as
indicated by the speaker terminals on the rear of the unit.
• DO NOT connect more than one speaker to one speaker
terminal.
7
EN06-08_UX-J55MD[UB]f.p65
7
7/1/03, 4:29 PM
English
Connecting External Equipment
You can connect other equipment which can be used as a
playback device.
When you connect and use the equipment, refer also to its
manual supplied.
• DO NOT connect any equipment while the
power is on.
• DO NOT plug in any equipment until all
connections are complete.
Putting the Batteries into the Remote
Control
Insert the batteries—R6S(SUM-3)/AA(15F)—into the remote
control by matching the polarity (+ and –) on the batteries
with the + and – marking on the battery compartment.
When the remote control can no longer operate the unit,
replace both batteries at the same time.
1
To connect external equipment
Be sure that the plugs of the audio cords are color coded:
White plugs and jacks are for left audio signals, and red ones
for right audio signals.
AUX/DVD
R6S(SUM-3)/AA(15F)
2
To AUX/DVD jacks
RIGHT
LEFT
External
equipment
To audio output
3
To play the other equipment through this unit, connect
between the audio output jacks on the other equipment and
AUX/DVD jacks by using audio cords (not supplied).
NOW you are ready to plug in the unit and any
other connected equipment.
IMPORTANT:
Be sure to check that all connections have been made
before plugging in the power cord.
• DO NOT use an old battery together with a new
one.
• DO NOT use different types of batteries
together.
• DO NOT expose batteries to heat or flame.
• DO NOT leave the batteries in the battery
compartment when you are not going to use the
remote control for an extended period of time.
Otherwise, the remote control will be damaged
from battery leakage.
8
EN06-08_UX-J55MD[UB]f.p65
8
7/1/03, 4:29 PM
English
Basic and Common Operations
Setting the Clock
To change the clock again
Before operating the unit any further, first set the built-in
clock. When you plug in the power cord, “0:00” starts
flashing on the display.
You can set the clock when the unit is either turned on or on
standby (off). You cannot set the clock if the unit is on Power
Save mode (see page 10).
On the remote control ONLY:
CLOCK/
TIMER
The hour digit starts flashing on the display.
GROUP SKIP
GROUP SKIP
CLOCK/
TIMER
When the key-touch tone is activated (see “Turning On/Off
the Key-touch Tone” on page 10), the unit lets you know the
time using long and short tones in different pitches ONLY
while the unit is on standby (off).
On the remote control ONLY:
Press DIMMER while the unit is on standby
(off).
“DIMMER OFF” appears, then the clock time
is shown on the display with tones.
to adjust the hour, then
press SET.
The minute digits start flashing on
the display.
SET
• Each time you press ¢ or 4, the hour
digit(s) change(s) continuously.
• If you want to correct the hour again, press
CANCEL. The hour digit(s) start(s) flashing again.
3
Press CLOCK/TIMER repeatedly until the
clock setting screen appears on the display.
The hour digit starts flashing. Then, perform
steps 2 and 3 in “Setting the Clock” again.
To check the clock time with tones
1 Press CLOCK/TIMER.
2 Press ¢ or 4 repeatedly
On the remote control ONLY:
DIMMER
The time is represented by a four-digit number: two digits
each for hours and minutes (ex. 2:58 = 0258).
Each digit is distinguished by a different pitch of tone, and
numbers are made up of long and short tones.
The following shows the details.
Differentiation of digits:
Press ¢ or 4 to adjust the minute, then
press SET.
The built-in clock starts.
Do
Mi
Higher hours digit
• Each time you press ¢ or 4, the minute digits
change continuously.
Sol
Do
Higher minutes digit
Lower hours digit
Lower minutes digit
Representation of numbers:
• Adjusting the hour and minute using the number buttons in steps 2
and 3
Ex.: To adjust the hour/minute to 5, press 5.
To adjust the hour/minute to 12, press +10, then 2.
To adjust the hour/minute to 20, press +10, then 10 (or press +10
twice, then 0).
• When you unplug the power cord or if a power failure occurs
The clock is reset to “0:00” right away. If this happens, set the clock again.
Numbers
Tones
Numbers
Tones
0
—
5
•••••
1
6
•••••-
* •••••: Five quick short tones
Ex.:
Hours
• The clock may gain or lose 1 to 2 minutes per month
If this happens, reset the clock.
9
EN09-12_UX-J55MD[UB]f.p65
9
2
3
4
------7
8
9
•••••-- •••••--- •••••----
7/1/03, 4:27 PM
Minutes
—
--
••••• •••••---
Do
Mi
Sol
Do
English
Continued
To turn off the clock indication (Power Save)
When you unplug the AC power cord or if a power
failure occurs
On the remote control ONLY:
Press DISP/CHARA while the unit is on
standby (off).
“DISPLAY OFF” appears on the display for a
while, then the clock indication goes off.
The clock is reset to “0:00” right away, while the tuner preset stations will be
erased in a few days.
DISP/CHARA
To turn off the unit automatically (Auto Standby)
To turn on the clock indication, press DISP/CHARA again
while the unit is on standby (off).
“DISPLAY ON” appears on the display for a while.
• Pressing DIMMER while the unit is on standby (off) will
also activate the clock indication (see also “To check the
clock time with tones” on page 9).
Using Auto Standby, the unit automatically turns itself off (on
standby) if no sound comes in for about 3 minutes except
when FM, AM, or AUX is selected as the source.
If an operation is done within this 3-minute period, Auto
Standby is canceled temporarily even though no sound comes
in.
• You can also turn off the unit automatically by using the
Sleep Timer. (See page 58.)
Turning On the Power and Starts Playback
On the remote control ONLY:
To activate Auto Standby, press A.STANDBY while holding
SHIFT.
STANDBY/ON
To turn on the unit, press STANDBY/ON
.
SLEEP
SHIFT
A.STANDBY
The STANDBY/ON lamp on the unit lights
green.
When you press one of the source selecting buttons, the unit
automatically turns on (and starts playback if the source is
ready).
On the remote control:
CD
MD
TAPE
6
6
23
FM/AM
/AUX
“A.STANDBY ON” and the AUTO STANDBY indicator appear
on the display.
• When no sound comes in, the AUTO STANDBY indicator
starts flashing on the display. About 20 seconds before the
unit turns itself off (on standby), “AUTO STANDBY”
starts flashing on the display.
AUTO STANDBY indicator
On the unit:
AUTO STANDBY
DISC
SELECT
0
0
AUX/DVD
‹/8
CD
‹/8
MD
¤‹
TAPE
FM/AM
• Pressing one of the eject buttons on the unit—CD10 to
CD50, 0 (MD eject) and 0 (TAPE eject)—also turns on
the unit if the disc trays, MD, and cassette are unlocked.
• When you press FM/AM/AUX repeatedly (or AUX/DVD
on the unit) to operate the external equipment, see page 27
and the manuals supplied with it.
To deactivate Auto Standby, press A.STANDBY again
while holding SHIFT.
“A.STANDBY OFF” appears on the display for a while and
the AUTO STANDBY indicator goes off.
Turning On/Off the Key-touch Tone
To turn off the unit (standby), press STANDBY/ON
again.
The STANDBY/ON lamp on the unit lights red.
• The clock time appears on the display if you have set the
built-in clock.
“0:00” will flash on the display if you have not set the
built-in clock.
To set the built-in clock, see “Setting the Clock” on page 9.
• A little power is always consumed even while the unit is on
standby (off).
If you do not want the key-touch tone to beep each time you
press a button, you can deactivate it while the unit is turned on.
On the remote control ONLY:
Press BEEP.
• Each time you press the button, the key-touch
tone turns on and off alternately.
BEEP ON
BEEP
LP:
BEEP OFF
To switch off the power supply completely, unplug the AC
power cord from the AC outlet.
10
EN09-12_UX-J55MD[UB]f.p65
10
7/1/03, 4:28 PM
English
Adjusting the Volume Level
Reinforcing the Bass Sound
You can adjust the volume level only while the unit is turned
on. The volume level can be adjusted between “VOLUME 0”
– “VOLUME 40.”
• The volume level has no effect on recording.
The richness and fullness of the bass sound is clearly
maintained regardless of how low you set the volume level
—Active Hyper Bass Pro.
• This function only affects the playback sound, and does not
affect your recording.
• This function also affects the sound from headphones.
On the remote control:
To increase the volume level, press
VOLUME +.
To decrease the volume level, press
VOLUME –.
• When you press and hold either button, you
can change the volume level continuously.
To get the effect, press AHB PRO repeatedly.
AHB PRO
VOLUME
The AHBPRO indicator also lights up on the display.
AHBPRO indicator
On the unit:
To increase the volume level, turn the
VOLUME + / – control clockwise.
To decrease the volume level, turn the
VOLUME + / – control counterclockwise.
VOLUME
AHBPRO
+
–
• Each time you press the button, the Active Hyper Bass Pro
effect level changes as follows:
AHB PRO 1
AHB PRO 2
AHB PRO OFF
(canceled)
• If “CANNOT LISTEN” appears on the display
During high-speed recording (see page 29), you cannot listen to any
source, and therefore, cannot adjust the volume level.
• For private listening
Connect a pair of headphones to the PHONES jack. No sound comes out
of the speakers. Be sure to turn down the volume level before connecting
or putting on the headphones.
• “AHB PRO 2” is more effective than “AHB PRO 1.”
To cancel the effect, press AHB PRO repeatedly until “AHB
PRO OFF” appears on the display.
The AHBPRO indicator goes off.
DO NOT turn off (standby) the unit with the volume
set to an extremely high level; otherwise, the
sudden blast of sound can damage your hearing,
speakers and/or headphones when you turn on
the unit or start playing any source.
REMEMBER you cannot adjust the volume level
while the unit is on standby (off).
11
EN09-12_UX-J55MD[UB]f.p65
11
7/1/03, 4:28 PM
English
Adjusting the Tone
Changing the Display Brightness
You can adjust the bass level (low frequency range) and the
treble level (high frequency range) within a range of “–5” to
“+5” only while the unit is turned on.
• This function only affects the playback sound, and does not
affect your recording.
• This function also affects the sound from headphones.
• There is a time limit in doing the following steps. If the setting
is canceled before you finish, start from step 1 again.
You can change the display brightness only while the unit is
turned on.
1 Press BASS/TREBLE to adjust the
On the remote control ONLY:
Press DIMMER while the unit is turned on.
• Each time you press the button, the display
brightness changes as follows:
DIMMER 1
BASS/
TREBLE
DIMMER
DIMMER 2
DIMMER OFF
bass or treble level.
DIMMER 1:
DIMMER 2:
The display illumination dims.
The display illumination dims and the
blue illumination on the display
disappears.
DIMMER OFF: The display and blue illumination
resumes.
Current setting
Ex.: When you select “BASS.”
2 On the remote control:
Press VOLUME + to increase the
level or press VOLUME – to
decrease the level.
Turning off (on standby) the unit sets the display brightness back to
“DIMMER OFF.”
VOLUME
On the unit:
Turn VOLUME + / – control
clockwise to increase the level
or counterclockwise to
decrease the level.
VOLUME
+
–
12
EN09-12_UX-J55MD[UB]f.p65
12
7/1/03, 4:28 PM
English
Listening to FM and AM Broadcasts
Setting the AM Tuner Interval Spacing
Some countries AM channel intervals are set to 9 kHz apart,
and some countries use 10 kHz apart.
When shipped, the built-in AM tuner is set to 9 kHz spacing.
You can change the channel interval to 9 kHz or 10 kHz
spacing.
2 Press and hold ¢ or 4 for more than 1
second.
GROUP SKIP
GROUP SKIP
4 DOWN
(On the remote control)
On the unit ONLY:
To set the AM tuner to the 10 kHz spacing, be sure that the
unit is turned off (on standby), but is plugged into a wall outlet.
Press
(standby/on) while holding ¢. The unit turns on
and tunes in to 530 kHz.
¢ UP
To set it back to the 9 kHz spacing, be sure that the unit is
turned off (on standby), but is plugged into a wall outlet.
Press
(standby/on) while holding 4. The unit turns on
and tunes in to 531 kHz.
¢ UP
(On the unit)
• ¢: Increases the frequencies.
• 4: Decreases the frequencies.
The unit starts searching for stations and stops when a
station of sufficient signal strength is tuned in.
• If an FM program is broadcast in stereo, the STEREO
indicator lights up on the display (only when the
reception is good).
To stop during searching, press ¢ or 4.
When you press ¢ or 4 repeatedly
The frequency changes step by step.
4 DOWN
To change the FM reception mode
When an FM stereo broadcast is noisy or hard to receive, you
can change the FM reception mode to improve the reception.
When you change the AM channel interval spacing
The preset stations you have set (both FM and AM) will be erased. In this
case, preset stations again. See “Presetting Stations” on page 14.
On the remote control ONLY:
Press FM MODE so that the MONO indicator
lights up on the display.
FM
MODE
Tuning in to a Station
1 Press FM/AM/AUX (or FM/AM on the unit)
to select either “FM” or “AM.”
FM/AM
AUX/DVD
/AUX
To restore the stereo effect, press FM MODE again so that
the MONO indicator goes off. In stereo mode, you can hear
stereo sound when a stereo program is broadcast.
• The STEREO indicator lights up only when the reception is
sufficient.
FM/AM
(On the remote control)
(On the unit)
The unit automatically turns on and tunes in to the
previously received station—either FM or AM.
• Each time you press the button, the band changes as
follows:
On the remote control:
FM
AM
AUX *
* For operating the external equipment, see page 27 and the manuals
supplied with it.
On the unit:
FM
AM
13
EN13-14_UX-J55MD[UB]f.p65
13
7/1/03, 5:33 PM
English
Presetting Stations
When you unplug the AC power cord or if a power
failure occurs
You can preset 30 FM and 15 AM stations manually.
The FM and AM preset stations will be erased in a few days. If this happens,
preset the stations again.
In some cases, test frequencies have been already stored
for the tuner since the factory examined the tuner preset
function before shipment. This is not a malfunction. You can
preset the stations you want into memory by following the
presetting method.
• There is a time limit in doing the following steps. If the setting
is canceled before you finish, start from step 2 again.
Tuning in to a Preset Station
On the remote control ONLY:
1 Press FM/AM/AUX to select either
FM/AM
/AUX
“FM” or “AM.”
On the remote control ONLY:
The unit automatically turns on and tunes in
to the previously received station—either
FM or AM.
• Each time you press the button, the band changes as
follows:
1 Tune in to the station you want to preset.
• See “Tuning in to a Station” on page 13.
2 Press SET.
SET
FM
“1” starts flashing on the display.
AM
AUX *
* For operating the external equipment, see page 27 and the manuals
supplied with it.
2 Press the number buttons
Ex.: When you select an FM station in step 1.
3 Press ¢ or 4 to select a
GROUP SKIP
GROUP SKIP
preset number.
Ex.: When you select preset number 14.
You can also select the preset
number using the number
buttons.
Ex.: For preset number 5, press 5.
For preset number 15, press
+10, then 5.
For preset number 20, press
+10, then 10.
For preset number 30, press
+10, +10, then 10.
1
2
3
4
5
6
7
8
9
10
0
+10
4 Press SET again.
to select the preset
number you want.
1
2
3
Ex.: For preset number 5, press
5.
For preset number 15, press
+10, then 5.
For preset number 20, press
+10, then 10.
For preset number 30, press
+10, +10, then 10.
4
5
6
7
8
9
10
0
+10
SET
“STORED” appears on the display for a
while.
The tuned station in step 1 is stored in the preset number
selected in step 3.
• Storing a new station on an already assigned number
erases the previously stored one.
14
EN13-14_UX-J55MD[UB]f.p65
14
03.7.10, 0:00 PM
English
Playing Back Discs on the 5-CD Changer
This unit has been designed to play back the following
discs—CD, CD-R, and CD-RW.
3 Press the same disc eject button (CD10 –
CD50) you have pressed in step 1.
The disc tray closes.
When playing a CD-R or CD-RW
User-edited CD-Rs (CD-Recordable) and CD-RWs (CDReWritable) can be played only if they are already
“finalized.”
• Usually you can play back your original CD-Rs or CDRWs recorded in audio CD format. However, sometimes
they may not play depending on their characteristics or
recording conditions.
• Before playing CD-Rs or CD-RWs, read their instructions
or cautions carefully.
• Some CD-Rs or CD-RWs may not play on this unit because
of their disc characteristics, damage or stain on them, or if
the player’s lens is dirty.
• CD-RWs may require a longer readout time. This is
because the reflectance of CD-RWs is lower than for
regular discs.
CD1 0
CD2 0
CD3 0
CD4 0
CD5 0
When loading more than one disc at a time
Press the disc eject button (CD10 – CD50) for the next tray you want to
place a disc onto. The first disc tray automatically closes and the next disc
tray comes out.
Playing Back All the Discs
—Continuous Play
You can play discs continuously.
1 Load discs into the 5-CD changer.
• See “Loading Discs” on the left column.
Loading Discs
2 Press DISC UP
On the unit ONLY:
1 Press one of the disc eject buttons (CD10 –
or DISC DOWN (or
DISC SELECT on the unit) repeatedly to
select the disc you want.
CD50) for the disc tray you want to load a
disc onto.
DISC UP
DISC
SELECT
The unit automatically turns on and the selected disc tray
comes out if it is unlocked. See “Prohibiting Disc Ejection
—Disc Lock” on page 19.
CD1 0
CD2 0
CD3 0
CD4 0
CD5 0
‹ /8
CD
DISC DOWN
(On the remote control)
(On the unit)
Playback starts from the first track of the selected disc.
Disc tray number Current track number
• Disc tray is counted from bottom to top. The bottom
tray is disc tray 1 and top tray is disc tray 5.
CD
1 2 3 4 5
2 Place a disc correctly on the circle of the disc
tray, with its label side up.
CD indicator and
disc tray indicators
Good
Not good
• When using a CD single (8 cm), place it on the inner
circle of the disc tray.
• You can also select a disc and start continuous play while
a source other than “CD” is selected (see page 16).
• You can also select and start playback a desired track of
the selected disc (see “To go to another track” on page
16 and “To go to another track directly using the
number buttons” on page 17).
• Without selecting the disc number, pressing CD 6
starts playing back the currently selected disc.
To stop play for a moment, press CD 6.
While pausing, the elapsed playing time flashes on the display.
• When the key-touch tone is activated (see page 10), the unit
keeps beeping while pausing.
15
EN15-19_UX-J55MD[UB]f.p65
15
Elapsed playing time
03.7.10, 0:00 PM
English
Continued
To resume play, press CD 6 again.
Basic Disc Operations
To stop during play, press 7.
To change a disc during playback of another disc
To remove discs, press the corresponding disc eject buttons
(CD10 – CD50) on the unit.
On the unit ONLY:
Press one of the disc eject buttons (CD10 – CD50) to
eject one of the disc trays which is not playing currently.
CD1 0
CD2 0
CD3 0
CD4 0
CD5 0
Disc playback sequence in the 5-CD changer
When 5 discs are loaded on the disc trays*, they are played in the following
sequence (when Repeat Play is not activated):
Ex.: When playback starts from the CD2 tray:
CD2 ] CD3 ] CD4 ] CD5 ] CD1 (then stops)
If discs are changed during play, playback will stop after
playing all the newly inserted discs.
* If no disc is on the disc tray, the tray is skipped.
Start Continuous Play while a source
other than “CD” is selected
To start playing a disc during playback of another
disc
Press DISC UP
or DISC DOWN
(or DISC SELECT
on the unit) repeatedly to select the disc you want.
1 Press DISC UP
or DISC DOWN (or
DISC SELECT on the unit) repeatedly to
select a disc while listening to a source other
than “CD.”
DISC UP
DISC
SELECT
DISC DOWN
‹/8
CD
DISC UP
(On the remote control)
DISC
SELECT
Each time you press the button, the next (or previous) disc is
selected. The selected disc starts playing.
‹/8
CD
DISC DOWN
(On the remote control)
(On the unit)
(On the unit)
The following indication appears on the display.
To locate a particular point in a track during play
Press and hold ¢ or 4.
GROUP SKIP
GROUP SKIP
4 DOWN
¢ UP
Disc tray number
• Each time you press the button, the disc tray number
changes as follows*:
CD1 PLAY ?
CD2 PLAY ?
CD5 PLAY ?
CD3 PLAY ?
(On the remote control)
(On the unit)
• ¢: Fast-forwards the tracks.
• 4: Fast-reverses the tracks.
CD4 PLAY ?
* When you press DISC SELECT repeatedly on the unit, the disc tray
number changes only clockwise in the above sequence.
2 Press CD 6 while the
indication in step 1 still remains
on the display.
Now the source is changed to “CD” and
Continuous Play starts from the selected disc.
To go to another track
Press ¢ or 4 repeatedly.
GROUP SKIP
GROUP SKIP
4 DOWN
CD
¢ UP
6
(On the remote control)
(On the unit)
• ¢: Skips to the beginning of the next or succeeding
tracks.
• You can also skip to tracks on the next disc.
• 4: Goes back to the beginning of the current or
previous tracks.
• You cannot skip back to tracks on the previous disc.
16
EN15-19_UX-J55MD[UB]f.p65
16
7/1/03, 4:30 PM
English
To go to another track directly using the number
buttons
On the remote control ONLY:
Pressing the number button(s) allows
you to start playing the track number
on the current disc.
Ex.: For track number 5, press 5.
For track number 15, press +10,
then 5.
For track number 20, press +10,
then 10.
For track number 30, press +10,
+10, then 10.
1
2
3
4
5
6
7
8
9
• Program Play can only function when all disc trays are
closed.
• If a program has been stored in memory, the program is
called up.
• Once the PRGM indicator lights, you cannot change a
disc.
3 Press DISC UP
or DISC
DOWN to select the disc
number you want to play.
CD
DISC UP
DISC DOWN
PRGM
1 2 3 4 5
10
0
+10
Disc tray number
To change the information shown on the display
On the remote control ONLY:
DISP/CHARA
Press DISP/CHARA.
Each time you press the button, the
information on the display alternates between
the source indication and the clock indication.
• If an MD is inserted, the MD remaining recording time
(“REC REMAIN”) is shown before the clock indication.
Programing the Track Playing Order
—Program Play
You can arrange the order in which the tracks play before you
start playing. You can program up to 32 tracks.
• To use Repeat Play (see page 19), press REPEAT after
starting Program Play.
• There is a time limit in doing the following steps. If the setting
is canceled before you finish, start from step 3 again.
Track number
• If “CD1*NO READ” appears on the display, press
PLAY MODE repeatedly to select Continuous Play.
Then, press DISC UP
or DISC DOWN
to select
the disc so that its disc information is shown on the
display, then press 7. Start from step 2 again.
* Selected disc number appears.
4 Press the number buttons
to select a track from the
selected disc in the
previous step.
• For how to use the number
buttons, see “To go to another
track directly using the number
buttons” on the left column.
1
2
3
4
5
6
7
8
9
10
0
+10
Program step number
CD
PRGM
1 2 3 4 5
Total playing time
1 Load discs into the 5-CD changer.
• If the current playing source is not “CD,” press CD 6,
then 7 before going to the next step.
On the remote control ONLY:
2 Press PLAY MODE repeatedly
PLAY
MODE
until “CD PROGRAM” appears
on the display.
The PRGM indicator also lights up on the display.
PRGM (program) indicator
CD
5 Program other tracks you want.
• To program tracks from the same disc, repeat step 4.
• To program tracks from a different disc, repeat steps 3
and 4.
6 Press CD 6.
To stop during play, press 7.
PRGM
1 2 3 4 5
• Each time you press the button, play mode changes as
follows:
CD PROGRAM
(Program Play)
CD RANDOM
(Random Play)
Continuous Play
To exit from Program Play, before or after play, press PLAY
MODE once or twice so that the unit enters another play
mode (Random Play or Continuous Play).
The PRGM indicator goes off.
• Turning off the unit also cancels Program Play and changes
play mode to Continuous Play. The program you have
made is still stored in the memory until you erase the entire
program (see page 18).
17
EN15-19_UX-J55MD[UB]f.p65
CD
6
The tracks are played in the order you
have programed. Program Play ends
when all the programmed tracks are
played once (when Repeat Play is not activated).
17
03.7.10, 0:01 PM
English
Continued
If Program Play is still activated, you cannot eject the discs.
To open disc trays (eject discs), before or after play, press
PLAY MODE once or twice so that the unit enters another
play mode (Random Play or Continuous Play) before
pressing the disc eject buttons (CD10 to CD50).
• If your entry is ignored
You are trying to program a track from an empty tray, or a track number
that does not exist on the disc.
• If “NO READ” appears on the display
You are selecting the disc that the unit has not yet read. Press DISC UP
or DISC DOWN
to select the disc so that its disc information is
shown on the display.
• If the total playing time is 100 minutes or more
The total playing time on the display will not be shown. “– – : – –” will
appear.
To check the program contents
On the remote control ONLY:
Before playing, you can check the
program contents by pressing ¢ or
4.
GROUP SKIP
GROUP SKIP
Playing at Random—Random Play
• ¢: Shows the programed tracks in the programed order.
• 4: Shows them in the reverse order.
• Pressing 4 first time after you have programed
shows the first track in the program.
The tracks of all loaded discs will be played at random.
• To use Repeat Play (see page 19), press REPEAT after
starting Random Play.
1 Load discs into the 5-CD changer.
• If the current playing source is not “CD,” press CD 6,
then 7 before going to the next step.
To modify the program
On the remote control ONLY:
On the remote control ONLY:
Before playing, you can erase the last
programed track by pressing CANCEL.
Each time you press the button, the last
programed track is erased from the program.
CANCEL
2 Press PLAY MODE repeatedly
until “CD RANDOM” appears on
the display.
To add tracks to the program before playing, simply select
the disc numbers and track numbers you want to add by
following steps 3 and 4 in Program Play.
To erase the entire program
The RANDOM indicator also lights up on the
display.
RANDOM indicator
CD
RANDOM
1 2 3 4 5
• Each time you press the button, play mode changes as
follows:
1 Press 7 to stop playback.
CD PROGRAM
(Program Play)
2 Press PLAY MODE once or twice
PLAY
MODE
so that the unit enters another
playback mode (Random Play or
Continuous Play).
the unit to eject all the discs used for making
the program.
CD2 0
CD3 0
CD4 0
CD RANDOM
(Random Play)
Continuous Play
3 Press CD 6.
CD
6
The tracks are played at random.
Random Play ends when all the tracks are
played once (when Repeat Play is not activated).
3 Press disc eject buttons (CD10 to CD50) on
CD1 0
PLAY
MODE
CD5 0
To stop during play, press 7.
• Opening a disc tray also stops and cancels Random Play.
To skip the current playing track, press ¢.
To skip back to the beginning of the current track, press 4.
• You cannot go back to the previous tracks.
The program will also be erased, when you unplug the AC
power cord or a power failure occurs.
• If you try to program a 33rd track
“MEMORY FULL” will appear on the display.
To exit from Random Play, before or after play, press PLAY
MODE once or twice so that the unit enters another play
mode (Continuous Play or Program Play).
The RANDOM indicator goes off.
• Turning off the unit also cancels Random Play and changes
play mode to Continuous Play.
18
EN15-19_UX-J55MD[UB]f.p65
18
7/1/03, 4:30 PM
English
Repeating Tracks or Discs—Repeat Play
You can repeat each track, each disc, or all discs in the 5-CD
changer as many times as you like.
You can also repeat your program or repeat all the tracks
randomly during Random Play.
2 Press SET at the start point from
SET
which you want to repeat (point
A).
“B” starts flashing.
CD
A-B
1 2 3 4 5
On the remote control ONLY:
Press REPEAT repeatedly during or
before playing.
REPEAT
3 Press SET again at the end point
Repeat mode indicator
SET
to which you want to stop repeat
(point B).
1
The unit automatically locates point A and
starts repeating the portion between points A and B.
• Each time you press the button, Repeat Play and its
indicator change and appear on the display as follows:
CD REPEAT 1
( 1)
CD REPEAT DISC*
( 1 DISC)
CD REPEAT OFF
CD REPEAT ALL
( ALL)
To cancel A-B Repeat Play, press REPEAT to select
“REPEAT OFF.” A-B Repeat Play is canceled and
Continuous Play continues from that point.
More about A-B Repeat Play
• Pressing ¢ or 4 cancels the A-B Repeat Play.
• A-B Repeat Play can be performed only within the same disc.
CD REPEAT A - B**
( A - B)
REPEAT 1:
Repeats one track continuously.
REPEAT DISC*: Repeats all tracks on a disc.
REPEAT ALL: Repeats all tracks on all discs
(continuously or at random), or all
tracks in the program.
REPEAT A-B**: Repeats the selected portion. (See below.)
REPEAT OFF: Cancels Repeat Play.
Prohibiting Disc Ejection—Disc Lock
You can prohibit disc ejection from the unit and can lock
discs—Disc Lock.
You can lock or unlock discs only when the unit is on standby
(off).
On the unit ONLY:
* “REPEAT DISC” is not used for Program Play and Random Play.
** “REPEAT A-B” can be used only during play.
Press CD10 while holding 7 to lock the disc.
7
CD1 0
A-B Repeat Play
While playing, you can select a portion of sound you want to
repeat.
• During Program Play (see page 17) or Random Play (see
page 18), you cannot perform A-B Repeat Play.
“LOCKED” appears on the display for a while, and the disc
trays are locked.
• The loaded MD or cassette is also locked. (See pages 25
and 26.)
On the remote control ONLY:
1 Press REPEAT repeatedly during
play to select “REPEAT A-B.”
“A” starts flashing.
CD
A-
1 2 3 4 5
REPEAT
If you try to eject a disc, “LOCKED” appears to inform you
that the Disc Lock is in use.
To cancel the prohibition and unlock the disc, repeat the
above procedure.
“UNLOCKED” appears on the display for a while, the disc
trays, MD, and cassette are unlocked.
19
EN15-19_UX-J55MD[UB]f.p65
19
7/1/03, 4:31 PM
English
Playing Back MDs
Continued
To stop during play, press 7.
Playing Back the Entire MD
—Normal Play
To remove the disc, press 0 (MD eject) on the unit.
1 Insert an MD into the MD loading slot.
The MD is pulled in automatically.
• Pressing 0 (MD eject) button also turns on the unit if the MD is unlocked.
Insert an MD in
the same way as
indicated on the
MD.
MD loading slot
CAUTION:
During Power Save (see page 10), do not insert an
MD. Before inserting an MD, cancel Power Save or turn
on the unit first.
• The following indications appear when the current
source is “MD”:
MD indicator
• If the MD has a disc/performer name or track has a title
The title will be shown at the lower part of the display for a while. (If a
title is long and cannot be shown at a time, the unit scrolls the title to show
the entire title.)
• About recording length mode
MDs are played back in the same recording length mode as they were
recorded. When an MD starts playing, the recording length mode of the
currently playing track appears on the display.
SP: Indicates the tracks recorded in standard stereo recording mode on
this unit or those recorded on an MD recorder incompatible with
MDLP (see below).
LP2: Indicates the tracks recorded in 2 times long-hour stereo recording
mode.
LP4: Indicates the tracks recorded in 4 times long-hour stereo recording
mode.
For more details, see page 29.
MDLP features a new sound compression method (ATRAC3, see page
60) and enables a 2 times (or 4 times) long-hour stereo recording and
playing function.
The MDLP logo is marked on the MD recorders and players compatible
with MDLP. It is also marked on MDs pre-recorded in ATRAC3
(excluding recordable MDs).
Basic MD Operations
MD
While playing an MD, you can do the following operations.
To stop play for a moment
Total track number
Press MD 6.
MD
The elapsed playing time starts flashing on
6
the display.
• When the key-touch tone is activated (see
page 10), the unit keeps beeping while pausing.
Total group number*
MD
To resume playback, press MD 6 again.
Total playing time**
* When the loaded MD has no group, the total group number will be
indicated by “– –”.
• To make or edit groups, see pages 39 to 45.
** Disc title appears/scrolls before the total playing time if the loaded
MD has a title.
2 Press MD 6.
To locate a particular point in a track during play
Press and hold ¢ or 4.
GROUP SKIP
GROUP SKIP
4 DOWN
¢ UP
MD
6
MD playback starts from the first track.
The recording length mode (SP/LP2/LP4)
appears on the display.
• Track title appears/scrolls before the recording length
mode if the track has a title.
(On the remote control)
(On the unit)
• ¢: Fast-forwards the track.
• 4: Fast-reverses the track.
MD playback stops automatically after playing all the
tracks on the MD.
20
EN20-25_UX-J55MD[UB]f.p65
20
7/1/03, 4:43 PM
English
To go to another track
While playing or pausing:
Press ¢ or 4 repeatedly.
GROUP SKIP
GROUP SKIP
(On the remote control)
Current group number*1
Current track number
4 DOWN
MD
¢ UP
(On the unit)
• ¢: Skips to the beginning of the next or succeeding
tracks.
• 4: Goes back to the beginning of the current or previous
tracks.
Elapsed playing time*2
Recording length mode
MD
To go to another track directly using the number
buttons
Current track title*3
On the remote control ONLY:
Pressing the number button(s) allows
you to start playing the track number
you want.
Ex.: For track number 5, press 5.
For track number 15, press +10,
then 5.
For track number 20, press +10,
then 10.
For track number 32, press +10,
+10, +10, then 2.
1
2
3
4
5
6
7
8
9
10
0
+10
MD
Current group title*3
Clock indication
When the MD recorder stops:
To change the information shown on the display
Total track number
On the remote control ONLY:
Total group number*1
MD
Press DISP/CHARA.
Each time you press the button, the
information on the display changes as on the
right column:
DISP/CHARA
Total playing time*2
MD
Remaining recording time
Clock indication
*1
*2
*3
When the current track does not belong to any group or when the disc has
no group, “– –” will appear on the display.
When the current track or disc has a title, its title will appear/scroll on the
display.
When the track/group has no title, “NO TR TITLE” or “NO GR TITLE”
appears on the display.
21
EN20-25_UX-J55MD[UB]f.p65
21
03.7.10, 0:01 PM
English
Continued
Programing the Track Playing Order
—Program Play
5 Press MD 6.
You can arrange the order in which the tracks play before you
start playing. You can program up to 32 tracks.
• There is a time limit in doing the following steps. If the
setting is canceled before you finish, start from step 3
again.
• If the current playing source is not “MD,” press
MD 6, then 7 before going to the next step.
On the remote control ONLY:
PLAY
MODE
until “MD PROGRAM” appears
on the display.
To stop during play, press 7.
To check the program contents
The PRGM indicator lights up on the display.
On the remote control ONLY:
PRGM (program) indicator
PRGM
MD
• Each time you press the button, play mode changes as
follows:
Before playing, you can check the
program contents by pressing ¢ or
4.
• ¢: Shows the programed tracks in
the programed order.
• 4: Shows them in the reverse order.
MD PROGRAM
MD RANDOM
(Program Play)
(Random Play)
To modify the program
Normal Play
MD GROUP
On the remote control ONLY:
(Group Play)
If a program has been stored in memory, the program is
called up.
3 Press the number buttons
to select the tracks.
• For how to use the number
buttons, see “To go to another
track directly using the number
buttons” on page 21.
Last programmed
track number
6
To exit from Program Play, before or after play, press PLAY
MODE repeatedly so that the unit enters another play mode
(Random Play, Group Play, or Normal Play).
The PRGM indicator goes off.
• Turning off the unit also cancels Program Play and changes
the play mode to Normal Play. The program you have made
is still stored in the memory until you erase the entire
program (see below).
1 Load an MD.
2 Press PLAY MODE repeatedly
MD
The tracks are played in the order you
have programed. Program Play ends when
all the programed tracks are played once
(when Repeat Play is not activated).
1
2
3
4
5
6
7
8
9
10
0
+10
GROUP SKIP
Before playing, you can erase the last
programed track by pressing CANCEL.
Each time you press the button, the last
programed track is erased from the program.
GROUP SKIP
CANCEL
To add tracks in the program before playing, simply select
the track numbers you want to add by following step 3 in
Program Play.
To erase the entire program, press 0 (MD eject) on the unit
to eject the MD.
• The program will be erased when you unplug the AC power
cord or a power failure occurs.
Step number
PRGM
MD
• If you try to program a 33rd track
“MEMORY FULL” will appear on the display.
Total playing time
4 Repeat step 3 to program other tracks you
want.
• If your entry is ignored
You are trying to program a track that does not exist on the MD (for
example, selecting track 14 on an MD that only has 12 tracks).
• If the total playing time is 150 minutes or more
The total playing time on the display will not be shown. “– – : – –” will
appear.
22
EN20-25_UX-J55MD[UB]f.p65
22
03.7.10, 0:01 PM
English
Playing at Random—Random Play
Playing Tracks in a Group—Group Play
The tracks of the loaded MD will be played at random.
You can play back tracks in a group.
• To make or edit groups, see pages 39 to 45.
1 Load an MD.
• If the current playing source is not “MD,” press
MD 6, then 7 before going to the next step.
On the remote control ONLY:
2 Press PLAY MODE repeatedly
PLAY
MODE
until “MD RANDOM” appears
on the display.
1 Load an MD including groups.
• If the current playing source is not “MD,” press
MD 6, then 7 before going to the next step.
On the remote control ONLY:
2 Press PLAY MODE repeatedly
until “MD GROUP” appears on
the display.
The RANDOM indicator lights up on the
display.
The GROUP indicator lights up on the display.
RANDOM indicator
MD
PLAY
MODE
GROUP indicator
MD
RANDOM
GROUP
• Each time you press the button, play mode changes as
follows:
MD PROGRAM
3
MD RANDOM
(Program Play)
(Random Play)
Normal Play
MD GROUP
• Each time you press the button, play mode changes as
follows:
MD PROGRAM
MD RANDOM
(Program Play)
(Random Play)
Normal Play
MD GROUP
(Group Play)
Press MD 6.
MD
The tracks are played at random.
Random Play ends when all the tracks are
played once (when Repeat Play is not
activated).
6
(Group Play)
3 Press GROUP SKIP ¢ or GROUP SKIP
4 while holding SHIFT to select a group.
GROUP SKIP
SHIFT
GROUP SKIP
To stop during play, press 7.
To skip the current playing track, press ¢.
To skip back to the beginning of the current track,
press 4.
• You cannot go back to the previous tracks.
• GROUP SKIP ¢: Selects group numbers in the
increasing order.
• GROUP SKIP 4: Selects group numbers in the
decreasing order.
The first track of Group 5
Current group number
MD
GROUP
To exit from Random Play, before or after play, press PLAY
MODE repeatedly so that the unit enters another play mode
(Group Play, Normal Play, or Program Play).
The RANDOM indicator goes off.
• Turning off the unit or ejecting MD also cancels Random
Play and changes the playback mode to Normal Play.
Recording length mode
of the current track
4 Press MD 6.
Total playing time
of the current track
MD
6
The tracks in the selected group starts
playing.
• When the loaded MD has no groups, all
the tracks on the MD are played back in
the same way as Normal play.
Group Play ends when all the tracks in the selected group
are played once (when Repeat Play is not activated).
23
EN20-25_UX-J55MD[UB]f.p65
23
7/1/03, 4:43 PM
English
Continued
To go to another track in the same group, press ¢ or
4 repeatedly.
• ¢: Skips to the beginning of the next or succeeding
tracks in the same group.
• 4: Goes back to the beginning of the current or previous
tracks in the same group.
To go to another group, press GROUP SKIP ¢ or
GROUP SKIP 4 repeatedly while holding SHIFT during
Group Play.
• GROUP SKIP ¢: Skips to the first track in the next or
succeeding groups.
• GROUP SKIP 4: Goes back to the first track in the
current or previous groups.
To stop during play, press 7.
To exit from Group Play, before or after play, press PLAY
MODE repeatedly so that the unit enters another play mode
(Normal Play, Program Play, or Random Play).
• Turning off the unit also cancels Group Play and changes
the playback mode to Normal Play.
Searching for Tracks to Play
—MD Title Search
You can search for the tracks by their titles and play them
back.
For details on assigning a title, see pages 51 – 53.
1 Load an MD.
• If the current playing source is not “MD,” press
MD 6, then 7 before going to the next step.
On the remote control ONLY:
2 Press TITLE SEARCH.
TITLE SEARCH
The TITLE SEARCH indicator lights up on
the display. Play mode changes to
Normal Play.
“TITLE” appears on the display and the character entry
position flashes.
TITLE SEARCH indicator
MD
TITLE SEARCH
Repeating Tracks—Repeat Play
You can have all the tracks, the program, the individual track
or group currently playing repeat as many times as you like.
Press REPEAT during or before play.
• Each time you press the button, Repeat Play
changes as follows:
(
REPEAT
MD REPEAT 1
ALL)
Character entry
position
3 Enter the character(s) to search for the track
On the remote control ONLY:
MD REPEAT ALL
Character set
(
1)
MD REPEAT OFF
(canceled)
• MD REPEAT ALL:
For Normal Play or Random Play:
Repeats all the tracks on the MD.
For Group Play:
Repeats all the tracks in a group.
For Program Play:
Repeats all the tracks in the program.
• MD REPEAT 1:
Repeats one track.
• MD REPEAT OFF: Cancels Repeat Play.
Ejecting the MD or turning off the
unit will also cancel the Repeat Play.
title.
You can enter up to 5 characters. The unit will search for
the tracks which have the entered characters at the
beginning of their titles.
• You can also search for the tracks without a title. In this
case, go to step 4 without entering any character.
1) Press DISP/CHARA to select the
character set you want.
• Each time you press the button,
character set changes as follows:
Capital letters
& Symbols
DISP/CHARA
Small letters
& Symbols
Numerals
To stop during play, press 7.
24
EN20-25_UX-J55MD[UB]f.p65
24
7/1/03, 4:43 PM
English
2) Press the character entry
1
2
3
button for a character you
want to enter.
Ex.:
4
5
6
• To enter an “A” or “a,” press
ABC once.
7
8
9
To enter a “B” or “b,” press
ABC twice.
10
0
+10
To enter a “C” or “c,” press
ABC three times.
• To enter a symbol, press MARK
repeatedly until the mark you want appears.
• To enter a numeral, press 0 – 9.
• To enter a space while entering a title, press
twice.
• To move the character entry position while entering a
title, press
or
.
• If you have entered an incorrect character, press
or
to select the character you want to correct, then
press CANCEL to delete it.
3) Repeat steps 3 – 1) and 3 – 2) to enter other
characters.
• If the character you want to enter next is assigned to
the same button you have just pressed in step
3 – 2), press
once to move the character entry
position to the right.
4 Press ENTER.
ENTER
“SEARCH • • • •” scrolls and the TITLE
SEARCH indicator starts flashing on the
display. The unit starts searching for the
track.
To skip the current playback and search for the next
track, press ¢.
To cancel title searching, press TITLE SEARCH or 7.
When you press the button during playback or search,
Normal Play resumes.
If you press 4, the current playing track will go back to the beginning or
previous track, but title search is still activated.
Available symbols are as follows:
(Blank)
To prohibit MD ejection—MD Lock
You can prohibit MD, disc, and cassette ejection from the
unit, and lock the disc.
See “Prohibiting Disc Ejection—Disc Lock” on page 19
for details.
MD
TITLE SEARCH
• When the track with the desired title is found, the unit
plays back the track. (After the track is played, the unit
starts searching for the next matching track.)
• If no track with the desired title is found, “SEARCH
END” appears on the display and Normal Play resumes.
The TITLE SEARCH indicator goes off.
25
EN20-25_UX-J55MD[UB]f.p65
25
7/1/03, 4:43 PM
English
Playing Back Tapes
Playing Back a Tape
You can play back type I tapes.
1 Insert a cassette into the cassette loading slot
Pressing 0 (TAPE eject) button also turns on the unit if the cassette is
unlocked.
with the exposed part of the tape facing left.
DO NOT press 0 (TAPE eject) during tape play.
To play both sides—Reverse Mode
You can set the deck to play just one side or both sides of a
tape once, or both sides continuously.
• When the unit is turned on, the TAPE indicator appears
on the display.
• If you insert the cassette when the unit is on tape mode,
“TAPE LOADING” appears on the display.
Press REV.MODE.
• Each time you press the button, Reverse
Mode changes as follows:
REV.
MODE
Tape operation indicators
:
TAPE
:
:
2 Press TAPE 2 3.
TAPE
Playback starts (if the unit has been on
standby, the unit automatically turns on).
23
To change the tape direction, press the button again.
• Each time you press the button, the tape direction
changes as follows:
: Plays the front side.
: Plays the reverse side.
Tape direction indicator
TAPE indicator
TAPE
Reverse Mode indicator
Plays back only one side (front or reverse).
Plays back the front and reverse sides once.
Plays back both front and reverse sides
continuously.
Tape direction
When the tape plays to the end, the deck automatically
stops if Reverse Mode is set to
or
. (See “To play
both sides—Reverse Mode” on the right column.)
To stop during play, press 7.
When you eject the cassette, Reverse Mode changes to
automatically.
• The use of C-120 or longer tape is not
recommended, since characteristic
deterioration may occur and this tape easily
jams in the pinch rollers and the capstans.
• You can also play back type II and type IV
tapes; however, the sound quality (tone) may
not be reproduced properly.
To prohibit cassette ejection—Cassette Lock
You can prohibit cassette, disc, and MD ejection from the
unit, and lock the cassette.
See “Prohibiting Disc Ejection—Disc Lock” on page 19
for details.
To fast-wind the tape rightward or leftward, press ¢ or
4.
The tape direction indicator (3 or 2) starts flashing rapidly
on the display.
To remove the cassette, press 0 (TAPE eject) on the unit.
The TAPE and tape operation indicators go off.
26
EN26-26_UX-J55MD[UB]f.p65
26
7/1/03, 4:42 PM
English
Listening to External Equipment
Listening to External Equipment
4 Adjust the volume level to your desired
You can listen to external equipment connected to the AUX/
DVD jacks on the rear of the unit.
• First make sure that the external equipment is properly
connected as follows (see also “Connecting External
Equipment” on page 8):
DO NOT connect other equipment while the power
is on.
AUX/DVD
To AUX/DVD jacks
RIGHT
LEFT
5 Apply sound effects, if you wish.
• For how to apply sound effects, see pages 11 and 12.
To adjust the Audio Input Level
If the sound from the component connected to the
AUX/DVD jacks is too loud or is not loud enough when
changing from another source to “AUX,” you can change the
audio input level through the AUX/DVD jacks (without
changing the volume level).
On the remote control ONLY:
External
equipment
To audio output
listening level.
Press and hold SET for more than 2 seconds
while the source is “AUX.”
• Each time you press and hold the button,
the audio input level alternates between
“LEVEL 1” and “LEVEL 2.”
SET
1 On the remote control:
Press FM/AM/AUX repeatedly
until “AUX” appears on the
display.
FM/AM
/AUX
LEVEL 1: Select this when the sound is too loud (initial
setting).
LEVEL 2: Select this when the sound is not loud enough.
• Each time you press the button, the source
changes as follows:
FM
AM
To change the information shown on the display
AUX
On the remote control ONLY:
On the unit:
Press AUX/DVD.
AUX/DVD
• “AUX” appears on the display.
FM/AM
DISP/CHARA
Press DISP/CHARA.
Each time you press the button, the
information on the display alternates between
the source indication and the clock indication.
• If an MD is inserted, the MD remaining recording time
(“REC REMAIN”) is shown before the clock indication.
2 Turn down the volume level to “VOLUME 0.”
VOLUME
VOLUME
+
–
(On the remote control)
(On the unit)
3 Start playing the external equipment.
• For operation of the external equipment, refer to the
manuals supplied with it.
27
EN27-27_UX-J55MD[UB]f.p65
27
7/1/03, 4:42 PM
English
Recording on MDs
Continued
Before You Start Recording on an MD
• It may be unlawful to record or play back copyrighted material without the consent of the copyright
owner.
• When you record onto partially recorded MD, its contents are not erased or overwritten. The recording starts from the
point following the last recorded track of the MD.
If you want to record on such an MD from the beginning, you have to erase its contents first (see “Erasing All Tracks
—ALL ERASE” on page 50).
• When an MD is fully recorded, recording will stops automatically.
• The recording level is automatically set correctly, so it is not affected by the volume level. Thus, during recording you can
adjust the sound you are actually listening to without affecting the recording level.
• While recording, you can hear sound mode effect and/or the AHB PRO (Active Hyper Bass PRO) effect through the
speakers or headphones. However, the sound is recorded without these effects (see pages 11 and 12).
• You can make a digital to digital recording from an audio CD onto an MD.
When selecting FM, AM, TAPE, or AUX as the source, you can make an analog to digital recording only.
• You cannot record more than 254 tracks onto an MD, even if there is still enough recording time remaining on it.
About the track marks
To avoid erasing important recordings
When playing an MD, you can move among the tracks.
You can do this because there is a mark recorded at the
beginning of each track enabling you to locate the track.
This mark is called a “track mark” and the portion between
two adjacent track marks is called a “track.”
The recordable MD has an erasure prevention tab so that
important recordings are not accidentally erased. When
you finish recording or editing, slide to open the erasure
prevention tab on the cartridge side surface. New recording
or editing is now no longer possible. (If you try to do,
“DISC PROTECTED” appears on the display.)
To do re-recording or editing, return the tab to the closed
position.
• When using CD synchronized recording, a track mark
is recorded at the beginning of each track. You cannot
put a track mark manually.
• When recording from an analog source such as FM,
AM, TAPE, or AUX, you can select “Auto Track
Recording” and “Manual Track Recording” by pressing
CD REC MODE (see page 32).
To add a track mark after recording is over, you can use
the DIVIDE function (see page 47).
Erasure prevention tab
Recording/Editing
possible
Disc protected: Recording/
Editing not possible
If “PLAY BACK DISC” appears on the display
when you try to record on an MD
The MD is only for playback use, not for recording (see page 63).
28
EN28-36_UX-J55MD[UB]f.p65
28
7/1/03, 4:41 PM
English
Stereo Long-Hour Recording (MDLP)
On conventional MD recorders, 2 times long-hour
recording on MDs has been possible only in monaural
sound, but this unit allows for 2 times or 4 times long-hour
recording without losing stereo sound.
With this feature, songs (tracks) can be recorded on a
single MD using different recording length modes—SP:
Standard Play, LP2: 2 Times Long Play, LP4: 4 Times
Long Play.
SP: Signifies standard-hour stereo recording. The
amount of time usable for recording is the same as
shown on the package of the MD.
LP2: Signifies 2 times long-hour stereo recording. The
amount of time usable for recording is twice as
long as shown on the package of the MD.
LP4: Signifies 4 times long-hour stereo recording. The
amount of time usable for recording is 4 times as
long as shown on the package of the MD.
REMEMBER to check the remaining recording time of
MDs before start recording
The remaining recording time of MDs will be calculated
and shown, based on the recording length mode (SP/LP2/
LP4) currently selected.
Before start recording or using the Recording Timer,
check the remaining recording time on the MD for each
recording length mode (SP/LP2/LP4) and select the
optimum recording length mode.
To check the remaining recording time
Press DISP/CHARA repeatedly until “REC REMAIN” and
the remaining time based on the current recording mode
appear on the display.
Precautions for performing long-hour stereo recording
After having made long-hour stereo recordings on this unit,
pay attention to the following:
• Songs (tracks) recorded in 2 times or 4 times long-hour
recording mode can only be played back on the equipment
provided with MDLP, compatible with a long-hour stereo
recording function; otherwise, “LP:” is displayed before a
title and playback proceeds without sounds.
• When editing songs (tracks) on an MD, you cannot join
(JOIN) songs (tracks) recorded in different recording
length modes (SP/LP2/LP4).
More about MDLP
• You cannot make a long-hour monaural recording using this unit.
• Sound quality will decrease as the recording length mode changes to
LP2 (little) and LP4 (much). To obtain the best sound quality, it is
recommended to use the SP mode when recording.
About High-Speed Recording
The time for high-speed recording is half or quarter as long
as the time for normal speed recording.
There are some restrictions to observe for high-speed
recording (x2 speed recording: two times as quick as normal
speed recording, x4 speed recording: four times as quick as
normal speed recording, x5 speed recording: five times as
quick as normal speed recording) to protect copyrights.
(HCMS: see page 61.)
This unit is so designed that a song (track) recorded from a
CD using high-speed recording cannot be re-recorded until
74 minutes elapse after the previous recording started.
If you try to re-record the same song (track) within the 74
minutes, recording is canceled and “HCMS CANNOT
COPY” appears on the display as a warning.
REMEMBER if you are trying to record a program
including the same song (track) twice using high-speed
recording, recording will stop at the beginning of the 2nd
recording of the same song (track). (“HCMS CANNOT
COPY” will appear on the display.)
During high-speed recording
You cannot listen to any source, and therefore, cannot adjust the volume
level. (“CANNOT LISTEN” will appear on the display if you try to do.)
29
EN28-36_UX-J55MD[UB]f.p65
29
7/1/03, 4:41 PM
English
Continued
Setting MD Recording Modes
Before recording on MDs, set the recording length mode
(SP/LP2/LP4), “LP:”-prefix addition mode, and the group
recording mode.
On the remote control ONLY:
To set the recording length mode
The recording length mode can be set and stored for each
source.
1) Select the source (FM, AM, CD, TAPE, or AUX) to
record.
REC
2) Press REC TIME.
TIME
• Each time you press the button, the
recording length mode changes as follows:
SP
SP:
LP2:
LP4:
LP2
To set group recording mode
You can form a new group (up to 99 groups) easily while
recording using group recording mode.
Press GROUP REC ON/OFF.
• Each time you press the button, group
recording mode turns on and off.
MD GROUP ON
GROUP REC
ON/OFF
MD GROUP OFF
MD GROUP ON: All the tracks recorded at a time will
form a new group. The GROUP indicator
lights up on the display.
MD GROUP OFF: Cancels group recording function. The
GROUP indicator goes off from the
display.
LP4
Records using standard-hour stereo recording.
The SP indicator lights up on the display.
Records using 2 times long-hour stereo
recording. The LP2 indicator lights up on the
display.
Records using 4 times long-hour stereo
recording. The LP4 indicator lights up on the
display.
To set “LP:”-prefix addition mode
You can select whether or not to add “LP:” to the beginning
of the title for the tracks recorded using the stereo long-hour
recording mode (LP2 or LP4).
Press LP: while holding SHIFT.
Recording CD onto an MD
—CD-MD Synchronized Recording
Using the CD synchronized recording method, you can start
and stop CD play and MD recording at the same time.
1 Load discs into the 5-CD changer.
• If the current playing source is not “CD,” press CD 6,
then 7 before going to the next step.
• You can make a program (see page 17) or select
Random Play (see page 18) if you want.
On the remote control ONLY:
2 Press DISC UP
or DISC DOWN to
select the disc you want to record, then 7
before going to the next step.
BEEP
SHIFT
LP:
DISC UP
DISC DOWN
• Each time you press these buttons, the “LP:”-prefix
addition mode alternates between on and off.
(LP:) ON
(LP:) OFF
(LP:) ON: Adds “LP:” to the beginning of the track title.
The total number of characters you can enter for
an MD is reduced (for details, see pages 51 –
53).
(LP:) OFF: Does not add “LP:” to the beginning of the track
title.
3 Insert a recordable MD into the MD loading
slot.
• Set the MD recording length mode, “LP:”-prefix
addition mode, and group recording mode (see left
column and above).
4 Press REC SPEED to select the
REC
SPEED
recording speed you want.
• Each time you press the button, recording
speed changes as follows:
x1
x2
(Normal speed) (2 times normal speed)
x4
(4 times normal speed)
• If you have selected Program Play or Random Play,
go to step 6.
30
EN28-36_UX-J55MD[UB]f.p65
30
7/1/03, 4:41 PM
English
5 Press CD REC MODE to select the
CD REC
MODE
recording mode.
While playing back or pausing a track you
want to record, press MD REC.
• Each time you press the button, recording
mode changes as follow:
1st TRACK REC
To record a single track during play or pause
CD1* DISC REC
ALL DISC REC
• 1st TRACK REC: Records the first track of all the
loaded CDs (up to 5 discs).
• This allows you to make a
directory of all your favorite CDs.
• CD1* DISC REC: Records the selected CD entirely.
MD
REC
The playback of the track is stopped, and the
same track starts playing from the beginning again. This time,
the MD recorder starts recording the track. The REC (MD
recording) indicator flashes on the display.
• After the track is recorded, both the CD player and the MD
recorder stop automatically.
“WRITING” flashes on the display and the unit beeps for a
while if the key-touch tone is activated (see page 10).
* Selected disc number appears on the display.
• ALL DISC REC: Records all the loaded CDs.
6 Press MD REC when the selected
MD
REC
recording mode in step 5 is still
shown on the display.
The recording starts and the REC (MD
recording) indicator starts flashing on the display.
• When you have selected a track by pressing ¢ or 4
before pressing CD REC MODE in step 5, recording
starts from the selected track (except when Program
Play mode is selected).
• If you do not select the recording mode in step 5, the
current CD will be recorded entirely.
• When you have selected Program Play or Random Play
mode, you cannot record using x4 speed recording
(“CANNOT REC x1 or x2 ONLY” will appear).
• You can use x4 speed recording during Program Play or
Random Play to record only the current playing track.
• Recording speed will be “x5” to record an entire CD
whose playing time is more than 28 minutes with “x4”
recording speed selected.
To change the information shown on the display
On the remote control ONLY:
DISP/CHARA
Press DISP/CHARA.
• Each time you press the button, the
recording indications, the current track
numbers of both the disc and the MD, and
the clock indication appear in sequence on the display.
Remaining playing time
CD
1 2 3 4 5
Remaining recording time
Current CD track number
CD
The track number on the disc
currently being recorded
CD
1 2 3 4 5
Remaining playing
time
MD
REC LP 2
GROUP x 1
1 2 3 4 5
MD
REC LP 2
GROUP x 1
MD
REC LP 2
GROUP x 1
Current MD track number
CD
1 2 3 4 5
MD operation indicators Remaining recording time
Ex.: Track 1 of CD2 is now recorded on an MD using
LP2 and Group recording at normal speed (x1).
When the CD player stops, the MD recorder also stops
automatically.
To stop recording, press 7.
“WRITING” flashes on the display and the unit beeps for a
while if the key-touch tone is activated (see page 10).
MD
REC LP 2
GROUP x 1
* If the loaded MD does not contain any group or more than 99 groups,
“G – –” will appear on the display.
When recording from a CD-R/RW
You cannot make a digital recording from a digital-copied CD-R/RW on an
MD. “SCMS CANNOT COPY” appears on the display and an analog
recording starts (see page 61). The recording speed is automatically set to x1
(normal speed).
If CD REC MODE is used, recording stops automatically if “SCMS CANNOT
COPY” appears on the display.
31
EN28-36_UX-J55MD[UB]f.p65
31
Current group number*
7/1/03, 4:41 PM
English
Recording Other Sources onto an MD
When the source is “FM” or “AM,” recording starts.
To record from FM/AM broadcasts:
1) Press FM/AM/AUX (or FM/AM on the unit) to
select either “FM” or “AM.”
AUX/DVD
/AUX
FM/AM
(On the remote control)
MD
REC
The REC (MD recording) indicator starts
flashing on the display.
1 Prepare the source to record from.
FM/AM
4 Press MD REC.
(On the unit)
2) Tune in to a preset station you want (see page 14).
To record from a tape:
1) Insert a cassette into the cassette loading slot.
• If the current playing source is not “TAPE,” press
TAPE 2 3, then 7 before going to the next step.
REV.
2) Press REV.MODE to select Reverse
MODE
Mode (see page 26).
To record from external equipment:
Press FM/AM/AUX (or AUX/DVD on the unit) to select
“AUX” and prepare the external equipment to play.
When the source is “TAPE,” playback and recording
starts—Synchronized Recording.
When the cassette player stops, recording also stops
automatically.
When the source is “AUX,” starts playback after “AUX
= MD” appears on the display.
MD
REC LP 2
GROUP x 1
TAPE
Ex.: When recording a tape using LP2 and Group recording.
To stop recording, press 7.
“WRITING” flashes on the display and the unit beeps for a
while if the key-touch tone is activated (see page 10).
When recording from the external equipment
FM/AM
/AUX
Recording starts automatically when the source sound comes into the unit,
and stops automatically if no sound comes into the unit for about 30 seconds
(Sound Synchronized Recording).
AUX/DVD
FM/AM
(On the remote control)
(On the unit)
• Adjust the audio input level if necessary (see page 27).
• For operation of the external equipment, see the
manuals supplied with it.
2 Insert a recordable MD into the MD loading
slot.
• Set the MD recording length mode, “LP:”-prefix
addition mode, and group recording mode (see “Setting
MD Recording Modes” on page 30).
To change the information shown on the display
On the remote control ONLY:
Press DISP/CHARA.
• Each time you press the button, the
information on the display changes as
follows:
DISP/CHARA
Source indication
MD
REC
SP
GROUP x 1
On the remote control ONLY:
3 Press CD REC MODE to select
CD REC
MODE
track mark entry mode.
• Each time you press the button, entry mode
alternates between auto and manual entry:
MANUAL TRK REC
AUTO TRK REC
MANUAL TRK REC: Separates tracks manually by
adding track marks at the places
where you want.
• Press SET to add a track mark
while recording.
AUTO TRK REC:
The unit automatically separates
and put a track mark if there is a
silence of 3 seconds or more
between tracks.
• By pressing SET, you can also
enter a track mark manually.
Remaining recording time
MD SP
REC
GROUP x 1
MD track number
MD group number*
Ex.: When you record an FM broadcast.
* When group recording is not activated, “– –” will appear on the display.
* See “About the track marks” on page 28 for details.
32
EN28-36_UX-J55MD[UB]f.p65
32
7/1/03, 4:41 PM
English
Recording on Tapes
Before You Start Recording on a Tape
• It may be unlawful to record or play back copyrighted material without the consent of the copyright
owner.
• The recording level is automatically set correctly, so it is not affected by the volume level. Thus, during recording you can
adjust the sound you are actually listening to without affecting the recording level.
• While recording, you can hear sound mode effect and/or the AHB PRO (Active Hyper Bass PRO) effect through the
speakers or headphones. However, the sound is recorded without these effects (see pages 11 and 12).
• If recordings you have made have excessive noise or static, the unit may be too close to a TV. Place the unit away from the
TV.
• You can use only type I tapes for recording.
To protect your recordings
Cassettes have two small taps on the back to protect
unexpected erasure or recording.
To protect your recording, remove these tabs.
To re-record on a protected tape, cover the holes with
adhesive tape.
To keep the best recording and playback sound
quality
You need to clean the heads.
• Clean the heads after every 10 hours of use with
a wet-type head cleaning tape (available at electronic and
audio shops).
Adhesive tape
The use of the C-120 or longer tape is not recommended, since
characteristic deterioration may occur and this tape easily jams
in the pinch rollers and the capstans.
When the head becomes dirty, the following symptoms
will occur:
– Sound quality is reduced.
– Sound level decreases.
– Sound drops out.
• Do not play dirty or dusty tapes.
• Do not touch the highly-polished head with any metallic
or magnetic tools.
To demagnetize the head
Turn off (on standby) the unit, and use a head
demagnetizer (available at electronics and audio shops).
At the start and end of cassette tapes
There is leader tape which cannot be recorded onto. Thus, when
recording discs, MDs, or radio broadcasts, wind the leader tape first to
ensure that the recording will be made without any music part lost.
33
EN28-36_UX-J55MD[UB]f.p65
33
7/1/03, 4:41 PM
English
Continued
Recording CD onto a Tape
—CD-Tape Synchronized Recording
6 Press TAPE REC when the
TAPE
REC
selected recording mode in step 5
is still shown on the display.
1 Load discs into the 5-CD changer.
• If the current playing source is not “CD,” press CD 6,
then 7 before going to the next step.
• You can make a program (see page 17) or select Random
Play (see page 18) if you want. = Go to step 3.
The recording starts and the REC (tape
recording) and tape direction indicators start flashing on
the display.
CD
TAPE
REC
1 2 3 4 5
On the remote control ONLY:
2 Press DISC UP
or DISC DOWN to
select the disc you want to record, then 7
before going to the next step.
Current track number
Elapsed playing time
Recording onto a Tape
DISC UP
You can use only type I tapes for recording.
DISC DOWN
1 Prepare the source to record from.
3 Put a recordable cassette into the cassette
loading slot.
4 Press REV.MODE to select a
REV.
MODE
reverse mode.
• Each time you press the button, the reverse
mode changes as follows:
Recording on
one side.
To record from a disc:
1) Load discs into the 5-CD changer.
• If the current playing source is not “CD,” press
CD 6, then 7 before going to the next step.
• You can make a program (see page 17) or select
Random Play (see page 18) if you want. = Go to
step 2.
or DISC DOWN
to select a
2) Press DISC UP
disc to record, then 7 before going to the next step.
Recording on both
sides once.
DISC UP
DISC DOWN
*
will be shown during recording when you select
.
• If you have selected Program Play or Random Play, go
to step 6.
5 Press CD REC MODE to select the
CD REC
MODE
recording mode.
• Each time you press the button, recording
mode changes as follow:
1st TRACK REC
CD1* DISC REC
ALL DISC REC
• 1st TRACK REC: Records the first track of all the
loaded CDs (up to 5 discs).
• This allow you to make a directory
of all your favorite CDs.
• CD1* DISC REC: Records the selected CD entirely.
To record from an MD:
Insert an MD into the MD loading slot.
• If the current playing source is not “MD,” press
MD 6, then 7 before going to the next step.
• You can make a program (see page 22), select Random
Play (see page 23) or Group Play (see page 23) if you
want.
To record from FM/AM broadcasts:
1) Press FM/AM/AUX (or FM/AM on the unit) to
select either “FM” or “AM.”
FM/AM
/AUX
AUX/DVD
FM/AM
* Selected disc number appears on the display.
• ALL DISC REC: Records all the loaded CDs.
(On the remote control)
(On the unit)
2) Tune in to a preset station you want (see page 14).
34
EN28-36_UX-J55MD[UB]f.p65
34
7/1/03, 4:41 PM
English
To record from external equipment:
To record a single track of a CD/MD during play
1) Press FM/AM/AUX (or AUX/DVD on the unit) to
select “AUX.”
On the remote control ONLY:
FM/AM
/AUX
While playing back a track of a CD or MD
you want to record, press TAPE REC.
TAPE
REC
AUX/DVD
FM/AM
(On the remote control)
(On the unit)
2) Prepare the external equipment to play.
• Adjust the audio input level if necessary (see page 27).
• For operation of the external equipment, see the
manuals supplied with it.
2 Put a recordable cassette into the cassette
loading slot.
3 Press REV.MODE to select
The playback of the track is stopped, and the
same track starts playing from the beginning
again. This time, the cassette deck starts recording the track.
• After the track is recorded, both playback and recording
stop automatically.
When you press TAPE REC while pausing a track
Recording starts from that point.
REV.
MODE
Reverse Mode.
To change the information shown on the display
• Each time you press the button, Reverse
Mode changes as follows:
On the remote control ONLY:
Recording on
one side.
*
Press DISP/CHARA.
• Each time you press the button, the
information on the display alternates
between the recording indication and the
clock indication.
Recording on both
sides once.
will be shown during recording when you select
4 Press TAPE REC.
.
TAPE
REC
The REC (tape recording) and tape direction
indicators start flashing on the display.
When the source is “FM” or “AM,” recording starts.
When the source is “CD” or “MD,” playback and
recording starts—Synchronized Recording.
When the CD or MD player stops, recording also stops
automatically.
When recording a disc or an MD
• A 4-second blank is automatically made on the tape before each track. To
record without the blank, press CD 6 or MD 6 twice in step 1, then
press TAPE REC.
• When the front side of the tape ends in the middle of a track, the recording
on the reverse side starts from the beginning of that track (if the reverse
mode is set to
).
However, if the front side ends within 12 seconds from the beginning of a
track, recording on the reverse side starts from the previous track.
When the source is “AUX,” starts playback after “AUX
= TAPE” appears on the display.
TAPE
REC
Ex.: When you record an FM broadcast
• When you select a track by pressing ¢ or 4 before
pressing TAPE REC, recording starts from the selected
track (except when Program Play is selected).
• When recording from an external equipment, start
playback after “AUX = TAPE” appears on the display.
To stop recording, press 7.
35
EN28-36_UX-J55MD[UB]f.p65
35
DISP/CHARA
7/1/03, 4:42 PM
English
Recording CD onto an MD and a Tape
—CD Synchronized Recording
To stop recording, press 7.
“WRITING” flashes on the display for a while.
With this recording method, you can start and stop CD play,
MD and tape recordings at the same time.
To eject the MD or tape, press 7 to stop the recording, then
press the corresponding eject button.
1 Load discs into the 5-CD changer.
To record a single track during play or pause
• If the current playing source is not “CD,” press
CD 6, then 7 before going to the next step.
• You can make a program (see page 17) or select Random
Play (see page 18) if you want. = Go to step 3.
On the remote control ONLY:
2 Press DISC UP
or DISC DOWN to
select the disc you want to record, then 7
before going to the next step.
On the remote control ONLY:
While playing back or pausing a track you
want to record, press MD&TAPE REC.
MD&TAPE
REC
The playback of the track is stopped, and the
same track starts playing from the beginning again. This time,
the MD recorder and cassette deck start recording the track.
• After the track is recorded, both playback and recording
stop automatically.
DISC UP
To change the information shown on the display
On the remote control ONLY:
DISC DOWN
3 Insert a recordable MD into the MD loading
slot and put a recordable cassette into the
cassette loading slot.
Press DISP/CHARA.
• Each time you press the button, the recording
indications, the current track numbers of
both the disc and the MD, and the clock
indication appear in sequence on the display.
DISP/CHARA
For the MD:
Set the MD recording length mode, “LP:”-prefix addition
mode, and group recording mode (see “Setting MD
Recording Modes” on page 30).
• Set the MD recording speed to “x1.”
For the cassette:
Press REV.MODE to select Reverse Mode as necessary.
4 Press MD&TAPE REC.
• When recording from a CD-R/RW
You cannot make a digital recording from a digital-copied CD-R/RW on
an MD. “SCMS CANNOT COPY” appears on the display and an analog
recording starts (see page 63).
• When recording on an MD and a tape at the same time
A 4-second blank before each track is not made on the tape.
MD&TAPE
REC
CD play and recording start.
• When you select a track by pressing ¢
or 4 before pressing MD&TAPE REC,
recording starts from the selected track (except
when Program Play is selected).
The REC (MD recording) and REC (tape recording)
indicators start flashing on the display.
MD and tape
recording indicators
CD
1 2 3 4 5
MD
REC
SP
Remaining
playing time
TAPE
REC
x1
MD remaining
The track number
on the disc currently recording time
being recorded
When CD player stops, MD recorder and the cassette
deck stop automatically.
36
EN28-36_UX-J55MD[UB]f.p65
36
7/1/03, 4:42 PM
English
Editing MDs
Guidance—MD Group Functions
To add to the conventional MD Editing functions (called the
track editing functions in this manual), MD Group functions
help you to classify the tracks by making groups on your
MD.
Classifying the tracks on an MD
MDLP enables you to record more tracks on a single MD
than usual. So, there are many tracks which have been
recorded from the various sources—CDs, FM, and so on—
on your MD.
In that case, if you can classify the tracks by source, by
album, or by artist, the playback of your favorite songs
becomes much easier.
Track number
1
2
3
4
5
6
7
8
9
10
A
B
B
B
B
B
C
C
D
E
Using MD Groups as a separate item
You can enjoy playback, recording, and editing groups.
• Playback (see page 23):
You can play back and repeat the desired group without
making a program: For example, you can play back
repeatedly genre B tracks by selecting Group 1 in the left
figure—Group Play.
• Recording (see page 30):
You can form a group while tracks are being recorded.
• Editing:
You can edit the groups using the following functions:
– Forming a group (FORM GR)
– Adding a track to a group (ENTRY GR)
– Dividing a group (DIVIDE GR)
– Joining two groups (JOIN GR)
– Moving a group (MOVE GR)
– Ungrouping tracks (UNGROUP)
– Dissolving all groups (UNGR ALL)
– Erasing tracks in a group (ERASE GR)
Track
How to make up Groups
1
2
3
4
5
6
7
8
9
10
A
B
B
B
B
B
C
C
D
E
Group 1
Group 2
Group 3
In the figure above, as an example, there are 5 different
genres (from A to E) of tracks on the MD. Using MD Group
functions, you can form a group by genre B tracks as Group
1, genre C tracks as Group 2, etc.
You can make up groups using two methods: Forming-agroup function and Group recording function.
• Forming-a-group function—FORM GR:
Select this when you want to make groups after recording
(see page 39).
• Group recording function:
Press GROUP REC ON/OFF to record and group tracks
at the same time (for details, see page 30).
By forming groups on the MD, you can classify the tracks
by each genre—the album title, the artist, etc. You can also
assign a name to each group (see pages 51 – 53).
37
EN37-45_UX-J55MD[UB]f.p65
37
7/1/03, 4:46 PM
English
Continued
Introducing Group Editing Functions
The groups and tracks can be edited in many ways (Group editing functions and Track editing functions). From this page to
page 45, the group editing functions are explained. For details on the track editing functions, see pages 46 to 50.
Forming a group (FORM GR): Page 39
This function forms a series of tracks or a single track into a
new group.
Ungrouping tracks (UNGROUP): Page 44
This function dissolves a group.
Group 1 Group 2 Group 3 Group 4 Group 5 Group 6
1 2 3 4 5 6 7 8 9 10 11 12 13
1 2 3 4 5 6 7 8 9 10 11 12 13 14 15 16 17 18 19 20
Track number
Group 1
1 2 3 4 5 6 7 8 9 10 11 12 13
Track number
Group 1 Group 2
Group 3 Group 4 Group 5
1 2 3 4 5 6 7 8 9 10 11 12 13 14 15 16 17 18 19 20
Adding a track to a group (ENTRY GR): Page 40
This function enters the selected track into a group.
Group 1
Group 2
1 2 3 4 5 6 7 8 9 10 11 12 13 14 15
Dissolving all groups (UNGR ALL): Page 44
This function dissolves all the groups.
Group 1 Group 2 Group 3 Group 4 Group 5 Group 6
1 2 3 4 5 6 7 8 9 10 11 12 13 14 15 16 17 18 19 20
Track number
Group 1
123456789
Track number
Group 2
10 11 12 13 14 15
1 2 3 4 5 6 7 8 9 10 11 12 13 14 15 16 17 18 19 20
Dividing a group (DIVIDE GR): Page 41
This function divides a group containing plural tracks.
Group 1
1 2 3 4 5 6 7 8 9 10
Group 2
11 12 13 14 15
Erasing tracks in a group (ERASE GR): Page 45
This function erases the tracks in the selected group.
• Group numbers and track numbers are renumbered
automatically.
Group 1 Group 2 Group 3 Group 4 Group 5 Group 6
Track number
Group 1
1 2 3 4 5
Group 2
Group 3
6 7 8 9 10 11 12 13 14 15
1 2 3 4 5 6 7 8 9 10 11 12 13 14 15 16 17 18 19 20
Blank
Track number
Group 1 Group 2 Group 3 Group 4 Group 5
1 2 3 4 5 6 7 8 9 10 11 12 13 14 15 16 17
Blank
Joining two groups (JOIN GR): Page 42
This function joins two adjacent groups into a single group.
Group 1
12345
Group 2
Group 3
6 7 8 9 10 11 12 13 14 15
Track number
Group 1
Group 2
1 2 3 4 5 6 7 8 9 10 11 12 13 14 15
Moving a group (MOVE GR): Page 43
This function moves the selected group by reordering the
group and track numbers.
Group 1 Group 2 Group 3 Group 4 Group 5 Group 6
1234
5 6 7 8 9 10 11 12 13 14 15 16 17 18 19 20
Track number
Group 1 Group 2 Group 3 Group 4 Group 5 Group 6
1 2 3 4 5 6 7 8 9 10 11 12 13 14 15 16 17 18 19 20
• If “PLAY BACK DISC” or “DISC PROTECTED” appears when
you try to edit an MD
You cannot edit such MDs. See pages 62 and 63.
• During Program Play or Random Play
You can edit the MD as long as the playback is stopped. However,
editing groups will resume Normal Play (the program in memory will be
cleared).
38
EN37-45_UX-J55MD[UB]f.p65
38
7/1/03, 4:46 PM
English
In the following examples of group editing, the process is
explained from the very first—that is, inserting a disc. You
can also edit an MD during playback (in Normal Play).
Forming a Group—FORM GR
This function allows you to form a group from a series of
tracks which do not belong to the other groups. You can form
a group from a single track.
Once a new group is formed, the other groups are renumbered.
• You can form up to 99 groups on a single MD.
• To stop any time during the editing process below before
step 8, press GROUP TITLE/EDIT.
1 Insert an MD you want to edit into the MD
5 Press SET.
SET
• If the track selected as the first track
belongs to another group, “GROUP
TRACK” appears on the display.
Select another track again (repeat step 4 ).
• If you want to form a group from the selected track
only, go to step 7.
• To cancel the setting, press CANCEL, then repeat from
step 4.
6 Press ¢ or 4 to select
GROUP SKIP
GROUP SKIP
the last track of the new
group.
• You can also select the track
using the number buttons. In this case, the selected track
starts playback repeatedly.
loading slot.
On the remote control ONLY:
2 Press GROUP TITLE/EDIT
GROUP TITLE
/EDIT
repeatedly until “FORM GR ?”
appears on the display.
• If you want to stop this editing process, press CANCEL.
3 Press SET.
SET
Ex.: When track 5 is selected.
7 Press SET.
• If the last selected track belongs to another group,
“GROUP TRACK” appears on the display.
Select another track again (repeat step 6 ).
• To cancel the setting, press CANCEL, then repeat from
step 4.
8 Press ENTER.
• During playback:
The currently playing track number starts flashing.
4 Press ¢ or 4 to select
GROUP SKIP
SET
ENTER
“EDITING” appears on the display. Then
“WRITING” and the REC (MD recording)
indicator flash while the editing you have
made is being recorded on the MD and playback stops.
GROUP SKIP
the first track of a new
group.
• You can also select the track using
the number buttons. In this case, the selected track starts
playback repeatedly.
To dissolve the group, see the UNGROUP function on page
44.
When “CANNOT FORM!” appears on the display in
step 7
You are trying to form a new group which includes another group between
the first and the last track. In this case, dissolve the previous group and form
a new one again.
Ex.: When track 3 is selected.
39
EN37-45_UX-J55MD[UB]f.p65
39
7/1/03, 4:46 PM
English
Continued
Adding a Track to a Group—ENTRY GR
This function allows you to enter a track into a group. The
track will be added as the last track in the selected group.
The track numbers will be renumbered.
• To stop any time during the editing process below before
step 8, press GROUP TITLE/EDIT.
1 Insert an MD you want to edit into the MD
loading slot.
On the remote control ONLY:
2 Press GROUP TITLE/EDIT
GROUP TITLE
/EDIT
repeatedly until “ENTRY GR ?”
appears on the display.
5 Press SET.
SET
• If the loaded MD has no group, you cannot go to the
following steps.
• When the selected track belongs to a group, its group
number appears on the display.
• To cancel the setting, press CANCEL, then repeat from
step 4.
6 Press GROUP SKIP ¢ or GROUP SKIP
4 while holding SHIFT to select the group.
SHIFT
GROUP SKIP
GROUP SKIP
• If you want to stop this editing process, press CANCEL.
3 Press SET.
SET
Ex.: When group 18 is selected.
7 Press SET.
SET
• During playback:
The currently playing track number starts flashing.
4 Press ¢ or 4 to select
GROUP SKIP
the track.
• You can also select the track using
the number buttons. In this case,
the selected track starts playback repeatedly.
GROUP SKIP
• To cancel the setting, press CANCEL, then repeat from
step 4.
8 Press ENTER.
ENTER
“EDITING” appears on the display. Then
“WRITING” and the REC (MD recording)
indicator flash while the editing you have
made is being recorded on the MD and playback stops.
Ex.: When track 13 is selected.
When “CANNOT ENTRY!” appears on the display in
step 7
You are trying to enter the selected track into the same group again. Repeat
procedure from step 6.
40
EN37-45_UX-J55MD[UB]f.p65
40
7/1/03, 4:46 PM
English
Dividing a Group—DIVIDE GR
5 Press ¢ or 4 to select
This function allows you to divide one group into two
separate groups.
You cannot divide the group containing only a single track.
When the original group has a title, two separate groups are
reassigned the same title as the original group.
Once a new group is divided, the other groups are
renumbered.
• To stop any time during the editing process below before
step 7, press GROUP TITLE/EDIT.
1 Insert an MD you want to edit into the MD
loading slot.
GROUP SKIP
GROUP SKIP
the track as the dividing
point.
The track selected in this step will
be the first track in the divided group.
• You can also select the track using the number buttons.
In this case, the selected track starts playback
repeatedly.
Ex.: When track 18 is selected.
• You cannot select the first track in a group or an
ungrouped track as a dividing point.
On the remote control ONLY:
2 Press GROUP TITLE/EDIT
GROUP TITLE
/EDIT
6 Press SET.
SET
repeatedly until “DIVIDE GR?”
appears on the display.
• To cancel the setting, press CANCEL, then repeat from
step 4.
• If you want to stop this editing process, press CANCEL.
3 Press SET.
SET
• If the loaded MD has no group, you cannot go to the
following steps.
• During playback:
The current playing track number and its group number
will appear. If the track does not belong to any group,
the group number will be indicated as “– –.”
7 Press ENTER.
“EDITING” appears on the display. Then
“WRITING” and the REC (MD recording)
indicator flash while the editing you have
made is being recorded on the MD and playback stops.
To join the divided groups, see the JOIN GR function on
page 42.
4 Press GROUP SKIP ¢ or GROUP SKIP
4 while holding SHIFT to select the group
you want to divide.
GROUP SKIP
SHIFT
GROUP SKIP
The first track of the selected group
Ex.: When group 2 is selected.
41
EN37-45_UX-J55MD[UB]f.p65
41
ENTER
7/1/03, 4:46 PM
English
Continued
Joining Two Groups—JOIN GR
5 Press SET.
This function allows you to join two adjacent groups into a
single group.
When the groups have their own titles, the title of the
preceding group is reassigned to the newly joined group.
Once two groups are joined, the other groups are renumbered.
• To stop any time during the editing process below before
step 6, press GROUP TITLE/EDIT.
1 Insert an MD you want to edit into the MD
loading slot.
On the remote control ONLY:
2 Press GROUP TITLE/EDIT
GROUP TITLE
/EDIT
repeatedly until “JOIN GR ?”
appears on the display.
SET
• To cancel the setting, press CANCEL, then repeat from
step 4.
6 Press ENTER.
ENTER
“EDITING” appears on the display. Then
“WRITING” and the REC (MD recording)
indicator flash while the editing you have
made is being recorded on the MD.
To divide the group, see the DIVIDE GR function on page
41.
When “CANNOT JOIN” appears on the display in
step 5
• If you want to stop this editing process, press CANCEL.
3 Press SET.
You are trying to join two groups which are separated by another track(s) inbetween. In this case, you need to move either of the groups (see page 43) or
the track(s) (see page 49).
SET
• If the loaded MD has only one or no group, you cannot
go to the following steps.
• During playback:
The group number of the currently playing track will
appear on the right. If the track does not belong to any
group, the group number will be indicated as “– –.”
4 Press GROUP SKIP ¢ or GROUP SKIP
4 while holding SHIFT to select the two
adjacent groups you want to join.
GROUP SKIP
SHIFT
GROUP SKIP
Ex.: When groups 7 and 8 are selected.
42
EN37-45_UX-J55MD[UB]f.p65
42
7/1/03, 4:46 PM
English
Moving a Group—MOVE GR
5 Press SET.
This function allows you to move a group.
Once a group is moved, the tracks and the other groups are
renumbered.
• To stop any time during the editing process below before
step 8, press GROUP TITLE/EDIT.
1 Insert an MD you want to edit into the MD
loading slot.
SET
• To cancel the setting, press CANCEL, then repeat from
step 4.
6 Press GROUP SKIP ¢ or GROUP SKIP
4 while holding SHIFT to select the
position where you want to move the group
to.
On the remote control ONLY:
2 Press GROUP TITLE/EDIT
GROUP TITLE
/EDIT
repeatedly until “MOVE GR ?”
appears on the display.
SHIFT
GROUP SKIP
GROUP SKIP
• If you want to stop this editing process, press CANCEL.
Ex.: When group 3 is moved to group 10.
3 Press SET.
SET
7 Press SET.
• If the loaded MD has only one or no group, you cannot
go to the following steps.
• During playback:
The group number of the currently playing track will
appear. If the track does not belong to any group, the
group number will be indicated as “– –.”
4 Press GROUP SKIP ¢ or GROUP SKIP
4 while holding SHIFT to select the group
you want to move.
GROUP SKIP
SHIFT
• To cancel the setting, press CANCEL, then repeat from
step 4.
8 Press ENTER.
“EDITING” appears on the display. Then
“WRITING” and the REC (MD recording)
indicator flash while the editing you have
made is being recorded on the MD.
GROUP SKIP
Ex.: When group 3 is selected.
43
EN37-45_UX-J55MD[UB]f.p65
43
SET
7/1/03, 4:46 PM
ENTER
English
Continued
Ungrouping Tracks—UNGROUP
5 Press SET.
This function allows you to dissolve a group.
You cannot erase the tracks using this function.
Once tracks are ungrouped, the other groups are renumbered.
• To stop any time during the editing process below before
step 6, press GROUP TITLE/EDIT.
1 Insert an MD you want to edit into the MD
loading slot.
On the remote control ONLY:
2 Press GROUP TITLE/EDIT
GROUP TITLE
/EDIT
repeatedly until “UNGROUP ?”
appears on the display.
• To cancel the setting, press CANCEL, then repeat from
step 4.
6 Press ENTER.
ENTER
“EDITING” appears on the display. Then
“WRITING” and the REC (MD recording)
indicator flash while the editing you have
made is being recorded on the MD.
Dissolving All Groups—UNGR ALL
• If you want to stop this editing process, press CANCEL.
3 Press SET.
SET
SET
This function allows you to dissolve all the groups.
You cannot erase the tracks using this function.
• To stop any time during the editing process below before
step 4, press GROUP TITLE/EDIT.
1 Insert an MD you want to edit into the MD
loading slot.
On the remote control ONLY:
2 Press GROUP TITLE/EDIT
• If the loaded MD has no group, you cannot go to the
following steps.
• During playback:
The group number of the currently playing track will
appear. If the track does not belong to any group, the
group number will be indicated as “– –.”
4 Press GROUP SKIP ¢ or GROUP SKIP
4 while holding SHIFT to select the group
you want to dissolve.
GROUP SKIP
SHIFT
GROUP TITLE
/EDIT
repeatedly until “UNGR ALL ?”
appears on the display.
• If you want to stop this editing process, press CANCEL.
3 Press SET.
SET
GROUP SKIP
• To cancel the setting, press CANCEL.
4 Press ENTER.
Ex.: When group 3 is selected.
ENTER
“EDITING” appears on the display. Then
“WRITING” and the REC (MD recording)
indicator flash while the editing you have
made is being recorded on the MD.
44
EN37-45_UX-J55MD[UB]f.p65
44
7/1/03, 4:47 PM
English
Erasing Tracks in a Group—ERASE GR
This function allows you to erase a group together with tracks
in the group.
You cannot resume the tracks in the erased group.
Once a group is erased, the other tracks and groups are
renumbered.
• To stop any time during the editing process below before
step 6, press GROUP TITLE/EDIT.
4 Press GROUP SKIP ¢ or GROUP SKIP
4 while holding SHIFT to select the group
you want to erase.
SHIFT
GROUP SKIP
GROUP SKIP
1 Insert an MD you want to edit into the MD
loading slot.
Ex.: When group 6 is selected
On the remote control ONLY:
2 Press GROUP TITLE/EDIT
5 Press SET.
SET
GROUP TITLE
/EDIT
repeatedly until “ERASE GR ?”
appears on the display.
• To cancel the setting, press CANCEL, then repeat from
step 4.
• If you want to stop this editing process, press CANCEL.
3 Press SET.
SET
6 Press ENTER.
“EDITING” appears on the display. Then
“WRITING” and the REC (MD recording)
indicator flash while the editing you have
made is being recorded on the MD.
• If the loaded MD has no group, you cannot go to the
following steps.
• During playback:
The group number of the currently playing track will
appear. If the track does not belong to any group, the
group number will be indicated as “– –.”
45
EN37-45_UX-J55MD[UB]f.p65
45
7/1/03, 4:47 PM
ENTER
English
Continued
Introducing Track Editing Functions
The groups and tracks can be edited in many ways (Group editing functions and Track editing functions). From this page to
page 50, the track editing functions are explained. For details on the group editing functions, see pages 37 to 45.
Dividing a track (DIVIDE): Page 47
This function divides a track by adding a track mark(s) in
the desired point(s) in the middle or where you want to
search for later.
Erasing all tracks (ALL ERASE): Page 50
This function erases all data on a disc entirely.
1
A
1
A
After dividing
track A
3
2
B
C
3
2
B
C
4
D
5
E
4
Track number
After erasing
all tracks
D
Track number
Blank disc
1
2
A1
A2
3
B
4
C
5
D
Joining two tracks (JOIN): Page 48
This function joins two adjacent tracks into a single track by
deleting a track mark.
1
3
2
A
B
C
4
D
2
1
A
B
C
1
E
3
D
Part to be erased
5
3
2
A
Track number
After joining
track A and B
Erasing a portion of a track
By combining “DIVIDE,” “ERASE” and “JOIN,” for
example, it is possible to erase only a part of an existing
track.
B
C
Dividing track A
into 3 tracks
4
E
1
2
3
A1
A2
A3
1
2
3
A1
A3
4
B
5
C
Track number
Erasing track A2
Moving a track (MOVE): Page 49
This function moves a track by reordering the track
numbers.
1
A
After moving
track B
3
2
B
C
4
D
5
Joining tracks
A1 and A3
1
A1
E
B
C
2
A3
4
B
Blank
3
C
Blank
Track number
1
A
2
C
3
D
4
E
5
B
Erasing tracks (ERASE): Page 50
This function erases selected tracks. After the erasure, the
subsequent tracks are justified and their track numbers are
renumbered automatically. You can erase up to 15 tracks at a
time.
1
A
After erasing
tracks B and D
2
B
3
C
4
D
5
E
Track number
1
A
2
C
3
E
Blank
• If “PLAY BACK DISC” or “DISC PROTECTED” appears when
you try to edit an MD
You cannot edit such MDs. See pages 62 and 63.
• During Program Play or Random Play
You can edit the MD as long as the playback is stopped. However,
editing tracks will resume Normal Play (the program in memory will be
cleared).
46
EN46-53_UX-J55MD[UB]f.p65
46
7/1/03, 4:45 PM
English
In the following examples of track editing, the process is
explained from the very first—that is, inserting a disc. You
can also edit an MD during playback (in Normal Play).
5 Press SET when you find the point
SET
where you want to divide the
track.
“POSIT. (position) 0” appears on the display,
and the unit repeats the selected point—a 3-second period
following the dividing point.
Dividing a Track—DIVIDE
This function allows you to divide one track into two separate
tracks. It is useful, for example, when you want to add track
marks at a certain point within a track or if you want to
separate a recording.
When the original track has a title, two separate tracks are
reassigned the same title as the original track in the same
group (if the original track is belonged to a group).
Once a track is divided, the other tracks are renumbered.
• To stop any time during the editing process below before
step 8, press TITLE/EDIT.
1 Insert an MD you want to edit into the MD
loading slot.
On the remote control ONLY:
2 Press TITLE/EDIT repeatedly
TITLE/EDIT
until “DIVIDE ?” appears on the
display.
• If the loaded MD has 254 tracks, “DISC FULL” will
appear (see “MD limitations” on page 61) and you
cannot go to the following steps.
• If the dividing point is satisfactory, go to step 7.
If not, go to the next step.
• To cancel the setting, press CANCEL, then repeat from
step 4.
6 Press
or
to precisely
adjust the dividing point.
10
+10
When you stop pressing the button,
the unit repeats the newly selected
dividing point.
• You can shift the dividing point up to ±128. This range
(±128) corresponds to approximately ±8 seconds* from
the original point (position 0).
Ex.: When adjusting the point by –103.
• If the loaded MD has no track, “DIVIDE ?” will not
appear on the display.
• If you want to stop this editing process, press CANCEL.
3 Press SET.
* When the recording length mode of the selected track is “SP.”
For “LP2,” it is approximately ±16 seconds, and for “LP4”
approximately ±32 seconds.
SET
• When you find the correct position, go to the next step.
• To cancel the setting, press CANCEL, then repeat from
step 4.
The first track on the MD starts playback
repeatedly.
4 Press ¢ or 4 to select
GROUP SKIP
GROUP SKIP
the track you want to
divide.
7 Press SET.
SET
• You can also select the track using
the number buttons.
8 Press ENTER.
Ex.: When track 12 is selected.
• If you press and hold ¢ or 4, you can fast-forward
or fast-reverse the selected track.
ENTER
“EDITING” appears on the display. Then
“WRITING” and the REC (MD recording)
indicator flash while the editing you have
made is being recorded on the MD.
To join the divided tracks, see the JOIN function on page
48.
47
EN46-53_UX-J55MD[UB]f.p65
47
7/1/03, 4:45 PM
English
Continued
Joining Two Tracks—JOIN
5 Press SET.
This function allows you to join two adjacent tracks into one
track.
When the tracks have their own titles, the title of the
preceding track is reassigned to the newly joined track.
Once two tracks are joined, the other tracks and/or the groups
are renumbered.
• To stop any time during the editing process below before
step 6, press TITLE/EDIT.
1 Insert an MD you want to edit into the MD
loading slot.
SET
• To cancel the setting, press CANCEL, then repeat from
step 4.
6 Press ENTER.
ENTER
“EDITING” appears on the display. Then
“WRITING” and the REC (MD recording)
indicator flash while the editing you have
made is being recorded on the MD.
On the remote control ONLY:
2 Press TITLE/EDIT repeatedly
TITLE/EDIT
until “JOIN ?” appears on the
display.
• If the loaded MD has no track, “JOIN ?” will not
appear.
• If you want to stop this editing process, press CANCEL.
3 Press SET.
SET
To divide the joined tracks, see the DIVIDE function on
page 47.
• If “CANNOT JOIN” appears in step 5
You cannot join the following tracks.
– Tracks recorded using different recording length modes (SP, LP2, LP4).
(See page 30.)
– Digital-recording tracks and analog-recording tracks.
– Tracks recorded using monaural long recording method (not possible on
this unit) and stereo-recording tracks.
• When the track belongs to a group
If the preceding track of two tracks you want to join belongs to a group,
the newly joined track will belong to that group. On the other hand, if the
preceding track does not belong to any group, the newly joined track will
not belong to any group even if the succeeding track belongs to a group.
• If the loaded MD has only one track, you cannot go to
the following steps.
4 Press ¢ or 4 to select
GROUP SKIP
GROUP SKIP
the two adjacent tracks you
want to join.
• You can also select the tracks
using the number buttons*. In this case, the selected
track starts playing repeatedly.
Ex.: When tracks 2 and 3 are selected.
* Select the succeeding track of two tracks when you use the number
buttons.
48
EN46-53_UX-J55MD[UB]f.p65
48
7/1/03, 4:45 PM
English
Moving a Track—MOVE
5 Press SET.
This function allows you to move a track to the position you
prefer. It is useful to change the order of the tracks as you
like.
Once a track is moved, the tracks and/or the groups are
renumbered.
• To stop any time during the editing process below before
step 8, press TITLE/EDIT.
1 Insert an MD you want to edit into the MD
loading slot.
• To cancel the setting, press CANCEL, then repeat from
step 4.
6 Press ¢ or 4 to select
GROUP SKIP
GROUP SKIP
the position where you want
to move the track to.
• You can also select the track
using the number buttons. In this case, the selected track
starts playing repeatedly.
On the remote control ONLY:
2 Press TITLE/EDIT repeatedly
SET
TITLE/EDIT
until “MOVE ?” appears on the
display.
Ex.: When track 3 is moved to track 8.
• If the loaded MD has no track, “MOVE ?” will not
appear on the display.
• If you want to stop this editing process, press CANCEL.
3 Press SET.
• If the track selected in this step belongs to a group, the
track selected in step 4 will be entered into the same
group with the current track after moving.
7 Press SET.
SET
SET
• To cancel the setting, press CANCEL, then repeat from
step 4.
• If the loaded MD has only one track, you cannot go to
the following steps.
4 Press ¢ or 4 to select
GROUP SKIP
the track you want to move.
GROUP SKIP
8 Press ENTER.
“EDITING” appears on the display. Then
“WRITING” and the REC (MD recording)
indicator flash while the editing you have
made is being recorded on the MD.
• You can also select the track
using the number buttons. In this
case, the selected track starts playing repeatedly.
Ex.: When track 3 is selected.
49
EN46-53_UX-J55MD[UB]f.p65
49
7/1/03, 4:45 PM
ENTER
English
Continued
Erasing Tracks—ERASE
6 Repeat steps 4 and 5 to select all the tracks
This function allows you to erase unwanted tracks.
You cannot resume the erased tracks.
Once tracks are erased, the other tracks and/or groups are
renumbered.
You can erase up to 15 tracks at a time.
• To stop any time during the editing process below before
step 8, press TITLE/EDIT.
1 Insert an MD you want to edit into the MD
loading slot.
On the remote control ONLY:
2 Press TITLE/EDIT repeatedly
TITLE/EDIT
until “ERASE?” appears on the
display.
you want to erase.
• You can select up to 15 tracks. If you select a 16th track
to erase, “MEMORY FULL” will appear on the display.
7 Press ENTER.
ENTER
8 Press ENTER.
ENTER
“EDITING” appears on the display. Then
“WRITING” and the REC (MD recording)
indicator flash while the editing you have
made is being recorded on the MD.
Erasing All Tracks—ALL ERASE
This function allows you to erase all the tracks on an MD.
You cannot resume the erased tracks.
• If the loaded MD has no track, “ERASE?” will not
appear.
• If you want to stop this editing process, press CANCEL.
3 Press SET.
SET
1 Insert an MD you want to edit into the MD
loading slot.
On the remote control ONLY:
2 Press TITLE/EDIT repeatedly
TITLE/EDIT
until “ALL ERASE?” appears on
the display.
4 Press ¢ or 4 to select
GROUP SKIP
GROUP SKIP
the track you want to erase.
• You can also select the track using
the number buttons. In this case,
the selected track starts playing repeatedly.
5 Press SET.
• If you want to stop this editing process, press CANCEL.
SET
3 Press SET.
SET
“ ” appears on the display.
The track marked with “ ” will be erased.
• To cancel the setting, press CANCEL.
Ex.: When track 5 is selected.
• When you do not want to erase the track, press
CANCEL to remove “ .”
4 Press ENTER.
ENTER
“EDITING” appears on the display. Then
“WRITING” and the REC (MD recording)
indicator flash while the editing you have
made is being recorded on the MD.
“BLANK DISC” appears on the display.
50
EN46-53_UX-J55MD[UB]f.p65
50
7/1/03, 4:45 PM
English
Assigning Titles to an MD
You can assign a name to each MD, to each group and to
each track using alphabetic characters (uppercase and
lowercase), symbols and numerals. Once a title is assigned, it
is displayed for your confirmation.
• You cannot edit titles composed of more than 61 characters.
About the number of characters entered for an MD
The total number of characters that you can enter for an MD is 1792. The
maximum number that you can enter for a disc/track title is 61.
(However, the actual number you can enter may be slightly less than the
maximum numbers due to the MD limitations—see page 61.)
• A space can be counted as one character.
• When the stereo long-hour recording (LP2 or LP4, see page 30)
method is used for recording, the maximum number you can enter for a
track title is automatically reduced since “LP:” and a space are
automatically added to the beginning of the track title. Consequently
this reduces the total number of characters you can enter for an MD.
Ex.: You can enter up to 10 characters for each track if an MD is
composed of 120 tracks recorded using the stereo long-hour
recording method.
In the following example, the process is explained from the
very first—that is, inserting a disc. If you have already started
recording or playing, start from step 2.
• You can edit titles during playback (in Normal Play).
• To exit from the title entry screen any time during the
process, press TITLE/EDIT or GROUP TITLE/EDIT
repeatedly.
1 Insert an MD you want to edit into the MD
loading slot.
2 Enter the unit into the title entry mode.
For the disc and track title:
TITLE/EDIT
Press TITLE/EDIT.
• During stop mode:
Disc title entry screen appears on the
display.
• During play mode:
Track title entry screen appears on the display.
For the group title:
Press GROUP TITLE/EDIT.
Group title entry screen appears on the
display.
GROUP TITLE
/EDIT
• If the loaded MD has no group, you cannot go to the
following steps.
3 Press
or
to change the
title entry mode.
10
+10
• Each time you press the button, the
title entry mode changes as follows:
For the disc and track title:
DISC TITLE?
The last
track title
1 TITLE?
2 TITLE?
3 TITLE?
For the group title:
GR– – TITLE?
GR 1 TITLE?
The last
group title
GR 2 TITLE?
4 Press SET to enter the unit into the
selected title entry mode.
Character entry position
Character set
Ex.: When the disc has no title.
51
EN46-53_UX-J55MD[UB]f.p65
51
03.7.10, 0:02 PM
SET
English
Continued
6 Press ENTER to finish the current
5 Enter characters.
1) Press DISP/CHARA to select the
character set you want.
• Each time you press the button, the
character set changes as follows:
Capital letters
& Symbols
DISP/CHARA
Small letters
& Symbols
Numerals
2) Press the character entry
button for a character you
1
2
3
want to enter.
Ex.:
4
5
6
• To enter an “A” or “a,” press
ABC once.
7
8
9
To enter a “B” or “b,” press
ABC twice.
10
0
+10
To enter a “C” or “c,” press
ABC three times.
• To enter a symbol, press
MARK repeatedly until the
mark you want appears. For available symbols, see
page 53.
• To enter a numeral, press 0 – 9.
• To enter a space while entering a title, press
twice.
• To move the character entry position while entering
a title, press
or
*.
• If you have entered an incorrect character, press
or
to select the character you want to correct,
then press CANCEL to delete it.
ENTER
title entry.
“EDITING” appears on the display for a
while, then the next title entry screen
appears.
• For the disc title:
The track title entry screen for the track 1 appears.
• For the track title:
The next track title entry screen appears (or the unit
exits from the title entry screen if the current track is the
last one on the disc).
• For the group title:
The next group title entry screen appears (or the same
screen still remains if the current group is the last one
on the disc).
If you want to continue assigning a title, repeat steps 3 to
6.
7 Press CANCEL to exit from the
CANCEL
title entry mode.
• While recording, do not go to the next step
until the recording ends.
8 Press 0 (MD eject) on the unit
to eject the MD.
0
‹ /8
MD
“WRITING” and the REC (MD
recording) indicator flash while the
editing you have made is being recorded on the MD.
* If you press
repeatedly during recording, the entered characters
may be displayed incorrectly. In this case, press TITLE/EDIT or
GROUP TITLE/EDIT, then repeat from step 2 again.
3) Repeat steps 5 – 1) and 5 – 2) to enter other
characters.
• If the character you want to enter next is assigned to
the same button you have just pressed in step
5 – 2), press
once to move the character entry
position to the right.
• The display can only show 6 characters at a time. If
you enter the 7th character, the first character
disappears, and so on.
52
EN46-53_UX-J55MD[UB]f.p65
52
03.7.10, 0:02 PM
English
Changing the Title
You can assign titles during play or recording
• During play:
Entering a track title
The MD recorder repeats playback of the current track until you press
ENTER in step 6. When you press ENTER, the next track will be
played.
Entering a disc title
The MD recorder repeats playback of all tracks of the MD until you
press ENTER in step 6. When you press ENTER, the MD recorder
enters the track title entry mode.
Entering a group title
The MD recorder repeats playback of the tracks in the group until you
press ENTER in step 6. When you press ENTER, the MD recorder
enters the next group title entry mode.
• During recording:
Entering a track title
The MD recorder continues recording even after you press ENTER in
step 6. When you press ENTER, a track title is assigned to the track
where you have started the title entry. If you do not press ENTER
before recording ends, the track title assigned will be canceled.
• During CD-MD or CD Synchronized Recording (see pages 30 and 36):
You can assign the disc title, and 16 track titles one after another as
recording goes on. The track titles you have entered are automatically
assigned to the tracks recorded on the MD in sequential order.
“EDITING” appears on the display for a while, then the next title entry
screen appears. If you enter 17th track title or more, they are ignored.
When you unplug the AC power cord or if a power
failure occurs before step 8
The editing you have made is not recorded on the MD.
Available symbols are as follows:
You can make a correction or change the title.
1 Follow steps 1 to 4 on page 51.
2 Select the character you
want to correct, by pressing
or .
+10
• Make sure that the character you
want to change is flashing.
3 Press CANCEL to delete the
CANCEL
character you have selected in the
above step.
4 Enter the correct character, referring to step
5 on page 52.
5 Repeat steps 2 to 4 of the current procedure
to correct more characters.
6 Press ENTER to finish correcting
ENTER
the title.
“EDITING” appears on the display for a
while, then the next title entry screen
appears.
• If you want to correct another title, select another title
entry mode by pressing
or
, press SET, then
repeat from step 2 above.
• If you want to finish the correction, go to the next step.
7 Press 0 (MD eject) on the unit
to eject the MD.
(Blank)
10
0
‹/8
MD
“WRITING” and the REC (MD
recording) indicator flash while the
editing you have made is being recorded on the MD.
To erase all the characters, press CANCEL repeatedly in
step 3 above to erase all the characters, then go to step 6.
53
EN46-53_UX-J55MD[UB]f.p65
53
7/1/03, 4:46 PM
Continued
There are three timers available—Recording Timer, Daily
Timer and Sleep Timer.
• Before using these timers, make sure the built-in clock is
set correctly (see page 9).
• When using the tuner as the source, preset stations in
advance (see page 14).
3 Select the source to record from.
1) Press ¢ or 4 repeatedly
to select the source.
• Each time you press the
button, the source changes as
follows:
FM
Using Recording Timer
With Recording Timer, you can make an unattended
recording.
• You can set Recording Timer whether the unit is turned on
or off (on standby).
• To correct a mis-entry any time during the setting process,
press CANCEL.
• To exit from the timer setting during the process, press
CLOCK/TIMER repeatedly until the source indication
appears.
How Recording Timer actually works
The unit automatically turns on, muting the volume, and
starts recording on the MD or on the tape when the start time
comes. Then, when the shut-off time comes, the unit
automatically turns off (on standby).
Recording Timer works only once, but the timer settings
remain stored in memory until you reset them or unplug the
AC power cord.
On the remote control ONLY:
GROUP SKIP
AUX
2) When you select “FM” or “AM,” press SET, then
select a preset number by pressing ¢ or 4.
GROUP SKIP
SET
GROUP SKIP
When you select “AUX,” set the timer function of the
external component as well.
3) Press SET.
A device to record onto flashes on the
display.
SET
4 Select the device to record onto.
1) Press ¢ or 4 repeatedly
to select the device.
MD REC
GROUP SKIP
GROUP SKIP
TAPE REC
SET
CLOCK/
TIMER
until “REC TIMER” appears on
the display.
The (timer) indicator lights up and the
REC (recording timer) indicator starts flashing on the
display.
3) When you select “MD REC,” select the recording
length mode (see page 30) by pressing ¢ or 4,
then press SET again.
GROUP SKIP
REC
GROUP SKIP
SET
• Each time you press the button, the timer changes as
follows:
Source indicator
AM
GROUP SKIP
2) Press SET.
1 Press CLOCK/TIMER repeatedly
REC TIMER
English
Using the Timers
DAILY TIMER
REV.
When you select “TAPE REC,” select
MODE
Reverse Mode (see page 26) by pressing
REV.MODE when you prepare the
device.
When recording starts, reverse mode indicator changes
to
automatically.
The hour digits of the start time start flashing.
Clock setting
(canceled)
2 Press SET.
SET
The source name flashes on the display.
54
EN54-58_UX-J55MD[UB]f.p65
54
7/1/03, 4:44 PM
English
5 Set the start time.
1) Press ¢ or 4 repeatedly
to adjust the hour.
You can also adjust the hour
using the number buttons.
GROUP SKIP
REC
2) Press SET.
The minute digits start flashing.
3) Press ¢ or 4 repeatedly
to adjust the minute.
You can also adjust the minute
using the number buttons.
GROUP SKIP
Before the start time, the REC (recording timer) indicator and
“REC TIMER STANDBY” start flashing on the display.
SET
GROUP SKIP
GROUP SKIP
Before the shut-off time, the display changes as follow if MD
is selected as the device to record:
MD
REC
SP
REC
x1
REC
MD
REC
Ex.: When you set start time to 11:30.
4) Press SET.
The hour digits of the shut-off time start
flashing.
SET
6 Set the shut-off time.
1) Press ¢ or 4 repeatedly
to adjust the hour.
You can also adjust the hour
using the number buttons.
Clock indication
GROUP SKIP
GROUP SKIP
SET
2) Press SET.
The minute digits start flashing.
3) Press ¢ or 4 repeatedly
to adjust the minute.
You can also adjust the minute
using the number buttons.
SP
x1
GROUP SKIP
To turn off the Recording Timer after its setting is done
1 Press CLOCK/TIMER repeatedly until “REC TIMER”
appears on the display.
2 Press CANCEL.
The (timer) and REC (recording timer) indicators go off
from the display.
GROUP SKIP
To turn on the Recording Timer again
1 Press CLOCK/TIMER repeatedly until “REC TIMER”
appears on the display.
2 Press SET repeatedly until the settings are shown on the
display for your confirmation.
The (timer) and REC (recording timer) indicators light
up on the display.
REC
Ex.: When you set shut-off time to 13:00.
4) Press SET.
The REC (recording timer) indicator
stops flashing and remains lit. The
contents of this setting appear on the
display for your confirmation.
7 Press STANDBY/ON
to turn
off the unit if you have set the
timer with the unit turned on.
SET
STANDBY/ON
To record onto an MD using the Group
recording, press GROUP REC ON/OFF to
turn on the Group recording after setting the Recording
Timer (before turning off the unit).
• Adjusting the hour and minute of the start and shut-off time using the
number buttons in steps 5 - 1), 5 - 3), 6 - 1), and 6 - 3)
Ex.: To adjust the hour/minute to 5, press 5.
To adjust the hour/minute to 12, press +10, then 2.
To adjust the hour/minute to 20, press +10, then 10 (or press +10
twice, then 0).
• When you press 7 while Recording Timer works
The recording stops but the timer is not canceled. The unit automatically
turns off (on standby) when the shut-off time comes.
• If the unit is kept turned on when the start time comes
Recording Timer does not work at all.
55
EN54-58_UX-J55MD[UB]f.p65
55
7/1/03, 4:44 PM
English
Continued
Using Daily Timer
You can also use the source selecting buttons.
With Daily Timer, you can wake up to your favorite music or
radio program.
• You can set Daily Timer whether the unit is turned on or off
(on standby).
• To correct a mis-entry any time during the setting process,
press CANCEL.
• To exit from the timer setting during the process, press
CLOCK/TIMER repeatedly until the source indication
appears.
When you select “CD”
1. Press SET.
2. Select the disc number by pressing ¢ or 4 (or
DISC UP
or DISC DOWN ), then press SET
again.
3. Press ¢ or 4 to select the track number.
If there is no disc on the selected disc tray and if the
selected track is the first track, the first track of next
disc will be selected and starts playback when the ontime comes.
How Daily Timer actually works
The unit automatically turns on, and starts playing the
specified source when the timer-on time comes. Then, when
the timer-off time comes, the unit automatically turns off (on
standby).
Daily Timer works every day, and the timer settings remain
stored in memory until you reset them or unplug the AC
power cord.
When you select “TAPE,” prepare it for playback.
When you select “FM” or “AM”
1. Press SET.
2. Select a preset number by pressing ¢ or 4.
When you select “AUX,” set the timer function of the
external component as well.
On the remote control ONLY:
1 Press CLOCK/TIMER repeatedly
When you select “MD”
1. Press SET.
2. Press ¢ or 4 to select the track number.
CLOCK/
TIMER
until “DAILY TIMER” appears
on the display.
The (timer) indicator lights up and the
DAILY indicator starts flashing on the display.
SET
2) Press SET.
The hour digits of the start time start
flashing.
4 Set the start time.
1) Press ¢ or 4 repeatedly
to adjust the hour.
You can also adjust the hour
using the number buttons.
DAILY
GROUP SKIP
SET
2) Press SET.
The minute digits start flashing.
• Each time you press the button, the timer changes as
follows:
REC TIMER
Source indicator
DAILY TIMER
Clock setting
3) Press ¢ or 4 repeatedly
to adjust the minute.
You can also adjust the minute
using the number buttons.
GROUP SKIP
GROUP SKIP
GROUP SKIP
DAILY
(canceled)
2 Press SET.
SET
The source name flashes on the display.
3 Select the source to play back.
1) Press ¢ or 4 repeatedly
to select the source.
• Each time you press the
button, the source changes as
follows:
GROUP SKIP
CD
MD
TAPE
AM
FM
AUX
Ex.: When you set start time to 7:00.
GROUP SKIP
4) Press SET.
The hour digits of the shut-off time start
flashing.
SET
56
EN54-58_UX-J55MD[UB]f.p65
56
7/1/03, 4:44 PM
English
5 Set the shut-off time.
1) Press ¢ or 4 repeatedly
to adjust the hour.
You can also adjust the hour
using the number buttons.
Before the start time, the DAILY indicator and “DAILY
TIMER STANDBY” start flashing on the display.
GROUP SKIP
GROUP SKIP
DAILY
2) Press SET.
The minute digits start flashing.
3) Press ¢ or 4 repeatedly
to adjust the minute.
You can also adjust the minute
using the number buttons.
SET
GROUP SKIP
GROUP SKIP
Before the shut-off time, the DAILY indicator and “DAILY
TIMER OFF” start flashing on the display.
DAILY
DAILY
Clock indication
Ex.: When you set shut-off time to 8:00.
4) Press SET.
The volume setting appears on the
display.
SET
6 Adjust the volume level.
GROUP SKIP
GROUP SKIP
1) Press ¢ or 4 repeatedly
to adjust the volume level.
• You can adjust the volume
level to “– –” or within the
range of 0 (silent) to 40 (maximum).
• When you select “VOLUME – –,” the volume is set
to the volume level when you turn off the unit.
DAILY
2) Press SET.
The DAILY indicator stops flashing and
remains lit. The contents of this setting
appear on the display for your
confirmation.
7 Press STANDBY/ON
to turn
off the unit if you have set the
timer with the unit turned on.
To turn off the Daily Timer after its setting is done
1 Press CLOCK/TIMER repeatedly until “DAILY TIMER”
appears on the display.
2 Press CANCEL.
The (timer) and DAILY indicators go off from the display.
To turn on the Daily Timer again
1 Press CLOCK/TIMER repeatedly until “DAILY TIMER”
appears on the display.
2 Press SET repeatedly until the settings are shown on the
display for your confirmation.
The (timer) and DAILY indicators light up on the
display.
SET
STANDBY/ON
• Adjusting the hour and minute of the start and shut-off time using the
number buttons in steps 4 - 1), 4 - 3), 5 - 1), and 5 - 3)
Ex.: To adjust the hour/minute to 5, press 5.
To adjust the hour/minute to 12, press +10, then 2.
To adjust the hour/minute to 20, press +10, then 10 (or press +10
twice, then 0).
• If the unit is kept turned on when the start time comes
Daily Timer does not work at all.
• Daily Timer will be canceled and the unit will not turn off
automatically in the following cases:
– When you change the source.
– When you enter the MD editing or title entry mode.
– When you turn off the Daily Timer (see above).
57
EN54-58_UX-J55MD[UB]f.p65
57
7/1/03, 4:44 PM
English
Using Sleep Timer
To sleep with the Sleep Timer and wake up with
the Daily Timer
With Sleep Timer, you can fall asleep to your favorite music.
• You can set Sleep Timer when the unit is turned on.
The unit turns off (on standby) when the shut-off time comes
(set by the Sleep Timer), and turns on when the start time (set
by the Daily Timer) comes.
How Sleep Timer actually works
1 Set the Daily Timer as explained on pages 56 and 57.
The unit automatically turns off after the specified time
length passes.
2 Start playing back any source you want to listen to
before sleep.
3 Set the Sleep Timer.
On the remote control ONLY:
1 Press SLEEP (A.STANDBY)
SLEEP
A.STANDBY
repeatedly.
The (timer) and the SLEEP indicators
start flashing on the display.
“SLEEP 10” appears on the display for a while.
Timer Priority
Since each timer can be set separately, you may wonder what
happens if the setting for these timers overlaps.
Below is the example of timer priority.
SLEEP
• Each time you press the button, the time length changes
as follows:
10
20
Source indication
(canceled)
A timer with the earlier start time has priority.
If Recording Timer is set to come on while Daily Timer is
operating, Recording Timer will not work.
6:00
30
60
Daily Timer
120
90
Recording Timer
2 Press SET or wait for about 5
6:30
7:00
7:30
will not start
SET
seconds.
The (timer) and the SLEEP indicators stop
flashing and remain lit.
The display dims automatically.
Sleep Timer always has priority.
If Sleep Timer is set to come on while Recording Timer is
operating, Recording Timer will be canceled when the shutoff time comes.
6:00
To check the remaining time until the shut-off time, press
SLEEP once. The remaining time until the shut-off time
appears for about 5 seconds.
To change the shut-off time, press SLEEP repeatedly until
the time length you want appears.
6:30
7:00
7:30
Sleep Timer
Recording Timer
canceled
Sleep timer and Auto Standby (see page 10) can be used
at the same time.
To cancel the setting, press SLEEP repeatedly until the
(timer) and SLEEP indicators go off from the display.
Sleep Timer will be also canceled in the following cases:
• When you turn off the unit.
• When you operate other timer settings.
• When you adjust the clock.
58
EN54-58_UX-J55MD[UB]f.p65
58
7/1/03, 5:47 PM
English
Maintenance
To get the best performance of the unit, keep your discs, tapes and mechanism clean.
General Notes
Handling MDs
In general, you will have the best performance by keeping
your discs, tapes and the mechanism clean.
• Store discs and tapes in their cases, and keep them in
cabinets or on shelves.
• Keep the unit’s disc trays closed when not in use.
Continued use of irregular shape discs (heart-shape,
octagonal, etc.) can damage the unit.
Handling discs
• Remove the disc from its case by
holding it at the edge while pressing
the center hole lightly.
• Do not touch the shiny surface of the
disc, or bend the disc.
• Put the disc back in its case after use
to prevent warping.
• Be careful not to scratch the surface
of the disc when placing it back in its
case.
• Avoid exposure to direct sunlight,
temperature extremes, and moisture.
To clean the disc
Wipe the disc with a soft cloth in a
straight line from center to edge.
DO NOT use any solvent—such as conventional
record cleaner, spray, thinner, or benzine—to
clean the disc.
• Do not open the shutter.
– The shutter is locked so that it will
not open. Trying to force it open will
break the MD. If the shutter opens
accidentally, close it again quickly
without touching the MD inside.
• Do not place MDs in the following
places:
– High temperature areas such as in
direct sunlight or inside a car.
– High humidity areas, e.g. in a
bathroom.
– On a beach or sandy area.
• Clean MDs regularly.
– If dust or dirt gets on cartridge, wipe it off with a soft dry
cloth.
Handling cassette tapes
• If the tape is loose in its cassette, take up
the slack by inserting a pencil in one of the
reels and rotating.
• If the tape is loose, it may get stretched, cut,
or caught in the cassette.
• Be careful not to touch the tape surface.
• Avoid storing tapes in any of the following
places:
– In dusty places
– In direct sunlight or heat
– In moist areas
– On a TV or speaker
– Near a magnet
Cleaning the unit
• Stains on the unit
Should be wiped off with a soft cloth. If the unit is heavily
stained, wipe it with a cloth soaked in water-diluted neutral
detergent and wrung well, then wipe clean with a dry cloth.
• Since the unit may deteriorate in quality, become
damaged or have its paint peel off, be careful about the
following:
– DO NOT wipe it with a rough cloth.
– DO NOT wipe it too vigorously.
– DO NOT wipe it with thinner or benzine.
– DO NOT apply any volatile substance such as an
insecticide to it.
– DO NOT allow any rubber or plastic to remain in contact
with it for a long time.
59
EN59-64_UX-J55MD[UB]f.p65
59
7/1/03, 4:43 PM
English
Additional Information
Continued
MD Disc Types
There are two types of MDs: Premastered (prerecorded) and Recordable (blank).
Premastered MDs
Premastered MDs, which have been recorded at music studio, can be played back like regular CDs. On an MD of this type,
data is recorded as the presence or absence of tiny pits. A laser beam focuses on the pits on the surface of the MD and reflects
the detection back to the lens in the MD recorder. The MD recorder then decodes the signals and plays them back as music.
This type of MD is called an “optical disc.”
Recordable MDs
Recordable MDs, which use magneto-optical technology, can be recorded and played back repeatedly. The laser inside the MD
recorder applies heat to the MD, demagnetizing the magnetic layer of the MD for recording and playback. This type of MD is
called a “magnetic-optical disc.”
ATRAC (Adaptive TRansform Acoustic Coding)/ATRAC3 (
)
The MD provides 80 minute recording and playback time, much more than an audio CD, but in a diameter of only 64 mm. This
ability to store such a large amount of data is the result of ATRAC, an audio compression technique developed for MD. This
technology cuts out faint sounds that would not be heard by the human beings. This technology, based on human sensitivity to
sounds, reduces recorded data volume up to about one-fifth of the original data volume.
Furthermore, this unit takes advantage of the latest ATRAC3 techniques, which can reduce the amount of data to record to one10th or one-20th of the original data volume. This allows for 2 times or 4 times long-hour stereo recording on this unit.
UTOC (User Table Of Contents)
Found only on recordable MDs, this area contains sub-data (track number, recording data, etc.) which can be rewritten by the
user.
UTOC enables us to search for tracks quickly and edit tracks on the MD.
3:12
4:15
6:05
Sound Skip Guard Memory
The biggest weakness of discs is their susceptibility to vibration. The “Sound Skip Guard Memory” has been developed to
cope with this weakness.
With this function, a few seconds of signals read by the optical read head from the MD are first stored in memory before being
reproduced as audio signals. Thus, even when vibration or shock interrupts signals being read, these stored signals can continue
to reproduce sounds for that few seconds. Thus, the user will enjoy uninterrupted music.
Normally....
When “vibrated”....
60
EN59-64_UX-J55MD[UB]f.p65
60
7/1/03, 4:43 PM
English
SCMS (Serial Copy Management System)
The MD recorder integrated to this unit uses the Serial Copy Management System which allows only first-generation digital
copies to be made of premastered software (like CDs or prerecorded MDs).
1st Generation
ABCDEFG
CD
2nd Generation
ABCDEFG
CD-R/RW
HCMS (High-speed Copy Management System)
Now onto recordable MDs (minidiscs), you can record (copy) sound at a recording speed exceeding the normal speed. This fact
requires some restrictions for protecting copyrights.
On this unit, you cannot re-record, at either high speed or normal speed, a song (track) that has been recorded once from a CD
at high speed, until 74 minutes elapse after the first recording of the song started.
For example, after having recorded the first song (track) of a CD at high speed, you cannot record it again, at either high speed
or normal speed, until 74 minutes elapse after the first recording of that song started.
MD limitations
The MD records data in an original format that differs from that of conventional cassette tapes or DATs. Since there are
some limitations with this recording format, the following types of symptoms may occur. These symptoms are not
malfunctions.
Symptoms
Cause
“DISC FULL” appears, even though there is still enough
remaining time on an MD.
There is a maximum number of tracks which can be
recorded, regardless of recording time. More than 254 tracks
cannot be recorded on an MD.
“DISC FULL” appears, even though the number of tracks
and recording time do not reach the limit.
Repeating erasure and recording on the same MD creates
many blank portions sparsely on the MD. When recording
on such an MD, a track is recorded on these blank portions
sparsely. If a track is divided and recorded into so many
portions, “DISC FULL” appears.
• The JOIN function sometimes does not work.
• The remaining time on the MD does not increase even
when tracks are erased.
If a divided portion of less than 8 seconds is made while a
track is recorded on the MD, that track cannot be joined to
another track using the JOIN function. Furthermore, if that
track is erased, the remaining time of the MD may not
increase exactly by the erased amount.
The sound drops out during fast forward or fast reverse.
If a track has been divided into many portions while being
recorded on the MD, sounds will drop out while fast
forwarding or reversing such an MD.
The amount of recorded time on the MD added to the
amount of remaining time is shorter than the MD’s total
possible recording time.
You cannot record on a blank portion of less than 12 seconds
(SP mode) on the MD. For this reason, the actual recording
time of discs may become shorter.
61
EN59-64_UX-J55MD[UB]f.p65
61
7/1/03, 4:43 PM
English
CD/MD Messages
For CD:
Message
CANNOT PLAY
CD1* NO DISC
(* Selected disc number appears.)
CANNOT REC
x1 REC ONLY
Signification
Solution
You are trying to play back a unplayable
CD or a CD with scratches, etc.
• No disc is on the disc tray.
• You are trying to play back an
unfinalized CD-R/RW.
You are trying to record a CD onto a
MD and a tape at the same time using
x2 or x4 speed recording.
Change the CD.
• Place a disc on the disc tray.
• This is not a malfunction. You can
play back “finalized” CD-R/RWs.
This is not a malfunction. Select normal
recording speed (x1). (See page 30.)
For MD:
Message
BLANK DISC
CANNOT ENTRY!
CANNOT FORM!
CANNOT GROUP!
CANNOT JOIN
CANNOT LISTEN
CANNOT REC
x1 or x2 ONLY
CANNOT TITLE
DISC FULL
DISC
PROTECTED
EMERGENCY
STOP
GROUP FULL
GROUP TRACK
HCMS CANNOT
COPY
LOAD ERROR
LOW TEMP
CANNOT COPY
Signification
Solution
The disc is blank.
The track has already been in the
selected group.
You are trying to form a new group
including other groups.
There is no more space for storing
information concerning MD group.
You are trying to join tracks (shorter
than 8 seconds) or groups which cannot
be joined.
You are trying to listen to the sound
during high-speed recording.
You are trying to record a CD in
Program Play or Random Play using x4
speed recording.
You are trying to enter the title on the
MD which already has over 1792
characters in total.
There is no more space on the MD or
there are over 254 tracks.
MD is write-protected.
A malfunction has occurred during
recording.
You are trying to form over 99 groups.
You are trying to make a group by
including a track which belongs to
another group.
You are trying to re-record a song that
has been recorded once at high speed,
before 74 minutes have passed after its
first recording.
MD is not loaded correctly.
The room temperature is too low to
record using x4 speed recording.
Change the MD if you want to enjoy
playback.
This is not a malfunction. (See “Adding
a Track to a Group—ENTRY GR” on
page 40.)
This is not a malfunction. (See “Forming
a Group—FORM GR” on page 39.)
You cannot form a group any more on
the MD.
This is not a malfunction.
(See pages 42 and 48.)
This is not a malfunction.
You cannot listen to the sound during
high-speed recording.
This is not a malfunction. Select other
recording speeds. (See page 30.)
This is not a malfunction. (See
“Assigning Titles to an MD” on page
51.)
Use another recordable MD or erase
some tracks.
Unprotect the MD or use another.
(See page 28.)
Stop playback, and eject the MD and reinsert it.
This is not a malfunction. There can be
up to 99 groups on an MD.
This is not a malfunction. (See
“Forming a Group—FORM GR” on
page 39.)
An internal timer works to protect
copyrights. Wait for 74 minutes or
more, then start recording.
Eject the MD and re-insert it.
This is not a malfunction. You can record
using x4 speed recording within 5˚C – 35˚C.
62
EN59-64_UX-J55MD[UB]f.p65
62
7/1/03, 4:43 PM
English
Message
Signification
MD NO DISC
NON AUDIO (or DVD)
CAN NOT COPY
PLAY BACK
DISC
READ ERROR
There is no MD.
You are trying to copy a non-audio disc
like a CD-ROM, Video CD, or DVD.
You are trying to edit or record on a
playback-only MD.
The UTOC fails to be read.
Digital copy of the 2nd generation is
prohibited.
Solution
SCMS CANNOT
COPY
Put an MD.
Stop recording.
Use a recordable MD.
Turn off the unit, then turn on it again.
You cannot make a digital recording
from a duplicated CD-R/RW onto an
MD. If you try to do so, the unit will
automatically convert the digital signals
to analog signals and record them at x1
speed (normal speed).
Troubleshooting
If you are having a problem with your unit, check this list for a possible solution before calling for service.
If you cannot solve the problem from the hints given here, or the unit has been physically damaged, call a qualified person,
such as your dealer, for service.
Symptom
Possible Cause
Action
Power does not come on.
The power cord is not connected to an
AC outlet.
Insert the plug into the socket.
Operations are disabled.
The built-in microprocessor has
malfunctioned due to external electrical
interference.
Unplug the AC power cord then plug it
back in.
No sound is heard.
• Connections are incorrect or loose.
• Check all connections and make
corrections. (See pages 6 to 8.)
• Unplug the headphones from the
PHONES jack.
• A pair of headphones is connected.
Unable to operate the unit by the remote
control.
Hard to listen to broadcasts because of
noise.
• The path between the remote control
and the remote sensor on the unit is
blocked.
• The batteries are exhausted.
• You are using the remote control too
far from the unit.
• Remove the obstruction.
• Antennas are disconnected.
• Reconnect the antenna correctly and
securely.
• Change the position and direction of
the AM loop antenna.
• Extend FM antenna and orient to the
best reception position.
• The AM loop antenna is too close to
the unit.
• The FM antenna is not properly
extended and positioned.
• Replace the batteries. (See page 8.)
• Signals cannot reach the remote
sensor. Move closer to the unit.
Loaded discs, MD, and cassette cannot
be ejected.
• The AC power cord is not plugged in.
• The Disc Lock function is in use.
• Plug in the AC power cord.
• Cancel the Disc Lock function. (See
page 19.)
The disc does not play.
The disc is upside down.
Put the disc in with the label side up.
The CD skips.
The CD is dirty or scratched.
Clean or replace the CD. (See page 59.)
Unable to record on an MD.
• You are using a protected MD.
• The MD is write protected.
• Change it with a recordable MD.
• Unprotect the MD. (See page 28.)
Impossible to record on a tape.
Small tabs on the back of the cassette
are removed.
Cover the holes with adhesive tape.
63
EN59-64_UX-J55MD[UB]f.p65
63
03.7.10, 0:02 PM
English
Specifications
CA-UXJ55MD
Cassette deck
Amplifier
Frequency response:
Normal (type I): 60 Hz—14 000 Hz
Wow and flutter:
0.15 % (WRMS)
Output Power (IEC 268-3):
40 W (20 W + 20 W) at 4 Ω (MAX.)
30 W (15 W + 15 W) at 4 Ω (10 % THD)
Audio input sensitivity/Impedance (at 1 kHz)
Analog input:
AUX/DVD:
400 mV/47 kΩ
(at “Input LEVEL 1”)
200 mV/47 kΩ
(at “Input LEVEL 2”)
Speakers/Impedence:
4 Ω – 16 Ω
General
Power requirement: AC 230 V , 50 Hz
Power consumption: At operation: 50 W
On standby: 11.8 W
0.9 W (in Power Save)
Dimensions (approx.):
175 mm x 239.5 mm x 378 mm (W/H/D)
Mass (approx.):
7.8 kg
Tuner
FM tuning range:
AM tuning range:
87.50 MHz—108.00 MHz
531 kHz—1 710 kHz (at 9 kHz
channel spacing)
530 kHz—1 710 kHz (at 10 kHz
channel spacing)
Supplied accessories
See page 6.
Design and specifications are subject to change without
notice.
CD player
CD Capacity:
Dynamic range:
Signal-to-noise ratio:
Wow and flutter:
5 CDs
87 dB
90 dB
Immeasurable
MD recorder
Audio playing system:
Recording system:
MiniDisc digital audio system
Magneto-optical overwrite
system
Reading system:
Non-contact, semiconductor laser
pickup (λ=780 nm)
Error correction system:
CIRC (Cross Interleave ReedSolomon Code)
Recording/Playback time (when using a 80-minute MD)
SP:
80 minutes
LP2: 160 minutes
LP4: 320 minutes
Sampling frequency:
44.1 kHz
Audio compression system: ATRAC (Adaptive TRansform
Acoustic Coding)/ATRAC3
(
)
64
EN59-64_UX-J55MD[UB]f.p65
64
7/1/03, 4:44 PM
VICTOR COMPANY OF JAPAN, LIMITED
EN, CS
© 2003 VICTOR COMPANY OF JAPAN, LIMITED
Cover_UX-J55MD[UB]f.p65
2
0803AIMMDWJEM
03.7.17, 4:11 PM