1
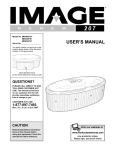
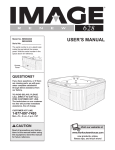
Model No. IMSB63910
IMSG63910
Serial No.
USER’S MANUAL
The serial number is on a sign
behind the access panel. Write the
serial number in the space above.
Access
Panel
QUESTIONS?
If you have questions, or if there
are missing parts, we will guarantee complete satisfaction
through direct assistance from
our factory.
TO AVOID DELAYS, PLEASE
CALL DIRECT TO OUR TOLLFREE CUSTOMER HOT LINE.
The technicians on our customer
hot line will provide immediate
assistance, free of charge.
CUSTOMER HOT LINE:
1-877-897-7493
Mon.–Fri., 6 a.m.–6 p.m. MST
CAUTION
Read all precautions and instructions in this manual before using
this equipment. Save this manual
for future reference.
Visit our website at
www.workoutwarehouse.com
new products, prizes,
fitness tips, and much more!
Table of Contents
Posting the Warning Sign . . . . . . . . . . . . . . . . . . . . . . . . . . . . . . . . . . . . . . . . . . . . . . . . . . . . . . . . . . . . . . . . 2
Important Safety Instructions . . . . . . . . . . . . . . . . . . . . . . . . . . . . . . . . . . . . . . . . . . . . . . . . . . . . . . . . . . . . . . 3
Before You Begin . . . . . . . . . . . . . . . . . . . . . . . . . . . . . . . . . . . . . . . . . . . . . . . . . . . . . . . . . . . . . . . . . . . . . . 6
Choosing a Location for the Hydrotherapy Spa . . . . . . . . . . . . . . . . . . . . . . . . . . . . . . . . . . . . . . . . . . . . . . . . 7
Assembly . . . . . . . . . . . . . . . . . . . . . . . . . . . . . . . . . . . . . . . . . . . . . . . . . . . . . . . . . . . . . . . . . . . . . . . . . . . . 8
Using the Hydrotherapy Spa . . . . . . . . . . . . . . . . . . . . . . . . . . . . . . . . . . . . . . . . . . . . . . . . . . . . . . . . . . . . . 10
Spa Shell Diagram . . . . . . . . . . . . . . . . . . . . . . . . . . . . . . . . . . . . . . . . . . . . . . . . . . . . . . . . . . . . . . . . . . . . 11
Using the Controls . . . . . . . . . . . . . . . . . . . . . . . . . . . . . . . . . . . . . . . . . . . . . . . . . . . . . . . . . . . . . . . . . . . . 12
Maintenance . . . . . . . . . . . . . . . . . . . . . . . . . . . . . . . . . . . . . . . . . . . . . . . . . . . . . . . . . . . . . . . . . . . . . . . . . 13
Trouble-shooting . . . . . . . . . . . . . . . . . . . . . . . . . . . . . . . . . . . . . . . . . . . . . . . . . . . . . . . . . . . . . . . . . . . . . . 16
Part List . . . . . . . . . . . . . . . . . . . . . . . . . . . . . . . . . . . . . . . . . . . . . . . . . . . . . . . . . . . . . . . . . . . . . . . . . . . . 18
Exploded Drawing . . . . . . . . . . . . . . . . . . . . . . . . . . . . . . . . . . . . . . . . . . . . . . . . . . . . . . . . . . . . . . . . . . . . . 19
Ordering Replacement Parts . . . . . . . . . . . . . . . . . . . . . . . . . . . . . . . . . . . . . . . . . . . . . . . . . . . . . . Back Cover
Limited Warranty . . . . . . . . . . . . . . . . . . . . . . . . . . . . . . . . . . . . . . . . . . . . . . . . . . . . . . . . . . . . . . . Back Cover
Posting the Warning Sign
The warning sign, shown below, must be posted on a wall or fence where it will be visible to all users of the
hydrotherapy spa. Whenever the spa is moved, the sign must also be moved and reposted near the spa. If the
sign becomes lost or illegible, call our toll-free Customer Hot Line at 1-877-897-7493 to obtain a replacement
sign. Post the sign as described above.
IMAGE is a registered trademark of ICON Health & Fitness, Inc.
2
Important Safety Instructions
WARNING:
To reduce the risk of drowning, electric shock, or serious injury, read the following important precautions before using the hydrotherapy spa.
READ AND FOLLOW ALL INSTRUCTIONS
1. It is the responsibility of the owner to ensure
that all users of the hydrotherapy spa are
adequately informed of all precautions.
10. Never insert any object into any opening.
11. Do not use breakable containers in or near
the hydrotherapy spa.
2. Use the hydrotherapy spa only as described
in this manual.
12. Do not sit on the spa cover or place objects
on it; it is not designed to support weight.
3. The hydrotherapy spa is intended for home
use only. Do not use the spa in a commercial,
rental, or institutional setting.
13. Remove any water or debris that may collect
on the spa cover.
4. Use the hydrotherapy spa only on a level surface. Do not use the spa on carpet or other
materials that could be damaged by moisture.
14. Keep children under the age of 12 and pets
away from the hydrotherapy spa when it is
not in use.
5. The hydrotherapy spa will weigh approximately 3,300 pounds when it is filled with
water. Make sure that the location you select
for the spa will support this weight, plus the
weight of the occupants.
15. Keep all chemicals away from children and
pets.
16. The pH and chemical balance of the water
must be maintained as explained in this manual (see pages 10 and 14). Failure to do so
may cause injury to users or damage to the
hydrotherapy spa, and will void the warranty.
6. Inspect and tighten all parts regularly.
Replace any worn parts immediately.
17. Individuals with infections and open sores or
wounds should not use the hydrotherapy
spa. Bacteria thrive in warm and hot water.
Always keep your spa disinfected and maintain the proper chemical balance.
7. DANGER—Risk of injury: Do not remove or
alter the covers on the suction fittings. Never
operate the hydrotherapy spa if the suction
guard is missing or broken. If you need to
replace a suction fitting or pump, make sure
you use only manufacturer recommended
replacement parts. Keep hair and body parts
away from the suction guard. Do not allow
long hair to float freely in the water; long hair
should be restrained with a bathing cap.
18. Shower before and after using the hydrotherapy spa. This will remove any deodorant, perspiration, or body oils that could contaminate
the water. Showering after will remove any
residual chemicals and any bacteria that may
have been in the spa.
8. IMPORTANT: Do not allow the hydrotherapy
spa to be exposed to direct sunlight when it
is empty. The surface of the spa shell can
reach temperatures as high as 150°F in a matter of minutes if exposed to the sun while it is
empty. These high temperatures can cause
significant damage, such as blistering of the
shell surface and warping of the spa shell.
Any damage caused by sun exposure is not
covered under the warranty.
19. WARNING—The Ground Fault Circuit
Interrupter (GFCI), must be tested before
each use. To test the GFCI, press the “test”
button while the hydrotherapy spa is running.
The spa should shut off. Press the “reset”
button. The spa should resume normal operation. If the spa continues to run after the
“test” button is pressed, then the GFCI is
damaged. Do not use the spa until the GFCI
has been repaired or replaced by a qualified
electrician.
9. Do not bring any object into the hydrotherapy
spa that could damage the spa shell.
3
20. DANGER—Risk of electric shock. Keep all
electrical appliances such as radios, telephones, televisions, and lights at least five
feet away from the water.
physician before using the hydrotherapy spa.
Pregnant women should not use the spa if
the water temperature is above 100°F; the
unborn child could be seriously harmed. This
is especially important during the first 90
days of the pregnancy.
21. A wire connector is provided on the electronics pack of the hydrotherapy spa to connect a
minimum No. 6 AWG (13.3 mm2) solid copper
conductor between the spa and any metal
equipment, electrical enclosure made of
metal, metal water pipes, or conduit within
five feet of the spa.
29. DANGER—To reduce the risk of drowning:
Prolonged immersion in the hydrotherapy spa
may cause hyperthermia. The causes, symptoms and effects of hyperthermia may be
described as follows: Hyperthermia occurs
when the internal temperature of the body
reaches a level several degrees above the
normal body temperature of 98.6°F. The symptoms of hyperthermia include an increase in
the internal temperature of the body, dizziness, lethargy, drowsiness and fainting. The
effects of hyperthermia include failure to perceive heat; failure to recognize the need to
exit the spa or hot tub; unawareness of
impending hazard; fetal damage in pregnant
women; physical inability to exit the spa or
hot tub and unconsciousness resulting in
danger of drowning. WARNING: The use of
alcohol, drugs or medication can greatly
increase the risk of fatal hyperthermia.
22. DANGER—Risk of electric shock: Do not set
the hydrotherapy spa within five feet of any
metal objects or surfaces. As an alternative,
you may use the spa within five feet of metal
objects if each metal object is permanently
connected to the wire connector on the electronics pack of the spa by a minimum No. 6
AWG (13.3 mm2) solid copper conductor (see
instruction 21).
23. Do not operate the pump motor when the
hydrotherapy spa is empty. The pump motor
may be seriously damaged if it is operated
without water circulating.
24. DANGER—Risk of drowning: Exercise
extreme caution to prevent unauthorized and
unsupervised use of the hydrotherapy spa by
children. Children must always be supervised.
30. WARNING—To reduce the risk of drowning:
Do not use the hydrotherapy spa if you are
under the influence of alcohol or drugs. Heat
from the water, in conjunction with alcohol or
drugs, can cause loss of consciousness.
25. DANGER—To reduce the risk of drowning:
• Never use the hydrotherapy spa alone.
• Children should not use the spa unless they
are supervised by an adult.
• Keep pets away from the spa at all times.
• Always replace and lock the spa cover when
the spa is not in use.
31. WARNING—To reduce the risk of injury or
drowning: Consult your physician about possible side-effects of any medications you may
be taking before using the hydrotherapy spa.
Heat from the water, in conjunction with some
medications, may cause drowsiness and
increase the risk of drowning. Other medications can effect blood pressure, heart rate,
and circulation.
26. WARNING—To reduce the risk of injury: The
water temperature should never exceed
104°F. Temperatures between 100°F and 104°F
are considered to be safe for healthy adults.
However, if you plan to remain in the hydrotherapy spa for more than 10 to 15 minutes, a
lower temperature is recommended. Lower
temperatures are also recommended for children. Children should not be allowed to swim
under the surface of the water in the spa.
32. Do not use the hydrotherapy spa immediately
after strenuous exercise.
33. If you feel pain or dizziness at any time while
using the hydrotherapy spa, discontinue use
and contact a physician.
34. WARNING—To reduce the risk of injury: It is
especially important for persons over the age
of 35 or persons with pre-existing health
problems, such as obesity, heart disease,
high or low blood pressure, circulatory problems, or diabetes to consult their physician
before using the hydrotherapy spa.
27. WARNING—To reduce the risk of injury:
Before entering the hydrotherapy spa, always
use an accurate thermometer to determine
the water temperature.
28. WARNING—To reduce the risk of injury:
Pregnant women should consult with their
4
35. WARNING: The spa jets produce a stream of
water with relatively high pressure. Prolonged
exposure of a localized area of the body may
cause bruises to the skin.
36. The included warning sign must be posted
where all users of the hydrotherapy spa can
see and read it. (See POSTING THE WARNING
SIGN on page 2.)
37. WARNING DECAL PLACEMENT: Locate the
decals shown below and familiarize yourself
with the information on the decals.
WARNING:
Read all instructions before using the hydrotherapy spa. ICON assumes no
responsibility for personal injury or property damage sustained by or through the use of this product.
SAVE THESE INSTRUCTIONS
5
Before You Begin
Congratulations for selecting the new IMAGE®
RENEW 639 hydrotherapy spa. The innovative
RENEW 639 allows you to enjoy all the benefits of
hydrotherapy in the comfort and privacy of your home.
For your benefit, read this manual carefully before
using the IMAGE® RENEW 639. If you have questions after reading the manual, please call our
Customer Service Department toll-free at 1-877-8977493, Monday through Friday, 6 a.m. until 6 p.m.
Mountain Time (excluding holidays). To help us assist
you, please mention the product model number and
serial number when calling. The model number is
IMSB63910 or IMSG63910. The serial number can be
found on a decal on the access panel inside the spa
(see the front cover of this manual).
Hydrotherapy is a proven method for soothing tired
muscles after exercise or for relieving the stress of a
busy life. The warm environment stimulates blood flow,
which is essential in the healing process, and the
powerful massage action further eases tension and
stress throughout the body. The IMAGE® RENEW 639
gives you the specialized treatment you need to feel
your best.
Air
Controls
Air
Control
Console
Before reading further, please familiarize yourself with
the parts that are labeled in the drawing below.
Jets On/Off Jets
Valve
On/Off
Valve
Jet
Jets
Filters
Jets
Access
Panel
Locking
Buckle
6
Spa Shell
Choosing a Location for the Hydrotherapy Spa
There are many factors to consider when choosing a location to set up the hydrotherapy spa. These factors vary
depending on whether you plan to use the spa inside or outside. We have listed several factors you may wish to
consider as you decide where to set up the spa.
If you set up the hydrotherapy spa inside:
If you set up the hydrotherapy spa outside:
1. The spa will increase the level of humidity in your
home. The location you choose should be well
ventilated. You may need to install a ventilation fan
or use a dehumidifier.
1. Check local building codes concerning the use of
outdoor spas.
2. The spa should be located near a 240-volt power
source. It must be wired directly into a grounded
circuit with a Ground Fault Circuit Interrupter
(GFCI) capable of carrying 40 amps. No other
appliance should be on the same circuit.
2. The spa should be located near a 240-volt power
source. It must be wired directly into a grounded
circuit with a Ground Fault Circuit Interrupter
(GFCI) capable of carrying 40 amps. No other
appliance should be on the same circuit.
3. The spa should be close to a source of water.
3. The spa should be close to a source of water.
4. We recommend that you place the spa on a waterand stain-resistant, non-slip surface. Do not use
the spa on rough or sharp surfaces such as gravel
or wood chips.
4. Do not use the spa on carpet or other material that
may be damaged by moisture. We recommend
that you place the spa on a water- and stain-resistant, non-slip surface with a floor drain for any
water that may splash from the spa.
5. Be sure that the location you choose is stable. It
must be able to support the weight of the spa
when it is filled with water, plus the weight of the
occupants. The spa weighs approximately 3,300
pounds when it is filled with water.
5. Be sure that the location you choose is stable. It
must be able to support the weight of the spa
when it is filled with water, plus the weight of the
occupants. The spa weighs approximately 3,300
pounds when it is filled with water.
6. Consider environmental factors such as rain, wind,
shade, and sunlight.
6. Do not use the spa above a finished living area,
due to the risk of water damage.
7. You should be able to monitor the use of the spa
from your home, to prevent unauthorized use by
children. You may want to enclose the spa with a
fence and self-latching gate to prevent unauthorized use.
7. Be sure that there is room around the spa to permit servicing of the unit. The dimensions of the spa
are 84” W x 84” L x 39” H. You should allow for this
size when choosing the location.
8. Be sure that there is room around the spa to permit servicing of the unit. The dimensions of the spa
are 84” W x 84” L x 39” H. You should allow for this
size when choosing the location.
8. The spa is not designed for in-floor installation.
However, it is compatible with a deck system that
is built flush with the top of the spa, provided you
leave access to the motor for service.
9. The spa is not designed to be installed below
ground level. However, it is compatible with a deck
system that is built flush with the top of the spa,
provided you leave access to the motor for service.
9. Be sure to note any other considerations, such as
aesthetics or privacy concerns, that may affect the
safety or enjoyment of using the spa.
10.Be sure to note any other considerations, such as
aesthetics or privacy concerns, that may affect the
safety or enjoyment of using the spa.
7
Assembly
Before beginning assembly, carefully read the
following information and instructions:
ASSEMBLY REQUIRES THE FOLLOWING
TOOLS (not included):
• Place all parts in a cleared area and remove the
packing materials from the spa shell. Do not dispose of the packing materials until assembly is
completed and the spa is operating.
• One phillips screwdriver
A wire connector is provided on the electronics
pack of the spa to connect a minimum No. 6
AWG (13.3 mm2) solid copper conductor
between the spa and any metal equipment,
electrical enclosure made of metal, metal water
pipes, or conduit within five feet of the spa.
• During assembly, make sure that all parts are
oriented as shown in the drawings.
• Read each assembly step before you begin.
• Tighten all parts as you assemble them, unless
instructed to do otherwise.
1. Before beginning assembly, make sure that you
have read and understand the information in the
box above and on the previous two pages.
1
Spa Shell
Remove the four #10 x 2” Sheet Metal Screws (46)
that secure the indicated Access Panel (25) to the
spa. Carefully remove the Access Panel and set it
aside. Be careful not to damage the spa shell.
46
25
2. Close the valve knob on the drain hose. Thread the
cap onto the drain hose.
46
2
Locate the four gate valves inside the access opening (there are two gate valves per pump). Make sure
that the gate valves are open and that the locking
clips are snapped onto the stems of the gate valves,
as shown in the inset drawing.
Gate Valves
Make sure that the six collars are tightened (there
are two collars per pump and two on the heater).
Refer to step 1. Re-attach the Access Panel (25) to
the spa.
Locking Clip
Collars
Cap
8
Valve
Knob
3. Insert the pillow (47) into the lounge seat receptacle. Rotate the pillow 180º to change its position.
3
47
4. The hydrotherapy spa operates on a 240-volt power source and must be wired directly to a 40 amp ground
fault circuit interrupter (GFCI) installed in your home. This procedure must be performed by a qualified
electrician. A wiring diagram is found on the inside of the electronics pack as a reference. Under no
circumstances should the spa be wired by someone other than a qualified electrician. Before you have
the spa wired, make sure that it is in the position you want and that it can be easily serviced, if needed.
5. Make sure that a qualified electrician has wired the
spa to a 240-volt power source.
5
3
Fill to Here
Remove the two warning decals (see page 5) from
the spa shell. Using a damp cloth, wipe the spa shell
clean. Before filling the spa, make sure that it is
in the desired position and that there is room to
easily service it. Once the spa is filled, it will
have to be drained before it can be moved.
5
Insert a garden hose into one of the filter housings,
begin filling the spa. Do not use soft water. The
spa may be filled with cold water; however, if warm
or hot water is used, the spa will be ready for use
sooner. Fill the spa until the water is at the level
shown at the right. Do not overfill the spa.
Refer to the inset drawing. Set the Filters (5) into the
filter housings. Next, screw the Filter Covers (3) into
the filter housings until they are fully seated.
6. Pull down one of the straps on the Spa Cover (11)
and hold the Buckle (26) against one of the premium
cedar panels on the spa. (Note: To position the
Buckle correctly, have a second person hold the
strap on the opposite side of the Spa Cover snug.)
The Spa Cover must be snug. Do not place the
Buckle over the grooves between the premium
cedar panels. Refer to the inset drawing. Remove
the latch from the Buckle (26). Attach the Buckle to
the premium cedar panel with two #4 x 3/4” Screws
(27).
Garden Hose
6
Strap
11
Latch
26
27
Strap
Attach the other three Buckles (26) to the premium
cedar panels in the same way.
26
Remove the Spa Cover (11) from the spa.
9
Using the Hydrotherapy Spa
The hydrotherapy spa is designed to seat seven
adults. The spa holds approximately 375 gallons of
water and offers a heating system (80°F to 104°F), a
filtration system, and adjustable hydrotherapy jets.
Follow the guidelines below to use and maintain the
spa for your long-term enjoyment.
Once you have tested the GFCI, you should verify the
water flow from the pumping unit. Set the air control
on the console to the lowest setting (see USING THE
CONTROLS on page 12). The pumping unit will heat
the water as it pumps. Cover the hydrotherapy spa
with the spa cover. The spa cover must be tight
(see SECURING THE SPA COVER ON THE SPA on
this page). The water will heat at about 6°F per hour
with the cover on. If you are using the spa indoors,
and the room temperature is maintained at 70°F, it will
take approximately 6 to 8 hours for the water to reach
the set temperature.
WIRING THE HYDROTHERAPY SPA
The hydrotherapy spa is designed to operate with a
240-volt power source. It must be wired directly into a
grounded circuit with a Ground Fault Circuit
Interrupter (GFCI) capable of carrying 40 amps. No
other appliance should be on the same circuit.
Connection of the spa to the 240-volt power
source must be performed by a qualified, licensed
electrician and must comply with all local, state,
and federal electrical codes. Please refer to the
instructions on the inside of the electronics package
for information about connecting the spa to a 240-volt
power source.
The temperature and the water flow can be set or
changed with the controls on the console (see USING
THE CONTROLS on page 12).
SECURING THE SPA COVER ON THE SPA
To secure the spa cover,
snap the latches on the spa
cover into the buckles on the
premium cedar panels.
Once the spa is filled with water, the power can be
turned on. Note: The first time the power is turned on,
the spa will start automatically.
Latch
To lock the buckles, insert
Key
the key and turn it clockwise 1/4 turn. To unlock the
buckles, insert the key and
turn it counterclockwise 1/4
Buckle
turn. Always keep the
buckles locked when the
spa is not in use. Keep the keys in a safe place,
out of the reach of children.
TESTING AND TREATING THE WATER
The first time you use the spa, you should test and
treat the water. You must also treat the water each
time you refill the spa. A test strip and a chemical
pack are available at your local pool and spa store.
Follow the directions carefully on the chemical pack to
test and treat the water. Always keep the chemicals
away from children and pets.
See WATER CHEMISTRY on page 13 for information
concerning proper water maintenance.
STARTING THE HYDROTHERAPY SPA
You should always test the GFCI before using the
hydrotherapy spa. First, turn on the spa by pressing
the jet button on the console (see USING THE CONTROLS on page 12). Once the spa is running, press
the GFCI “test” button. The spa should shut off. Press
the “reset” button. The spa should resume normal
operation. If the spa continues to run after the “test”
button is pressed, the GFCI is damaged. Do not use
the spa until the GFCI has been repaired or replaced
by a qualified electrician.
10
Spa Shell Diagram
P
J
P
J
K
N
L
K
L
K
L
K
K
M
M
I
N
K
C
B
L
F
D
H
K
O
I
E
A
G
L
K
K
A. The filters can be removed for cleaning or replacement (see CHECKING AND CLEANING THE FILTERS on page 13).
K
K1
L
I. The four air controls regulate the air flow to the
whirlpool, hydrotherapy, and volcano jets.
J. The four neck jets can be adjusted to spray soothing water on your neck. To activate the neck jets,
turn the neck jet valves (P) counterclockwise. To
turn the neck jets off, turn the valves clockwise.
B. The underwater light can be used for night operation (see USING THE CONTROLS on page 12). The
spa includes both red and blue covers for the light.
C. The temperature probe monitors water temperature.
K. The twenty rotary jets provide a spinning massage.
Note: The jets labeled K1 are always on.
D. The volcano jet provides a soothing foot massage.
L. The six rotary jets provide a pulsating massage
action. Rotate the outer ring counterclockwise to
turn the jets on. Rotate the outer ring clockwise to
turn the jets off.
E. The whirlpool jet diverts the water flow three different ways. By turning the outer ring, you can divert
the water flow between the volcano jet (D), the other
jets on the spa, and the whirlpool jet (E), which creates a whirlpool action. Note: The outer ring may
be hard to turn while the pump is turned on high.
M. The four variable-flow jets are fully adjustable.
Turn the outer rings to regulate the flow.
F. The four suction fittings provide water to the
pumps. Never operate the spa without the suction
covers in place.
N. The two power massage jets provides a soothing
massage to your lower back. Turn the outer ring to
regulate the flow.
G. An optional ozone generator can be purchased and
installed to utilize the ozone jet. Ozone helps sanitize the spa with minimal chemical treatment.
O. The skimmer cleans the surface of the water.
P. The neck jet valves control water flow to the four
neck jets (J). To completely turn off the water flow to
the jets, see Pump Button 2 on page 12.
H. The console controls the spa jets, turns the underwater light on and off, and adjusts the water temperature setting (see USING THE CONTROLS on
page 12).
11
Using the Controls
Neck Jet Valve
Air Control 4
Air Controls
Display
Invert Button 1, 2, and 3
Display
Pump
Button 1
Pump
Button 2
Light
Button
Temperature
Buttons
hydrotherapy. If the button is pressed a third time, the
jets will shut off.
1
2
3
1
2
1
4
4
1
Pump Button 2: Turns the spa jets labeled 1 and 2
(at the left) on and off. If the button is pressed once,
the jets will run, providing soothing hydrotherapy. If
the button is pressed again, the jets will shut off.
The spa also features an automatic mode that heats
and filters the water when the spa is left unattended.
When the power to the spa is first turned on, or if the
water temperature is below the set temperature, the
water will be heated as required. Note: To keep the
filter and heat cycles from running, the power to
the spa must be turned off.
On/Off
Valve
3
3
4
Light Button: Turns the underwater light on and off.
Air Control 1: Determines the amount of air flowing
through the hydrotherapy jets labeled 1 (above). If the
control is turned counterclockwise, the amount of air
will increase; if the control is turned clockwise, the
amount of air will decrease. Air controls 2–4 function
in the same manner.
Temperature Buttons: Control the temperature setting
of the water. The temperature setting can be from
80°F to 104°F. The water heats at about 6°F per hour
with the cover on. Use a medical or other accurate
thermometer to check the temperature of the water.
Note: The word “COOL” will appear in the console
display if the temperature of the water is more than
20°F cooler than the set temperature. When this happens, the heater will automatically activate to warm the
water. The word “ICE” will appear in the display if the
temperature drops below 40°F. If this happens, the
pump will automatically circulate the water and warm
the plumbing to keep the water from freezing.
Air Controls 2, 3, and 4: Determine the amount of air
flowing through the hydrotherapy jets labeled 2, 3,
and 4 (above).
Display Invert Button: Turns the display 180°, allowing it to be read from inside or outside of the spa.
Pump Button 1: Turns the spa jet labeled 3 and 4
(above) on and off. If the button is pressed once, the
jets will run on low. If the button is pressed a second
time, the jets will run on high, providing gentle
Neck Jet Valve: Controls water flow to the two neck
jets (see J on page 11).
12
Maintenance
The hydrotherapy spa is designed to provide years of
enjoyment. Please follow the guidelines below to
properly maintain your spa.
entirely. Use a non-silicone-based vinyl conditioner on
the cover after you clean it. This will help protect the
cover from sun damage.
MAINTENANCE SCHEDULE
CHECKING AND CLEANING THE FILTERS
Daily
• Check the water level and refill the spa to the level
shown in step 5 on page 9.
• Check the pH balance and sanitizer level. Adjust if
necessary (see WATER CHEMISTRY on this page).
The filters should be checked periodically for build-up
of dirt and oil. If the filters need to be cleaned, follow
the steps below:
1. Turn off the power.
2. Unscrew the filter
Filter
covers.
Cover
3. Lift the the filters out
of the filter housings.
4. Check the filters for
dirt and debris. If the
Filter
filters need to be
Filter
cleaned, rinse the filHousing
ters with a hose. If
the filters are still
dirty, soak them in
cleaning solution
from a pool and spa
supply store.
5. Inspect the filters for
damage. Replace the filters if they are damaged.
6. Insert the cleaned or new filters into the filter housings.
7. Re-attach the filter covers.
Weekly
• Clean the spa shell at the waterline.
• Check and thoroughly clean the filter (see CHECKING AND CLEANING THE FILTERS on this page).
• Replace the filter if needed (see ORDERING
REPLACEMENT PARTS on the back cover).
Monthly
• Clean the spa cover (see MAINTAINING THE SPA
COVER on this page).
• Soak the filter for two hours in a trisodium phosphate (TSP) solution. Rinse the filter in clean water.
• Replace the filter if needed (see ORDERING
REPLACEMENT PARTS on the back cover).
Every Three Months
• Drain the spa and refill it with clean water. Sanitize
and test the pH of the water.
• Check for any leaks around the pumps or joints in
the pipes. The seals will wear out over time; detecting leaks early can reduce repair costs.
• Clean the interior of the spa. Do not use solvents or
waxes.
WATER CHEMISTRY
The maintenance of the pH level is very important to
the operation of the spa. To maintain the proper pH
level and to sanitize the spa, you can purchase a
chemical starter kit from your local pool and spa supply store.
MAINTAINING THE SPA EXTERIOR
The premium cedar surround has been treated at the
factory. For information and supplies to maintain the
beauty and color of the premium cedar surround, contact your local pool and spa supply store.
CAUTION: The chemicals used to maintain the pH
balance of the water and to sanitize the water can
be dangerous. Always follow these basic guidelines when handling the chemicals:
1. Always read and follow the directions on the
label, unless directed otherwise.
2. Never mix different chemicals.
3. Do not exceed the recommended amounts of
chemicals—follow the directions on the label
closely.
4. Keep all chemicals out of the reach of children
and pets.
5. Keep containers closed tightly when not in use.
6. Never add water to the chemicals—always add
the chemicals to the water as directed.
7. Always store chemicals in a cool, dry place.
CLEANING THE SPA SHELL
The spa shell should be cleaned with a mild soap
solution; do not use solvents. The spa should always
be clean and dry before being moved or stored.
MAINTAINING THE SPA COVER
The spa cover should be cleaned monthly. To clean
the spa cover, use water and a non-abrasive cleaner
on the entire cover. Rinse the cover with a garden
hose to remove any cleaner residue. Dry the cover
13
MAINTAINING THE PROPER PH BALANCE
REMOVING AND ATTACHING THE ACCESS PANEL
The pH factor is a measure of the relative acidity or
alkalinity in the water, and is measured on a scale of
1 to 14. Pure water has a value of 7, which is neutral.
Any value above 7 is alkaline, and any value below 7
is acidic. You should maintain a slightly alkaline pH
level, between 7.2 and 7.8, in the hydrotherapy spa.
To locate the access panel, refer to the drawing on
page 6. Turn off the power to the spa. To remove the
access panel, first remove the four indicated screws.
Slide the access panel down and then pull the bottom
of it away from the spa. Note: Be careful not to
damage the spa shell as you remove the access
panel.
Severe problems can occur when the pH balance is
not maintained within this range. If the pH level
exceeds 7.8, dissolved minerals can build up and clog
the plumbing in the spa jet unit. If the pH level falls
below 7.2, the acid level in the water will begin to corrode the metal parts in the spa jet unit. Also, the sanitation agents in the water will not be effective if the pH
level is not properly maintained. Damage caused by
improper pH levels is not covered under the warranty.
46
To maintain the proper pH level, test the pH of the
water regularly. To test the water, purchase a pH test
kit at a pool and spa supply store. The pH reading
should be between 7.2 and 7.8. If the level is too low,
add a pH increaser (usually soda ash). If the level is
too high, add a pH reducer (usually sodium bisulfate).
Test the water again after five minutes. See the
instructions with your pH test kit for additional information about testing and adjusting the pH.
25
46
To re-attach the access panel, insert the top of the
access panel under the edge of the spa shell. Slide
the access panel up until the bottom of the access
panel clears the trim along the bottom of the spa.
Then, slide the access panel into place and re-attach
the four screws.
SANITIZING THE HYDROTHERAPY SPA
The most common sanitizing agent is a solid bromine
concentrate. The amount required varies according to
several factors, such as user load, temperature, and
water conditions. Proper water maintenance is a complex process. Contact your local pool and spa store
for information concerning which chemicals you
should use in your area to sanitize the spa.
DRAINING THE HYDROTHERAPY SPA
The hydrotherapy spa should be drained at least four
times per year and refilled with clean water. You may
need to drain the spa more often, depending on the
user load. This must be done because after repeated
chemical treatment the water becomes chemically
saturated. Once this happens, additional chemical
treatment of the water is no longer effective. The spa
should also be drained if you will not be using it for
long periods of time. The spa must always be drained
before major repairs are made.
CHANGING THE FILTER CYCLE
The spa will filter the water every 12 hours. The duration of the cycle can be adjusted to last 2 to 5 hours.
Press the temperature up or temperature down button
on the console. When the display begins to flash,
press the pump button. The display will read F2. To
change the time, press the temp up button until the
desired time is reached. Press the pump button to
confirm the selection. As spa usage increases, the
duration of the filter cycle may need to be increased.
The hydrotherapy spa should always be covered
when it is empty. Direct sunlight can cause extensive damage. The surface of the spa shell can
reach temperatures as high as 150°F in a matter
of minutes if exposed to the sun while it is empty.
These high temperatures can cause significant
damage, such as blistering of the shell surface
and warping of the spa shell. Any damage caused
by sun exposure is not covered under warranty.
14
To drain the hydrotherapy spa, follow the steps below:
WINTER USE AND CARE
1. Using the console, adjust the temperature to the
lowest setting.
2. Shut off the power to the spa, at the circuit breaker
or GFCI.
3. Remove the access panel from the spa (see
ATTACHING AND REMOVING THE ACCESS
PANEL on page 14).
4. Pull the hose out and hold it above the waterline.
Remove the cap, open the valve knob, and attach
a garden hose to the drain hose. Lower the hose
and drain the spa.
The hydrotherapy spa is designed for year-round use.
If you decide to store the spa for the winter, store it in
a warm, dry location. Follow the steps below to winterize the spa.
1. Make sure the power to the spa is turned off.
2. Drain the spa (see DRAINING THE HYDROTHERAPY SPA on the previous page and this page).
3. Remove all remaining water from the spa shell. Dry
the spa shell with towels.
4. Set the air controls to the lowest setting. Use a
wet/dry vacuum to pull any remaining water from
the system. To do this, place the vacuum nozzle
over each jet, starting with the highest jet and finishing with the lowest jet.
5. Set the air controls to the highest setting and
repeat step 3.
6. Drain the pumps (see DRAINING THE PUMPS on
this page). Once the water is drained from the
pumps, place the vacuum nozzle over the drainage
hole in the pumps and vacuum any additional
water from the pumps. Note: For additional protection, remove the pumps/motors from the spa
and store them in a climate-controlled room.
7. Clean the spa shell (see page 13).
8. Clean the filters (see page 13).
9. Shut the power off at the breaker. Label the
breaker in such a way that the breaker will not
be turned on accidentally.
10. Re-attach the access panel and the spa cover.
Cap
Valve
Knob
Drain
Hose
5. When the spa is empty, remove the garden hose,
close the valve knob, re-attach the cap, and return
the drain hose inside the spa.
6. Re-attach the access panel.
7. Refill the spa and treat the water with chemicals
(see pages 10 and 13).
DRAINING THE PUMPS
REPLACING THE LIGHT BULB
If the underwater light burns out, you will need to
remove the access panel to replace it (see ATTACHING
AND REMOVING THE ACCESS PANEL on page 14).
Make sure the spa power is turned off. Next, locate the
light housing. Turn the light housing counterclockwise
and remove it from the spa shell.
After the hydrotherapy spa is drained, the jet pumps
should also be drained if the spa will be stored for
more than thirty days or if it may be exposed to freezing temperatures.
Turn off the power to
the spa. To drain the jet
pumps, remove the
access panel from the
spa unit (see ATTACHING AND REMOVING
THE ACCESS PANEL
on page 14). Locate the
jet pumps inside the
spa. Loosen the indicated collar on each of the
pumps.
Light Housing
Light
Bulb
Light
Housing
Collar
To replace the light bulb, pull the old light bulb out of
the housing and insert a new light bulb. Re-attach the
light housing to the spa shell. Re-attach the access
panel to the spa.
15
Trouble-shooting
Most problems can be solved by following the simple steps below. Find the symptom that applies, and
follow the steps listed. If further assistance is needed, call our Customer Service Department toll-free at
1-877-897-7493, Monday through Friday, 6 a.m. until 6 p.m. Mountain Time.
1. SYMPTOM: THE SPA WILL NOT OPERATE
6. SYMPTOM: THE WATER DOES NOT HEAT
a. Check to see if the GFCI breaker is tripped or
was not turned on. Reset the GFCI breaker.
a. Make sure that the hydrotherapy spa is fully
covered with the spa cover. The spa cover
must be tight for the water to heat. Set the
air control to low. The water will heat at a rate
of 6°F per hour. If you are using the spa
indoors and the room temperature is maintained at 70°F, it will take approximately 6 to 8
hours for the water to reach the set temperature.
2. SYMPTOM: THE CIRCUIT BREAKER OR THE
GFCI TRIPS WHILE THE SPA IS OPERATING
a. Reset the circuit breaker or the GFCI. If the circuit breaker or the GFCI trips again, contact a
qualified electrician for service.
b. If you are using the hydrotherapy spa outdoors,
it may take longer for the water to heat. See
the chart below for the approximate heating
time.
3. SYMPTOM: THE PUMP HUMS
a. The filters may be dirty or damaged. Remove
the filters from the filter housings and clean or
replace the filters (see page 13).
Air Temperature
70°F +
50°F to 70°F
30°F to 50°F
b. The pump may have a foreign object stuck in
the impeller. Contact our customer service
department.
Heating Time
6 to 8 hours
9 to 11 hours
12 to 14 hours
b. If the water still has not heated after 24 hours,
contact our customer service department.
c. The pump may have a loose wire connection.
Contact our customer service department.
7. SYMPTOM: THE WATER IS NOT BEING
CLEANED BY THE FILTER
4. SYMPTOM: THE PUMP HUMS, BUT DOES NOT
ROTATE
a. Check to see if the filters are in place. Clean
the filters if they are dirty.
a. The pump may be jammed. Contact our customer service department. If your spa is no
longer under warranty, contact a local spa and
pool service provider.
b. Check the chemical balance of the water. If the
pH is incorrect, the sanitizing agents will not
function properly. See the section on maintaining the proper pH balance on page 14.
5. SYMPTOM: THE PUMP IS NOISY WHILE
OPERATING
8. SYMPTOM: THE WATER PULSATES OR
THERE IS MINIMUM WATER FLOW
a. There may be debris in the pump. Contact our
customer service department.
a. This usually occurs only when the water level is
low. Add water until it is 2 to 4” above the skimmer basket.
b. The pump may have a bad bearing. Contact
our customer service department.
b. The Filter Covers may not be tight. Make sure
the Filter Covers are tight.
16
9. SYMPTOM: THE WATER LEVEL DROPS
10. SYMPTOM: THE SPA JET UNIT CONTINUES
TO RUN AFTER IT HAS BEEN SHUT OFF
a. A clamp or seal inside the pump compartment
may be loose. Check inside the pump compartment for excess water and watch the pump unit
while it is operating to see if water drips from
any of the plumbing. If you can identify the
location of the leak inside the spa jet unit, tighten the clamp or replace the damaged seal.
a. To turn the main jets off, press pump button 1
once or twice. Note: If the actual spa water
temperature is below the set temperature, or if
the spa is running a filter cycle, the heater
pump/motor will not shut off.
b. Some water loss due to evaporation is normal.
If rapid water loss occurs, or if you notice wetness on the floor around the hydrotherapy spa,
the spa shell may have a leak. Contact your
local pool and spa service provider for repairs.
17
Part List—Model No. IMSB63910/IMSG63910
Key No. Qty.
1
2
3
4
5
6
7
8
9
10
11
12
13
14
15
16
17
18
19
20
21
22
23
24
25
26
27
28
29
30
31
32
33
34
1
1
2
2
2
2
1
1
12
1
1
6
4
1
4
4
4
4
1
1
1
1
1
1
4
4
8
10
1
1
8
1
1
1
Description
R1101A
Key No. Qty.
Thermometer Fitting
3-wire Power Cord
Filter Cover with O-Ring
Filter O-Ring
Filter
Rubber Isolator
Blue Light Cover
Red Light Cover
#10 x 1” Sheet Metal Screw
2-speed Pump
Spa Cover
Dual Rotary Jet Face
Jet Pump/Motor O-ring
Heater/Electronics Package*
Medium Jet Housing
#10 x 1 1/4” Screw
Suction Cover
Air Control Knob
1-speed Pump
4-wire Power Cord
Diverter
Basket
Console Overlay
Filter Door
Access Panel
Buckle
#4 x 3/4” Screw
#8 1 1/2” Screw
Console with Overlay
Hose Washer
Flat Washer
Diverter Valve
Trim Plate
Foam, Weir
32
33
35
36
37
38
39
40
41
42
43
44
45
46
47
48
49
50
51
52
53
54
55
#
#
#
#
#
#
#
1
4
20
1
1
1
21
1
21
4
2
32
1
2
2
1
1
6
4
1
1
2
2
1
1
1
1
4
Description
Volcano Jet
Nozzle Housing
Small Rotator
Large Rotary Jet
Face Ring
Small Nozzle
Jet Ring
Nozzle Bushing
Pivot Ring
Medium Nozzle
Drain Plugs
#10 x 2” Sheet Metal Screw
Pillow
Drain Plug O-ring
On/Off Valve Handle
Hose Cap
Skimmer Housing*
Dual Rotary Jet
Neck Jet
Whirlpool Jet
Large Rotary Jet
Ground Wire
Key
User’s Manual
Large Warning Sign
Warning Sign
Light Bulb
Corner Panel
* Indicates a part that is serviceable only by service
technicians.
# Indicates a non-illustrated part.
Specifications are subject to change without notice.
28
51
21
7
50
22
34
24
18
30
8
Exploded Drawing—Model No. IMSB63910/IMSG63910)
R1101A
9
10
13
31
9
11
19
13
13
48
2
45
6
31
13
48
3
4
20
45
3
6
1
4
9
14
5
23
9
5
9
49
29
26
53
47
53
18
27
18
39
40
41
42
37
43
46
41
15
44
36
54
25
25
46
35
46
46
38
55
12
52
19
16
17 16
17
16
17 16
17
Ordering Replacement Parts
To order replacement parts, simply call our Customer Service Department toll-free at 1-877-897-7493, Monday
through Friday, 6 a.m. until 6 p.m. Mountain Time (excluding holidays). To help us assist you, please be prepared to give the following information when calling:
1. The MODEL NUMBER of the product (IMSB63910 or IMSG63910)
2. The NAME of the product (IMAGE® RENEW 639 hydrotherapy spa)
3. The SERIAL NUMBER of the product (see the front cover of this manual)
4. The KEY NUMBER and DESCRIPTION of the desired part(s) (see the PART LIST and EXPLODED DRAWING
on pages 18 and 19).
Limited Warranty
ICON Health & Fitness, Inc. (ICON), warrants this product to be free from defects in workmanship and material, under normal use and service conditions, for a period of ninety (90) days from the date of purchase. ICON
extends a limited five (5) year warranty on the spa shell structure. ICON extends a limited two (2) year warranty on the pump, motor, and electronics package. This warranty extends only to the original purchaser.
ICON's obligation under this warranty is limited to replacing or repairing, at ICON's option, the product through
one of its authorized service centers. All repairs for which warranty claims are made must be pre-authorized
by ICON. This warranty does not extend to any product or damage to a product caused by or attributable to
freight damage, abuse, misuse, improper or abnormal usage, or repairs not provided by ICON authorized service personnel; to products used for commercial or rental purposes; or to products used as store display models. Specifically excluded are damages caused by or attributable to the following incidents: any damage to the
premium cedar surround or frame attributable to improper handling or freight damage; damage resulting from
improper winterization; damage to the spa shell resulting from improper chemical treatment, damage to the
spa shell resulting from exposure to extreme temperatures, or damage to the spa shell resulting from exposure to direct sunlight and ultraviolet rays while the spa is empty; damage to the pump, motor, plumbing, and
components due to improper maintenance, chemical treatment, or exposure; or damage resulting from failure
to properly follow user’s manual installation, operating, or maintenance instructions. Also excluded are consumable components, including but not restricted to filter cartridges. No other warranty beyond that specifically set forth above is authorized by ICON.
ICON is not responsible or liable for indirect, special or consequential damages arising out of or in connection
with the use or performance of the product or damages with respect to any economic loss, loss of or damage
to property including water damage, loss of revenues or profits, loss of enjoyment or use, costs of removal,
installation or other consequential damages of whatsoever nature. Some states do not allow the exclusion or
limitation of incidental or consequential damages. Accordingly, the above limitation may not apply to you.
The warranty extended hereunder is in lieu of any and all other warranties and any implied warranties of merchantability or fitness for a particular purpose is limited in its scope and duration to the terms set forth herein.
Some states do not allow limitations on how long an implied warranty lasts. Accordingly, the above limitation
may not apply to you.
This warranty gives you specific legal rights. You may also have other rights which vary from state to state.
ICON HEALTH & FITNESS, INC., 1500 S. 1000 W., LOGAN, UT 84321-9813
Part No. 180722 R1101A
Printed in USA © 2001 ICON Health & Fitness, Inc.