1
Ikelite Digital Housing
i n s t r u c t i o n
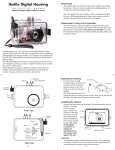
Bracket
(H9 Only)
Meter
(H9 Only)
Lid
Snap
m a n u a l
Quick Release
Button
#6111.7 for Sony DSC-H7
#6111.9 for Sony DSC-H9
Rubber
Handles
Lid
Snap
Lid
Snap
Lens
Port
Tray
Base
Front View
Mode Dial
Shutter
Button
Congratulations on your purchase of an Ikelite Digital Camera
Housing. Ikelite has over 30 years of experience in the underwater
photographic and lighting market. Our products are designed and
built in the USA by Ikelite for both the professional and amateur
photographer.
The clear housing permits instant visual inspection of the camera
and all sealing surfaces as well as complete monitoring of controls
and camera LCD screens.
Ikelite Digital Housings are slightly negative in salt water for
stability. This housing has been water pressure tested at the
factory. Housing is pressure tested to 200’ (60m).
Opening the Housing
Lid Snaps have a Lock.
Lid Snap Lock
To open, push Lid Snap Lock
forward and lift as shown. Keep
pressure on the Lid Snap so it
does not fly open quickly.
Lift
Some lid snaps have a lot of
spring tension once they go over center, have a firm grip on the
lid snap. Lid Snaps may be opened one at a time.
Push Forward
Installing the Camera
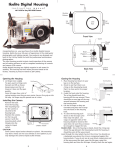
Remove the back from the housing. The mounting tray for the
camera is secured to the housing back. Position the camera on
the tray and secure it with the mounting bolt which threads
into the camera's tripod socket. Use a coin or flat bladed
Lid
screwdriver to tighten
Hook
the mounting bolt so
the camera is flat
O' Ring
against the tray.
Pop-up Flash
The Pop-up Flash does
not have to be in the
open position before
closing the housing.
Zoom
Power
Finder/
Playback
Menu
Control Buttons
Home
Wheel Dial
2
Back View
Using the Camera’s Built-in Flash.
If you do not have an External flash the camera’s built-in flash
can be used. See Diffuser Instructions.
Diffuser and Deflector Installation
Diffuser or Deflector should be installed before inserting the
camera into the housing.
A diffuser and deflector are included with the housing. The diffuser
is white transparent plastic and should be installed when the
camera’s built-in flash will be used. The deflector is also white but
is not transparent and should be installed when an exterenal Strobe
and EV Controller will be used.
To install the diffuser or deflector spread the lens clamp and
slide over the camera lens. The white plastic should be placed
in front of the camera flash. The lens clamp should be pushed
back against the camera.
Diffuser/Deflector
Lid
Hook
Lid
Hook
Mounting
Tray
Mounting Bolt
CAUTION:
Some camera tripod socket threads are plastic. The mounting
tray bolt is metal. Do not cross thread or over tighten as you
may damage the camera tripod socket threads.
CAMERA / MOUNT
3
4
Diffuser and Deflector Continued
Closing the Housing
The deflector should be installed on the camera when using an
external strobe such as the DS51 or DS125 Substrobe and EV
Controller. The deflector material is non-transparent, it will block
any light from going forward which will help to eliminate backscatter
and it will redirect the camera’s flash to the EV Controller which
controls the external strobe(s) output. (See page 9)
1. Place housing face down in your lap.
2. Check to see that there is an o’ring
on the housing back and that it is
clean and in its proper location.
3. Guide the back onto the housing.
The o’ring should touch the housing
o’ring
all the way around. There should be
an even gap all the way around
housing
between the housing and the
housing back.
4. Lift the lid snaps so they are
extended and place the lid snap
housing back
into the hook on the housing back.
5. To close the housing push
down on the lid snaps until
they snap into place . Lid
even gap
all 4 sides
snaps on opposite sides of
the housing should be closed
at the same time. Be sure they
o’ring
are down far enough to engage
housing
the lock.
Double check - Once the housing is
closed, check the o’ring seal. Check the gap between the
housing back and the housing, it should be even all the
way around.
Look through the clear plastic back at the o’ring. You should see
a darkened area where the o’ring is compressed against the
housing back. If you do not see an even black compression seal
all the way around the back, open the lid snaps, reseat the
housing back and close the lid snaps. Visually check the seal again.
5
6
Diffuser
If you do not have an external
material
flash it is recommended that the
flash diffuser be installed on the
camera each time the camera is
Lens Clamp
installed in the housing. The camera’s
flash can be turned ON and OFF by
the camera’s flash control. If the
camera’s flash is set to ON, the flash
will pop-up when the shutter release is
Spread to Install
depressed. If the camera’s flash is popped
up, the flash can still be turned OFF by setting the camera’s flash
control to OFF. (See camera instructions for flash control.)
Diffuser/Deflector
Due to the location of the camera’s built-in flash the housing’s port
blocks a portion of the flash. The diffuser will aid in distributing the
light but the bottom portion of the picture may receive less light
(shadow) when the camera lens is set at it’s widest angle, the
amount of shadow will depend on the camera to subject distance.
To eliminate the shadow, zoom the lens toward telephoto. The
amount of zooming required to eliminate the shadow will depend
on camera to subject distance. (You can test this above water)
Deflector
Lens Port
The Lens Port is factory sealed, do not remove.
Treat the glass in the lens port as a camera lens. After use, rinse
and gently dry the lens port to avoid water spotting. To clean
use a mild soap solution or lens cleaner.
Do not use alcohol or window cleaner on the Lens Port.
Checking Controls
Once the housing has been closed, push the controls back into
place. Make sure they line up with the camera’s controls.
Turn Camera On
Turn the camera on and operate each of the housing controls to
get a feel for using the camera in the housing. Take a few pictures
above water with the camera in the housing.
Due to the location of the camera’s built-in flash the housing’s port
blocks a portion of the flash. The diffuser will aid in distributing the
light but the bottom portion of the picture may receive less light
(shadow) when the camera lens is set at it’s widest angle, the
amount of shadow will depend on the camera to subject distance.
To eliminate the shadow, zoom the lens toward telephoto. The
amount of zooming required to eliminate the shadow will depend
on camera to subject distance. (You can test this above water)
7
housing back
Optional Accessories
Back O'ring #0132.59
O'rings last for several years if properly maintained.
(See maintenance) Always carry a spare.
Using a DS Substrobe & EV-Controller
To use a external DS Substrobe requires the EV-Controller.
The EV-Controller has a built-in slave sensor that is triggered by
the camera’s built-in flash which fires the external DS Substrobe.
The EV-Controller provides 10 manual power settings in 1/2 stop
increments for precision lighting.
Substrobe Packages available
Ikelite Ball Arm Systems are provided with these packages
#3944.47 SubStrobe DS51 with EV Controller
#3944.54 SubStrobe DS51 with EV Controller
#3944.77 SubStrobe DS125 with EV Controller
No color filters or wide-angle lenses are available for the
Sony DSC-H7 or the DSC-H9 housing.
8
Optional Accessories Continued
Substrobe DS51
Substrobe DS125
SA-100R
Arm
SA-100R
Arm
EV Controller
EV Controller
Substrobe DS51
The Substrobe DS51 covers
the equivalent of a 28mm
lens. It is the ideal choice
when using only the camera
lens or the camera lens with
a macro accessory lens.
Quick-Release Base, Handles and Tray
Substrobe DS125
9
The Substrobe DS125 covers
the equivalent of a 18mm
lens, 100 degrees. It is the
ideal choice when using
accessory wide angle lenses
greater than 28mm.
Maintenance
The Ikelite Digital Housing should be given the same care and
attention as your other photographic equipment. In addition to
normal maintenance we recommend that the housing be returned
to Ikelite periodically to be checked and pressure tested.
1. Do Not leave the camera and housing in direct sunlight for
prolonged periods. Heat may damage the camera.
2. Do Not ship the camera in the housing.
3. Before using the housing, always check the tightness of the
set screw in each control knob.
Check each control gland penetrating the housing to make sure
they are tight. There is a slight chance that either could vibrate
loose during travel.
4. Keep the back o’ring clean and lightly lubricated. To lubricate
remove the o’ring from the back. Put a small amount of lkelite
lubricant on your fingers. Draw the o’ring through your fingers
to apply a light coating of lubricant. Only apply enough
lubricant to make the o’ring feel slick. Do Not stretch the o’ring.
This light coating of lubricant will help to keep the o’ring from
drying out and will help to show a dark sealing line when the
housing back is properly sealed.
5. Keep the area where the o’ring fits and the sealing surface of
the housing clean.
6. Rinse the housing exterior thoroughly in fresh water after each
salt water use. Dry with a soft cloth. Dry lens port to eliminate
water spotting.
After several uses in salt water soak the housing in a mild soap
solution, rinse and dry before storage. When storing the housing,
remove the back o’ring, lightly lubricate and place in a plastic bag.
Place the plastic bag with o’ring inside the housing for safe keeping.
CAUTION
Never use spray lubricants as the propellant ingredient can
cause the plastic housing to crack.
11
Quick-Release Base
The Quick-Release Base is
plastic. A toggle lever located
underneath the base allows
the base to be easily removed
from the Tray. Turn the
housing upside down, pull
out on the toggle lever.
Rotate the lever 90° to
remove the base.
Handles and Tray
The housing handles are
rubber and the tray is
aluminum. Their weight
helps to offset the buoyancy
of the housing. The complete
assembly is slightly negative
underwater for better
control. The handles have a
push button release for easily
attaching and removing
strobe arms. The tray and
handles can be removed from
the housing. To remove the
tray, the base must be
removed to gain access to
the nuts holding the tray on
the housing. Remove the 2
nuts, washers and rubber
spacers. DO NOT remove
the bolts protruding through
the housing.
10
Control Maintenance
Quick Release Base
Slot
Flip Quick Release
Lever Up
Rotate Quick
Release Lever
Remove Quick
Release Lever
and Base
BASE QUICK RELEASE
Ikelite controls are designed to provide years of reliable service
with minimal maintenance.
1. Push button controls require no maintenance other than rinsing
in fresh water after saltwater use. If a push button control
becomes difficult to push or if it sticks when depressed, soak the
housing in luke warm fresh water. After a few minutes operate
the push button. If this does not correct the problem, return the
housing to Ikelite for maintenance.
2. Some of the controls have long shafts. These controls can be
lubricate shaft
housing
pull out to
expose shaft
pulled out, exposing the shaft (see drawing).
To lubricate the control, gently pull on the knob until the
stainless steel shaft is exposed. Lightly lubricate the shaft, then
move the shaft in and out several times. This will lubricate the
x’ring in the Ikelite control gland. This should be done before
using the housing after a prolonged storage period, or once a
week when the housing is in use.
12
3. Some of the controls have a short shaft and cannot be pulled
out exposing the shaft for lubrication. In the unlikely event one
of these controls sticks or becomes difficult to operate you can
remove the control from the housing and lubricate it, or return
the housing to Ikelite for maintenance. To remove the control,
loosen the set screw in the knob (allen wrench required);
remove the knob. If there is salt or dirt build-up on the exposed
control shaft, clean the shaft. Open the housing and gently slide
the control shaft out of the control gland. Clean and lightly
lubricate the shaft, including the end of the shaft. Slide the
shaft back into the control gland and gently slide it back and
forth a few times without fully removing the shaft from the
gland. Replace the knob, NOTE the flat area on the shaft, the
set screw in the knob should tighten down against the flat area
on the control so the knob does not turn on the shaft.
control
shaft
Flat
Tighten set screw down
against this area when
replacing the knob.
housing
gland
Loosen set screw
(allen wrench required)
Lubricate end of shaft
before reinserting into
gland
General Tips
1. Due to the power required to operate the camera, flash, and
LCD screen it is a good idea to start each dive with a fresh set
of batteries.
2. Some cameras reset their flash to AUTO when the camera is
turned on. If you prefer another setting be sure to select it.
3. As soon as you enter the water, take a moment and check the
housing to see that it is properly sealed.
4. Next, check to see if there are any bubbles on the face of the
lens port. If there are, take your finger and remove them. If
there are bubbles on the lens port they can produce soft focus
spots in your photographs.
Lubricants
1. Ikelite provides silicone lubricant with the housing. We
recommend that you use only Ikelite lubricant on Ikelite
products as some other brands may cause the o’ring to swell
and not seal properly.
2. Use only enough lubricant to lightly cover control shafts and
o’rings. Wipe off any excess lubricant with a clean cloth.
Lubricant is not a sealant, it is used to reduce friction.
Excessive lubricant can collect sand and dirt which may
interfere with proper sealing.
CAUTION
Never use spray lubricants as the propellant ingredient can
cause the plastic housing to crack.
13
Photo Tips
1. The number one rule in underwater photography is eliminate
as much water between camera and subject as possible. Get
as close as you can to the subject, then use the zoom. If you
are using flash, subjects beyond 6 feet (1.8m)will not have
much color.
2. The camera’s built-in flash is very close to the camera lens. The
flash will light up any suspended particles in the water and they
will be recorded in your picture. This effect is called backscatter.
To eliminate as much backscatter as possible, photograph close.
Photograph in clear water; do not stir up the sand or silty
bottom. If backscatter becomes a problem in the environment
you are photographing, an external flash will help eliminate
much of the backscatter.
3. Digital cameras have a slight lag time between when you press
the shutter release button and the camera actually takes the
picture. Hold the camera steady a second or two after pressing
the shutter release button.
4. Do not shoot down on subjects as they will quite often blend
into the background and be difficult to see in the photograph.
Shoot subjects straight on or shoot up at a slight angle using
the blue water as a contrasting background.
5. Underwater flash is used to restore the warmer colors filtered
out by the water as well as to illuminate the subject. When
photographing underwater, set the camera to use flash on
every shot. If the camera’s flash is set to AUTO and the sun is
behind your subject, the camera may see enough light that it
does not fire the flash. With the sun behind the subject the
subject is shaded (dark) and needs flash for a good exposure.
15
14
Ikelite Limited Warranty
All Ikelite products are warranted against any manufacturing
defects for a period of one (1) year from the date of purchase.
Defective products should be returned prepaid to Ikelite. Ikelite
will, at its discretion, repair or replace such products, and will
return to customer prepaid. All other claims, of any nature,
including but not limited to bulb failure are not covered. Except
as mentioned above, no other warranty expressed or implied,
applies to this Ikelite product.
Returning Products for Service
Ikelite is most interested in preforming any service to assure that
all products perform as intended. For repair or service, return the
product to the address below with your name, address, phone
number and a brief description of the problem. Evidence of
purchase date must be provided to obtain warranty service.
Ikelite Underwater Systems
50 W 33rd Street
Indianapolis, IN 4620 8 USA
317-923-4523
email: [email protected]
www.ikelite.com
Digital 6111.9-01-0 80 7