1
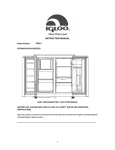
MODEL:FR320B PARTS LIST …………………………2 INSTALLATION…………………… 3 USING YOUR REFRIGERATOR…..4 PRECAUTIONS……………………..4 REVERSING THE DOOR…………..5 MAINTENANCE……………………6 TROUBLE SHOOTING…………… . 7 Igloo TM and the Igloo logo are trademarks of Igloo Products Corp. used by C.I. Ltd. under license WARNING: Keep all ventilation openings clear of obstruction. Do not use any mechanical devises or any other means to accelerate the defrosting process. Do not use electrical appliances inside the unit. WARNING: If the power cord is damaged ,it must be replaced by the manufacturer or its service agent or a similarly qualified person in order to avoid a hazard. DANGER: Risk of child entrapment. Before you throw away your old refrigerator or freezer: ●Take off the doors ●Leave the shelves in place so that children may not easily climb inside. 1 1.Parts List 1 2 10 3 4 5 9 8 7 6 Evaporator door 9 10 Temperature control unit Ice tray Drip tray Removable shelves Straight bar Bottle rack Coke rack Dairy rack Tin rack NOTE: This figure is only a sketch of the refrigerator, the actual product may differ. 2 2.Installation Ventilation For proper ventilation keep the back of the refrigerator 4 inches away from the wall. Give the refrigerator sides 8 inches, and the overhead at least 12 inches of clearance from obstruction. Power Supply The refrigerator can only operate using a single phase alternating current (see the rating label). If the voltage of your power supply varies, it is recommended to utilize an A.C. automatic voltage regulator. This refrigerator uses a 3-pronged plug with a grounding prong and therefore must be used with a corresponding 3-slot outlet to accommodate the grounding prong. Power Cord The cord should be neither lengthened nor folded into a coil during operation. The cord should be kept clear of any hot surfaces near the unit's compressor. It is not recommended that an extension cord be used with this unit. The appliance should be positioned in a fashion that leaves the plug easily accessible. Protection from Moisture Avoid placing the refrigerator in a place where heavy moisture is present to minimize the possibility of oxidation or rusting of the metal pieces. The refrigerator should never be directly sprayed with water. Protection from Heat The refrigerator should be kept away from any heat source or direct sunlight. Placement of the Unit The surface on which the refrigerator will be placed must be flat and solid. It should not be laid on any soft material such as foam, plastic, etc. The feet of the refrigerator can be adjusted to make a solid connection with the placement surface. Do not place the unit near any volatile combustibles such as gas, petrol, alcohol, lacquer, etc. The above-mentioned items cannot be stored in the refrigerator. Moving Whether during movement or in placement, the refrigerator can not be tilted more than 45° from the upright position nor can it be placed upside-down. 3 3.USING YOUR REFRIGERATOR Temperature Control 1.The first time you turn the unit on, set the temperature control to the “7” position. 2.The settings for the temperature control are “0,1,2,3,4,5,6,7”. After 20 minutes, adjust the temperature control setting to “4”. The setting of “4” should be sufficient for home or office use. 3.To stop the cooling cycle, turn the temperature control to “0”. 4 5 6 7 3 2 1 0 THERMOSTAT CONTROL DIAL NOTE: Turning the temperature control to the “0” position stops the cooling cycle, but does not shut off the power to the refrigerator. If the unit is unplugged, turned off, or if power to the unit is lost, you must wait 5 minutes before restarting the unit. If you attempt to restart before this time, the refrigerator may not start. Store this appliance in the coolest area of the room. This can help save energy. If the room's temperature is too high, the temperature in the refrigerator may not reach the target temperature. 4.Precautions Water getting into the refrigerator may form a layer of frost inside the unit. If the frost is more than 2mm thick, you should defrost the unit. Defrosting is done manually. When defrosting, set the knob of the temperature regulator to position “0” (where the compressor will stop cycling) and leave the door open until ice and frost dissolve thoroughly. To speed up defrosting, you may put a bowl of warm water (about 50°C) into the unit. After defrosting, be sure to re-set the temperature control knob to the original position. Do not use hot water or hair dryer while defrosting. Use of these items may cause deformation of the inner case of the unit. Do not scrape ice, frost, or food with sharp tools. This may damage the inner casing or the surface of the unit. If the power cord of this appliance is damaged, it must only be replaced by a professional or a repair shop suggested by the manufacturer. Never allow children to operate, play with, or crawl inside the appliance. 4 5.Reversing the Door This refrigerator has the capability of either opening the door from the left or right side. This unit is delivered to you with the door opening from the left side. Should you desire to reverse the direction, please follow these instructions. Refer to the following illustration for assistance. Note: All removed parts must be saved for reinstallation of the door. 1.Remove the upper hinge cap (1). 2.Using a pry-tool, remove the plug buttons (5). 3.Remove the two Phillips screws (2) that connect the upper hinge (3) on the right side of the cabinet top. 4.Carefully lift the door and place it on a padded surface to prevent scratching. 5.Remove the plug (9) and transfer it to the uncovered hole on the right side of the unit. Be sure to press the button firmly into the hole. 6.Remove the two bolts (7) that hold the lower hinge (4) on the right side of the unit. 7.Remove the screw-type leveling front leg (8) and transfer it to the right side as shown in the adjacent figure. 8.Set the door into it's new place making sure the pin enters the bushing at the lower frame section (hole). 9.Secure the upper hinge (3) previously removed in step 3 on the left side of the unit. Make sure the pin enters the bushing on the upper frame section (hole). 10.Loosely secure the lower left hinge (4) and do not tighten the bolts until the door is in the closed position and leveled. 11.Insert the plug buttons (5) on the uncovered holes (right side). 12.Replace the upper hinge cap (1). ① ⑤ ② ③ ① ② ③ ④ ⑤ ⑥ ⑦ ⑧ ⑨ ⑨ ④ ⑧ ⑥ ⑦ 5 Door Hinge Cap Door hinge Screws Upper Door Hinge Lower Door Hinge Plug Short Leg Door Hinge Bolts Leveling Front Leg Hinge Plug(Door Frame) 6.Maintenance The refrigerator should be cleaned and maintained at least once a month. When performing maintenance, make absolutely sure that the power plug is first disconnected from the power outlet. Wipe the inner and outer surface of the refrigerator and its accessories with a wet cloth. If they are too dirty, scrub them with a neutral detergent and then clean them with water and dry them with a clean cloth. A small amount of glass wax may be used to polish the refrigerator surface. For cleaning, don't use hot water, gasoline, alcohol, kerosene, cleanser, alkaline detergent, acid, chemical cloth, etc; so as not to damage the lacquer coat and plastics. Never spray the refrigerator directly with water. This may cause rusting or may weaken the insulation. Be sure to always keep the rubber seals of the door clean. If the plastic parts in the refrigerator stay contaminated by dirt or oil for long periods of time, the will age quickly and may crack. The drain pan gets dirty easily and if it is not cleaned regularly, it may produce odors. Be sure to clean this pan regularly. 6 7.Trouble shooting 1.If the refrigerator is not working: a. Check to see if there is a power failure. b. Check to be sure that the plug is connected to the power outlet. c. Check to be sure that a fuse has not blown. 2. If the refrigerator is cooling excessively: a. The temperature control dial may be set too high. b. If you place foods containing high amounts of moisture directly under the cool air outlets, they will freeze easily. This does not indicate a malfunction. 3.If the refrigerator is not cooling sufficiently: a. The food may be packed too tightly together which will block the flow of cool air. b. If hot foods are placed in the refrigerator, this will alter the temperature inside the unit. c. The door may not have been closed properly. d. The door gaskets may be damaged. e. The refrigerator may not be ventilated well enough. f. There may not be sufficient clearance between the refrigerator and other surfaces. Ensure there is proper clearance on both the sides and top of the unit.The temperature control dial may not be set properly. 4.If defrosting water overflows inside the refrigerator and/or onto the floor: a. Check to ensure that the drain pipe and the drain hose are not obstructed. b. Check to ensure that the drain pan is housed properly. 5.If the front of the refrigerator cabinet heats up: a. In order to safeguard against condensation, these is an anti-condensation pipe that heats the front of the cabinet while running. A warm cabinet front does not indicate a malfunction. 6.If the side panels of the refrigerator cabinet heat up: a. The side panels of the cabinet may heat up when the door is opened or closed frequently, when starting the unit, and when the unit operates in high ambient temperatures. This is does not indicate a malfunction. 7.If condensation forms on the outside of the refrigerator: a. Condensation may form on the outside of the unit when there is high ambient humidity. This does not indicate a malfunction and the condensation can be wiped dry with a dry cloth. 8.If you hear a sound like water flowing: a. A sound like water flowing indicates that the refrigerant is flowing. This does not indicate a malfunction. 7