1
See page 2
ENGLISH
Español
H U N T E R H E R I TA G E
Vea la página 9
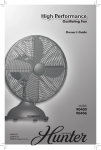
12-INCH HIGH-PERFORMANCE
OSCILLATING TABLE FANS
HUNTER RETRO
Owner’s Guide
f o r H ERI TA G E A ND RE T R O M O DE L FA NS
READ AND SAVE THESE INSTRUCTIONS
44800-01 11/29/2007
Important Safety Information
Read & Save These Instructions
!
Warning
To reduce the risk of fire or electrical
shock, DO NOT use this fan with
any solid-state speed control device.
CAution
When using electrical appliances,
basic precautions should always be
taken to reduce the risk of fire, electric shock and personal injury:
9. Close supervision is necessary
when any appliance is used by
or near children.
10. NEVER insert fingers, pencils
or any other objects through the
grill when the fan is running.
1.Read all instructions before using this fan.
11. DO NOT operate any appliance
with a damaged cord or plug,
after the appliance malfunctions
or has been dropped or damaged in any manner.
2. Improper installation may result
in the risk of fire, electric shock
or personal injury.
12.To disconnect, grip plug and pull
from wall outlet. NEVER yank
on cord.
3. To prevent the risk of fire and
electric shock, DO NOT use the
unit near windows. Rain and
moisture may create an electrical hazard.
13.ALWAYS use on a dry surface.
4.The power plug must be removed from the power socket
when not in use, before cleaning, servicing, maintenance and
before moving to another location.
5. DO NOT put fan in a damp
place or where humidity is highsuch
as a bathroom.
6.The fan should be placed on a
flat, stable surface or tabletop
to avoid overturning.
7. Use fan only for intended use,
as described in this instruction
manual.
8.To protect against electrical
shock, DO NOT immerse unit,
2
plug or cord in water or spray
with liquids.
14.This product is intended for
household use only and not for
commercial or industrial use.
15. DO NOT operate fan in the
presence of explosive and/or
flammable fumes.
16. DO NOT place fan or any parts
near an open flame, cooking or
any other heating appliances.
17. DO NOT use near curtains,
plants, window treatments, etc.
18.This appliance has a grounded
three-prong plug and is suitable for grounded receptacle
use only. An adapter is available for connecting three-blade
grounding-type plugs to two-slot
receptacles. The adapter must
be properly grounded. DO NOT
attempt to defeat the purpose
of this safely feature.
44800-01 11/29/2007
Welcome
Unpacking
Thank you for choosing Hunter’s
12-Inch High-Performance Table
Fan. This manual gives you complete instructions for using your fan.
Here are some the features you will
enjoy with your fan:
As you unpack the fan, save the
carton and packing materials in
case you want to move or ship the
unit in the future.
• An attractive design that enhances any decor
• A powerful Hunter motor for maximum air flow
• Three speeds to adjust your
comfort level
Before installing your fan, record
the following information for your
records and for warranty assistance.
Carefully remove all items from the
box.
NOTE: It is best to have someone
hold the box while you lift the fan
and the protective packaging out of
the carton.
Make sure all shipping materials
are removed from fan before operating.
Model Name_ _________________
Date Code____________________
Date Purchased________________
Where Purchased______________
Please attach your receipt
or a copy of your receipt
to this manual for future
reference.
44800-01 11/29/2007
3
Grounding Instructions
This appliance is for household use
only and may be plugged into any
120-volt AC electrical outlet (ordinary household current). DO NOT
use any other type of outlet.
!
Warning
This unit is suitable for grounded
receptacle use only.
The cord has a grounded plug as
shown in Figure 1. An adapter, as
shown in Figure 2, is available for
connecting three-blade groundingtype plugs to two-slot receptacles.
The green grounding lug extending
from the adapter must be connected to a permanent ground such
as a property grounded outlet box.
The adapter should not be used if
a three-slot grounded receptacle is
available.
LINE CORD SAFETY TIPS
1.NEVER pull or yank on the cord
or the appliance.
2.To insert plug, grasp it firmly
and guide it into the outlet.
3.To disconnect the appliance,
grasp the plug and remove it
from the outlet.
4.Before each use, inspect the
line cord for cuts and/or abrasion marks. If any are found,
the appliance should be
serviced and the line cord replaced. Please return it to our
Service Department or to an
authorized service representative.
5.NEVER wrap the cord tightly
around the appliance, as this
could place undue stress on the
cord where it enters the appliance and could cause it to fray
and break.
6.DO NOT operate appliance if
the line cord shows any damage, if the appliance works
intermittently or stops working
entirely.
Grounded
Plug
Adapter
Metal
Screw
Grounding Pin
Grounded Outlet
Box Cover
Figure 1
4
Grounding
Means
Grounded Outlet
Cover Box
Figure 2
44800-01 11/29/2007
Operation
This appliance is for household use
only.
1.Place the fan on a dry, safe, flat
surface where it cannot fall or
be pulled by the cord.
2.Plug the fan into a grounded
120-volt AC electrical outlet (ordinary household current).
DO NOT use any other type
of outlet. Make sure that the
rated voltage of the fan is the
same as the power source before plugging it into the power
source.
Handle
3.Turn the fan “ON” or “OFF”
by sliding the Power/Speed
Control to the up or down. The
power should always be OFF
before unplugging the fan.
4.To select the speed, move the
Power/Speed Control up from
OFF (O) to the desired speed
setting: Low, Medium. or High.
5.To make the fan oscillate, push
the oscillation pin down. To stop
oscillating, pull the oscillation
pin up.
Handle
Oscillation
Pin
Oscillation
Pin
Power / Speed
Control Switch
HERITAGE mODEL
Power / Speed
Control Switch
rETRO MODEL
Figure 3
44800-01 11/29/2007
5
Maintenance
This fan is permanently lubricated
and will not require additional lubrication (oil) for the life of the fan.
This fan requires little maintenance
and contains no user serviceable
parts. DO NOT try to fix it yourself.
Contact qualified service personnel
if servicing is needed.
2. Disassemble Grilles by carefully
removing the Grille Ring Screw
on the bottom of the grille and
removing the Grille Ring. See
Figure 4.
Grille
Ring
TO CLEAN:
1. Before cleaning, turn fan off and
unplug from electrical outlet.
Wipe off excess dust with a lintfree cloth.
2.To ensure adequate air circulation
to the motor, keep vents located
at the rear of the motor housing free from dust accumulation.
A vacuum cleaner hose can be
used to clean these vents.
Grille Ring
Screw
Figure 4
3. DO NOT immerse the fan in water or any other liquid.
3. Grilles and blades may be
cleaned with soft cloth dampened
with mild soap and water.
CLEANING GRILLe AND BLADE:
4. Use a soft, slightly damp cloth to
wipe the remaining fan parts.
1.Turn the fan off and unplug from
the electrical outlet.
5. DO NOT allow water or any other
liquid to get into the motor housing or base.
6.After the Blades and Grilles have
dried completely, reassemble the
fan. Reposition the Grille Ring so
that the Grille Ring Screw is at
the bottom of the Grilles. Carefully align the Grille Ring Screw into
its holes and tighten it so that the
Grille Ring is securely in place.
DO NOT OVERLY TIGHTEN.
7. DO NOT plug fan into an electrical outlet until it has been fully
reassembled.
6
44800-01 11/29/2007
Storage
Troubleshooting
1.Keep the original packaging for
the purpose of storing the fan.
Problem
2.ALWAYS store the fan in a dry
place.
3.NEVER store the fan while it is
still plugged in.
4.NEVER wrap the cord tightly
around the fan.
5.DO NOT put any stress on the
cord where it enters the fan, as
it could cause the cord to break.
• Can not turn on fan.
Solution
• Make certain the fan is plugged
in and that the power outlet has
power.
Problem
• Fan will not oscillate.
Solution
• Push down on the Oscillation
Pin.
If you have tried these troubleshooting solutions and still have
trouble, call 1-888-830-1326 (For
CAN: 1-866-268-1936) or visit our
Web site at
http://www.hunterfan.com.
HUNTER FAN COMPANY
2500 FRISCO AVENUE
MEMPHIS, TN 38114
44800-01 11/29/2007
7
44800-01 11/29/2007
8
Español
VENTILADOR OSCILANTE DE GRAN
RENDIMIENTO DE 12”
H U N T E R H E R I TA G E
HUNTER RETRO
MANUAL DEL PROPIETARIO
PARA LOS MODELOS H erita g e y retro
LEA Y GUARDE ESTAS INSTRUCCIONES
9
44800-02 11/29/2007
INFORMACIÓN IMPORTANTE DE SEGURIDAD
Lea y guarde estas instrucciones
!
ADVERTENCIA
Para reducir el riesgo de fuego o choque
eléctrico, NO use este ventilador con
ningún tipo de dispositivo de control de
velocidad de estado sólido.
PRECAUCION
Cuando se usan aparatos eléctricos, se
deben tomar siempre ciertas precauciones para reducir el riesgo de fuego, choque eléctrico y lesiones personales.
1.Lea todas las instrucciones antes de
usar este ventilador.
2. Una instalación incorrecta podrá resultar en un riesgo de fuego, choque
eléctrico o lesiones personales.
3.Para evitar el riesgo de fuego y
choque eléctrico, NO use la unidad
cerca de ventanas. La lluvia y la
humedad pueden crear un peligro
eléctrico.
4. El enchufe eléctrico se debe retirar
del tomacorriente de la pared cuando no se use el ventilador, antes de
limpiarlo, darle servicio o mantenimiento y antes de moverlo a otro
lugar.
9. Una supervisión cercana es necesaria cuando cualquier aparato es
usado por niños o cerca de ellos.
10. NUNCA inserte sus dedos, lápices o
cualquier otro objeto a través de la
rejilla cuando el ventilador está en
operación.
11. NO opere un aparato eléctrico que
tenga un cordón o enchufe eléctrico
dañado, después de que haya tenido algún problema de operación,
se haya caído o se haya dañado de
cualquier manera.
12.Para desconectar el ventilador, agarre el enchufe y sáquelo del tomacorriente de la pared. NUNCA tire del
cordón.
13.SIEMPRE use el ventilador sobre un
superficie seca.
14. Este producto ha sido diseñado para
uso residencial solamente y no para
uso comercial ni industrial.
15. NO opere el ventilador en la presencia de explosivos ni de vapores
inflamables.
16. NO coloque el ventilador ni ninguna
pieza cerca de una llama abierta,
cocina o cualquier otro aparato que
produzca calor.
5. NO coloque el ventilador en un lugar
mojado ni donde la humedad sea
alta, como en un baño.
17. NO use el ventilador cerca de cortinas, plantas, tratamientos para
ventanas, etc.
6. El ventilador se debe colocar sobre
una superficie o mesa plana y estable, para evitar que se caiga o se
vuelque.
18. Este aparato tiene un enchufe de
tres clavijas para conexión a tierra
y sólo se puede usar en un tomacorriente conectado a tierra. Existen
adaptadores disponibles para conectar un enchufe de tres clavijas
a un tomacorriente de dos ranuras.
Estos adaptadores deben estar
conectados a tierra correctamente.
NO trate de usar un adaptador que
elimine la seguridad de una buena
conexión a tierra.
7. Use el ventilador solamente para
el fin con el que ha sido diseñado,
como se describe en este manual
de instrucciones.
8.Para protección contra un choque
eléctrico, NO sumerja esta unidad,
el enchufe o el cordón eléctrico en
agua ni lo rocíe con líquidos.
10
44800-02 11/29/2007
BIENVENIDO
Gracias por elegir el Ventilador de
mesa de alto rendimiento de 12” de
Hunter. Este manual contiene instrucciones completas para usar su
ventilador. Estas son algunas de las
características que disfrutará con su
ventilador:
• Diseño atractivo que realiza la
decoración de cualquier lugar.
• Poderoso motor Hunter para un
máximo flujo de aire.
• Tres velocidades para ajustar el
flujo de aire a un nivel confortable
para usted.
Antes de instalar su ventilador, anote
la información siguiente para sus
récords y para asistencia con la
garantía.
DESEMPAQUE DEL
_____________________________
Cuando desempaque el ventilador,
guarde la caja y los materiales protectores de empaque, en caso de
que quiera mover o embarcar la
unidad en el futuro.
Saque todas las partes de la caja con
mucho cuidado.
NOTA: Es mejor que alguien sostenga la caja mientras usted levanta el
ventilador y los materiales protectores fuera de la caja.
Asegúrese de que todos los materiales protectores hayan sido retirados
del ventilador antes de ponerlo en
funcionamiento.
Nombre del modelo______________
Código de fecha_ _______________
Fecha de compra________________
Lugar donde lo compró___________
Por favor, fije su recibo
o una copia de su recibo
a este manual para
referencia futura.
44800-02 11/29/2007
11
Este aparato es para uso casero
solamente y se puede enchufar en
cualquier tomacorriente de 120 voltios, corriente alterna (c.a.) (voltaje
residencial normal). NO use ningún
otro tipo de tomacorriente.
Esta unidad se puede enchufar
solamente en un tomacorriente
del tipo conectado a tierra.
El cordón eléctrico tiene un enchufe
conectado a tierra como se muestra
en la Figura 1. Se puede obtener un
adaptador, como se muestra en la
Figura 2, para conectar los enchufes
de tres clavijas en tomacorrientes de
dos ranuras. El terminal verde que
se extiende del adaptador se debe
conectar a una tierra permanente, tal
como una caja eléctrica conectada
a tierra correctamente. El adaptador
no se debe usar si existe un tomacorriente con tres ranuras disponible.
CONSEJOS DE SEGURIDAD PARA
EL CORDÓN ELÉCTRICO
1. NUNCA tire del cordón del aparato eléctrico.
12
44800-02 11/29/2007
OPERACIÓN
Este ventilador es para uso residencial solamente.
1. Coloque el ventilador sobre una
superficie seca, segura y plana,
de donde no se pueda caer ni ser
tirado por el cordón.
2. Enchufe el ventilador en un tomacorriente eléctrico conectado
a tierra de 120 voltios c.a. (voltaje residencial normal). NO use
ningún otro tipo de tomacorriente.
Asegúrese de que el voltaje de
operación del ventilador sea el
mismo que el del tomacorriente
antes de enchufar el cordón eléctrico.
Asa
3. Encienda (“ON”) o apague
(“OFF”) el ventilador, deslizando
el interruptor de control de encendido y velocidad hacia la derecha
o la izquierda. El ventilador debe
estar siempre apagado antes de
desenchufarlo del tomacorriente.
4.Para seleccionar la velocidad,
mueva el control de encendido
y velocidad desde la posición
“OFF” hasta la velocidad deseada: O (apagado), I (baja), II (media) y III (alta).
5.Para que el ventilador oscile,
oprima la perilla de oscilación
hacia abajo. Para detener la
oscilación, tire de la perilla hacia
arriba. La perilla de oscilación
está ubicada en la parte superior
de la caja del motor, cerca del
asa.
Asa
Perilla de
oscilaciór
Perilla de
oscilaciór
Interruptor de
control de
encedido de
velocidad
Interruptor de
control de
encedido de
velocidad
mODELo RETRO
mODELo HERITAGE
FIGURA 3
44800-02 11/29/2007
13
Mantenimiento
Este ventilador ha sido lubricado
permanentemente y no requiere lubricación (aceite) durante el resto de su
vida útil.
Este ventilador requiere muy poco
mantenimiento y no contiene piezas
que puedan ser reparadas por el
usuario. NO trate de arreglar usted
mismo este ventilador. Llame a una
persona de servicio cualificada si el
ventilador necesita servicio.
2. Desmonte las rejillas retirando cuidadosamente el tornillo del anillo
de rejilla ubicado en la parte inferior de la misma y retire el anillo.
Vea la Figura 4.
Anillo del
rejilla
PARA LIMPIARLO:
1.Antes de limpiarlo, apague el
ventilador y desconéctelo del tomacorriente. Limpie el exceso de
polvo con un paño que no tenga
hilachas.
2.Para asegurar una circulación de
aire adecuada en el motor, mantenga las aberturas de ventilación
en la parte posterior de la caja del
motor libres de cualquier acumulación de polvo. Se puede usar la
manguera de una aspiradora de
polvo para limpiar estas aberturas.
Tornillo del anillo
de rejilla
FigurA 4
3.Las rejillas y las aspas pueden
limpiarse usando un paño suave
humedecido con una solución
jabonosa suave y agua.
3. NO sumerja el ventilador en agua
ni en ningún otro líquido.
4. Use un paño suave y húmedo
para limpiar las otras partes del
ventilador.
FORMA DE LIMPIAR LA REJILLA
Y LAS PALETAS:
5. NO permita que el agua ni ningún
otro líquido entre en la caja del
motor ni en la base.
1.Apague el ventilador y desenchúfelo del tomacorriente.
6. Después de que las aspas y las
rejillas se hayan secado completamente, ensamble nuevamente
el ventilador. Reubique el anillo de
las rejillas de manera que el tornillo del mismo quede en la parte
inferior de las rejillas. Alinee cuidadosamente el tornillo del anillo
de las rejillas en sus agujeros de
manera que el anillo de las rejillas
quede firmemente en su lugar. NO
APRIETE DEMASIADO.
7. NO enchufe el ventilador en un
tomacorriente hasta que haya sido
armado completamente.
14
44800-02 11/29/2007
ALMACENAMIENTO
LOCALIZACIÓN DE FALLAS
1. No bote la caja original y los
materiales de empaque, porque
los puede usar para guardar el
ventilador.
PROBLEMA
2.SIEMPRE guarde el ventilador en
un lugar seco.
3. NUNCA guarde el ventilador
mientras está enchufado todavía.
• El ventilador no enciende.
SOLUCIÓN
• Asegúrese de que el ventilador
esté conectado y que el tomacorriente funcione
4. NUNCA enrolle el cordón apretadamente alrededor del ventilador.
PROBLEMA
5. NO aplique ninguna tensión
sobre el cordón en el punto donde entra en el ventilador, ya que
pudiera causar su ruptura.
SOLUCIÓN
• El ventilador no oscila.
• Oprima la perilla de la parte superior de la caja del motor para
activar la oscilación.
Si ha tratado todas estas soluciones
de fallas y todavía tiene un problema,
llame al teléfono 1-888-830-1326
(Para CAN: 1-866-268-1936) o visite
nuestro sitio en la Internet, usando la
dirección http://www.hunterfan.com.
HUNTER FAN COMPANY
2500 FRISCO AVENUE
MEMPHIS, TN 38114
44800-02 11/29/2007
15