1
Personal Video Recorder
Personlig digital videospelare
CONAX embedded
Inbyggd CONAX
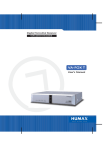
CXC-2000PVR
User's Manual
Användarhandbok
**
**
**
**
**
Notice
**
Copyright (Copyright © 2001 HUMAX Corporation)
Not to be copied, used or translated in part or whole without HUMAX's prior consent in writing except
approval of ownership of copyright and copyright law.
**
Warranty
The information in this document is subject to change without notice. HUMAX does not have any
responsibility for direct, indirect, accidental, necessary and other damage due to your offer or use of
the information contained in this manual.
**
Trademarks
VIACCESS™ is a trademark of France Telecom.
CryptoWorks (TM) is a trademark of Philips Electronics N.V.
Irdeto is a trademark of Mindport BV.
Nagravision is a registered trademark of Kudelski S.A.
Conax is a trademark of Telenor Conax AS.
'Dolby' and the double-D symbol are trademarks of Dolby Laboratories.
Manufactured under license from Dolby Laboratories.
**
**
Thank you for purchasing a HUMAX Personal Video Recorder. Please read this user manual
carefully to be able to safely install, use and maintain the product at maximum performance. Keep
this user manual next to your product for future reference.
**
**
**
**
**
**
**
**
**
GB 1
**
**
**
**
**
Notice
**
Read this manual carefully and make sure you understand the provided instructions. For your safety,
check what the result each action will be.
Warnings, Cautions and Notes
Throughout the whole manual, pay special attention to the following marks that indicate hazardous
situations.
**
•
Warning
Indicates a hazardous situation which, if not avoided, could result in (serious) injury.
•
Caution
Indicates a situation which, if not avoided, could damage the equipment or other apparatus.
•
Note
Indicates additional information to the user to make the user aware of possible problems and
information of any importance to help the user to understand, to use and to maintain the
installation.
**
**
To reduce the risk of electric shock, do not remove cover (or back). No
user serviceable parts inside. Refer servicing to qualified service
personnel.
This symbol indicates dangerous voltage inside the product that
presents a risk of electric shock or personal injury.
**
**
**
This symbol indicates important instructions accompanying the product.
**
**
**
**
**
**
**
**
**
**
GB 2
**
**
**
**
**
Safety and Warning
**
This Personal Video Recorder has been manufactured to comply with international safety standards.
Please read the following safety precautions carefully.
Safety Instructions and Precautions
1. MAINS SUPPLY
**
90 - 250V AC 50/60Hz
Operate your product only from the type of power source indicated on the marking label. If
you are not sure of the type of power supply to your home, consult your local power
company. Disconnect the product from the mains before you start any maintenance or
installation procedures
**
2. OVERLOADING
**
Do not overload a wall outlet, extension cord or adapter as this may result in electric fire or
shock.
**
3. LIQUIDS
**
The product should not be exposed to any liquids such as dripping or splashing. In addition,
no objects filled with liquids, such as vase, should be placed on the apparatus.
**
4. CLEANING
**
Disconnect the product from the wall outlet before cleaning.
Use a light damp cloth (no solvents) to dust the product.
**
**
5. VENTILATION
**
The slots on top of the product must be left uncovered to allow proper airflow to the unit. Do
not stand the product on soft furnishings or carpets. Do not stack electronic equipment on top
of the product.
**
**
6. ATTACHMENTS
**
Do not use any unsupported attachments as these may be hazardous or cause damage the
product.
**
7. CONNECTION TO THE CABLE TV SIGNAL AND TV
**
Connect all components before plugging any power cords into the wall outlet. Always turn off
the product, TV and other components before you connect or disconnect any cables.
8. LOCATION
**
Place the product indoors to avoid exposing it to lightning, rain or sun. Do not place it near a
radiator or heat register.
Make sure it has more than 10 cm clearance from any appliances susceptible to
electromagnetic influences, such as a TV or a VCR.
Do not block these openings with any object, and do not place the product on a bed, sofa,
rug, or other similar surface.
If you place the product on a rack or bookcase, ensure that there is adequate ventilation and
that you have followed the manufacturer's instructions for mounting.
Do not place the product on an unstable cart, stand, tripod, bracket or table from where it can
fall. A falling product can cause serious injury to a child or adult, and serious damage to the
appliance
**
**
**
**
**
**
**
**
**
GB 3
**
**
**
**
**
Safety and Warning
**
9. LIGHTNING, STORM, or NOT IN USE
**
Unplug the product from the wall outlet and disconnect the cable during a thunderstorm or
when left unattended and unused for long periods of time. This will prevent damage to the
unit due to lightning and power-surges.
**
10. EXTRANEOUS OBJECTS
**
Do not insert anything through the openings in the unit, where they can touch dangerous
voltage points or damage parts
**
11. REPLACEMENT of PARTS
**
When replacement parts are required, be sure the service technician uses replacement parts
specified by the manufacturer, or those that have the same characteristics as the original
part.
Unauthorized substitution may result in additional damage to the unit.
**
**
Warning
**
1. Follow these directions in order not to damage the power cord or plug.
Do not modify or process the power cord or plug arbitrarily.
Do not bend or twist the power cord too much.
Make sure to disconnect the power cord with the plug held.
Keep heating appliances as far as possible from the power cord in order to prevent the cover
vinyl from melting.
2. Follow these directions. Failure to follow one of them may cause electrical shock.
Do not open the main body.
Do not insert metals or inflammable objects inside the product.
Do not touch the power plug with wet hands.
Disconnect the power cord in case of lightning.
**
3. Do not use the product when it is out of order. If you continue to use the product when
defective, a serious damage can be caused toit. Make sure to contact your local product
distributor if the product is out of order.
4. Please do not insert metal or alien substance into the slots for the modules and smart cards.
In doing so can cause damage to the product and reduce its life span.
5. Hard Disk Drive
Do not move the product or turn the power off suddenly while the hard disk drive is running.
The company shall not be liable for any corruption of data on the hard disk drive caused by
the carelessness or misuse of users.
Do not separate the hard disk drive from the main body.
**
**
**
**
**
**
**
**
GB 4
**
**
**
**
**
Contents
**
1. Before Using the Recorder
GB8
**
1.1 Package Contents
GB8
1.2 Front Panel
GB9
1.3 Rear Panel
GB10
1.4 Conditional Access
GB11
1.5 Remote Control Unit
GB12
2. Setup
GB14
**
2.1 Connecting the Cable
GB14
2.2 Powering On
GB17
GB18
3. Installation Wizard
**
**
3.1 Language
GB18
3.2 Area Setting
GB18
3.3 Channel Search
GB19
3.4 Time Setting
GB20
3.5 Result
GB20
4. Basic Operation
GB21
**
**
4.1 Switching Channel
GB21
4.2 Volume Control
GB21
4.3 Teletext
GB21
4.4 Changing the Subtitle Language
GB23
4.5 Changing an Audio Language
GB23
4.6 Programme Information (I- plate)
GB24
4.7 Option List
GB26
GB28
5. Time Shifted Recording
**
5.1 Time Bar
GB28
5.2 Pause
GB28
5.3 Rewind to Previous Scene
GB29
5.4 Fast Forward to the Next Scene
GB29
5.5 Recording
GB29
5.6 Additional Time Shift Operations Using Time Bar
GB30
**
**
**
**
**
**
**
**
GB 5
**
**
**
**
**
Contents
**
6. Recording and Playback
GB31
**
6.1 Instant Recording
GB31
6.2 Recording Reservation
GB31
6.3 Programme Playback
GB33
6.4 Editing Recorded Programmes
GB33
6.5 Checking Hard Disk Drive
GB35
GB36
7. Channel List
**
7.1 Displaying and Switching Channel List
GB36
7.2 Changing Channel List Group
GB37
7.3 Edit Channels
GB38
7.4 Edit Favourite Channels
GB40
7.5 Channel Change Mode
GB43
8. Programme Guide
GB44
**
**
8.1 Viewing Programme Guide Information
GB44
8.2 Finding a Programme
GB46
8.3 Viewing Reserved Programme
GB47
GB49
9. Setting Preferences
**
**
**
**
**
9.1 Parental Control
GB49
9.2 Language Setting
GB51
9.3 Time Setting
GB53
9.4 A/V Control
GB55
9.5 UHF Tuning
GB57
9.6 Miscellaneous Settings
GB58
**
**
**
**
**
GB 6
**
**
**
**
**
**
**
10. Installation
GB59
**
10.1 Channel Search
GB59
10.2 Linear Search
GB62
10.3 Default Setting
GB64
11. Software Update
GB65
**
11.1 OTA (Over the Air)
GB65
12. System Information
GB68
**
12.1 Status
GB68
12.2 Signal Detection
GB68
12.3 Conditional Access (for Conax embedded)
GB69
13. Games
GB70
14. Menu Map
GB71
15. Troubleshooting
GB72
**
15.1 Troubleshooting
GB72
15.2 Error Message
**
GB73
16. Specification
**
GB74
17. Glossary
GB76
18. Service and Support
GB77
**
**
**
**
**
**
**
**
GB 7
**
**
**
**
**
1. Before Using the Recorder
**
This chapter provides detailed instructions on the product and its accessories.
1.1 Package Contents
Please check all package contents before using your product.
**
**
Remote Control Unit
**
Batteries
**
User's Manual
**
**
**
SCART Cable
**
RF Cable
**
**
Note: Since faults may occur if the remote controller is being left without a battery for a long time,
always keep the battery inserted in the remote controller.
**
Warning:
• To install a hard disk drive, contact your product provider.
**
**
**
•
The company shall not be liable for problems caused by installing a hard disk drive by user.
•
This product provides best performance with Seagate ST380012ACE(80G) or Maxtor
4R080L0(80G) Hard Disk Drive.
•
This product provides only 80GB of hard disk drive. The company shall not be liable for
problems caused by the installation of hard discs bigger than 80GB.
**
**
**
**
**
GB 8
**
**
**
**
**
**
**
1.2 Front Panel
**
**
1. STANDBY LED
Red light is displayed when the product is in the standby mode.
**
**
**
**
2. RECORD LED
Green light is displayed when the product is in recording.
**
**
3. RADIO LED
Yellow light is displayed when the recorder is in radio mode.
**
**
4. STANDBY Button
Switches between operation and standby modes.
**
**
5. TV/RADIO Button
Switches between TV and Radio.
**
**
6. CH - / CH +
Moves the TV/Radio channel up/down.
**
**
7. SMART CARD SLOT
Slot for a smart card.
**
**
Note: See 1.4 Conditional Access when you insert the smartcard.
**
**
**
**
**
**
**
**
GB 9
**
**
**
**
**
1. Before Using the Recorder
**
1.3 Rear Panel
**
**
1. CABLE IN
Connects a cable to a CABLE input jack on the Recorder.
**
**
2. TV/VCR
Connects a RF signal from your recorder to RF(ANT) input jack on your TV or VCR.
**
**
3. TV SCART
Connects a TV SCART cable.
**
**
**
**
4. VCR SCART
Connects a VCR SCART cable.
**
**
5. S/PDIF
Outputs the digital audio signals.
**
**
6. VIDEO
Connects to your TV or VCR and output Video signals.
**
**
7. AUDIO L/R
Connects to your TV or VCR and output Audio signals.
**
**
8. RS-232C
Connects to your PC to upgrade product's software programme.
**
**
9. ON/OFF
Power on/off.
**
**
**
**
**
**
**
**
**
**
GB 10
**
**
**
**
**
**
**
1.4 Conditional Access
Although some TV and Radio channels are free to air, most TV and Radio/Music channels are
available on a subscription basis and can only be enjoyed via Conditional Access component. The
Conditional Access component is removable Smartcard.
**
Inserting Smartcard
**
A Smartcard looks similar to a credit card and entitles you to view and listen to all the channels you
choose to subscribe to. The Smartcard slot on the product can be used for Conax Smartcard only.
**
1. Open the right-hand flap on the front panel of the product.
2. Hold the Smartcard horizontally with the electronic chip (generally small square, gold in
colour) facing upwards.
3. Insert the Smartcard into the top slot until the card is completely in.
**
**
**
**
**
**
**
**
**
**
**
GB 11
**
**
**
**
**
1. Before Using the Recorder
**
1.5 Remote Control Unit
**
**
**
**
**
**
**
**
**
**
GB 12
**
**
**
**
**
**
**
1. SOURCE
Selects the input source between TV
and recorder.
11. PLAYBACK CONTROL BUTTONS
Includes fast rewind, play, fast forward,
record, stop, pause buttons.
**
**
**
**
2. TV/RADIO
Switches between TV and Radio modes.
12. STANDBY
Switches between Operation and
Standby modes.
**
**
**
3. NUMERICAL (0~9) BUTTONS
Enters a TV/Radio channel number or
menu option number.
**
**
13. GUIDE
Displays the Programme Guide.
**
**
**
4. LIST
Displays the channel list.
14. EXIT
Exits the main menu or Guide screen.
**
**
**
**
5. BACK
Returns to the previous menu and
screen.
15. OK
Selects a menu, or confirms the selected
operation. And displays the channel list
during watching a programme.
**
**
**
6. ARROW BUTTONS
Changes the channel or move the cursor
to the up, down, left or right menu
option.
**
**
16. G (Game)
Displays the Game.
**
**
17. SUBTITLE
Changes the subtitle language.
**
**
**
7. OPT+ (OPTION)
Displays the channel attributes during
watching a programme.
**
**
**
18. V-/V+
Adjusts the audio volume.
**
**
8. AUDIO
Displays the Audio list.
**
**
19. i (INFORMATION)
Displays the information about the
channel and programme.
**
**
9. CH-/CH+ and PAGE-/PAGE+
Changes the Channel or Page.
**
**
20. MUTE
Pauses the audio temporarily. That is,
volumes on/off temporarily.
**
**
10. MENU
Displays the main menu.
**
**
**
**
**
**
**
**
**
**
**
GB 13
**
**
**
**
**
2. Setup
**
This chapter describes how to set up the Recorder. Select the most appropriate procedure
depending on your requirements.
Note: If you encounter any problem when setting up the Recorder, please contact your local
product distributor.
2.1 Connecting the Cable
1. Connecting TV
This is the most simple setup mode.
**
**
**
**
**
**
**
•
Connect your CATV line to the CABLE IN socket on the Recorder for receiving cable
services.
•
TV Scart are connected as in the figure above.
**
**
**
**
**
GB 14
**
**
**
**
**
**
**
2. Connecting TV/VCR with 2 SCARTs
This is the optimal way to connect the Recorder.
**
**
**
**
**
**
**
**
**
**
**
GB 15
**
**
**
**
**
2. Setup
**
3. Connecting Hi-Fi system
If you wish to connect S/PDIF to the optical S/PDIF terminal and Dolby digital decoder to listen digital
audio, connect as following.
**
**
**
**
**
**
**
**
**
**
**
GB 16
**
**
**
**
**
**
**
2.2 Powering On
1. Connect the power cord of the recorder to a wall outlet.
2. Turn on the power switch, located at the left on the back of the recorder.
Make sure that the Standby LED indicator is turned on Red.
**
**
3. Power on by pressing the STANDBY
**
button at Remote Controller.
**
**
**
**
**
**
**
**
**
**
GB 17
**
**
**
**
**
3. Installation Wizard
**
When powering on your product for the first time after purchasing, the Installation Wizard is
automatically started.
You can easily set-up using simple organisation and options, and watch the broadcasting after
completing the set-up procedure. You can select items using the NUMERICAL (0-9) button.
button or select Back and press the OK
Note: If you press the BACK
running the Installation Wizard, you can return to the previous screen.
button while
3.1 Language
Select the appropriate language from the list using the
button and press the OK
button to save the selected
language as a default language for Menu, Subtitle, and Audio.
**
3.2 Area Setting
**
The country is fixed to Sweden.
**
**
**
**
**
**
**
**
GB 18
**
**
**
**
**
**
**
3.3 Channel Search
You can set parameters to search channels.
Select the following item using the
button, and press the OK
•
Frequency: The default value is set to 362000. If you
wish to set your desired frequency value, select User
Define, and enter the value using the NUMERICAL (0~9)
button.
•
Symbol Rate: The default value is set to 6875. Select
your desired symbol rate using the
button, and
or button. If the desired value is not
press the OK
listed, then select User Define, and enter the value using
the NUMERICAL (0~9) button.
•
Network Search: The default value is set to Enable.
or button.
Select Enable or Disable using the OK
When using the network search, select Enable. You can
also disable the network search by selecting Disable.
•
Network ID : Select your desired Network ID using the
button, and press the OK
or button. If the
desired value is not listed, then select User Define , and
enter the value using the NUMERICAL (0~9) button.
**
Select Next and press the OK
search.
or
button.
**
button to start channel
Please wait for finishing the Channel Search. If you want to stop
the operation during search, press the OK
button.
If the Channel Search is stopped or finished, you can edit the
found channels.
• Select All: Select all the found channels.
•
Unselect All: Unselect all the found channels.
•
Delete: Delete the selected channels.
Select Save, and press the OK
go to the next step.
button to save the result and
**
**
**
**
**
**
**
**
GB 19
**
**
**
**
**
3. Installation Wizard
**
3.4 Time Setting
You can set the current time.
Press the OK
Offset.
or
button to display the values for GMT
Select the appropriate GMT Offset value using the
button to set the current time.
and press the OK
button
Note: The default item is Auto. If GMT Offset is Auto, it is
automatically set depending on your country. However, if
the time is NOT set properly, you can change GMT Offset
to fit your local time.
Select Next using the
to go to the next step.
button and press the OK
button
3.5 Result
**
**
**
**
It displays the default language, country, time offset, network id,
and channel search result.
Select Finish using the
button and press the OK
button to complete the Installation Wizard.
**
**
**
**
**
**
GB 20
**
**
**
**
**
4. Basic Operation
**
This chapter describes functions such as switching channel, volume control, and basic features for
watching programmes.
4.1 Switching Channel
You can switch the current channel using one of the following methods.
1. Press the CH-/CH+
or
buttons.
2. Enter your desired channel numeric using the NUMERICAL (0-9) buttons to move to the
channel directly.
button to switch between TV channel and Radio channel.
3. Press the TV/RADIO
Note: You can switch channel using the Channel List or Programme Guide. Please refer to
Chapter 7 and 8 for more information.
4.2 Volume Control
1. Press the V-/V+
or
buttons to adjust the audio volume.
button to stop the sound temporarily.
2. Press the MUTE
Note: The mute function keeps enabled while you change the channel.
**
**
4.3 Teletext
When the channel supports teletext, the teletext icon ( ) is displayed on the I-plate. To enter
button to display teletext.
Teletext mode, press the SUBTITLE
1. Using Teletext Menu
1. Press the MENU
teletext mode.
button to display teletext menu in
2. Select your desired teletext function using the
3. Press the OK
button.
button.
**
**
**
**
**
**
**
**
GB 21
**
**
**
**
**
4. Basic Operation
**
Teletext Functions
Index
Return to index page. If there is no index page, jump to page 100.
Sub-page
Search the sub-page using the sub-code written by users. If it’s not
in the teletext mode, display the current time.
MIX
Adjusts transparency of teletext screen.
Cancel
Hides the teletext except page number.
Reveal
Displays the concealed information.
Double Size Displays the text size as double size.
Page Hold
Holds the current page not updating it.
2. Viewing Teletext Page
1. Enter your desired page number using the NUMERICAL
(0~9) buttons to move to the page directly.
2. Press the
number.
button to move to the next page in increased
button to move to the previous page in
3. Press the
decreased number.
**
4. Press the CH-/CH+
previous/next page.
buttons to move to
**
button to move back up to 7 recently
5. Press the BACK
viewed pages in sequence.
**
**
**
**
**
**
**
**
GB 22
**
**
**
**
**
**
**
4.4 Changing the Subtitle Language
If the current programme provides Subtitle information, you can select the language for the Subtitle.
1. Press the SUBTITLE
language list.
button to display the subtitle
2. Select your desired subtitle language using the
button, and press the OK
button. Then the subtitle will
be displayed in the selected language at the bottom of the
screen.
3. Select OFF from the subtitle language list not to display
subtitle from the screen.
Note: You can select a default subtitle language by selecting MENU - Preferences - Language
Setting - Subtitle Language.
4.5 Changing an Audio Language
If the current programme is available in multiple audio languages, you can select the language that
you wish to listen in.
**
1. Press the AUDIO
**
button to display Audio list.
2. Select your desired audio language using the
to change Audio immediately.
button
3. Select Audio Direction(left, right, stereo) using the
button.
Note: You can select your desired default audio language by selecting MENU - Preferences Language Setting - Audio Language.
**
**
**
**
**
**
**
**
GB 23
**
**
**
**
**
4. Basic Operation
**
4.6 Programme Information (I- plate)
Programme information is displayed for a specific period of time whenever you switch channels. You
can view the programme information by pressing the i
button while watching a programme.
button to hide the I-plate.
Press the EXIT
1. General Information
General Information is displayed as follows on the screen.
**
**
**
1. Channel number and channel name
2. Programme name
3. Icons
Displayed only if this programme is recording.
Displayed only if this programme is reserved.
Represents parental level. It indicates the minimum level of ages that the
programme is targeted at.
Displayed only when the channel is a locked channel.
Displayed only when the channel is a scrambled channel.
Displayed only when subtitle information is available.
Displayed only when there is any teletext information.
Displayed only when the programme is a dolby digital one.
**
**
**
**
**
**
**
**
GB 24
**
**
**
**
**
**
**
4. Current time
5. Detail programme information: displayed if detailed programme information is provided.
6. Channel looping mode and Channel List Name : if you select Within the current channel
list by selecting MENU - Edit Channels - Channel Change Mode, the Icon of Channel
looping mode is displayed. And channel list, which you selected, is displayed.
7. Programme broadcasting time and progress bar: displays programme playing time and
progress bar.
8. Next programme Information : displayed if next programme information is provided. Press the
button to display the next programme information.
Note: If there is no available programme information, programme information is not displayed.
2. Detailed Programme Information
You can see detailed information about the current programme.
Press the i
button where I-plate is displayed to view detailed
information.
Note:
• Press the i
**
•
button again to hide the information box.
If the Detailed programme information is more than one
button to move to the previous or
page, use the
next page.
**
**
**
**
**
**
**
**
**
GB 25
**
**
**
**
**
4. Basic Operation
**
4.7 Option List
You can view and confirm detailed information about the current channel and change the
information.
button when the channel list is displayed to view Option List. Then the
Note: Press the OPT+
following functions in the option list are performed to the current channel where cursor is
located.
1. Add a channel to favourite group
You can add current channels to the favourite group immediately. Also, you can add a channel to
multiple Favourite groups.
1. Press the OPT+
button.
2. Select Favourite using the
or OK
button.
button, and press the
button and press
3. Select favourite group using the
button to register for Favourite Group.
the OK
**
button again on the selected Favourite
4. Press the OK
Group to release the registered channel.
5. Move to the parent menu using the
changes automatically.
**
button to save the
Note: For detailed information about how to change Favourite
Group's name and how to register Favourite Channel for
the whole channels, refer to Chapter 7.
**
**
**
**
**
**
**
**
GB 26
**
**
**
**
**
**
**
2. Lock/Unlock a Channel
You can lock or unlock the current channel while watching a programme.
1. Press the OPT+
button.
2. Select Lock using the
button.
OK
button, and press the
or
button, and press the
3. Select Lock option using the
button.
OK
4. Select Unlock option using the
button.
the OK
button, and press
5. You will be prompted to enter your Password. Enter your
password to unlock the channel.
6. Move to the parent menu using the
changes automatically.
button to save the
Note: When switching to the Locked Channel, you must enter
the password to watch a programme.The Default
Password is ‘0000’.
**
**
3. Delete a Channel
You can delete the current channel while watching a programme.
1. Press the OPT+
button.
2. Select Delete using the
or button.
button, and press the OK
3. Select Yes in the confirmation message and press the OK
button.
4. Enter password using the NUMERICAL (0-9) button to
delete the current channel and move to the next channel.
**
Note:
• The Default Password is ‘0000’.
•
The channel will be permanently deleted. If you would like
to get it back, you should search channels again using the
Installation menu.
**
**
**
**
**
**
**
**
GB 27
**
**
**
**
**
5. Time Shifted Recording
**
This unit automatically saves the programme on air so that users can watch programmes as they
watch a video tape using functions such as rewind, fast forward, replay and pause.
5.1 Time Bar
If you press playback control buttons while watching TV, the Time bar appears on the bottom of the
screen.
**
**
**
Time bar displays the current operation status, the time difference between the broadcasting point
and watching point, and an amount of temporarily saved programme. Time bar also provides 5
operation buttons on the right side for additional time shift operations.
**
5.2 Pause
If you press the PAUSE
button on the remote controller,
or
the current programme is paused. If you press the PLAY
button once again, the programme is resumed
PAUSE
from that point.
Note:
Pause makes the time difference or delay between the
broadcasting point and watching point. The time difference is
equal to the paused time period. You can check the time
difference in the Time bar. Other operations such as slow motion
and rewind also make the time difference.
button to remove the time difference, and
Press the STOP
watch the programme on air presently.
**
**
**
**
**
**
**
**
GB 28
**
**
**
**
**
**
**
5.3 Rewind to Previous Scene
Press the REWIND
button on the remote controller to
watch the scene passed by. Whenever you press the REWIND
button, the rewind speed increases by 3 steps.
If you press the PLAY
button, the rewinding operation
stops, and the programme is played at normal speed.
Note: You can rewind to the point when you have changed to
the current channel. If the watching point reaches the
start point during rewinding, the programme is played at
normal speed from the point.
5.4 Fast Forward to the Next Scene
Press the FORWARD
button on the remote controller to
fast forward the programme. Whenever you press the
button, the speed increases by 3 steps.
FORWARD
**
If you press the PLAY
button, the fast forward operation
stops, and the programme is played at normal speed.
**
Note: You can use the fast forward operation only when there
is a time difference between the current watching and the
broadcasting point caused by some previous operations
such as pause, slow motion, and rewind. You can fast
forward to the current broadcasting point. If the watching
point reaches to the broadcasting point, the programme
is played at normal speed.
**
5.5 Recording
Press the REC
button on the remote controller to start recording the current programme. While
the time shift operation records the programme temporarily, record operation records the programme
permanently so you can playback the recorded programme at any time. For more information about
recording, refer to Chapter 6.
**
**
**
**
**
**
**
**
GB 29
**
**
**
**
**
5. Time Shifted Recording
**
5.6 Additional Time Shift Operations Using Time Bar
You can perform additional time shift operations using the 5 operation buttons on the right side of the
time bar.
1. Slow Motion
Select SLOW MOTION
and then press the OK
button to play the current programme in
once again to play the programme at normal speed.
slow motion. Press SLOW MOTION
**
2. Direct Jump
Select DIRECT JUMP
and then press the OK
bar. Move this arrow to a desired time point using the
to play the programme from the specified time point.
button. A moving arrow appears in progress
button, and then press the OK
button
**
3. Replay
**
Select REPLAY
and press the OK
button, to replay the current programme from the 7
seconds before. When the replay has been completed, the programme is normally played from the
point.
**
**
4. Skip
Select SKIP
and then press the OK
button to play the programme from the time point 30
seconds forward from the current watching point.
You can use the skip operation only when there is a time difference between the current watching
and the broadcasting point while you use the fast forward operation. If the time difference is less than
30 seconds, the programme is played from the current broadcasting point.
**
5. Displaying a Playlist
Select PLAYLIST
and press the OK
the currently saved programme list.
button to display
Select desired programme and then press the OK
playback the programme.
button to
You can perform the time shift operations like VCR functions
using the Playback control buttons while playing a programme.
button to stop playing the current saved
Press the STOP
programme, and watch the current programme on air.
**
**
**
**
**
**
**
**
GB 30
**
**
**
**
**
6. Recording and Playback
**
You can record a programme without an external media device such as a VCR.
6.1 Instant Recording
Press the REC
Press the STOP
button on the remote controller to record the current programme instantly.
button to stop recording.
Note:
• You cannot change channels during the recording operation.
•
Ensure that there is enough free space before recording, because if the free space on the
hard disk drive is insufficient, recording will stop. Recording 1 hour of programme may require
up to 3GB of free space of hard disk space. The space for recording 1 hour of programme
may be different depending on the programme recorded.
6.2 Recording Reservation
You can reserve recording to record your desired programme automatically. You can reserve
recording of a programme using Menu - Record - Recording Schedule and Guide. For detailed
information on recording reservation using Guide, refer to Chapter 8 .
1. Press the MENU
**
button.
2. Select Record using the
or button.
**
button and press the OK
button and
3. Select Recording Schedule using the
or button to display the reserved
press the OK
recording list on the screen.
4. Select a blank list and press the OK
new recording reservation.
button to add a
button to
5. Select the reserved list and press the OK
edit the existing reservation information.
1. Adding Recording Reservations
1. Enter Channel Number using the NUMERICAL (0~9)
buttons. The channel name changes automatically
according to the input channel number
2. Enter Recording Start Time using the
NUMERICAL (0~9) buttons.
3. Enter Recording End Time using the
NUMERICAL (0~9) buttons.
button, and
button, and
4. Select Repeat mode from Once/Daily/Weekly using the
button.
**
**
**
**
**
**
**
**
GB 31
**
**
**
**
**
6. Recording and Playback
**
5. Select Programme Lock mode using the
button.
6. When you have finished, select Save, and then press the OK
button.
button to cancel the reservation.
7. Select Cancel, and then press the OK
Note:
• You can reserve 20 programmes for recording.
•
If the programme to reserve overlaps with the existing one, adjust the reservation so as not to
overlap.
•
If the target channel is locked, restricted by watching time or parental control, you have to
enter a password for reservation.
2. Editing Recording Reservations
1. Change Recording Start Time using the
Numerical (0~9) buttons.
button, and
button, and
2. Change Recording End Time using the
Numerical (0~9) buttons.
button. You can
3. Change Repeat mode using the
select from Once, Daily, and Weekly.
**
button.
4. Change Programme Lock mode using the
5. Select Delete, and then press the OK
a reservation.
6. Select Cancel, and then press the OK
7. Select Save, and then press the OK
button to delete
**
button to cancel an edit operation.
button to finish editing operation.
Note: If you have configured Lock on a recording reservation, you have to enter a password to
playback the recorded programme.
**
**
**
**
**
**
**
**
GB 32
**
**
**
**
**
**
**
6.3 Programme Playback
Select your desired programme from the recorded programme list, and then press the PLAY
button to playback the recorded programme.
You can view the programme list recorded by instant recording or recording reservation by selecting
Menu - Record - Recorded Programme. Otherwise, you can easily view the recorded programme
list using PLAYLIST
on the right side of the Time bar while you are watching a programme.
1. Press the MENU
button.
2. Select Record using the
or button.
button, and press the OK
button,
3. Select Recorded Programme using the
or button to display the record
and press the OK
programme list.
4. Select the desired programme to playback using the
button, and then press the PLAY
button to playback
the programme.
button to stop the current
5. Press the STOP
programme, and watch the current programme on air.
**
6. You can perform time shift operations like VCR functions such as rewind, forward, slow
motion, pause, skip, and replay using the Playback control buttons on the remote controller or
the additional buttons on the right side of the time bar while you are playing back a
programme.
**
Note: For more information on the time shift operations like VCR functions, refer to Chapter 5 .
6.4 Editing Recorded Programmes
Select Menu - Record - Recorded Programme, and then select the desired recorded programme to
edit the information of the programme.
1. Press the MENU
button.
2. Select Record using the
or button.
button, and press the OK
button,
3. Select Recorded Programme using the
or button. The recorded
and press the OK
programme list appears.
4. Select the desired programme, and then press OK
display the edit screen.
to
Note: If you press the i
button while playing a programme, a screen appears showing the
information on the recorded programme.
**
**
**
**
**
**
**
**
GB 33
**
**
**
**
**
6. Recording and Playback
**
1. Deleting a Recorded Programme
Select Delete in the edit screen, and then press the OK
button.
2. Changing The Name of a Recorded Programme
1. Select Programme in the edit screen, and then press the
OK
button to display a keyboard on the screen.
2. Enter the desired programme name on the screen
, and OK
button.
keyboard using the
3. Select OK, and then press the OK
complete.
button to
3. Protecting Recorded Programmes from Deletion
1. Select Protect in the edit screen, and then press the OK
or Disable.
**
or
button to change Enable
2. You have to enter a password to change the status from Enable to Disable.
**
Note: If the protect option of the programme is configured to Enable, you cannot delete the
programme. Therefore, you have to change the protect option to Disable to delete a
protected programme.
4. Locking a Recorded programme
1. Select Lock in the edit screen, and then press the OK
Disable.
or
button to change Enable or
2. You have to enter a password to change the status from Enable to Disable.
Note: If the Lock option of a programme is configured to Enable, you have to enter a password to
playback the programme.
**
**
**
**
**
**
**
**
GB 34
**
**
**
**
**
**
**
6.5 Checking Hard Disk Drive
You can check the free space of the hard disk drive, and can format the disk drive if necessary.
1. Press the MENU
button.
2. Select Record using the
or button.
3. Select HDD Control using the
or button.
OK
button, and press the OK
button, and press the
4. You can check the used and free space of the HDD.
button to remove all
5. Select Format and press the OK
the recorded programmes saved on the HDD, and
initialise the HDD.
**
6. Select OK for the format confirm message, and enter a
password to start formatting the HDD.
**
**
Note:
• You have to be careful because performing format deletes all the recorded programmes
saved on the HDD.
•
Even if you have removed the HDD because it is out of order, you can still watch
programmes.
**
**
**
**
**
**
**
**
GB 35
**
**
**
**
**
7. Channel List
**
Three types of channel lists are provided for easy and quick channel searching.
TV
The list of all TV channels with 2 sub-groups: one is sorted by channel number, the
other is sorted by channel name.
Radio
The list of all Radio channels with 2 sub-groups: one is sorted by channel number,
the other is sorted by channel name.
Favourite
The list of the favourite channels with 5 sub-groups that you can organise channels
by your private taste.
**
7.1 Displaying and Switching Channel List
You can display channel list using the LIST
channel list.
button and switch into other channel on the
1. Press the LIST
button while watching a programme
to display the selected channel list.
button and
2. Select your desired channel using the
button to change the channel.
press the OK
**
3. Enter the channel numeric directly using the NUMERICAL
(0~9) buttons to move cursor into your desired channel.
button to change into the
And then press the OK
selected channel.
Note:
• If there are multiple channels, press the PAGE-/PAGE+
**
**
**
**
button to move by channel.
•
button while the channel list is displayed, the
Whenever you press the TV/RADIO
channel list will be switched between TV and Radio channel list.
•
To display scramble icon ( ) in the channel list, select ON by going to MENU - Preferences
– Miscellaneous Settings - Option in CH List.
**
**
**
**
**
GB 36
**
**
**
**
**
**
**
7.2 Changing Channel List Group
You can select channel list by group.
1. Press the button while the channel list is displayed to
view the group list.
2. Select your desired channel group using the
to display its sub-groups.
or
3. Press the OK
sub-group using the
button.
button
button, select your desired
button, and then press the OK
4. The channel list for the selected sub-group is displayed.
**
Note:
• The sub-group of Favourite channel list may exist or not depending on your configuration.
•
**
If Within the Current Channel List option is selected from MENU - Edit channels Channel Change Mode menu, you can only change programme within the selected channel
list using the CH-/CH+
while your watching a programme.
**
**
**
**
**
**
**
**
GB 37
**
**
**
**
**
7. Channel List
**
7.3 Edit Channels
You can edit all channels or each channel by channel list group.
1. Press the MENU
button.
2. Select Edit Channels using the
or button.
the OK
3. Select Edit Channel Lists using the
or button.
press the OK
button, and press
button, and
4. You will be prompted to enter your password. Enter your
password using NUMERICAL (0~9) button.
Note:
• Press the BACK
or
or EXIT
the MENU
•
**
button to save the changes and return to the previous menu. Press
button to exit the Menu screen.
You can easily navigate all menus using the assigned numeric for each menu. Press the
NUMERICAL (0~9) buttons for each menu. Press the MENU - 3 - 1 in that order on the
remote controller to select the Edit Channel Lists menu.
1. Select a Channel Group
**
You can select the channel list group to edit. TV and Radio are included as Channel List Groups.
1. Press the OK
List Group.
or
button in group to display Channel
2. Select your desired Channel List Group using the
button, and press the OK
button.
Note:
• Press the TV/RADIO
•
**
**
**
button to move to TV or RADIO channel list directly.
For editing Favourite channel list, move to MENU - Edit Channels - Edit Favourite
Channels menu.
**
**
**
**
**
GB 38
**
**
**
**
**
**
**
2. Delete Channels
You can delete one or more channels.
1. Move the cursor to the channel list using the
button.
2. Select your desired channel, and then press the OK
button to delete the channel(s). You can select multiple
channels.
3. Select Delete on the right using the
button.
the OK
button, and press
3. Lock/Unlock Channels
You can lock or unlock one or more channels.
1. Move the cursor to the channel list using the
button.
2. Select your desired channel, and then press the OK
button to lock/unlock the channel(s). You can select
multiple channels.
**
3. Select Lock in the right using the
button.
OK
**
button, and press the
Note:
• Only if locked channel(s) is selected or all channels are
locked, Lock is switched into Unlock. When you press
Unlock, locked channel is switched into unlocked
channel.
•
Enter password using the NUMERICAL (0~9) button to
watch locked channel.
**
4. Select/Unselect All Channels
You can select/unselect all channels at a time.
1. Select Select All in the right and press the OK
2. Select Unselect All in the right and press the OK
channels.
button to select all channels.
button to unselect all the selected
**
**
**
**
**
**
**
**
GB 39
**
**
**
**
**
7. Channel List
**
7.4 Edit Favourite Channels
You can edit Favourite channel or Favourite channel list.
1. Press the MENU
button.
2. Select Edit Channels using the
button.
the OK
button, and press
3. Select Edit Favourite Channels using the
or button.
and press the OK
Note:
• Press the BACK
or
or EXIT
the MENU
•
button,
button to save the changes and return to the previous menu. Press
button to exit the Menu screen.
You can easily navigate all menu items using the assigned numerical button for each menu.
Press the MENU - 3 - 2 in order on the remote controller to select the Edit Favourite
Channels menu.
**
The buttons for editing the Favourite channel list are described in the following table.
**
**
**
**
**
**
**
Add
Adds Favourite channel.
**
**
Remove
Removes from the Favourite channel.
**
**
TV/Radio
Switches between TV and Radio channel list.
**
**
Fav.Group
Changes Favourite channel list group.
**
**
Move
Moves the order of channel list within the Favourite channel list.
**
**
Rename
Renames the name of Favourite channel list.
**
**
Sort
Sorts channels by number or name in all TV/Radio channel list.
**
**
Unselect All
Unselect all the selected channel.
**
**
**
**
**
GB 40
**
**
**
**
**
**
**
1. Add/Remove favourite channels
You can add favourite channel(s) to a specific Favourite channel
list or remove the added favourite channel(s) from the list.
1. Select Favourite Group using
.
2. Select your desired channel(s) in all TV/Radio channel list,
to add Favourite channel(s).
and press
3. Select your desired channel(s) in Favourite channel list,
to remove Favourite channel(s).
and press
Note: You can switch between TV and Radio channel list using
TV/RADIO
button or
.
**
**
2. Move favourite channels
You can move favourite channel(s) to your desired location within the Favourite channel list.
1. Select Favourite Group using
.
2. Select your desired channel to move within the Favourite
button.
channel list and press the OK
3. Select
, and press the OK
button.
4. Move the cursor to your desired location using the
button, and press the OK
button.
5. The selected channel(s) is moved to the desired location
you selected.
**
**
**
**
**
**
**
**
GB 41
**
**
**
**
**
7. Channel List
**
3. Rename a favourite channel list
You can rename Favourite channel list.
1. Select Favourite group to rename using
2. Select
, and press the OK
.
button.
3. Enter the Favourite channel list name using the
keyboard displayed on the screen.
4. When finishing entering the Favourite channel list name,
button.
select OK, and press the OK
**
**
4. Additional Features
Additional Features provides many useful functions which are necessary to add Favourite Channel.
**
Change between TV and Radio channel list
You can add not only TV channel(s) but also Radio channel(s) to Favourite channel list. Press
switch all channel list into TV or Radio channels.
Note: You can also change into TV or Radio channel by pressing TV/RADIO
controller.
to
button at remote
**
Select a favourite channel list
You can select your desired Favourite channel list to edit. Press
to display the Favourite channel list. Then select your desired
button, and press the OK
button.
channel list using the
**
**
**
**
**
**
**
**
GB 42
**
**
**
**
**
**
**
Sort a channel list
You can sort all TV or Radio channel lists by channel number or name for easy Favourite channel
searching. If channel lists are sorted by channel number,
is displayed. When you press this
button, all the channel lists are sorted by name. Or, if channel lists are sorted by channel name,
is switched into
. Press this button to order channels by number.
**
Unselect all the selected channels
Press
button to unselect all the selected channel.
**
7.5 Channel Change Mode
You can change the channel either in the group or in the entire groups while watching a programme.
1. Press the MENU
button.
2. Select Edit Channels using the
button.
the OK
button, and press
button,
3. Select Channel Change Mode using the
or button.
and press the OK
**
4. Select All Channels or Within the Current Channel List
button, and press the OK
button.
using the
**
Note: When Within the current channel list in Favourite Group option is selected, you can
only change the channel within the current channel list. To change the channel in
another channel list in which the current channel list is not located, change the channel
list or select All channels option.
**
**
**
**
**
**
**
**
GB 43
**
**
**
**
**
8. Programme Guide
**
The Programme Guide displays programme information about each channel, based on the date and
time.You can also schedule your watching using the information given.
8.1 Viewing Programme Guide Information
You can view programme information for all channels.
1. Press the GUIDE
button.
2. Move to previous or next programme within the same
button.
channel using the
button. If
3. Move to another desired channel using the
there are multiple channels, use PAGE-/PAGE+
button to move to channels by page. Also, you can enter
your desired channel number using the NUMERICAL
(0~9) button on the remote controller to move to the
channel directly.
4. Select your desired programme, and press the OK
button. Then you can watch the
programme if it is on air, or you can reserve it if it is the following programme.
button in the selected programme to view Extended Information for the
5. Press the i
selected channel.
**
**
**
1. Viewing Guide Information by Groups
You can view programme information for desired channel list by groups.
1. Press the GUIDE
button.
2. Press the Red button to display the channel list group.
3. Select your desired channel list group using the
button to display the appropriate sub-group.
4. Move the cursor to the sub-group using the
select your desired sub-group using the
button.
then press the OK
button,
button, and
5. The Programme Guide for selected channel list is
displayed.
**
**
**
**
**
**
**
**
GB 44
**
**
**
**
**
**
**
2. Viewing Programme Information Using Time Bar
You can quickly search for your desired time zone using the Time bar.
1. Press the GUIDE
button.
2. Press the Green button to display Time Bar.
button, and
3. Select the Time Bar button using the
button to move as your desired amount
press the OK
of time. If you press the button repeatedly, the same
operation is repeated.
4. Each button functions as follows.
Now Moves to the current programme where the cursor is located.
Moves to the previous programme or 30 minutes before.
Moves to the next programme or 30 minutes after.
Moves to 2 hours before.
Moves to 2 hours after.
Day Moves to one day before.
Day
**
5. Select
Moves to one day after.
button and press the OK
**
button to exit the Time Bar.
Note: Guide provides programme information from the previous day up to 7 days depending on the
broadcasting company.
3. Reserving a Recording
You can automatically reserve your desired programme by selecting the scheduled programme and
pressing the OK
button.
1. Select the desired programme and press the OK
button. The following message will be displayed.
2. Select OK and press the OK
button to reserve the
programme. When a reservation has been completed, the
icon is displayed on the reserved programme.
3. Select CANCEL and press the OK
reserve the programme.
button to not
4. If the channel is locked, parental controlled or restricted by
watching time, you will be prompted to enter your
Password. Enter your Password to complete the
reservation.
**
**
**
**
**
**
**
**
GB 45
**
**
**
**
**
8. Programme Guide
**
8.2 Finding a Programme
You can find your desired programme by programme name or genre easily.
1. Press the GUIDE
button.
2. Press the Blue button to display Find screen.
3. Enter the programme name directly using the keyboard
displayed on the screen.
Note: If you press Previous or Next button on the
Keyboard displayed on the screen, the
keyboard layout is switched.
4. When completing entering programme name, select the
Find button, and press the OK
button.
5. If you select your desired programme from the results of
button,
finding programme screen and press the OK
you can watch the programme if it is on air, or you can
reserve your programme if it is scheduled(the following
programme).
**
6. Select By Genre and press the OK
programme by genre.
button to search
7. Select your desired genre and press the OK
**
button.
8. As the result screen of Find programme by Name, select
your desired programme from the Results of Finding
button to watch
Programme screen and press the OK
the programme immediately or reserve the programme.
Note: The results of the finding programme may differ depending on the provided programme
information.
**
**
**
**
**
**
**
**
GB 46
**
**
**
**
**
**
**
8.3 Viewing Reserved Programme
You can add or edit reserved programmes by viewing the reserved programme list.
1. Press the GUIDE
button.
2. Press the Yellow button to display the Schedule screen.
3. Select the scheduled programme and press the OK
button to edit the reservation information.
4. Select blank list and press the OK
new reservation schedule.
button to add a
**
**
1. Editing a Reserved Programme
1. Change reserved Start Time using the
the NUMERICAL (0~9) buttons.
button and
button and the
2. Change reserved End Time using the
NUMERICAL (0~9) buttons.
3. Change Repeat mode using the
are Once, Daily, and Weekly.
button. The options
4. Change Programme Lock mode using the
5. Select Delete and press the OK
reserved programme.
6. Select Cancel and press the OK
7. Select Save and press the OK
button.
button to delete the
button to cancel the editing.
button to complete the editing.
Note: If the Lock option of a programme is configured to Enable, you have to enter a password to
playback the programme.
**
**
**
**
**
**
**
**
GB 47
**
**
**
**
**
8. Programme Guide
**
2. Adding a Reservation
1. Enter your desired Channel Number using the
NUMERICAL (0~9) button. The channel name is
automatically displayed by channel number.
2. Enter your desired Start Time using the
the NUMERICAL (0~9) button.
button and
button and
3. Enter your desired End Time using the
the NUMERICAL (0~9) button.
4. Select one of repeat mode options among Once, Daily,
button.
and Weekly using the
5. Select Programme Lock mode using the
6. Select Save and press the OK
7. Select Cancel and press the OK
button.
button to complete entering.
button to cancel the reservation.
Note:
• You can reserve up to 20 programmes.
**
**
**
**
•
If your desired programmed is already reserved, adjust the reservation appropriately.
•
If the channel is locked, restricted by watching time, you will be prompted to enter your
Password to complete the reservation.
**
**
**
**
**
**
GB 48
**
**
**
**
**
9. Setting Preferences
**
You can set censorship, watching time, and all other items suitable for your environment.
Note:
• Press the BACK
or
or EXIT
the MENU
•
button to save the changes and return to the previous menu. Press
button to exit the Menu screen.
You can easily select any item from the menu using the NUMERICAL (0-9) buttons.
**
9.1 Parental Control
You can set parental control for each programme and watching
time. You can also change your Password.
1. Press the MENU
button.
2. Select Preferences using the
or button.
OK
button, and press the
3. Select Parental Control using the
or button.
press the OK
button, and
4. When a prompting message is displayed to request your
password, enter the password using the NUMERICAL
(0-9) button.
**
**
**
1. Set Censorship
Censorship Classification allows you to block programmes
according to the age level you have set.
1. Select Censorship Classification using the
button,
or button.
and press the OK
button, and
2. Select your desired age level using the
button.
press the OK
**
**
**
**
**
**
**
**
GB 49
**
**
**
**
**
9. Setting Preferences
**
View All
All programmes can be watched because there is no age limitation.
7
Programmes are blocked for children under the age of 7.
12
Programmes are blocked for children under the age of 12.
15
Programmes are blocked for children under the age of 15.
18
Programmes are blocked for children under the age of 18.
Lock All
Programmes are blocked without considering the age level.
**
Note:
• You have to enter Password to watch the programme which is blocked by the age level.
•
Some broadcasting companies do not broadcast the censorship classification information.
**
2. Set Allow Watch Time
You can block programmes according to the watching time for all the channels.
1. Select Allow Time Control using the
button.
2. Select Enable or Disable Allow Time Control using the
or OK
button.
**
**
Disable You can watch a programme whenever you want
regardless of Allow Time.
**
Enable You can watch a programme only while the time
specified by Allow Time.
3. When you have selected Enable, set the Start and End
Time using the NUMERICAL (0-9) buttons, and press the
OK
button.
4. If you wish to cancel the entered time, select Cancel
button.
button, and press the OK
Note: Once the setting has been completed, you can watch
programme only during the time specified by Allow Time.
Otherwise you will need to enter the Password to watch
any programme during unspecified time.
**
**
**
**
**
**
**
**
GB 50
**
**
**
**
**
**
**
3. Change Password
You can change the existing password into new one.
button, and
1. Select Change Password using the
button.
press the or OK
2. Enter New Password using the NUMERICAL (0-9)
button.
button, and select OK and press the OK
3. Enter New Password again to confirm Verify Password,
button.
and press the OK
Note: The Default Password is "0000". If you have forgotten
your Password, please contact your local product
distributor.
9.2 Language Setting
You can set Language for Menu, Audio, and Subtitle.
1. Press the MENU
button.
**
2. Select Preferences using the
or button.
OK
button, and press the
3. Select Language Setting using the
or button.
press the OK
**
button, and
1. Menu/Audio/Subtitle Language
You can set the language for Menu, Audio and Subtitle.
1. Select Menu/Audio/Subtitle Language using the
2. Press the
or OK
button.
button to display the available Language List.
button, and press the OK
3. Select your desired language using the
button.
**
**
**
**
**
**
**
**
GB 51
**
**
**
**
**
9. Setting Preferences
**
2. Audio Priority
You can select the priority of audio.
1. Select Audio Priority using the
button.
2. Select one option from Dolby Digital or PCM using the
or OK
button.
**
Dolby Digital
This is used when the audio output is connected to 5.1-channel
digital audio system.
PCM
This is used when the audio output is connected to general audio
system including TV.
**
3. Subtitle Display
You can select whether or not to display the Subtitle automatically if provided.
1. Select Subtitle Display using the
button.
2. Select one option from Auto or Manual using the
**
or OK
button.
Auto
Subtitles are displayed automatically in the predefined subtitle language.
Manual
Subtitles are displayed in the language when you select the subtitle language by
button on the remote controller.
pressing the SUBTITLE
**
4. Subtitle Font
You can select the Subtitle font.
1. Select Subtitle Font using the
button.
2. Select one option from Variable or Fixed using the
or OK
button.
**
Variable
Fixed
**
**
**
Uses the horizontally variable Subtitle Font.
Uses the fixed Subtitle Font.
**
**
**
**
**
GB 52
**
**
**
**
**
**
**
9.3 Time Setting
You can specify the current time and Power On/Off time.
1. Press the MENU
button.
2. Select Preferences using the
or button.
OK
button, and press the
3. Select Time Setting using the
or button.
OK
button, and press the
1. Set Current Time
You can set the GMT Offset for current time.
1. Select GMT Offset using the
button.
button to display GMT list. GMT is
2. Press the or OK
changed by from 30 minutes to 1 hour.
**
3. Select your GMT offset using the
button.
the OK
buttons, and press
**
Note: The current time is set automatically whenever GMT
Offset changes.
The default item is Auto.
If GMT offset is Auto, it is automatically set depending on
your country. However, if the time is NOT set properly,
you can change GMT Offset to fit your local time.
**
**
**
**
**
**
**
**
GB 53
**
**
**
**
**
9. Setting Preferences
**
2. Power On
You can set the time when the product is automatically
powered on.
1. Select Power On using the
button.
2. Select either Enable or Disable the Power On using
button.
the or OK
**
Enable
Uses the Power On and sets the
Power On time.
Disable
Does not use the Power On.
3. When you have selected Enable, enter Channel No
and Time using the NUMERICAL (0~9) buttons, and
press the OK
button.
**
**
3. Power Off
You can set the time when the product is automatically powered off.
1. Select Power Off using the
button.
2. Select either Enable or Disable Power Off using the
or OK
button.
**
Enable
Uses the Power Off and sets the Power Off time.
Disable
Does not use the Power Off.
3. When you have selected Enable, enter the Time using the NUMERICAL (0-9) button, and
press the OK
button.
Note: Once Power On/Off is specified, it is repeated everyday.
**
**
**
**
**
**
**
**
GB 54
**
**
**
**
**
**
**
9.4 A/V Control
You can set Audio or Video Output Control.
1. Press the MENU
button.
2. Select Preferences using the
or button.
OK
button, and press the
3. Select A/V Control using the
or button.
OK
button, and press the
1. TV-SCART
You can set TV SCART Output.
1. Select TV-SCART using the
button.
or
2. Select one option among CVBS/RGB/S-Video using the OK
button.
2. VCR SCART
**
You can set VCR-SCART Output.
1. Select VCR-SCART using the
**
button, and press the OK
2. Select one option from CVBS/S-Video using the OK
or
or
button.
button.
3. Audio Output
You can set the Audio Output.
1. Select Audio Output using the
button.
2. Select one option from Stereo or Mono using the
or OK
button.
**
**
**
**
**
**
**
**
GB 55
**
**
**
**
**
9. Setting Preferences
**
4. Screen Ratio
You can set the aspect ratio of your TV.
1. Select Screen Ratio using the
button.
2. Select one option from 4:3 or 16:9 using the
or OK
button.
5. Display Format
You can select the Display Format according to TV Screen Ratio.
1. Select Display Format using the
button, and press the OK
or
button.
2. If the Screen Ratio is set to '4:3', you can select one among Auto/Letter box/Center Mode
button, and press the OK
button.
using the
3. If the Screen Ratio is set to '16:9', you can select one among Auto/Pillar box/Full mode
button, and press the OK
button.
using the
**
**
**
**
**
**
**
**
**
**
GB 56
**
**
**
**
**
**
**
9.5 UHF Tuning
You can set the UHF channel.
1. Press the MENU
button.
2. Select Preferences using the
or button.
OK
button, and press the
3. Select UHF Tuning using the
or button.
OK
button, and press the
1. UHF Channel
You can select UHF Channels for the TV. The Channel range and Frequency change according to
PAL Standard.
1. Select UHF Channel using the
button, and press the OK
or button.
**
button, and
2. Select channel range based on the following channel criteria using the
button.
press the OK
**
**
CH21-CH69
CH28-CH69
PAL I/G for Europe
PAL B for Europe/Australia
2. PAL
You can select the PAL standard.
1. Select PAL using the
button, and press the OK
or
2. Select one option among PAL I / PAL G / PAL B using the
button.
button.
button, and press the OK
3. UHF Offset
You can adjust fine tuning setting.
1. Select UHF Offset using the
button, and press the OK
or
button.
button, and press the OK
2. Select a range between -4 ~ +4 using the
button.
**
**
**
**
**
**
**
**
GB 57
**
**
**
**
**
9. Setting Preferences
**
9.6 Miscellaneous Settings
1. Press the MENU
button.
2. Select Preferences using the
or button.
OK
button, and press the
button,
3. Select Miscellaneous Settings using the
or button.
and press the OK
1. i-Plate Display Time
You can set the duration during which the Information box is to be displayed when you switch the
channel.
1. Select i-Plate Display Time using the
button, and press the OK
or button.
2. Select a value between 1~20 seconds using the
button, and press the OK
button.
Note: When it is set to Disable, the i-Plate will not be displayed when you switch the channel.
**
**
2. OSD Transparency
You can set the transparency of On Screen Display (OSD).
1. Select OSD Transparency using the
button, and press the OK
2. Select one option among Disable / 25 / 50 / 75 using the
button.
or
button.
button, and press the OK
**
Disable
25, 50, 75
Fully opaque screen
As the number is bigger, the screen is more transparent.
3. Option in CH List
You can set whether or not to display the scrambled icon in channel list.
1. Select Option in CH List using the
button.
2. Select one option from On/Off using the
or OK
button.
**
On
Off
**
**
**
Scramble icon displays in the channel list.
Scramble icon disappears in the channel list.
**
**
**
**
**
GB 58
**
**
**
**
**
10. Installation
**
This chapter describes how to search for channels and a series of procedures.
10.1. Channel Search
If your product is connected to the cable and television, you can search channels manually by
searching parameters, if you know the MUX information.
1. Press the MENU
button.
button, and press the
2. Select Installation using the
button. You will be prompted to enter your
OK
password.
3. Select Channel Search using the
or button.
the OK
button, and press
1. Frequency
1. Select Frequency using the
or button.
OK
**
2. Select frequency value using the
button.
the OK
button, and press the
button, and press
**
3. When you select User Define to set frequency manually,
enter frequency value using the NUMERICAL (0~9 )
button.
2. Symbol Rate
1. Select Symbol Rate using the
or button.
the OK
button, and press
2. Select desired symbol rate value using the
button.
and press the OK
button,
3. When you select User Define to set symbol rate
manually, enter symbol rate value using the NUMERICAL
(0~9 ) button.
**
**
**
**
**
**
**
**
GB 59
**
**
**
**
**
10. Installation
**
3. Network Search
1. Select Network Search using the
or button.
the OK
button, and press
or
2. Select Disable or Enable using the OK
button.
Note: Enable allows you to use Network ID.
4. Network ID
1. Select Network ID using the
or button.
OK
button, and press the
2. Select desired Network ID using the
or button.
press the OK
**
**
**
**
button, and
3. If the desired value is not listed, then select User Define,
and enter the value using the NUMERICAL (0~9) button.
**
**
**
**
**
**
GB 60
**
**
**
**
**
**
**
5. Search
You can complete the setting and start searching.
1. Select Search and press the OK
button to start
Channel Search.
2. Wait while the recorder searches for the channels, this
may take a few minutes.
3. During operating search, the cursor is located at Stop.
button during
Therefore, if you press the OK
searching, the operation is stopped and only the channels
found so far will be displayed.
4. If the search operation is successfully completed, and no
button and try to
channels are found, press the OK
reset the search operation again if necessary.
**
5. You can delete unnecessary channels from the searched
channels. Select your desired channels to delete and
button. Then select Delete and press
press the OK
button. To delete all channels, select Select
the OK
All to select all channels, select Delete, and press the OK
button.
**
6. When completing channel search and deleting
unnecessary channels, select Save, and press the OK
button to save the changes.
**
**
**
**
**
**
**
**
GB 61
**
**
**
**
**
10. Installation
**
10.2 Linear Search
You can search channels by setting the range of frequencies and other parameters.
1. Start Frequency and End Frequency
1. Select Start / End Frequency using the
or button.
press the OK
button, and
2. Set the Start/End Frequency which the Linear Search start
from/to in order to set the frequency range to seek.
2. Step
**
**
**
**
1. Select Step using the
or button.
button, and press the OK
2. Set the step frequency that will be added start frequency.
Your product will search channels at the increasing
frequency by step frequency. If you don't know the value,
please select Auto
**
**
**
**
**
**
GB 62
**
**
**
**
**
**
**
3. Append Symbol Rate
1. Select Append Symbol Rate using the
or button.
press the OK
2. Select the symbol rate using the
button.
the OK
button, and
button, and press
3. It will be displayed symbol rates that you selected.
Product will search channels by all of symbol rates that
you selected.
4. Search
You can complete the setting and start searching.
1. Select Search and press the OK
button to start Linear Search.
2. The next procedures are the same as those for Channel Search. Please refer to Channel
Search.
**
**
**
**
**
**
**
**
**
**
GB 63
**
**
**
**
**
10. Installation
**
10.3 Default Setting
Default Setting restores the product to the default settings
Warning:
Please note that once you perform Default Setting, all data such as Channel List and
User Configured data are deleted.
To perform Factory Default:
1. Press the MENU
button.
2. Select Installation using the
or button.
OK
button, and press the
3. Enter Password using the NUMERICAL (0~9) button.
4. Select Default Setting using the
or button.
OK
button, press the
button to restore all
5. Select Yes and press the OK
setting to Factory Default. Select No and press the OK
or BACK
button to return to the previous menu.
**
**
**
**
6. Confirm again to start loading default setting. Enter
Password using the NUMERICAL (0~9) button to
perform restoring.
7. When completing the default setting, the Installation
Wizard will run automatically. For detailed information
about Installation Wizard, refer to 3. Installation Wizard.
**
**
**
**
**
**
GB 64
**
**
**
**
**
11. Software Update
**
In order to maintain proper performance of this product, it is essential to have the most up-to-date
software.
Whenever new software is released, com hem will upgrade your product via OTA.
11.1 OTA (Over the Air)
OTA, an abbreviation of "over-the-air" , means that the software can be downloaded where the
manufacturer reserves the right to decide when and where to release through cable.
Over the Air (OTA) is simply an alternative method for downloading software versions. However, the
manufacturer reserves the right to decide when and where this software update can take place by
latest software versions over the cable. The software update will only occur under the following
circumstances.
1. The equipment should have appropriate loader software.
Caution:
Please note that if you don't have normal loader software, the equipment may not be
updated or work after software update.
2. The manufacturer decides to release software downloading.
**
**
Caution:
• Please be careful to keep the power on and the power cord plugged in during software
update. If the power is off during software update, it may cause fatal damage to the product.
•
**
Please be careful not to pull out the Signal line during software update. Update may be
interrupted and the product may not work.
Note:
• The product cannot work at all during software update.
•
It may take 5-10 minutes to update software.
•
Scheduling operation cannot work during software update.
**
**
**
**
**
**
**
**
GB 65
**
**
**
**
**
11. Software Update
**
1. If new software is found when powering on
1. A message will be displayed to notify that new software is found.
2. Select Yes and press the OK
button to update the software.
3. Starts downloading new software. Please wait until the update is completed.
4. When completing the software update, the equipment is automatically powered off and on
again.
2. If a new version of software is detected during watching a
programme
1. A message will be displayed to notify that new software is
found.
button to start
2. Select Yes and press the OK
button to
upgrading. Select No and press the OK
return to the previous screen.
**
**
**
**
**
**
**
**
**
**
GB 66
**
**
**
**
**
**
**
3. If using Software Update
You can perform Software Update only if you know MUX information of software update correctly.
1. Press the MENU
button.
button, and press the
2. Select Installation using the
or button.
OK
3. Enter Password using the NUMERICAL (0~9) buttons.
4. Select Software Update using the
or button.
press the OK
button, and
5. Set the Frequency which provides update software.
6. Select the Symbol Rate. You can enter the specific value
by selecting User Define
Note: How to setting parameters in Software
Update is the same as how to set
parameters in Channel Search. Refer
to Channel Search.
7. Select Search and press the OK
software.
**
button to search
8. It is displayed whether or not New Software exist.
button to
If new software does not exist, press the OK
return to the Software Update Menu.
9. Select Yes and press the OK
Select No and press the OK
previous menu.
**
button to start updating.
button to return to the
10. Performs Software Update. Please wait until it is
completed.
11. When completing the software update, the product is
automatically powered off and on again.
**
**
**
**
**
**
**
**
GB 67
**
**
**
**
**
12. System Information
**
You can view all system information, signal strength, and smart card information.
1. Press the MENU
button.
2. Select System using the
or button.
button, and press the OK
12.1 Status
You can view System information
1. Select Status using the
or button.
button, and press the OK
2. Confirm the information about Hardware version,
Software version, Loader version, System ID, Update
Date.
**
**
12.2 Signal Detection
You can view the signal strength and signal quality.
1. Select Signal Detection using the
or button.
press the OK
button, and
2. Display information about the graphs and percentage of
Signal Strength and Quality of the channel.
**
**
**
**
**
**
**
**
GB 68
**
**
**
**
**
**
**
12.3 Conditional Access (for Conax embedded)
1. Product Ordering
This item is for IPPV and it will be reserved until software is
updated. When the cursor is located in this menu, there will be no
action even after selecting.
**
2. Subscription Status
This shows the authorised list of Conax channels in the smart card.
**
3. Event Status
**
This menu shows the channel ordered using PPV.
4. Change CA PIN
This lets you change the Smart Card PIN code.
5. Maturity Rating
This menu lets you set the level of authorization to watch the Conax scrambled channel.
To watch the event beyond the set level, you should enter the Smart Card PIN code.
6. About Conax CA
It displays information about Conax CA - software version, interface version, card number, number of
session, language, and conditional access system identification.
Note: The supported functions vary depending on CAS version.
**
**
**
**
**
**
**
**
GB 69
**
**
**
**
**
13. Games
**
This product provides various games for user's entertainment.
**
1. Press the GAME
button.
2. According to the instruction displayed on screen, you can enjoy the game using using the
button, and OK
button.
**
Note: Press the EXIT
or BACK
button to exit the game.
**
**
**
**
**
**
**
**
**
**
GB 70
**
**
**
**
**
14. Menu Map
**
**
**
**
This recorder doesn't support a gray item.
**
**
**
**
**
**
**
**
GB 71
**
**
**
**
**
15. Troubleshooting
**
15.1 Troubleshooting
Before contacting your local service, please read the following instructions. If the product does not
work normally after completing the following troubleshooting, please contact your local product
distributor or service centre.
**
1. The LED on the front panel does not light.
**
- Check the main power cable and check that it is plugged into a suitable power outlet.
2. No picture
**
- Make sure that the product is in Operation Mode.
- Make sure that the AV Cable is firmly connected to the TV.
- Make sure that Cable line is correctly connected to the equipment.
- Check the brightness level of TV.
- Check the channel is on air.
3. Poor picture & sound quality
**
- Make sure there is no mobile phone or microwave oven near the equipment.
4. No or poor sound
**
- Check the volume level of the TV and product.
- Check the Mute status of the TV and product.
- Press the Audio button to change the audio type.
**
**
5. Remote controller does not operate
**
- To manipulate the equipment with remote controller, the remote controller's emitting part
should directly point towards the receiving part of product's remote controller.
- Check the battery of Remote controller.
6. Reservation is unavailable
**
- Check whether it is not overlapped with other reservation.
- Check whether the power switch is off.
7. Watching scrambled channel is not available
**
- Check the correct Smart Card is plugged in.
- Check the correct smart card is plugged in, and correctly plug the smart card again.
- Check whether the Smart Card is damaged.
- Make sure you subscribe to the channel.
- If the recorder has been turned off for a longer time (standby or power off), please wait for
authorization, up to 60 minutes.
**
**
**
**
**
**
**
**
GB 72
**
**
**
**
**
**
**
15.2 Error Message
Error message
Possible causes
What to do
No or bad signal
The cable is not connected.
Make sure the cable is connected
properly.
The cable may be damaged or
defective.
Exchange the cable.
The channel is not broadcasting.
The channel is
scrambled or not
available.
The channel has signal, but no
video.
Confirm if the channel is currently on
air.
The channel is deleted by
broadcasting company.
The channel is for data
broadcasting.
Cannot watch the channel in usual
way.
The audio is not
available.
The channel has signal, but no
Audio.
Press the AUDIO button to confirm if
the channel has Audio.
No access
No subscription to this channel.
Make sure you subscribe to the
channel.
No authorization.
If the recorder has been turned off
for a longer time (standby or power
off), please wait for authorization, up
to 60 minutes.
No card inserted.
Smart card is not plugged in.
Plug in Smart Card.
Incorrect card
Wrong Smart Card is plugged in.
Plug in suitable Smart Card.
Smart Card is not correctly plugged
in.
Pull out the Smart Card, and plug it
in again.
Smart Card is broken.
Replace the Smart Card.
**
**
**
**
**
**
**
**
**
**
GB 73
**
**
**
**
**
16. Specification
**
Tuner and Channel
Input Connector
IEC-type, IEC-169-2, Female
Frequency Range
47MHz to 862MHz
Input Impedance
75
Signal Level
-13 to +15 dBm
Demodulation
QAM
Input Symbol Rate
1.5-7Ms/s
Constellation
16-QAM, 32-QAM, 64-QAM, 128-QAM, 256-QAM
MPEG Transport Stream
A/V Decoding
Transport Stream
MPEG-2 ISO/IEC 13818
Transport Stream Specification
**
Profile Level
MPEG2 MP@ML
Input Rate
15 Mbit/s Max
Aspect Ratio
4:3, 16:9, Letter Box
Video Resolution
720 x 576
Audio Decoding
MPEG/MusiCam Layer I and II
Audio Mode
Single channel/Dual channel/Joint Stereo/Stereo
**
RF Modulator
RF/Loop-through Output
Connector
75
, IEC 169-2
Output Channel
CH 21 ~ 69
TV standard
PAL I/G/B
Preset Channel
CH 36
Memory / HDD
**
**
**
Flash Memory
2M bytes
Graphic (MPEG) DRAM
24M bytes
EEPROM
8K bytes
HDD
80G bytes
**
**
**
**
**
GB 74
**
**
**
**
**
**
**
A/V and Data In/Out
Video
RCA/SCART Video Output (CVBS, S-Video, RGB)
Audio R/L
RCA/SCART Volume and Mute Control
(Resolution: 20 bits DAC, MAX, 2Vrms)
S/PDIF
Digital Audio Output, Fiber-Optic (Resolution: 20 bits)
RS-232C
Transfer Rate : 115,200bps, 9 pin Socket type
Power Supply
Input Voltage
90~250V AC, 50/60Hz
Type
SMPS
Power Consumption
Max. 20 W
Standby Power
Max. 10W
Protection
Separate Internal Fuse.
The input should be protected against lightning
Physical Specifications
**
Size
370 mm x 60 mm x 262 mm
Weight (Net)
Around 3.5Kg
Operating Temp
0
Storage Humidity
5% ~ 95% RH(Non-Condensing)
**
to + 45
**
**
**
**
**
**
**
**
GB 75
**
**
**
**
**
17. Glossary
**
Frequency
The number of cycles or events per one second, which is expressed in the unit of hertz
**
FTA (Free-To-Air)
An unscrambled broadcast, which you can view without additional payments to a service provider.
**
Hi-Fi (High Fidelity)
The characteristics of audio devices that can play back all the audio frequencies of the human, which
is the range of 16Hz~20KHz, uniformly from the low frequency to high frequency. Sometimes it is
used to indicate good quality of an audio device such as stereo tape recorder.
**
OSD (On Screen Display)
The function that displays the information about the monitor that the user needs or has to know on
the screen directly. OSD information includes brightness, contrast, tuning, RGB adjustment, and
screen size and positions (top, left, width, and height), and so on.
**
OTA (Over The Air)
Means that software downloads where the manufacturer reserves the right to decide when and
where to release them.
**
Programme Guide (Electronic Programme Guide, EPG)
**
An electronic programme guide provides on-screen listing of current and scheduled programmes.
Multi-functional Set Top Box such as Personal Video Recorder allows the viewer to record an
upcoming programme.
**
**
SCART
A 21-pin connector used for connection of this product, VCR and TV. Also called Euroconnector or
Peritel connector.
**
S/PDIF (Sony/Philips Digital Interface format)
Standard format for digital audio output. It outputs audio signals directly as digital audio signals
without changing into analog signals because conversion into analog signals can degrade signal
quality.
**
**
**
**
**
**
**
**
GB 76
**
**
**
**
**
18. Service and Support
**
You can get information such as a troubleshooting guide, software upgrades and product support
guide from the following web sites and call center (Hotline).
Please try to contact to your local dealers first when you have any problem.
Web site and e-mail
Homepage
http://www.humaxdigital.com
English
http://www.humaxdigital.com/Deutsch/
Deutsch
http://www.humaxarabia.com
Arabic
**
HCSA (Humax Customer Service Area)
Software Download, Information and Technical Q&A
http://www.humaxdigital.com/hcsa/
English
http://www.humaxdigital.com/Deutsch/hcsa/
Deutsch
**
E-mail (Technical Q&A)
**
[email protected]
Europe & North Africa
[email protected]
Germany
[email protected]
Middle East
[email protected]
Asia & Other area
**
**
**
**
**
**
**
**
**
GB 77
**
**
**
**
**
18. Service and Support
**
Call Center
Humax Middle East Call Center (Dubai, UAE)
Tel:
+971 (0)4 359 2323 (Open: 9:00 - 20:00 / close on Friday)
E-mail:
[email protected]
Open:
Local Time in Dubai (GMT+4)
Support Language:
English/Arabic
9:00 - 20:00 (Saturday - Thursday, close on Friday)
**
Humax Hotline (Germany)
0,12/Min)
Germany:
01805 778 870 (
Other Countries:
+ 49 1805 778 870 (
Open:
Local Time in Germany (GMT+1)
0,12/Min+ International Call Charge)
8:00 - 20:00 (Monday - Friday)
8:00 - 18:00 (Saturday)
**
Support Language:
Deutsch/English
**
**
Humax BTCI Hotline (Premiere Model)
Germany:
01805-778900 (
Austria:
0900-900633 (
0,12/Min)
0,33/Min)
**
For hardware repair, please refer to support website. (Homepage or HCSA)
**
**
**
**
**
**
**
**
GB 78
HNCXC2000PVRCH.100GB/SV