1
EN
Start Here
ES
Comience aquí
1
USB
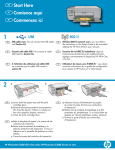
USB cable users: Do not connect the USB
cable until Section A.
EN
Usuarios de cable USB: no conecte el
cable USB hasta la Sección A2.
ES
2
a
Ethernet
EN
ES
EN
b
ES
Wired network users: You must follow the instructions
in this setup guide to be successful adding the
HP All-in-One to your network.
Usuarios de red cableada: siga las instrucciones
de esta Guía de instalación para agregar
correctamente el dispositivo HP All-in-One a la red.
a. Remove all tape and protective film from the lid
and from the front and back of the device.
b. Lift the color graphics display and remove the
protective film. You can adjust the angle of the
display to a position suitable for viewing.
a. Retire las cintas, las lengüetas y la película
protectora de la tapa, así como de la parte
anterior y posterior del dispositivo.
b. Levante la pantalla de gráficos de color y retire la
cinta protectora. Regule el ángulo de inclinación
de la pantalla hasta obtener una visión óptima.
3
*
*
EN
Verify the box contents. The contents of your
box may differ.
*May be included
HP Photosmart C6200 All-in-One series
*
ES
Compruebe el contenido de la caja. El contenido
de la caja puede ser distinto.
*Puede estar incluido.
4
EN
ES
5
EN
6
EN
a
a. Connect the power cord and adapter.
b. Press to turn on the HP All-in-One.
NOTE: Pay attention to the helpful messages
and animations in the display during the
setup process.
Do one of the following:
• If a prompt appears asking you to set the
language and country/region, use the
arrows to select your language from the list of
up to 25 languages, press OK, and confirm.
Select your country/region, press OK and
confirm.
• If a prompt appears asking to install print
cartridges, go to the next step in this guide.
2 • HP Photosmart C6200 All-in-One series
a. If the control panel faceplate is not already
attached, position it over the buttons on the device.
b. Press down firmly on all edges of the overlay to
secure it. Make sure all buttons are visible and not
blocked.
a. Si la carátula del panel de control aún no
está puesta, colóquela sobre los botones del
dispositivo.
b. Presione con firmeza en todos los bordes de la
plantilla para fijarla. Asegúrese de que todos los
botones se ven y de que no están bloqueados.
b
ES
ES
a. Conecte el cable de alimentación y el adaptador.
b. Presione para encender el dispositivo
HP All-in-One.
NOTA: Preste especial atención a las animaciones
y mensajes de ayuda de la pantalla durante el
proceso de instalación.
Realice una de las siguientes acciones:
• Cuando se le solicite que establezca el
idioma y el país/región, utilice las flechas
para seleccionar su idioma en la lista de
25 idiomas, presione OK para confirmar.
Seleccione su país/región, presione OK
para confirmar.
• Si se le solicita que instale los cartuchos de
impresión, vaya al siguiente paso de la guía.
7
EN
Open the access door.
8
ES
a
b
a. Squeeze the bottom of each latch to release
it, and then lift the latch.
b. Lift all six latches.
EN
9
Abra la puerta de acceso.
b
ES
EN
c
ES
d
e
a. Presione la parte inferior de cada pestillo para
soltarlo y, a continuación, levántelo.
b. Levante los seis pestillos.
a. Match the color and pattern of the ink cartridge to
the color and pattern above the latches.
b. Push the black ink cartridge in to the first slot on
the left. Close the latch.
c. Repeat with each of the color ink cartridges.
d. Make sure each latch is secure.
Note: Use only the ink cartridges that came with
the printer. The ink in these cartridges is specially
formulated to mix with the ink in the print head
assembly at first-time setup.
e. Close the access door.
a. Haga coincidir el color y el modelo del cartucho
de tinta con el color y el modelo que figuran sobre
los pestillos.
b. Inserte el cartucho de tinta negro en la primera
ranura de la izquierda. Cierre la tapa.
c. Repita la misma operación con cada cartucho de
tinta de color.
d. Asegúrese de que todos los pestillos están bien
colocados.
Nota: Utilice sólo los cartuchos de tinta
proporcionados con la impresora. La tinta de estos
cartuchos ha sido especialmente formulada para
mezclarse con la tinta del conjunto de cabezales
de impresión en el momento de realizar la
instalación por primera vez.
e. Cierre la puerta de acceso.
HP Photosmart C6200 All-in-One series • 3
10
EN
11
EN
a
b
c
a. Pull out the main tray.
b. Slide the paper-width guide to the left.
c. Insert plain white paper into the main tray
and adjust the paper guides.
d. Push in the main tray and press OK.
a
b
In addition to plain paper, you can also load
photo paper in the photo tray. If you do not
have photo paper, continue to the next step.
a. Lift the photo tray lid.
b. Load photo paper with the glossy side down
in the photo tray. Slide the paper guides
against the photo paper.
c. Push the photo tray in, and lower the photo
tray lid until it is fully closed.
d. Pull out the tray extender and lift up the
paper catch.
12
ES
a. Tire de la bandeja principal.
b. Deslice la guía de anchura del papel hacia la
izquierda.
c. Introduzca papel blanco normal en la bandeja
principal y ajuste las guías de papel.
d. Empuje la bandeja principal y presione OK.
d
ES
EN
ES
4 • HP Photosmart C6200 All-in-One series
d
Además de papel normal, también puede cargar
papel fotográfico en la bandeja de fotografías.
Si no dispone de papel fotográfico, continúe en
el siguiente paso.
a. Levante la tapa de la bandeja de fotografías.
b. Coloque el papel fotográfico con la
cara brillante orientada hacia abajo en la
bandeja de fotografías. Deslice las guías de
papel hacia el papel fotográfico.
c. Empuje la bandeja de fotografías y baje la
tapa de la bandeja de fotografías hasta que
esté totalmente cerrada.
d. Tire del extensor de la bandeja y levante el
tope del papel.
a. Press the OK button after you have loaded paper
in the main tray, then wait a few minutes while the
alignment page is printed. The alignment process
ensures high print quality.
b. Press the OK button after the alignment page is
printed. When the page is printed, alignment is
complete.
a. Presione el botón OK después de haber cargado
papel en la bandeja principal, a continuación,
espere unos minutos mientras se imprime la
página de alineación. El proceso de alineación
garantiza la alta calidad de impresión.
b. Presione el botón OK cuando se haya impreso
la página de alineación. Una vez impresa esta
página, el proceso de alineación ha finalizado.
13
EN
Continue to the next step for instructions
on connecting your HP All-in-One to your
computer.
ES
Continúe en el siguiente paso para obtener
instrucciones acerca de cómo conectar el dispositivo
HP All-in-One a su equipo.
14
EN
Choose only ONE connection type
(A - USB or B - Ethernet/Wired network)
ES
Seleccione sólo UN tipo de conexión
(A - USB o B - Ethernet/red cableada)
B - Ethernet
A - USB
*
EN
ES
Use the instructions in Section A if you want
to connect the HP All-in-One directly to one
computer .
*IMPORTANT: Do not connect the USB cable
until Step b.
Equipment needed: USB cable.
Siga las instrucciones de la Sección A si
desea conectar el dispositivo HP All-in-One
directamente a un equipo.
*IMPORTANTE: No conecte el cable USB hasta
el Paso b.
Equipo necesario: cable USB.
EN
ES
Use the instructions in Section B if you want
an Ethernet cable connection between the
HP All-in-One and your network.
Equipment needed: router and
Ethernet/network cable.
Utilice las instrucciones de la Sección B si
desea establecer una conexión por cable
Ethernet entre HP All-in-One y la red.
Equipo necesario: un direccionador y un cable
Ethernet/red.
HP Photosmart C6200 All-in-One series • 5
A1 - USB
Windows:
EN
ES
EN
ES
a. Turn on your computer, login if necessary, and
then wait for the desktop to appear. Insert the
green CD and follow the onscreen instructions.
IMPORTANT: If the startup screen does not appear,
double-click My Computer, double-click the
CD-ROM icon with the HP logo, and then doubleclick setup.exe.
a. Encienda el equipo, inicie la sesión si es necesario
y, a continuación, espere a que aparezca el
escritorio. Introduzca el CD verde y siga las
instrucciones que aparecen en pantalla.
IMPORTANTE: Si no aparece la pantalla de
inicio, haga doble clic en Mi PC, haga doble
clic en el icono CD-ROM con el logotipo HP y,
a continuación, haga doble clic en setup.exe.
IMPORTANT: Purchase a USB cable separately if it is
not included.
b. Once the USB prompt appears, connect the USB
cable to the port on the back of the HP All-in-One,
and then to any USB port on the computer.
c. Follow the onscreen instructions to complete the
software installation.
d. Go to page 9 to explore your HP All-in-One.
IMPORTANTE: Compre un cable USB por separado si
no está incluido.
b. Cuando aparezca el indicador USB, conecte el
cable USB al puerto ubicado en la parte posterior
del dispositivo HP All-in-One y, a continuación, a
cualquier puerto USB del equipo.
c. Siga las instrucciones que aparecen en pantalla
para completar la instalación del software.
d. Vaya a la página 9 para examinar el dispositivo
HP All-in-One.
6 • HP Photosmart C6200 All-in-One series
Mac:
EN
ES
EN
ES
IMPORTANT: Purchase a USB cable
separately if it is not included.
a. Connect the USB cable to the port on the
back of the HP All-in-One, and then to any
USB port on the computer.
IMPORTANTE: Compre un cable USB por
separado si no está incluido.
a. Conecte el cable USB al puerto ubicado
en la parte posterior del dispositivo
HP All-in-One y, a continuación, a
cualquier puerto USB del equipo.
b. Insert the green CD.
c. Double-click the HP Photosmart CD icon on
the desktop.
d. Double-click the HP All-in-One Installer
icon. Follow the onscreen instructions.
e. Complete the Setup Assistant screen.
f. Go to page 9 to explore your
HP All-in-One.
b. Inserte el CD verde.
c. Haga doble clic en el icono del CD de
HP Photosmart del escritorio.
d. Haga doble clic en el icono HP All-in-One
Installer. Siga las instrucciones que
aparecen en pantalla.
e. Complete la pantalla Asistente de
instalación.
f. Vaya a la página 9 para examinar el
dispositivo HP All-in-One.
B1 - Ethernet
EN
a. Locate your Ethernet/network cable.
b. Remove the yellow plug from the back of the
device.
c. Connect one end of the Ethernet/network cable to
the Ethernet port on the back of the device.
d. Connect the other end of the Ethernet/network
cable to the router (not in the Internet port).
e. Go to Section B2 of this Setup Guide to install your
software.
Important: Your computer and the HP All-in-One must be on
the same active, working network.
If you are using a DSL or cable modem, make sure you do not
connect the Ethernet/network cable from the HP All-in-One to
the cable modem. Connect it to the router only.
ES
a. Localice el cable Ethernet/red.
b. Extraiga el conector amarillo de la parte posterior
del dispositivo.
c. Conecte un extremo del cable Ethernet/red al
puerto Ethernet situado en la parte posterior del
dispositivo.
d. Conecte el otro extremo del cable Ethernet/red al
direccionador (no al puerto de Internet).
e. Vaya a la Sección B2 de la Guía de instalación
para instalar el software.
Importante: Su equipo y el dispositivo HP All-in-One deben
encontrarse en la misma red activa.
Si está utilizando un módem DSL o de cable, asegúrese
de que no conecta el cable Ethernet/red del dispositivo
HP All-in-One al módem de cable. Conéctelo sólo al
direccionador.
HP Photosmart C6200 All-in-One series • 7
B2 - Ethernet
Windows:
EN
ES
a. Turn on your computer, login if necessary, and
then wait for the desktop to appear.
b. Insert the green CD and follow the onscreen
instructions to install the software.
IMPORTANT: If the startup screen does not appear,
double-click My Computer, double-click the
CD-ROM icon with the HP logo, and then
double-click setup.exe.
c. On the Connection Type screen, make sure to
select through the network.
d. Your firewall software may provide prompts
warning you that HP software is attempting to
access your network. You should respond so that
access is “always” allowed. Then continue with the
HP software installation.
Note: Anti-virus and anti-spyware applications may
block software installation and may need to be
disabled. Remember to turn them back on again
following installation.
a. Encienda el equipo, inicie la sesión si es necesario
y, a continuación, espere a que aparezca el
escritorio.
b. Introduzca el CD verde y siga las instrucciones
que aparecen en pantalla para instalar el
software.
IMPORTANTE: Si no aparece la pantalla de inicio,
haga doble clic en Mi PC y en el icono CD-ROM
con el logotipo de HP y, a continuación, vuelva a
hacer doble clic en setup.exe.
c. En la pantalla Tipo de conexión, asegúrese de
seleccionar a través de la red.
d. Es posible que el software del cortafuegos envíe
mensajes en los que se le advierte de que el
software de HP está intentando tener acceso a
su red. Debe responder de modo que el acceso
“siempre” esté permitido. A continuación, prosiga
con la instalación del software de HP.
Nota: Las aplicaciones de antivirus y antispyware
pueden bloquear la instalación del software y
es posible que haya que desactivarlas. Recuerde
volver a activarlas al finalizar la instalación.
8 • HP Photosmart C6200 All-in-One series
Mac:
EN
ES
a. Turn on your computer, login if necessary,
and then wait for the desktop to appear.
b. Insert the green CD.
c. Double-click the HP Photosmart CD icon on
the desktop.
d. Double-click the HP All-in-One Installer
icon. Follow the onscreen instructions.
e. Complete the Setup Assistant Screen.
a. Encienda el equipo, inicie la sesión si es
necesario y, a continuación, espere a que
aparezca el escritorio.
b. Inserte el CD verde.
c. Haga doble clic en el icono del CD de
HP Photosmart del escritorio.
d. Haga doble clic en el icono HP All-in-One
Installer. Siga las instrucciones que
aparecen en pantalla.
e. Complete la pantalla Asistente de
instalación.
B3 - Ethernet
EN
EN
EN
EN
If you have additional computers on your
network, install the HP All-in-One software on
each computer.
Follow the onscreen instructions. Make sure that
you choose the connection types between the
network and your HP All-in-One (not between
your computer and the network).
Explore the features
Now that your HP Photosmart software
program is installed on your computer, you can
try out one of the features on the HP All-in-One.
Print a 4 x 6 inch photo
ES
ES
ES
ES
a
EN
a. If you have not already done so, load photo
paper in the photo tray.
b. Insert the memory card from your camera
into the appropriate memory card slot in the
HP All-in-One.
Si tiene otros equipos en la red, instale el
software HP All-in-One en cada uno de ellos.
Siga las instrucciones que aparecen en
pantalla. Asegúrese de que selecciona el
tipo de conexión entre la red y el dispositivo
HP All-in-One (no entre el equipo y la red).
Examine las funciones
Ahora que ha instalado el programa de
software HP Photosmart en su equipo, puede
probar algunas de las funciones del dispositivo
HP All-in-One.
Imprima una fotografía de
10 x 15 cm (4 x 6 in)
b
ES
a. Cargue papel fotográfico en la bandeja de
fotografías, en caso de que no lo haya hecho
todavía.
b. Introduzca la tarjeta de memoria de la cámara
en la ranura adecuada en el dispositivo
HP All-in-One.
HP Photosmart C6200 All-in-One series • 9
View Photos
Photosmart Express
8/59
View Photos
8/59
View
Print
Create
Share
Save
Press
to browse,
OK
to zoom
Photo Options
Press
Print Preview
Print Preview
Print Now
Edit Photo
Add More
Print All Preview
Settings
OK
for options,
to browse
Page 1/1
4x6 Borderless
Press
EN
EN
OK
to preview this photo
c. When the Photosmart Express menu
appears in the color graphics display, press
OK to select View.
d. Press the arrow buttons to view the desired
photo, then press OK to display the selected
photo.
e. Press OK to display photo options.
f. Press OK to preview the selected photo.
g. Press OK to print the photo.
USB - Troubleshooting
Press
ES
ES
OK
to print,
for pages
c. Cuando aparezca el menú Photosmart
Express en la pantalla de gráficos de color,
presione OK para seleccionar Ver.
d. Presione los botones de flecha para ver
la fotografía que desee y, a continuación,
presione OK para ver la fotografía
seleccionada.
e. Presione OK para ver las opciones de
fotografía.
f. Presione OK para obtener una vista
preliminar de la fotografía seleccionada.
g. Presione OK para imprimir la fotografía.
Solución de problemas de USB
www.hp.com/support
EN
ES
10 • HP Photosmart C6200 All-in-One series
Problem: (Windows only) The Device Setup Has Failed To Complete
screen appears.
Action: Unplug the device and plug it in again. Check all connections.
Make sure the USB cable is plugged into the computer. Do not plug
the USB cable into a keyboard or a non-powered USB hub. Refer to
Section A.
Problema: (Sólo en Windows) Aparece la pantalla Se ha producido un
error en la instalación del dispositivo.
Acción: Desconecte el dispositivo y vuelva a conectarlo. Compruebe
todas las conexiones. Asegúrese de que el cable USB está conectado al
equipo. No conecte el cable USB a un teclado ni a un concentrador USB
sin alimentación. Consulte la Sección A.
www.hp.com/support
EN
ES
EN
ES
EN
EN
ES
Problem: (Windows) The Microsoft Add Hardware screen appears.
Action: Cancel all screens. Unplug the USB cable, and then insert the
green HP All-in-One CD. Refer to Section A.
Problema: (Windows) Aparece la pantalla Agregar hardware de
Microsoft.
Acción: Cierre todas las pantallas. Desconecte el cable USB y, a
continuación, inserte el CD verde del dispositivo HP All-in-One. Consulte
la Sección A.
Problem: (Windows only) You did not see the screen prompting you to
connect the USB cable.
Action: Cancel all screens. Remove, and then re-insert the green
HP All-in-One CD. Refer to Section A.
Problema: (Sólo en Windows) No ha visto la pantalla que indica que
debe conectar el cable USB.
Acción: Cierre todas las pantallas. Extraiga el CD verde del dispositivo
HP All-in-One y, a continuación, vuelva a insertarlo. Consulte la
Sección A.
Network Troubleshooting
ES
Solución de problemas de red
Problem: While you install the HP All-in-One software, you see the error message Printer Not Found.
Action:
• The HP All-in-One may not be connected to your network. Check all cable connections between the
HP All-in-One, the router, and your PC.
• Try temporarily disabling any firewall, anti-spyware, or anti-virus software you may be currently running on
your PC.
Problema: Mientras se instala el software HP All-in-One, aparece el mensaje de error Impresora no
encontrada.
Acción:
• Es posible que el dispositivo HP All-in-One no esté conectado a la red. Compruebe todas las conexiones de
cable entre el dispositivo HP All-in-One, el direccionador y el equipo.
• Intente desactivar de forma temporal los software firewall, antispyware o antivirus que puedan estar
ejecutándose en el equipo.
HP Photosmart C6200 All-in-One series • 11
EN
Explore more features
ES
EN
ES
EN
For more information, see the HP Photosmart
C6200 All-in-One series Basics Guide, as
well as the onscreen help, which provides
detailed instructions on using all features of the
HP All-in-One.
© 2007 Hewlett-Packard Development Company, L.P.
Printed in ()
Printed in ()
ES
Examine otras funciones
Printable School Papers: Did you know you can
print school papers from your HP All-in-One? Print
notebook paper, graph paper, task checklists, or
even music paper from the control panel. Press
(Setup) on the control panel to access Printable
School Papers.
Documentos escolares imprimibles: ¿Sabía que
el dispositivo HP All-in-One permite imprimir
documentos escolares? En el panel de control,
imprima papel de bloc de notas, papel milimetrado,
listas de comprobación de tareas o incluso
pentagramas. Presione
(Instalar) en el panel
de control para acceder a Documentos escolares
imprimibles.
Para obtener más información, consulte la Guía
básica de HP Photosmart C6200 All-in-One series,
así como su correspondiente ayuda en pantalla, que
proporciona instrucciones detalladas sobre cómo
utilizar todas las funciones de HP All-in-One.
*CC988-90001*
*CC988-90001*
CC988-90001