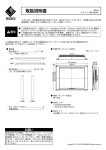
Download HP S1921d Setup Poster
Transcript
S1921,51921d LCD Monitors
Optimum Resolution 1366 x 768 @ 60 Hz
SN 7
nn
SA 7
> 1/3 [IK A
„647 rr: ISSN
—
a
——]
—
|
7
NZZ i i
NN
=I
AU: Y A > гг
O
Copyright O 2010 Hewlett-Packard Development Company, L.P.
| МИМО | The information contained herein is subject to change without notice.
5 Printed in China. Impresso em China. Imprimé en Chine. Stampato in Cina
972847822 Impreso en China HENRI. ЕЕ о ==01 914
Optimum Resolution
1366 x 768 @ 60 Hz
Quick Setup:
Step 1 — Pick up the panel and lower the pedestal onto the base until it locks. Avoid applying
pressure to the panel front to prevent damage.
Step 2 — Connect VGA cable.
Step 3 — Connect the power cord to the monitor and to a grounded wall outlet.
Step 4 — Adjust viewing angle.
Step 5 — Turn on the monitor.
For additional documentation, support, and drivers go to: www.hp.com/support
RETR:
1— SCIE S Bonds RHEIN SHEEN, RHE; FREEZE, MENE EZ, EE
E El EN A EX EL БАЗА ИЯ о
2—K VGAEH—IM EXE ли Е, ЭНЕН НЕМ Lo
3—K EMANAN DAS E, 7— Ba EPIA Eo
4— VIE DA NE E ENE
5—1] HE Má.
Ma LEI, AAA, 155% Muh: www.hp.com/support
Installation rapide :
Étape 1 — soulevez l’écran et abaissez le socle pour le mettre en position dans la base jusqu’à ce
qu'il s'enclenche. N'appuyez pas sur l'avant de l'écran car vous risqueriez de l'endommager.
Étape 2 — branchez le câble VGA.
Étape 3 — branchez le cordon d'alimentation au moniteur et à une prise murale avec mise à la terre.
Étape 4 — ajustez l’angle de vue du moniteur.
Étape 5 — allumez le moniteur.
Pour obtenir de la documentation supplémentaire, de l'assistance technique ou des pilotes, visitez
le site : www.hp.com/support
Instalación rápida:
Paso 1 — Levante el panel y baje el pedestal hacia la base hasta que encaje. No ponga presión en la
parte delantera del panel para evitar daños.
Paso 2 — Conecte el cable VGA.
Paso 3 — Conecte el cable de alimentación al monitor y a un enchufe de pared con toma de tierra.
Paso 4 — Ajuste el ángulo de visualización.
Paso 5 — Encienda el monitor.
Para ver documentación adicional y obtener apoyo o controladores, vaya a: www.hp.com/support
E
ZA 1— == El 4= 97-72) 7) £ 9 TAE +52. Е НРА ое ИН ©]
Nada AE 75H AE sI ©.
GA 2— VGA ES Y ASH 9
FA) 3 — ANA +9 EU E ZE 749 ALE ASNO
GA) 4— 7 42 == 5 >| ©.
SA 5— HAJA= AM
>
©
27} NE = 2] al, A] 2] al SH A= Z++4: www.hp.com/support
Quick Setup:
Langkah 1 — Ambil panel dan bawah ke alas dasar sampai terkunci. Hindari tekanan ke
panel ke depan untuk mencegah kerusakan.
Langkah 2 — Hubungkan kabel VGA
Langkah 3 — Hubungkan kabel listrik ke monitor dan ke stopkontak dinding grounded.
Langkah 4 — Mengatur sudut pandang.
Langkah 5 — Hidupkan monitor.
Untuk dokumentasi tambahan, dukungan, dan driver pergi ke: www.hp.com / support


