1
Setup - Parts
HFRS Tandem
Supply System Kit
3A2264A
EN
For use with non-heated bulk supply of medium to high viscosity sealants and adhesive
materials. For professional use only.
Not approved for use in European explosive atmosphere locations.
125 psi (0.9 MPa, 9 bar) Maximum Air Inlet Pressure - S20 3 in. rams
150 psi (1.0 MPa, 10 bar) Maximum Air Inlet Pressure - D200 3 in. rams
Important Safety Instructions
Read all warnings and instructions in manual
3A2175. Save all instructions.
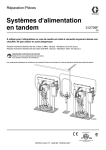
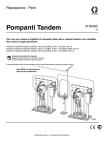
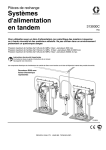
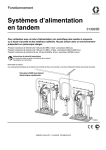
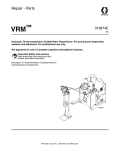
24M226 Assembly Shown
r_24m226_cover
Contents
Related Manuals . . . . . . . . . . . . . . . . . . . . . . . . . . . 3
Models . . . . . . . . . . . . . . . . . . . . . . . . . . . . . . . . . . . 4
Overview . . . . . . . . . . . . . . . . . . . . . . . . . . . . . . . . . . 5
Kit Description . . . . . . . . . . . . . . . . . . . . . . . . . . . 5
Pneumatic Crossover System Components . . . . 6
Integrated Air Controls . . . . . . . . . . . . . . . . . . . . 8
Air Line Accessories . . . . . . . . . . . . . . . . . . . . . . 8
Setup . . . . . . . . . . . . . . . . . . . . . . . . . . . . . . . . . . . . . 9
Ram Installation and Setup . . . . . . . . . . . . . . . . . 9
Grounding . . . . . . . . . . . . . . . . . . . . . . . . . . . . . 10
Pressure Relief Procedure . . . . . . . . . . . . . . . . . . 10
Startup . . . . . . . . . . . . . . . . . . . . . . . . . . . . . . . . . . 11
Shutdown . . . . . . . . . . . . . . . . . . . . . . . . . . . . . . . . 12
Prime . . . . . . . . . . . . . . . . . . . . . . . . . . . . . . . . . . . . 12
Troubleshooting . . . . . . . . . . . . . . . . . . . . . . . . . . . 13
Repair . . . . . . . . . . . . . . . . . . . . . . . . . . . . . . . . . . . 14
Ram Repair . . . . . . . . . . . . . . . . . . . . . . . . . . . . 14
Pump Repair . . . . . . . . . . . . . . . . . . . . . . . . . . . 14
Crossover Schematics . . . . . . . . . . . . . . . . . . . 14
Schematics . . . . . . . . . . . . . . . . . . . . . . . . . . . . . . . 15
Pneumatic Crossover . . . . . . . . . . . . . . . . . . . . 15
D200 Ram Tube Connection Diagram . . . . . . . 16
S20 Ram Tube Connection Diagram . . . . . . . . . 17
Parts . . . . . . . . . . . . . . . . . . . . . . . . . . . . . . . . . . . . 18
Tandem Supply System - D200 . . . . . . . . . . . . . 18
Tandem Supply System - S20 . . . . . . . . . . . . . . 20
Pneumatic Crossover Kits . . . . . . . . . . . . . . . . . 22
Pump Outlet Check Valve Kits . . . . . . . . . . . . . 25
Technical Data . . . . . . . . . . . . . . . . . . . . . . . . . . . . 26
Graco Standard Warranty . . . . . . . . . . . . . . . . . . . 28
Graco Information . . . . . . . . . . . . . . . . . . . . . . . . 28
2
3A2264A
Related Manuals
Related Manuals
Component Manuals in U.S. English:
Manual Description
313526
Supply Systems Operation
313527
Supply Systems Repair-Parts
312375
Check-Mate® Displacement Pumps
Instructions-Parts
312376
Check-Mate® Pump Packages
Instruction-Parts
312889
60 cc Check-Mate Displacement Pump
Repair-Parts
312374
Air Controls Instructions-Parts
3A2264A
3
Models
Models
Check the identification plate (ID) for the 6-digit part number of your tandem system.
ID
To order replacement parts, see Parts starting on page 18.
Each tandem supply kit consists of one single air-powered ram supply system and supply hose, as well as all the
components necessary to configure all pneumatic tandem supply system controls. This kit must be added to an identical single ram supply system (identified with the model information) with supply hoses to make up a complete tandem supply unit. This kit is intended only for use with HFRS systems that include a D200 or S20 supply system (See
manual 3A2175). Attempts to integrate with other systems may not be functional and may require additional parts.
Model
4
Description
To Be Installed with
Existing Supply
System
24M226
Tandem Crossover Kit, 20:1, 55 gallon, Carbon Steel
CM7A59
24M227
Tandem Crossover Kit, 20:1, 55 gallon, Stainless Steel
CM7C58
24M228
Tandem Crossover Kit, 20:1, 5 gallon, Carbon Steel
CM7A3C
24M229
Tandem Crossover Kit, 20:1, 5 gallon, Stainless Steel
CM7C3F
3A2264A
Overview
Overview
Kit Description
Each tandem supply kit consists of one single air-powered ram supply system and supply hose, as well as all
the components necessary to configure all pneumatic
tandem supply system controls. This kit must be added
to an identical single ram supply system (identified with
the model information) with supply hoses to make up a
complete tandem supply unit. This kit is intended only
for use with HFRS systems that include a D200 or S20
supply system (See manual 3A2175). Attempts to integrate with other systems may not be functional and may
require additional parts.
Keep clear of the inactive ram, as automatic crossover
may occur unexpectedly. To repair or adjust the ram, first
follow all steps of the Pressure Relief Procedure on
page 10.
3A2264A
5
Overview
Pneumatic Crossover System
Components
NOTE:
D200, and S20 sizes are used in pneumatic crossover systems.
FIG. 1. shows a pneumatic crossover system. Refer to
manual 313526 (supplied) for ram installation and operating instructions. The pneumatic crossover operates as
follows:
The position of the limit switch (E) on the ram determines when the air motor is turned off. Start by positioning the limit switch to trip when the ram platen (D) is 1 in.
(25 mm) from the bottom of the drum. During operation
the position may be adjusted as desired.
The bypass valve (L) allows you to prime the inactive
pump after a drum change. Open the valve to prime the
pump. Close the valve when priming is complete, and
during normal operation.
During system operation, as the ram approaches the
drum bottom, the top of the ram contacts the limit switch
(E). The limit switch shuts off air to the air motor via a
solenoid valve (Y), which stops air flow to one motor and
starts air flow to the other air motor. This allows continuous material flow and changing of material drums.
6
3A2264A
Overview
Typical Crossover System Diagram
V
W
AB
V
T
AA
W
AC
U
E
E
T
U
Y
L
Y
H
A
L
H
S
C S
D
B
C
D200 Rams Shown
Y
D
TI11160A
L
E
H
S20 Ram Shown
FIG. 1: Component Identification, Pneumatic Crossover
Key to FIG. 1:
A
B
C
D
E
H
L
S
Ram A
Ram B
Pump (Ram A and B)
Platen (Ram A and B)
Limit Switch (Ram A and B)
Integrated Air Controls (Ram A and B); see page 8
Bypass Valve (Ram A and B)
Fluid Line (not supplied)
3A2264A
T
U
V
W
Y
AA
AB
AC
Main Air Line (not supplied)
Air Line Drain Valve (not supplied)
Air Filter (not supplied)
Bleed-Type Air Shutoff Valve (not supplied)
Solenoid Valve (Ram A and B)
Cable from Ram A to Limit Switch A
Cable from Ram A to Limit Switch B
Main Crossover Cable; from Ram A to Solenoid B
7
Overview
Integrated Air Controls
Air Line Accessories
The integrated air controls include:
See FIG. 1.
•
•
Main air slider valve (BA): turns air on and off to
the system. When closed, the valve relieves pressure downstream.
Ram air regulator (BB): controls ram up and down
pressure and blowoff pressure.
•
Ram director valve (BC): controls ram direction.
•
Exhaust port with muffler (BD)
•
Air motor regulator (BE): Controls air pressure to
motor.
•
Air motor slider valve (BF): turns air on and off to
the air motor. When closed, the valve relieves air
trapped between it and the air motor. Push the valve
in to shutoff. Remote DataTrak: The air solenoid
(Y, FIG. 1), the air motor slider valve (BF), and the
main air slider valve (BA) must be open for air to
flow. (See Remote DataTrak Setup section in Supply
Systems operation manual 313526.)
•
Blowoff button (BG): turns air on and off to push
the platen out of an empty drum.
•
Air line drain valve (U)
•
Air line filter (V): removes harmful dirt and moisture from compressed air supply.
•
Second bleed-type air valve (W): isolates air line
accessories and supply system for servicing. Locate
upstream from all other air line accessories.
•
Air relief valve (attached to ram air regulator, not
visible): automatically relieves excessive pressure.
BF
BE
BD
BG
BC
BA
TI10438A
BB
FIG. 2. Integrated Air Controls
8
3A2264A
Setup
Setup
Ram Installation and Setup
1. Install and set up individual rams as explained in
manual provided.
2. Install outlet check valve assemblies on each ram.
Refer to page 25.
3. Install pneumatic crossover kits components on
each ram.
a. See pilot valve assembly drawing on page 22.
b.
Identify and locate the integrated air control
module.
c.
Remove the air hose and air fitting from the top
of the integrated air control module.
k.
Tube the system using the appropriate D200 or
S20 tubing drawing.
NOTE: The table on the drawing shows tubing cut
lengths. Using longer tube lengths will require additional
tubing (not provided).
4. When tubing is complete, slowly extend rams to the
full up and full down positions and take note how the
tubing moves.
5. Secure tubing in place with tape or wire ties.
NOTICE
To avoid machine damage and ensure proper operation, verify tubes are not pinched, kinked, or pulled
taught where they are secured when the rams are
raised or lowered.
NOTE: Leave the hose attached to the air motor on the
other end
d. Install the pilot valve assembly on top of the
integrated air control module as shown on page
22.
e. Install removed fitting from step c into port 1 of
the pilot valve assembly.
f.
Remove plug located on the integrated air control moduel and replace it with a tube fitting.
(See item 209 on page 22).
g. Install the crossover valve assembly on the ram
cylinder as shown on page 22. This assembly
will be installed on only one ram.
h. See tubing drawing on page 16 (D200 Ram
Tube Connection Diagram) or page 17 (S20
Ram Tube Connection Diagram) for location
of level switch assembly.
i.
Install level switch assembly to the top of the
ram cylinder as shown on page 23.
j.
Calibrate the switch to trip when the follower is
about 2 in (51 mm) above the ram base.
3A2264A
9
Pressure Relief Procedure
Grounding
The equipment must be grounded. Grounding reduces
the risk of static and electric shock by providing an
escape wire for the electrical current due to static build
up or in the event of a short circuit.
Pump: use ground wire and clamp (supplied). Loosen
grounding lug locknut and washer. Insert ground wire
end into lug slot and tighten locknut securely. Connect
ground clamp to a true earth ground.
Air and fluid hoses: use only electrically conductive
hoses with a maximum of 500 ft. (150 m) combined
hose length to ensure grounding continuity. Check electrical resistance of hoses. If total resistance to ground
exceeds 29 megohms, replace hose immediately.
Air compressor: follow manufacturer’s recommendations.
Dispense valve: ground through connection to a properly grounded fluid hose and pump.
Fluid supply container: follow local code.
Solvent pails used when flushing: follow local code.
Use only conductive metal pails, placed on a grounded
surface. Do not place the pail on a nonconductive surface, such as paper or cardboard, which interrupts
grounding continuity.
Pressure Relief
Procedure
NOTE: Refer to FIG. 2 on page 8 for the following procedure.
1. Turn off the air motor slider valve (BF) on both ram A
and B.
2. On both ram A and B, turn off the main air slider
valve (BA). Set the ram director valve (BC) to the
down position. The ram will slowly drop.
3. Perform Pressure Relief Procedure of the HFR
system. See manual 3A2175.
4. On both ram A and B, open the drain valve and/or
the pump bleed port. Have a container ready to
catch the drainage.
If you suspect that the spray tip/nozzle or hose is completely clogged, or that pressure has not been fully
relieved after following the steps above, very slowly
loosen the tip guard retaining nut or hose end coupling
and relieve pressure gradually, then loosen completely.
Now clear the tip/nozzle or hose.
To maintain grounding continuity when flushing or
relieving pressure: hold metal part of the dispense
valve firmly to the side of a grounded metal pail, then
trigger the valve.
10
3A2264A
Startup
Startup
10. Move to the current “Active” ram and lower it to the
bottom.
Flush Before Using Equipment
11. Verify that the cross bar contacts and actuates the
Air Limit Valve when lowered and that the Ram
Crossover occurs.
The pump was tested with lightweight oil, which is left in
the fluid passages to protect parts. To avoid contaminating your fluid with oil, flush the pump with a compatible
solvent before use. See your pump manual for flushing
directions.
1. Perform Setup on page 9.
2. Verify the following:
•
That you have equal line air pressure supplied
to both A & B units within 5 psi (35 kPa, 0.3 bar)
of each other.
•
The Bypass/Prime ball valves (item L in FIG. 1,
page 7) are closed,
•
That the air motor regulators are adjusted to
30 psi (210 kPa, 2.1 bar)
NOTICE
To prevent pump seal damage, adjust the pressure
down if the motor cycles too rapidly during the following test procedure
3. Position both A & B units about half way up, place in
“Neutral”, and open both motor isolation slider
valves (item BA in FIG. 2 on page 8).
4. Verify that only one ram unit motor cycles.
NOTE: The motor of the ram lowered should stop and
become “Inactive” and the opposite ram motor should
begin to cycle becoming “Active”).
12. Verify that the Bypass/Prime function works on the
“Inactive” ram by opening the Bypass/Prime ball
valve. The “Inactive” ram motor should begin to
cycle (the “Active” ram should continue to cycle).
13. Close Bypass/Prime ball valve.
14. Lower the “Active” ram to the bottom. Verify that
Ram Crossover does not occur.
NOTE: When an Active ram is lowered while the Inactive
ram is still lowered, a crossover should not occur. A
crossover in this condition could be caused by an air
leak, unequal supply line pressures, or a problem with
the 4-way Remote Air Valve.
15. Raise the opposit ram.
16. Verify that crossover occurs when the Air Limit Valve
is deactivated. Lower the same ram and verify that
Ram Crossover does NOT occur.
17. Startup Complete.
5. Go to the “Active” ram with the cycling motor and
lower it to the bottom.
6. Verify that the cross bar contacts and actuates the
Air Limit Valve when lowered and that the Ram
Crossover occurs.
NOTE: The motor of the ram lowered should stop and
become “Inactive” and the opposite ram motor should
begin to cycle becoming “Active”).
7. Verify that the Bypass/Prime function works on the
“Inactive” ram by opening the Bypass/Prime ball
valve. The “Inactive” ram motor should begin to
cycle (the “Active” ram should continue to cycle).
8. Close the Bypass/Prime ball valve.
9. Raise the “Inactive” ram about half way and place in
“Neutral”.
3A2264A
11
Shutdown
Shutdown
Turning the system OFF relieves pressure from the
pump motor. It does not depressurize the fluid pressure. Follow the Pressure Relief Procedure, page
10.
Prime
If the pump being primed is not the active pump, it will
be necessary to activate the air motor by opening the
bypass ball valve (FIG. 1, item L).
The tandem supply controls do not effect essential system operation.
1. Follow the procedure defined in the supply system
manual for priming.
The tandem controls act to allow only one of the two
pump air motors to run at any given time, unless the
pilot valve is bypassed. To manually activate the air
motor, open the bypass ball valve (FIG. 1, item L). Other
system functions are not effected by the tandem controls.
2. After priming, close the bypass ball valve to allow
the level sensors to shutdown the air motor.
1. Follow the procedure defined in the supply system
manual for shutdown.
12
3A2264A
Troubleshooting
Troubleshooting
1. Follow Pressure Relief Procedure, page 10, before
disassembling any part of the supply system.
NOTE: Refer to the Supply System Repair-Parts
manual for specific ram troubleshooting. Refer to
the Check-Mate Pump Packages manual for pump
troubleshooting.
Problem
Does not crossover.
Cause
2. Disconnect power before repairing the supply system.
3. Check all possible problems and causes before disassembling the supply system.
Verification
Alternate ram has an empty Verify ram has material.
sensor activated.
Replace empty drum.
Alternate pump is not
primed.
Prime pump.
Verify alternate ram is
ready to run.
Level switch not adjusted to Verify level switches actitrip properly.
vate at desired low level
point.
3A2264A
Solution
Adjust level switch.
13
Repair
Repair
Ram Repair
See manual 313527 for ram and platen repair procedures and replacement parts.
Pump Repair
See pump manuals for pump repair procedures and
replacement parts.
See manual 312796 for air motor repair procedures and
replacement parts.
Crossover Schematics
See page 15 for a schematic of pneumatic crossover
systems.
14
3A2264A
INTEGRATED
AIR CONTROL
V1
V1
M1
IN
EX
C1
P2
B
A1
A2
A
B
A
P1
RAM A
PUMP
ESTCODE
3(CYL)
REMOTE
PILOT
A1
V1
3
1
5
2
4
P2
RAM B
AIR
INLET
INTEGRATED
AIR CONTROL
RAM A
AIR
INLET
M1
RAM A
BYPASS
VALVE
TEE
3A2264A
1(IN)
2(EX)
RAM A
PILOT
VALVE
RAM A
LEVEL
SWITCH
V2
V2
RAM B
BYPASS
VALVE
C2
1(IN)
2(EX)
RAM B
PILOT
VALVE
RAM B
PUMP
ESTCODE
3(CYL)
REMOTE
PILOT
A2
A2
V2
RAM B
LEVEL
SWITCH
3
1
5
2
4
P1
Schematics
Schematics
Pneumatic Crossover
15
Schematics
D200 Ram Tube Connection Diagram
C1
V1
A1
P2
C2
C2
P1
A2
C1
V2
M1
V2
A2
A1
P2
P1
V1
M1
16
Tag
Tube Size
(in.)
Length
in (mm)
A1
1/4
36 (914)
Pilot air to switch on Unit A air motor
A2
1/4
180 (4572)
Pilot air to switch on Unit B air motor
C1
3/8
6.5 (165)
Bypass air - Unit A
C2
3/8
6.5 (165)
Bypass air - Unit B
M1
1/4
20 (508)
Main air to 4-way valve
P1
1/4
180 (4572)
Pilot air to switch from Unit B to A
P2
1/4
68 (1727)
Pilot air to switch from Unit A to B
V1
1/4
68 (1727)
Supply air to limit valve - Unit A
V2
1/4
68 (1727)
Supply air to limit valve - Unit B
Function
3A2264A
Schematics
S20 Ram Tube Connection Diagram
A2
C2
A1
C1
C2
P2
V1
C1
P1
A2
A1
P1
P2
V2
M1
V2
V1
M1
3A2264A
Tag
Tube Size
(in.)
Length
in (mm)
A1
1/4
61 (1550)
Pilot air to switch on Unit A air motor
A2
1/4
180 (4572)
Pilot air to switch on Unit B air motor
C1
3/8
6.5 (165)
Bypass air - Unit A
C2
3/8
6.5 (165)
Bypass air - Unit B
M1
1/4
49 (1245)
Main air to 4-way valve
P1
1/4
180 (4572)
Pilot air to switch from Unit B to A
P2
1/4
7 (178)
Pilot air to switch from Unit A to B
V1
1/4
12 (305)
Supply air to limit valve - Unit A
V2
1/4
49 (1245)
Supply air to limit valve - Unit B
Function
17
Parts
Parts
Tandem Supply System - D200
003
Supply System A
003
003
Supply System B
003
005,
006
005,
006
004
002
002
007
001
009 (2x)
008 (2x)
006
18
3A2264A
Parts
Ref
001
002
003
004
005
006
007
008
009
Part
CM7A59
CM7C58
257377
255452
255675
24F726
24M225
C19661
124406
15M863
801787
113833
122763
122327
6303-21
124433
3A2264A
Quantity
24M226, KIT,
24M227, KIT,
upgrade, 20:1,
upgrade, 20:1,
pxover, 55 gallon, pxover, 55 gallon,
carbon
stainless
Description
SUPPLY UNIT, 20:1, 0 volt, d200
1
SUPPLY UNIT, 20:1, 0 volt, d200
1
KIT, pump outlet check
2
KIT, pump outlet, check, carbon steel
2
KIT, pneumatic cross-over
1
1
HOSE, assy, 3/4id, female/male, sst
1
HOSE, coupled, 180l, 3/4id
1
BUSHING, reducing
2
FITTING, adapter, 3/4npt x 12jic
3
FITTING, connector, male
1
FITTING, tee, pipe 3\4
1
TEE, pipe, female
1
FITTING, elbow, straight, 3/4npt, 90, ss
2
FITTING, elbow, street
2
ADAPTER, swvl, jic12x3/4npt, feamle/male
2
FITTING, swivel, 3/4nptx12jic, male/female, sst
2
19
Parts
Tandem Supply System - S20
Supply System A
003
Supply System B
005,
006
003
005,
006
004
002
002
007
001
009 (2x)
008 (2x)
006
20
3A2264A
Parts
Quantity
Ref
001
002
003
004
005
006
007
008
009
Part
CM7A3C
CM7C3F
257377
255452
257373
24F726
24M225
C19661
124406
15M863
801787
113833
122763
122327
6303-21
124433
3A2264A
Description
SUPPLY UNIT, 20:1, 0 volt, s20, 20l
SUPPLY UNIT, 20:1, 0 volt, s20, 20l
KIT, pump outlet check
KIT, pump outlet, check, carbon steel
KIT, pneumatic xover
HOSE, assy, 3/4id, 180l, feamle/male, sst
HOSE, cpld, 180l, 3/4id
BUSHING, reducing
FITTING, adapter, 3/4npt x 12jic
FITTING, connector, male
FITTING, tee, pipe 3\4
TEE, pipe, female
FITTING, elbow, straight, 3/4npt, 90
FITTING, elbow, street
ADAPTER, swivel, jic12x3/4npt, female/male
FITTING, swivel, 3/4nptx12jic, male/female
24M228, KIT,
upgrade, 20:1,
pxover, 5 gallon,
carbon
24M229, KIT,
upgrade, 20:1,
pxover, 5 gallon,
stainless
1
1
2
2
1
1
1
1
2
3
1
1
1
2
2
2
2
21
Parts
Pneumatic Crossover Kits
255675, for 3 in. D200 Rams
257373 for S20 Rams
Pilot Valve Assembly 255675
Pilot Valve Assembly 257373
229
206
207
229
203
206
235
205
207
202
205
201
204
206
206
203
208
202
208
201
233
204
209
209
TI10932A
r_257373_313529_2a
Typical Crossover Valve
Assembly
229
224
214
225
229
223
221
222
225
230
226
229
22
229
TI10941A
3A2264A
Parts
Pneumatic Crossover Kits (continued)
Level Switch Assembly 255675
229
228
219
220
216
213
226
229
226
212
214
218
215
217
222
211
221
215
214
TI10942A
210
Level Switch Assembly 257373
229
211
228
222
213
216
218
219
217
220
212
221
226
226
210
229
214
215
r_257373_313529_1a
3A2264A
23
Parts
Pneumatic Crossover Kits
Ref.
201
202
203
204
205
Part
111337
C20487
C59752
113218
C12508
206
207
208
C19683
115240
115436
209
210
211
116658
------212 104116
213 111820
214 C19204
215 100179
216 C06182
217 100813
218 C19965
219 100068
220 100072
221 100016
222 101682
223 --224 113338
225 123366
226 C06061
228 100139
229 597151
230 110475
231 C12509
232★ 114958
233 104969
235 100896
Description
TEE, street; 3/4 npt(m) x 3/4 npt(f) x 3/4 npt(f)
NIPPLE, hex; 3/4 npt
VALVE, pneumatic, 3-way.
VALVE, ball, vented; 3/4 npt (m x f)
HOSE, nylon; 3/8 in. (10 mm) OD; 6 in. (153 mm);
black
BUSHING, reducing; 3/4 npt(m) x 3/8 npt(f)
FITTING, tube; 3/8 npt(m) x 3/8 in. (10 mm) OD tube
ELBOW, tube, 90°; 3/8 npt(m) x 3/8 in. (10 mm) OD
tube
FITTING, tube; 1/4 npt(m) x 1/4 in. (6 mm) OD tube
BRACKET, crossover
BRACKET, limit valve; for D200 rams
BRACKET, limit valve; for S20 rams
WASHER, plain; #10
SCREW, cap, socket hd; 10-24 x 3/4 in. (19 mm)
WASHER, lock; #10
NUT, hex mscr; 10-24
VALVE, limit, air
WASHER, flat
SCREW, cap, socket-hd; 6-32 x 1-1/4 in. (31 mm)
WASHER, lock, spring; #6
NUT, hex mscr; 6-32
WASHER, lock; 1/4
SCREW, cap, socket-hd; 1/4-20 x 5/8 in. (16 mm)
PLATE, mounting, 4-way valve
VALVE, air, remote, 4-way
SCREW, cap, socket-hd; 10-24 x 1-1/8 in. (29 mm)
MUFFLER
PLUG, pipe; 1/8 npt
ELBOW, tube; 1/8 npt(m) x 1/4 in. OD tube
TEE, street; 1/8 npt(m) x 1/8 npt(f) x 1/8 npt(f)
TUBE, nylon; 1/4 in. (6 mm) OD; 52 ft (15.9 m); black
STRAP, tie
BUSHING, reducing; for S20 rams
BUSING, reducing
Qty
2
2
2
2
AR
4
2
2
2
2
2
2
4
4
6
4
2
4
4
4
4
6
6
1
1
2
5
2
12
1
AR
4
2
2
★ Not shown.
--- Not for sale.
24
3A2264A
Parts
Pump Outlet Check Valve Kits
255452, used on carbon steel Check-Mate 60 and 100 Displacement Pumps (shown)
257377, used on stainless steel Check-Mate 60 and 100 Displacement Pumps
5
Ref. Description
255452
401 UNION, pipe; 1-1/4 in. npt(f)
CONNECTOR; 3/4 npt(m) x 1
in. unf
402 NIPPLE, hex; 1-1/4 in. npt
NIPPLE, hex; 1-1/4 in. npt
NIPPLE, reducing; 1 in. npt x
3/4 npt
403 VALVE, check; 1-1/4 in. npt
(fbe)
VALVE, check; 3/4 npt (fbe)
404 ELBOW, street, 90°; 1 in. npt (m
x f)
ELBOW; 3/4 npt (m x f)
521975
257377
15M863
C20490
521850
C59546
C38324
Ref. Description
ELBOW; 1-1/2 in. npt (f x f)
405 BUSHING, reducing; 1 in.
npt(m) x 3/4 npt(f)
NIPPLE, reducing; 1-1/4 in. npt
x 1 in. npt
NIPPLE, reducing; 1 in. npt x
3/4 npt
BUSHING, reducing; 1-1/2 npt
x 1-1/4 npt (fbe)
COUPLING, reducing; 1-1/2 in.
npt x 1 in. npt (fbe)
255452
257377
C19661
15M864
255455 Shown
401
401
405
402
402
404
403
403
402
404
TI10888A
r_255455_313529_1f
405
4.
3A2264A
25
Technical Data
Technical Data
Max air input pressure (supply system)
psi (MPa, bar) / Air inlet size
S20 - 3 in. single post, 5 gal. (20 L) . . . . . . . . . . . . . .
125 (0.9, 9) / 1/2 npt(f)
D200 - 3 in. dual post, 55 gal. (200 L), 30 gal. (115 L),
16 gal. (60 L), 8 gal. (30 L), 5 gal. (20 L) . . . . . . . . . .
150 (1.0, 10) / 3/4 npt(f)
Max fluid, air working pressure, and weigh
(displacement pump) . . . . . . . . . . . . . . . . . . . . . . . . .
For Check-Mate pump packages, see manual 312376.
Pump Wetted parts . . . . . . . . . . . . . . . . . . . . . . . . . . . . .
For Check-Mate displacement pumps, see manual
312375.
Ambient operating temperature range (supply system)
32-120 °F (0- 49°C)
Sound data. . . . . . . . . . . . . . . . . . . . . . . . . . . . . . . . . . . .
See separate air motor manual.
26
3A2264A
Technical Data
3A2264A
27
Graco Standard Warranty
Graco warrants all equipment referenced in this document which is manufactured by Graco and bearing its name to be free from defects in
material and workmanship on the date of sale to the original purchaser for use. With the exception of any special, extended, or limited warranty
published by Graco, Graco will, for a period of twelve months from the date of sale, repair or replace any part of the equipment determined by
Graco to be defective. This warranty applies only when the equipment is installed, operated and maintained in accordance with Graco’s written
recommendations.
This warranty does not cover, and Graco shall not be liable for general wear and tear, or any malfunction, damage or wear caused by faulty
installation, misapplication, abrasion, corrosion, inadequate or improper maintenance, negligence, accident, tampering, or substitution of
non-Graco component parts. Nor shall Graco be liable for malfunction, damage or wear caused by the incompatibility of Graco equipment with
structures, accessories, equipment or materials not supplied by Graco, or the improper design, manufacture, installation, operation or
maintenance of structures, accessories, equipment or materials not supplied by Graco.
This warranty is conditioned upon the prepaid return of the equipment claimed to be defective to an authorized Graco distributor for verification of
the claimed defect. If the claimed defect is verified, Graco will repair or replace free of charge any defective parts. The equipment will be returned
to the original purchaser transportation prepaid. If inspection of the equipment does not disclose any defect in material or workmanship, repairs will
be made at a reasonable charge, which charges may include the costs of parts, labor, and transportation.
THIS WARRANTY IS EXCLUSIVE, AND IS IN LIEU OF ANY OTHER WARRANTIES, EXPRESS OR IMPLIED, INCLUDING BUT NOT LIMITED
TO WARRANTY OF MERCHANTABILITY OR WARRANTY OF FITNESS FOR A PARTICULAR PURPOSE.
Graco’s sole obligation and buyer’s sole remedy for any breach of warranty shall be as set forth above. The buyer agrees that no other remedy
(including, but not limited to, incidental or consequential damages for lost profits, lost sales, injury to person or property, or any other incidental or
consequential loss) shall be available. Any action for breach of warranty must be brought within two (2) years of the date of sale.
GRACO MAKES NO WARRANTY, AND DISCLAIMS ALL IMPLIED WARRANTIES OF MERCHANTABILITY AND FITNESS FOR A
PARTICULAR PURPOSE, IN CONNECTION WITH ACCESSORIES, EQUIPMENT, MATERIALS OR COMPONENTS SOLD BUT NOT
MANUFACTURED BY GRACO. These items sold, but not manufactured by Graco (such as electric motors, switches, hose, etc.), are subject to
the warranty, if any, of their manufacturer. Graco will provide purchaser with reasonable assistance in making any claim for breach of these
warranties.
In no event will Graco be liable for indirect, incidental, special or consequential damages resulting from Graco supplying equipment hereunder, or
the furnishing, performance, or use of any products or other goods sold hereto, whether due to a breach of contract, breach of warranty, the
negligence of Graco, or otherwise.
FOR GRACO CANADA CUSTOMERS
The Parties acknowledge that they have required that the present document, as well as all documents, notices and legal proceedings entered into,
given or instituted pursuant hereto or relating directly or indirectly hereto, be drawn up in English. Les parties reconnaissent avoir convenu que la
rédaction du présente document sera en Anglais, ainsi que tous documents, avis et procédures judiciaires exécutés, donnés ou intentés, à la suite
de ou en rapport, directement ou indirectement, avec les procédures concernées.
Graco Information
For the latest information about Graco products, visit www.graco.com.
TO PLACE AN ORDER, contact your Graco distributor or call to identify the nearest distributor.
Toll Free: 1-800-746-1334 or Fax: 330-966-3006
All written and visual data contained in this document reflects the latest product information available at the time of publication.
Graco reserves the right to make changes at any time without notice.
Original instructions. This manual contains English. MM 3A2264
Graco Headquarters: Minneapolis
International Offices: Belgium, China, Japan, Korea
GRACO INC. AND SUBSIDIARIES • P.O. BOX 1441 • MINNEAPOLIS MN 55440-1441 • USA
Copyright 2011, Graco Inc. All Graco manufacturing locations are registered to ISO 9001.
www.graco.com