1
Instructions - Parts List
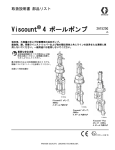
Viscount® 4-Ball Pumps
3A0537G
EN
Hydraulic-powered pumps for low pressure, high volume circulation of finishing materials.
Do not use for flushing or purging lines with caustics, acids, abrasive line strippers, and
other similar fluids. For professional use only.
Important Safety Instructions
Read all warnings and instructions in
this manual. Save these instructions.
See page 3 for model information, including
maximum working pressure and approvals.
TI15609a
Viscount II
Pump with
4000cc 4-Ball
Lower
TI15600a
Viscount II
Pump with
2000cc 4-Ball
Lower
TI15601a
Viscount I Plus
Pump with
1000cc 4-Ball
Lower
II 2 G c IIB T3
Related Manuals
Contents
Related Manuals . . . . . . . . . . . . . . . . . . . . . . . . . . . 2
Models . . . . . . . . . . . . . . . . . . . . . . . . . . . . . . . . . . . 3
Pumps with 750cc, 1000cc, 1500cc, or 2000cc
4-Ball Lowers . . . . . . . . . . . . . . . . . . . . . . . . 3
Pumps with 3000cc or 4000cc 4-Ball Lowers . . . 3
Warnings . . . . . . . . . . . . . . . . . . . . . . . . . . . . . . . . . 4
Installation . . . . . . . . . . . . . . . . . . . . . . . . . . . . . . . . 6
Grounding . . . . . . . . . . . . . . . . . . . . . . . . . . . . . . 6
Stand Mount . . . . . . . . . . . . . . . . . . . . . . . . . . . . 7
Wall Mount . . . . . . . . . . . . . . . . . . . . . . . . . . . . . 7
Plumbing . . . . . . . . . . . . . . . . . . . . . . . . . . . . . . . 7
Flush Before Using Equipment . . . . . . . . . . . . . . 7
Accessories . . . . . . . . . . . . . . . . . . . . . . . . . . . . . 8
Operation . . . . . . . . . . . . . . . . . . . . . . . . . . . . . . . . 11
Pressure Relief Procedure . . . . . . . . . . . . . . . . 11
Prime the Pump . . . . . . . . . . . . . . . . . . . . . . . . 11
Stop the Pump at the Bottom of Its Stroke . . . . 11
Shutdown . . . . . . . . . . . . . . . . . . . . . . . . . . . . . 11
Maintenance . . . . . . . . . . . . . . . . . . . . . . . . . . . . . . 12
Preventive Maintenance Schedule . . . . . . . . . . 12
Flushing . . . . . . . . . . . . . . . . . . . . . . . . . . . . . . 12
Mix Tank Volume . . . . . . . . . . . . . . . . . . . . . . . 12
Hydraulic Power Supply Check . . . . . . . . . . . . . 12
Stall Test . . . . . . . . . . . . . . . . . . . . . . . . . . . . . . 12
Changing the TSL . . . . . . . . . . . . . . . . . . . . . . . 13
Troubleshooting . . . . . . . . . . . . . . . . . . . . . . . . . . . 14
Repair . . . . . . . . . . . . . . . . . . . . . . . . . . . . . . . . . . . 15
Disassembly . . . . . . . . . . . . . . . . . . . . . . . . . . . 15
Reassembly . . . . . . . . . . . . . . . . . . . . . . . . . . . . 15
Reassemble the Coupling Adapter and Tie Rods to
the Motor . . . . . . . . . . . . . . . . . . . . . . . . . . . 17
Parts . . . . . . . . . . . . . . . . . . . . . . . . . . . . . . . . . . . . 18
Viscount I Plus Pumps with 750cc, 1000cc,
1500cc, or 2000cc 4-Ball Lowers . . . . . . . . 18
Viscount II Pumps with 2000cc 4-Ball Lower . . . 19
Viscount II Pumps with 3000cc or
4000 cc 4-Ball Lowers . . . . . . . . . . . . . . . . . 20
Dimensions . . . . . . . . . . . . . . . . . . . . . . . . . . . . . . . 21
Motor Mounting Hole Diagrams . . . . . . . . . . . . . . 22
Mounting Stand Hole Layouts . . . . . . . . . . . . . . . 22
255143 Wall Mount Bracket . . . . . . . . . . . . . . . . . . 23
Technical Data . . . . . . . . . . . . . . . . . . . . . . . . . . . . 24
750, 1000, 1500, and 2000cc Pumps with
Viscount I Plus Motor . . . . . . . . . . . . . . . . . 24
2000cc Pumps with Viscount II Motor . . . . . . . . 25
3000 and 4000cc Pumps with Viscount II Motor 25
Performance Charts . . . . . . . . . . . . . . . . . . . . . . . . 26
Graco Standard Warranty . . . . . . . . . . . . . . . . . . . 30
Graco Information . . . . . . . . . . . . . . . . . . . . . . . . . 30
Related Manuals
Part No. Description
308330
Viscount I Plus Hydraulic Motor manual
308048
Viscount II Hydraulic Motor manual
3A0539
4-Ball Lower manual (750cc, 1000cc,
1500cc, and 2000cc)
3A0540
4-Ball Lower manual (3000cc and 4000cc)
2
3A0537G
Models
Models
Pumps with 750cc, 1000cc, 1500cc, or 2000cc 4-Ball Lowers
Model No.
Series
Maximum Pump
Working Pressure
psi (MPa, bar)
24E322
A
450 (3.1, 31.0)
750cc
Viscount I Plus
npt
cst
24E323
24E324
A
A
450 (3.1, 31.0)
450 (3.1, 31.0)
750cc
750cc
Viscount I Plus
Viscount I Plus
tri-clamp
tri-clamp
24E485
24E486
24E325
24E326
24E327
24E487
24E488
24E328
24E329
24E330
24E489
24E490
24E331
24E332
24E333
24E491
24E492
24E334
24E335
24E336
24E493
24E494
A
A
A
A
A
A
A
A
A
A
A
A
A
A
A
A
A
A
A
A
A
A
450 (3.1, 31.0)
450 (3.1, 31.0)
300 (2.1, 21.0)
300 (2.1, 21.0)
300 (2.1, 21.0)
300 (2.1, 21.0)
300 (2.1, 21.0)
225 (1.6, 16.0)
225 (1.6, 16.0)
225 (1.6, 16.0)
225 (1.6, 16.0)
225 (1.6, 16.0)
167 (1.2, 12.0)
167 (1.2, 12.0)
167 (1.2, 12.0)
167 (1.2, 12.0)
167 (1.2, 12.0)
460 (3.2, 32.0)
460 (3.2, 32.0)
460 (3.2, 32.0)
460 (3.2, 32.0)
460 (3.2, 32.0)
750cc
750cc
1000cc
1000cc
1000cc
1000cc
1000cc
1500cc
1500cc
1500cc
1500cc
1500cc
2000cc
2000cc
2000cc
2000cc
2000cc
2000cc
2000cc
2000cc
2000cc
2000cc
Viscount I Plus
Viscount I Plus
Viscount I Plus
Viscount I Plus
Viscount I Plus
Viscount I Plus
Viscount I Plus
Viscount I Plus
Viscount I Plus
Viscount I Plus
Viscount I Plus
Viscount I Plus
Viscount I Plus
Viscount I Plus
Viscount I Plus
Viscount I Plus
Viscount I Plus
Viscount II
Viscount II
Viscount II
Viscount II
Viscount II
npt
npt
npt
tri-clamp
tri-clamp
npt
npt
npt
tri-clamp
tri-clamp
npt
npt
npt
tri-clamp
tri-clamp
npt
npt
npt
tri-clamp
tri-clamp
npt
npt
Lower Size
Motor
Connection
Style
Material
Rod
Material
Cylinder
Material
Nitride
sst
sst
Chromex™
Chromex
Chromex
sst
sst
cst
sst
sst
sst
sst
cst
sst
sst
sst
sst
cst
sst
sst
sst
sst
cst
sst
sst
sst
sst
Chromex
Chromex
Chromex
Chromex
Chromex
Chromex
Chromex
Chromex
Chromex
Chromex
Chromex
Chromex
Chromex
Chromex
Chromex
Chromex
Chromex
Chromex
Chromex
Chromex
Chromex
Chromex
MaxLife®
Chrome
MaxLife
Chrome
Chrome
MaxLife
Chrome
MaxLife
Chrome
Chrome
MaxLife
Chrome
MaxLife
Chrome
Chrome
MaxLife
Chrome
MaxLife
Chrome
Chrome
MaxLife
Chrome
MaxLife
Chrome
Pumps with 3000cc or 4000cc 4-Ball Lowers
Model No.
Series
Maximum Pump
Working Pressure
psi (MPa, bar)
24E337
24E338
24E339
24E340
24E341
24E342
A
A
A
A
A
A
400 (2.8, 28.0)
400 (2.8, 28.0)
400 (2.8, 28.0)
300 (2.1, 21.0)
300 (2.1, 21.0)
300 (2.1, 21.0)
3A0537G
Lower Size
Motor
Connection
Style
Material
Rod
Material
Cylinder
Material
3000cc
3000cc
3000cc
4000cc
4000cc
4000cc
Viscount II
Viscount II
Viscount II
Viscount II
Viscount II
Viscount II
npt
npt
npt
npt
npt
npt
cst
sst
sst
cst
sst
sst
Chromex
Chromex
Chromex
Chromex
Chromex
Chromex
Chrome
Chrome
MaxLife
Chrome
Chrome
MaxLife
3
Warnings
Warnings
The following warnings are for the setup, use, grounding, maintenance, and repair of this equipment. The exclamation point symbol alerts you to a general warning and the hazard symbols refer to procedure-specific risks. When
these symbols appear in the body of this manual, refer back to these Warnings. Product-specific hazard symbols and
warnings not covered in this section may appear throughout the body of this manual where applicable.
WARNING
WARNING
PERIGO DE FOGO E EXPLOSÃO
Os vapores inflamáveis na área de trabalho, tais como os provenientes de solventes e tintas, podem
inflamar-se ou explodir. Para ajudar a evitar incêndio e explosão:
• Utilize o equipamento apenas em áreas bem ventiladas;
• Elimine todas as fontes de ignição, como, por exemplo, luzes piloto, cigarros, luzes elétricas portáteis
e plásticos de proteção (potencial arco estático).
• Mantenha a área de trabalho sem detritos, incluindo solvente, panos e gasolina;
• Não ligue nem desligue cabos de alimentação ou interruptores, na presença de vapores inflamáveis;
• Ligue à terra todo o equipamento na área de trabalho. Consulte as instruções de Ligação à terra .
• Utilize apenas tubos flexíveis com ligação à terra;
• Segure a pistola firmemente apoiando-a na parede do balde em contacto com a terra, quando estiver
a descarregar para dentro do mesmo;
• Se ocorrerem faíscas de estática ou se sentir um choque elétrico, interrompa a utilização imediatamente.
Não utilize o equipamento até identificar e corrigir o problema.
• Tenha sempre um extintor operacional na área de trabalho.
A carga estática pode-se acumular nas peças plásticas durante a limpeza e pode disparar e inflamar
vapores inflamáveis. Para ajudar a evitar incêndio e explosão:
•
Limpe as peças plásticas apenas em áreas bem ventiladas.
•
Não limpe com um pano seco.
•
Não opere pistolas eletrostáticas numa área de trabalho de equipamento.
PERIGO DE EQUIPAMENTO PRESSURIZADO
O produto proveniente da pistola/pistola de distribuição, fugas ou componentes danificados poderá entrar
em contacto com os olhos ou com a pele e provocar ferimentos extremamente graves.
• Siga o Procedimento de Descompressão neste manual, quando parar de pintar e antes de dar
início aos procedimentos de limpeza, verificação ou manutenção.
• Aperte todas as ligações relativas ao produto antes de utilizar o equipamento.
• Verifique diariamente todos os tubos e uniões. Substitua imediatamente as peças gastas ou danificadas.
PERIGO EMERGENTE DE PRODUTOS OU VAPORES TÓXICOS
Os líquidos ou vapores tóxicos podem provocar lesões graves ou morte se entrarem em contacto com os
olhos e a pele, ou se forem inalados ou engolidos.
• Leia as folhas de dados de segurança do material (MSDS) para conhecer os perigos específicos dos
líquidos que está a utilizar.
• Armazene os líquidos perigosos em recipientes aprovados e elimine-os em conformidade com as
diretrizes aplicáveis.
4
3A0537G
Warnings
WARNING
WARNING
EQUIPAMENTO DE PROTECÇÃO PESSOAL
Utilize equipamento de proteção adequado ao usar o equipamento ou se estiver na área de funcionamento
do mesmo. O equipamento protege-o de lesões graves, tais como lesões oculares, perda de audição,
inalação de vapores tóxicos e queimaduras. Este equipamento inclui, mas não é limitado a:
• Proteção para os olhos e ouvidos.
• Respiradores, roupa protetora e luvas, tal como recomendado pelo fabricante do líquido e solvente.
PERIGO DE MÁ UTILIZAÇÃO DO EQUIPAMENTO
A utilização incorreta do equipamento poderá resultar em ferimentos graves ou morte.
• Não utilize a unidade se estiver cansado ou sob a influência de drogas ou de álcool.
• Não exceda a pressão de trabalho ou o nível de temperatura máximo do componente do sistema com
a classificação mais baixa. Consulte a Dados Técnicos em todos os manuais do equipamento.
• Utilize líquidos e solventes compatíveis com as peças do equipamento em contacto com o líquido.
Consulte a Dados Técnicos em todos os manuais do equipamento. Leia as advertências dos
fabricantes do líquido e do solvente. Para obter informações completas relativas ao material que utiliza,
solicite a folha de dados de segurança do material (MSDS) ao distribuidor ou ao revendedor.
• Não abandone a área de trabalho enquanto o equipamento se encontrar energizado ou sob pressão.
Desligue todo o equipamento e siga o Procedimento de Descompressão quando o equipamento
não está a ser utilizado.
• Verifique diariamente o equipamento. As peças danificadas ou com desgaste devem ser imediatamente
reparadas ou substituídas apenas por peças genuínas do fabricante.
• Não altere nem modifique este equipamento.
• Utilize o equipamento apenas para o fim a que se destina. Solicite informações ao seu distribuidor.
• Afaste os tubos flexíveis e cabos de áreas com movimento, pontas afiadas, peças em movimento e
superfícies quentes.
• Não dê nós nem dobre os tubos flexíveis, nem os utilize para puxar o equipamento.
• Mantenha as crianças e os animais afastados da área de trabalho.
• Cumpra todas as normas de segurança aplicáveis.
PERIGO RESULTANTE DE PEÇAS EM MOVIMENTO
As peças em movimento podem entalar ou amputar os dedos e outras partes do corpo.
• Mantenha-se afastado das peças em movimento.
• Não utilize o equipamento tendo removido as respetivas proteções e coberturas.
• O equipamento sob pressão pode começar a funcionar sem aviso. Antes de efetuar ações de verificação,
deslocação ou assistência no equipamento, siga o Procedimento de Descompressão e desligue
todas as fontes de alimentação.
3A0537G
5
Installation
Installation
Grounding
The equipment must be grounded. Grounding
reduces the risk of static and electric shock by
providing an escape wire for the electrical current
due to static build up or in the event of a short circuit.
Pump: use a ground wire and clamp. See FIG. 1.
Loosen the locknut (W) of the grounding lug (Z). Insert
one end of the wire (Y) in the ground lug and tighten the
locknut securely. Connect the ground clamp to a true
earth ground. Order Part No. 237569, Ground Wire and
Clamp.
Air and fluid hoses: use only electrically conductive
hoses with a maximum of 500 ft. (150 m) combined
hose length to ensure grounding continuity. Check the
electrical resistance of hoses. If total resistance to
ground exceeds 25 megohms, replace hose immediately.
Hydraulic power supply: follow manufacturer’s recommendations.
Surge tank: use a ground wire and clamp.
Dispense valve: ground through a connection to a
properly grounded fluid hose and pump.
Fluid supply container: follow local code.
Object being sprayed: follow local code.
Solvent pails used when flushing: follow local code.
Use only conductive metal pails, placed on a grounded
surface. Do not place the pail on a nonconductive surface, such as paper or cardboard, which interrupts
grounding continuity.
Y
To maintain grounding continuity when flushing or
relieving pressure: hold metal part of the spray gun
firmly to the side of a grounded metal pail, then trigger
the gun.
TI15854a
W
Z
FIG. 1 Ground Wire
6
3A0537G
Installation
Stand Mount
Plumbing
Mount the pump in the accessory pump stand (B). Use
Part No. 253692 Stand for 750, 1000, 1500, and 2000cc
Pumps (see FIG. 2, page 9) and Part No. 218742 Stand
for 3000 and 4000cc Pumps (see FIG. 3, page 10).
Install a fluid shutoff valve (D) between the mix tank (A)
and the pump.
See Mounting Stand Hole Layouts on page 22.
Secure the stand to the floor with M19 (5/8 in.) bolts
which engage at least 152 mm (6 in.) into the concrete
floor to prevent the pump from tipping.
Wall Mount
1. Ensure the wall is strong enough to support the
weight of the pump assembly and accessories, fluid,
hoses, and stress caused during pump operation.
When using a stainless steel pump, use stainless steel
plumbing to maintain a corrosion-resistant system.
Flush Before Using Equipment
The equipment was tested with lightweight oil, which is
left in the fluid passages to protect parts. To avoid contaminating your fluid with oil, flush the equipment with a
compatible solvent before using the equipment. See
Flushing, page 12.
2. Ensure that the mounting location has sufficient
clearance for easy operator access.
3. Position the wall bracket at a convenient height,
ensuring that there is sufficient clearance for the
fluid suction line and for servicing the lower.
4. Drill four 7/16 in. (11 mm) holes using the bracket as
a template. Use any of the three mounting hole
groupings in the bracket. See 255143 Wall Mount
Bracket, page 23.
5. Bolt the bracket securely to the wall using bolts and
washers designed to hold in the wall’s construction.
6. Attach the pump assembly to the mounting bracket.
7. Connect air and fluid hoses.
3A0537G
7
Installation
Accessories
•
For Viscount II motors, use a minimum 22 mm (7/8
in.) ID return line (K). The motor has a 1 in. npt(f)
hydraulic oil return fitting.
•
Return line shutoff valve (R): isolates the motor
when servicing the system.
Install the following accessories in the order shown in
FIG. 2, using adapters as necessary.
Hydraulic Power Supply
NOTICE
NOTICE
The hydraulic power supply must be kept clean at all
times to avoid damage to the motor and hydraulic
power supply.
1. Blow out hydraulic lines with air and flush thoroughly before connection to the motor.
To avoid damage to the pump, never use the return
line shutoff valve to control the hydraulic flow. Do not
install any flow control devices on the hydraulic return
line.
•
2. Plug hydraulic inlets, outlets, and line ends when
disconnecting them for any reason.
Return fluid filter (J): removes residue from the
hydraulic fluid to help keep the system running
smoothly (10 micron size).
Be sure the power supply can provide sufficient power
to the motor. Be sure the power supply is equipped with
a suction filter to the hydraulic pump.
Fluid Line
Hydraulic Supply Line
•
Fluid filter: with a 60 mesh (250 micron) stainless
steel element to filter particles from the fluid as it
leaves the pump.
•
Fluid drain valve (U): required in your system, to
relieve fluid pressure in the hose and gun.
•
Fluid shutoff valve (D): shuts off fluid flow.
•
•
For Viscount I Plus motors, the hydraulic inlet on the
motor is 3/4 in., 37° flare. Use a minimum 1/2 in. (13
mm) ID hydraulic supply line (L).
For Viscount II motors, use a minimum 13 mm (1/2
in.) ID supply line (L). The motor has a 3/4 npt(f)
hydraulic oil supply fitting.
•
Supply line shutoff valve (S): isolates the motor
when servicing the system.
•
Hydraulic fluid pressure gauge (P): monitors the
hydraulic oil pressure to the motor to avoid overpressurizing the motor or lower.
•
Pressure- and temperature-compensated flow
control valve (T): prevents the motor from running
too fast, which can damage it.
•
Pressure reducing valve (N), which has a drain
line (M) running to the return line (K): controls the
hydraulic pressure to the motor.
For typical installation, see FIG. 2 on page 9.
Hydraulic Return Line
•
8
For Viscount I Plus motors, the hydraulic outlet on
the motor is 7/8 in., 37° flare. Use a minimum 5/8 in.
(16 mm) ID hydraulic return line (K).
3A0537G
Installation
E
L
K
R
N P S
Y
M
E
T
J
A
U
B
G
D
D
U
F
TI15855a
D
C
FIG. 2. Typical Installation for 750, 1000, 1500, and 2000cc Pumps (Viscount I Plus Motor Shown)
Key:
A
B
C
D
E
F
G
J
K
L
M
N
Mix Tank
253692 Pump Stand
Fluid Supply Line; 1-1/2 in. (38 mm) minimum diameter
Fluid Shutoff Valve
Fluid Line; 1 in. (25 mm) minimum diameter
Surge Tank Stand
Surge Tank
10 Micron Return Filter
Hydraulic Return Line
Hydraulic Supply Line
Drain Line
Pressure Reducing Valve
3A0537G
P
R
S
T
U
Y
Hydraulic Pressure Gauge
Return Line Shutoff Valve
Supply Line Shutoff Valve
Flow Control Valve
Fluid Drain Valve (required)
Ground Wire (required see page 6 for installation)
9
Installation
L
K
P
N
S
Y
T
M
U
A
R
J
D
G
E
D
U
F
B
D
C
TI15856a
FIG. 3. Typical Installation for 3000 and 4000cc Pumps (Viscount II Motor Shown)
Key:
A
B
C
D
E
F
G
J
K
L
10
Mix Tank
218742 Pump Stand
Fluid Supply Line; 1-1/2 in. (38 mm) minimum diameter
Fluid Shutoff Valve
Fluid Line; 1 in. (25 mm) minimum diameter
Surge Tank Stand
Surge Tank
10 Micron Return Filter
Hydraulic Return Line
Hydraulic Supply Line
M
N
P
R
S
T
U
Y
Drain Line
Pressure Reducing Valve
Hydraulic Pressure Gauge
Return Line Shutoff Valve
Supply Line Shutoff Valve
Flow Control Valve
Fluid Drain Valve (required)
Ground Wire (required see page 6 for installation)
3A0537G
Operation
Operation
Pressure Relief Procedure
1. Shut off the hydraulic supply line valve (S) first, then
the return line valve (R).
2. Open the dispensing valve, if used.
3. Open all fluid drain valves (U) in the system, having
a waste container ready to catch drainage. Leave
drain valve(s) open until you are ready to pump
again.
NOTICE
When shutting down the hydraulic system, always
shut off the hydraulic supply line shutoff valve (S) first,
and then the return line shutoff valve (R) to prevent
overpressurizing the motor or its seals. When starting
the hydraulic system, open the return line shutoff
valve first.
7. Verify that pump actuations are priming the pump
wet-cup. If not, confirm that the TSL pump piston is
being depressed at bottom changeover, and that
reservoir check valves are not stuck closed.
8. Close the fluid shutoff valve (D) downstream of the
pump. The pump should stall against pressure.
NOTE: In a circulation system, the pump operates continuously until the power supply is shut off. In a
direct-supply system, the pump starts when the dispense valve is opened, and stops when the dispense
valve is closed.
Stop the Pump at the Bottom of
Its Stroke
Relieve the pressure when you stop the pump for any
reason. Stop the pump on the downstroke, before the
motor changes over.
Prime the Pump
1. Fill the TSL reservoir to the Maximum fill line with
Throat Seal Liquid (TSL). See FIG. 4 on page 13.
NOTE: During operation the TSL level in the reservoir
will fluctuate slightly at pump changeover.
NOTICE
Failure to stop the pump at the bottom of its stroke
allows fluid to dry on the piston rod, which can damage the throat packings and the TSL pump piston seal
when the pump is restarted.
2. Close the flow control valve (T) by turning knob
counterclockwise reducing pressure to zero. Close
the supply line shutoff valve (S) and the return line
shutoff valve (R). Also verify that all drain valves (U)
are closed.
Shutdown
3. Check that all fittings throughout system are tightened securely.
Follow Pressure Relief Procedure, page 11.
4. Start the hydraulic power supply.
Always flush the pump before the fluid dries on the displacement rod. See Flushing on page 12.
5. Open the return line shutoff valve (R), then the supply line shutoff valve (S). Slowly turn the flow control
valve (T) clockwise, increasing pressure until pump
starts.
6. Cycle pump slowly until all air is pushed out and
pump and hoses are fully primed.
3A0537G
11
Maintenance
Maintenance
Preventive Maintenance
Schedule
The operating conditions of your particular system
determine how often maintenance is required. Establish
a preventive maintenance schedule by recording when
and what kind of maintenance is needed, and then
determine a regular schedule for checking your system.
Your maintenance schedule should include the following:
Flushing
•
•
•
Flush before changing colors, before fluid can dry in
the equipment, at the end of the day, before storing,
and before repairing equipment.
Flush at the lowest pressure possible. Check connectors for leaks and tighten as necessary.
Flush with a fluid that is compatible with the fluid
being dispensed and the equipment wetted parts.
Mix Tank Volume
Stall Test
Perform a stall test periodically to ensure the piston seal
is in good working condition and prevent system overpressurization:
Close the fluid shutoff valve (D) closest to the pump on
the downstroke and be sure that the pump stalls. Open
the fluid shutoff valve to restart the pump. Close the fluid
shutoff valve (D) closest to the pump on the upstroke
and be sure that the pump stalls.
NOTICE
Do not allow the pump to run quickly for a long period
of time as this may damage the packings.
Stop the pump on the downstroke, before the air motor
changes over.
NOTICE
Failure to stop the pump at the bottom of its stroke
allows fluid to dry on the piston rod, which can damage the throat packings and the TSL pump piston seal
when the pump is restarted.
Don't let the mix tank run dry. When the tank is empty,
the pump demands more power as it tries to suck in
some fluid. This causes the pump to run too fast, which
can seriously damage the pump.
Hydraulic Power Supply Check
Carefully follow the hydraulic power supply manufacturer's recommendations on reservoir and filter cleaning,
and periodic changes of hydraulic fluid.
12
3A0537G
Maintenance
Changing the TSL
To change the TSL:
Check the condition of the TSL and the level in the reservoir every week, minimum. TSL should be changed at
least every month.
1. Shut off the pump.
Part No. 206995 Throat Seal Liquid (TSL) carries residue from the pump rod into the reservoir. Discoloration
of the TSL fluid is to be expected during normal operation. After some time the TSL will thicken and darken,
and must be replaced. Thick, dirty TSL will not pump
through the lines and will harden in the pump wet-cup.
To avoid the buildup of static charge, do not rub the
plastic bottle with a dry cloth while it is attached to the
pump. Remove the bottle to clean, if needed.
2. Remove and empty the reservoir bottle. Clean any
residue.
How long TSL lasts depends on which chemicals are
used, how much is used, what pressure, and condition
of the pump seal and rod.
3. Clean screen (Z) of inlet check valve (VI). If check
valves are not sealing and dirty TSL is getting into
the wet-cup, replace the check valves (VI, VO). See
FIG. 4.
A drop in the level of TSL in the reservoir indicates that
the throat packings are starting to wear. Add TSL to the
reservoir and keep the level above the Minimum fill line.
Monitor the usage and condition of the TSL. If pumped
material bypasses the throat packings and enters the
TSL reservoir, replace the packings.
4. Fill the reservoir to the Maximum fill line with Throat
Seal Liquid (TSL).
5. Run pump. Each time pump rod reaches bottom of
stroke, check that some TSL is pumped from reservoir through wet-cup and back to reservoir.
VO
Maximum Fill Line
Minimum Fill Line
VI
Z
TI15853b
TI15857a
FIG. 4. Cutaway of TSL Reservoir, and Fill Lines
3A0537G
13
Troubleshooting
Troubleshooting
Problem
Pump output low on both strokes.
Pump output low on only one stroke.
Cause
Solution
Restricted hydraulic supply lines.
Clear any obstructions; be sure all shutoff
valves are open; increase pressure, but
do not exceed maximum working pressure.
Exhausted fluid supply.
Refill and reprime pump.
Clogged fluid outlet line, valves, etc.
Clear.
Worn piston packing.
Replace. See lower manual.
Held open or worn ball check valves.
Check and repair.
Worn piston packings.
Replace. See lower manual.
No output.
Improperly installed ball check valves.
Check and repair.
Pump operates erratically.
Exhausted fluid supply.
Refill and reprime pump.
Held open or worn ball check valves.
Check and repair.
Worn piston packing.
Replace. See lower manual.
Excessive hydraulic fluid supply pressure to motor.
See motor manual.
Restricted hydraulic supply lines.
Clear any obstructions; be sure all shut
off valves are open; increase pressure,
but do not exceed maximum working
pressure.
Pump will not operate.
14
Exhausted fluid supply.
Refill and reprime pump.
Clogged fluid outlet line, valves, etc.
Clear.
Damaged hydraulic motor.
See motor manual.
Fluid dried on piston rod.
Disassemble and clean pump. See lower
manual. In future, stop pump at bottom of
stroke.
3A0537G
Repair
Repair
Disassembly
Reassembly
NOTE: The 3000 and 4000cc pumps are easiest to
repair when left in the Part No. 218742 accessory pump
stand and disassembled as instructed in the lower manual. For repair at a remote location, have another pump
stand available.
NOTE: If the coupling adapter (108) and tie rods (103)
have been disassembled from the motor, see Reassemble the Coupling Adapter and Tie Rods to the
Motor on page 17.
1. See FIG. 6. Assemble the coupling nut (105) to the
piston rod (R).
2. Orient the lower (102) to the motor (101). Position
the lower on the tie rods (103). Lubricate the
threads of the tie rods. Screw the tie rod locknuts
(104) onto the tie rods. Torque the tie rod locknuts
to 50-55 ft-lb (68-75 N•m).
1. Relieve the pressure, see Pressure Relief Procedure page 11.
2. Disconnect the hoses from the lower and plug the
ends to prevent fluid contamination.
3. Insert the collars (106) into the coupling nut (105).
3. See FIG. 5. Remove the 2-piece shield (122) by
inserting a screwdriver straight into the slot, and
using it as a lever to release the tab. Repeat for all
tabs. Do not use the screwdriver to pry the shields
apart.
4. Loosen the coupling nut (105) and remove the collars (106). Remove the coupling nut from the piston
rod (R). Unscrew the locknuts (104) from the tie
rods (103). Separate the motor (101) and lower
(102). See FIG. 6.
5. To repair the air motor or lower, see the separate
manuals listed under Related Manuals on page 2.
a. 750, 1000, 1500, and 2000cc Pumps: Tighten
the coupling nut onto the coupling adapter (108)
and torque to 90-100 ft-lb (122-135 N•m).
b. 3000 and 4000cc Pumps: Tighten the coupling
nut onto the motor shaft (S) and torque to 150
ft-lb (203 N•m).
4. See FIG. 5. Install the shields (122) by engaging the
bottom lips with the groove in the wet-cup cap (C).
Snap the two shields together.
5. Flush and test the pump before reinstalling it in the
system. Connect hoses and flush the pump. While it
is pressurized, check for smooth operation and
leaks. Adjust or repair as necessary before reinstalling in the system. Reconnect the pump ground wire
before operating.
Shield Disassembly
Shield
ti15758a
ti15759a
ti15757a
ti15770a
FIG. 5. Disassembly and Reassembly of the Shields
3A0537G
15
Repair
Viscount I Plus
Pump with
1000cc 4-Ball
Lower
Viscount II Pump
with 2000cc 4-Ball
Lower
Viscount II Pump
with 4000cc 4-Ball
Lower
101
101
111
101
110
103
109
6
103
107
108
2
106
105
111
1
122
Part of 101
S
109
103
S
106
105
2
2
5
108
122
2
112
106
105
R
4
1
R
122
102
102
104
2
104
3
102
2
3
R
TI15602a
TI15610a
104
2
1
Torque to 90-100 ft-lb (122-135 N•m).
2
Torque to 50-55 ft-lb (68-75 N•m).
3
Lubricate threads.
4
Torque to 75-80 ft-lb (102-109 N•m).
5
Torque to 150 ft-lb (203 N•m).
6
Torque to 15-17 ft-lb (20-23 N•m).
3
TI15599a
FIG. 6. Reassembly
16
3A0537G
Repair
Reassemble the Coupling
Adapter and Tie Rods to the
Motor
NOTE: Use this procedure only if the coupling adapter
(108) and tie rods (103) have been disassembled from
the motor, to ensure proper alignment of the motor shaft
to the piston rod.
NOTE: 3000 and 4000cc Pumps do not have a coupling
adapter (108) or a mounting plate (111).
1. 750, 1000, 1500, and 2000cc Pumps only: Loosen,
but do not remove, the screws holding the mounting
plate (111) to the motor (101). See FIG. 6.
2. Install the tie rods (103).
a. 750, 1000, 1500, and 2000cc Viscount I Plus
Pumps: Screw the tie rods (103) through the
mounting plate (111) and into the threaded
holes in the base of the motor. Torque to 50-55
ft-lb (68-75 N•m).
b. 750, 1000, 1500, and 2000cc Viscount II
Pumps: Screw the tie rods (103) into the mounting plate (111) and torque to 50-55 ft-lb (68-75
N•m).
c.
3000 and 4000cc Pumps: Screw the tie rods
(103) into the base of the motor and torque to
50-55 ft-lb (68-75 N•m).
5. Orient the lower (102) to the motor (101). Position
the lower on the tie rods (103). Lubricate the
threads of the tie rods. Loosely screw the tie rod
locknuts (104) onto the tie rods.
6. 750, 1000, 1500, and 2000cc Pumps only: Tighten
the mounting plate screws as follows.
a. Viscount I Plus motors: Torque the screws (109)
to 15-17 ft-lb (20-23 N•m).
b. Viscount II motors: Torque the screws (109) to
50-55 ft-lb (68-75 N•m).
7. Torque the tie rod locknuts (104) to 50-55 ft-lb
(68-75 N•m).
8. Insert the collars (106) into the coupling nut (105).
a. 750, 1000, 1500, and 2000cc Pumps: Tighten
the coupling nut onto the coupling adapter (108)
and torque to 90-100 ft-lb (122-135 N•m).
b. 3000 and 4000cc Pumps: Tighten the coupling
nut onto the motor shaft (S) and torque to 150
ft-lb (203 N•m).
9. Flush and test the pump before reinstalling it in the
system. Connect hoses and flush the pump. While it
is pressurized, check for smooth operation and
leaks. Adjust or repair as necessary before reinstalling in the system. Reconnect the pump ground wire
before operating.
3. Fill the cavity in the bottom of the motor shaft with
grease.
4. 750, 1000, 1500, and 2000cc Pumps only: Install
the coupling adapter (108) as follows.
a. Viscount I Plus motors: Screw the coupling
adapter (108) into the motor shaft until the pin
holes align. Install the pin (107) in the first hole
from the end of the coupling.
b. Viscount II motors: Slide the adapter nut (112)
onto the adapter (108). Screw the nut (112)
onto the motor shaft (S) and torque to 75-80
ft-lb (102-109 N•m).
3A0537G
17
Parts
Parts
Viscount I Plus Pumps with 750cc, 1000cc, 1500cc,
or 2000cc 4-Ball Lowers
Common Parts
Ref.
No. Description
101 MOTOR, Viscount I Plus, see manual
308330
102 LOWER, 4-Ball, see manual 3A0539
103 TIE ROD, 14.25 in. (362 mm) between
shoulders
104 NUT, lock, hex; 9/16-12 unc
105 NUT, coupling
106 COLLAR, coupling
107 PIN, cotter
108 ADAPTER, coupling
109 SCREW, cap
110 WASHER, lock
111 PLATE, mounting
122 SHIELD KIT; includes 2 shields
101
111
103
110
109
107
108
106
105
Part of 101
122
Part No.
261466
Qty
.
1
see tables
15G924
1
3
108683
184059
184128
100103
16C373
100001
100214
16E086
24F252
3
1
2
1
1
4
4
1
1
Parts that Vary by Model
102
102
104
TI15602a
18
Pump
(see page 3)
24E322
24E323
24E324
24E485
24E486
24E325
24E326
24E327
24E487
24E488
24E328
24E329
24E330
24E489
24E490
24E331
24E332
24E333
24E491
24E492
Lower Size
750cc
1000cc
1500cc
2000cc
4-Ball Lower
(see manual 3A0539)
24F420
24F415
24F416
24F413
24F414
24F431
24F426
24F427
24F424
24F425
24F439
24F434
24F435
24F432
24F433
24F447
24F441
24F442
24F440
24F443
3A0537G
Parts
Viscount II Pumps with 2000cc 4-Ball Lower
Common Parts
Ref.
No. Description
101 MOTOR, Viscount II, see manual
308048
102 LOWER, 4-Ball, see manual 3A0539
103 TIE ROD, 14.25 in. (362 mm) between
shoulders
104 NUT, lock, hex; 9/16-12 unc
105 NUT, coupling
106 COLLAR, coupling
108 ADAPTER, coupling
109 SCREW, cap, socket hd
111 PLATE, mounting
112 NUT, adapter
122 SHIELD KIT; includes 2 shields
101
111
109
103
108
Part No.
223646
Qty
.
1
see table
15G924
1
3
108683
184059
184128
15K736
C19789
120558
183079
24F252
3
1
2
1
3
1
1
1
Parts that Vary by Model
112
106
105
102
Pump
(see page 3)
24E334
24E335
24E336
24E493
24E494
122
Lower Size
2000cc
4-Ball Lower
(see manual 3A0539)
24F447
24F441
24F442
24F440
24F443
102
104
TI15599a
3A0537G
19
Parts
Viscount II Pumps with 3000cc or 4000 cc 4-Ball Lowers
Common Parts
Ref.
No. Description
101 MOTOR, Viscount II, see manual
308048
102 LOWER, 4-Ball, see manual 3A0540
103 TIE ROD, 12.72 in. (323 mm) between
shoulders
104 NUT, lock, hex; 9/16-12 unc
105 NUT, coupling
106 COLLAR, coupling
122 SHIELD KIT; includes 2 shields
101
103
Part No.
223646
Qty
.
1
see table
180487
1
3
102216
186925
184129
24F255
3
1
2
1
Parts that Vary by Model
106
105
102
Pump
(see page 3)
24E337
24E338
24E339
24E340
24E341
24E342
122
Lower Size
3000cc
4000cc
4-Ball Lower
(see manual 3A0540)
24F450
24F448
24F449
24F453
24F451
24F452
102
104
TI15610a
20
3A0537G
Dimensions
Dimensions
Viscount I Plus
Pump with
1000cc 4-Ball
Lower
A
A
A
B
B
C
Motor
Viscount I Plus
Viscount II
Viscount II
B
C
C
TI15600a
TI15601a
3A0537G
Viscount II Pump with
4000cc 4-Ball Lower
Viscount II Pump with
2000cc 4-Ball Lower
Lower Size
750cc
1000cc
1500cc
2000cc
2000cc
3000cc
4000cc
TI15609a
A
in. (mm)
B
in. (mm)
C
in. (mm)
49.00 (1245)
28.78 (731)
17.4 (442)
53.72 (1365)
28.78 (731)
17.4 (442)
54.75 (1391)
29.0 (737)
23.0 (584)
Approx.
Weight
lb (kg)
74 (33.6)
75 (34.0)
76 (34.5)
77 (34.9)
150 (68.0)
215 (97.5)
217 (98.4)
21
Motor Mounting Hole Diagrams
Motor Mounting Hole Diagrams
Viscount I Plus Adapter Plate 16E086
Four 0.45 (11.4 mm)
diameter holes
4.508 in.
(115 mm)
Viscount II Motor Mounting Hole Layout
6.186 in.
(157 mm)
4X 3/8-16 UNC - 2B
7.43 in.
(188 mm)
Four 0.344 (8.7 mm)
diameter holes
6.186 in.
(157 mm)
4.508 in.
(115 mm)
7.43 in.
(188 mm)
6.186 in.
(157 mm)
6.186 in.
(157 mm)
TI15860a
TI10465a
Mounting Stand Hole Layouts
253692 Floor Stand (for 750, 1000, 1500,
and 2000cc Pumps)
218742 Floor Stand (for 3000 and 4000cc Pumps)
17.0 in.
(431.8 mm)
6.41 in.
(160 mm)
6.41 in.
(160 mm)
30°
19.88 in.
(505.0 mm)
16.88 in.
(428.8 mm)
30°
60°
11.1 in.
(278 mm)
7.4 in.
(185 mm) radius
14.50 in.
(368.3 mm)
TI15859a
22
Threaded 0.68 in.
(17 mm) holes
3A0537G
255143 Wall Mount Bracket
255143 Wall Mount Bracket
17.8 in.
(450.9 mm)
14.5 in.
(368.3 mm)
2.0 in.
(50.8 mm)
5.4 in.
(136.5 mm)
7.4 in.
(187.3 mm)
5.3 in.
(133.4 mm)
1.0 in.
(25.4 mm)
9.0 in.
(228.6 mm)
1.6 in.
(41.4 mm)
12.4 in.
(314.3 mm)
7/16 in. (11 mm)
diameter holes for
mounting to wall
1/2 in. (12.7 mm) diameter
holes for mounting to stand
TI8614B
3A0537G
23
Technical Data
Technical Data
750, 1000, 1500, and 2000cc Pumps with Viscount I Plus Motor
Model
24E322
24E323
24E324
24E485
24E486
24E325
24E326
24E327
24E487
24E488
24E328
24E329
24E330
24E489
24E490
24E331
24E332
24E333
24E491
24E492
Lower
Size
Maximum
Working
Pressure
psi (MPa, bar)
Maximum
Hydraulic
Maximum Fluid Flow at
Working
Hydraulic
60 cycles
Pressure
Hydraulic Oil Motor Fluid per minute
psi (MPa, bar) Consumption Temperature gpm (lpm)
750cc
750cc
750cc
750cc
750cc
1000cc
1000cc
1000cc
1000cc
1000cc
1500cc
1500cc
1500cc
1500cc
1500cc
2000cc
2000cc
2000cc
2000cc
2000cc
450 (3.1, 31.0)
450 (3.1, 31.0)
450 (3.1, 31.0)
450 (3.1, 31.0)
450 (3.1, 31.0)
300 (2.1, 21.0)
300 (2.1, 21.0)
300 (2.1, 21.0)
300 (2.1, 21.0)
300 (2.1, 21.0)
225 (1.6, 16.0)
225 (1.6, 16.0)
225 (1.6, 16.0)
225 (1.6, 16.0)
225 (1.6, 16.0)
167 (1.2, 12.0)
167 (1.2, 12.0)
167 (1.2, 12.0)
167 (1.2, 12.0)
167 (1.2, 12.0)
9.6 (36.4)
9.6 (36.4)
9.6 (36.4)
9.6 (36.4)
9.6 (36.4)
14.1 (53.5)
14.1 (53.5)
14.1 (53.5)
14.1 (53.5)
See
14.1 (53.5)
Performance 134°F (54°C)
19.4 (73.6)
Chart
19.4 (73.6)
19.4 (73.6)
19.4 (73.6)
19.4 (73.6)
26.8 (101.5)
26.8 (101.5)
26.8 (101.5)
26.8 (101.5)
26.8 (101.5)
1500 (10.3,
103.0)
Maximum
Output
Fluid
per Cycle Temperature
(cc)
Rating
610
610
610
610
610
890
890
890
890
890
1230
1230
1230
1230
1230
1690
1690
1690
1690
1690
150°F (66°C)
Sound data: See Viscount I Plus manual 308330.
Wetted parts: See 4-Ball Lower manual 3A0539.
24
3A0537G
Technical Data
2000cc Pumps with Viscount II Motor
Model
24E334
24E335
24E336
24E493
24E494
Lower
Size
2000cc
2000cc
2000cc
2000cc
2000cc
Maximum
Working
Pressure
psi (MPa, bar)
Maximum
Hydraulic
Maximum Fluid Flow at
Working
Hydraulic
60 cycles
Pressure
Hydraulic Oil Motor Fluid per minute
psi (MPa, bar) Consumption Temperature gpm (lpm)
460 (3.2, 32.0)
1200 (8.3, 83.0)
See
Performance 134°F (54°C) 31.5 (119.3)
Chart
Maximum
Output
Fluid
per Cycle Temperature
(cc)
Rating
2000
150°F (66°C)
Sound data: See Viscount II manual 308048.
Wetted parts: See 4-Ball Lower manual 3A0539.
3000 and 4000cc Pumps with Viscount II Motor
Model
24E337
24E338
24E339
24E340
24E341
24E342
Lower
Size
Maximum
Working
Pressure
psi (MPa, bar)
3000cc
3000cc
3000cc
4000cc
4000cc
4000cc
400 (2.8, 28.0)
400 (2.8, 28.0)
400 (2.8, 28.0)
300 (2.1, 21.0)
300 (2.1, 21.0)
300 (2.1, 21.0)
Maximum
Hydraulic
Maximum Fluid Flow at
Working
Hydraulic
60 cycles
Pressure
Hydraulic Oil Motor Fluid per minute
psi (MPa, bar) Consumption Temperature gpm (lpm)
1200 (8.3, 83.0)
See
Performance 134°F (54°C)
Chart
47.3 (179)
47.3 (179)
47.3 (179)
63 (238.6)
63 (238.6)
63 (238.6)
Maximum
Output
Fluid
per Cycle Temperature
(cc)
Rating
3000
3000
3000
4000
4000
4000
150°F (66°C)
Sound data: See Viscount II manual 308048.
Wetted parts: See 4-Ball Lower manual 3A0540.
3A0537G
25
Performance Charts
Performance Charts
To find Fluid Outlet Pressure (psi/MPa/bar) at a specific fluid flow (lpm/gpm) and operating hydraulic pressure (psi/MPa/bar):
To find Motor Hydraulic Oil Consumption (l/min. or
gpm) at a specific fluid flow (l/min. or gpm):
1. Locate desired flow along bottom of chart.
1. Locate desired flow along bottom of chart.
2. Follow vertical line up to intersection with selected
fluid outlet pressure curve (black). Follow left to
scale to read fluid outlet pressure.
2. Read vertical line up to intersection with hydraulic oil
consumption curve (dashes). Follow right to scale to
read hydraulic oil consumption.
See Models on page 3 for your pump part number.
Viscount I Plus Motor, 750cc Lower
CPM
psi (MPa, bar)
19
PUMP OUTLET PRESSURE
Key:
A 10.3 MPa, 103 bar (1500 psi)
hydraulic pressure
B 7.2 MPa, 72.4 bar (1050 psi)
hydraulic pressure
C 4.1 MPa, 41 bar (600 psi)
hydraulic pressure
400
(2.8, 28)
300
2.1, 21)
200
(1.4, 14)
100
(0.7, 7)
56
GPM
(l/min)
74
5 (19.0)
A
4 (15.2)
3 (11.4)
B
2 (7.6)
C
1 (3.8)
HYDRAULIC OIL CONSUMPTION
500
3.4, 34)
37
0
GPM 0
(l/min)
3
(11)
6
(23)
9
(34)
12
(46)
15
(57)
PUMP DELIVERY (Test Fluid: No. 10 Motor Oil)
Viscount I Plus Motor, 1000cc Lower
PUMP OUTLET PRESSURE
HYDRAULIC OIL CONSUMPTION
NOTE: The shaded area within
the table shows the recommended range for continuous
duty circulation applications.
PUMP DELIVERY (Test Fluid: No. 10 Motor Oil)
26
3A0537G
Performance Charts
See Models on page 3 for your pump part number.
Viscount I Plus Motor, 1500cc Lower
PUMP OUTLET PRESSURE
HYDRAULIC OIL CONSUMPTION
Key:
A 10.3 MPa, 103 bar (1500 psi)
hydraulic pressure
B 7.2 MPa, 72.4 bar (1050 psi)
hydraulic pressure
C 4.1 MPa, 41 bar (600 psi)
hydraulic pressure
PUMP DELIVERY (Test Fluid: No. 10 Motor Oil)
NOTE: The shaded area within
the table shows the recommended range for continuous
duty circulation applications.
Viscount I Plus Motor, 2000cc Lower
CPM
psi (MPa, bar)
12
24
GPM
36
48
PUMP OUTLET PRESSURE
A
2.5 (9.5)
120
0.84, 8.4)
80
(0.56, 5.6)
40
(0.28, 2.8)
2.0 (7.6)
B
1.5 (5.7)
1.0 (3.8)
C
0.5 (1.9)
HYDRAULIC OIL CONSUMPTION
160
(1.12, 11.2)
60 (l/min)
3.0 (11.4)
0
GPM 0
(l/min)
5
(19)
10
(38)
15
(57)
20
(76)
25
(95)
PUMP DELIVERY (Test Fluid: No. 10 Motor Oil)
3A0537G
27
Performance Charts
See Models on page 3 for your pump part number.
Viscount II Motor, 2000cc Lower
CYCLES PER MIN.
0
4
8
12
16
20
24
28
NOTE: The shaded area within
the table shows the recommended range for continuous
duty circulation applications.
400 (2.8, 28)
A
32
36
8.0 (30.4)
7.0 (26.6)
350 (2.4, 24)
6.0 (22.8)
B
300 (2.1, 21)
5.0 (19.0)
250 (1.7, 17)
4.0 (15.2)
200 (1.4, 14)
C
3.0 (11.4)
150 (1.0, 10)
2.0 (7.6)
100 (0.7, 7)
1.0 (3.8)
50 (0.3, 3)
0 (0, 0)
0.0
(0.0)
HYDRAULIC OIL CONSUMPTION
Key:
A 10.3 MPa, 103 bar (1500 psi)
hydraulic pressure
B 7.2 MPa, 72.4 bar (1050 psi)
hydraulic pressure
C 4.1 MPa, 41 bar (600 psi)
hydraulic pressure
FLUID PRESSURE, psi (MPa, bar)
450 (3.1, 31)
GPM
(l/min)
0
2.0 4.0 6.0 8.0 10.0 12.0 14.0 16.0 18.0
(7.0) (15.0) (22.5) (30.0) (37.9) (45.4) (53.0) (60.6) (68.1)
FLUID FLOW, gpm (lpm)
28
3A0537G
Performance Charts
See Models on page 3 for your pump part number.
Key:
A 10.3 MPa, 103 bar (1500 psi) hydraulic pressure
B 7.2 MPa, 72.4 bar (1050 psi) hydraulic pressure
C 4.1 MPa, 41 bar (600 psi) hydraulic pressure
NOTE: The shaded area within the table shows the
recommended range for continuous duty circulation
applications.
Viscount II Motor, 3000cc Lower
Fluid Outlet Pressure
psi
MPa, bar
21
31
42
52
60
HYDRAULIC OIL CONSUMPTION
10
400
2.8, 28
FLUID PRESSURE
Hydraulic Oil Consumption
cycles per minute
A
300
2.1, 21
B
200
1.4, 14
C
100
0.7, 7
0
gpm
liters/minute
0
8
30
16
60
24
91
32
121
40
151
48
181
cycles per minute
gpm
l/min
12
45
10
38
10
21
31
42
52
60
8
30
16
60
24
91
32
121
40
151
48
181
8
30
6
23
4
15
2
7.6
0
gpm
liters/minute
0
FLUID FLOW (TEST FLUID: NO. 10 WEIGHT OIL)
FLUID FLOW (TEST FLUID: NO. 10 WEIGHT OIL)
Viscount II Motor, 4000cc Lower
FLUID PRESSURE
2.1, 21
8
cycles per minute
15
23
30
38
Hydraulic Oil Consumption
46
53
A
1.8, 17.5
1.4, 14
B
1.0, 10
0.7, 7
C
0.35, 3.5
gpm
liters/minute
30
60
91
121
151
181
212
FLUID FLOW (TEST FLUID: NO. 10 WEIGHT OIL)
3A0537G
HYDRAULIC OIL CONSUMPTION
Fluid Outlet Pressure
psi
MPa, bar
gpm
l/min.
8
cycles per minute
15
23
30
38
30
60
46
53
181
212
60
45
30
15
gpm
liters/minute
91
121
151
FLUID FLOW (TEST FLUID: NO. 10 WEIGHT OIL)
29
Graco Standard Warranty
Graco warrants all equipment referenced in this document which is manufactured by Graco and bearing its name to be free from defects in
material and workmanship on the date of sale to the original purchaser for use. With the exception of any special, extended, or limited warranty
published by Graco, Graco will, for a period of twelve months from the date of sale, repair or replace any part of the equipment determined by
Graco to be defective. This warranty applies only when the equipment is installed, operated and maintained in accordance with Graco’s written
recommendations.
This warranty does not cover, and Graco shall not be liable for general wear and tear, or any malfunction, damage or wear caused by faulty
installation, misapplication, abrasion, corrosion, inadequate or improper maintenance, negligence, accident, tampering, or substitution of
non-Graco component parts. Nor shall Graco be liable for malfunction, damage or wear caused by the incompatibility of Graco equipment with
structures, accessories, equipment or materials not supplied by Graco, or the improper design, manufacture, installation, operation or
maintenance of structures, accessories, equipment or materials not supplied by Graco.
This warranty is conditioned upon the prepaid return of the equipment claimed to be defective to an authorized Graco distributor for verification of
the claimed defect. If the claimed defect is verified, Graco will repair or replace free of charge any defective parts. The equipment will be returned
to the original purchaser transportation prepaid. If inspection of the equipment does not disclose any defect in material or workmanship, repairs
will be made at a reasonable charge, which charges may include the costs of parts, labor, and transportation.
THIS WARRANTY IS EXCLUSIVE, AND IS IN LIEU OF ANY OTHER WARRANTIES, EXPRESS OR IMPLIED, INCLUDING BUT NOT
LIMITED TO WARRANTY OF MERCHANTABILITY OR WARRANTY OF FITNESS FOR A PARTICULAR PURPOSE.
Graco’s sole obligation and buyer’s sole remedy for any breach of warranty shall be as set forth above. The buyer agrees that no other remedy
(including, but not limited to, incidental or consequential damages for lost profits, lost sales, injury to person or property, or any other incidental or
consequential loss) shall be available. Any action for breach of warranty must be brought within two (2) years of the date of sale.
GRACO MAKES NO WARRANTY, AND DISCLAIMS ALL IMPLIED WARRANTIES OF MERCHANTABILITY AND FITNESS FOR A
PARTICULAR PURPOSE, IN CONNECTION WITH ACCESSORIES, EQUIPMENT, MATERIALS OR COMPONENTS SOLD BUT NOT
MANUFACTURED BY GRACO. These items sold, but not manufactured by Graco (such as electric motors, switches, hose, etc.), are subject to
the warranty, if any, of their manufacturer. Graco will provide purchaser with reasonable assistance in making any claim for breach of these
warranties.
In no event will Graco be liable for indirect, incidental, special or consequential damages resulting from Graco supplying equipment hereunder, or
the furnishing, performance, or use of any products or other goods sold hereto, whether due to a breach of contract, breach of warranty, the
negligence of Graco, or otherwise.
FOR GRACO CANADA CUSTOMERS
The Parties acknowledge that they have required that the present document, as well as all documents, notices and legal proceedings entered into,
given or instituted pursuant hereto or relating directly or indirectly hereto, be drawn up in English. Les parties reconnaissent avoir convenu que la
rédaction du présente document sera en Anglais, ainsi que tous documents, avis et procédures judiciaires exécutés, donnés ou intentés, à la suite
de ou en rapport, directement ou indirectement, avec les procédures concernées.
Graco Information
For the latest information about Graco products, visit www.graco.com.
For patent information, see www.graco.com/patents.
TO PLACE AN ORDER, contact your Graco distributor or call to identify the nearest distributor.
Phone: 612-623-6921 or Toll Free: 1-800-328-0211 Fax: 612-378-3505
All written and visual data contained in this document reflects the latest product information available at the time of publication.
Graco reserves the right to make changes at any time without notice.
Original instructions. This manual contains English. MM 3A0537
Graco Headquarters: Minneapolis
International Offices: Belgium, China, Japan, Korea
GRACO INC. AND SUBSIDIARIES • P.O. BOX 1441 • MINNEAPOLIS MN 55440-1441 • USA
Copyright 2010, Graco Inc. All Graco manufacturing locations are registered to ISO 9001.
www.graco.com
Revised September 2014