1
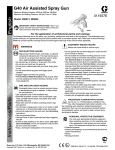
Component Identification
12. With gun pointed down, clean front of the gun with the
soft-bristle brush and solvent.
13. Scrub the tip (33) and guard (6) with soft-bristle brush. To
clean out air cap holes, use a soft tool such as a
toothpick, to avoid damaging critical surfaces. Blow air
through the spray tip to ensure the orifice is clean.
14. If the diffuser (5) was removed, trigger the gun while you
reinstall the diffuser with the gun tool (30). Tighten the
diffuser securely to obtain a good seal. Torque to 155-165
in-lb (18-19 N.m). When properly tightened, the flange will
bottom out on the gun.
15. Install tip (33) and guard (6) on gun, page 5.
16. Using a soft cloth dampened in solvent, wipe off outside of
gun.
17. After cleaning, lubricate the
following parts weekly with
lubricant 111265.
• Trigger pivot pin (A)
• Both sides of gun where
trigger contacts gun (B)
• Fluid needle shaft, behind
trigger (C)
5.
6.
B
Needle Repair (2)
1.
Relieve pressure, page 5. Remove the diffuser (5), see
Seat Repair, page 7.
2.
Remove the trigger pivot pin
nut (14), pivot pin (13), and
trigger (3) using the gun tool
(30) and nut driver (29).
13
14
C
3
ti8835a
Relieve pressure, page 5. Lock trigger (1a).
Unscrew fluid inlet fitting (25).
Remove inline fluid filter (24).
Clean filter with soft brush and compatible solvent.
Inspect filter and if damaged, replace it.
Install inline fluid filter (24) into base of fluid tube (16).
Screw fluid inlet fitting (25) into base of tube. Torque to
175-185 in-lb (20-21 N•m).
Repair
ti6574a
3.
Seat Repair
Use Carbide Seat Repair Kit - 249456. For best results use all
new parts provided in kit.
1. Relieve the pressure, page 5. Remove the fluid and air
hoses from the gun.
2. Remove the guard (6) and spray tip (33).
3. Trigger gun to pull the needle housing off the seat while
you unscrew the diffuser (5) from the gun body (1), using
gun tool (30).
4. Inspect o-rings (5e, 5f, and 6a) in place. Carefully remove
the o-rings from the diffuser housing (5a) and replace if
necessary.
5. Remove the seat nut (5d), seat (5c) and seat gasket (5b)
using a 7/32 in. hex wrench.
6. Inspect seat (5c) and seat gasket (5b) and replace if
necessary.
Remove the fluid
2a
needle assembly
2
(2) from the front of
the gun by using
29
the nut driver tool
(29). If the needle
ti6575a
is bent or
damaged, or the
packing is worn or
leaking, replace the entire needle assembly. If
replacement is necessary, be sure to remove the o-ring
(2a) as it may stick inside the gun body.
Air Valve Repair (8)
1.
2.
3.
333182A
Reinstall the seat gasket (5b) seat (5c) and seat nut (5d).
Torque to 45-50 in-lb (5.0-5.6 N•m). Be sure not to
overtighten nut.
• When reinstalling the carbide seat (5c), the tapered end
of the seat must point toward the gun tip.
A
Cleaning/Replacing Filter (24)
1.
2.
3.
4.
7.
Unscrew the spring cap (11) from the back of the gun
body (1) using the gun tool (30). Remove the two springs
(15 and 19), the shaft (9), and seat (10).
Push the air valve assembly (8) out the back of the gun.
Inspect the u-cup (7) in the gun body (1). If the u-cup is
worn or leaking, carefully remove the u-cup from the front
of the gun body, using a pick.
15
8
7
11
19
9
1
ti22776a
7