1
Repair
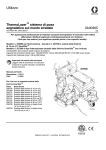
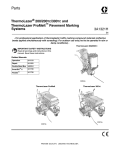
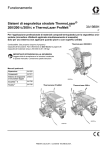
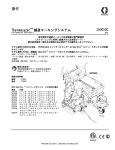
ThermoLazer™ Pavement Marking System
313879B
- For professional application of thermoplastic traffic marking compound materials
(reflective beads applied simultaneously with screeding) - For outdoor use only (not to be operated in rain or damp conditions) Model No. 258699 North America - Includes 257500 and 4 in. (10 cm) SmartDie™ Screed Box
Model No. 257500 International (SmartDie™ Screed Box not included)
Fuel: LP Gas (Propane Vapor)
Burner capacities (max total): 138,000 BTU/hr. (40.44 kW) [38,000 BTU/hr. (7.03 kW) without torch]
Material capacity (max): 300 lb (136 kg)
IMPORTANT SAFETY INSTRUCTIONS
Read all warnings and instructions in this
manual. Save these instructions.
Related Manuals
Operation
313787
Parts
313880
257500
For use with the following SmartDie™ Screed Box:
Part
Description
256736 4 in. (10 cm) Screed Box
257469 5 in. (12 cm) Screed Box
256737 6 in. (15 cm) Screed Box
257470 7 in. (18 cm) Screed Box
256738 8 in. (20 cm) Screed Box
257471 9 in. (22.5 cm) Screed Box
257472 10 in. (26 cm) Screed Box
256739 12 in. (30 cm) Screed Box
256799 Double Line 4-4-4 in. (10-10-10 cm) Screed Box
24B729 Double Line 4-3-4 in. (10-8-10 cm) Screed Box
ti14144a
Table of Contents
Table of Contents
Table of Contents . . . . . . . . . . . . . . . . . . . . . . . . . . 2
Warnings . . . . . . . . . . . . . . . . . . . . . . . . . . . . . . . . . 3
Kettle Gas Safety Valve,
Kettle Temperature Control, and
Kettle Thermopile Diagnosis . . . . . . . . . . . . . . 5
Kettle Temperature Control Calibration . . . . . . . . . 6
Temperature Control Replacement . . . . . . . . . . . . 6
Thermometer Replacement . . . . . . . . . . . . . . . . . . 6
Kettle Thermometer Calibration . . . . . . . . . . . . . . . 7
Adjust Kettle Pilot Ignitor Electrode Gap . . . . . . . 7
Thermopile Replacement . . . . . . . . . . . . . . . . . . . . 8
Adjust Gas Pressure to Kettle Burners . . . . . . . . 11
Adjust Kettle Pilot Burner Flame . . . . . . . . . . . . . 12
2
Adjust Kettle Main Burners Flame . . . . . . . . . . . . 12
Cleaning Kettle Main Burner Gas Lines . . . . . . . . 13
Cleaning Kettle Pilot Burner Gas Lines . . . . . . . . 13
Replacing Screed Box Spring . . . . . . . . . . . . . . . . 14
Securing Bead Dispenser Wheel . . . . . . . . . . . . . 15
Linkage Rod Adjustment . . . . . . . . . . . . . . . . . . . . 15
Screed Box/Bead Dispenser Box Actuator . . . . . 15
Adjusting Screed Box Pivot Arm . . . . . . . . . . . . . 16
Troubleshooting . . . . . . . . . . . . . . . . . . . . . . . . . . . 17
Technical Data . . . . . . . . . . . . . . . . . . . . . . . . . . . . 23
Graco Standard Warranty . . . . . . . . . . . . . . . . . . . 24
Graco Information . . . . . . . . . . . . . . . . . . . . . . . . . 24
313879B
Warnings
Warnings
The following are general warnings related to the safe setup, use, grounding, maintenance and repair of this equipment. In the text of this manual, the exclamation point symbol alerts you to a warning and the hazard symbol refers to
specific risks. Refer back to these General Warnings pages. Additional procedure-specific warnings will be included
where applicable.
Warnings
FIRE AND EXPLOSION HAZARD
Flammable fumes and liquids, such as propane gas, gasoline and combustible fuel, in work area can
ignite or explode. To help prevent fire and explosion:
• Do not use equipment unless fully trained and qualified.
• Do not allow open containers of flammables within 25 ft (7.6 m) of equipment. Do not operate equipment within 10 ft (3 m) of any structure, combustible material, or other gas cylinders.
• Shut off all burners when adding fuel to equipment.
• Close the tank shut-off valve immediately if you smell propane gas; extinguish all open flames. If gas
odor continues, keep away from equipment and immediately call the fire department.
• Follow lighting instructions for the burner and torch.
• Do not heat thermoplastic traffic marking compound material above 450° F (232° C)
• Fire extinguisher equipment shall be present and working.
• Keep work area free of debris, including solvent, rags and gasoline.
EQUIPMENT MISUSE HAZARD
Misuse can cause death or serious injury.
• Do not leave equipment unattended.
• Keep children and animals away from work area.
• Do not exceed the maximum working pressure or temperature rating of the lowest rated system
component. See Technical Data in all equipment manuals.
• Check equipment daily. Repair or replace worn or damaged parts immediately with genuine
manufacturer’s replacement parts only.
• Do not alter or modify equipment.
• Use equipment only for its intended purpose. Call your Graco distributor for information.
• Do not fill material beyond maximum capacity.
• Route gas lines, hoses, wires and cables away from traffic areas, sharp edges, moving parts, and hot
surfaces.
• Do not kink or overbend gas lines.
• Do not override or defeat safety devices.
• Do not operate the unit when fatigued or under the influence of drugs or alcohol.
BURN HAZARD
Equipment surfaces and fluid that is heated can become very hot during operation. To avoid severe
burns:
• Do not touch hot fluid or equipment.
• Wait until equipment and material has cooled completely.
CARBON MONOXIDE HAZARD
Exhaust contains poisonous carbon monoxide, which is colorless and odorless. Breathing carbon
monoxide can cause death. Do not operate in an enclosed area.
313879B
3
Warnings
Warnings
TOXIC FLUID OR FUMES HAZARD
Toxic fluids or fumes can cause serious injury or death if splashed in the eyes or on skin, inhaled, or swallowed.
• Read MSDS to know the specific hazards of the materials you are using.
PERSONAL PROTECTIVE EQUIPMENT
You must wear appropriate protective equipment when operating, servicing, or when in the operating
area of the equipment to help protect you from serious injury, including eye injury, inhalation of toxic
fumes, burns, and hearing loss. This equipment includes but is not limited to:
• Clothing and respirator as recommended by the fluid, material, and solvent manufacturer.
• Gloves, shoes, overalls, face shield, hat, etc. rated for elevated temperatures of at least 500° F
(260° C).
4
313879B
Kettle Gas Safety Valve, Kettle Temperature Control, and Kettle Thermopile Diagnosis
Kettle Gas Safety Valve,
Kettle Temperature Control, and
Kettle Thermopile Diagnosis
Terminal Connections
3
TH
TH
TP
The gas safety valve, temperature control and thermopile can be checked by using a millivolt meter. Before
checking, make certain all electrical connections are
clean and tight.
1
TP
Connect millivolt meter to appropriate terminals (see
Terminal Connections).
Step
Status of
Temperature
Part(s) to Be
Terminal
Control
Checked
Connections
Contacts
1
Gas safety
valve
2 and 3
Closed
2
Temperature
control
1 and 2
Closed
ti14524a
Desired
Meter
Reading
2
Diagnosis
Greater than If mV reading > 100 mV and the automatic valve (main
100 mV
burners) does not come on, replace the gas safety valve.
If mV reading < 100mV, proceed with diagnostic steps 2
and 3.
Less than
80 mV
If reading > 80 mV:
•
Clean and tighten electrical connections at temperature control and gas safety valve.
•
Check valve to make sure wires are in good condition. Replace as required.
•
Rapidly change temperature setting on temperature
control to see if cycling cleans the contacts.
If the preceding fails to give mV reading < 80 mV, replace
temperature control.
3
Gas safety
valve magnet
and
thermopile
1 and 2
Open
Greater than If mV reading < 325 mV:
325 mV
•
Clean and tighten all electrical connections.
•
Adjust pilot burner to increase millivolt output (see
page 11).
If the preceding fails to give mV reading > 325 mV, replace
thermopile.
Check valve magnet after obtaining correct mV output for
thermopile:
•
Ignite pilot burner only and allow the mV reading to
stabilize.
•
Shut pilot burner (turn gas safety valve knob OFF).
Note the mV reading where magnet drops out.
If magnet unlocks at mV reading < 120 mV, the magnet is
OK. NOTE: When magnet unlocks a click can be heard
and mV reading may fluctuate slightly.
313879B
5
Kettle Temperature Control Calibration
Kettle Temperature Control Calibration
6. If the temperature control setting is lower than the
remote calibrated temperature setting on temperature probe, turn adjusting screw clockwise. Every
1/4 in. turn will change temperature 35° F (19.4° C).
To Check Kettle Temperature Control Calibration:
1. Move Thermolazer™ to an area with no wind.
2. Turn temperature control to 400° F (204° C).
3. Agitate material for 4 to 5 minutes.
ti14523a
4. After control has reached steady state temperature
and burners do not cycle more than once per minute, insert remote calibrated temperature probe in
material and directly adjacent kettle temperature
control probe.
5. Compare temperature of remote calibrated temperature probe to temperature setting on temperature
control.
7. If the temperature control setting is higher than the
remote calibrated temperature probe, turn adjusting
screw counterclockwise--every 1/4 in. turn will
change temperature 35° F (19.4° C).
8. Recheck calibration by turning temperature control
to 410° F (210° C) and repeat steps 3-7.
Temperature Control Replacement
When replacing temperature control, keep in mind that
the temperature probe is an integral part of the assembly. Do not make any sharp bends in the capillary tubing.
Bends should be 0.25 in. (0.64 cm) in radius or greater.
ti14557a
Be sure to seal capillary tubing with high temperature
mortar at kettle outlet.
Thermometer Replacement
Thermometer can not be removed from ThermoLazer™
without damaging thermometer probe. If probe end is
frozen in material, heat material and remove until material level is lower than thermometer probe.
6
313879B
Kettle Thermometer Calibration
Kettle Thermometer Calibration
6. If kettle thermometer is lower than the remote calibrated temperature probe, turn adjusting screw
counterclockwise.
Adjusting Screw
To Check Kettle Thermometer Calibration:
RESET
1. Move ThermoLazer™ to an area with no wind.
2. Turn temperature control to 400° F (204° C).
3. Agitate material for 4 to 5 minutes.
4. After control has reached steady state temperature
and burners do not cycle more than once per minute, insert remote calibrated temperature probe in
material and directly adjacent kettle temperature
control probe.
ti14525a
7. If the kettle thermometer is higher than the remote
calibrated temperature probe, turn adjusting screw
clockwise.
5. Compare temperature of remote calibrated temperature probe to thermometer.
Adjust Kettle Pilot Ignitor Electrode Gap
1. Loosen screw (231).
.17 to .20 in.
2. Rotate ignitor electrode (7) until gap of .17 to .20 in.
(.43 to .51 cm) is achieved.
3. Retighten screw (231).
7
ti14519a
313879B
7
Thermopile Replacement
Thermopile Replacement
Removal
1. Shut off gas valve on LP-tank and disconnect hose.
6. Pull thermopile wire out of gas safety valve enclosure (28).
28
ti4128a
ti14854a
2. Remove gas safety valve enclosure back cover.
7. Cut wire tie.
ti14851a
3. Remove cover (252) from gas safety valve enclosure (28).
8. Disconnect gas pilot line (76) at gas pilot coupling
(171).
28
171
252
76
ti14856a
ti14852a
4. Disconnect thermopile wires from gas safety valve
(13).
9. Remove gas pilot mounting plate (18).
13
18
ti14857a
ti14853a
5. Remove wire grommet (209) from gas safety valve
enclosure (28).
10. Remove thermopile (7).
7
28
ti14855a
209
ti14858a
8
313879B
Thermopile Replacement
Installation
1. Replace thermopile (7).
7. Connect thermopile wires to gas safety valve (13).
See Parts manual 313880 for additional details.
7
13
ti14862a
2. Replace gas pilot mounting plate (18).
ti14866a
8. Replace cover (252) on gas safety valve enclosure
(28).
18
ti14863a
252
3. Connect gas pilot line (76) at gas pilot coupling
(171).
171
28
ti14867a
9. Replace gas safety enclosure back cover.
76
ti14861a
4. Guide thermopile wire into gas safety valve enclosure (28).
28
10. Reconnect hose and turn LP-gas tank valve ON.
ti14864a
5. Zip-tie wires together.
ti14127a
6. Replace wire grommet (209) on gas safety valve
enclosure (28).
28
ti14865a
209
313879B
9
Adjust Gas Pressure to Kettle Burners
Adjust Gas Pressure to Kettle Burners
1. Shut off kettle gas safety valve (CC).
CC
2. Turn kettle temperature control knob (AA) to 0
(“OFF”).
3. Remove kettle gas safety valve 1/8-27 NPT pipe
plug.
4. Screw 0 to 30 in. w.c. (0 to 7.47 cb) calibrated gas
pressure gauge or manometer into kettle gas safety
valve outlet.
5. Ignite kettle gas pilot burner.
148
ti14518a
6. Turn kettle gas safety knob (CC) to ON.
7. Turn kettle temperature control to 250° F (121° C).
8. Record gas pressure at kettle gas safety valve outlet. Gas pressure should read 11 in. w.c. (2.74 cb).
9. Remove adjusting screw cap.
10. Turn adjusting screw (148) clockwise to increase
gas pressure (counterclockwise to decrease gas
pressure).
ti14521a
11. Install adjusting screw cap.
12. Turn kettle temperature control knob (AA) to 0
(“OFF”).
156
13. Shut off kettle gas safety valve (CC).
14. Remove gas pressure measuring device.
15. Add LP-gas pipe sealant to 1/8-27 NPT pipe plug
(156) and install in kettle gas safety valve.
10
313879B
Adjust Kettle Pilot Burner Flame
Adjust Kettle Pilot Burner Flame
1. Ignite kettle gas pilot burner.
2. Record pilot burner flame height and color. Flame
should be 2 to 3 in. (5 to 7 cm) high and blue-orange
in color.
3. Remove flame adjusting screw cap.
ti14522a
4. Turn adjusting screw clockwise to decrease flame
height (counterclockwise to increase flame height).
5. Install flame adjusting screw cap.
2 to 3 in.
ti14413a
Adjust Kettle Main Burners Flame
1. Ignite kettle gas pilot burner.
1 to 2 in.
2. Turn kettle gas safety valve (CC) to ON.
3. Turn kettle temperature control knob (AA) to 250° F
(121° C).
4. Record pilot burner flame height and color. Flame
should be 1 to 2 in. (3 to 5 cm) high and blue-orange
in color.
5. Record burner venturi gap. Gap should be .17 to .20
in. (4 to 5 mm).
ti14525a
.17 to .20 in.
6. Loosen air shutter jam nut and adjust air shutter to
obtain correct gap.
7. Lock air shutter jam nut. Use thread sealant for a
more secure locking.
313879B
11
Cleaning Kettle Main Burner Gas Lines
Cleaning Kettle Main Burner Gas Lines
1. Disconnect gas tubing line (49) from gas tube fitting
tee (165).
3. Reconnect gas tubing line (49) to gas tube fitting tee
(165).
2. Force air into gas tubing line (49). Insert rubber
hose over gas tubing tee and force air into tubing at
30 psi (2.1 bar).
165
ti14558a
49
Cleaning Kettle Pilot Burner Gas Lines
1. Disconnect gas tubing line (186) from gas tubing
line (118).
3. Reconnect gas tubing line (186) to gas tubing tee
(118).
2. Force air into gas tubing line (118). Insert rubber
hose over gas tubing tee and force air at 30 psi
(2.1 bar).
186
118
12
ti14559a
313879B
Replacing Screed Box Spring
Replacing Screed Box Spring
1. Position replacement spring as shown below and
slide into spring guard.
3. Set screed box on its side.
ti14551a
ti14553a
2. Push spring up through guard and loop end around
guard pin until spring sits in groove.
4. Loop open end of spring and guard over first pin on
screed box. Then push spring guard up and over
second pin on screed box.
ti14549a
ti14550a
313879B
ti14552a
13
Securing Bead Dispenser Wheel
Securing Bead Dispenser Wheel
To properly dispense beads, drive wheel (27) must be in
direct contact with tire (89). If drive wheel (27) becomes
loose and/or starts to slip, use allen wrench to tighten
set screw (211).
NOTE: To ensure proper contact between drive wheel
(27) and tire (89), make sure air pressure is always at 60
psi (4.14 bar).
211
89
27
ti14564a
Linkage Rod Adjustment
Adjustments can be made to linkage rods by removing
clevis cotter hairpin (268), clevis (179) pin, loosening
nuts (128), and then turning clevis as required to
lengthen or shorten rod connectors.
To ensure proper application of beads and thermoplastic, make sure screed box linkage rod (182) measures
16.875 in. (42.8 cm). Be sure to measure where nut
(128) meets clevis (179) when checking for proper linkage rod length.
16.875 in.
2. If the wheel does not cause the ThermoLazer tire to
rotate both forward and backwards, loosen nuts
(128), clevis cotter hair pin, clevis pin, and rotate the
clevis (179) one turn counterclockwise.
179
128
3. Reconnect clevis to deployment bar and again
rotate bead box wheel to see if adjustments cause
ThermoLazer to move forward and backwards.
4. Continue to rotate clevis 1/2 turn counterclockwise
until rotating bead box wheel causes ThermoLazer
to move forward and backwards.
182
ti14565a
Adjust the bead box linkage rod (181) so bead box drive
is touching ThermoLazer tire when screed box is in
down (but not open) position. A slight downward force
on the bead box linkage should be required when inserting the clevis pin through the clevis deployment bar.
1. With screed box in down (but not open) position,
rotate the bead box wheel by hand.
14
313879B
Screed Box/Bead Dispenser Box Actuator
Screed Box/Bead Dispenser Box Actuator
If the screed box/bead dispenser box actuator does not
remain in the “down and locked” position, adjust the
3/4-16 lock nut by turning clockwise 1/4 to 1/2 turn or
until the actuator does not freely rotate.
ti14604a
Adjusting Screed Box Pivot Arm
If the SmartDie™ screed box jumps up when setting the
box in the down-and-locked position, check linkage rod
lengths (see page 14).
3. Move bottom of box pivot arm spring to desired hole
and reconnect. Moving the spring in will decrease
tension, while moving the spring out will increase
tension.
If the SmartDie™ screed box continues to jump up after
adjusting linkage rods, move the screed box pivot arm
spring to the next hole.
1. Unhook top of box pivot arm spring.
ti14629a
4. Reconnect top of box pivot arm spring.
ti14627a
2. Unhook bottom of box pivot arm spring.
ti14630a
Repeat moving pivot arm spring until SmartDie™ screed
box stops jumping up when setting box in the
down-and-locked position.
If moving pivot arm spring does not stop the SmartDie™
screed box from jumping up when setting box in
down-and-locked position, replace pivot arm spring.
ti14628a
313879B
15
Troubleshooting
Troubleshooting
Problem
Cause
Kettle pilot burner does Low or empty LP-gas tank
not ignite or does not
Gas supply hose not connected to tank
remain ignited
LP-gas tank shut-off valve closed
Solution
Replace with full tank.
Connect gas supply hose.
Open LP-gas tank shut-off valve.
Manual gas shut-off valve closed
Open manual gas shut-off valve.
Gas lines leaking or disconnected
Check for gas leaks. Connect and tighten
fittings.
Kettle gas safety valve knob not in correct
position
Turn knob to “PILOT” position and fully
push in (see Operation manual).
Not providing adequate time for thermopile to
heat up
See Operation manual.
Kettle pilot igniter has weak battery
Replace part (see Parts manual).
Kettle pilot electrode gap incorrect
Adjust gap (see page 7).
Incorrect flame length and/or gas pressure
Adjust flame and pressure (see Repair
manual).
Strong wind blowing flame out
Move ThermoLazer™ out of strong winds.
Make sure burner view ports are closed.
Burner and/or gas lines plugged
Unplug holes and lines. Isolate all gas regulators if clearing line with forced air (see
page 5).
Kettle gas safety valve not functioning correctly
Replace part if it fails diagnostic test (see
page 5).
Thermopile not functioning correctly
Replace part if it fails diagnostic test (see
page 8).
Kettle pilot electrode ground wire not correctly Clean connections and retighten. Replace
connected
ground wire if damaged.
Kettle pilot electrode lead wire has a short
16
Replace part (see Parts manual).
Kettle pilot igniter not functioning correctly
Replace part (see Parts manual).
Kettle burner regulator not functioning correctly
Replace part (see Parts manual).
313879B
Troubleshooting
Problem
Kettle main burners do
not ignite or are not
burning correctly
Cause
Solution
Kettle gas safety valve knob not at correct
position
Turn knob to ON position (see Operation
manual).
Kettle temperature control dial set at a lower
temperature than material temperature
Turn kettle temperature control dial to temperature 25° F (13.9° C) higher than material temperature.
Kettle gas safety valve not functioning correctly
See Repair manual and replace part if it
fails diagnostic testing.
Burner and/or gas lines plugged
Unplug holes and lines. Isolate all gas regulators if clearing line with forced air (see
page 12).
Kettle temperature control not functioning cor- Replace part (see Parts manual).
rectly
Kettle main burners do
not shut off
Gas lines have been disconnected
Connect and tighten hose fittings. Check
for gas leaks.
Incorrect flame length and/or gas pressure
Adjust flame and pressure (see page 11).
Kettle gas safety valve knob not at correct
position
Replace part (see Parts manual).
Kettle temperature control dial is not turned to Turn kettle temperature control dial to a
a setting lower than material temperature
setting 25° F (13.9° C) (minimum) lower
than material temperature.
Kettle temperature control not functioning cor- Replace part (see Parts manual).
rectly
Kettle gas safety valve not functioning correctly
Replace part if it fails diagnostic testing
(see page 5).
Kettle main burner does Kettle temperature control dial is not turned to Turn kettle temperature control dial to a
not turn on
a setting higher than material temperature
setting 25° F (13.9° C) (minimum) higher
than material temperature.
Kettle temperature control not functioning cor- Replace part (see Parts manual).
rectly
Kettle gas safety valve not functioning correctly
Thermometer not
Material has not reached temperature control
matching material tem- set point
perature in kettle
Material not fully obligated
Cool or windy ambient conditions
Replace part if it fails diagnostic test (see
page 5).
Allow time for material to reach operating
temperature.
Agitate material.
Move ThermoLazer™ out of cool windy
conditions. Discharge material and check
thermometer.
Thermometer calibrated incorrectly
Calibrate thermometer (see page 7).
Kettle temperature control calibrated incorrectly
See Repair manual and replace part if it
can not be calibrated. See Parts manual
313880.
Thermometer not functioning correctly
Replace part (see Parts manual).
Kettle temperature control not functioning cor- Replace part (see Parts manual).
rectly
313879B
Kettle gas safety valve not functioning correctly
Replace part if it fails diagnostic test (see
page 5).
Incorrect flame length and/or gas pressure
Adjust flame and pressure (see page 11).
17
Troubleshooting
Problem
SmartDie™ screed box
IR burner does not
ignite, does not remain
ignited, or can not
change heat output
Cause
Empty LP-gas tank
Solution
Replace with full tank.
LP-gas tank shut-off valve closed
Open LP-gas tank shut-off valve.
Gas supply hose not connected to tank
Connect gas supply hose.
Gas lines leaking or disconnected
Check for gas leaks. Connect and tighten
fittings.
Not allowing time for IR burner thermocouple
to sense heat
See Operation manual.
IR burner regulator/flow control valve not func- Replace part (see Parts manual).
tioning correctly
Torch does not ignite
™
PaddleMax agitator
handle is hard to move
IR burner safety shut-off valve not functioning
correctly
Replace part (see Parts manual).
IR burner thermocouple not functioning correctly
Replace part (see Parts manual).
Empty LP-gas tank
Replace with full tank.
LP-gas tank shut-off valve closed
Open LP-gas tank shut-off valve.
Torch manual gas shut-off valve closed
Open manual shut-off valve.
Gas supply hose not connected to tank
Connect gas supply hose.
Gas lines leaking or disconnected
Check for gas leaks. Connect and tighten
fittings.
Torch assembly not functioning correctly
Replace part (see Parts manual).
Material is cold
Allow time for material to reach operating
temperature
Bushings are worn
Replace bushings (see Parts manual).
Linkage ball rod ends need lubrication
Add grease
Foreign material lodged between agitator and Remove material in kettle and CAREkettle
FULLY dislodge and remove foreign material.
ControlFlow™ gate
valve difficult to open
or close
™
ControlFlow gate
valve leaking
18
Cold material temperature
Heat material to operating temperature.
Make sure thermometer is free to move.
Gate sticking in guides
Check for excess material in guides. Apply
heat as required and remove excess material. Add grease to lubricate guides.
Bushings are worn
Replace bushings (see Parts manual).
Gate not completely closed
Close gate completely.
Foreign material lodged in gate opening
CAREFULLY dislodge and remove foreign
material.
313879B
Troubleshooting
Problem
Cause
Solution
SmartDie™ screed box Foreign material in screed box discharge
opening
leaking
Dirty screed box
Excessive material
buildup when starting
and stopping extruding
CAREFULLY dislodge and remove foreign
material.
CAREFULLY clean box. All moving parts
need to be free of debris.
Spring broken
Replace spring (see page 13).
Incorrect deployment rod linkage length
Adjust length (see page 14).
Incorrectly adjusted SmartDie™ screed
box/bead dispenser box actuator
Adjust lever (see page 14).
Worn screed box gate
Replace gate (see Parts manual 313880).
Worn screed box trough
Replace trough (see Parts manual
313880).
Screed box not adjusted to ground
See Operation manual.
Screed box open when
stationary
ThermoLazer™
is
Synchronize ThermoLazer™ and screed
box motion.
Foreign material in screed box discharge
opening
CAREFULLY dislodge and remove foreign
material.
Dirty screed box
CAREFULLY clean box. All moving parts
need to be free of debris.
Beads not discharging Low bead level in bead hopper
or discharging unevenly Bead dispenser doors closed
Fill bead hopper.
Open doors as required to obtain desired
flow pattern width.
Bead dispenser drive wheel not engaged
Secure bead dispenser wheel (see page
14).
Bead dispenser drive wheel slipping
Tighten. Check air pressure (see page 14).
Debris in discharge opening of bead dispenser Remove debris.
Beads not discharging
at required flow rate
313879B
Debris on ThermoLazer™ tire or bead dispenser wheel
Remove debris.
Moisture in beads
Remove wet beads. Dry hopper, bead
hoses and bead dispenser. Fill hopper with
dry beads.
Bead dispenser flow rate lever not correctly
set
Rotate flow rate lever to correct position.
Bead dispenser drive wheel slipping
Tighten wheel and check tire pressure
(see page 14).
Bead dispenser doors not fully open
Open door fully.
Moisture in beads
Remove wet beads. Dry hopper, bead
hoses and bead dispenser. Fill hopper with
dry beads.
Moisture on road surface
Allow road surface moisture to dry.
Rough road surface
Smooth road surface.
Bead Dispenser low on material
Add material to Bead Hopper.
19
Troubleshooting
Applying Material
Problem
Cause
Ragged line edges when extruding
Solution
Dirty screed box
CAREFULLY clean box. Discharge
opening and die plate runners need
to be free of debris.
Cold material temperatures
Heat material as required.
Marking speed too fast
Slow Thermolazer™ speed.
Material thickness too think
Slow Thermolazer™ speed and keep
screed box filled.
Rough material surface when extrud- Overheated material
ing
Moisture on road surface
Reduce heat.
Allow road surface moisture to dry.
Rough road surface
Smooth road surface.
Screed box low on material
Add material to screed box.
EXAMPLES:
Correct line application will produce a full straight line with sharp edges; correct color,
thickness and width; a firm bond to the surface; and have uniform reflectivity.
ti14507a
Insufficient adhesion (material bulges •
at beginning of line)
•
Material temperature too low
•
Raise material temperature
Thermolazer™ speed too fast
•
Decrease speed of
Thermolazer™
•
Clear debris from road
•
Wait for temperature of surface to
raise
•
Debris on road
•
Surface temperature too cold
ti14508a
Rough and bumpy line
•
Debris on surface
•
Clear debris from surface
•
Crust from overheated material
•
Lower material temperature
•
Debris caught in die
•
Clean debris from die
•
Material not covering road high
spot
•
Adjust screed box line thickness
•
Moisture or solvent on surface
•
Remove solvent from surface
•
Material is overheated
•
Lower temperature of material
ti14509a
Gas bubbles in line
ti14510a
20
313879B
Troubleshooting
Problem
Cause
Ragged edges and gaps in line
Solution
• Material temperature is too low
• Raise material temperature
• Thermolazer™ speed is too fast
• Wait for change in ambient conditions to remove moisture
• Reduce Thermolazer™ speed
ti14511a
Swollen rounded line
• Material temperature is too high
• Lower material temperature
• Uneven road surface
• Apply to even road surfaces
• Die is not evenly riding on substrate
• Remove debris from screed box
lever rod
ti14512a
Material shadows on sides
• Inspect/replace damaged screed
box lever rod/lever arm
ti14513a
Line is wavy
• Strong road surface camber
• Apply so camber does not influence application
• Incorrect Thermolazer™ operation • Use correct application methods
(for example, try locking swivel
wheel)
ti14514a
Cracks in line
ti14515a
Rough edges and lines in surface
• Cracks in road surface
• Repair cracks
• Temperature stress from
overheating
• Lower temperature in material
• Material applied too cold
• Increase material temperature
• Material applied too thin
• Slow Thermolazer™ speed to
apply thicker material
• Material temperature is too low
• Raise material temperature
• Material is overheated or scorched • Lower material temperature
• Moisture in road surface
• Wait until road surface is dry
• Die does not fully close
• Clean die
• Debris caught in die
• Clear debris from die
• Worn die gate
• Replace die gate
• Worn die trough
• Replace die trough
• Broken spring
• Replace spring
ti14516a
Jagged line ends; material drips
between lines
ti14517a
313879B
21
Technical Data
Technical Data
Fuel:
Gas supply pressure (maximum):
Kettle burner inlet pressure:
IR burner inlet pressure:
Torch inlet pressure:
Kettle main burner heating capacity (maximum):
Kettle pilot burner heating capacity (maximum):
IR burner heating capacity (maximum):
Torch heating capacity (maximum):
Kettle holding capacity (maximum):
Kettle Temperature (maximum):
Kettle Temperature (operating):
Tire pressure (rear wheels):
Tire pressure (swivel wheel):
Battery (Kettle Pilot Burner Igniter):
Bead Hopper Capacity (maximum):
Liquefied petroleum gas (LP-gas) (propane vapor)
250 psi (17.24 bar)
11 in. w.c. (2.7 kPa)
12 psi (.83 bar)
18 psi (1.24 bar)
Two (2) burners; each burner rated at 10,100 btu/hr (2.96 kW)
3800 btu/hr (1.11 kW)
14,000 btu/hr (4.10 kW)
100,000 btu/hr (29.31 kW)
300 lb (136 kg) (thermoplastic traffic marking compound materials)
450° F (232° C)
380° - 420° F (193° - 216° C) 60 psi (4.14 bar)
60 psi (4.14 bar)
45 psi (3.10 bar)
AA (1.5 V)
80 lb (36.3 kg) Type II glass bead
Dimensions
Weight:
Length:
Height:
Width:
22
295 lb (134 kg)
72 in. (1.83 m)
51 in. (1.30 m)
48 in. (1.22 m)
313879B
Graco Standard Warranty
Graco Standard Warranty
Graco warrants all equipment referenced in this document which is manufactured by Graco and bearing its name to be free from defects in
material and workmanship on the date of sale to the original purchaser for use. With the exception of any special, extended, or limited warranty
published by Graco, Graco will, for a period of twelve months from the date of sale, repair or replace any part of the equipment determined by
Graco to be defective. This warranty applies only when the equipment is installed, operated and maintained in accordance with Graco’s written
recommendations.
This warranty does not cover, and Graco shall not be liable for general wear and tear, or any malfunction, damage or wear caused by faulty
installation, misapplication, abrasion, corrosion, inadequate or improper maintenance, negligence, accident, tampering, or substitution of
non-Graco component parts. Nor shall Graco be liable for malfunction, damage or wear caused by the incompatibility of Graco equipment with
structures, accessories, equipment or materials not supplied by Graco, or the improper design, manufacture, installation, operation or
maintenance of structures, accessories, equipment or materials not supplied by Graco.
This warranty is conditioned upon the prepaid return of the equipment claimed to be defective to an authorized Graco distributor for verification of
the claimed defect. If the claimed defect is verified, Graco will repair or replace free of charge any defective parts. The equipment will be returned
to the original purchaser transportation prepaid. If inspection of the equipment does not disclose any defect in material or workmanship, repairs will
be made at a reasonable charge, which charges may include the costs of parts, labor, and transportation.
THIS WARRANTY IS EXCLUSIVE, AND IS IN LIEU OF ANY OTHER WARRANTIES, EXPRESS OR IMPLIED, INCLUDING BUT NOT LIMITED
TO WARRANTY OF MERCHANTABILITY OR WARRANTY OF FITNESS FOR A PARTICULAR PURPOSE.
Graco’s sole obligation and buyer’s sole remedy for any breach of warranty shall be as set forth above. The buyer agrees that no other remedy
(including, but not limited to, incidental or consequential damages for lost profits, lost sales, injury to person or property, or any other incidental or
consequential loss) shall be available. Any action for breach of warranty must be brought within two (2) years of the date of sale.
GRACO MAKES NO WARRANTY, AND DISCLAIMS ALL IMPLIED WARRANTIES OF MERCHANTABILITY AND FITNESS FOR A
PARTICULAR PURPOSE, IN CONNECTION WITH ACCESSORIES, EQUIPMENT, MATERIALS OR COMPONENTS SOLD BUT NOT
MANUFACTURED BY GRACO. These items sold, but not manufactured by Graco (such as electric motors, switches, hose, etc.), are subject to
the warranty, if any, of their manufacturer. Graco will provide purchaser with reasonable assistance in making any claim for breach of these
warranties.
In no event will Graco be liable for indirect, incidental, special or consequential damages resulting from Graco supplying equipment hereunder, or
the furnishing, performance, or use of any products or other goods sold hereto, whether due to a breach of contract, breach of warranty, the
negligence of Graco, or otherwise.
FOR GRACO CANADA CUSTOMERS
The Parties acknowledge that they have required that the present document, as well as all documents, notices and legal proceedings entered into,
given or instituted pursuant hereto or relating directly or indirectly hereto, be drawn up in English. Les parties reconnaissent avoir convenu que la
rédaction du présente document sera en Anglais, ainsi que tous documents, avis et procédures judiciaires exécutés, donnés ou intentés, à la suite
de ou en rapport, directement ou indirectement, avec les procédures concernées.
Graco Information
TO PLACE AN ORDER, contact your Graco distributor or call to identify the nearest distributor.
Toll Free: 1-800-690-2894.
313879B
23
All written and visual data contained in this document reflects the latest product information available at the time of publication.
Graco reserves the right to make changes at any time without notice.
This manual contains English. MM 313879
Graco Headquarters: Minneapolis
International Offices: Belgium, China, Japan, Korea
GRACO INC. P.O. BOX 1441 MINNEAPOLIS, MN 55440-1441
Copyright 2008, Graco Inc. is registered to I.S. EN ISO 9001
www.graco.com