1
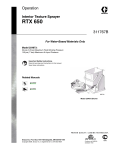
Operation
Texture Gun & Hopper
311776B
- For Water-Based Materials and Indoor Use Only -
Models 245924 Series D
125 psi (8.75 bar, 0.875 MPa) Maximum Working Air Pressure
70 psi (4.9 bar, 0.49 MPa) Maximum Working Fluid Pressure
Important Safety Instructions
Read all warnings and instructions in this manual.
Save these instructions.
Related Manuals
311777
ti8525a
Graco Inc. P.O. Box 1441 Minneapolis, MN 55440-1441
Copyright 2006, Graco Inc. is registered to I.S. EN ISO 9001
Warnings
Warnings
The following are general warnings related to the setup, use, grounding, maintenance and repair of this equipment.
Additional, more specific warnings may be found throughout the body of this manual where applicable. Symbols
appearing in the body of the manual refer to these general warnings. When these symbols appear through the manual, refer back to these pages for a description of the specific hazard.
Warnings
Equipment Misuse Hazard
Equipment misuse can cause equipment to rupture, malfunction, or start unexpectedly and cause
serious injury.
• Before operating this equipment, read all manuals, tags, and labels including material labels and
instructions.
• Do not expose system to rain. Always store system indoors.
• Do not alter or modify equipment.
• Do not spray cementitious materials.
• Do not exceed maximum working pressure of lowest rated component in your system.
• Check equipment daily. Repair or replace worn or damaged parts immediately.
• To reduce risk of serious injury, including electric shock and splashing fluid in eyes, follow Pressure
Relief Procedure, page 3 before servicing the unit.
• Do not use hoses to pull equipment.
• Route hoses away from traffic areas, sharp edges, moving parts and hot surfaces. Do not expose
Graco hoses to temperatures above 130° F (55° C) or below -35° F (-37° C).
• Store hazardous fluid in an approved container. Dispose of hazardous fluid according to all local,
state and national guidelines.
• Never directly inhale compressed air. Compressed air may contain toxic vapors.
Electric Shock Hazard
To reduce the risk of electric shock:
• Be sure sprayer is adequately grounded through electrical outlet.
• Use only 3-wire, extension cords.
• Make sure ground prongs are intact on sprayer and extension cords.
• Do not operate with cover removed.
• Turn off sprayer. Follow Pressure Relief Procedure, page 3, and unplug unit, before removing any
parts.
2
311776B
Warnings
Warnings
Pressurized Equipment Hazard
Fluid from gun, leaks or ruptured components can splash in the eyes or on skin and cause serious injury.
• Follow Pressure Relief Procedure, page 3 when you stop spraying and before cleaning, checking
or servicing.
• Do not point spray gun at anyone; put hand, fingers or rag over nozzle, or stop or deflect leaks with
your hand, body, glove, or rag.
• Wear protective clothing, gloves, and eyewear.
Personal Protective Equipment
You must wear appropriate protective equipment when operating, servicing, or when in the operating
area of the equipment to help protect you from serious injury, including eye injury, inhalation of toxic
fumes, burns, and hearing loss. This equipment includes but is not limited to:
• Protective eyewear
• Clothing and respirator as recommended by the fluid and solvent manufacturer
• Gloves
• Hearing Protection
Cleaning Solvent Hazard with Plastic Parts
Use only compatible water-based solvents to clean plastic structural or pressure-containing parts. Many
solvents can degrade plastic parts to the point where they could fail. Such failure could cause serious
injury or property damage. See Technical Data on page of this instruction manual and in all other
equipment manuals. Read fluid and solvent manufacturer’s warnings.
Sprayer Warnings
For sprayer operation and warning information refer to your sprayer or compressor operation manual.
Pressure Relief Procedure
Grounding
To reduce the risk of serious bodily injury,
To reduce risk of electrical shock, proper
including electric shock and splashing fluid in
eyes, follow this procedure whenever you stop
spraying:
electrical grounding is essential. See your
sprayer or compressor instruction manual and
consult your local electrical codes for detailed
grounding instructions.
1. Shut OFF air source.
2. Turn main Pump Power OFF.
3. Disconnect power source from both air and
material product.
4. Turn gun air valve ON.
5. Point gun into waste bucket and open trigger
to relieve pressure.
311776B
3
Component Identification
Component Identification
Model 245924
E
F
F
ti8526a
G
P
N
H
B
D
J
K
A
M
C
Identifier
4
Component
Description
A
Air Valve
Adjusts air to material mix ratio.
B
Flow Adjustment Nut
Sets needle position.
C
Trigger
Engages material flow/shuts off material flow.
D
Trigger Lock
Holds trigger open to assist operator during long jobs.
E
Material Fill Opening
Where mixed material is loaded into hopper. For overhead applications and high walls, position hopper
on gun with material fill opening facing toward nozzle (J) (front) of gun. For all other applications, material fill opening should face toward the air valve (A) (back) of gun.
F
Handles
Provided for operator comfort and relieve operator fatigue during long jobs.
G
Hopper
Holds material.
H
Gun Plug
Must be in place when material hose is used with texture pump system. To use hopper, remove plug and
install hopper as described on page 5.
J
Nozzle
Different sizes available for use with different applications, See Nozzle Selection chart, page 7. #2 provided with 253898.
K
Hose Plug
Must be installed when hopper is used. See Graco RTX manual for installation and operating instructions for this feature.
M
Air Fitting
Quick Disconnect used to attach air hose to gun.
N
Clamp
Secures hopper on gun.
P
Gun Plug Clip
Secures gun plug to gun. WARNING: Must be installed prior to pressurizing system with RTX material
feed system.
311776B
Basic Operation for Hopper Gun Setup
Basic Operation for Hopper Gun Setup
Hopper Installation
4. Fasten clamp.
1. The Hose Plug must be securely fastened to bottom
of gun when using the Hopper. Gun Plug must be
removed from top of gun.
5. Connect air hose to gun.
ti8534a
ti8537a
6. Install spray nozzle, page 7.
It is easier to remove plug if gun is triggered.
2. Align notched opening in base of hopper to raised
notch on hopper port of gun body.
ti8535a
7. Fill hopper with texture mix.
ti2644a
For overhead applications and high walls, position
the hopper on the gun with the material fill opening
facing toward the nozzle (front) of the gun. For all
other applications, material fill opening should face
the air valve (back) of the gun.
ti2476b
8. Open air valve.
9. Turn compressor ON. Adjust air valve for desired
texture.
3. Push hopper down, over hopper port as far as it will
go.
311776B
5
Mixing Material
Mixing Material
Correct material mixture is essential to achieve
the desired finish.
2. Agitate to mix, using a half-inch, variable speed drill
with mixing paddle, to a smooth, lump-free consistency.
Mix the material in a separate container before
pouring it into hopper.
Dry Mix - 40 lb (18 kg) bag.
For best results do not use partial bags of
material.
1. Slowly add one 40 lb. (18 kg) bag of texture material
to 5-6 gallons (18.9-22.7 liters) of clean water as
instructed on the bag instructions.
ti2497#1
3. Allow ceiling texture to set for at least 15 minutes.
Then remix prior to use.
Premix
1. Slowly add approximately 2 to 4 qts (1.9 to 3.8 liters)
of water to a 5 gallon (18.9 liter) bucket of premix.
ti2496a
ti2493a
2. Agitate to mix, using a half-inch, variable speed drill
with a mixing paddle, to a smooth, lump-free consistency.
6
311776B
Spray Techniques
Spray Techniques
Recommended Nozzle Selection Chart
Application
Nozzle Size2
Simulated
Acoustic
6 mm, white (fine to medium)
8 mm, gray (coarse)
4 mm, beige
6 mm, white
6 mm, white
8 mm, gray
8 mm, gray
12 mm, black
Orange peel
Splatter coat
Knockdown
1
2
Air Volume1
medium to high
medium to high
low to medium
low
Control air volume with gun air valve.
For more material volume try a larger nozzle.
• When adjusting flow nut, release trigger, then
adjust.
• If adjusting while triggered, needle will turn
but provide no adjustment.
• If nut will not turn, check to see if it is either
set to maximum adjustment or there is
material on threads. Clean threads as
needed.
• Test spray pattern on cardboard. Hold gun 18
to 24 in. (45.7 to 60.9 cm) from surface. Using
a circular motion, overlap each stroke.
To Get Less Material
Try one or a combination of these methods:
Adjusting the System
Sufficient fluid output (volume and pressure) and good
atomization is a balance of atomizing air, material
thickness/material flow and nozzle selection. Achieving
the correct balance for your application requires
experimentation to achieve desired results. Keep in
mind these important points when adjusting gun:
• Open air valve
• Turn gun flow adjustment nut to decrease flow,
counter-clockwise
• Use smaller nozzle
To Get More Material
1. Select proper nozzle for your application. See Nozzle Selection Chart. Remember, the larger the nozzle, the heavier the pattern.
2. Start with gun air flow valve completely open. If
needed, slowly close gun air flow until you get a
good spray pattern.
Try any one or a combination of these methods:
• Close air valve
• Turn gun flow adjustment nut to increase flow,
clockwise
• Use thinner material mixture
• Use a larger nozzle
For Continuous Spraying
Use trigger lock to hold trigger open and reduce fatigue.
ti8528a
3. Adjust air flow adjustment nut and air valve to
achieve uniform, round spray pattern. It may be necessary to change spray nozzles to achieve the
desired spray pattern.
Check Material Consistency Periodically
Check and thin material as needed to maintain proper
consistency. The material may thicken as it sits and slow
down production. Agitate periodically.
ti8539a
311776B
7
Cleanup
Cleanup
Once you have finished spraying, follow these steps to
clean your gun and hopper.
1. Shut off compressor.
8. Turn on compressor.
9. Open gun air valve, forcing air through tip to clear
out any remaining material.
2. Disconnect air line from gun.
ti8528a
10. Disconnect compressor.
ti8568a
3. Drain remaining material into a bucket until most of
the texture material is out of hopper.
4. Fill hopper with clean water. Remove nozzle from
gun and allow water to flow through and out of gun.
Be sure to keep air passages in needle clean and
free of material.
To improve working condition for future use, after
cleaning, apply a few drops of light oil to:
5. Flush until gun is clean.
• Air hose quick disconnect
6. Remove hopper from gun and finish cleaning all
components. A soft brush may be used to help
loosen any dried on material from surface.
• Material hose connections
• Flow adjustment on gun
7. Connect air line to gun.
ti8534a
8
311776B
Troubleshooting
Troubleshooting
Problem
Material will not flow from hopper
Pattern too fine.
Pattern too course.
Gun will not shut off
Cause
Solution
• Material too thick
• Thin material
• Not enough air
• Open gun air valve more
• Gun adjustment set too low
• Increase trigger travel
• Nozzle too small
• Increase nozzle size
• Gun is plugged
• Clean gun
• Not enough material in hopper
• Add material
• Material too thin
• Thicken
• Air pressure too high
• Close gun air valve partially
• Gun needle travels too low
• Increase
• Nozzle too small
• Replace nozzle with larger size
• Material too thick
• Thin material
• Air pressure too low
• Open gun air valve more
• Nozzle to large
• Replace nozzle with smaller size
• Worn nozzle or needle
• Relieve Pressure, page 3 and
replace worn parts
• Nozzle not on all the way
• Debris in needle passage
• Tighten completely
• Relieve Pressure, page 3 and
clean
Fluid leaking at Flow Adjustment Nut
• Damaged seal
• Relieve Pressure, page 3 and
replace seal
Fluid leaking out of either plug
• Missing or damaged o-rings
• Relieve Pressure, page 3 and
replace o-ring
• Gun damaged
• Replace gun
Needle adjustment won’t adjust
Material leaking out around gun/hopper connection
• Dirty threads
• Clean threads
• Nozzle not on gun
• Put nozzle on gun
• Needle triggered
• Adjust when trigger not pulled
• Clamp not tight
• Tighten
• Damaged gun/hopper
• Check for damage and replace if
needed
• Debris between gun/hopper
• Remove hopper from gun, clean,
and replace hopper if needed
311776B
9
Graco Standard Warranty
Graco Standard Warranty
Graco warrants all equipment referenced in this document which is manufactured by Graco and bearing its name to be free from defects in
material and workmanship on the date of sale to the original purchaser for use. With the exception of any special, extended, or limited warranty
published by Graco, Graco will, for a period of twelve months from the date of sale, repair or replace any part of the equipment determined by
Graco to be defective. This warranty applies only when the equipment is installed, operated and maintained in accordance with Graco’s written
recommendations.
This warranty does not cover, and Graco shall not be liable for general wear and tear, or any malfunction, damage or wear caused by faulty
installation, misapplication, abrasion, corrosion, inadequate or improper maintenance, negligence, accident, tampering, or substitution of
non-Graco component parts. Nor shall Graco be liable for malfunction, damage or wear caused by the incompatibility of Graco equipment with
structures, accessories, equipment or materials not supplied by Graco, or the improper design, manufacture, installation, operation or
maintenance of structures, accessories, equipment or materials not supplied by Graco.
This warranty is conditioned upon the prepaid return of the equipment claimed to be defective to an authorized Graco distributor for verification of
the claimed defect. If the claimed defect is verified, Graco will repair or replace free of charge any defective parts. The equipment will be returned
to the original purchaser transportation prepaid. If inspection of the equipment does not disclose any defect in material or workmanship, repairs will
be made at a reasonable charge, which charges may include the costs of parts, labor, and transportation.
THIS WARRANTY IS EXCLUSIVE, AND IS IN LIEU OF ANY OTHER WARRANTIES, EXPRESS OR IMPLIED, INCLUDING BUT NOT LIMITED
TO WARRANTY OF MERCHANTABILITY OR WARRANTY OF FITNESS FOR A PARTICULAR PURPOSE.
Graco’s sole obligation and buyer’s sole remedy for any breach of warranty shall be as set forth above. The buyer agrees that no other remedy
(including, but not limited to, incidental or consequential damages for lost profits, lost sales, injury to person or property, or any other incidental or
consequential loss) shall be available. Any action for breach of warranty must be brought within two (2) years of the date of sale.
GRACO MAKES NO WARRANTY, AND DISCLAIMS ALL IMPLIED WARRANTIES OF MERCHANTABILITY AND FITNESS FOR A
PARTICULAR PURPOSE, IN CONNECTION WITH ACCESSORIES, EQUIPMENT, MATERIALS OR COMPONENTS SOLD BUT NOT
MANUFACTURED BY GRACO. These items sold, but not manufactured by Graco (such as electric motors, switches, hose, etc.), are subject to
the warranty, if any, of their manufacturer. Graco will provide purchaser with reasonable assistance in making any claim for breach of these
warranties.
In no event will Graco be liable for indirect, incidental, special or consequential damages resulting from Graco supplying equipment hereunder, or
the furnishing, performance, or use of any products or other goods sold hereto, whether due to a breach of contract, breach of warranty, the
negligence of Graco, or otherwise.
legales en que se incurra, o bien se instituyan en cumplimiento con el presente documento o en relación directa o indirecta con el mismo, sean
redactados en inglés.
ADDITIONAL WARRANTY COVERAGE
Graco does provide extended warranty and wear warranty for products described in the “Graco Contractor Equipment Warranty Program”.
TO PLACE AN ORDER OR FOR SERVICE, contact your Graco distributor,
or call 1-800-690-2894 to identify the nearest distributor.
All written and visual data contained in this document reflects the latest product information available at the time of publication.
Graco reserves the right to make changes at any time without notice.
This manual contains English: MM 311776
Sales Office: Minneapolis
International Offices: Belgium, Korea, China, Japan
PRINTED IN USA 2007
10
311776B