1
Instructions – Parts List
Parts
55 GALLON (200 LITER) DRUM SIZE
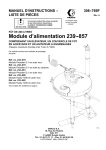
239857 Supply Module
308769D
Includes elevator, stainless steel drum cover,
and back-geared agitator
100 psi (0.7 MPa, 7 bar) Maximum Air Input Pressure
This module fits the following pump modules:
Part No. 232078
SST 3:1 President Module
Part No. 232079
CST 3:1 President Module
Part No. 232081
SST 3:1 President Module
Part No. 232080
SST Husky 1040 Module
Part No. 232082
SST Husky 1040 Module
Read warnings and instructions.
See page 2 for table of contents.
7707A
0359
GRACO INC.ąP.O. BOX 1441ąMINNEAPOLIS, MNą55440-1441
Copyright 1998-1997, Graco Inc. is registered to I.S. EN ISO 9001
II 1/2 G T6
ITS03ATEX11251
Table of Contents
Warnings . . . . . . . . . . . . . . . . . . . . . . . . . . . . . . . . . . . . . . 2
Installation . . . . . . . . . . . . . . . . . . . . . . . . . . . . . . . . . . . . . 5
Operation . . . . . . . . . . . . . . . . . . . . . . . . . . . . . . . . . . . . 10
Parts . . . . . . . . . . . . . . . . . . . . . . . . . . . . . . . . . . . . . . . . 12
Technical Data . . . . . . . . . . . . . . . . . . . . . . . . . . . . . . . . 14
Dimensions . . . . . . . . . . . . . . . . . . . . . . . . . . . . . . . . . . . 14
Mounting Hole Layout . . . . . . . . . . . . . . . . . . . . . . . . . . 15
Graco Warranty . . . . . . . . . . . . . . . . . . . . . . . . . . . . . . . 16
Graco Information . . . . . . . . . . . . . . . . . . . . . . . . . . . . . 16
Symbols
Warning Symbol
WARNING
This symbol alerts you to the possibility of serious
injury or death if you do not follow the instructions.
Caution Symbol
CAUTION
This symbol alerts you to the possibility of damage to
or destruction of equipment if you do not follow the
instructions.
WARNING
EQUIPMENT MISUSE HAZARD
Equipment misuse can cause the equipment to rupture or malfunction and result in serious injury.
INSTRUCTIONS
D This equipment is for professional use only.
D Read all instruction manuals, tags, and labels before operating the equipment.
D Use the equipment only for its intended purpose. If you are uncertain about usage, call your Graco
distributor.
D Do not alter or modify this equipment. Use only genuine Graco parts and accessories.
D Check equipment daily. Repair or replace worn or damaged parts immediately.
D Do not exceed the maximum working pressure stated on the equipment or in the Technical Data
for your equipment. Do not exceed the maximum working pressure of the lowest rated component
in your system.
D Use fluids and solvents which are compatible with the equipment wetted parts. Refer to the Technical Data section of all equipment manuals. Read the fluid and solvent manufacturer’s warnings.
D Route hoses away from traffic areas, sharp edges, moving parts, and hot surfaces. Do not expose
Graco hoses to temperatures above 180_F (82_C) or below –40_F (–40_C).
D Wear hearing protection when operating this equipment.
D Do not lift pressurized equipment.
D Comply with all applicable local, state, and national fire, electrical, and safety regulations.
2
308769
WARNING
FIRE AND EXPLOSION HAZARD
Improper grounding, poor ventilation, open flames or sparks can cause a hazardous condition and
result in a fire or explosion and serious injury.
D Ground the equipment and the object being sprayed. Refer to Grounding on page 8.
D If there is any static sparking or you feel an electric shock while using this equipment, stop spraying immediately. Do not use the equipment until you identify and correct the problem.
D Provide fresh air ventilation to avoid the buildup of flammable fumes from solvents or the fluid
being sprayed.
D Keep the spray area free of debris, including solvent, rags, and gasoline.
D Electrically disconnect all equipment in the spray area.
D Extinguish all open flames or pilot lights in the spray area.
D Do not smoke in the spray area.
D Do not turn on or off any light switch in the spray area while operating or if fumes are present.
D Do not operate a gasoline engine in the spray area.
TOXIC FLUID HAZARD
Hazardous fluid or toxic fumes can cause serious injury or death if splashed in the eyes or on the skin,
inhaled, or swallowed.
D Know the specific hazards of the fluid you are using.
D Store hazardous fluid in an approved container. Dispose of hazardous fluid according to all local,
state and national guidelines.
D Always wear protective eyewear, gloves, clothing and respirator as recommended by the fluid and
solvent manufacturer.
308769
3
WARNING
PRESSURIZED EQUIPMENT HAZARD
Spray from the gun, hose leaks, or ruptured components can splash fluid in the eyes or on the skin
and cause serious injury.
D Do not point the gun at anyone or at any part of the body.
D Do not stop or deflect leaks with your hand, body, glove or rag.
D Follow the Pressure Relief Procedure on page 10 whenever you: are instructed to relieve pressure; stop spraying; clean, check, or service the equipment; and install or clean the spray tip.
D Tighten all fluid connections before operating the equipment.
D Check the hoses, tubes, and couplings daily. Replace worn, damaged, or loose parts immediately.
Permanently coupled hoses cannot be repaired; replace the entire hose.
MOVING PARTS HAZARD
Moving parts, such as the air motor piston, elevator, and agitator blades, can pinch or amputate your
fingers.
D Keep clear of all moving parts when starting or operating the pump.
D Keep your hands away from the elevator, pump support, drum cover, and the lip of the drum while
the elevator is operating or is charged with air.
D Always shut off the agitator and disconnect the air line before you remove the agitator from the
drum or check or repair any part of the agitator.
D Before servicing the equipment, follow the Pressure Relief Procedure on page 10 to prevent the
equipment from starting unexpectedly.
4
308769
Installation
WARNING
FIRE AND EXPLOSION HAZARD
Always maintain a minimum of 1 in.
clearance between rotating agitator parts
and container to prevent sparks from
contact.
General Information
NOTE: Reference numbers and letters in parentheses
in the text refer to the callouts in the figures and the
parts drawing.
NOTE: Always use Genuine Graco Parts and Accessories, available from your Graco distributor. If you
supply your own accessories, be sure they are adequately sized and pressure-rated for your system.
Prepare the Site
Select a site with at least 9 ft (2.8 m) overhead clearance for the elevator when fully raised.
Ensure that the wall is strong enough to support the
weight of the pump and accessories, fluid, hoses, and
stress caused during pump operation.
Refer to Fig. 1. Bring a compressed air supply line (A)
from the air compressor to the supply module location.
Be sure all air hoses are properly sized and pressurerated for your system. Use only electrically conductive
hoses. The air hose should have a 3/8 npt(m) thread.
Prepare the Operator
All persons who operate the equipment must be
trained in the safe, efficient operation of all system
components as well as the proper handling of all fluids.
All operators must thoroughly read all instruction
manuals, tags, and labels before operating the equipment.
Install a bleed-type shutoff valve (B) in the air line to
isolate the air line components for servicing. Install a
moisture trap and drain valve (C) to help remove
moisture and contaminants from the compressed air
supply.
The following manuals are included with this equipment:
Keep the site clear of any obstacles or debris that
could interfere with the operator’s movement.
D
D
D
D
Have a grounded, metal pail available for use when
flushing the system.
308769, Supply Module
306287, Elevator
308466, Drum Cover
308609, Back-Geared Agitator
308769
5
Installation
Installing the 239857 Supply Module
NOTE: Refer to Fig. 1 and to the Dimension drawing
on page 14 and the Mounting Hole Layout on page 15.
1. Ensure that there is at least 9 ft (2.8 m) overhead
clearance for the elevator (150) when fully raised.
WARNING
To reduce the risk of serious injury whenever you
are instructed to relieve pressure, always follow the
Pressure Relief Procedure on page 10.
2. Remove and discard the existing suction tube at
the end of suction hose (H).
3. Locate the elevator (150) so the pump’s suction
hose (H) will reach the swivel (101) at the top of
the back-geared agitator (102). The suction hose
is 6 ft (1.8 m) long. Do not stretch the hose tight;
let it hang as shown in Fig. 1, to assist fluid flow
into the pump.
4. See page 15. Using the elevator base as a template, mark the floor. Drill four holes in the floor for
1/2 in. bolts. Make sure the bolts are long enough
to prevent the elevator from tipping.
5. Connect the suction hose to the swivel outlet (101)
of the agitator (102). Connect the suction hose
ground wire to the ground lug on the agitator as
shown on page 8.
6
308769
6. Loosen the captive screw and open the quick
connector (F) on the air filter/regulator/lubricator
assembly (G).
7. Slide the pipe adapter (J) out of the quick connector (F). Remove and discard the pipe plug from the
bottom port of the tee (K).
8. Bring the coiled hose (105) up through the large
hole in the back pressure regulator’s bracket (E).
9. Screw the adapter (159) at the end of the coiled
hose (105) into the tee (K).
10. Slide the pipe adapter (J) into the quick connector
(F), close, and tighten the captive screw.
Supplied Components
Refer to Fig. 1.
D Fluid is supplied to the pump through the suction
tube (109). The suction tube is installed in the shaft
of the agitator (102). See Fig. 1.
D The back-geared agitator (102) keeps the fluid in
suspension and also includes a suction tube (109)
to draw fluid from a 55 gallon drum.
D The air-operated elevator (150) allows you to
raise the drum cover and agitator from an empty
drum, replace the drum, and lower the agitator into
the new drum.
D The stainless steel drum cover (114) fits a 55
gallon (200 liter) drum.
Installation
B
A
Detail of Air Controls
C
K
2
J
159
F
4
G
105
150
108
1
101
E
102
114
Supply Module Shown with
3:1 President Pump Module
H
109
3
1
Ensure that there is 9 ft (2.8 m) overhead clearance
for the elevator when fully raised.
2
Mount the pump module so the top of the bracket is
4 to 5 ft (1.2 to 1.5 m) above the floor.
3
4
The suction hose is 6 ft (1.8 m) long. Do not stretch
the hose tight; let it hang as shown, to assist fluid
flow into the pump.
See Detail of Air Controls in upper left corner.
7704B
Fig. 1
308769
7
Installation
Grounding
WARNING
Z
FIRE AND EXPLOSION HAZARD
Before operating the pump, ground the
system as explained below. Also read
the section FIRE AND EXPLOSION
HAZARD on page 3.
Y
Fig. 2
1. Pump: refer to the grounding instructions in your
separate pump manual.
2. Air and fluid hoses: use only electrically conductive
hoses.
TI1052
6. Suction hose: attach the hose ground wire to the
ground lug on the agitator. See Fig. 2. If you are
not using an agitator, attach the wire to the fluid
supply container.
7. Fluid supply container: follow your local code.
3. Air compressor: follow manufacturer’s recommendations.
4. Spray gun: ground through connection to a properly grounded fluid hose and pump.
5. Agitator: remove the ground screw (Z) and insert
through the eye of the ring terminal at end of
ground wire (Y). Fasten the ground screw back
onto the pump and tighten securely. Connect the
other end of the ground wire to a true earth
ground. See Fig. 2. To order a ground wire and
clamp, order Part No. 222011.
8
308769
8. Object being sprayed: follow your local code.
9. Solvent pails used when flushing: follow your local
code. Use only metal pails, which are conductive,
placed on a grounded surface. Do not place the
pail on a nonconductive surface, such as paper or
cardboard, which interrupts the grounding continuity.
10. To maintain grounding continuity when flushing or
relieving pressure, hold a metal part of the spray
gun firmly to the side of a grounded metal pail,
then trigger the gun.
Notes
308769
9
Operation
Pressure Relief Procedure
WARNING
PRESSURIZED EQUIPMENT HAZARD
The system pressure must be manually relieved to
prevent the system from starting or spraying accidentally. To reduce the risk of an injury from accidental spray from the gun, splashing fluid, or
moving parts, follow the Pressure Relief Procedure whenever you:
D
D
D
D
are instructed to relieve the pressure,
stop spraying,
check or service any of the system equipment,
or install or clean the spray nozzle.
1. Press down the air control valve (P) button. Lower
the elevator until the cover (114) rests properly on
the lip of the drum. Disconnect the quick coupler
(124) from the male fitting (D) on the air control
valve.
2. Relieve the air and fluid pressure, following the
instructions in your separate pump manual.
Elevator Operation
1. To raise the elevator (150), connect the quick
coupler (124) on the end of the coiled hose (105)
to the male fitting (D) on the air control valve (P).
Pull up the air control valve button to raise the
elevator to its full height.
WARNING
MOVING PARTS HAZARD
Moving parts can pinch or amputate your
fingers. When raising or lowering the
elevator, keep your fingers and hands
away from the elevator (150), cover support (125),
drum cover (114), and lip of the drum.
Do not remove the quick coupler (124) from the
male fitting (D) until the elevator is completely
lowered.
10
308769
2. Position a full drum under the drum cover (114).
3. To lower the elevator (150), press down the air
control valve (P) button. Lower the elevator until
the cover (114) rests properly on the lip of the
drum. Disconnect the quick coupler (124) from the
male fitting (D).
4. Refer to manual 306287 for further elevator operating instructions.
Agitator Operation
1. Close the agitator’s needle valve (L).
2. Connect the quick coupler (124) on the end of the
coiled hose (105) to the male fitting (M) on the
agitator (102).
3. Slowly open the needle valve (L) to start the
agitator (102). Use the valve to adjust the speed.
Do not operate the agitator too fast. If the fluid
foams or a vortex forms on the fluid surface,
reduce the speed of the agitator.
4. Refer to manual 308609 for further agitator operating instructions.
Shutdown
WARNING
To reduce the risk of serious injury whenever you
are instructed to relieve pressure, always follow the
Pressure Relief Procedure on page 10.
1. Lower the elevator (150).
2. Shut off the agitator (102).
3. Relieve the pressure.
Operation
150
105
124
M
L
P
114
D
102
125
7688B
Fig. 3
308769
11
Parts
Part No. 239857, Series A, Supply Module
159 (Ref)
105 (Ref)
159
105
124
104
103
150
101
107
102
109
B
108
155 (Ref)
134
155
125
B
114
102 (Ref)
109 (Ref)
12
308769
7686B
Parts
Part No. 239857, Series A, Supply Module
Ref.
No.
101
Description
SWIVEL; sst; 3/4 npt (m x f)
Part No.
112268
Qty
1
102
AGITATOR, back-geared; see manual 308609
238157
1
103
BUSHING; sst; 1” npt(m) x 3/4 npt(f)
502851
1
104
ELBOW, 90_; sst; 1” npt (fbe)
500251
1
105
HOSE, air; nylon; 1/4 in. (6 mm) ID; 1/4 npt (mbe); 50 ft (15.2 m) long
205600
1
107
STRAP, tie
103546
3
108
GROUND WIRE AND CLAMP
222011
1
109
RISER TUBE KIT; see manual 308609
238250
1
114
COVER, drum; sst; see manual 308466
238283
1
124
COUPLER, quick disconnect, female
114558
1
125
ASSEMBLY, cover support; see manual 306287
237578
1
134
KIT, air control, elevator; see manual 306287
237579
1
150
ELEVATOR, drum; see manual 306287
204385
1
155
KIT, return tube
238884
1
159
ADAPTER; 3/8 npt(m) x 1/4 npt(f)
159841
1
308769
13
Technical Data
Category
Data
Maximum air input pressure
100 psi (0.7 MPa, 7 bar)
Weight
approximately 100 lb (45 kg)
Wetted parts
Back-Geared Agitator: See agitator manual 308609.
Drum Cover: Stainless Steel
Fluid Hoses: Nylon
Dimensions
1
Ensure that there is 9 ft (2.8 m) overhead clearance
for the elevator when fully raised.
1
7707A
14
308769
Mounting Hole Layout
5.5 in.
(140 mm)
8.88 in.
(225.9 mm)
0.56 in. (14.2 mm) Holes
06533
308769
15
Graco Standard Warranty
Graco warrants all equipment manufactured by Graco and bearing its name to be free from defects in material and workmanship on the
date of sale by an authorized Graco distributor to the original purchaser for use. With the exception of any special, extended, or limited
warranty published by Graco, Graco will, for a period of twelve months from the date of sale, repair or replace any part of the equipment
determined by Graco to be defective. This warranty applies only when the equipment is installed, operated and maintained in accordance with Graco’s written recommendations.
This warranty does not cover, and Graco shall not be liable for general wear and tear, or any malfunction, damage or wear caused by
faulty installation, misapplication, abrasion, corrosion, inadequate or improper maintenance, negligence, accident, tampering, or substitution of non–Graco component parts. Nor shall Graco be liable for malfunction, damage or wear caused by the incompatibility of
Graco equipment with structures, accessories, equipment or materials not supplied by Graco, or the improper design, manufacture,
installation, operation or maintenance of structures, accessories, equipment or materials not supplied by Graco.
This warranty is conditioned upon the prepaid return of the equipment claimed to be defective to an authorized Graco distributor for
verification of the claimed defect. If the claimed defect is verified, Graco will repair or replace free of charge any defective parts. The
equipment will be returned to the original purchaser transportation prepaid. If inspection of the equipment does not disclose any defect
in material or workmanship, repairs will be made at a reasonable charge, which charges may include the costs of parts, labor, and
transportation.
THIS WARRANTY IS EXCLUSIVE, AND IS IN LIEU OF ANY OTHER WARRANTIES, EXPRESS OR IMPLIED, INCLUDING BUT
NOT LIMITED TO WARRANTY OF MERCHANTABILITY OR WARRANTY OF FITNESS FOR A PARTICULAR PURPOSE.
Graco’s sole obligation and buyer’s sole remedy for any breach of warranty shall be as set forth above. The buyer agrees that no other
remedy (including, but not limited to, incidental or consequential damages for lost profits, lost sales, injury to person or property, or any
other incidental or consequential loss) shall be available. Any action for breach of warranty must be brought within two (2) years of the
date of sale.
Graco makes no warranty, and disclaims all implied warranties of merchantability and fitness for a particular purpose in connection
with accessories, equipment, materials or components sold but not manufactured by Graco. These items sold, but not manufactured
by Graco (such as electric motors, switches, hose, etc.), are subject to the warranty, if any, of their manufacturer. Graco will provide
purchaser with reasonable assistance in making any claim for breach of these warranties.
In no event will Graco be liable for indirect, incidental, special or consequential damages resulting from Graco supplying equipment
hereunder, or the furnishing, performance, or use of any products or other goods sold hereto, whether due to a breach of contract,
breach of warranty, the negligence of Graco, or otherwise.
FOR GRACO CANADA CUSTOMERS
The parties acknowledge that they have required that the present document, as well as all documents, notices and legal proceedings
entered into, given or instituted pursuant hereto or relating directly or indirectly hereto, be drawn up in English. Les parties reconnaissent avoir convenu que la rédaction du présente document sera en Anglais, ainsi que tous documents, avis et procédures judiciaires
exécutés, donnés ou intentés à la suite de ou en rapport, directement ou indirectement, avec les procedures concernées.
Graco Information
TO PLACE AN ORDER, contact your Graco distributor, or call this number to identify the distributor closest to you:
1–800–328–0211 Toll Free
All written and visual data contained in this document reflects the latest product information available at the time of publication.
Graco reserves the right to make changes at any time without notice.
Sales Office: Minneapolis
Foreign Offices: Belgium, Canada, England, Korea, France, Germany, China, Japan
GRACO INC.
P.O. BOX 1441
MINNEAPOLIS, MN
55440–1441
http://www.graco.com
16
308769
e1998–1997 Graco Inc. 308769 Rev. D 10/2004 PRINTED IN U.S.A.