1
INSTRUCTIONS-PARTS LIST
INSTRUCTIONS
308–610
Rev. A
This manual contains important
warnings and information.
READ AND KEEP FOR REFERENCE.
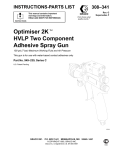
See manual 308–341 for complete gun
warnings and instructions.
Optimiser 2K Upgrade Kit
Part No. 238–216
For use with the Optimiser 2K Spray Gun, Part No. 949–239
Pressure Relief Procedure
1. Close the adhesive and activator shut-off valves.
WARNING
PRESSURIZED EQUIPMENT HAZARD
The equipment stays pressurized until pressure is
manually relieved. To reduce the risk of serious
injury from pressurized fluid, accidental spray from
the gun, or splashing fluid, follow this procedure
before cleaning or servicing the gun and whenever
you are instructed to relieve pressure.
GRACO INC.
2. Trigger the gun into the spray booth* to relieve the
fluid pressures and clear excess activator from the
gun.
*
If the gun has been flushed with solvent, be sure to
spray the solvent into a grounded metal waste container.
3. Close the atomizing air shut-off valve.
P.O. BOX 1441 MINNEAPOLIS, MN
COPYRIGHT 1995, GRACO INC.
Graco Inc. is registered to I.S. EN ISO 9001
55440–1441
Installation
Disassembly
8. Remove the plate (H*) from the gun.
NOTE: The reference letters marked with an asterisk
(for example, Y*) in the text and Fig. 1, should be
discarded and replaced with the parts from the kit. See
the parts list, page 4, for the parts included with the
kit.
9. Remove the fan air valve assembly (M). Remove
the retaining ring (J) and adjustment nut (T*) from
the air valve (N).
1. Flush and clean the gun as instructed in the spray
gun manual 308–341, included with the kit.
2. Follow the Pressure Relief Procedure on the
cover.
10. Remove the fluid adjustment knob (L). Pull the
needle (V*) out of the gun body.
11. Discard the parts being replaced. Clean the remaining parts in soapy water.
Installing the Kit
3. Remove the air cap (Y*) from the gun. See Fig. 1.
NOTE: See Fig. 3 for torques and other assembly
notes.
4. Remove the gun and activator triggers (A, B).
5. Push on the tube connector (C) and disconnect the
tube (D*).
1. Assemble the activator valve (G), using the kit
parts (1, 8, 11).
a. Make sure the thin end of the needle (11) is
straight to avoid scratching the nozzle.
6. Remove the two screws (E) from the activator inlet
housing (F).
b. Install the o-ring (Q), spreader (P), and activator packing nut (K) into the activator inlet
housing (F). See Fig. 2.
7. Remove and disassemble the activator valve (G).
K AA*
F
P BB*
E
CC*
Q
B
F
G
*D
DD*
C
H*
J
M
T*
N
Spreader (P) taper faces away from o-ring (Q)
Tighten packing nut (K) to 20 in-lbs (2.3 NSm)
02781A
Fig. 2
*Y
c.
d. Secure the activator housings (8, F) with the
four stainless steel screws (1).
*V
A
L
CAUTION
05879
Fig. 1
Assemble the remaining valve parts.
To avoid damaging the threads, do not over-tighten
the screws (1).
Installation
7. Install the needle (5) into the gun body, then install
the fluid adjustment knob (L) and spring (X).
Installing the Kit (continued)
2. Install the restrictor (6), flat side up, into the activator outlet housing (8).
3. Place the o-ring (9) in the groove in the activator
outlet housing (8). Lightly lubricate the o-ring.
4. Secure the activator valve (G) to the plate (7) with
the two screws (E).
5. Place the o-ring (9) in the groove on the plate (7).
Lightly lubricate the o-ring, and slide the plate, with
the activator valve assembly, onto the top of the
gun body.
6. Install the gun and activator triggers (A, B) with the
pivot pin (S) and screw (R).
8. Pull back the trigger (A) until the activator valve
starts to open. Tighten the two hex nuts on the
activator needle so that both fluid valves open
together.
9. Install the adjustment nut (4) and the retaining ring
(J) on the air valve (N). Install the air valve assembly into the gun body.
10. Connect the tube (2).
11. Install the air cap (10), and secure it with the
retaining ring (W).
Lightly lubricate.
Lightly lubricate contact area on trigger (B) face.
Tighten to 25–35 in-lbs (2.8–4.0 NSm).
Tighten to 1–5 in-lbs (0.1–0.6 NSm).
Tighten to 10–15 in-lbs (1.1–1.7 NSm).
Tighten to 20 in-lbs (2.3 NSm).
Tighten to 5 in-lbs (0.6 NSm).
F
11 E
8
1 B
G
2
6
R
3
9
7
W
J
9
4
10
N
L
S
A
5
X
05880
Fig. 3
Parts
Part No. 238–216
Includes items 1 to 12. Refer to Fig. 3, page 3.
Ref.
No.
Part No.
Description
1
2
113–411
187–169
SCREW, cap, SST; 10–24 x 3/4 in.
TUBE; nylon;
5/32 in. (3.97 mm) O.D.
CONNECTOR, tube
NUT, air adjustment
FLUID NEEDLE ASSY.;
0.055 in. (1.397 mm) size
RESTRICTOR, orifice
3l
4
5
514–581
188–700
238–218
6
191–015
Qty.
4
1
2
1
1
1
Ref.
No.
Part No.
Description
7
8
9
10
190–247
625–730
106–555
185–794
11
949–295
PLATE, gun
HOUSING, activator outlet
O-RING; Vitonr
AIR CAP; 0.020–0.055 in.
(0.508–1.397 mm) size
NEEDLE ASSY., activator valve
l The tube connectors are included as spare parts.
They do not need to be installed with the other kit
parts. In general, replace the tube connectors after
6 months of usage.
Graco Phone Number
TO PLACE AN ORDER, contact your Graco distributor, or call this number to identify the distributor closest to you: 1–800–367–4023 Toll Free
Sales Offices: Atlanta, Chicago, Detroit, Los Angeles
Foreign Offices: Belgium, Canada, England, Korea, Switzerland, France, Germany, Hong Kong, Japan
GRACO INC.
4
308-610
Qty.
P.O. BOX 1441 MINNEAPOLIS, MN
PRINTED IN U.S.A. 308–610 December 1995
55440–1441
1
1
2
1
1