1
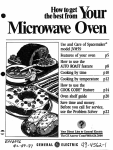
Howto
get
thebestfrom
Oven
contents
Adapter Plugs
Aluminum Ml
22
4
Minute/Second Timer
Model and Serial Numbers
Appliance Registration
Auto Defkost
2
M
Oven Shelf
Pbwer Levels
18,19
8-11
precautions
Problem Solver
3
20,21
Auto Roast
Auto Simmer
Care and Cleaning
Control I%nel
12,13
’13
15*17
6,7
Repair Service
safety Instructions
23
3,4
●
1O,12, 13
Conversion Guide
Cooking Complete Reminder
14
5
Temperatw Cook
Tanperature Probe
Cooktq Light
Delayed CmIcing
6
11
Time Cook
Time Defrost
Exhaust Fan
Extension Cords
Features
Grease Filters
6,16
22
11
2
Warranty
Useand
of
model
JVM141G
Care
10
8
9
Back Cover
The electric output
of this microwave oven
is 625 watts.
5
16,17
Grounding Instructions
Hold Thne
22
11
Light Bulb Replacement
Microwaving TIPS
16
2
Mur Dti
Lineto General Ekctric
The GE Amwwr Cer& 800.626.2000
6ENERAL~
ELECTRIC
.
Help us hdpJOU.o.
wfbre~p-,
readthisbookcmefbBy *
Besureyourmicmwwe
ovenhq@s&md
It is intended to help you operate
and maintain your new microwave
oven properly.
It is important that we know the
location of your oven should a need
occur for adjustments.
Keep it handy for answers to your
questions.
Your supplier is responsible for
~istering you as the uwner.
If you don’t understand something
or need more help, write (include
your phone number):
Consumer Affhirs
GE Appliances
Appliance Rark
Louisville, KY40225
Please check with your supplier
to be sure he has done so; also send
inWWoWmerPmductownemhip
Registration Cad. If you move, or
if w are not the original purchaser
please write to us, stating model
and serial numbm. This appliance
●
Imrstbemgisted.p leaset)e
certain that it ill.
W* down the model
and serial numbers.
write to:
You’llfind them on a label inside
the oven on the upper left side.
GE Appliances
_
PrOduct Service
Appliance Park
Louisville, KY40225
These numbers are also on the
Consumer Product Ownership
Registration Gird that came with
your microwave oven. Before
sending in this card, please write
these numbers here:
bid
Number
Use these numbers in any
correspondence or service calls
concerning your microwave oven.
Mkmmviq
.
If you received a
damaged oven...
Immediately contact the dealer
(or builder) that sold you the
microwave oven.
tive time@
money.
B@weyourequ
estservice...
check the Problem Solver on
pages 20 and 21. It lists causes of
minor operating problems that you
can correct yourself.
‘I@s
● Make sure all cookware used in
your microwave oven is suitable for
microwaving. Most glass casseroles,
cooking dishes, measuring CUPS,
custard cups, pottery or china
dimerware which does not have
metdlictri
morglaz ewitiarnetic
sheen can be used. Some cookware
is labeled “suitable fix rnicruwaving~’
If you are unsure, use this dish test:
Measure 1 cup water in a glass cup.
Place in oven on or beside dish.
Microwave 1-1%minutes at High. If
waterbecomeshot, dishismi~e
safk. If dish heats, it should not be
used for microwaving.
● Paper towels, wax paper and
plastic wrap can be used to cover
dishes in oder to retain moisture
and prevent spattering.
some rnicrowwd frequire
stirring, rotating or rearranging.
Check your cookbook.
●
● Steam builds up pressure in fds
which are tightly cavered by a skin
or membrane. Pierce potatoes, egg
yolks and chicken livers to prevent
bursting.
PRECAUTIONS
IX) AVOID
POSSIBLE
EXPOSURE m
lmcEssrvE
MICROWA~
(a) Do Not Attempt to operate
this oven with the door open since
open door operation can result in
harmfid exposure to microwave
energy. It is importantnot to .
de&ator tamperwith the safety
interlocks.
(b) Do Not Place any object
between the oven front iiwe and
the dmr or allow soil or cleaner
residue to accumulate on sealing
Surfilces.
(c) Do Not Operate the oven
if it is damaged. It is particularly
importanttkt the ov& door close
pr6per1yand thatthere is no
damage to the:
(1) door (bent)
(2) hinges and latches (brokenor
loosened)
(3) door seaIs and sealing surfkes.
(d) The Oven Should Not be
adjustedor repairedby anyone
except properly qualified service
personnel.
This micrcmkveoven is UL listed
for installation over electric
and gas ranges.
IMPORTANTSAFETYINSTRUCTIONS
Read all instructions
bdOIX!
using this 41p@fUlC4?o
Whenusingelectricalapphnces,
basicsafktyprecautionsshouldbe
fbllowed,includingthe fbllowing:
ovencavity:
–Do notowmx)okibod. CarefWy
●
wARNING-Totiuw
the risk of burns, electricshock,
fire, injtuy to pemonsor exposure
to excessivemicrowaveenergy:
Q Use this applianceonlyfir its
intendeduse as describedin this
manual.
● Readand fbllowthe specific
“PRECAUTIONS‘It) AVOID
‘POSSIBLEEXPOSURE‘Ill
EXCESSIVEMICROWAVE
ENERGY”at left.
● ‘Ihinppliancemustbegrounded.
ConnectonIytoproperIygrounded
outlet. See “GROUNDING
INSTIUKHONS” on page22.
● Rx best operation,plugthis
applianceinto its ownelectrical
outlet, to preventflickeringof
lights,blowingof fbseor tripping
ofcircuit breaker.
● M@
or locatethis appliance
only in accordancewiththe
providedinstallationinstructions.
QDo not coveror blockany
openingson the appliance.
● Do not use outdoors.
● Do not immersepowercordor
plug in water.
● Keeppowercord awayfkom
heated SUIfiiCt%
● Do not let powercordhang
overedgeof tableor counter.
● Donotoperatethisapplianceif it
has a damagedpowercordorplug,
if it is not workingproperly,or if
ithasbeendamag ed or dropped.
● Seedoor surfkcecleaning
instructionson page E
● This applianceshouldbe
servicedonly by qualifiedservice
persomel. Contactnearest
authorizedservicefiiciIityfor
examination,repairor adjustment.
● Aswithanyappliance,close
supervisionis necessarywhen
usedbychildren.
3
.
●
mmchlce”theriskof
~inthe
attendapplianceif paper,plastic,
or other combustiblematerials
are placedinsidethe ovento
iiicilitatecooking.
–Remove wiretwist-tiesfkom
paperor plasticbagsbefore
placingbagsin oven.
–Do not use yourmicrowave
ovento dry newspapem.
+aper towds, IMlpkiIM
and
waxpaper.Recycledpaper
productscan containmetalflecks
whichmaycausearcingor ignite.
Riperproductscontainingnylon
or nylonfilamentsshouldbe
avoided,as theymayalso ignite.
–Do not poppopcornin your
micrwwavemmmnless
inaspecial
microwavepopcornaccessoryor
unlessyouuse popcornlabeled
fir use in microwaveovens.
–Do not operatethe ovenwhile
emptyto avoiddamageto the
ovenandthe dangerof fire. If
byaccidentthe ovenshouldrun
emptya minuteor two,no harm
is done. However,try to avoid
operatingthe ovenemptyat all
times-it savesenergyand
prolongsthe life ofthe oven.
–Do not overcookpotaTheycoulddehydrateand catch
fire, causingdamageto youroven.
–If materialsinsideovenshould
ignite,keepovendoor closed,
turn ovenoff, and disconnect
powercord, or shutoff powerat
fhseor circuitbreakerpanel.
● Someproductssuchas whole
eggsandseaiedcontainers-fbr
exampIe,closedglassjars-may
explodeand shouldnot be heated
in this oven.
● Avoidheatingbabyfd
in
glassjars, evenwithouttheir lids;
especiallymeatand eggmixtures.
e
~.-.
..
,.
‘.
.
. ,. .
‘.~,~
.’
.
.
. ..
.
,,
. .,.
. .
.
.
~.
,
L
.
. .
IIMPORTANTSAFETY
Instructions.,,”. .....,
(ccitinued)
~ .
.
. ,..
,,”.
~,.,
/’
.,
,,.
“:
&&of~es*~
r)on’tddhwti!hfzen~ longerexposuresto~
“’,
V*
m
innarrowIEckEdbotdes(e$peciay the
&xxi
and
utensils
addijpitei‘--~mm the shelffiomoven
●
IWhesemasons: 1)Usemiamm .~~
whennot in use. ‘;
P~ti~Odytiwe~~
,
, -Do
,
~~
not store arkook withshelf
strict compliancewiththeutensil
~, on floor ofoven. Eroductdamage
manufactm#s I’ecOmmmdatiuns. Inaymult.
.’..”
~
z) I?onotsubjec@mptyM
~-Use pot holdem’~liandlethe
tomimowWing.3)DolMp!mmit
shdfaudutensds,~
m@!ehot.
chikirento useplastic.utends
–Donottimi&bwning
withoutComplewsupefiion.
dish on she~ theshelfcould
● when cooking porkJWnv
thedimctionsexactly andal*
“ ‘ ~“
~ .~...
cookthemeatto anihterM
TWEHObD: ;;:::’
,.
temperatureofMast 160%
carbonatedbevemges).Evenif
the containeris opened,pressure
can buildup. Thiscancausethe
containerto burst, resultingin
injury.
@usemetdoniy
asfiirdedin
cookbook.TV dinpm maybe
micnmm?edinibihysiessthan’
3/4”high; removetop ibil cover
and return trayto box. When
usingmetal in microwavemm,
keep xnetd (other than metal ~
shelf) at Ieastl-inch away&om
sides of oven.
● Cookingutensilsmaybecome
hot tKCitUSe
of heat trandkrred
fromthe heatedfbod.M hoIders
maybeneededto handlethe
utensiL
● sometim~ the ovenfloor can
becometoo hot to touch.Be
can#ultouchingthe floorduring
and stir cooking.
o Foodscookedin liquids(such
as pasta)mq tendto boil over
morerapidlythanfbodscon@ining
less moisture.Shouldthis occur,
refixto page 15fir instructionson
huwtockantheinsideoftheoven.
● Tiwrmometer-Do
not use a
thermometerin fd youare
microwavingunlessthethermometer
is designedor recommendedfir
use in the microwaveoven.
● Removethe temperature
probefiwmthe ovenwhennot
usingit tocookwith. If youleave
the probe insidethe ovenwithout
insertingit in M or liquid, and
turn on microwaveenergy,it can
createdxtricd arcingin the
ovenanddamageovenwalls.
● PlasticuWMils-Pklsticutensils
designedfix microwavecooking
are very useful,but shouldbe
usedcarefidly.Evenmicrowave
plasticmaynot be as tolerantof
overcookingconditionsas are
glassor ceramicmaterialsand
maysoftenor char if subjectedto
short periodsof overcooking.In
Thisassuresthat,
in.themte
●
possibilitythat trikhinamaybe
presentin the meat, itwill be
killedandmeatwiWesaMoeaL
● Boilingeggsis
—— not
recommiindedina.microwave
oven.Pressurecanbuildup insi&
eggydk and maycauseit to burst,
resultingin injury.
● Foodswith unimken outer
%*W suchas potatoes,sausages,
. tomatoes,apples,chickenlivers
andother giblets,and eggyolks
(seepreviouscaution)shouidbe
piemedto allowsteamto *cape
duringcooking.
● “Boilabl&cookingpouches
andtightiych)sed@stic bags
shouldbe slit, piercedor vented
as directedin cookbook.If they
are not, plasticcouldburst during
or immediatelyafter cooking,
possiblyresultingin injury.Also,
phstic storagecontainersshouId
beat least partiallyuncovered
becausethey fbrma tightseal.
Whencookingwithcontainers
tightlycoveredwithplasticwrap,
removec#eringcaRfLIHy
anddireCt
steamawaytim handsand fkce.
● Spontaneous boiling-Under
certainspecialcircumstances,
liquidsmaystart to boil during
or shortlyafter removalfromthe
microwaveoven.Topreventburns
tim splashingliquid, stir the
liquidbriefly beforeremovingthe
containerfkomthemicmwaveoven.
4
~
packedwiththemikrowaveoven.
liinyoul’oveil
‘ IMWxhaustii
will operateautomatieldly
undercertainconditions(see
●
AutomaticFan Fkaturq page
qerati~
isrequired toprevent
6). While the fhis
caution
the starthg andSpre@ngof
accidentalCOO* @es whiIe
the exhaustbk inase. For
thisreason: - j “
-NewrIeave s&%we&its
unattendedat highheatsaltings.
BoilOvercausessmokingand
greasyspilkwershit mayignite
and spreadif ventfinis operating.
Tbminimizeautomatich
operation,use adquate sized
utensilsanduse highheat settings
onIywhennecamry.
–Intheevent ofagrease~
smotherflamingpan on surhce
unit bycoveringpan completely
with welI-fittinglid, cookiesheet
or flat tray.
–Never flame fti underthe
ovenwiththe vent*operating
becauseit mayspreadthe flames.
–&p hoodandgreasefihm
dean, accordingtoMructionson
pages 16and 17,to maintaingood
ventingand avoidgreasefires.
SAW THESE
INSTRUCTIONS
Features of Your Microwave Oven
GDx’npleteRemhMkr
cooking
@or TIME COOK and DEFROST cycles)
To remind you that you have food in the
oven, the oven will display “End” and beep
once a minute until you either open the oven
door or touch the CLEAIUOFF pad.
T
e
ID
(i)
d)
1. Door Hmdk Pull to open door.
Door must be securely latched for
oven to operate.
2. Door Latch3WhBdowwithMetal ShkU
Screen allows cooking to be viewed
while keeping microwaves confined
in oven.
4. Model and Serial Numbers.
5 Oven Vent.
&Mode StirrerCover.Protects
the microwave energy distributing
system. Do not remo?e the cover.
Youwill damage the oven.
7. ~r”
WmpmMumPrde. Use with
Ternp Cook/Hold and Auto Roast
filnctions only.
& I!W!eptacle fm ‘IkmperatlU’e
Probe. Robe must be securely
inserted into receptacle befbm oven
will start any temperature or Auto
Roast cooking.
9. l’wu I%sition Metal Shelf.
Doubles the oven capacity when
reheating or cooking smaller fd
items. (For complete use of shelf,
see pages 18-19.)
Ilk Oven Floor.
11. Auto Roast &Auto Mti
Wide.
12. Grease Filtaso
~ boktop Light.
14. Oven Light. Light comes on
when door is opened or when oven
is operating in any fimction.
K RedmuMng
page 16.
Filter. See
I& ‘Ibwh C(mtmi I%neland
Di@tal Display. For detailed
intimation on each feature, see
pages 6 and 7.
17. Hood Controk
lb I%&. Press HI, LO or OFF.
LFads. Press ON, NIGHT
or OFF.
I
I
I
Your Touch Control Mel
The touch control panel allows you to set the oven
controls electronically with the touch of a finger. It’s
designed to be easy to use and understand. With your
microwave oven, you have the option of using your
automatic cooking control pads for quick and easy
convenience cooking. Or you may make your own
programs to suit your individualized cooking style.
7. Auto Roast. Insert probe, touch this pad, and
desired number pad for code to slow-cook or
temperature cook meat with automatic preset
program. (See pages 12and 13.)
VvheIllbul%lginthehn
& Exhaust Fan. Press HI, LO or OFF for desired
fkn speed.
The display panel displays five 8’s, 18POWER and
all of the uven functions. After 15seconds, all lights
disappear and “RESET” appears in the upper portion.
Touch the CLEAR/OFF pad, set the CLOCK and
oven is ready for use.
If power is disrupted at anytime, the above sequence
recurs and you must reset CLOCK afkertouching
CLEAR/OFF.
“Error” Appears
on Display
●
●
● When using Temp Cook/Hold, you have entered
a temperature less than 9(PF. or more than 19!YF.
● When using Auto Defiwst, the fd
weight you
entered did not correspond with the code number
entered.
& Clear/Off. When touched, it stops the oven and
erases all settings except time of day.
●
9. Time Defrost. Gentle thawing at automatic power
level 3, or change power level after entering time.
(See page 9.)
10. Tmp Cook/Hoid. Use the temperature probe to
cook by using a preset temperature. When internal food
temperature reaches 90’T?, oven shows temperature
until preset temperature is reached and holds
temperature for up to one hour. (Seepage 10.)
U. Min/Sec Timer. This feature uses no microwave
energy while it fimctions as both a kitchen timer or as
a holding period between defkost and time or
temperature cooking. (See page 11.)
12. Pbwer bvei. Touch this pad before entering
another power level number if you want to change
from automatic power level 10(High) for cooking or
power level 3 (Low) fir defrosting.
“Probe” Appeam on Display:
J3. Start. Touch this pad to begin any function.
● Probe has been forgotten when Auto Roast or Temp
Cook/Hold is being used.
14. Auto Defrost. Touch this pad, then code number
and fd weight. The oven automatically sets power
levels and defrosting time. (See page 14.)
. probe is ~
securely seated in oven wall receptacle.
1. Display I%neLDisplays time of day, time or
temperature during cmking functions, power level
being used, cooking mode and instructions.
2. Time Cook 1 and Time Cook II. Microwave for a
preset amount of time using automatic power level 10
or change power level afler setting time. (Seepage 8.)
S Auto Start. Allows you to program your oven to
begin cooking at a preset time of day-up to a 12-hour
delay. (See page 8.)
4. Clock. Touch this pad to enter time of day or check
time of day while microwaving. To set clock, first
touch CLOCK pad and then enter time of day. For
example, if time is 1:30, touch number pads 1, 3, and
Oand “1:30” will appear on display. “START” will
flash on displw, directing you to touch START, thus
setting the clock. If you wish to reset or change time,
simply repeat above process.
S Number F&ds.Touch these pads to enter cook
time, fd temperature, puwer level, Auto Roast codes
or Auto Defrost codes and food weight.
15. Light. Touch desired pad to illuminate counter or
to turn on night light.
AUIUWATXCFM FEATURE
Cooking appliances installed under the oven might,
under some heavy usage conditions, cause temperatures
high enough to overheat some internal parts of the
microwave oven.
To prevent overheating fim taking place, the exhaust
fkn is designed to automatically turn on at low speed if
excessive temperatures occur. Should this happen,
the fan cannot be manually turned off, but it will
automatically turn off when the internal parts have
cooled. The fm may stay on up to approximately 30
minutes after the range and microwave oven controls
have been turned off.
A)
-@
-0
-e
-0
-4Q
+1
c
ookingbyl’hne
Thethnecookhgfhturealkm
step 4: T&uchST’.
“COOK
~E
1j’ “-R
10;”and time
counting down show on display.
ymltopresetthecmkingthne.
The oven shuts offautomaticalIy.
I%werlevel 10(High) is
recommended fir most cooking,
but you may change this fbr more
flexibility. See your cookbook.
To become better acquainted with
timecooking, makeacupofcof!ke
by fbllowing the *S below.
u$h$twnm8i!cooklI
7/4
The Time Cook II ikature lets you
set two time cooking fimctions
within one program. This is ideal
when w want to change power
kvds during your cooking
operations. Here’s how to do it.
AM!!
Step 1: Fti a cup 2/3 Ml ofwtter,
addltawpoonofinstant
coffee and
stir to dissolve. Use a cup that has
no metal decoration and is
microwave saib (see Microwaving
TIPs on page 2). Place cup in uven
and close door.
Step 5: When time is up, the oven
signals and flashes “End? Oven,
light and fall shut off.
Step 6: Open the door.
Sttpk Place fbodinuven%
microwave-saik container and close
the door.
Step2: ‘Ibuch TIME COOK I pad.
DiSpkly -“:
0“ ~ “-R
IO? “ENTER COOK TIME l“
flashes.
Stap3:selectpurcookingtime.Ibr
c example, touch 2, 1 and 5 for two
minutes and lS seconds. Display
‘~:fi” ~ “-R
10:”
“COIOKTIME l“ flashes.
Step& ‘IbuchTIME COOKII pad.
I
Step2: ‘IbuchTIME COOK I.
Dlsphly shows “: (y ~ “-~
10:’ “E~R
C~K TIME l“
flashes.
Step 5: Set your cooking time.
Hawtocbange RYwdAwd
After setting cooking time,
touch PUWER LEVEL pad,
then touch desired number for
new power level.
Step 6: ‘Ibuch START.
Step 3: Select your time. For
example, touch 1,2 and Otbr a
minute and 20 seconds. DisplW
shuws “1:20” and “POWER 10?
“COOK ~
~’ fkk.
Because automatic power level 10
is recommended fw this cup of
coflke, there is no need to change
the puwer level. (If power level 10
is not appropriate, see “How to
Change Pbwer Level” at right.)
Step Z “POWER 10” is displged
and Cook Twlisshowncounting
duwn.
Step8Atthe
endof Cook Timel,
the second power level is displayed
and Cook T-2
is shuwn counting
down.
Step 9: When time is up, the oven
signals and flashes “End~’The
uven, light and fan shutoff.
Step I& Open the door.
HuwtKD
Use Auto Start
Autostart allows youtoprogram
youroventobegin cookingata
preset time of day-up to a U
hour delay.
‘Ib use Auto start
Step 1: Enter your desired cooking
program.
step 2: Touch AU’113START plld
(instead of START pti).
Step 3: Enter the time you want
the oven to start. (Be sure your
microwave oven clock shows the
correct time of day.)
Step& Touch WAKI’ pad. The
uven will automatically start at
the desired time.
Questions and Answers
Q Isetmyovenforthetime
called f~ in the reci~ but at the
endofthetimeallowed,m
yfood
wasn’t done. what happened?
A. Since house power varies due
to time or location, many time
cooking recipes give you a time
range to prevent overcooking. Set
the oven for minimum time, test the
food for doneness, and cook your
&xxia little longer, if necemary.
Q Itouchedthenumberpads
andmiectedmypowerievei. when
I touched START, however~my
oven didn’t come on. Why not?
A. The TIME COOK IorIIpad
must be touched before setting the
number pads or else your oven will
not begin cooking.
Q Iwanttocookonapower
level other than High. Whatdo I
need to do?
A. To change the power level,
touch the POWER LEVEL pad,
then touch desired number for new
power level.
Q Can I interrupt Time Cook to
check the fd?
A. Yes. To resume cooking,
simply close the door and press
the START pad. The timer must be
reset for cooking to resume unless
time is remaining on timer.
Defrosting by ‘Ihne
TiIne Ddkostiddgned
for speedy thawiug of frozen fandisoneoMqgreata&
antqp
ofa microwave oven.
QuestmsdAnswers
●
Q When Ipress START, Ihear
8 dull thUXllp@ noise What is it?
A. This sound is normal. It is
letting you know the oven is using a
power level lower than 10(High).
Usdrhne-toqlaickly
thawibodssuchas bread, rolk%
~tidl~
Auto Ih!&ostispmfermd lbrmeat
andpmdtrybecause theavensets
theddkoMn$ timeandpower
levels for you.
● Prover level 3 is automatically set
for defrosting, but you ~ change
this for more flexibility.
Sh@ ‘IbuchSIAIU’. “DEFTIME”
shows and time counts down on
display. When cycle is completed,
the uven signals and flashes “End~’
then automatically shuts off.
Step 5: ‘Ihm package over, close
doorandrepeat Steps 2and3toset
remaining half of defrosting time
and touch START.
● See your cookbook for defrosting
help.
To become better aquainted with
Time Defrost, defrost a 10-02.
p-o
f-n
s-berries
by
following the steps below.
Step 6: When oven signals and
flashes ‘Wn& open door, remove
w-e
~ _
s-berries
to finish defbsting.
Steph Placepackageoffrcwen
strawberries in the oven and close
door. Be sure package contains
no metal.
Ddkosbg
.kn
in paper or plastic
can be defkosted in the paclmge.
● For even defrosting, some foods
need to be broken up or separated
part of the way through the
defrosting time.
Step 2: ‘I&h TIME DEFROST.
Display shows”: 0“ and”~
3? “ENTER DEF TIME” flashes.
● Family-size pK?-Wcki&d
frozen entrees can bedefrostedand
microwaved. If the food is in a foil
container, transfkr it to a microwave
safk dish.
step3:selectone
halfofthetotal
defi=@lbr=m*in
your cookbook. Ibr example, touch
4,0 andO fbr4 minutes. Displq
shuws ‘4:00” and “-R
3.”
“DEF
~E”
flashes.
4
Howtochmgem*l
After setting ckfrostingtime,
touch POWER LEVEL F@
then touch desired number fix
new power level.
‘njls
● Check your cookbook for other
defrosting tips.
Q. CanIdefkostsmall
itemsin
a hurry?
A. Yes, but they will need more
frequent attention than usual. Raise
the power kwel after entering the
time by touching the desired power
level pad. Power level 7 cuts the
total defrosting time about in 1/2;
puwerlevel 10cutsthetotaldehXing
time to approximately 1/3. During
either, rotate or stir fd frequently.
Q Wqydon’tthedefmsting
times in the cookbook seem right
fw my fd?
A. Cookbook times are averages.
Defrosting time can vary according
to the temperature in your fkeezer.
Set your oven fix the time indicated
in your cookbook. If your fd is
still not completely thawed at the
end of that time, reset your oven
and adjust the time accordingly.
Q Shouidaliftibe
Compktely thawed before
cooking?
A. Some fds should not be
completely thawed before cooking.
For example, fish cooks so quickly
it is better to begin cooking while it
is still slightly tin.
Q Can Iopenthedoorduring
Time Defrost to check on the
P~
of my f~?
A. Ym. Youmay open the door at
any time during microwming. ‘Ib
resume defrosting, close the door
and press STA~. The oven begins
operating if time is left on timer.
If not, reset timer.
Cooking by Temperature
Internal temperature is the best
test of doneness for many fa.
Howto!IkmpCookaR&d
Beef Rib ~O$tSt to Medium
Temp Cook/Hold takes the
guesswork out of cooking because
the oven automatically switches
to Hold setting after reaching
the preset food temperature and
maintains that temperature for up
to one hour or until you touch the
CLEAR/OFF pad.
Step 1: Inserttemperature probe
and attach probe securely in oven
wall. Close the door.
The ‘lkmperature
HA~OLE
fkp 2: Touch TEMP COOKI
HOLD. The display panel shows
~~F~$
~ ~~_R
1o:’ “ENTER
TEMP” flashes.
Step 3: Touch 1,2,5 for 125°F.
“TEMP COOK” flashes. “125F”
and “POWER 10” show on display.
Probe
CASLE
The temperature probe is a fti
thermometer that gauges the
internal temperature of your fd;
it must be used when using Temp
Cook/Hold or Auto Roast. To
utilize your probe properly, follow
directions for use and insertion in
this book in the Automatic
Roasting section.
Step 4: Touch POWER LEVEL
pad. “ENTER POWER” flashes.
Touch 5 for medium power.
“TEMp COOK:’ “~5~’ ad
“POWER 5“ show on display.
Step 5: Touch START. If internal
temperature of the roast is less than
%)%, displ~ will sbv “COW’ or
if temperature is 90”F. or above,
display shows temperature
counting up.
Step 6: When 125°F.is reached,
the oven will sound and display
“HOLD”. The uven will then hold
9the temperature.
Step % Touch the CLEAIUOFF
pad to stop the cycle.
Step 8: Remove probe and fbod
from th~ oven.
c00khlg
TIPS
● Use a lower power level; it will
heat more evenly even though
requiring more time.
QBesure frozen ibodhasbeen
completely defbted beibm inserting
probe. Probe may break off if used
in frozen foods.
● Use the clip to keep the probe in
place while heating.
● Cover foods loosely for moisture
control and quick, even heating.
Questions
and Answers
QAfter If~thesteps
and touched the ST~
pad,
“ERROR” flashed in the display
andasignal sounded. W@’s
Wrculg?
A. “ERROR” flashes if you set
the temperature either below 90”F.
or above 199”F.The uven tells you,
between the flashing of “ERROR;’
what incorrect entry was made. To
re-enter, touch CLEAR/OFF pad
and begin again.
Q Are there any f~
I can’t
‘IkmpCook?
A. Yes. Delicate butter icings, ice
cream, frozen whipped toppings,
etc. soften rapidly at warm
temperatures. Batters, doughs and
frozen foods are also difficult to
cook precisely with the probe. It’s
best to time cook these foods.
Q Why did “PRC)BE” flash on
the display after I touched the
SIART pad?
A. “PROBE” will flash if you
don’t seat the cable end of the probe
securely into the receptacle in the
oven wall or if you touch the TEMP
COOWHOLD pad and forget to
use the probe.
QCan Ileavemyprobeinthe
oven if it’s not inserted in fd?
A. No, if it touches the oven wall,
you may damage the oven.
Q Can I lkmp Cook different
portions offal at different
temperature?
A. Yes. The temperature probe
gives you the f%eedomto cook
different portions of food at
different temperatures to suit
individual eating styles. Simply
place probe in fti and change
temperature setting as needed.
How to Use the Minute/Second ‘Iher
The MINSEC TIMER has three
timing functions:
Step 1: T&e casserole from Ikeezer
and place in oven.
QIt operates as a minute timer.
●Itcanbesettodelay _
●Itcanbeused asaholdsetting
Step %Touch 2,5,0 and Ofor
twenty-fiveminutes of cooking time.
“COOK TIME l“ flashes, “25:(K)”
and ‘TOWER 10”appear on displw.
after defw
The MIN/SEC TIMER operates
without microwave energy.
Huw to The a3-Minute
Phone call
1. Touch MIN/SEC TIMER pad.
The display shows”: O“ and
“ENTER TIME” flashes.
2. Touch number pads 3,0 and O
(for 3 minutes and no seconds).
Display ShcJws“3:00” ~ “me”
S Touch START. Display shows
time counting down.
4. When time is up, oven signals,
flashes “EndJ’ and display shows
time of day.
~
a Hokiing
Time
TlwMinute/Second Timer can also
Step2: Tmch TIME DEFROST pad.
Step8: Tmch START.“DEFTIME”
and “15:00” counting down shuw on
display. As each fimction is
automatically performed, oven
display shows instructions entered
and the fimction.
The display shows”: O“ and
‘$powER 3~’ “ENTER DEF
TIME” flashes.
Step 9: When time is up, the
oven signals, flashes “End” and
shuts Off.
Step 3: Touch pads 1,5,0 and Ofor
15minutes&frost@ time. “15:(Xl”
appears on display. (Defrosting is
,
automatically &t-on power level 3
but can be changed by touching
the POWER LEVEL pad and the
desired power level.)
Questions and Answers
be used to program a holding time
~~-~.
Thetimecanrange fmmonesecond
to99minutes and99seconds. A
holding or standing time maybe
requested in some of your own
recipes or cookbook.
~
cooking
Delayed
To delay cooking up to 99 minutes
and99seconds, touchTIMECOOKI
or TEMP COOK/HOLD and enter
cook time or temp. lbuch MIN/SEC
TIMER andentiernumber of minutes
to de~ cooking. Touch STAKE
Timer will count down to zero and
cooking will begin. When delaying
temperature cooking, be sure that
probe is in fbod before pressing
STAKI?.
How to Time Def*,
and Time Cook
Hold
Let’ssayyuu wanttodefkos tafiuzen
casserole for 15minutes, hold fbr
10minutes and then ‘Ilrne Cook for
25 minutes. Hem’s how to do it:
Step 4: Set holding or standing
time by towhing MIN/SEC TIMER.
The displiy shuws”: O“ and
“ENTER TIME” flashes.
step 5: Touch 1,0,0 and Oto hold
for ten minutes. “10:00” appears on
display and “TIME’ flashes.
step 6: Touch TIME COOK I pad.
The display shows”: O“ and
~~_R
lo~”“ENTER COOK
TIME 1“ flashes.
Q. What will happen if I
accidentally reverse my defrost,
hold and cook instructions?
A. The oven will automatically
rearmnge your program. Defrosting
will always come first, then hold,
and then the cooking fbnction.
Q Can I defrost and hold only?
A. Yes. Sometimes you may only
want to defrost a food, hold it, and
cook it later. All you need to do is
program in Time Defrost and
amount of time. Then program a
holding time (example in steps 4
and 5 at left). Be sure to put the
thawed dish in the refrigerator
promptly.
N(YTE:Let fds remain at room
temperature only as long as safe.
Times will vary.
Q. I programmed my oven for
a specific defrosting time but it
defkmted longer than necessary.
what happened?
A. When instructions conflict,
the oven carries out the last
instruction. You may have set the
oven to Defrost for 4 minutes,
Hold/Time for 2 minutes, and then’
Defrost fbr6minutes. Inthiscase, the
oven would D@ost for 6 minutes
and Hold/Time for 2 minutes.
Automatic Roasting
Autoltoastuaesth
ettmperawre
probe tocooktotheddred
m
-~
unlike
‘IbmpCot&/Hold,which rsscsa
mm=,titi
usesupto3palWUsleUiqp which
autnmaticallyswitchduring
-tim~-,
tender cooking results without
~u
Just as in conventional roasting,
only tender roasts should be Auto
Roasted until specified internal
temperatures are reached. Less
tender roasts should be microwaved
by time, according to the cookbook
which comes with your oven.
I%qaAqgR0a@3
Pbrkor ham masts need no trivet.
Addl/2cupwaterto roast dishand
cover with plastic wrap.
for
Auto hasting
Place meat in oven with probe to
the right. Insert cable end of probe
firmly into receptacle on uven wall.
HowtHDAutoRoast
BeeftoMedium
Place tender beef roast on trivet in
Xnicrowavesafkdish.1.nsertprobe
horhmtally into the center meaty
amanottouching boneorfat. hhke
surcthehandle doesnottouchthe
food or top or sides of the oven.
Cover with wax paper.
1. Touch AU’10 ROAST pad.
“AUTO” appears on display and
“ENTER CODE” thShCS. Touch
number pad 2. “CODE 2“ appears
on dispi~ and “ST~’
flashes.
T-h START. Display shows
temperature and “CODE 2?
Auto Roast Guide
Use containers and coverings as directed at left. Place probe correctly in roast before cooking.
. men ~en beeps ~d flmhes “TU~~’ turn mat ~er.
●
●
Recommended codes are also shown inside oven on Auto Roast Guide.
Fti
code
Final
TUnp
Approx. Tune
(Min. per lb.)
Hold*
Minutes
1
2
3
115°
125°
145°
12-14
14-16
17-18
5-1o
10-15
30
4
1
175°
115°
18-20
17-19
20
5-1o
5
4
190°
175°
13-15
13-15
20
20
Tender Roast
Medium
Well
Pbrk
Loin Roast
Precooked Ham
I%ukry
Whole Chicken (3 lbs.)
‘Ihkey Breast
(Insertprobe horizontallyinto meatiestarea.)
*Rccomrnendedstandingtime beforeserving.
Automatic Simmer
Automatic Simmer
(Auto Roast code 6)
(Auto Roast COde 6)
Your cookbook has information
on automatic simmering, including
guides and recipes.
Total time includes time to bring
food to 180QF.and hold at that
temperature until done.
Set Automatic Simmer like Auto
Roast, example at left. Wplay
shows’ ‘COOL” until fd is
90”F., then switches to show
fd temperature until 180”F.
Food
Oven switches to Hold at 180”F.,
until you remove f~ and turnoff
oven. If stirring is recommended,
you can reset oven by retouching
START. Touch CLEAR/OFF
after cooking.
Beef
Pot Roast*
Stew
Chili
Chicken*
Stewing
Broiler/Fryer
Ham or Pork
Roast
I
Approx.
Tne/Hrs.
6-8
6-8
11-13
11-12
4-6
I
4-6
*For frozen, add 2 to 3 hours.
Step 1: Remove frozen meat from
W&e and place in mic~c.
sdk dish. Place in oven and close
door.
Automatic
Def*
With the Auto DefPost fkature,
the oven automatically sets the
defrosting time and power levels
for you. Yw choose the appropriate
code number from 1 to 6 for the
fd you are defrosting, then enter
the fbodweightinpounds andtenthg
of a pound (See Convemion Guide
below) and touch START. The oven
calculates the defrosting time and
changes power levels during
defrosting to give even defrosting
R!sults.
whenthem~hes~
ly
half of the total defrosting time, the
display flashes “TURN;’ telling
you to turn fti over and will not
continue defrosting until door is
opened and STAKI’is touched
again.
After defrosting time is complete,
the oven automatically goes into a
holding period as shown on the
Automatic Defrosting Guide on
this page. This holding period is
necessary to finish the defrosting
of the interior of the food.
Howt6etAwoDehost
N(YI’E:Before you begin, check
the Auto Defrost code guide located
atthebottornofthe ovenwhenyou
open the door. This guide shows
minimum and maximum fbod
weights fix each code number.
Youwillneed toknowyourfbod
weight and corresponding code
ME tYegiMing.
N(YI”E:If “ERROR” appears after
entering fd weight, check the
Auto Defrost code guide to make
sure that weight corresponds to the
code number entered.
Step2: Tmh Auto Defrost pad.
“ENTER CODE’ flashes on display.
Step3: lbuchnuniberpad4. “CODE
4“ and “LBS.” shows on display.
“ENTER WEIGHT” flashes.
,
Step 4: lbuch number pad 3 and
Ofor weight of 3 lbs. Display shows
“3.0:’ “CODE 4“ and “WART”
flashes.
Step S: Touch START pad. Defrost
time begins counting down on
display.
A@amstk IMh@ing
MIN.-MAX.
WEIGHT
1
2
3
4
:
.5-4.9
lbs.
.5–5.9
3.0-5.9
3.0-5.9
.5–3.9
lbs.
lbs.
Ibs.
Ibs.
.5–3.9lbs.
Step 8: When defrosting time is
completed, oven automatically
switches to a Hold period of 20
minutes for code 4. Hoid time
counting down shuws on display.
When holding time is finished oven
signals, “End” flashes, and oven
turns off.
c ~
Gtie
If the weight is stated in pounds
and ounces, the ounces must be
converted to tenths (.1) of a pound.
@IIces
1-2
3
4-5
6-7
8
9-1o
11
12-13
14-15
Rbunds
.1
.2
.3
.4
.5
.6
.7
.8
.9
Guide
mm
‘rmrlP
Recommend
lXXID
none
none
none
20 min.
20 min.
Chiclum pieces
Fish
Ground Beef
Roasts, Bone in
Roasta, Boneless
none
Steakaand Chops
*In AutoDefrost, it is
necessary to allow the
meat to stand during
holding time. Ym may
take the meat out of the
ovenif you prefer.
Care and Cleaning
Iburnewmicrowavemk
a valuable appliance. Protect
it from misuse by following
these rules:
● ✍❐
your oven CktMl and
sweet-smebg. Opening the oven
door a&w minutes after cooking
helps air-out the interior. An
occasional thorough wiping with a
solution of baking soda and water
keeps the interior fkesh.
● Don’tuse sbarp+dged utendls
with youroven. The inside and
outside oven walls can be scratched.
The control panel can be damaged.
Don%removethemodestirrer
cover at the top of the oven
●
(microwave fkature60npage
Youwill damage the oven.
5).
BE CERTAIN POWERISOFF
BEFORE CLEANING ANY
Pm OF THIS OVEN.
Hcnvto Ckanthe
Inside
~floorandmodestirrer
cover. Some spatters can be
removed with a paper towel, others
W require a damp cloth. Remove
greasy spatters with a sudsy cloth,
thenrinsewithadamp cloth. Donot
use abrasive cleaners on uven walls.
NEVER USE A COMMERCIAL
OVEN CLEANER ON ANY Pm
OF YOUR MICROWAVEUVEN.
Door (iide). Wtiow: W@e Up
spatters daily and wash when soiled
with a damp cloth. Rinse thoroughly
and dry.
Metal and plastic parts on door:
Wipe frequently with a damp
cloth to remove all soil. DO N(YI?
USE ABRASIVES, SUCH AS
CLEANING POWDERS OR
STEEL AND PLASTIC PADS.
THEY WILL MAR THE
SURFACE.
Special note when using
Brown ‘N Sear Dish: If grease
is present, high heat generated on
bottom of a Brown ‘N Sear dish
may cause the grease to burn onto
theovenfloor. Thismayberemoved
with a cleanser such as Bon Ami@
brand cleanser.
After using this cleanser, rinse
and dry thoroughly, following
instructions on can. Do not use it
on the painted surfiwes such as the
walls-it may scratch the paint.
Automatic lkmperature Probe.
Probe is sturdy, but care should be
taken in handling. Do not twist or
bend; avoid dropping temperature
probe.
Clean as soon after using as possible.
To CkMUl,
wipe with SW@Ckldl,then
rub lightly with plastic scouring
ball if necessary. Rinse and dry.
(Or wash in dishwasher.)
Shelf Accessory. Your shelf
accessory is designed for use in a
microwve oven only; do not use in
a conventional oven. Do not use a
browning dish with the shelf.
Arcing could occur.
Clean shelf with mild soap and
water or in the dishwasher. Do not
clean in a self-cleaning oven.
Door Surf..ce. When cleaning
surfaces of door and oven that
come together on closing the door,
use only mild, nonabrasive soaps
or detergents applied with a sponge
or soft cloth.
Huwto Clean the Outside
Be sure bulbs to be replaced are
cool before removing. Break the
adhesive seal by gently unscrewing
the bulbs. Replace with 40-watt
incandescent bulbs (WB2X4253)
available from your GE supplier.
High intensity 40-watt bulbs
(40SllN/1) which are available in
supermarkets and hardware stores
may also be used for replacements.
Raise light compartment cover and
replace screw. Connect electrical
power to microwave oven.
Case. Clean the outside of your oven
with soap and damp cloth, rinse
with a damp cloth and then dry.
Wipe the window clean with a
damp cloth. Chrome trim is best
wiped with a damp cloth and then
with a dry towel.
Control P&nel.W@ with a damp
cloth. Dry thoroughly. Do not U*
cleaning sprays, large amounts of
soap and water, abrasives, or sharp
objects on the panel-they can
damage it.
Pbwer Cord. If the cord becomes
soiled, unplug and wash with damp
cloth. For stubborn spots, sudsy
water may be used, but be certain
to rinse with a damp cloth and dry
thoroughly before plugging cord
into outlet.
Light
Cooktop
REWE
R@ftc-
SCREW
I
a
F
To replace cooktop light, first
disconnect power at main fuse or
cimuit breaker panel or pull pIiw
Remove screw on right side oflight
compartment cover and lower
cover until it stops.
I (continued
next page)
OvenLightRqkemnt
CHARCCJALFtLM
REUSASLE
lb replace your oven light, first
~etimainfhse
or circuit breaker or @l plq
Remavethetopgrill bytigoff
3 screws which hold it in place.
I
GftEASE
Yourmicrowaveoven has two
reusable metal filters to help
remove grease fkomtitimda
disposable charcoal flter to help
remove smoke and odors caused by
cooking with your range. When the
fan is operated, air is drawn up
through the falters and then
recirculated.
‘rhegrmemtemshou
Next, remove the single screw
located above door near center of
oven that secures lamp housing.
Remove bulb and replace with
30-watt incandescent bulb
(WB2X4235) available from your
GE supplier. Seam lamp housing
with screw.
Cieanoffthegrease anddust
on hood surfiwes often. Use a
warm detergent solution. About
1 tablespoon of ammonia may be
added to the water. ‘R&ecare not
to touch the faltersand enameled
surfaces with this. Ammonia will
tend to darken metal.
FILTERS
ldk
cleaned at least once a month.
Never operate your hood without
the faltersin place. In situations
where flaming might occur on
surfiwes below hood, filtsr will
retard entry of flames into the unit.
mdspo$ah~e
should berepiacedwhmitkj
noticeably dirty or discolored
(usually after 6 to 12months,
depending on hood usage). Order
Part No. WB2X4267 from your
dealer. DO N~ CLEAN THIS
FILTER. DO N~ OPERATE
YOUR HOOD WITHOUT ALL
THREE FIL~RS IN PLACE.
remove grease fflter, grasp the
“finger hoid” on the fflter and slide
to the rear.
‘Ib
16
Then pull filter downward and to
the fkmt. The falter will dropout.
‘Ibdean grease filter,soak,
then agitate falter in hot detergent
solution. Don’t use ammonia or
other alkali because it will darken
metal. Light brushing can be used
to remove embedded dirt. Rinse,
shake and remove moistum before
replacing. Filters should be
cleaned at least once a month.
Never operate your hood without
the fSltersin place. In situations
where flaming might occur on
surkes below hood, filters will
retard entry of flames into the unit.
1’
grease filter., slide the
falter in the frame slot on the back
of the opening.
To replace
Pull filter upward and to the front
to lock into place.
charcoal filter,
Wmmnectpow
eratmainf=or
cimuit breaker or pull pIug.
Removethe top grill ~ taking off
3 screws which hold it in place.
Grasp filter and slide toward front
of oven. It will slide right out.
‘Ib remove the
a new filter, remove
plastic and other outer wrapping
from the new filter. Insert filter into
top opening of oven as shuwn. It
will rest at an angle on two side
support tabs and in front of right
rear tab.
Replace grill and secure with
3 screws.
To install
Guide to Use of the Oven Shelf
Cookware for Shelf
Heating and Reheating
.U~pOt~whenkidlhg
metal shelf and cookware.
They may be hot.
The two position wire shelf is
specifically designed fbr added
capacity heating and mkating in
w Spl=mak@ miclwwmemen.
More than one fd maybe heated
or reheated and ready to serve at
the same time.
When microwaving with the oven
shelf, some techniques will differ
from the cookbook which came
with your oven. It is important to
arrange fds properly, and this is
shown on the next page. Cookware
size is important; select from among
the suggestions at right. Also, fbod
size should be considered; foods
over 3% inches high, or 3 pounds
are not recommended for shelf
cooking.
Batters and dough foods and also
uncooked fti
which need to be
prepared from scratch should be
cooked without the oven shelf,
following cookbook directions.
Use pot holders when handling
fbods heated together with your
oven shelf, especially when heating
larger amounts of fd in 8-inch
square or other 2-quart size
casseroles. Extra steam generated
from multiple fd cooking may
make cookware hotter than with
regular microwaving.
Ibsitiming the Shelf
Bdbre placing hod in the dishes,
checktoseethatthey will fittogedwr
on or under the shelf. Also, be sure
cookware is microwave safe.
Cookware for heating or reheating
include 1 cup measuring cup,
8x4x3-inch loaf dishes, 9x5x3inch loaf dishes or 9-inch pie plates.
To insert shelf, tip the back slightly
and fit the shelf support guides onto
the support guides located on each
side of rear oven wall.
Next, lower the front until the shelf
support guides fit onto the support
@ales l&ated at each side of-~e
oven in the tint.
When properly positioned, the
shelf should fit snugly in place.
I
.1
/Shelf has two positions. Use in low
position when heating two casseroles
or reheating frozen TV dimers or
entrees.
I
Leftovers may be placed in small
individual ceramic or plastic bowls
or divided plates.
Use wax paper or plastic wrap
instead of lids on casseroles. Lids
may add too much height to dish.
1+
The high shelf position more
evenly spaces the area above and
below the shelf. Use this position
for heating plates of leftovers.
When properly positioned, the
shelf should fit snugly in place,
be level and not touch the back
wail of the oven.
If aming occurs when using the
shelf to cook more than one fti
atthesame~
tumthe~ti.
Make sure the shelf is positioned
securely on all four sheifsupports
and not touching oven walls.
HowtoHeatorReheat
Similarljq)esof Fd
Twoplatesofleftovel% maybe
reheatedtogether. Arrange thick
or dense fd
to outside edges of
plate and cover with plastic wrap.
Microwave at High (10)for 2 to 3
minutes. Reverse position of plates
(top to bottom) and rotate l/2 turn.
Continue microwaving at High (10)
for 2 to 3 minutes. Continue
heating, if necessary, until hot.
Reheating two casseroles (height
should be less than31% inches) is
possible. Cover with plastic wrap.
Use staggered arrangements of
fd, placing food on right side of
shelf and left side of floor. Refer to
Heating or Reheating Guide in
cookbook for suggested microwave
time per casserole and add the
times together. Microwave at High
(10)reversing position of foods (top
to bottom) after half of time. Also,
heat several small bowls of
leftovers this way, stirring and
reversing positions after half of time.
.
W frozen individual entrees
(5t0701z. each) ortwo Tvdinnem
(10t0120z. eaeh)arebothreadyto
serve at the same time. Remove
trays of fd from their boxes and
turn back one comer of the plastic
cover to vent. If there are any foil
covers, remove them and return the
trays of fd to their boxes. (Batter
fbods should be removed from the
trays and cooked conventionally.)
Place inuvenwith one TVdinneron
right shelf and the second dinner on
left floor. Micruwave at High (10)
for 7 minutes. Reverse positions
(top to bottom) and rotate foods 1/2
turn. Continue microwaving at
High (10)for 7 minutes. Check
dimers for heating. If one dinner
seems less done than desired,
return it to the box and continue
heating on shelf 1 to 2 more minutes.
HmvtoReheat SeveralDMkrentTjq?
esofl!bodsZbgether
When heating several different
types of food together, foods which
should be served hot must be placed
on the oven shelf, while fbods
which are OIllywarmed should be
placed on the floor. This is because
micruwaveenergy enters the oven
from the top only. Also, it is
important to remember that fbods
absorb microwaveenqy at
diflixent rates. Rates can be aflixtd
bythesizeofthe food, and its
starting temperature.
Because of the varying rates, you
mayneedtostartreheating alarge
or dense fbod a &w minutes ahead
of time, then add other smaller or
less dense foods. Alternately, if
oneofthefbods youareheating
seems undercooked but the others
am heated satisktorily, let the
underheated food continue cooking.
Heat or reheat different types of
fd at High (10).‘Ibdetermine
heating times, add times for all
fti
together. (See heating guide
in cookbook.) Aller half of time,
stir or ~
M
(do not
reverse positions). Check fbods (top
shelf especially) after 3/4 of total
time and remove any which are
done. Continue cooking others.
Place on shelf large or dense
foods which need the most heating,
such as leftover fried chicken,
casseroles of canned or leftover
vegetables, rice or pasta. Place on
oven floor those foods which need
only be warmed, such as bakery
pies, rolls, muffins or breads.
Questions?
Use This Problem Solver
PROBLEM
POSSIBLE CAUSE AND REMEDY
OVEN WILL N~
COME ON
A fie ~ ~~ home maY~ bl~ or ~~ c~t
b-r
trippd. Replace fWe or
reset circuit breaker.
● unplug you ~ “crowaveoven, then plug it back in.
c M* sum s~rong plug on oven is My i~~
into I@ ~tde.
CONTROL PANEL
●
LIGHTED, YET ~EN
WILL NCYI’START
●
~wr not ~ly
dosed.
must be touched *r entering cooking sdection.
● ~o~er
~l~on
en~~ WY
~ ~
~ ~OFI?
● M*
sump
be en~~ ~~g
be ~r to~~g -E
●
ST..
not touched to ~cel
COOK 10r IL
it.
CLEAR/OFF was touched acci&ntalIy. Reset cooking program and touch START.
● Temperature prok not inserted properiy or not being used during Auto Roast or
Temp Cook.
. M&c SUmyou haveentereda desired finished tempem*r touc~ng TEMp
COOK/HOLD.
●
●
FOODS ARE EITHER
OVERCOOKED OR
UNDERCOOKED
Make sure you entered a code number after touching AUTO fimctions.
cm~g
ties ~ ~
~awe of s~ing food tempemtum, fd density
or amount of fin oven. Touch TIME COOK I and additional cooking
time fix completion.
● ~co~ct~er
level ente~c ~eck cookbook for recommended power level or
changing levels during cooking if necessary.
● Dish ~
not rod,
~rned or stirred. Some &shes quire specific instructions.
Check cookbook or recipe fix these instructions.
● T~ my
dishes in oven at -e
time. cooking time must be increased. Check
cookbook for recommendation on increasing time.
●
● Probe not inserted properly into meat or dish when using Temp Cook or
Auto Roast Ibctions. Check cookbook or Auto Roast section of this book for specific
instructions.
“ERROR” APPEARS
ON DISPLAY
When using Temp Cook/Hold, a temperature less than 9(YF. or more than
199°F. has been entered.
~ ~i@ is ~c~
fir Auto ~~~t cm on wide. It is necessq to reset oven.
● men
us~g clock, you have not entereda valid clock time.
●
I
PROBLEM
I
POSSIBLE CAUSE AND REMEDY
I
“PROBE” APPEARS
ON DISPLAY
I
● Probe has been forgotten or not seated properly in oven wall when using
Temp Cook/Hold or Auto Roast fimctions.
I
I
“RESET” APPEARS
ON DISPLAY
●
I
herhas
been
disrupted.
Touch CLEAR/OFF
and reset clock.
AUthese things are normal with your microwave oven:
Steam or vapor escaping from
around the door.
● Light reflection around door or
outer case.
●
thmping
. IM,
sound while oven
is operating.
● Dimming ovenlight and change
in blower sound may occur while
operating at power levels other
than high.
If you need more help.. call, toll free:
The GE Answer Cente#
800.626.2000
consumer information service
21
Some TV.~io in&~e~nce
might be noticed while using your
microwave oven. It’s similar to the
interference caused by other small
appliances and does not indicate a
problem with your oven.
●
●
Gmundmghastnmo ‘m
This appliance must be grounded.
event of an electrical short
circuit, grounding reduces the risk
ofekctric shock by providing an
escape wire for the ekctric current.
This appliance is equipped with a
power cord having aground@
wire with a grounding plug. ‘I’M?
plug must be plugged into an outlet
that is properly installed and
grounded. @lg. 1)
Inthe
WMNG-~prop,
use of the grounding plug can result
in a risk of electric shock.
Consult a qualified electrician or
service technician if the grounding
instructions are not completely understood, or if doubt exists as to
whether the appliance is properly
grounded.
nn
Where a standard two-prong wall
receptacle is encountered, it is
your personal responsibility and
obligation to have it replaced with
a propdy grounded three-prong
wall receptacle.
Do not
under any circumstance cut or remove the
third (ground) prong fkom
the power cord.
Do not use an adapter plug
with this appliance.
Do not
use an extension cord
with this appliance.
If YouN*
Service
To obtain service, see your warranty
on the back page of this book.
We’reproud of our service and
want you to be pleased. If fix some
reason you are not happy with the
service you receive, here are three
steps to fbllow for further help.
FIRST, contact the people who
serviced your appliance. Explain
why you are not pleased. Inmost
cases, this will solve the problem.
NEXT, if you are still not pleased,
write all the details--including
your phone number-to:
Manager, Consumer Relations
GE Appliances
Appliance Park
Louisville, Kentucky 40225
FINALLY, if your problem is still
not resolved, write:
Major Appliance
Consumer Action Panel
20 North W&ckerDrive
Chicago, Illinois 60606
—
ELmRlc
McRow’’ovEN
WARRANTY
Saw
proof of original purchass date such as your sales slip or canalled chsck to establish warranty psriod.
WIUKTISCUVERED
FULL ON&YEAR WARRANTY
For one year from date of original
purchase,we will pfOVid8,free of
charge, parts and sewice labor
in your home to repair or replace
~~titimk~
own that fails because of a
manufacturingdefect.
LIMiTEO ADDITIONAL
NlNE4fEAR WARRANTY
Forthe second throughtenth
year from date of original purch~,
we will provide, free of charge, a
tub if
replacement mag~
the magnetrontube fails because
of a m~tiudn9
-O
Mu PY
for the sewice trip to your home
and service labor charges.
.
WHATIS NOTCWERED
● s4Wcetrips to your home to
teach you how to uee the product.
~81.
~
~
~ ●m ~
If you then have any questions
about operating the product,
pleaee contact your dealer or our
Consumer Affairsoffice at the
address below,or call, toll free:
GE AnswerCenter@
800.6262)00
corwumer informationservice
This warranty is extended to
the original purchaser and any
succeeding owner for products
purchased for ordinary home use
in the 48 mainland states, Hawaii
and Washin
, D.C. In Alaska the
warranty is tr e same except that it is
LIMITED because you must pay to
ship the productto the service shop
or for the service technician’stravel
coststo your home.
All warranty service will be provided
by our Factory Sewice Centers or
by our authorized Customer Care”
servicersduring normal working
hours.
Look in the White or Yellow Pages
of ur telephone directoryfor
G&ERAL ELWRIC COMPANY,
GENERAL EL~RIC
FACiORY
SERVICE, GENERAL ELECTRICH~OINT
F~RY
SERVICE or
GENERAL ELECTRIC CU~MER
CARE” SERVICE.
● Replacement of house fuses or
resettingof circuit breakers.
. Failure ~ the p~u~
if it i$ u$~
for other than its intended purpose
or used commercially.
. Damage to productcaused
by accident, fire, ftoodsor acts
of God.
WARRANTOR IS NOT RESPONSIBLE
FOR CONSEQUENTIAL DAMAGES.
● Improper installation.
If you have an installationproblem,
contactyour dealer or inetalier.
Youare reeponeiblefor providing
adequateeleMcal, ~
exhasting
and other connecting facilities.
oroonsequantkd
damages,
sotheabovelimitationor exclusion
Soma8Ws6donot~
thaexclusion
orlimitation
~ inckientsl
my~~b~.
~wm~g-~~~ti~mq~hawti
wtig~whkhn
~-~eto~te.
Toknowwhat yourbgal rightsare in yourstate,oonauityour100alor stateooneumeraffairsofficeor your etate’sAttorneyGeneral.
~R
Gert8Ml
Electric Company
WWUWrhdpisrmdod concerning this warranty,write:
ihnqar~mer
Aflkhq GEAppiiar’iC8e,imOUiSViii8, KY 40225
GENERAL@)
3-W
ELECTRIC
JVM141G