1
How getthebestfrom
—
p5
Energy-saving
Tips
p6
Features
p7
Surfacetooting
p15
Oventooting
Howtooperatethe
p22
self-cleaning
oven
Questions?
UsetheProblem
Solver p26
YourDirect Line to&neml Electric
The GE&wer Cenwf 800.626.2000
UseandCareof
model
JBP28G
~~f~~~
. filsi~tlctions * , . . . . . ...3. 4
.zz;c?gy-savi~lg
Tips . . . . . . . . ...5
FeaturesofYeurMge . . . . . ...6
.~Q~f~~~cQQking . . . . . . . . . . .7-10
Homecmning
Tips. . . . . . . ...11
surface
CoQtigGuide. . . . u, 13
Automatic
TimermdClock. . ..14
usingYQuroven. ..+ . . . . ..*. U
Btig . . . . . . . . . . . . . . . . . . ..l6
R&+ng
Guide
=.. .... .... . ...17
Roasting. . . . . . . . . . . . . . . . . ..l$
RoastiRg
Guide. . . . . . . . . . . . ..19
Brofiing . . . . . . . . . . . . . . . . . ..2o
BroilingGuide . . . . . . . . . . . ...21
Operathg the self‘cIeting QveH. . *. . . ..22.23
Removableovan Door. . . . . . . .24
~area~dcl~ning . ... . . . . . ...24
cleaning Guide . . . . *. +. . . . *25TheProblemsolver . * -.. . ..26
lfYou NeedSemice . . . . . . . . . .~
Wuranty . . .q. .* . . .. Backcover
●
●
●
●
●
It isintendedto helpyouoperate
and maintainyournewrange
properly.
Keepit handyfor answersto your
questions.
If youdon’tunderstandsomething
or needmorehelp,write(include
yourphonenumber):
ConsumerAffairs
Ger}eralElectricCompany
AppliancePark
Louisville,KY40225
write
downthemodel
andserialnmbers.
You’llfind themon a labelon
the front of the rangebehindthe
storagedrawer.
Thesenumbersare also on the
ConsumerProductOwnership
RegistrationCard that camewith
yourrange.Beforesendingin this
card, pleasewritethesenumbers
here:
ModelNumber
SerialNumber
Use these numbersin any
correspondenceor servicecalls
concerningyourrange.
Immediatelycontactthe dealer(or
builder)that soldyouthe range.
save
time
andnloneye
Beforeyourequest
serticeo
o @
Checkthe ProblemSolveron
page26.It listscausesof minor
operatingproblemsthatyoucan
I
..
men using electricalappliances,
basic safety precautions should
be followed, incIudingthe
following:
applianceOdy
for its
intended use as described in this
manual
@use tMs
●
@Besure your apptiance is
properly kwed md gromded
by a qualified technicianin
accordance with the provided
initiation instructions.
~ Don9tattempt to repair
,
or replace my part of your
range dess it is Specwldly
recommended k this book. Al
other servicingshouldbe re~rred
to a qualified technician.
* h notImve cMdrendonechikh-enshouldnot be Iefidone
or unattendd in an area where an
apphanceis in use. They shodd
neverbe allowedto sit or stand
on any part of the appliance.
tochb,
stand or hang on tie door,
@hn’t allow anyone
draweror-e
top. ~ey codd
-age
the mge and even tip
it over,caus@ severe personal
injury.
~MS OF
cHmDmN
SHOWDN~ BES~mD
~ C~~E~ ~OW A
-GE ORONH
BACHPL~H OFA
~ CAmON:
mmsT
m
@Keep hood ad
grease fi!ters
venting
and to avoidgrease fires.
clean to maintain good
@Do not let coo~g grease
or other flamable materials
accumdate in or near the
‘–
~—
range.
-
~h not use water on grease
fries.Never pick up a fl~ming
=
~f.
pan. Smother flmkg
pan on
~~
‘ surfaceunitby covering pan
cornplletelywith we~-fitttig fid9
sheet or flat tray.
C-LWmG ONT=
<~
R*g
grease oukide a p,m
MGE TO~ACH ITEMS
can
be
put
out by covering with
COWD BESEWOUSLY
baking
soda
or, ifavatiabie, a
mmD.
~~, ~
rndti”pur~se dry chemical
@Never wear loos~-fittkg or ~ ‘~ or fo~ fire exttiguisher.
..
hanging garments w~b-king
~‘~
Do
‘~~~
touch
‘heating
theappkce. H-able
qterial
could be ignited if broug,htin .. . . ~ elemetits or intiripr solace of
oven; These surfaces may be hot
con~ct with hot heatingelements
~
enough’ti.burn
even though they —--and may cause severebums.
. ~
are’dark in color. During and
o Use o~y dry poth61de~—
?*T USe,do not touch, or let- ‘
moist or damp potholders on
clothing or other flamniable
hot surfaces may result in bums
‘ materi~s ,con~ct sufiace ~~, .‘ ~
from steam. Do not let potholders ‘ ~ areas ne~by sutiace unikor any
touch hot heating elements. Dp- ~
..intqriof area ofhe oven; allow
not use a towel or other bu~ ~. ~ ~ sufficient timefor cooling,‘first. ❑ —
,..
cloth.
~~~Potentially hot surfaces in~lude ~ =_==
* Never use your apptiance for ‘ . the cookttipandartis facing the
wartig or heatkg the tifi.
=
~~ Coo@p, oven vent opening and
sfices
near
the
opening
and
S
~ $toqk in or on”~pp~W~e— ~ ‘ - crevices arotind the oven ~oor
~~ble
ma&fids shoddnot be ‘ Remember. The inside ~~rfac~
‘.
stored in an oven or near sufice
‘ .~
of the tiven.qay be hot when the
=~.
units.
~.
~door
..
., is o~ened.
m—
.*~~~ c~Mg pork, follow
=;
our directions exactly and always —
,)
~.cbok the heat to at Ieast 170°F.
=This a$stiresfiat, in the remote ‘ =#possibility
that trichina may be
=-A=-=--=
present in tie meat, it will be
S
~–-—
kill~d and tie meat will be safi
=~m
to eat.
..
~
~
---––
Ef1
wGRcmDm
~
cookie
mpomm~sm TY
(continu~)
ms~~uc~~o~$
oven
@Smd away frommge when
Qwtig oven door. Hot* or
stem which esupes m muse
b-@
hinds, fice red/or ey6.
@Use proper pan sti-This .
apptiance is eqtipped with one
~ ~!-bums, ignition
of fla~ble
materials, arid
spillage,the hande of a container
shotid be W
=
the cen~r
of the range without extending
over nearby surface uni@.
* ~w2ystirn smface ht to
0~ before rernovhg utemil.
@Wep w eye on foods bebg
fried at ~GH or WD~
@GH
tind shouldbe used in or around
my pafl of the oven.
‘.
~
heab.
—
mew=sam
mps
Yot3rrange,likemanyother
householditems,is heavy and
cansettle into soft floor coverings
such as cushionedviny!or
carpeting. Whenmovingthe range
on thistypeof flooring,use care,
andit is recommendedthat these
simpleand inexpensiveinstructions
befollowed.
Therangeshouldbe instaIledon
a sheetofplywood(or similar
material)as follows:Whenthe
floor coveringends at the front of
fh~ra~~ge,the areathatthe range
willrest on shouldbe builtup with
plywoodto the samelevelor higher
thanthe floor covering.This will
allowthe rangeto be movedfor
cleaningor servicing.
Iingthe
Range
Levelingscrewsare locatedon
eachcorner of thebaseof the
range.Removethebottomdrawer
andyoucan levelthe rangeon an
unevenfloor.
Toremovedrawer,pull drawer
outall the way,ti~tup the front
and bke it out. Toreplace
drawer,insert rollersat backof
drawerbeyondstopon rangeglides.
Liftdrawerif necessaryto insert
easily.Let frontof drawerdown,
thenpush into close.
@Usecookwareof mediumweight
aluminum,withtight-fittingcovers,
andflatbottomswhichcompletely
coverthe heatedportionofthe
surfaceunit.
@Cookfresh vegetableswitha
minimumamountof waterin a
coveredpan.
@Watchfoodswhenbringingthem
quicklytacookingtemperaturesat
HIGHheat. Men foodreaches
cookingtemperature,reduceheat
immediatelyto lowestsettingthat
@Preheatovenonlywhen
necessary.Mostfoodswillcook
satisfactorilywithoutpreheating.
If youfind preheatingis necessary,
watchthe indicatorlightandput
foodin ovenpromptlyaftertie
light~O~S OUt.
@Aiwaysturn ovenOFF before
removingfood.
~
.
@Duringbaking,avoidfrequent
dooropenings.Keepdooropenas
shorta timeas possiblewhenit is
opened.
Features
ofYourRange
II
II
\
Featwe hdex
1 Modeland SerialNumbers
Expltined
on page
2
7,8
2 SurfaceUnitControls
I
3 Sensi-TempControl
18
4 “ON” IndicatorLightsfor
SurfaceUnits
I 5 OvenSetControl
I
6 OvenTempControl
7
115
I
15
7 OvenCyclingLight
15
8 AutomaticOvenTimer,Clock
and MinuteTimer
14
[ 9 Door LockedLight
10 SolidElementSufiaceUnit
11 Sensi-TempSurfaceUnit
Featwe hdex
~ OvenLightSwitch
Expltined
on page
1151
13 BroilUnit
120
14 OvenInteriorLight
I
15 OvenShelves
1151
16 OvenShelfSupports
[151
17 Broder h
I
and Rack
18 OvenLiner
22
24
20
I
I
1251.
19 BakeUnit (Maybe liftedgently
for wipingovenfloor.)
20 StorageDrawer
I
I
—
25
1241
m
I
21 Door Latch
i
—
1221
I
10
8
6
i
22Door Gasket
1221
23OvenVent
141
—
-.
kfomu*Ym
Coobp
forthemtimme
Thetop workingsurfaceof
thenewsolidelementshavea
protectivecoatingwhichmustbe
hardenedbeforeusingtheelemen~
forthe first time.Tohardenthis
coating,the elementsshouldbe
heatedwithouta pan for a short
periodof time(regularelements
at HI settingand Sensi-Temp
elementat maximumsetting
for 3 to 5 minutes).
Therewillbe somesmokeand
odor; thisis normal.It is nontoxicand completelyharmless.
Heatingof theelementwill
changethe stainlesssteelelement
trimringsandtemperature
sensorsto a goldcolor.
4
THE ELEMENTPR~EaIVE
COATINGMUSTBEHARDENED
~ HELPPROTECI’THE ELEMENT
OVERITSLmE.
Gneml Idormation
AboutSolidElemenk
Theuse of yoursolidelement
cooktopis quitesimilarto an
electriccoilcooktop,withwhich
youprobablyare familiar.With
bothtypesyouwillenjoythe
cleanlinessof electricityandthe
benefitsof retainedheatin the
elements.However,thereare
differences.
~ Solidelementsdo N~ glowred,
evenat HI setting.
* Solidelementsreachtemperature
a littleslower,andholdheatlonger
thanconventionaltubularelements.
Solidelementshaveveryevenheat
distribution.Sincesolidelements
holdheatlonger,youmaywishto
turn the elementoff sooner,and
takeadvantageof theresidualheat.
The amountof residualheatis
dependentuponthe quantityand
typeof food,the materialand
thicknessof thepan and the setting
usedfor cooking.
o The red dot inthe cen~r ofthesolid
elementindicatesbutit-intemperature
limitersthat automaticallyreduce
theheatif a panboilsdry,if the
elementis turnedon withouta pan
or if thepan is notmakingenough
contactwiththe surfaceofthe
element.The red dotswill wearoff
withuse withoutaffectingthe
performanceof the elements.
~There is~~~
hat ~ he element.
Onboilovers,waitfor elementto
coolbeforecleaningelementarea.
~Solidelementcookingtakesyou
a stepcloserto easiercleanup,
becausethe cookingsurfaceis
sealedagainstspillsand thereare
no dripbowlsor burnerboxto clean.
@Youmustuse properflatbottomed
cookware,not warped,convex,or
concave.Impropercookwarecould
causeunsatisfactorycooking
results.
——
~~~~~C~
COOti~g
(continual)
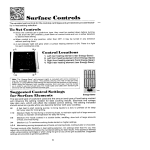
Semi-WmpTM
Control
Yoursurfaceunitsand controlsare
designedto giveyouan infinite
choiceof heat settingsfor surface
unitcooking.
Atboth OFF andHI settings,there
is a slightniche.Whenturningthe
controlknobto eitherof these
positions,youwillfeel the control
“click”intothe niche.
Whencookingin a quietkitchen,
youmayhear slight“clicking”
sounds-an indicationthattheheat
settingsyouselectedare being
maintained.
Switchingheatsto highersettings
alwaysresultsin a quickerchange
thanswitchingto lowersettings.
cml*
forUskg
Gtide
Hea@
~–Bring waterto boil.
~Dm
HI (8-9)–Fast fry,pan
broil;maintainfastboil on large
amountof food.
~D—Saute andbrown;maintain
slowboilon largeamountof food.
~W (>3)–Cookafterstartingat~;
cookwithlittlewaterin mered pan.
W—Steam rice, cereal; maintain
servingtemperatureof mostfoods.
1. At HI or MEDIUMHI (8-9),
neverleavefoodunattended.
Boiloverscausesmoking;greasy
spilloversmaycatchfire.
2. AtWM or LOW(2-3), melt
chocolate,butteron smallunit.
Thiscontrolallowsyouto pre-select
thedesiredtemperature.Toturn
the elementON, pushin andturn
clockwise.Youwillfeela “click”
at the “off” positionand at the
“boil” position.
The automaticelementsensestie
temperatureofthe cookingutensil
andregulatesit accordingto the
settingselected.Onlyonesettingis
necessaryforeachmethod-frying,
simmering,etc.
Whenturnedon, the Sensi-Temp
elementalwaysbeginswithfu~
power,no matterwherethedid
is set. Whenthetemperature
correspondingto that settinghas
beenreached,the elementcycles
OFF and ON, similarto youroven.
Evenwhenthe did is set at
minimumthe elementbeginson
fill poweruntilthe selectedheat
settingis reached.
The Sensi-Tempelementwillnot
bum foodwhenthe correctsetting
is selected.Forexample,baked
beans,chocolate,mashedpotatoes
canbelefiontheSensi-Temp
element
withoutscorchingor burning.Food
maydehydrateif lefion butthe heat
sensingdevicewillnot letthe food
or pan overheatbeyondthe setting.
Cooktoptemperaturesincrease
withthe numberof elementsthat
areon. With3 or 4 elements
t~lrnedon, surfacetemperatures
arefigh, so be carefulwhen
touchg the cooktop.
‘
8
Howb SettheControk
Step 1:Graspcontrolknoband
pushin.
1
[
Step2:Turneitherclockwiseor
counterclockwiseto desiredheat
setting.
~
ControBmust be pushedinto set
onlyfrom0~ position.When
controlis in anypositionother
than0~, it maybe rotated
withoutpushingin.
Be sureyouturn controlto OFF
whenyoufinishcooking.An
indicatorlightwillglowwhen
ANYheaton anysbce unitis on.
Aluminumcookwareconductsheat
fasterthanothermetals.Castiron
andcoatedcastironcookwareis slow
to absorbheat, but generallycooks
evenlyat WM or MED settings.
Steelpansmaycookunevenlyif
notcombinedwith other metals.
Flat ground~roceram” saucep
or skilletscoatedon the bottom
withaluminumcookevenly.Glass
saucepansshouldbe used onlyas
the m-mufacturerdescribes.Do not
use a wiretrivet or anyother kind
of heat-retardingpad betweenthe
cookwareand the element.
—
—
—
ToReceiveMmhm
Performance
fromYour
SolidElement
~Forcooking,theuseof appropriate
utensilsis important.
@Goodutensilshavea thick,flat
bottomwhichabsorbstheheatfrom
theelement.Thethick, flatbottom
providesgoodheatdistribution
fromtheelementto the food.This
cookingprocessrequireslittle
water,fat andelectricity.
~Utensilswiththin, uneven
bottomsdo notadequatelyutilize
theheatcomingfromtheelement.
Thefoodto be cookedmaybumand
requiremoretimeandelectricity.
Youwouldalsohaveto addmore
fator water.
=
—
~Use onlypansof goodquality
the solidelements.Theyshould
avea stablebottom,slightlyconcave
towardsthe center,just enough
sothatthe bottomof thepanhas
the greatestpossiblecontactwith
the solidelementduringheating
operation.Thisresultsin the
optimumuse of energy.Pans
withunevenbottomsarenot
suitable.
d
@Use pansofthe correctdiameter
only.Theyshouldbe slightlylarger
thanthe solidelementso spillovers
willflowontothe cooktopandnot
bakeontothe element.A damp
clothis sufficientto removethe
spill. Pansshouldnotoverhang
morethan 1inch overtheelement.
~Tooptimizecookingtimeand
energyusage,youshoulduse a
pan thatis sizedcorrectlyfor the
cookingprocess,with a well-fitted
lid to avoidevaporationlossand
cookwithas littlewateror fatas
possible.If thepan is toosmall,
energyis wastedand spillagecan
flowontothe solidelement.
h
=Evennessof thepan bottomcan
be checkedby a rule or the straight
edgeof a table.
~Placeonlydry panson the solid
element.Do notplacelidson the
solidelement,particularlywetlids.
@Specialcookingproceduresthat
requirespecificcookingutensils,
suchas woks,pressurecookers,
deepfatfryers,etc., musthaveflat
bottoms,be thecorrectsizeand
covered,if applicableto cooking
process,as identifiedearlierin
thissection.
*..*
a .-.,
●✎✍✎☛
,. .
,.e,
,..
~Exceptin pressurecooking
withwaterand waterbath canning,
canningpotsshouldnotextendmore
than 1inchbeyondthe surfaceof a
solidelementandshouldhaveflat
bottoms.Whencanningpotsdo not
meetthisdescription,the useof the
HI heatsettingcausesexcessive ~
heatbuildupandmayresultin
damageto the cooktop.See “Home
CanningTips”sectionfor further
information.
Tocheckhowa panwillperformona sotidelement:
3. A uniformpatternof bubbles
1. Put 1inchof -waterinto
—
@Don’tuse panswith rounded
bottoms.Theydon’thaveenough .
contactwith the solidelementto
cookproperly.
the pan.
2. Bringwaterto a boiland
observethe patternofthe
bubblesas the watercomesto
a boil.
acrossthe bottomof the pan
confirmsa goodheattransferand
a goodpot.
4. Bubbleslocalizedin otiy a
portionof the bottomindicate
unevencontactof thepan to the
element,unevenheattransfer,
and an unsuitablepot.
9
— .
surface
cook@
Quetiiom
(continued)
& -em
Q. MayI canfoodsand preserves
on mysolidelementsurface
units?
A. Yes,but onlyuse containers
designedfor canningpurposes.
Checkthe manufacturer’s
instructionsand recipesfor
preservingfoods.Be sure canneris
flat-bottomd and fits overthe
centerof solidelement.Since
canninggenerateslargeamountsof
steam,be carefulto avoidbums
fromsteamor heat. Canning
shouldonlybe doneon surface
units.
Q. Whydoesthe solidelement
smokewhenI firstturn it on?
A. Thisinitialharmlessnontoxic
smokingis bothnormaland
necessary.A rustpreventativeis
appliedto eachelementat the
factory.Whenthe unit is turnedon
for the first time,the coatingwill
burn off the elementareas. This
takesapproximatelyfiveminutes
and shouldbe donewithoutany
panson the element.Otherwise,
thecoatingwillstickto thepan.
Q. Whyis the cooktophotto
the touch?
A. Moreheatis transferredto the
cooktopbythe solidelementthan
by conventionalcoilsbecausethe
elementis clampedsecurelyto the
cooktop.This,of course,eliminates
spil.loversfrom gettinginsidethe
cooktopchassis.The secretto
keepingthecooktopcomfortably
cooleris to turn the cooktopon
onlyafierthe cookwareand its
contentsare placedon the element.
Moreheatwillthenbe transferred
to the cookwareandthe foodrather
thanthe cooktop.In eithercase,
however,the cooktoptemperature
is wellwithinthe limitsset by
UnderwritersLaboratoriesandwill
not causedamageto the cabinets,
countertops,cookware,dishtowels
and othermaterials.
Q. CanI use specia!cooking
equipment,likean orientalwok,
on mysolidelementsurface
units?
A. Cookwarewithoutflat surfaces
is notrecommended.Thelifeof
yoursolidelementcanbe
shortenedandtherangecooktop
canbe damagedfromthe highheat
neededfor thistypeof cooking.
Q. Whyis the porcelainfinishon
mycontainerscomingoffl
A. If youselecta heat setting
higherthan requiredfor the
containermaterial,andleaveit, the
finishmaysmoke,crack,pop,or
bum dependingon the potor pan.
Also,a toohighheatfor long
periods,and smallamountsof dry
food,maydamagethe finish.
Q. WhyamI overcookingmy
foodwiththe newsolidelement?
A. The solidelementis very
energy-efficientand retainsitsheat
muchlongerthanthe coilelement.
Foodwillboilor fry threeto five
minutesafierthe controlsare turned
off. Werecommendthatyoubegin
cookingat lowersettingsthanyou
havein thepast and gradudly
increaseor decreaseheatas desired.
The energysavingsare significant.
Q. Whydoesit tie along time
to cookmyf~d?
A. It doesn’t.The extratime it
takescomparedto the conventional
coilelementis measuredin seconds,
notminutes.Thesefewsecondsare
duetothegrea~rmassoftheelement.
If the foodis cookingslowly,it is
becausethepotsandpansarewarped
or havean unevenbottomsurface.
If flatbottompots andpansare
used, cookingperformanceof the
solidelementcloselyparallelsthat
of the coilelementwithless energy
consumption.
—
A
oHome
Cantiw mps
Canning shouldbe doneon
cooMoponly.
—
In surfacecooking,the use of
cookwareextendingmorethan
l-inchbeyondedgeof cooking
element’strim ringis not
recommended.However,when
canningwith water-bathor
pressurecanner,larger-diameter
cookwaremaybe used. Thisis
becauseboilingwatertemperatures
(evenunderpressure)are not
harmfulto cooktopsurfaces
surroundingthe cookingelement.
HOWEVER,DO NOTUSE
LARGEDIAMETERCANNERS
OROTHERLARGEDIAMETER
UTENSILSFORFRYINGOR
BOILINGFOODSCYT’HER
THANWATER.Mostsyrupor
saucemixtures—andall typesof
frying-cook at temperatu~esmuch
igherthanboilingwater.Such
temperaturescouldeventually
harmcooktopsurfacessurrounding
heatingunits.
ObserveFoMowi~Poinb
inCami~
1.Be surethecannerfitsoverthe
centerof the cookingelement.If
yourrangeor i~ locationdoesnot
allowthe cannerto be centeredon
the cookingelement,use smallerdiametercontainersfor good
canningresults.
2. Flat-bottomedcannersmustbe
used.Do notusecannerswith
flangedor rippledbottoms(ofien
foundin enamelware)becausethey
don’tmakeenoughcontactwiththe
solidelementandtaketoolongto
boilwater.
MGHT
WRONG
CAUTION:
Safecanningrequiresthatharmful
microorganismsare destroyedand
thatthejars are sealedcompletely.
Whencanningfoodsin a waterbath
canner,a gentlebut steadyboil
mustbe maintainedcontinuously
forthe requiredtime.When
canningfoodsin a pressurecanner,
thepressuremustbe maintained
continuouslyfor therequiredtime.
Solidelemenfiheatup andcool
downmoresIowlythan
conventionalelemenb.Bwause
of this difference,afteryouhave
adjustedthe controls,it is very
importantto makesurethe
prescribedboiior pressure
levelsaremaintainedfor the
requiredtime.
3. Whencanning,use recipesand
proceduresfromreputablesources.
Reliablerecipesandproceduresare
availablefromthe manufacturerof
yourcanner;manufacturersof
glassjars for canning,suchas Ball
andKerr; and theUnitedStates
Departmentof Agriculture
ExtensionService.
4. Rememberthatcanningis a
processthatgenerateslarge
amountsof steam.Toavoidbums
fromsteamor heat, be careful
whencanning.
N~E: If yourrangeis being
operatedon lowpower(voltage),
canningmaytakelongerthan
expected,eventhoughdirections
havebeencarefullyfollowed.The
processmaybe improvedby:
(1)usinga pressurecanner,and
(2)startingwithH~ tap waterfor
fastestheatingoflargequantitiesof
water.
—.
——
—.
—
-.
-
Food
RegularElement
Completeat *tting
Startat Setting
Sensi-TemP~
Element
Beveragm
Cocoa
3-4-heat milk.Cover.
WM—fmishheating.
Bringtoa boilat 250.Heatmilkat 200.
Coffee
Percolator-type
HI—bringwatertoperk.
WM—maintaingentlebut
steadyperk.
Placecoffeeinbasketandwaterin pot. To
perk, setat 275.Tokeephot, set at 175.
Breads
FrenchToast,
Pancakes,
GrilledSandwich
7–preheat skillet4-8
minutes.
7—finishcooking.
Preheatskillet4 to 5 minutesat 350-450,
addfd.
Butter
WM—allowabout5 to 10
minutesto melt.
Cereak
Cornmeal,Grits,
WM—allowabout5 to 10minutes
to melt.
HI-cover, bringwater
to a boil.
WM-2–add cerealand
finishtimingaccordingto
packagedirections.
Bringwaterto a boilat 225,addcerealand
timeaccordingtopackagedirections.
HI—cookuntiljust starting
to sizzle.
7-8—finishcooking.
Cookon 350-425.
SwissSteak,
PotRoast,braised
HI—meltfat, then4-5to
brown.Addliquid.
2-3—simmeruntiltender,
covered.
Brownmeaton350,thenswitchto 175to
200,simmeruntiltender.
Chicken,fried
HI—meltfit, then4-5 to
brownchicken,cover.
2-3—cookuntiltender.
Brownchickenon400,switchto 200to
finishcooking.
Chicken,Shrimp
Deep-fried
HI–heat oil.
5 to HI—maintain
temperature.
425or HI—toheatandmaintain
temperature.
LambChops,
Hambu~ers,
I.inkSausage,pan-fried
ThinSteaks
HI—preheatskillet,then
greaselightly.
6-7–brownmeatandcook
todesireddoneness.
Preheatskilletandcookon 300-400.
StewedChicken,
CornedBeef,
Tongue,etc.—
Simmering
HI—bringliquidto
steaming.
2-3—covered,cookuntil
forktender.(Watershould
slowlyboil.) Forverylarge
amountsMEDheatmaybe
needed.
HI-bring a largeamountof watertoboti,
tlienswitchto 200-350simmer.
HI—bringsaltedwaterto
a boilin a coveredutensil,
addpastaslowlyso boiling
doesnot stop.
8-9–maintaina rollingboil,
cookuntiltender.Forlarge
amounts,HI maybe needed
to keepwaterat rollingboil
throughoutentirecooking
time.
HI–bring a largeamountof watertoboil,
addpastaandcookon 350.
HI—heat,untilpopcorn
startsto pop.
3-4-finish popping,
300-Place oil andpopcorninpan, cover
andcookuntilit stopspopping.
Oatmeal
Meat,Fish, Wultry
Bacon
SausagePatties
%ta$
Macaroni,
Noodles,
Spaghetti
Popcorn
e
~
Preheatskilletandcookon425-475.
—
12
S%emedHeatSetthgs
Retiar Element
Startat Setting
Completeat Setting
Food
Rice
HI—cover,bringwaterto
a boil.
Chocolate
2–allow about10to 15
minutesto meltthrough,
stirtosmooth.
Desserts
Candy
Puddingand
PieFilling
Eggs
Cooked-in-Shell
3-4-cook.
2-cover,finishtiming
accordingtopackage
directions.
I
Sensi-TempTM
Element
Addrice to water,cover,cookon200
accordingtopackagedirections.
WM-175—dlow
about10to 15minutesto
meltthrough.
Followrecipe.
34—cookaccordingto
packagedirections.
Placeingredientsin panandcookfollowing
packagedirectionson 200.
HI—bringwaterto a boil,
addeggs.
OFF--timeaccordingly,
forsofi~~ooked
3 to4
minutesor hard-cooked
15to20 minutes.
Heatwateron 200,cook22 to 24 minutes.
Fried,Scrambled
HI-melt butter,addeggs.
WM—stirringto desired
doneness.
Meltbutteron275,thenaddeggs.
Poached
HI---bringwatertoboil, add
eggs.
WM—finishcooking.
Heatwateron250,add eggs,cook3 to 5
minutes.
Sauces
HI—meltfat.
3-4-finish cooking.
Meltfatandcookon 200.
Soup,Stews
HI—heatupliquid,
WM—simmer.
Heatand simmeron 200.
HI–cover,bringsalted
waterto a boil.
3-4-cook 10-30minutes,
dependingon tendernessof
vegetable.
Placefreshvegetablesin panwithwater,
coverandcookon200.
Frozen
HI–cover,bringsalted
waterandvegetablesto a
boil.
3-4-cook accordingtotime
on package.
Placefrozenvegetablesinpanwithwater,
coverandcookat 225.
Fried
HI–preheat skilletand oil
or tit.
3-4-cook untildesired
tendernessis reached.
Preheatskilletandoil at 275,addfoodand
cookuntiltender.
Deep-FatFrying
HI—heatoil.
5-HI—maintain
temperature.
Heatoil and fryfoodat 425-HI,use a candy
thermometerto monitortemperature.
In-Pouch
HI—cover,bringwater
toa boil.
4-5—finishtimingas
directedonpackage.
Bringwatertoboiland cookat 225-250.
Saute
HI—heatoilor meltbutter;
addvegetables.
4-5—cookuntildesired
donenessis reached.
Heatoil or meltbutteron200,thencook
vegetablestodesireddoneness.
Vegetables
Fresh
N~E:
Temperature and time are suggested guidelines only. Youmay vary them to suit your cooking habits and needs.
13
.
Automatic~mer andClock
A
TheAutomaticTimerand Clockon
yourrangeare helpfuldevicesthat
serveseveralpurposes.
~ SET THE MINUTETIMER,
turn thecenterknob,without
pushingin, untilpointerreaches
numberof minutesyouwishto time.
(Minutesare marked,up to 60,in
thecenterringon theClock.)Atthe
end ofthe settime,a buzzersounds
to tellyoutimeis up. Turnknob,
withoutpushingin, untilpointer
reachesOFF andbuzzerstops.
Tosetclock
We
Automatic~er
~ SET THE CLOCK,push the
center knob in and turn theclock
handsto the correcttime. (The
MinuteTimerpointerwillmove
also,let knobout, turn the Timer
pointerto OFF.)
TO~~~~i~~~e
~~~e uses
~mer
TheMinuteTimerhas been
combinedwiththe RangeClock.
Useit to time allyourprecise
cookingoperations.You’ll
recognizethe MinuteTimeras the
pointerwhichis differentin color
andshapethanthe Clockhands.
UsingAutomaticTimer,youcan
TIMEBAKEwiththe ovenstarting
immediatelyandturningoff at
the StopTimeset or youcan set
bothDELAYSTARTand S~P
dialsto automaticallystartandstop
ovenat a latertimeofday.It takes
the worryout ofnot beinghome
to startor stopthe oven.
Settingthe dialsfor TIMEBAKE
is explainedin detailon page16.
QuestiomandAmwem
Q. Howcan I usemyMinute
Timerto makemysurface
cookingeasier?
A. YourMinuteTimerwillhelp
timetotalcookingwhichincludes
timetoboil foodandchange
temperatures.Donotjudgecooking
timebyvisiblesteamonly.Food
willcookin coveredcontainers
eventhoughyoucan’tsee any
steam.
Q. Mustthe Clockbe set on
correcttime of daywhenI wish
to usethe AutomaticT’imerfor
baking?
A. Yes,if youwishto set the
DELAYSTARTor STOPdialsto
turn on and off at settimesduring
timedfinctions.
Q. CanI use theMinuteTimer
duringovencooking?
e
A. TheMinuteTimercanbe used
duringanycookingfinction. The
AutomaticTimers(DELAYSTART
~
and S~P dials)are used with
TIMEBAKEfunctiononly.
Q. CanI changethe Clockwhile
I’mTimeCookingin the oven?
A. No.TheClockcannotbechanged
duringanyprogramthat usesthe
oventimer.Youmusteither stop
thoseprogramsor waituntilthey
are finishedbeforechangingtime.
—
14
~
OusingYouroven
BeforeusingYouroven
1. Lookat thecontrols.Besure
youunderstandhowto setthem
properly.Readoverthe directions
fortheAutomaticOvenTimerso
youunderstandits use withthe
controls.
2. Checkoveninterior.Lookat
theshelves.T&e a practicerun at
removingand replacingthem
properly,to givesure, sturdy
support.
3. Readoverinformationandtips
thatfollow.
4. Keepthisbookhandyso youcan
referto it, especiallyduringthe
firstweeksof gettingacquainted
withyourrange.
.
PREHEATINGthe oven,evento
hightemperaturesettings,is sptiy
—rarelymorethanabout10minutes.
Preheatthe ovenonly when
necessary.Mostfoodswillcook
satisfactorilywithoutpreheating.
If youfindpreheatingis necessary,
keepan eyeon theindicatorlight
andputfoodin the ovenpromptly
afierthe lightgoesout.
Oven
-—.
—
—
-.
InkriorShelvw
The shelvesare designedwithstoplocksso thatwhenplacedcorrectly
on the shelfsupports,they(a)will
stopbeforecomingcompletely
fromthe oven,and (b) willnottilt
whenremovingfoodfromor
placingfoodon them.
oven
Controk
Thecontrolsfor the ovenare
markedOVENSET and OVEN
TEMP.The OVENSET controlhas
settingsfor BA-KE,TIME BAKE,
BROIL,CLEANand OFF.When
youturn the knobto the desired
setting,the properheatingunitsare
thenactivatedfor that operation.
TheOVENTEMPcontrolmaintains
thetemperatureyouset, from
150°F.to BROIL(550”F.).
ShelfPositiom
Toremoveshelffrom theoven,
pullshelftowardyouandtiltfront
end upward.Becertainthatshelfis
coolbeforetouching.
Toreplaceshelfin oven,place
shelfon shelfsupportso curveon
shelfis pointingupwardandtoward
rear of oven.Tiltup frontandpush
shelftowardbackof ovenuntilit
goespastridgeon ovenliner;lower
frontof shelfandpush to back
of oven.
oven
cyclingL@t
TheOvenCyclingLightglows
untilthe ovenreachesyour selected
temperature,thengoes off andon
i~ theovenunit(~)duringcooking.
15
The ovenhas fourshelfsupports—
A (bottom),B, C andD (top).
Shelfpositionsforcookingfood
are suggestedon Baking,Roasting
and Broilingpages.
OvenLi@t
Use the switchto turn the oven
lighton and off.
Switchis locatedon therange
backsplashto the leftofthe oven
setknob.
A
Whencookinga foodfor the first
timein yournewoven,usethe time
givenon recipesas a guide.Oven
thermostatsmay “drift” fromthe
factorysettingoverthe years,and
5-to 10-minutedifferencesin timing
betweenan oldandnewovenarenot
unusual.Youmightthinkyournew
ovenis notperformingcorrectly;
however,it has beenset correctlyat
thefactoryandis more likelyto be
accuratethan the ovenit replaced.
1. Placefoodin oven,beingsureto
leaveabout S’betweenpansand
ovenwallsfor goodcirculationof
heat. Closeovendoor,and avoid
frequentdoor openingsduring
bakingto preventundesirable
results.
off automaticallyat specifictimes
youwantbakingto startandstop.
YourTimeBakeoptions:
SW & AutimaticStop.
Xmmediate
Oventurns on rightawayandturns
offautomaticallyat yourpreset
stoptime.
DelayedStart& Stop.Oven
automaticallyturnson laterat
yourpresetstarttimeandturns
offat yourpresetstoptime.
Rememberwhensettingstoptime
thattime-bakedfoodswillcontinue
cookingafiertheoventurnsoff.
Howto Set betiate
StartandAutomaticStop
Beforebeginning,makesurethe
rangeclockshowsthe correcttime
of day.
3. Checkfoodfor donenessat
minimumtimeon recipe. Cook
longerif necessary.Switchoff
heatand removefoods.
Bake
1. To‘setStartTime,pushin knob
on DELAYSTARTdialand~rn
pointerto timeyouwantovento
turn on; for example,3:30.
2. Toset StopTime,pushin knob
on S~P dialandturn pointerto
timeyouwantovento turn offi for
example,6:00.Thismeansyour @
recipecalledfor2YZhoursof
bakingtime.
N~E: Timeon S~P dialmustbe
~
laterthantimeshownonrangeclock
andDELAYSTARTdial.
1. Toset StopTime,pushin knob
on S~P dial andturn pointerto
timeyouwantovento turnoff, for
example,6:00.TheDELAYSTMT
dialshouldbeat the sameposition
as thetime of dayon clock.
2. ~rn OVENSET knobto
BAKEand OVENTEMP knob
to temperatureon recipeor
BakingGuide.
Howto he
Howto SetDelayedStart
andStop
~
2. ~m OVENSET knobto
TIMEBAKE.TurnOVENTEMP
knobto desiredoventemperature;
for example,250”F.
The oventimercontrolsare
designedto turn the ovenon and
16
3. firn OVENSETknobto TIME
BAKE.TurnOVENTEMPknobto
250”F.or recommendedtemperature.
Placefoodin oven,closethe door
andthe ovenwillbe turnedon and
off automaticallyat the timesyou
haveset. TurnOVENSETto OFF
and removefoodfromoven.
OVENINDICA~R LIGHTat
TIMEBAKEsettingmaywork
differentlythanat BAKEsetting.
Carefilly recheckthe stepsgiven
above.If all operationsare doneas
explained,the ovenwill operate
as it should.
—
—
1. Aluminumpansconductheat
quickly.For mostconventional
~ting, light,shinyftishes generally
givebestresultsbecausethey
preventoverbrowning.Dull(satinfinish)bottomsurfacesof pansare
recommendedfor cakepansand
pieplatesto be surethoseareas
browncompletely.
4
—
—
2. Dark or non-shinyfinishes,
glassand Pyroceram@cookware
ofienabsorbheat, whichmayresult
indry,crispcrusts.Reduceovenheat
25°F.if lightercrustsare desired.
Preheatcast iron for bakingsome
foodsfor rapidbrowningwhen
foodis added.
Oven
Temperature
Time,
Minutes
Food
Contiiner
Bread
Biscuits(lA-in.thick)
ShinyCookieSheet
400°-4750
15-20
Coffeecake
Cornbreador ~fflns
Gingerbread
Muffins
Popovers
ShinyMeti Panwithsatin-finishbottom
CastIronor Glass
ShinyMeta3Panwithsatin-finishbottom
ShinyMetalMuffinPans
ShinyMetalMuffinPans
350°-400”
400°-4500
350°
400°-4250
375°
20-30
20-40
45-55
20-30
45-60
Quickloafbread
Metalor GlassLoafPans
350°-375”
45-60
Yeastbread(2 loaves)
MetalorGlassLoafPans
375°-4250
45-60
Plainrolls
Sweetrolls
ShinyOblongor MuffinPans
ShinyOblongor MuffinPans
375°-4250
350°-3750
10-25
20-30
Aluminum~be Pan
MetalJellyRollPan
Metalor CeramicPan
325”-375°
375°-4000
325°-3500
30-55
10-15
45-60
Cakes
(withoutshortening)
Angelfood
Jellyroll
Sponge
Metalor CeramicPan
ShinyMetalMuffinPans
MetalOrGlassLoafor ‘AIbePan
ShinyMetalPanwithsatin-finishbottom
ShinyMetalPanwithsatin-finishbottom
Metalor GlassLoafPans
325°-3500
350°-3750
275°-3000
350°-375”
350°-3750
350°
45-65
20-25
2-4hrs.
20-35
25-30
40-60
Cookies
Brownies
Drop
Refrigerator
?olledor sliced
Metalor GlassPans
CookieSheet
CookieSheet
CookieSheet
325°-3500
350°-4000
400°-4250
375°-4000
25-35
10-20
6-12
7-12
Glassor MetalPan
Glass CustardCupsor Casserole
(set in panofhotwater)
GlassCustardCupsor Casserole
300°-4000
300°-3500
30-60
30-60
325°
50-90
$es
‘ro*n
fieringue
Foil PanonCookieSheet
Spreadtocrust edges
400°-4250
320°-3500
45-m
15-25
b e crust
‘Wo
crust
Rstry shell
G1ass or Satin-finishMetal
G]assor Satin-finishMetal
GIassor Satin-finishMetal
400°-4250
400°-4250
450°
40-60
40-60
12-15
Miscellaneous
?akedpotatoes
;callo@ dishes
Souffles
SetonOvenShelf
G]assor Metal%n
GlaSs
325°-4000
325°-3750
300°-3500
60-90’
30-60
30-75
‘uddings,Rice
,ndCustard
Comments
Canned,refrigeratedbiscuitstake
2 to 4 minuteslesstime.
Preheatcastironpanforcrispcrust.
Decreaseabout5 minutesformuffin
mix,or bakeat450W.for25minutes,
thenat 350”F.for 10to 15minutes.
Darkmetalor glassgivedeepest
browning.
Darkmetalor glassgivedeepest
browning.
Two-piecepanis convenient.
Linepanwithwaxedpaper.
/.
Cakes
Bundtcakes
Supcakes
Fruitcakes
.ayer
.ayer,chocolate
Loaf
Fmits,
XherDesserts
3akedapples
:ustard
3. Openthe ovendoor to check
foodas littleas possibleto prevent
unevenheatingandto saveenergy.
“
Paperlinersproducemommoistcrusts.
Use300”F.forsmallor individualcakes.
Barcookiesfrommixusesametime.
Increasetemperature25”F.to 50°F.
for morebrowning.
Reducetemperatureto 300”F.forlarge
custard.
Cookbreador ricepuddingwithcustard
base80to90minutes.
Largepiesuse400”F.andincreasetime.
Toquicklybrownmeringue,use400”F.
for 8 to 10minutes.
Custardfillingsrequire”lower
temperature,longertime.
Increasetimeforlargeamountor size.
-–
-—.
—.
—
-~
-.
- ..
u.a.
=
Roasting
Roastingis cookingbydryheat.
Tendermeator poultrycanbe
roasteduncoveredinyouroven.
Roastingtemperatures,which
shouldbelowandsteady,keep
spatteringtoa minimum.When
roasting,it isnotnecessaryto
sear,baste,coveror addwater
toyourmeat.
Roastingisreallyabaking
procedureusedformeats.Therefore,
ovencontrolsaresetto BAKEor
TIMEBAKE.(Youmayheara
slightclickingsound,indicatingthe
ovenis workingproperly.)Roasting
iseasy;just followthesesteps:
Step 1:Checkweightofmeat,and
place,fatsideup,onroastingrack
in a shallowpan. (Broilerpanwith
rackis a goodpanforthis.)Line
broilerpanwithdurninumfoilwhen
usingpan formarinating,cooking
withfruits,cookingheavilycured
meats,or forbastingfoodduring
cooking.Avoidspillingthese
materialson ovenlineror door.
Step2: Placein ovenon shelfin
Aor Bposition.Nopreheatingis
necessary.
QuestiomandAmwers
it necessarytocheck for
donenmwithameatthermometer?
A. Checkingthe finishedinternal
temperatureat thecompletionof
cookingtime is recommended.
Temperaturesareshownin Roasting
Guideon oppositepage.For roasts
over8 lbs., cookedat 300”F.with
tiuced time,checkwiththermometer
at half-hourintervalsafterhalfthe
timehas passed.
Q. k
Step 4: Mostmeatscontinueto
cookslightlywhilestanding,after
beingremovedfromtheoven.For
rareor mediuminternaldoneness,
if meatisto stand10to20minutes
whilemakinggravy,or foreasier
carving,youmaywishto remove
meatfromovenwheninternal
temperatureis5 to 10”F.below
temperaturesuggestedin guide.
If nostandingisplanned,cook
meatto suggestedtemperaturein
guideonoppositepage.
N~E: Youmaywishto useTIME
BAKE,asdescribedonpage16,to
turnovenonandoffautomatically.
Rememberthatfoodwillcontinue
tocookinthehotovenandtherefore
shoddberemovedwhenthedesired
internaltemperaturehasbeen
reached.
Q.Whyis myroastcrumbling
whenI try to carveit?
A. Roastsare easierto sliceif
allowedto cool 10to 20 minutes
afterremovingfromoven.Be sure
to cut acrossthegrainofthe meat.
ForRozen Roasb
roastsofbeef,pork,
*Frozen
Q.Do I needto preheatmy
oveneachtimeI cooka roast
or poultry?
A. It is rarely necessaryto preheat
@
..
youroven,onlyfor very small
roasts, whichcooka shortlength
of time.
—
Q. Whenbuyinga roast,are
thereanyspecialtips thatwould
help me cookit moreevenly?
A. Yes.Buya roastas evenin
thicknessas possible,or buy rolled
roasts.
lamb,etc., canbe startedwithout
thawing,butallow10to25minutes
perpoundadditionaltime(10
minutesper poundforroastsunder
5 pounds,moretimeforlarger
roasts).
Q. CanI seal the sidesof myfoil
“tent” when roastinga turkey?
A. Sealingthe foilwill steamthe
meat.Leavingit unsealedallowsthe
air to circulateandbrownthe meat.
~Thawmostfrozenpoultrybefore
roastingto ensureevendoneness.
Somecommercialfrozenpoultry
canbecookedsuccessfullywithout
thawing.Followdirectionsgiven
onpacker’slabel.
Step3: T’urnOVENSETtoBA~
andOVENTEMPto325”F.Small
poultrymaybecookedat 375°F.
forbestbrowning.
—
18
oRoasting
Guide
—
Roasting
1. Positionovenshelfat B for
small-sizeroasts(3 to 7 lbs.) and
at A for largerroasts.
2. Placemeatfat-sideup, or poultry
breast-sideup, on broilerpanor
othershallowpan withtrivet.Do
notcover.Do notstuffpoultryuntil
just beforeroasting.Use meat
probefor moreaccuratedoneness.
(Do notplaceprobein stuffing.)
NW
3. Removefatanddrippingsas
necessary.Basteas desired.
4. Standingtimerecommended
for roastsis 10to 20 minutesto
allowroastto firm up andmakeit
easierto carve.Internaltemperature
willrise about5°to 10°F.To
compensatefor temperaturerise, if
desired,removeroastfromoven
earlierthanindicated.
Oven
Temperature
Doneness
Meat
Tendercuts;rib, highqualitysirlointip,
rumpor topround*
325°
LambLegor bone-inshoulder*
325°
Vealshoulder,legor loin*
Porkloin,rib or shoulder*
Ham,precooked
325°
325°
325°
Rare:
Medium:
WellDone:
Rare:
Medium:
WellDone:
WellDone:
WellDone:
ToWarm:
Ham,raw
325°
WellDone:
5. Wozenroask canbe
conventionallyroastedby adding
10to 25 minutesper poundmore
timethangivenin guidefor
refrigeratedroasts.(10minutes
perpoundforroastsunder5pounds.)
Defrostpoultrybeforeroasting.
Approximate
RoastingTime,
in MinutesperPound
3 to5-lbs.
6 to 8-lbs.
24-30
18-22
30-35
22-25
35-45
28-33
21-25
20-23
25-30
24-28
30-35
28-33
35-45
30-40
35-45
30-40
10minutesperpound(anyweight)
UnderIo-lbs.
10to 15-lbs.
20-30
17-20
Internal
Temperature‘F
130°-1400
150°-1600
170°-1850
130°-1400
150°-1600
170°-1850
170°-1800
1700-180°
125°-1300
160°
❑
- ’.
*Forbonelessrolledroastsover6-inchesthick,add5 to 10minutesper poundto timesgivenabove.
Poultry
Chickenor Duck
Chickenpieces
325°
375°
WellDone:
WellDone:
~rkey
325°
WellDone:
19
3 to5-lbs.
35-40
35-40
10to M-lbs.
20-25
——
—-
Over5-lbs.
30-35
Over15-lbs.
15-20
185°-1900
185°-1900
In thigh:
185°-1900
-=
----..
m- =
Broiling
Broilingis cookingfoodbyintense
radiantheatfromthe upperunitin
theoven.Mostfish and tendercuts
ofmeatcan be broiled. FO11OW
thesestepsto keepspatteringand
smokingto a minimum.
..
Step 1:If meathasfator gristlenear
edge,cut verticalslashesthrough
bothabout2“apart. If desired,fat
maybe trimmed,leavinglayer
about1/8”thick.
Step2: Placemeaton broilerrack
in broilerpan. Alwaysuserackso
fatdripsintobroilerpan; otherwise
juicesmaybecomehotenoughto
catchti.
Skp 3:Wsitionshelfon-remended
shelfpositionas suggestedinBroiling
Guideon page 19.Mostbroilingis
doneon C position,but if your
ovenis connectedto 208 volts,you
maywish to usehigherposition.
L/J
Step4: Leavethe ovendoorajar a
fewinches(exceptwhenbroiling
chicken).Thedoor staysopenby
itself,yetthe propertemperature
is maintainedin the oven.
Step5: TurnbothOVENSETand
OVENTEMPknobsto BROIL.
Preheatingunitsis not necessary.
(Seenotesin BroilingGuide.)
Step 6: Turnfoodonlyonceduring
cooking.Timefoodsfor firstside
per BroilingGuide.
~rn food,thenusetimesgivenfor
secondsideas a guideto preferred
doneness.(Wheretwothicknesses
andtimesare giventogether,use
first timesgivenfor thinnestfood.)
Q.WhyshouldI leavethe door
closedwhenbr(;}iling
chicken?
A. Chickenis theonlyfood
recommendedforclosed-door
broiling.Thisis becausechickenis
relativelythickerthanotherfoods
youbroil. Closingthe doorholds
moreheatin theovenallowing
chickento cookevenlythroughout.
Step%~m OVENSETknob
to OFF.Servefoodimmediately,
andleavepan outsideovento cool
duringmealfor easiestcleaning.
us~
ofAlmhm
Fofl
/ I
I
1
1. Ifdesired,broilerpanmaybe
linedwithfoilandbroilerrackmay
be coveredwithfoilforbroiling.
ALWAYS
BECERTAIN~ MOLD
FOILTHORC?UGHLY
~
BROILERRACK,ANDSLIT
FOILTOCONFORMWITH
SLITSIN RACK.Broilerracksare
designedto minimizesmokingand
spattering,andtokeepdrippings
coolduringbroiling.Stoppingfat
andmeatjuicesfromdrainingto
thebroilerpanpreventsrackfrom
servingitspurpose,andjuicesmay
becomehotenoughtocatchfire.
2. DONOTplacea sheetof
aluminumfoilon shelf.Todoso
mayresultin improperlycooked
foods,damageto ovenfinishand
increasein heatonoutsidesurfaces
oftheoven.
3. A sheetofaluminumfoilmaybe
usedon flooroftheovenunderthe
bakeunit, if desired.BECERTAIN
FOILDOESN~ ~UCH BAKE
UNIT.Aluminumfoilusedinthis
waymayslightlyaffectthebrowning
of somefoods.Changefoilwhenit
becomessoiled. ~
20
Q.Whenbroiling,is it necessary
to alwaysuse a rackin the pan?
A. Yes.Usingtherack suspends
themeatoverthepan. Asthemeat
cooks,thejuicesfallintothepan,
thuskeepingmeatdrier. Juices
are protectedbytherack andstay
cooler,thuspreventingexcessive
spatterand smoking.
Q.ShouldI saltthe meatbefore
broiling?
A. No. Saltdrawsoutthejuices e
andallowsthemto evaporate.
Alwayssaltaftercooking.Turn
meatwithtongs;piercingmeat
witha fork alsoallowsjuicesto
escape.Whenbroilingpoultry
or fish, brush eachsideofien
withbutter.
—
Q.Whyare mymeatsnotturning
out as brownas theyshould?
A. In someareas,the power
(voltage)to theovenmaybe low.
In thesecases,preheatthe broil
unit for 10minutesbeforeplacing
broilerpan withfoodin oven.
Checkto see if youare usingthe
recommendedshelfposition.Broil
for longestperiodof time indicated
in the BroilingGuide.~m food
onlyonceduringbroiling.
Q. Do I needto greasemybroiler
racktopreventmat fromstic~?
AeNo. Thebroilerrack is designed
to reflectbroilerheat, thuskeeping
the surfacecoolenoughto preven
9’
meatstickingtothesufice. Howeve,
sprayingthebroilerracklightlywith
a vegetablecookingspraybefore
cookingwillmakecleanupeasier.
_
_
BroiBing
1. Alwaysusebroilerpanandrack
thatcomeswithyouroven.It is
designedto minimizesmokingand
spatteringbytrappingjuicesin the
shieldedlowerpart of the pan.
2. Ovendoor shouldbe ajarfor all
foodsexceptchicken;thereis a
specialpositionon door which
holdsdoor opencorrectly.
3. For steaksandchops,slashfat
evenlyaroundoutsideedgesofmeat.
Food
Quantityand/or
Thickness
Bacon
‘A-lb.(about8
thinslices)
GroundBeef
WellDone
l-lb. (4patiies)
1Ato %-in.thick
BeefSteaks
Rare
I;:;;:ne
l-inchthick
(1to 1%-lbs.)
Toslash,cut crosswisethrough
outerfat surfacejust to theedgeof
themeat. Use tongsto turn meat
overto preventpiercingmeatand
losingjuices.
4. If desired,marinatemeatsor
chickenbeforebroiling.Or brush
withbarbecuesaucelast5 to 10
minutesonly.
5. Whenarrangingfoodon pan,
do notlet fattyedgeshangover
sides,whichcouldsoilovenwith
fatdripping.
6. Broilerdoesnotneedto be
preheated.However,for verythin
foods,or to increasebrowning,
preheatif desired.
7. frozen Steakscan be
conventionallybroiledby
positioningthe ovenshelfat next
lowestshelfpositionand increasing
cookingtimegivenin this guide
1%timesper side.
Shelf
Position
FirstSide
T’ime,Minutes
SecondSide
Time,Minutes
c“
3-4
3-4
Armngein singlelayer.
c
7-8
6-7
Spaceevenly.
Upto 8pattiestakeaboutsametime.
c
c
c
c
c
B
7-8
9-1o
13-14
9-1o
15-16
25-26
7-8
9-1o
13-14
7-8
14-16
20-25
Steakslessthan1inchcookthrough
beforebrowning.Panfryingis
recommended.
Slashfat.
30-35
10-15
Reducetimesabout5 to 10minutesper
sidefor cut-upchicken.Brusheachside
withmeltedbutter.Broilwithskin
downfirstandbroilwithdoorclosed.
Comments
Rare
Medium
WellDone
1%-in.thick
(2 to2%-lbs.)
Chicken
1 whole
(2 to2%-lbs.),
splitlengthwise
A
2 to4 slices
1pkg.(2)
2 (split)
c
11~-z
c
3-4
bbster MS
(6to 8-oz.ach)
2-4
B
13-16
Donot
turnover.
Cutthroughbackofshell. Spread
open.Bmshwithmeltedbutter
beforeandafterhalftime.
Fish
l-lb. fillets %to
I/z-in.thick
c
5-6
4-5
Handleandturnverycarefilly.
Brushwithlemonbutterbeforeand
duringcookingif desired.Preheat
broilertoincreasebrowning.
Ham Slices
(precooked)
l-in. thick
B
8-9
7-8
Increasetimes5to 10minutesper side
for 1~-inchthickor homecured.
PbrkChops
WellDone
2(% inch)
2 (l-in. thick)
about1lb.
c
B
10-11
13-”14
10-11
13-14
Slashfat.
timb Chops
Medium
WellDone
edium
k e]]Done
2(1 inch)
about 10to 12oz.
2 (1%inch)
about 1lb.
c
c
c
B
7-8
9-1o
10-11
17-18
4-7
lo-n
6-7
12-14
Slashht.
l-lb. pkg.(10)
c
5-6
1-2
Bakery~oducts
Bread(Toast)or
ToasterPastries
EnglishMuffins
Wienersand similar
?recookedsausages,
1~ratwurst
!-
1A
-
U—A
—
—–
--w.-
..
-=
=
Spaceevenly.PlaceEnglishmuffins
cut-side-upandbrushwithbutter,if
desired.
If desired,splitsausagesin half
lengthwiseinto5 to6-inchpieces.
—
21
CareandCleaning
Opemtingthe
SeIf-CleatingOven
BeforeSettingOvenControls,
Cl~eckTheseThings:
HowtoSetOvenforCleaning
Step 1:
~rn OVENSETand OVEN
TEMPknobsto CLE~.
Step3:
Set the automaticoventimer:
Step1:
Removebroilerpan, broilerrack
andothercookwarefrom theoven.
(Ovenshelvesmaybe lefi in oven.
Note:Shelvesmaybecomegray
atier severalcleanings.)
Step2:
Removeany combustibleitems
fromthe storagedrawer.This
includesutensilswith plastic
handlesthatcanbecomeoverheated
andmelt. Removeall utensilsand
foodfromthe cooktop.
Step3:
Wi~eup heavysoilon oven
bottom.
CAUTION:Anytimethe OVEN
SETknobis set to cleanposition
andthedooris notlatched,a buzzing
soundwillremindyouto lockthe
doorpromptly.Allowingthebuzzto
continuefor an extendedtimemay
causedamageto the locksystemso
thatthedoor cannotbe latched.
Step2:
Rotatethe doorlatchto its locked
position.
e Makesureboththe rangeclock
andthe DELAYSTARTdialshow
the correcttime of day.Whenthe
DELAYSTARTknobis pushedin
and turned,it will “pop” intoplace
whenthetime shownon the range
clockis reached.
oD~ide oncleaninghoursnecessary.
Recommendedcleaningtimefor a
heavily-soiled
ovenwithheavy,greasy
sDatteris 3 hours;for a moderatelys~iledovenwiththinspillsandlight
spatteris 2 hours.
m
@Addthesehoursto presenttime
of day,thenpushin andturn S~P
dialclockwiseto thisdesiredstop
time.
_
The DOORLOCKEDlightwill
glow,indicatingovenis hot and
door cannotbe opened.Ovendoor
and windowgethot duringselfcleaning.DO N~ ~UCH.
Use of surfaceelementswhilethe
rangeis self-cleaningis not
recommended.
Nm: If youwishto startand stop
cleaningat a latertimethanshown
on clock,push in and turn DELAY
STARTdialtotimeyouwishto start.
Addthe hoursneededfor cleaning
to this “start” time, then pushin
and turn S~P dialto this desired
stoptime. Ovenwill automatically
turn on and off at the set times.
o
c
A. Oven Front Frame
B. OvenDoorGasket
C. Openingsin Door
D. OvenLight
step 4:
Cleanspattersor spillson oven
frontframe (A)and ovendoor
outsidegasket(B)with a dampened
cloth.Polishwitha dry cloth.Do
notcleangasket(B). Do notallow
waterto run downthroughopenings
in topof door (C). Neverusea
commercialovencleanerin or
aroundself-cleaningoven.
e
step5:
Closeovendoorand makesure
ovenlight(D) is off.
‘
—
—
22
-
FOIIOW
TheseStipsafkr
Self-Cleani~
Afiercleaningis complete,the
doorwillstaylockeduntiltheoven
coolsandthe DOORLOCKED
lightgoesoff. Thistakesabout
30 minutes.
step1:
WhenDOORLOCKEDlightis
off, rotateLA~H HANDLEto its
originalpositionand openthedoor.
Step 2:
TurnOVENSETknobto OFF.
Step ~:
TW OVENTEMPknobto WM.
QuewiomandAmwers
Q. Whywon’tmyovenclean
immediatelyeventhoughI set
all the timeandcleanknobs
correctly?
A. Checkto be sureyourDELAY
STARTdial is setto the sametime
as the rangeclock.Alsocheckto
be sureLATCHHANDLEis in
lockedposition.
Q. If myovenck)ckis notworking,
can I stillself-cleanmyoven?
A. No. YourAutomaticOven
Timerusesthe rangeclockto help
startandstopyourself-cleaning
cycle.
Q. CanI use commercialoven
cleanerson anypartof my
self-cleaningoven?
A. No cleanersor coatingsshould
be usedaroundanypart ofthis
oven.If youdo usethemanddo.not
wipethe ovenabsolutelyclean,the
residuecan scar the ovensurface
anddamagemeti partsthe next
timethe ovenis automatically
cleaned.
Q. CanI cleanthe WovenGasket
aroundthe ovendoor?
A. No, this gasketis essentialfor
a goodovenseal, and caremustbe
takennotto rub, damageor move
this gasket.
Q. Afterhavingjust usedthe
oven,the DOORLOCKEDlight
cameon and I couldnot movethe
LATCHHANDLE.my?
A. After severalcontinuoushightemperaturebakingsor broilings,
the DOORLOCKEDlightmay
comeon. The ovendoor can’tbe
latchedfor self-cleaningwhilethe
DOORLOCK.EDlightis on. If
this happens,let the ovencooluntil
the DOORLOCKEDlightgoes
off. Thenthe ovendoor can be
latchedfor self-cleaning.
Q. mat shouldI do if excessive
smokingoccursduringcleating?
A. Thisis causedby excessivesoil,
and youshouldswitchthe OVEN
SETknobto OFF.Openwindows
to rid roomof smoke.Allowthe
ovento cool for at leastonehour
beforeopeningthedoor.Wipeup
theexcesssoil andresettheclean
cycle.
Q. h the “crackting”soundI
hearduringcleaningnormal?
A. Yes.This is themetalheating
andcoolingduringboththe
cookingand cleaningfunctions.
Q. Shouldtherebe anyodor
duringthe cleaning?
A. Yes,there maybe a slightodor
duringthe first fewcleanings.
Failureto wipe outexcessivesoil
mightalso causean odor when
cleaning.
Q. Whatcausesthe hair-like
lineson the enameledsurface
of myoven?
A. Thisis a normalcondition
resultingfromheatingandcooling
duringcleaning.Theydo notaffect
howyourovenperforms.
Q. Whydo 1 haveashleft in my
ovenaftercleaning?
A. Sometypesof soilwillleavea
depositwhichis ash. It canbe
removedwith a dampspongeor
cloth.
Q. My ovenshelvesdo notslide
easily.Whatis thematter?
A. Afiermanycleanings,oven
shelvesmaybecomeso cleanthey
do not slideeasily.If youwish
shelvesto slidemoreeasily,
dampenfingerswitha small
amountof cookingoil andrub
lightlyoversidesof shelfwhere
theycontactshelfsupports.
Q. Myovenshelveshavebecome
grayafterseveralcleanings.k
this normal?
A. Yes.After manycleanings,the
shelvesmaylose somelusterand
discolorto a deepgraycolor.
23
—— ———
—.
-—
~
—.
——
—
—
-
careandcleani~
Propercare andcleaningare
importantsoyourrangewillgive
youefficientand satisfactory
service.Followthesedirections
carefullyin caringfor yourrangeto
assurestie andpropermaintenance.
PorcelahE-cl
Mh
Theporcelainenamelfinishis
sturdybut breakableif misused.
Thisfinishis acid-resis~t. However,
anyacidfoodsspilled(suchas fruit
juices,tomatoor vinegar)shouldnot
bepermittedto remainon thefinish.
seam
-
SolidMementi
RemovableOvenDoor
HH
I
Toremovethedoor,opencompletely,
pressdownlightiyondoorand slide
hingekeepersfo rd on each
hingeto locktPe dooropen.
undertheRa~e
Thearea underthe rangecanbe
reachedeasilyfor cleaningby
removingthebottomdrawer.To
remove,pulldrawerout alltheway,
tiltup the frontand removeit. To
replace,insertglidesat backof
drawerbeyondstopon rangeglides.
Lifidrawerif necessaryto insert
easily.Let frontof drawerdown,
thenpush into close.
OvenLamp
Graspthedooron bothsidesmidway
betw~enthetop andbottom.Close
the doorhalfway(45°)andIifiuntil
the hingesdisengagefromthe
rangebody.
CA~TION:Beforereplacingyour
ovenbulb,disconnectthe electrical
powerfor yourrangeat themain
fuseor circuitbreakerpanel.Be
sureto let the lampcoverandbulb
coolcompletelybeforeremovingor
replacing.
\
1 11.b’
/Tompla&,Ppdooratsidm. Wth
thed&r at& figle as shown,locate
the upperhingesin thetwoupper
slotson the frontfaceof the oven5
owerthe doorto the horizontal
I
ositionallowingthe
lowerhingeto
Dl 4engage.Press downlightlyon door,
Toremovelamp: unscrewthe 3 v
returningthehingekeepersto the ~
slottedscrewsin the lamp cover,
normalpositionand
closethe door.detachlens and frame and remove
CA~TION:If
the
dooris
not
A,.lL
Uulu.
horizontal,the hingesare not
‘Fo replaceImp: use a high
properlyengaged.Liftthe door off
temperatureappliancebulbof same
and reinstallit.
sizeandwattageas original.Replace
thelampcoverandrescrewit back
intoplace. ReconnWtelectrical
powerto the range.
24
J
The solidelementis madeof high
strengthcast-ironalloy.Thetrim
ring is stainlesssteel.A heatresistantcoatinghelpspreservethe
surfaceofthe element.
Thesolidelementshouldbe washed
witha dampcloth,dried,andwiped
overlightlywithcookingoil.
Boiled-overmaterialon the
elementshouldbe removedwith a
slightlydampclothas soonas
possibleafiertheelementcools.
Dry theelementby switchingit on
for a fewminu~s.
Cleanverydirty solidelements
withadampclothanda Iitdecleaning
powderwith a scouringpad.
The matteblacksurfacecan be
maintainedbytreatingit periodically
withthe CelloElectrol@polish
packedwith yourrange.Use the
@
applicatorto applya verythin
coatingof the polishto the entire
eleme;t surfa~e.Turnthe element
on highfor severalminutesto bake
—
the polishto theelement.Whenthe
elementis cooled,rub lightiywith
a clothor papertowelto remove
anyexcesspolish.Beforenextuse,
burn offthe elementby meansof a
shortpreheatingperiod. A slight
amountofsmokeandodorwilloccur.
Cookingand pre-deliveryfactory
testingwillpermanentlychangethe
trim ringto a goldcolor.This
normalcharacteristicof staitiess
steelwillnot affectthe operationor
performanceofyourelements.
Cleaningthe trim ring with a good
qualitystainlesssteelcleanerwill
alsorestorethe trim ring to its
originalcolor,untilit is reheated.
Failureto maintainthe solid
elementsas directedwill resultin
defacingthe surfaceovera period
of timeprimarilydueto corrosion
as the elementsare madeof cast
iron construction.
Do notuse coversoverthe solid
—
elements.An elementturnedon
—
whilethe coveris in placecan
permanentlydamagethe cooktop.
Coverscan alsotrapmoisturewhich
maycausethe elementsto rust.
-
N~E:btrange/oven
parhcoolbefore touchingorhandling.
PART
GENERALDWCTIONS
BakeUnitand
Donotcleanthebakeunitor broilunit. Anysoilwillburnoffwhentheunitis heated.
NOTE:Thebakeunitis hingedandcanbe li~ gentlytocleantheovenfloor.If
spillover,residue,or ashaccumulatesaroundthebakeunit,gentlywipearoundtheunit
withwarmwater.
BroilUnit
BroilerPanandRack
@SoapandWater
oSoap-FilledScouringPad
e CommercialOvenCleaner
Drainfat, coolpanandrackslightly.(Donotlet soiledpanandrackstandin oventocool.)
Sprinkleondetergent.Fillthepanwithwarmwaterandspreadclothorpapertowelover
therack.Letpanandrackstandfora fewminutes.Wash;scourif nwessary.Rinseanddry.
O~ION: Thebroilerpanandrackmayalsobe cleanedin a dishwasher.
Controlmobs:
RangeTopandOven
o MildSoapandWater
Pulloffknobs.Washgentlybutdonotsoak.Dryandreturncontrolstorangemakingsure
tomatchflatareaonthe knobandshti.
OutsideGkissFinish
e SoapandWater
Cleanoutsideofcooledblackglassdoorwitha glasscleanerthatdoesnotcontain
ammonia.Washotherglasswithclothdampenedinsoapywater.Rinseandpolishwitha
drycloth.If knobsareremoved,donotallowwaterto rundowninsidesufice ofglass
whilecleaning.
Me@l,including
Side~im and
TrimStrips
a SoapandWater
Wash,rinse,andthenpolishwitha drycloth.DON~ USEsteelwool,abrasives,
ammonia,acids,or commercialovencleanerswhichmaydamagethefinish.
PorcelainEnmnel
Surface’$
oPaperTowel
@Dry ~lOth
o SoapandWater
Avoidcleaningpowdersor harshabrasiveswhichmayscratchtheenamel.If acidsshould
spillontherangewhileit ishot, usea drypapertowelor clothto wipeuprightaway.
Whenthesurfacehascooled,washandrinse.Forotherspills,suchas fatsmatterings,
etc.,
washwithsoapandwaterwhencooledandthenrinse,Polishwithdrycloth.
SoapandWater
Usea mildsolutionofsoapandwater.Do notuseanyharshabrasivesor cleaningpowders
whichmayscratchor mar surface.
PaintedSurfaces
sideOvenDoor*
—
*
●
QSoapandWater
Soap-~illedScouringPad
●
——
—.
—.
—.
-=
-
CleanONLYthedoorlineroutsidethegasket.Thedooris automaticallycleanedif the
ovenis in theSelf-Cleaningcycle.If spilloveror spatteringshouldoccurincooking
function,wipethedoorwithsoapandwater.DONCYI’
rubor damagegasket.Avoid
gettingsoapandwateronthegasketor intherectangularflangesonthedoor.
AvoidgetiingANYcleaningmaterialsonthegasket.
OvenGasket
OvenLiner
* SoapandWater
Coolbeforecleaning.Frequentwipingwithmildsoapandwaterwillprolongthetime
betweenmajorcleanings.Besureto rinsethoroughly.Forheavysoiling,useyourselfcleaningcycleoften.
Shelves
(SeeSelf-Cleaning
OvenDirections)
o SoapandWater
Shelvescanbe cleanedin Self-Cleaningovenor dishwasher,or byhand,usingsoapand
water.Rinsethoroughlytoremovesoapaftercleaning.
SolidElements
o SoapandWater
@CleansingPowder
@Soap-FilledScouringPad
oCelloE1ectrolPolish
Thesolidelementshouldbe washedwitha dampclothandthendriedout.Finish
bywipingoverlightlywithcookingoil, Cleanverydim solidelementswitha damp
clothanda littlecleaningpowderwitha scouringpad.Thematteblacksufice canbe
maintainedbytreatingit periodicallywiththeCelloelectrolpolishpackedwithyour
range.Tousethe finish,usethe applicatortoapplya verythincoatingofthepolishtothe
entireelementsutiace.fim theelementonhighforseveralminutestobakethepolishto
theelement.Whentheelementis cooled,rublightlywitha clothor papertoweltoremove
anyexcesspolish.
StorageDrawer
BSoapandWater
Forcleaning,removedrawerbypullingit allthewayopen,tilt upthe frontandliftout.
Wipewithdampclothor spongeandreplace.Neveruseharshabrasivesor scouringpads.
StainlessSteel
TrimRings
~SoapandWater
DStainlessSteelCleaner
Wipeall ringsaftereachcookingsounnoticedspatterwillnot “bumon” nexttimeyou
took.TOremove“burned-on”spatters,cleanwitha goodqualitystairdesssteelcleaner.
--
*Spillageof marinades,fruitjuices, andbastingmaterialscontainingacidsmaycausediscoloration.Spilloversshouldbewipedupimmediately,
withcarebeingtakennottotouchanyhotportionoftheoven.Whenthesurfaceis cool,cleanandrinse.
-.
25
Questions?
Use Thk Roblem Solver
PROBLEM
POSSIBLECAUSEAm REMEDY
OVENWILLN~ WORK
6 Plugon rangeis notcompletelyinsertedin theelectricaloutlet.
e Thecircuitbreakerin yourhousehasbeentripped,or a fusehas beenblown.
~Ovencontrolsnotproperlyset.
~Door leftin lockedpositionaftercleaning.
OVENLIGHT
DOESNOTWORK
@Lightbulbis loose.
,
@Bulbis defective.Replace.
* Switchoperatingovenlightis broken.Callfor service.
FOODDOESNOT
BROILPROPERLY
@OVENSETtiob not set at BROIL.
@OVENTEMPknob not set at BROIL.
@Door notlefi ajar as recommended.
g Impropershelfp’ositionbeingused. CheckBroilingGuide.
~@Necessarypreheatingwas notdone. ~
1 @Foodis beingcookedon hotpan. ‘
~Utensilsare not suitedforbroiling.
@Aluminumfoilusedon the broilpan rackhas notbeenfittedproperlyand slit
as reco~ended.
~~
FOOD DOESN~ ROAST
OR BAKEPROPERLY
SURFACEUNITSN~
FUN~IONING PROPERLY
SU~ACE UNITSSMOKE
w~LE HEAT~G
COOKTOPIS Ha
$ OVENSETknobnot set on BA’~.
‘ ~.‘ ‘~
~.6VEN TEMPbob not set correctly.
~
* Shelfpositionis incorrect.CheckR,oastingor BakingGuide.
~
@Ovenshelfis not level.
“~
~ ‘
@Incorrectcoo&are or cookwa~e.6f’impropersizeis beingused. ~
‘
@A foiltentwasnotused whenneededto slowdownbrowningduringroasting.
,.
@Surfaceunitcontrolsare notproperlyset. ‘‘ ‘
.,, .’.
.,.
,.
. .. .
@Somesmokeand odor is normalwhenusingsurfaceunitsfor the firsttime .
and also afierusingCO11O
electrolcletier.
. .
e Becausesolidelemk.ntsheatby conduction,the eooktopmay’seemhotterthan
youare used to, This is normal:Makesureproperlyfittingpans areused.
e
—
—
26
POSSIBLE CAUSEAmwm~y
U you need more help.. .Cau,toufree:
HYOU Need
service
Toobtainservice,seeyourwarranty
ontheback pageofthis book.
$IVreproud of our serviceand
~tmtyouto be pleased.If for some
reasonyou are nothappywiththe
serviceyou receive,here are three
stepsto followfor further help.
FIRST,contactthepeoplewho
servicedyourappliance.Explain
~~hyyouare notpleased.IrImost
cases,this willsolvethe problem.
NEXT,if youare stillnotpleased,
writeall.the details-including
yourphonenumber—to:
Mmager, ConsumerRelations
GeneralElectric
AppliancePark
Louisville,Kentucky40225
FINALLY,if yourproblemis still
notresolved,write:
MajorAppliance
ConsumerActionPanel
20 North WackerDrive
Chicago,Illinois60606
,<
,.,‘ ,
n
11
YOURGENERAL
ELE~R[C RANGE
WARRAN~
Saveproof of originalpurchasedatesuchasyoursalesslip or cancelledcheckto establishwarrantyperiod.
WHATISCOVERED
FULLONE-YEARWARRANTY
Foroneyearfromdateof original
purchase,we will provide,freeof
charge,partsandservicelabor
in yourhometo repairor replace
any pati of therangethatfails
becauseof a manufacturingdefect.
LIMITEDADDITIONAL
IFOURWEAR
WARRANTY
Forthe secondthroughfifthyear
fromdateof originalpurchase,we
will provide,freeof charge,a
replacementsolidelementsurface
heatingunit if the elementfails
becauseof a manufacturing
defect.Youpayfor the servicetrip
to yourhomeandservicelabor
charges.Thiswarrantydoesnot
coverSensi-Temp
components,
wiring,or switches.
WHATIS Nm c~vE~ED
o Servicetrips to your hometo
teachyou howto usethe product.
ReadyourUseand Cammaterial.
If youthen haveanyquestions
aboutoperatingthe product,
pleasecontactyourdealeror our
ConsumerAffairsofficeatthe
addressbelow,or call, toll free:
The GEAnswerCenteP
800.626.2000
consumerinformationservice
Thiswarrantyis extendedto
the originalpurchaserandany
succeedingownerfor products
purchasedfor ordinaryhomeuse
in the 48 mainlandstates,Hawaii
andWashington,D.C.InAlaskathe
warrantyis the sameexceptthat it is
LIMITEDbecauseyoumustpayto
shipthe productto the serviceshop
or for the servicetechnician’stravel
coststo your home.
Ail warrantyservicewill be provided
byour FactoryServiceCentersor
byour authorizedCustomerCare@
servicersduring normalworking
hours.
Lookin the Whiteor YellowPages
of yourtelephonedirectoryfor
GENERALELE~RIC COMPANY,
GENERALELECTRICFA~ORY
SERVICE,GENERALELECTRICHOTPOINTFA~RY SERVICEor
GENERALELE~RIC CUSTOMER
CARE@SERVICE.
c Replacementof housefusesor
resettingof circuitbreakers.
. Failureof the productif it is used
for otherthan its intendedpurpose
or usedcommercially.
● Damageto productcaused
by accident,fire,floodsor acts
of God.
WARRAN~R IS/V~ RESPONSIBLE
FORCONSEQUENTIALDAMAGES.
. Improperinstallation.
If youhavean installationproblem,
contactyourdealeror installer.
Youare responsiblefor providing
adequateelectrical,gas,.exhausting
andotherconnectingfacilities.
Somestates do notallowthe exclusionor limitationof incidentalor consequentialdamages,sothe abovelimitationor exclusion
maynotapplyto you.Thiswarrantygivesyouspecificlegalrights,andyoumayalsohaveotherrightswhichvaryfromstateto state.
Toknowwhatyourlegalrightsare”inyourstate,consultyourlocalor stateconsumeraffairsofficeor yourstate’sAttorneyGeneral.
Warrantor:GeneralElectricCompany
Ilffurtherhelpis neededconcerningthiswarranty,write:
Manager—Consumer
Affairs,GeneralElectricCompany,AppliancePark,Louisville,KY 40225
,a
—
GE NE RALe
~
ELECTRIC
JBP28G
Printedin Canada
247
—
—