1
New 3/01 2085341
1
SEE MARKING ON BOTTOM / BACK OF PRODUCT
THE LIGHTNING
FLASH AND ARROWHEAD WITHIN THE
TRIANGLE IS A
WARNING SIGN
ALERTING YOU OF
"DANGEROUS
VOLTAGE" INSIDE
THE PRODUCT.
CAUTION: TO REDUCE THE
RISK OF ELECTRIC SHOCK,
DO NOT REMOVE MOTOR
COVER (OR BACK). NO
USER-SERVICEABLE PARTS
INSIDE. REFER SERVICING
TO QUALIFIED SERVICE
PERSONNEL.
THE EXCLAMATION
POINT WITHIN THE
TRIANGLE IS A
WARNING SIGN
ALERTING YOU OF
IMPORTANT
INSTRUCTIONS
ACCOMPANYING
THE PRODUCT
RISK OF ELECTRIC SHOCK
DO NOT OPEN
CAUTION
WARNING :
To prevent fire or electrical
shock hazard,
do not expose this product
to rain or moisture.
e
For Your Safety
The AC power plug is polarized (one blade is wider than
the other) and only fits into AC power outlets one way.
If the plug won't go into the outlet completely, turn the
plug over and try to insert it the other way. If it still won't
fit, contact a qualified electrician to change the outlet,
or use a different one.
Do not attempt to bypass this safety feature.
base
tube without
connector
notched end
For short height (See drawing at left.)
1. Place base flat on floor.
2. Push tube without connector
into base, leaving notch end up.
Turning tube while pushing will
assure tube is fully seated in base.
base
For tall height (See drawing at right.)
1. Place base flat on floor.
2. Push tube with connector into base,
leaving connector end up.
Turning tube while pushing will assure
tube is fully seated in base.
3. Push tube without connector onto
other tube, over connector.
Turning tube while pushing will assure
tube is fully seated on connector.
tube with
connector
a
a
Ventilador de Lujo Tipo Pedestal de 16 pulgadas con Termostato
106670
Guía del Usuario
IMPORTADOR:
COMERCIALIZADORA MEXICO AMERICANA S.de R.L. de C.V.
NEXTENGO NO. 78
COLONIA SANTA CRUZ ACAYUCAN
DELEGACION AZCAPOTZALCO
MEXICO D.F. C.P. 02770
TELEFONO (5) 328-3500
RFC: CMA9109119L0
This fan is for residential use only. It is not intended to be used in
commercial or industrial settings.
1. Never insert fingers, pencils, or other foreign objects through the grill.
2. Disconnect fan when moving it from one location to another.
3. Be sure that the fan is on a stable surface when operating to avoid the
chance of it overturning.
4. Disconnect fan when removing grill for cleaning. Reinstall grill before
reconnecting to power supply.
5. WARNING: To reduce the risk of fire, electric shock or personal injury:
a) Do not use this fan with any solid-state speed control device.
b) Unplug fan before cleaning or servicing.
c) If you disassemble your fan, completely reassemble before plugging
into outlet.
d) Do not use this fan in a window. Rain may create an electrical hazard.
Modelo 106670
Consumo de Corriente: 70 W
Frecuencia de Operacion: 60 Hz
Tension de Alimentacion: 120 V~
Para servicio de productos, llame al departamento de servicio al cliente al 368-01-05
Número de producto:
UPC:
106670
READ AND SAVE THESE INSTRUCTIONS
Important Safety Instructions
LEA Y GUARDE ESTAS INSTRUCCIONES
Instrucciones Importantes de Seguridad
681131066709
Mantenimiento
Este ventilador es sólo para uso residencial. No está destinado para uso
comercial o industrial.
1. Nunca inserte los dedos, lápices u otros objetos extraños a través de la parrilla.
2. Desconecte el ventilador para pasarlo de una ubicación a otra.
3. Asegúrese que el ventilador se encuentre sobre una superficie estable
durante el uso para evitar que se vuelque.
4. Desconecte el ventilador antes de retirar la parrilla para la limpieza. Vuelva
instalar la parrilla antes de volver a conectar el ventilador a la fuente de alimentación.
5. ADVERTENCIA: Para reducir el riesgo de incendios, electrochoques o
lesiones personales:
a) No use este ventilador con ningún dispositivo de estado sólido
para control de velocidad.
b) Desenchufe el ventilador antes de limpiarlo o darle servicio.
c) Si usted desarma su ventilador, vuelva a armarlo completamente
antes de enchufarlo en el tomacorriente.
d) No use este ventilador en una ventana. La lluvia puede causar un
riesgo eléctrico.
106670
notched end
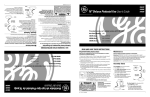
Assembly: Stand
Always unplug cord before cleaning or disassembly.
Cleaning: IMPORTANT! DO NOT immerse electrical parts in water!
Disassembled grills may be immersed to be cleaned with a mild detergent
and water. Wipe all other parts with soft cloth moistened with water and
mild detergent only. DRY ALL PARTS COMPLETELY BEFORE
REASSEMBLING AND RECONNECTING TO POWER SOURCE.
Lubrication: Motor is permanently lubricated.
Maintenance
681131066709
For product service, call customer service at 368-01-05
Item Stock Number: UPC:
Model 106670
Energy Consumption: 70 W
Operating Frequency: 60 Hz
Voltage: 120 V~
IMPORTER:
COMERCIALIZADORA MEXICO AMERICANA S.de R.L. de C.V.
NEXTENGO NO. 78
COLONIA SANTA CRUZ ACAYUCAN
DELEGACION AZCAPOTZALCO
MEXICO D.F. C.P. 02770
TELEFONO (5) 328-3500
RFC: CMA9109119L0
Para su seguridad
El enchufe de alimentación AC es de tipo polarizado (una de sus
cuchillas es más ancha que la otra) y sólo se encaja en los
tomacorrientes AC en un sentido. Si el enchufe no encaja bien en el
tomacorriente, inviértalo e intente insertarlo en posición invertida. Si
aún no encaja bien, solicite que un electricista calificado reemplace el
tomacorriente, o utilice un tomacorriente distinto.
No intente burlar esta característica de seguridad.
e
16" Deluxe Pedestal Fan with Thermostat
User’s Guide
106670
PRECAUCIÓN
RIESGO DE ELECTROCHOQUES
NO LO ABRA
EL RAYO CON
PUNTA DE FLECHA
DENTRO DEL
TRIÁNGULO ES
UN SÍMBOLO
DE ADVERTENCIA
PARA AVISARLE
DE LA PRESENCIA
DE“VOLTAJE
PELIGROSO” DENTRO
DEL PRODUCTO.
PRECAUCIÓN: PARA REDUCIR
EL RIESGO DE ELECTROCHOQUES,
NO RETIRE LA CUBIERTA
(O PARTE POSTERIOR) DEL
MOTOR. NO CONTIENE
COMPONENTES REPARABLES
POR EL USUARIO. SOLICITE
QUE PERSONAL DE SERVICIO
CALIFICADO REALICE LOS
TRABAJOS DE SERVICIO.
Siempre desenchufe el cordón antes de limpiar o desarmar el aparato.
Limpieza: ¡IMPORTANTE! ¡NO sumerja los componentes eléctricos en
agua! Las parrillas desarmadas pueden sumergirse en una solución de
agua y un detergente suave para la limpieza. Limpie todas las demás
piezas únicamente con un trapo suave humedecido con agua y un
detergente suave. SEQUE TODAS LAS PIEZAS COMPLETAMENTE
ANTES DE REARMARLAS Y CONECTAR EL APARATO A LA FUENTE
DE ALIMENTACIÓN.
Lubricación: El motor ha sido lubricado permanentemente.
Armado: Pedestal
Para altura alta (Vea el dibujo a la derecha.)
1. Coloque la base plana en el piso.
2. Empuje el tubo con conector en
la base, dejando el extremo con conector
hacia arriba. El girar el tubo a medida que se
lo empuja asegura que el tubo quede
plenamente asentado en la base.
3. Empuje el tubo sin conector en el
otro tubo, sobre el conector. El girar el
tubo a medida que se lo empuja asegura
que el tubo quede plenamente asentado
en la base.
extremo con
muesca
tubo con
conector
extremo con
muesca
base
ADVERTENCIA:
EL SIGNO DE
ADMIRACIÓN
DENTRO
DEL
TRIÁNGULO ES
UN SÍMBOLO DE
ADVERTENCIA
PARA AVISARLE
DE INSTRUCCIONES
IMPORTANTES
QUE ACOMPAÑAN
AL PRODUCTO.
Para evitar los incendios
y el riesgo de electrochoques,
no exponga esta producto
a la lluvia o humedad.
tubo sin
conector
Para altura baja (Vea el dibujo a la izquierda.)
1. Coloque la base plana en el piso.
2. Empuje el tubo sin conector en la base,
dejando el extremo con muesca hacia arriba.
El girar el tubo a medida que se lo empuja
asegura que el tubo quede plenamente
asentado en la base.
base
VEA LAS INDICACIONES EN EL FONDO / PARTE POSTERIOR DEL PRODUCTO.
New 3/01 2085341
1
Conjunto de la Cabeza
Ponga el conjunto de la cabeza a
dentro del tubo sin emplamador.
Alinear la parte de cierre de resorte del
lado del cuello del ensamblado de la
cabeza, con la ranura y el reten del tubo.
Deslizar el ensamblado de la cabeza por
el tubo y presionar firmemente. Se
sentirá un ruidillo definido cuando quede
asentado debidamente y el ensamblado
de la cabeza no gire.
Conjunto de la cabeza
Operación
Hacia Adelante:
Oscilar
Hacia Arriba:
Estacionario
Oscilacion: Empuje la perilla ubicada en la parte superior de la caja del motor para hacer que la cabeza del
ventilador se mueva de un lugar hacia otro.
cierre de
resorte
corte
tubo sin
emplamador
Armado: Aspa y parrilla
helice
helice
parrilla trasera
motor
Inclinacion: Este ventilador está equipado de cabeza
de ventilador de ángulo múltiple para la circulación del
aire por toda habitación o cuarto.
Siga lo que se indica a continuación para graduar
propiamente el "ángulo de inclinación" del ventilador.
1. Ponga una mano sobre el soporte exactamente por
debajo del cuello del ventilador.
2. Ponga la otra mano sobre la parte superior del ventilador.
3. Empuje o hale suavemente la cabeza del ventilador hasta que quede en la
posición deseada.
snaps
rejilla
trasera
2
Wal-Mart Stores, Inc., Bentonville, AR.
tab
notch
Nota: El ensamble de la cremallera en el ventilador tipo pedestal 16
pulgadas ventiladre de pedestal esta disenada para que trabe en cada
posición. Asi que cuando ajuste el angulo del ventilador oira un sonido lo
cual es normal.
snaps
Velocidad: Control la velocidad del ventilador con el cambio de velocidad
en la parte derecha del pedestal.
tapa de
ventilador
Termostato: Regular el Cuadrante del Termostato para que el Ventilador
refresque a nivel cómodo. El Termostato apagará y encenderá el Ventilador
automáticamente a medida que cambie la temperature de la habitación.
tuerca de plástico
2. Alinee el corte triangular (“∆”) en la parrilla
trasera con el poste triangular en la parte
superior de la cubierta delantera del motor. Asiente completamente la parrilla
trasera y fíjela con la tuerca de plástico,
apretándola en sentido horario.
menós luz: caliente
más luz: fresco
16 pulgadas ventiladre de
pedestal cambio del termostato
front grill
1. Incline el cabezal del ventilador
hacia atrás. Coloque la parrilla
trasera en el motor.
New 3/01 2085341 Printed in USA
106670
of the General Electric
g is a trademark
Company used under license by
5. With fan head in upright position, align ornament of front grill so it is
horizontal. Insert bottom of front grill into plastic rear grill. Tab at the
bottom of plastic rear grill should fit over notch on front grill. Snap
front grill into rear grill beginning at the bottom and working up both
sides. Note: No grill clips are needed for assembly.
tab
tab
g
g
ornament
cambio de
velocidad del ventilador
(el numero más bajo indica la
velocidad del ventilador)
adorno
pasador
4. Install ornament into front grill.
Insert tabs into rectangular slots.
Snap into place.
lengüeta
ranura
3. Slide blade onto motor shaft.
(Align groove on blade hub with
pin on motor shaft.)
To secure blade, screw
fan spinner onto shaft
counterclockwise until
tight on blade hub.
hendidura
groove
4. Instale el adorno en la parrilla
delantera. Inserte las lengüetas en
las ranuras rectangulares. Encájelo
a presión en su lugar.
parrilla
delantera
(lighted number indicates fan speed)
fan speed dial
16" Deluxe Pedestal Fan
thermostat dial
g
g
lengüeta
trabas a
presión
muesa
lengüeta
trabas a
presión
5. Con el cabezal del ventilador en posición vertical, alinee el adorno de la
parrilla delantera de modo que quede horizontal. Inserte la parte inferior
de la parrilla delantera en la parrilla trasera de plástico. La lengüeta en la
parte inferior de la parrilla trasera de plástico debe encajar sobre la muesca
en la parrilla delantera. Encaje la parrilla delantera a presión en la parrilla
trasera empezando en la parte inferior y avanzando hacia arriba en los dos
lados. Nota: No se necesitan pinzas para armar la parrilla.
2. Place other hand on top of fan.
1. Place one hand on the pole just under the fan
neck.
g
106670
es una marca comercial de General Electric
Company, usado bajo licencia por Wal-Mart
Stores, Inc., Bentonville, AR, EE.UU.
New 3/01 2085341 Impreso en USA
2
Down: Oscillate
lengüeta
more light: cooler
less light: warmer
3. Deslice el aspa en el eje del motor.
(Alinee la hendidura en el cubo del aspa
con el pasador en el eje del motor.)
Para sujetar el aspa, atornille el buje
del ventilador en el eje en
sentido contrahorario hasta
que quede apretado en el
cubo del aspa.
tabs
motor
blade
Note: The ratchet assembly on the 16" Deluxe Pedestal Fan with thermostat is designed for positive
lock positioning. Therefore, when adjusting the fan
angle, you will hear a clicking sound. This is normal.
3. Gently push or pull the fan head until it is in
the desired position.
tube without
connector
notched
end
snap
Tilting: This fan is equipped with a multi-angle fan
head for whole-room air circulation. To properly
adjust the "tilt angle" of your fan:
Oscillation: Push down oscillation knob on
motor housing to make fan head move from side
to side.
Operation
head assembly
adorno
slots
pin
ornament
2. Align triangular "∆" cut in the rear grill
with triangular post on top of front
motor cover. Fully seat rear grill and secure with plastic nut, turning clockwise.
1. Tilt fan head back.
Put rear grill on motor.
plastic nut
Thermostat: Adjust the thermostat dial so that the fan cools to a comfortable
level. The 16" Deluxe Pedestal Fan thermostat will automatically turn the fan off
and on as the room temperature changes.
fan
spinner
Speed: Control fan speed with fan speed dial at far right of body.
rear
grill
rear grill
Assembly: Blade & Grill
Place head assembly onto notched
end of tube without connector. Align
snap area on rear of head assembly
collar with the notch and catch on
tube. Slide the head assembly down
onto tube and press down firmly. You
will feel a definite click when seated
properly, and the head assembly will
not turn.
Assembly: Head
Up: Stationary
e
a
Ventilador de Lujo Tipo Pedestal de 16 pulgadas con Termostato
106670
Guía del Usuario
1
New 3/01 2085341
SEE MARKING ON BOTTOM / BACK OF PRODUCT
THE LIGHTNING
FLASH AND ARROWHEAD WITHIN THE
TRIANGLE IS A
WARNING SIGN
ALERTING YOU OF
"DANGEROUS
VOLTAGE" INSIDE
THE PRODUCT.
CAUTION: TO REDUCE THE
RISK OF ELECTRIC SHOCK,
DO NOT REMOVE MOTOR
COVER (OR BACK). NO
USER-SERVICEABLE PARTS
INSIDE. REFER SERVICING
TO QUALIFIED SERVICE
PERSONNEL.
THE EXCLAMATION
POINT WITHIN THE
TRIANGLE IS A
WARNING SIGN
ALERTING YOU OF
IMPORTANT
INSTRUCTIONS
ACCOMPANYING
THE PRODUCT
RISK OF ELECTRIC SHOCK
DO NOT OPEN
CAUTION
base
WARNING :
To prevent fire or electrical
shock hazard,
do not expose this product
to rain or moisture.
For Your Safety
The AC power plug is polarized (one blade is wider than
the other) and only fits into AC power outlets one way.
If the plug won't go into the outlet completely, turn the
plug over and try to insert it the other way. If it still won't
fit, contact a qualified electrician to change the outlet,
or use a different one.
Do not attempt to bypass this safety feature.
IMPORTADOR:
COMERCIALIZADORA MEXICO AMERICANA S.de R.L. de C.V.
NEXTENGO NO. 78
COLONIA SANTA CRUZ ACAYUCAN
DELEGACION AZCAPOTZALCO
MEXICO D.F. C.P. 02770
TELEFONO (5) 328-3500
RFC: CMA9109119L0
3. Be sure that the fan is on a stable surface when operating to avoid the
chance of it overturning.
4. Disconnect fan when removing grill for cleaning. Reinstall grill before
reconnecting to power supply.
Para servicio de productos, llame al departamento de servicio al cliente al 368-01-05
Número de producto:
UPC:
This fan is for residential use only. It is not intended to be used in
commercial or industrial settings.
1. Never insert fingers, pencils, or other foreign objects through the grill.
2. Disconnect fan when moving it from one location to another.
106670
681131066709
READ AND SAVE THESE INSTRUCTIONS
Important Safety Instructions
LEA Y GUARDE ESTAS INSTRUCCIONES
Instrucciones Importantes de Seguridad
Este ventilador es sólo para uso residencial. No está destinado para uso
comercial o industrial.
1. Nunca inserte los dedos, lápices u otros objetos extraños a través de la parrilla.
2. Desconecte el ventilador para pasarlo de una ubicación a otra.
3. Asegúrese que el ventilador se encuentre sobre una superficie estable
durante el uso para evitar que se vuelque.
4. Desconecte el ventilador antes de retirar la parrilla para la limpieza. Vuelva
instalar la parrilla antes de volver a conectar el ventilador a la fuente de alimentación.
5. ADVERTENCIA: Para reducir el riesgo de incendios, electrochoques o
lesiones personales:
a) No use este ventilador con ningún dispositivo de estado sólido
para control de velocidad.
b) Desenchufe el ventilador antes de limpiarlo o darle servicio.
c) Si usted desarma su ventilador, vuelva a armarlo completamente
antes de enchufarlo en el tomacorriente.
d) No use este ventilador en una ventana. La lluvia puede causar un
riesgo eléctrico.
106670
tube without
connector
2. Push tube without connector
into base, leaving notch end up.
Turning tube while pushing will
assure tube is fully seated in base.
For short height (See drawing at left.)
1. Place base flat on floor.
notched end
base
3. Push tube without connector onto
other tube, over connector.
Turning tube while pushing will assure
tube is fully seated on connector.
tube with
connector
a
5. WARNING: To reduce the risk of fire, electric shock or personal injury:
a) Do not use this fan with any solid-state speed control device.
b) Unplug fan before cleaning or servicing.
c) If you disassemble your fan, completely reassemble before plugging
into outlet.
d) Do not use this fan in a window. Rain may create an electrical hazard.
Modelo 106670
Consumo de Corriente: 70 W
Frecuencia de Operacion: 60 Hz
Tension de Alimentacion: 120 V~
2. Push tube with connector into base,
leaving connector end up.
Turning tube while pushing will assure
tube is fully seated in base.
For tall height (See drawing at right.)
1. Place base flat on floor.
notched end
Assembly: Stand
Cleaning: IMPORTANT! DO NOT immerse electrical parts in water!
Disassembled grills may be immersed to be cleaned with a mild detergent
and water. Wipe all other parts with soft cloth moistened with water and
mild detergent only. DRY ALL PARTS COMPLETELY BEFORE
REASSEMBLING AND RECONNECTING TO POWER SOURCE.
Lubrication: Motor is permanently lubricated.
Always unplug cord before cleaning or disassembly.
Maintenance
681131066709
For product service, call customer service at 368-01-05
Item Stock Number: UPC:
Model 106670
Energy Consumption: 70 W
Operating Frequency: 60 Hz
Voltage: 120 V~
IMPORTER:
COMERCIALIZADORA MEXICO AMERICANA S.de R.L. de C.V.
NEXTENGO NO. 78
COLONIA SANTA CRUZ ACAYUCAN
DELEGACION AZCAPOTZALCO
MEXICO D.F. C.P. 02770
TELEFONO (5) 328-3500
RFC: CMA9109119L0
Para su seguridad
El enchufe de alimentación AC es de tipo polarizado (una de sus
cuchillas es más ancha que la otra) y sólo se encaja en los
tomacorrientes AC en un sentido. Si el enchufe no encaja bien en el
tomacorriente, inviértalo e intente insertarlo en posición invertida. Si
aún no encaja bien, solicite que un electricista calificado reemplace el
tomacorriente, o utilice un tomacorriente distinto.
No intente burlar esta característica de seguridad.
PRECAUCIÓN: PARA REDUCIR
EL RIESGO DE ELECTROCHOQUES,
NO RETIRE LA CUBIERTA
(O PARTE POSTERIOR) DEL
MOTOR. NO CONTIENE
COMPONENTES REPARABLES
POR EL USUARIO. SOLICITE
QUE PERSONAL DE SERVICIO
CALIFICADO REALICE LOS
TRABAJOS DE SERVICIO.
EL SIGNO DE
ADMIRACIÓN
DENTRO
DEL
TRIÁNGULO ES
UN SÍMBOLO DE
ADVERTENCIA
PARA AVISARLE
DE INSTRUCCIONES
IMPORTANTES
QUE ACOMPAÑAN
AL PRODUCTO.
VEA LAS INDICACIONES EN EL FONDO / PARTE POSTERIOR DEL PRODUCTO.
New 3/01 2085341
Armado: Pedestal
Para altura alta (Vea el dibujo a la derecha.)
1. Coloque la base plana en el piso.
2. Empuje el tubo con conector en
la base, dejando el extremo con conector
hacia arriba. El girar el tubo a medida que se
lo empuja asegura que el tubo quede
plenamente asentado en la base.
3. Empuje el tubo sin conector en el
otro tubo, sobre el conector. El girar el
tubo a medida que se lo empuja asegura
que el tubo quede plenamente asentado
en la base.
extremo con
muesca
extremo con
muesca
tubo con
conector
base
ADVERTENCIA:
PRECAUCIÓN
RIESGO DE ELECTROCHOQUES
NO LO ABRA
EL RAYO CON
PUNTA DE FLECHA
DENTRO DEL
TRIÁNGULO ES
UN SÍMBOLO
DE ADVERTENCIA
PARA AVISARLE
DE LA PRESENCIA
DE“VOLTAJE
PELIGROSO” DENTRO
DEL PRODUCTO.
Mantenimiento
Siempre desenchufe el cordón antes de limpiar o desarmar el aparato.
Limpieza: ¡IMPORTANTE! ¡NO sumerja los componentes eléctricos en
agua! Las parrillas desarmadas pueden sumergirse en una solución de
agua y un detergente suave para la limpieza. Limpie todas las demás
piezas únicamente con un trapo suave humedecido con agua y un
detergente suave. SEQUE TODAS LAS PIEZAS COMPLETAMENTE
ANTES DE REARMARLAS Y CONECTAR EL APARATO A LA FUENTE
DE ALIMENTACIÓN.
Lubricación: El motor ha sido lubricado permanentemente.
Para evitar los incendios
y el riesgo de electrochoques,
no exponga esta producto
a la lluvia o humedad.
tubo sin
conector
Para altura baja (Vea el dibujo a la izquierda.)
1. Coloque la base plana en el piso.
2. Empuje el tubo sin conector en la base,
dejando el extremo con muesca hacia arriba.
El girar el tubo a medida que se lo empuja
asegura que el tubo quede plenamente
asentado en la base.
base
1
e
16" Deluxe Pedestal Fan with Thermostat
User’s Guide
106670
2
Wal-Mart Stores, Inc., Bentonville, AR.
Inclinacion: Este ventilador está equipado de cabeza
de ventilador de ángulo múltiple para la circulación del
aire por toda habitación o cuarto.
tab
snaps
snaps
g
g
Velocidad: Control la velocidad del ventilador con el cambio de velocidad
en la parte derecha del pedestal.
tapa de
ventilador
Termostato: Regular el Cuadrante del Termostato para que el Ventilador
refresque a nivel cómodo. El Termostato apagará y encenderá el Ventilador
automáticamente a medida que cambie la temperature de la habitación.
tor. Asiente completamente la parrilla
trasera y fíjela con la tuerca de plástico,
apretándola en sentido horario.
16 pulgadas ventiladre de
pedestal cambio del termostato
menós luz: caliente
cambio de
velocidad del ventilador
más luz: fresco
(el numero más bajo indica la
velocidad del ventilador)
adorno
pasador
4. Install ornament into front grill.
Insert tabs into rectangular slots.
Snap into place.
lengüeta
ranura
3. Slide blade onto motor shaft.
(Align groove on blade hub with
pin on motor shaft.)
To secure blade, screw
fan spinner onto shaft
counterclockwise until
tight on blade hub.
1. Incline el cabezal del ventilador 2. Alinee el corte triangular (“∆”) en la parrilla
trasera con el poste triangular en la parte
hacia atrás. Coloque la parrilla
superior de la cubierta delantera del motrasera en el motor.
front grill
tuerca de plástico
ornament
Nota: El ensamble de la cremallera en el ventilador tipo pedestal 16
pulgadas ventiladre de pedestal esta disenada para que trabe en cada
posición. Asi que cuando ajuste el angulo del ventilador oira un sonido lo
cual es normal.
tab
motor
notch
tubo sin
emplamador
Siga lo que se indica a continuación para graduar
propiamente el "ángulo de inclinación" del ventilador.
1. Ponga una mano sobre el soporte exactamente por
debajo del cuello del ventilador.
2. Ponga la otra mano sobre la parte superior del ventilador.
3. Empuje o hale suavemente la cabeza del ventilador hasta que quede en la
posición deseada.
tab
corte
5. With fan head in upright position, align ornament of front grill so it is
horizontal. Insert bottom of front grill into plastic rear grill. Tab at the
bottom of plastic rear grill should fit over notch on front grill. Snap
front grill into rear grill beginning at the bottom and working up both
sides. Note: No grill clips are needed for assembly.
cierre de
resorte
parrilla trasera
helice
helice
Hacia Arriba:
Estacionario
Oscilacion: Empuje la perilla ubicada en la parte superior de la caja del motor para hacer que la cabeza del
ventilador se mueva de un lugar hacia otro.
Armado: Aspa y parrilla
rejilla
trasera
Hacia Adelante:
Oscilar
of the General Electric
g is a trademark
Company used under license by
Ponga el conjunto de la cabeza a
dentro del tubo sin emplamador.
Alinear la parte de cierre de resorte del
lado del cuello del ensamblado de la
cabeza, con la ranura y el reten del tubo.
Deslizar el ensamblado de la cabeza por
el tubo y presionar firmemente. Se
sentirá un ruidillo definido cuando quede
asentado debidamente y el ensamblado
de la cabeza no gire.
Operación
106670
Conjunto de la cabeza
New 3/01 2085341 Printed in USA
Conjunto de la Cabeza
hendidura
groove
4. Instale el adorno en la parrilla
delantera. Inserte las lengüetas en
las ranuras rectangulares. Encájelo
a presión en su lugar.
slots
pin
tabs
(lighted number indicates fan speed)
fan speed dial
16" Deluxe Pedestal Fan
thermostat dial
plastic nut
Thermostat: Adjust the thermostat dial so that the fan cools to a comfortable
level. The 16" Deluxe Pedestal Fan thermostat will automatically turn the fan off
and on as the room temperature changes.
Speed: Control fan speed with fan speed dial at far right of body.
motor
rear grill
Assembly: Blade & Grill
Note: The ratchet assembly on the 16" Deluxe Pedestal Fan with thermostat is designed for positive
lock positioning. Therefore, when adjusting the fan
angle, you will hear a clicking sound. This is normal.
trabas a
presión
blade
3. Gently push or pull the fan head until it is in
the desired position.
2. Place other hand on top of fan.
Oscillation: Push down oscillation knob on
motor housing to make fan head move from side
to side.
Operation
Assembly: Head
head assembly
Tilting: This fan is equipped with a multi-angle fan
head for whole-room air circulation. To properly
adjust the "tilt angle" of your fan:
Down: Oscillate
Up: Stationary
2
snap
1. Place one hand on the pole just under the fan
neck.
es una marca comercial de General Electric
Company, usado bajo licencia por Wal-Mart
Stores, Inc., Bentonville, AR, EE.UU.
notched
end
g
tube without
connector
Place head assembly onto notched
end of tube without connector. Align
snap area on rear of head assembly
collar with the notch and catch on
tube. Slide the head assembly down
onto tube and press down firmly. You
will feel a definite click when seated
properly, and the head assembly will
not turn.
lengüeta
rear
grill
New 3/01 2085341 Impreso en USA
fan
spinner
trabas a
presión
5. Con el cabezal del ventilador en posición vertical, alinee el adorno de la
parrilla delantera de modo que quede horizontal. Inserte la parte inferior
de la parrilla delantera en la parrilla trasera de plástico. La lengüeta en la
parte inferior de la parrilla trasera de plástico debe encajar sobre la muesca
en la parrilla delantera. Encaje la parrilla delantera a presión en la parrilla
trasera empezando en la parte inferior y avanzando hacia arriba en los dos
lados. Nota: No se necesitan pinzas para armar la parrilla.
106670
less light: warmer
lengüeta
lengüeta
1. Tilt fan head back.
Put rear grill on motor.
g
muesa
more light: cooler
g
2. Align triangular "∆" cut in the rear grill
with triangular post on top of front
motor cover. Fully seat rear grill and secure with plastic nut, turning clockwise.
parrilla
delantera
adorno
ornament
3. Deslice el aspa en el eje del motor.
(Alinee la hendidura en el cubo del aspa
con el pasador en el eje del motor.)
Para sujetar el aspa, atornille el buje
del ventilador en el eje en
sentido contrahorario hasta
que quede apretado en el
cubo del aspa.