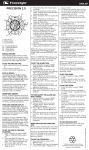
1
®
Stride
S4
S2
S3
S1
S5
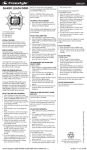
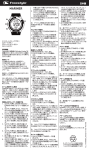
S1- Start/lap Button
S2- Stop/reset Button
S3- Mode/next Button
S4- Light Button
S5- Lap Button
SPECIAL FEATURE:
This Freestyle product features unique
Hydro Pushers®: these pushers can be
pressed under water to a dynamic water
pressure (not water depth) of 3 ATM.
DISPLAY MODES:
The watch has six display modes: NORMAL TIME, CHRONOGRAPH, RECALL,
TIMER, HEAT TIMER and ALARM.
To change from one display mode to
another, press S3 button once.
TO SET THE TIME AND CALENDAR:
1. Press S3 button to select NORMAL
TIME mode.
2. Press and hold S1 button to toggle
between Time Zone 1 (T1) and Time
Zone 2 (T2)
3. Press and hold S2 button, the
message “HOLD TO SET” will be displayed for approximately 2 seconds
and the Time Zone setting will blink.
4. Press S1 button to select Time Zone
1 (TIME 1) or Time Zone 2 (TIME 2) to
set.
5. Press S3 button, the hour digits will
blink.
6. Press S1 button to increase the hour
digits by one unit. Holding down the
button will speed up the process.
7. Press S3 button, the minute digits
will blink.
8. Press S1 button to set the minute
digits.
9. Press S3 button, the second digits
will blink.
10. Press S1 button to reset the second
digits to zero.
11. Press S3 button, the month digits
will blink.
12. Press S1 button to set the month
digits.
13. Press S3 button, the date digits will
blink.
14. Press S1 button to set the date
digits.
15. Press S3 button, the year digits will
blink.
16. Press S1 button to set the year
digits.
17. Press S3 button, the time format
setting will blink.
18. Press S1 button to toggle between
12-hour (12HR) format and 24-hour
(24HR) format.
19. Press S3 button, the date setting
ENGLISH
format will blink.
20. Press S1 button to toggle between
month-date (MM-DD) format and
date-month (DD-MM) format.
21. Press S3 button, the hourly chime
(CHIME) setting will blink.
22. Press S1 button to toggle between
ON and OFF of the hourly chime
setting.
23. Press S3 button once, the button
beep (BEEP) setting will blink.
24. Press S1 button to toggle between
ON and OFF of the button beep setting.
25. When finished making all the settings, press S2 button to confirm.
NOTE: In 12-hour format, the hour
digits are identified by “PM” for 12:00
P.M.-11:59 P.M.
NOTE: The day (of the week) is automatically calculated.
NOTE: The year digits range from 2008
to 2099.
TO USE THE CHRONOGRAPH:
1. Press S3 button to select CHRONOGRAPH mode.
2. The maximum number of laps that
can be stored in a new workout will
be displayed. If the lap memory is full,
the message “FULL” will be displayed
and a tune will be emitted.
3. The chronograph will then be displayed in its current state- stopped,
running, or reset.
4. To resume a stopped counting, press
S1 button to resume from where it
left off.
5. To start a new counting, reset the
chronograph to zero first. Press and
hold S2 button, the message “HOLD
TO CLR” will be displayed for approximately 2 seconds and the counter will
be reset to zero.
For changing the chronograph display
format:
In CHRONOGRAPH mode,
1. Make sure the chronograph is in the
reset state and there is no previous
lap record.
2. Press S4 button to toggle between
LAP format or SPL format.
3. If LAP format is selected, the lap time
(individual lap time) will be displayed.
If SPL format is selected, the split
time (cumulative lap time) will be
displayed.
For the measurement of elapsed time:
In CHRONOGRAPH mode,
1. Press S1 button to start counting.
2. To stop counting, press S2 button.
Press S1 button to resume from
where it left off.
3. To reset to zero, press S2 button to
stop counting, then press and hold S2
button, the message “HOLD TO CLR”
will be displayed for approximately 2
seconds and the counter will be reset
to zero.
For the measurement of split time:
In CHRONOGRAPH mode,
1. Press S1 button to start counting.
2. While the chronograph is running,
press S1/S5 button to register a lap.
3. Depends on the chronograph display
format chosen, the individual lap time
of the previous lap (if LAP format is
chosen) or the cumulative lap time
(if SPL format is chosen) will be
displayed. The lap number of the
previous lap will be blinking at the top
line of the display.
After 10 seconds, the current elapsed
time and the current lap number will
be displayed.
4. Repeat the last step until all the laps
have been registered.
5. To stop counting, press S2 button.
The total accumulated lap time will
be displayed.
6. To reset to zero, press and hold S2
button, the message “HOLD TO CLR”
will be displayed for approximately 2
seconds and the counter will be reset
to zero.
For using the 5-second countdown start:
In CHRONOGRAPH mode,
1. Make sure the chronograph is in the
reset state and there is no previous
lap record.
2. Press and hold S2 button, the number
“5” will flash for approximately 2
seconds, and then the 5-second
countdown start will be activated.
3. Press S1 button to initiate the 5-second count down.
4. After 5 seconds (count down to zero),
a long beep will be emitted and the
chronograph will be initiated.
NOTE: The chronograph can count
up to a maximum time of 99:59:59:99
(99hours, 59 minutes, 59:99 seconds).
If the chronograph has reached the
maximum time as specified, press and
hold S2 button to reset the chronograph
to zero.
NOTE: You can leave the chronograph
running while switching over to other
operating modes. In NORMAL TIME
mode, the chronograph indicator will
appear as a reminder.
For saving the lap record:
In CHRONOGRAPH mode,
1. Upon finishing a counting, press and
hold S4 button, the message “HOLD
TO SAVE” will be displayed for approximately 2 seconds.
2. If there is sufficient memory, the
lap record will be stored and the
remaining available lap memory will
be displayed.
If there is insufficient memory, the
lap record will be stored along with as
many of the oldest splits as possible
and the message “FULL” will be
displayed.
TO USE THE RECALL MODE:
1. Press S3 button to select RECALL
mode.
2. If there is lap record stored, the data
stamp (showing the day of the week,
date and month) of a stored data will
blink at the upper line of the display.
If there is no lap record stored, the
message “no DATA” will be displayed.
3. Press S1 button to cycle the date
stamp(s) of the corresponding lap
record(s). This has no effect if there is
no lap record stored.
4. When the desired lap record is displayed, press S2 button to select.
5. Press S1 button to cycle the details of
the selected lap record in the order of:
®
To delete individual lap record:
In RECALL mode,
When the desired lap record is selected,
press and hold S2 button, the message
“HOLD TO DEL” will be displayed for approximately 2 seconds. The lap record of
the current date stamp will be deleted.
To delete all lap records:
In RECALL mode,
In the lap record selection page where
the date stamp of a stored data is
blinking, press and hold S4 button. The
message “ALL DEL” will be displayed for
approximately 2 seconds. All lap records
will then be deleted and the remaining
available lap memory will be displayed.
NOTE: When displaying the fastest/
slowest lap, the message “BEST”/
”SLOW” and the corresponding lap
number will toggle every 2 seconds at
the upper line of the display.
NOTE: When displaying the individual
lap record, press S4 button to toggle
between LAP format or SPL format.
TO SET THE TIMER:
1. Press S3 button to select TIMER
mode. The TIMER will be displayed
in its current state- stopped, running, or reset.
2. If the TIMER is in stopped state,
press S2 button once to reset the
timer. If the timer is running, press
S2 button to stop the counting first
before resetting the TIMER.
3. When the TIMER is in reset state,
press and hold S2 button, the message “TIMER SET” will be displayed
and the countdown interval selection
“INT-01” will blink.
4. Press S1 button to select the countdown interval selection to set.
5. Press S3 button, the hour digits will
blink.
6. Press S1 button to increase the
digits by one unit. Holding down the
button will speed up the process.
7. Press S3 button, the minute digits
will blink.
8. Press S1 button to set the minute
digits.
9. Press S3 button, the second digits
will blink.
10. Press S1 button to set the second
digits.
11. Press S3 button, the Action-at-End*
option will blink.
12. Press S1 button to select among
Countdown-Countdown-Stop
(CD-STP), Countdown-CountdownRepeat(CD-REP) and CountdownCount-Up (CD-UP).
13. When finished making all the settings, press S2 button to confirm the
settings.
To set all countdown interval reset
time(s) to zero:
In TIMER mode,
When the timer is in stopped state,
press and hold S2 button. The message “CLR” will be displayed and all
countdown interval reset time(s) will be
set to zero.
ENGLISH
TO SET THE ALARM TIME:
1. Press S3 button to select ALARM
mode.
2. Press and hold S2 button, the message “ALARM SET” will be displayed,
and the alarm entry number will
blink.
3. Press S1 button to select the alarm
entry to set.
4. Press S3 button, the hour digits will
blink.
5. Press S1 button to increase the hour
digits by one unit. Holding down the
NOTE: The TIMER can be set up to a
button will speed up the process.
maximum of 23 hours, 59 minutes and
6. Press S3 button, the minute digits
59 seconds.
will blink.
7. Press S1 button to set the minute
TO USE THE TIMER:
digits.
1. Press S3 button to select TIMER
8. Press S3 button, the alarm fremode. The timer will be displayed in
quency selection will blink.
its current state-stopped, running,
9. Press S1 button to cycle among daily
or reset.
(DAILY), Sunday weekly (SU WKY),
2. To resume a counting, press S1 button
Monday weekly (MO WKY)…Saturday
to resume from where it left off.
weekly (SA WKY).
3. To start a new counting, reset the
10. When finished making all the settimer first. Press S2 button to reset
tings, press S2 button to confirm.
the countdown interval(s) to the preset
The alarm will be automatically
value.
turned on.
4. When the countdown interval 1 has
reached zero and there is no other
NOTE: In 12-hour format, the hour digits
countdown interval(s) set to non-zero
are identified by “PM” for 12:00P.M. to
value, the timer will stop and a timer
11:59 P.M.
alert tune will be emitted.
If a countdown interval has reached
TO TURN ON/OFF THE ALARM:
zero and there is other countdown
1. Press S3 button to select ALARM
interval(s) set to non-zero value, a
mode.
timer interval alert tune will be emit2. Press S2 button to toggle between
ted and the timer will continue to the
ALARM 1 (ALM 1) and ALARM 2
next countdown interval.
(ALM 2).
5. To stop counting, press S2 button.
3. Press S1 button to toggle between ON
Press S1 button to resume from
and OFF of the alarm.
where it left off.
4. If the alarm is off, the message “OFF”
6. To reset the timer, press S2 button to
will appear.
stop counting. Press S2 button again
If the alarm is ON, the alarm indicator
will appear.
to reset the count down interval(s) to
the preset value.
WHEN AN ALARM GOES OFF:
An alarm tune will be emitted and the
NOTE: You can leave the timer running
light will flash at the designated time
while switching over to other operatwhen the alarm is activated. To stop the
ing modes. In NORMAL TIME mode,
tune and flashing light, press any button.
the timer indicator will appear as a
reminder.
When no button is pressed after the tune
TO SET THE HEAT TIMER:
is done, the watch will automatically
1. Press S3 button to select HEAT TIMER enter a snooze mode. The alarm will go
mode.
off again after 5 minutes.
2. Press and hold S2 button, the message “HT TMR SET” is displayed.
To deactivate the snooze mode, press
3. Press S2 button to alter the timer
S3 button to select ALARM mode, then
setting among 15, 20, 25, 30 and 35
press S1 button to deactivate the alarm.
minutes.
will keep
NOTE: The alarm indicator
TO USE THE HEAT TIMER:
flashing in NORMAL TIME or ALARM
1. Press S3 button to select HEAT TIMER mode when the watch is in the snooze
mode.
mode.
2. The heat timer will then be displayed
in its current state-stopped, running
TO USE THE BACKLIGHT:
or reset.
Press S4 button to turn on the backlight
3. To resume a stopped counting, press
for approximately 3 seconds.
S1 button to resume from where it
left off.
4. To start a new counting, reload the
heat timer first.
Press S1 button to stop counting, then
Press S2 button to reload the heat
timer.
5. When reaching zero in a countdown, a
tune will be emitted.
NOTE*: Illustration of the Action-at-End
options:
a) Countdown-Countdown-Stop- the
TIMER will stop when the countdown
reaches zero.
b) Countdown-Count-Up- the TIMER will
count up to a maximum of 23 hours,
59 minutes and 59 seconds when the
countdown reaches zero.
c) Countdown-Countdown-Repeat- the
TIMER will repeat the countdown
when the countdown reaches zero.
NOTE: You can leave the heat timer
running while switching over to other
operating modes.
To reduce carbon foot print, these
Freestyle instructions are printed with
soy inks on recycled paper.
FS1152-STRIDE-AG7891-R04
lap time (TOTAL), fastest lap (BEST),
slowest lap (SLOW) and individual lap
records in sequential order.
®
Stride
S4
S2
S3
S1
S5
S1 – Botón de iniciar/vuelta
S2 – Botón de parar/resetear
S3 – Botón de modor/siguiente
S4 – Botón de luz
S5 – Botón de vuelta
CARACTERÍSTICA ESPECIAL:
Este producto de Freestyle tiene una
característica única, Hydro Pushers®:
Los pushers se pueden pulsar bajo agua
con una presión de agua dinámica (no la
profundidad) de 3 ATM.
MODOS DE PANTALLA:
El reloj tiene seis vistas: HORA NORMAL,
CRONO, LLAMADA, TEMPORIZADOR ,
TEMPORIZADOR CALOR y ALARMA.
Para cambiar de un modo de pantalla a
otro, presione una vez el botón S3.
PARA CONFIGURAR LA HORA Y EL
CALENDARIO:
1. Presione el botón S3 para seleccionar
el modo de HORA NORMAL.
2. Presione y sostenga el botón S1 para
alternar entre Zona Horaria 1 (T1) y
Zona Horaria 2 (T2).
3. Presione y sostenga el botón S2, el
mensaje “HOLD TO SET” aparecerá
en pantalla por unos dos segundos y
titilará el ajuste de Zona Horaria.
4. Presione el botón S1 para seleccionar
Zona Horaria 1 (T1) o Zona Horaria 2
(T2) para su ajuste.
5. Presione el botón S3 una vez, titilarán
los dígitos de la Hora.
6. Presione el botón S1 una vez para
incrementar los dígitos de Hora de uno
en uno. Manteniendo presionado el
botón acelerará el proceso.
7. Presione el botón S3 una vez, titilarán
los dígitos de Minutos.
8. Presione el botón S1 para ajustar los
dígitos de Minutos.
9. Presione el botón S3 una vez, los
dígitos de Segundos titilarán.
10.Presione el botón S1 para reajustar los
Segundos a cero.
11.Presione el botón S3 una vez, titilarán
los dígitos del Mes.
12.Presione el botón S1 para ajustar los
dígitos del Mes.
13.Presione el botón S3 una vez, titilarán
los dígitos de la Fecha.
14.Presione el botón S1 para ajustar los
dígitos de la Fecha.
15.Presione el botón S3 una vez, titilarán
los dígitos del Año.
16.Presione el botón S1 para ajustar los
dígitos del Año.
17.Presione el botón S3 una vez, titilará el
ajuste de Formato de Hora.
18.Presione el botón S1 para alternar
entre los formatos de 12 horas (12HR)
y el de 24 horas (24HR).
19.Presione el botón S3 una vez, titilará el
ajuste de Formato de Fecha.
20.Presione el botón S1 para alternar
entre los formatos de mes-fecha (MM-
ESPAÑOL
DD) y fecha-mes (DD-MM).
21.Presione el botón S3 una vez, titilará el
ajuste de Campana Horaria (CHIME).
22.Presione el botón S1 para alternar
entre ACTIVADO y DESACTIVADO del
ajuste de la Campana.
23.Presione el botón S3 una vez, titilará el
ajuste de Pitido de Botón (BEEP).
24.Presione el botón S1 para alternar
entre ACTIVADO y DESACTIVADO del
Pitido de Botón.
25.Tras culminar con los ajustes, presione
el botón S2 para confirmar.
línea superior de la pantalla.
Tras diez segundos, el tiempo acumulado actual y el número actual de vuelta
aparecerán en la pantalla.
4. Repita el último paso hasta que todas
las vueltas hayan sido registradas.
5. Para detener la cuenta, presione el
botón S2. El tiempo total acumulado de
vueltas aparecerá en pantalla.
6. Para reajustar a cero, presione el botón
S2, aparecerá el mensaje “HOLD TO
CLR” por unos dos segundos y el contador será reajustado a cero.
NOTA: En el formato de 12 horas, los
dígitos de Hora son identificados con “PM”
para 12:00-23:59.
Uso de la cuenta regresiva de cinco segundos de inicio:
En el modo de CRONOGRAFO,
1. Asegúrese que el CRONOGRAFO se
encuentre en estado de reajuste y que
no exista un registro de vuelta previo.
2. Presione y sostenga el botón S2,
el número “5” titilará por unos dos
segundos, y luego se activará la cuenta
regresiva de cinco segundos de inicio.
3. Presione el botón S1 para iniciar la
cuenta regresiva de cinco segundos.
4. Tras cinco segundos (cuenta regresiva
a cero), sonará un largo pitido y el
CRONOGRAFO será iniciado.
NOTA: El día de la semana es calculado
automáticamente.
NOTA: Los dígitos del Año van del 2008
al 2099.
PARA USAR EL CRONÓMETRO:
1. Presione el botón S3 para seleccionar
el modo CRONOGRAFO.
2. El número máximo de vueltas que
puede guardar en un nuevo ejercicio,
aparecerá en pantalla. Si la memoria
de vueltas está llena, aparecerá el mensaje “FULL” y será emitido un pitido.
3. El CRONOGRAFO aparecerá en pantalla
en su estado actual – parado, en marcha o a cero.
4. Para reanudar la cuenta, presione el
botón S1 parareanudar desde donde
había dejado.
5. Para iniciar una nueva cuenta, reajuste
el CRONOGRAFO a cero primero.
Presione y sostenga el botón S2, aparecerá el mensaje “HOLD TO CLR” por
unos dos segundos y el contador será
reajustado a cero.
NOTA: El CRONOGRAFO puede contar
hasta un tiempo máximo de 99:59:59.99
(99 horas.59 minutos:59.99 segundos).
Si el CRONOGRAFO ha alcanzado el
tiempo máximo especificado, presione
y sostenga el botón S2 para reajustar el
CRONOGRAFO a cero.
NOTA: Puede dejar corriendo el
CRONOGRAFO mientras cambia a otros
modos de operación. En el modo de HORA
NORMAL, el indicador de CRONOGRAFO
aparecerá como recordatorio.
Grabar un registro de vuelta:
En el modo de CRONOGRAFO,
Cambio del Formato de Pantalla del
1. Tras terminar la cuenta, presione y
CRONOGRAFO:
sostenga el botón S4, aparecerá el
En el modo CRONOGRAFO,
mensaje “HOLD TO SAVE” por unos 2
1. Asegúrese que el CRONOGRAFO se
segundos.
encuentre en estado de reajuste y que
2. Si hay suficiente memoria, el registro
no exista un registro de vuelta previo.
de vuelta será guardado y el total de
2. Presione el botón S4 para alternar entre
memoria restante disponible aparecerá
formato de LAP (VUELTA) o de SPL.
en pantalla.Si hay insuficiente memo3. Si ha seleccionado formato de LAP,
ria, el registro de vuelta será guardado
el tiempo de vuelta (tiempo de vuelta
junto a la mayor cantidad posible de tiindividual) aparecerá en pantalla. Si ha
empos divididos anteriores y aparecerá
seleccionado formato de SPL, el el mensaje “FULL”.
tiempo dividido (tiempo de vuelta
acumulado) apare cerá en pantalla.
PARA USAR LA MODO DE RECORDATORIO:
Medición del tiempo transcurrido:
1. Presione el botón S3 para seleccionar
En el modo CRONOGRAFO,
el modo de RECORDATORIO (RECALL),
1. Presione el botón S1 para iniciar la
2. Si no hay registro de vuelta guardado,
cuenta.
la estampa de fecha (mostrando el día
2. Para detener la cuenta, presione el
de la semana, fecha y mes) de datos
botón S2. Presione el botón S1 para
guardados titilará en la línea superior
reanudar desde donde había dejado.
de la pantalla. Si no hay registro de
3. Para reajustar a cero, presione el botón
vuelta guardado, aparecerá el mensaje
S2 para detener la cuenta. Presione
“no DATA”.
y sostenga el botón S2, aparecerá el
3. Presione el botón S1 para ciclar las
mensaje “HOLD TO CLR” por unos dos
estampas de fecha correspondientes a
segundos y el contador será reajustado
los registros de vuelta. a cero.
Esto no tiene efecto alguno en caso que
no haya registro de vueltas.
Medición del tiempo dividido:
4. Cuando aparezca el registro de vuelta
En el modo CRONOGRAFO,
deseado, presione el botón S2 para
1. Presione el botón S1 para iniciar la
seleccionar.
cuenta.
5. Presione el botón S1 para ciclar los
2. Mientras está corriendo el CROdetalles del registro de vuelta seleccioNOGRAFO, presione una vez el botón
nado en el orden de: tiempo de vuelta
S1/S5 para registrar una vuelta.
(TOTAL), vuelta más rápida (BEST),
3. Dependiendo del formato elegido de
vuelta más lenta (SLOW) y tiempos indi
CRONOGRAFO, el tiempo individual de
viduales de vuelta en orden secuencial.
vuelta de la vuelta previa (si ha elegido
formato de LAP) o el tiempo acumulado
de vuelta (si ha elegido formato de SPL) Para borrar un registro de vuelta
individual:
aparecerá en pantalla. El número de
vuelta de la anterior vuelta titilará en la En el modo de RECORDATORIO,
®
Para borrar todos los registros de vuelta:
En el modo de RECORDATORIO,
En la pagina de selección de registro de
vuelta, donde la estampa de fecha de
datos guardados se encuentre titilando,
presione y sostenga el botón S4. Aparecerá el mensaje “ALL DEL” por unos 2
segundos. Todos los registros de vuelta
serán borrados y se mostrará la memoria
de vuelta restante.
NOTA: Cuando visualice la vuelta más
rápida / lenta, el mensaje “BEST”/ “SLOW”
y el número de vuelta correspondiente
alternarán en pantalla cada 2 segundos en
la línea superior de la pantalla.
NOTA: Cuando visualice un registro
individual de vuelta, presione el botón
S4 para alternar entre formato de LAP o
formato de SPL.
PARA CONFIGURAR EL TEMPORIZADOR:
1. Presione el botón S3 para seleccionar
modo de TEMPORIZADOR (TIMER).
Aparecerá el TEMPORIZADOR en su
estado actual – parado, en marcha o a
cero.
2. Si el TEMPORIZADOR se encuentra
detenido, presione una vez el botón
S2 para reajustar el TEMPORIZADOR.
Si el TEMPORIZADOR está corriendo,
presione el botón S2 para detener la
cuenta antes de reajustar el TEMPORIZADOR.
3. Cuando el TEMPORIZADOR esté en
modo de reajuste, presione y sostenga
el botón S2, aparecerá el mensaje
“TIMER SET” y titilará la Selección de Intervalo de Cuenta Regresiva “INT01”.
4. Presione el botón S1 para seleccionar
la Selección de Intervalo de Cuenta
Regresiva a ajustar.
5. Presione el botón S3 una vez, titilarán
los dígitos de Hora.
6. Presione el botón S1 una vez para
incrementar los dígitos de uno en
uno. Manteniendo presionado el botón
acelerará el proceso.
7. Presione el botón S3, titilarán los
dígitos de Minutos.
8. Presione el botón S1 para ajustar los
dígitos de Minutos.
9. Presione el botón S3, titilarán los
dígitos de los Segundos.
10.Presione el botón S1 para ajustar los
dígitos de los Segundos.
11.Presione el botón S3 una vez, titilará la
opción acción al final*.
12.Presione el botón S1 para seleccionar
entre Cuenta Regresiva – Detención
de Cuenta Regresiva (CD-STP), Cuenta
Regresiva – Repetición de Cuenta Regresiva (CD-REP) y Cuenta Regresiva – Cuenta Ascendente (CD-UP).
13.Tras culminar con los ajustes, presione
el botón S2 para confirmar los ajustes.
Para ajustar a cero todos los Tempos de
Intervalo de Cuenta Regresiva:
En el modo de TEMPORIZADOR,
Cuando el TEMPORIZADOR esté detenido,
presione y sostenga el botón S2. El mensaje “CLR” aparecerá y todos los Tempos
de Intervalo de Cuenta Regresiva serán
reajustados a cero.
NOTA*: Ilustración de las opciones de
acción al final:
a) Cuenta Regresiva – Detención de
ESPAÑOL
Cuenta Regresiva (CD-STP) – el
TEMPORIZADOR se detendrá cuando la
cuenta regresiva alcance cero.
b) Cuenta Regresiva – Cuenta Ascendente
(CD-UP) – el TEMPORIZADOR contará
hasta un máximo de 9 horas 59 minutos
59 segundos cuando la cuenta regresiva
alcance cero.
c) Cuenta Regresiva – Repetición de
Cuenta Re-gresiva (CD-REP) – el
TEMPORIZADOR se repetirá la cuenta
cuando la cuenta regresiva alcance
cero.
NOTA: El TEMPORIZADOR puede ser
ajustado hasta un máximo de 23 horas 59
minutos y 59 segundos.
PARA USAR EL TEMPORIZADOR:
1. Presione el botón S3 para seleccionar
el modo TEMPORIZADOR (TIMER).
El TEMPORIZADOR aparecerá en su
estado actual – parado, en marcha o a
cero.
2. Para reanudar la cuenta, presione el
botón S1 para reanudar desde donde
había dejado.
3. Para iniciar una nueva cuenta, reajuste
el TEMPORIZADOR primero. Presione
el botón S2 para reajustar los Intervalos
de Cuenta Regresiva a su valor por
defecto.
4. Cuando el intervalo de cuenta regresiva
1 haya alcanzado cero y no hay otro
Intervalo de Cuenta Regresiva ajustado
a un valor que no sea cero, el TEMPORIZADOR se detendrá y una Melodía de Alerta del TEMPORIZADOR sonará.
Si un Intervalo de Cuenta Regresiva
haya alcanzado cero y sí hay otro
Intervalo de Cuenta Regresiva ajustado
a un valor que no sea cero, el TEMPORIZADOR se detendrá y una Melodía de
Alerta de Intervalo del TEMPORIZADOR
sonará y
el TEMPORIZADOR continuará al
siguiente Intervalo de Cuenta Regresiva.
5. Para detener la cuenta, presione el
botón S2. Presione el botón S1 para
reanudar desde donde había dejado.
6. Para reajustar el TEMPORIZADOR,
presione el botón S2 para detener la
cuenta. Presione el botón S2 nuevamente para reajustar el Intervalo de Cuenta Regresiva a su valor por defecto.
NOTA: El temporizador puede seguir
contando mientras usted usa otros modos
de funcionamiento.
PARA CONFIGURAR LA HORA DE LA
ALARMA:
1. Presione el botón S3 para seleccionar
el modo de ALARMA.
2. Presione y sostenga el botón S2, aparecerá el mensaje “ALARM SET”, y titilará
el Número de Entrada de ALARMA.
3. Presione el botón S1 para seleccionar
la Entrada de Alarma a ajustar.
4. Presione el botón S3 una vez, titilarán
los dígitos de Hora.
5. Presione el botón S1 una vez para
incrementar los dígitos de Hora de
uno en uno. Si mantiene presionado el
botón acelerará el proceso.
6. Presione el botón S3 una vez, titilarán
los dígitos de Minutos.
7. Presione el botón S1 para ajustar los
dígitos de Minutos.
8. Presione el botón S3 una vez, titilará la
Selección de Frecuencia de Alarma.
9. Presione el botón S1 para ciclar entre
diaria (DAILY), Dominical (SU WKY),
lunes semanal (MO WKY)… sábado
semanal (SA WKY).
10.Tras culminar con los ajustes, presione
el botón S2 para confirmar los ajustes.
La ALARMA se activará automáticamente.
NOTA: En el formato de 12 horas, los
dígitos de Hora son identificados con “PM”
para 12:00 P.M a 11:59 P.M.
PARA ENCENDER/APAGAR LA ALARMA:
1. Pulse el botón S3 para seleccionar el
modo de ALARMA.
2. Presione el botón S2 para alternar
entre ALARMA 1 (ALM 1) y ALARMA 2
(ALM 2).
3. Presione el botón S1 para alternar
entre ALARMA activada y apagada.
4. Si la ALARMA está apagada, aparecerá
el mensaje “OFF”. Si la ALARMA está
activada, el indicador de ALARMA
aparecerá.
CUANDO SALTA LA ALARMA:
Una melodía de ALARMA será emitida y
la luz titilará a la hora designada cuando
sea activada la ALARMA. Para detener
la melodía y la luz titilando, presione
cualquier botón.
NOTA: Puede dejar corriendo el TEMPORIZADOR mientras cambia a otros
Si la melodía de ALARMA se produce sin
modos. En el modo de HORA NORMAL, el
aparecerá interrupción del usuario, el reloj entrará
indicador de TEMPORIZADOR
como recordatorio.
automáticamente al modo de snooze.
La ALARMA sonará nuevamente tras 5
PARA CONFIGURAR EL TEMPORIZADOR
minutos.
DE CALOR:
1. Pulse el botón S3 para seleccionar el
Para desactivar el modo snooze, presione
modo de TEMPORIZADOR DE CALOR.
el botón S3 para seleccionar el modo
2. Mantenga pulsado el botón S2, verá el
ALARMA, luego presione el botón S1 para
mensaje “HT TMR SET” en la pantalla.
desactivar la ALARMA.
3. Pulse el botón S2 para configurar el
seguirá
temporizador en 15, 20, 25, 30 y 35
NOTA: El indicador de ALARMA
titilando en los modos de HORA NORMAL
minutos.
o ALARMA cuando el reloj haya entrado al
modo de snooze.
PARA USAR LA TEMPORIZADOR DE
CALOR:
PARA USAR LA LUZ DE FONDO:
1. Pulse el botón S3 para seleccionar el
Pulse el botón S4 para encender la luz de
modo de TEMPORIZADOR DE CALOR.
fondo durante unos 3 segundos.
2. Aparecerá el temporizador de calor
en el estado en que esté: parado, en
marcha o a cero.
3. Pulse el botón S1 para retomar la
cuenta ahí donde se quedó.
4. Para iniciar una cuenta nueva, primero
hay que poner el temporizador a cero.
Pulse el botón S1 para interrumpir la
cuenta y después pulse el botón S2
Para reducir la huella del carbono,
para recargar el temporizador.
las instrucciones de Freestyle se han
5. Después de haber llegado a cero en la
imprimido con tinta de soja en papel
cuenta atrás, sonará un tono.
reciclado.
FS1152-STRIDE-AG7891-R04
Cuando haya sido seleccionado el registro
de vuelta deseado, presione y sostenga el
botón S2, aparecerá el mensaje “HOLD
TO DEL” por unos 2 segundos. El registro
de vuelta de la estampa de fecha actual
será borrado.
®
Stride
S4
S2
S3
S1
S5
S1 – Start/Runde-Taste
S2 – Stopp/Rücksetzen-Taste
S3 – Modus/Weiter-Taste
S4 – Licht-Taste
S5 – Runde-Taste
BESONDERHEITEN:
Dieses Freestyle-Produkt ist mit einzigartigen Hydro-Pusher® ausgestattet: Diese
Knöpfe können bis zu einem dynamischen
Wasserdruck (nicht Wassertiefe) von 3 ATM
unter Wasser gedrückt.
ANZEIGEMODI:
Die Uhr hat sechs Anzeigenmodi: NORMALZEIT, STOPPUHR, SPEICHERABRUF,
TIMER,HITZE-TIMER und ALARM.
Betätigen Sie S3 einmal, um von einem
Anzeigemodus in einen anderen Modus
zuschalten.
UM ZEIT UND KALEDER EINSTELLEN:
1. Betätigen Sie S3, um den NORMALZEITModus aufzurufen.
2. Halten Sie S1 gedrückt, um zwischen der
Anzeige für Zeitzone 1 (T1) und Zeitzone
2 (T2) uzuschalten.
3. Halten Sie S2 gedrückt; die Meldung
“HOLD TO SET” erscheint ca. 2 Sekunden lang, und die Zeitzonen-Einstellung
blinkt nun.
4. Betätigen Sie S1, um die gewünschte
Zeitzone (T1) oder Zeitzone 2 (T2) einzustellen.
5. Betätigen Sie S3 einmal, und die Stundenanzeige blinkt nun.
6. Betätigen Sie S1 einmal, um die
Stundenanzeige um jeweils eine Einheit
aufwärts einzustellen. Halten Sie die Taste gedrückt, um die
Einstellung schnell vorzunehmen.
7. Betätigen Sie S3 einmal, die Minutenanzeige blinkt nun.
8. Betätigen Sie S1, um die Minutenanzeige
einzustellen.
9. Betätigen Sie S3 einmal, und die Sekundenanzeige blinkt nun.
10.Betätigen Sie S1, um eine Rücksetzung
der Sekun denanzeige auf null auszuführen.
11.Betätigen Sie S3 einmal, und die Monatsanzeige blinkt nun.
12.Betätigen Sie S1, um die Monatsanzeige
einzustellen.
13.Betätigen Sie S3 einmal, und die Anzeige
für das Datum blinkt nun.
14.Betätigen Sie S1, um das Datum einzustellen.
15.Betätigen Sie S3 einmal, und die Anzeige
für das Jahr blinkt nun.
16.Betätigen Sie S1, um die Anzeige für das
Jahr einzustellen.
17.Betätigen Sie S3 einmal, und die Einstellung für das Zeitanzeige-Format blinkt
nun.
18.Betätigen Sie S1, um zwischendem
12-Stundenformat (12HR), und dem
24-Stundenformat (24HR) umzuschalten.
19.Betätigen Sie S3 einmal, und die Einstellung für das Datumsformat blinkt nun.
20.Betätigen Sie S1, um zwischen den
Datumsformaten “Monat-Datum”
DEUTSCH
(MM-DD) und “Datum-Monat” (DD-MM)
umzuschalten.
21.Betätigen Sie S3 einmal, und die
Stundenläuten-Einstellung (CHIME)
blinkt nun.
22.Betätigen Sie S1, um die StundenläutenFunktion “EIN” oder “AUS” zu schalten.
23.Betätigen Sie S3 einmal, um die
Tastentöne-Funktion einzustellen. Die
Piepton-Anzeige (BEEP) blinkt nun.
24.Betätigen Sie S1, um die Tastentöne
“EIN” oder “AUS” zu schalten.
25.Betätigen Sie S2, um alle Einstellungen
abschließend zu.
HINWEIS: Im 12-Stundenformat erscheint
der “PM”-Indikator für eine Zeit zwischen
12:00-23:59.
HINWEIS: Der Wochentag wird automatisch
entsprechend der Kalendereinstellung
eingestellt.
HINWEIS: Die Kalendereinstellung hat eine
Reichweite von 2008 bis 2099.
UM DEN CHRONOGRAPen ZU BENUTZEN:
1.Betätigen Sie S3, um den STOPPUHRModus (CHRONO) aufzurufen.
2.Der Rundenspeicher zeigt nun die
maximale Anzahl der Runden an, die
während eines Laufs gespeichert werden
können. Sobald der Rundenspeicher voll
ist, erscheint die Meldung “FULL”, und ein
Piepton ertönt.
3.Die STOPPUHR-Anzeige erscheint nun im
jeweils aktiven Betriebsmodus – gestoppt,
in Betrieb oder zurückgesetzt.
4.Betätigen Sie S1, um eine Zeitmessung an
der Stelle fortzusetzen, an der diese zuvor
unterbro chen wurde.
5.Führen Sie zuerst eine Rücksetzung der
STOP-PUHR aus, um eine neue Zeitmessung zu beginnen.
Halten Sie S2 gedrückt, und die Meldung
“HOLD TO CLR” erscheint ca. 2 Sekunden
lang, und der Rundenzähler zeigt wieder
Null an.
Umschalten des STOPPUHR-Anzeigeformates:
Im STOPPUHR-Modus,
1.Stellen Sie sicher, dass eine Rücksetzung
der STOPPUHR ausgeführt wurde, und
dass keine Rundenzeiten im Speicher
vorhanden sind.
2.Betätigen Sie S4, um zwischen dem
Modus für LAP oder SPL umzuschalten.
3.Wenn das LAP-Format gewählt wird, dann
wird die Rundenzeit (einfache Rundenzeit)
angezeigt.Wenn das SPL-Format gewählt
wird, dann wird die Zwischenzeit (kumulative Rundenzeit) angezeigt.
Messung eines Zeitintervalls:
Im STOPPUHR-Modus,
1.Betätigen Sie S1, um die Zeitmessung zu
beginnen.
2.Betätigen Sie S2, um die Zeitmessung
anzuhalten. Betätigen Sie S1, um die
Zeitmessung an der Stelle fortzusetzen,
wo Sie diese angehalten haben.
3.Betätigen Sie S2, um die Zeitmessung
anzuhalten, und um eine Rücksetzung
der Anzeige auf Null auszuführen; halten
Sie S2 gedrückt, und die Meldung “HOLD
TO CLR” erscheint ca. 2 Sekunden lang,
und anschließend zeigt der Rundenzähler
wieder “Null” an.
Messung einer Zwischenzeit:
Im STOPPUHR-Modus,
1.Betätigen Sie S1, um mit der Zeitzählung
zu beginnen.
2.Betätigen Sie S1/S5 einmal, während
die STOPPUHR läuft, um eine Runde zu
speichern.
3.Abhängig vom eingestellten STOPPUHRAnzeige format erscheint nun eine
einfache Zwischenzeit für die zuvor
gelaufene Runde (wenn LAP eingestellt
ist), oder eine kumulative Rundenzeit
(wenn SPL einges tellt ist). Die Nummer
der vorherigen Runde blinkt in der oberen
Zeile der Anzeige.
Nach 10 Sekunden erscheint wieder die
aktuelle Gesamtzeit und die Rundennummer für einen Lauf.
4.Wiederholen Sie die obigen Schritte, bis
alle Rundenzeiten ermittelt und gespeichert wurden.
5.Betätigen Sie S2, um die Zeitmessung zu
beenden. Die Gesamtzeit für alle Runden
wird nun angezeigt.
6.Halten Sie S2 gedrückt, um eine
Rücksetzung auf Null auszuführen; die
Meldung “HOLD TO CLR”erscheint nun
ca. 2 Sekunden lang, und anschließend
wird wieder “Null” für den Rundenzähler
angezeigt.
Einsatz des 5-Sekunden Start-Countdown:
Im STOPPUHR-Modus,
1.Stellen Sie sicher, dass eine Rücksetzung
für den STOPPUHR ausgeführt wurde,
und dass keine zuvor ermittelten Rundenzeiten gespeichert sind.
2.Halten Sie S2 gedrückt, und “5” blinkt ca.
2 Sekunden in der Anzeige; anschließend
ist die Uhr bereit für den 5-SekundenCountdown für den Start.
3.Betätigen Sie S1, um den 5-SekundenCountdown zu starten.
4.Nach 5 Sekunden (Countdown auf Null)
ertönt ein langer Piepton, und die Zeitmessung der STOPPUHR läuft nun.
HINWEIS: Der STOPPUHR kann maximal
ein Zeitintervall von “99:59:59.99” (99
Stunden.59 Minuten:59.99 Sekunden)
messen. Halten Sie S2 gedrückt, um eine
Rücksetzung der STOPPUHR-Anzeige auf
Null auszuführen, sobald das maximale
Zeitintervall angezeigt wird.
HINWEIS: Sie können die STOPPUHR im
Hintergrund weiterlaufen lassen, während
Sie in andere Betriebsmodi umschalten.
Im NORMALZEIT-Modus erscheint nun der
STOPPUHR-Indikator
, wodurch Sie darauf hingewiesen werden, dass die Stoppuhr
im Hintergrund läuft.
Speichern einer Rundenzeit:
In STOPPUHR-Modus,
1.Halten Sie S4 gedrückt, nachdem Sie
eine Rundenzeit ermittelt haben, und die
Meldung “HOLD TO SAVE” erscheint ca. 2 Sekunden lang.
2.Wenn der Rundenzeit-Speicher nicht
voll ist, dann wird die gemessene Zeit
gespeichert, und die Anzahl der Runden,
die noch gespeichert werden können wird
angezeigt.
Wenn kein Speicher mehr frei ist,
dann wird die zuletzt gemessene Zeit
gespeichert, und die älteste gespeicherte
Rundenzeit wird überschrieben; die
Meldung “FULL” erscheint nun.
UM DIE RECALL-MODUS ZU BENUTZEN:
1.Betätigen Sie S3, um den RECALL-Modus
(RECALL) zu aktivieren.
2.Wenn eine Rundenzeit gespeichert wurde,
dann erscheint das Datum (Wochentag,
Datum und Monat) für den gespeicherten
Eintrag blinkend in der oberen Zeile der
Anzeige.
Wenn keine Rundenzeit vorhanden ist,
dann erscheint die Meldung “no DATA”.
3.Betätigen Sie S1, um die Einträge für
einen Lauf in zeitlicher Reihenfolge
entsprechend der Rundennummer in die
Anzeige aufzurufen. Die Taste hat keine Funktion, wenn keine Rundenzeiten
gespeichert wurden.
4.Betätigen Sie S2, sobald die gewünschte
Runde angezeigt wird, um die Einzelheiten
für diese Runde anzuzeigen.
5.Betätigen Sie nun S1, um die gespeicherten Daten für diesen Lauf in der
nachfolgenden Ordnung anzuzeigen:
Rundenzeit (TOTAL), Schnellste Runde
(BEST), Langsamste Runde (SLOW) und
Rundenzeiten in zeitlicher Abfolge.
®
Alle Rundenzeiten löschen:
Im RECALL-Modus,
Halten Sie S4 gedrückt, während die
Datumsanzeige für eine ausgewählte Rundenzeit blinkend in der Anzeige erscheint.
Die Meldung “ALL DEL” erscheint nun
ca. 2 Sekunden lang. Alle gespeicherten
Rundenzeit-Einträge werden nun gelöscht,
und die Anzahl der Runden, die noch/wieder
gespeichert werden können wird angezeigt.
HINWEIS: Während der Anzeige der schnellsten/langsamsten Rundenzeit, erscheint
die Meldung “BEST”/“SLOW”, und die entsprechende Rundennummern erscheinen
abwechselnd alle 2 Sekunden in der oberen
Zeile der Anzeige.
HINWEIS: Betätigen Sie S4, während eine
einzelne Rundenzeit angezeigt wird, um
zwischen den Rundenzeit-Anzeigeformaten
LAP oder SPL umzuschalten.
UM DEN TIMER EINSTELLUNG:
1. Betätigen Sie S3, um den TIMERModus aufzurufen. Die TIMER-Anzeige
erscheint nun im jeweils aktiven
Betriebsmodus – gestoppt, in Betrieb
oder zurückgesetzt.
2. Betätigen Sie S2 einmal, wenn der
TIMER im Stopp-Modus funktioniert, um
eine Rücksetzung des TIMERS auszuführen. Betätigen Sie S2, wennder TIMER
läuft, um einen laufenden Countdown
zu beenden, bevor Sie eine Rücksetzung
des TIMERS ausführen.
3. Halten Sie S2 gedrückt, nachdem die
Rücksetzung des TIMERS ausgeführt
wurde, und die Meldung “TIMER SET”
erscheint, und die Einstellung für das
Countdown-Intervall “INT-01” blinkt nun.
4. Betätigen Sie S1, um die Auswahl
für die Einstellung des gewünschten
Countdown-Intervalls auszufüh-ren.
5. Betätigen Sie S3 einmal, und die Stundenanzeige blinkt nun.
6. Betätigen Sie S1 einmal, um die Anzeige
um jeweils 1 Einheit aufwärts einzustellen. Halten Sie die Taste gedrückt,
um die Einstellung schnell aufwärts
vorzunehmen.
7. Betätigen Sie S3, und die Minutenanzeige blinkt.
8. Betätigen Sie S1, um die Minutenanzeige
einzus-tel-len.
9. Betätigen Sie S3, und die Sekundenanzeige blinkt.
10.Betätigen Sie S1, um die Sekundenstellen einzustellen.
11.Betätigen Sie S3 einmal; die Anzeige
blinkt, und Sie können nun verschiedene
Optionen zur Funktion-en-Auswah*
betätigen.
12.Betätigen Sie S1, um zwischen den Optionen “Countdown - Countdown-Stopp
(CD-STP)”, “Countdown - CountdownWiederhohlen (CD-REP)” und “Countdown - Count-Up (CD-UP)” auswählen.
13.Bestätigen Sie die Einstellungen mit S2,
nachdem Sie die gewünschten Einstellungen ausgeführt haben.
Rücksetzung aller Countdown-Intervalle
auf “Null”:
Im TIMER-Modus,
Halten Sie S2 gedrückt, während der TIMER
im Stoppmodus funktioniert. Die Meldung
“CLR” erscheint nun, und alle TimerCountdown-Intervalle werden nun auf “Null”
eingestellt.
HINWEIS*: Beschreibung der abschließenden Funktionen-Auswahl:
DEUTSCH
a)Countdown - Countdown-Stopp (CDSTP) – der TIMER hält an, sobald der
Countdown auf Null gezählt hat.
b)Countdown - Count-Up (CD-UP) – Der
TIMER zählt ein Zeitintervall bis max. 9
Stunden 59 Minuten und 59 Sekunden
aufwärts, nachdem der Countdown auf
Null gezählt hat.
c)Countdown - Countdown-Wiederholen
(CD-REP) – der TIMER wiederholt den
Countdown, sobald dieser auf Null
gezählt hat.
HINWEIS: Der TIMER kann auf ein Intervall
von maximal 23 Stunden, 59 Minuten und 59
Sekunden eingestellt werden.
UM DEN TIMER ZU BENUTZEN:
1.Betätigen Sie S3, um den TIMER-Modus
zu aktivieren. Die aktuelle TIMER-Einstellung wird nun angezeigt – gestoppt, in
Betrieb oder zurückgesetzt.
2.Betätigen Sie S1, um den Timer an der
Stelle wieder zu aktivieren, an der Sie den
Countdown unterbro chen haben.
3.Betätigen Sie zuerst S2, und führen Sie
eine Rücketzung des Countdown-Intervalls auf den Vorgabe wert aus, um einen
neuen Countdown zu starten.
4.Nachdem das Countdown-Intervall “1”
auf Null gezählt hat, und kein anderes
Countdown-Intervall eingestellt wurde,
d.h. nicht auf “Null” eingestellt ist, dann
hält der TIMER an, und ein Alarmton ist hörbar.
Sobald ein Countdown-Intervall auf Null
gezählt hat, und ein zweites CountdownIntervall eingestellt wurde, d.h. nicht auf
“Null” eingestellt ist, dannist ein Alarmton
hörbar, und anschließend beginnt der
TIMER mit dem Countdown des nächsten
Countdown-Intervalls.
5.Betätigen Sie S2, um den Countdown zu
beenden. Betätigen Sie S1, um den Timer
wieder an dem Zeitpunkt einzuschalten, an dem Sie den
Countdown unterbrochen haben.
6.Betätigen Sie S2, um eine Rücksetzung
de TIMERS auszuführen, und um den
Countdown zu beenden. Betätigen Sie
anschließend nochmals S2, um eine
Rückstellung aller Countdown-Intervalle
auf die zuvor eingestellten Vorgabewerte auszuführen.
HINWEIS: Sie können den TIMER im
Hintergrund laufen lassen, während Sie
in andere Betriebsmodi umschalten. Im
NORMALZEIT-Modus erscheint der TIMERIndikator , um Sie darauf hinzuweisen,
dass der Timer im Hintergrund läuft.
UM EINSTELLUNG DES HEAT TIMER:
1. Drücken Sie die Taste S3, um den HEAT
TIMER-Modus zu wählen.
2. Drücken und halten Sie die Taste S2,
worauf die Nachricht “HT TMR SET”
angezeigt wird.
2. Drücken Sie die Taste S2, um die
entsprechende Timereinstellung unter 1,
3, 5, 10, 15, 20, 25, 30, 45 und 60 Minuten
zu wählen.
UM DEN HEAT TIMER ZU BENUTZEN:
1. Drücken Sie die Taste S3, um den HEAT
TIMER-Modus zu wählen.
2. Der Heat Timer zeigt dann den laufenden
Status an - gestoppt, in Betrieb oder
zurückgesetzt.
3. Zur Fortsetzung einer unterbrochenen
Zählung ab der letzten Messung, drücken
Sie die Taste S1.
4. Zur Wiederaufnahme der Messung
muss zuerst der Heat Timer neu geladen
werden.
Drücken Sie zum Abbruch der Messung
die Taste S1; anschließend drücken und
halten Sie die Taste S2, um den Heat
Timer neu zu laden.
5. Wenn beim Countdown Null erreicht wird,
ertönt ein Signalton.
HINWEIS: Während des Wechsels zu
anderen Modi können Sie den Heat Timer
weiterlaufen lassen.
UM DIE ALARMZEIT EINSTELLEN:
1. Betätigen Sie S3, um den ALARM-Modus
zu aktivieren.
2. Halten Sie S2 gedrückt; die Meldung
“ALARM SET” erscheint, und die Einstellungen des gewünschten ALARMS
blinken nun.
3. Betätigen Sie S1, um die gewünschte
Anzeigestelle für die Einstellung auszuwählen.
4. Betätigen Sie S3 einmal, und die Stundenanzeige blinkt nun.
5. Betätigen Sie S1 einmal, um die Stundenanzeige eine Einheit aufwärts einzustellen. Halten Sie die Taste gedrückt,
um die Einstellung schnell auf-wärts
vorzunehmen.
6. Betätigen Sie S3 einmal, und die
Minutenanzeige blinkt nun.
7. Betätigen Sie S1, um die Minutenanzeige
einzustellen.
8. Betätigen Sie S3 einmal, und die Einstellung für das Alarm-Intervall blinkt nun.
9. Betätigen Sie S1, um die Einstellungen
wie folgt auszuführen: Täglich (DAILY),
Sonntag wöchentlich (SU WKY), Montag
wöchentlich (MO WKY)… Samstag
wöchentlich (SA WKY).
10.Bestätigen Sie mittels S2, nachdem
alle Einstellungen ausgeführt wurden.
Die ALARM-Funktion wird automatisch
“EIN” geschaltet, sobald Sie die Einstellung abschließen.
HINWEIS: Im 12-Stundenformat erscheint
ein “PM”-Indikator vor einer Zeit zwischen
12:00 P.M bis 23:59 P.M.
UM DEN ALARM EIN/AUS ZU SCHALTEN:
1. Drücken Sie Taste S3 um den ALARMModus zu wählen.
2. Betätigen Sie S2, um zwischen ALARM
1 (ALM 1) und ALARM 2 (ALM 2) umzuschalten.
3. Betätigen Sie S1, um die ALARM-Funktion “EIN”und “AUS” zu schalten.
4. Wenn der ALARM “AUS” geschaltet ist,
dann erscheint die Anzeige “OFF”.
Wenn der ALARM “EIN” geschaltet ist,
dann erscheint die Meldung “EIN”, und
der ALARM-Indiak-tor
erscheint.
WENN ALARM ERTÖNT:
Ein ALARM-Ton ertönt, und die Anzeigebeleuchtung blinkt zur eingestellten
ALARM-Zeit. Betätigen Sie eine beliebige
Taste, um den Alarmton und die blinkende
Anzeigebeleuchtung jederzeit abzuschalten.
Wenn der Benutzer den ALARM-Ton nicht
manuell abschaltet, dann wird automatisch die Alarmwiederholung aktiviert. Der
ALARM ertönt nun nach 5 Minuten erneut.
Betätigen Sie S3, um den ALARM-Modus
aufzurufen, und die Weckalarm-Wiederholung zu deaktivieren; betätigen Sie
anschließend S1, um die ALARM-Funktion
abzuschalten.
HINWEIS: Der Alarm-Indikator
blinkt
fortlaufend in der NORMALZEIT-Anzeige
oder im ALARM-Modus, sobald die Weckalarm-Wiederholung aktiviert wurde.
UM DIE HINTERGRUNDBELEUCHTUNG ZU
BENUTZEN:
Drücken Sie Taste S4 um die Hintergrundbeleuchtung für etwa 3 Sekunden
anzuschalten.
Diese Freestyle-Gebrauchsanweisung
wurde mit Tinte auf Sojabasis auf
Recycling-Papier gedruckt um den
Kohleausstoß zu reduzieren.
FS1152-STRIDE-AG7891-R04
Löschen einer Rundenzeit:
Im RECALL-Modus,
Halten Sie S2 gedrückt, während die Einträge für eine Rundenzeit angezeigt werden,
und die Meldung “HOLD TO DEL” erscheint
nun ca. 2 Sekunden lang. Die Einträge für
diese Runde werden nun aus dem Speicher
gelöscht.
®
Stride
S4
S2
S3
S1
S5
S1 – Bouton démarrage/tour
S2 – Bouton arrêt/réinitialisation
S3 – Bouton mode/suivant
S4 – Bouton lumière
S5 – Bouton tour
FONCTION SPECIALE:
Ce produit Freestyle unique offre la fonction
unique Hydro Pushers®: ces boutons peuvent être pressés sous l’eau à une pression
dynamique de l’eau (ce qui ne correspond
pas à la profondeur) de 3 ATM.
MODES D’AFFICHAGE:
La montre offre six modes d’affichage: AFFICHAGE NORMAL DE L’HEURE, CHRONO,
RAPPEL, MINUTEUR,MINUTEUR DE
CHALEUR et ALARME.
Pour alterner entre les différents mode
d’affichage, appuyez une fois sur le bouton
S3.
RÉGLAGE DE L’HEURE ET DU CALENDRIER:
1. Appuyez sur le bouton S3 pour sélectionner le mode AFFICHAGE NORMAL DE
L’HEURE.
2. Maintenez le bouton S1 enfoncé pour
alterner entre l’affichage de l’heure du
premier (T1) ou celle du second (T2)
fuseau horaire.
3. Maintenez le bouton S2 enfoncé. Le message “HOLD TO SET” s’affiche environ
deux secondes sur l’écran et les unités
de l’heure du fuseau horaire clignotent.
4. Appuyez sur le bouton S1 pour régler le
premier fuseau horaire (T1) ou le second
fuseau horaire (T2).
5. Appuyez une fois sur le bouton S3: les
unités des heures clignotent.
6. Appuyez sur le bouton S1 pour augmenter les unités des heures une par
une. Gardez le bouton enfoncé pour faire
défiler les unités rapidement.
7. Appuyez une fois sur le bouton S3. Les
unités des minutes clignotent.
8. Appuyez sur le bouton S1 pour régler les
unités des minutes.
9. Appuyez une fois sur le bouton S3. Les
unités des secondes clignotent.
10.Appuyez sur le bouton S1 pour réinitialiser les unités des secondes.
11.Appuyez une fois sur le bouton S3. Les
unités du mois clignotent.
12.Appuyez sur le bouton S1 pour régler les
unités du mois.
13.Appuyez une fois sur le bouton S3. Les
chiffres de la date clignotent.
14.Appuyez sur le bouton S1 pour régler
la date.
15.Appuyez une fois sur le bouton S3. Les
unités de l’année clignotent.
16.Appuyez sur le bouton S1 pour régler les
unités de l’année.
17.Appuyez une fois sur le bouton S3. Le
format de l’heure clignote sur l’écran.
18.Appuyez sur le bouton S1 pour sélectionner le format 12 heures (12HR) ou 24
heures (24HR).
FRANÇAIS
19.Appuyez une fois sur le bouton S3. Le
format de la date clignote.
20.Appuyez sur le bouton S1 pour sélectionner le format mois-date (MM-DD) ou le
format date-mois (DD-MM).
21.Appuyez une fois sur le bouton S3.
L’écran de réglage du carillon des heures
(CHIME) clignote.
22.Appuyez sur le bouton S1 pour ACTIVER
ou DÉSACTIVER le carillon des heures.
23.Appuyez une fois sur le bouton S3.
L’écran de réglage du bouton Beep
(BEEP) clignote.
24.Appuyez sur le bouton S1 pour ACTIVER
ou DÉSACTIVER la fonction Bip.
25.Après avoir terminé le réglage, appuyez
sur le bouton S2 pour confirmer.
du tour (si le format SPL est sélectionné)
s’affiche sur l’écran. Le numéro du tour
précédent clignote sur la ligne supérieure de l’écran.
Au bout de dix secondes, la montre affiche
la durée cumulée et le numéro du tour
actuel.
4.Répétez l’étape précédente pour enregistrer tous les tours.
5.Pour arrêter le chronomètre, appuyez sur
le bouton S2. La durée cumulée totale du
tour s’affiche.
6.Pour remettre le chronomètre à zéro,
maintenez le bouton S2 enfoncé. Le message “HOLD TO CLR” apparaît pendant
deux secondes et le compteur se remet à
zéro.
NOTE: Dans le format d’affichage 12 heures,
le témoin “PM” apparaît sur l’écran lorsqu’il
est entre 12:00-23:59 heures.
Utilisation du compte à rebours de cinq
secondes:
Dans le mode CHRONOMÈTRE,
1.Vérifiez que le CHRONOMÈTRE est réinitialisé et qu’aucun tour n’est enregistré.
2.Maintenez le bouton S2 enfoncé: le chiffre
“5” clignote environ deux secondes et le
mode compte à rebours de 5 secondes est
activé.
3.Appuyez sur le bouton S1 pour mettre
en marche le compte à rebours de cinq
secondes.
4.Au bout de cinq secondes (lorsque le
compte à rebours atteint “zéro”), la
montre émet un long bip et le CHRONOMÈTRE est réinitialisé.
NOTE: Le jour de la semaine est calculé
automatiquement par la montre.
NOTE: L’année peut être réglée entre 2008
et 2099.
UTILISATION DU CHRONOMÈTRE:
1.Appuyez sur le bouton S3 pour sélectionner le mode CHRONOMÈTRE.
2.Le nombre maximum de tours pouvant
être enreg-istrés s’affiche sur l’écran. Si la
mémoire des tours est pleine, le message
“FULL” s’affiche sur l’écran et la montre
émet un bip.
3.Le CHRONOMÈTRE affiche ensuite les
données qui correspondent au mode dans
lequel il se trouve – compteur arrêté,
compteur en cours ou réinitialisé.
4.Pour que le chronomètre recommence à
compter là où il s’était arrêté, appuyez sur
le bouton S1.
5.Pour que le chronomètre compte à partir
de zéro, réinitialisez-le. Maintenez le
bouton S2 enfoncé: le message “HOLD TO
CLR” s’affiche alors deux secondes sur
l’écran et le compteur se remet à zéro.
Pour changer le format d’affichage des données du CHRONOMÈTRE:
Dans le mode CHRONOMÈTRE,
1.Vérifiez que le CHRONOMÈTRE est réinitialisé et qu’aucun tour n’est enregistré.
2.Appuyez sur le bouton S4 pour sélectionner le format LAP ou SPL.
3.La durée du tour (durée individuelle du
tour) est affiché si vous sélectionnez le
format LAP. Si le format SPL est sélectionné, la durée du tour inter médiaire
(durée cumulée du tour) est affichée.
Mesure du temps écoulé:
Dans le mode CHRONOMÈTRE,
1.Appuyez sur le bouton S1 pour que le chro
nomètre commence à compter.
2.Pour qu’il s’arrête de compter, appuyez
sur le bouton S2. Appuyez sur le bouton
S1 pour que le chronomètre recommence
à compter là où il s’était arrêté.
3.Pour remettre le chronomètre à zéro,
appuyez sur le bouton S2 pour l’arrêter.
Gardez le bouton S2 enfoncé: le message
“HOLD TO CLR” s’affiche alors environ 2
secondes et le chronomètre est remis à
zéro.
Mesure du temps intermédiaire:
Dans le mode CHRONOMÈTRE,
1.Appuyez sur le bouton S1 pour commencer à compter le temps.
2.Pendant que le CHRONOMÈTRE est en
marche, appuyez une fois sur le bouton
S1/S5 pour enregistrer un tour.
3.En fonction du format d’affichage sélectionné pour le CHRONOMÈTRE, la durée
individuelle du tour précédent (si le format
LAP est sélectionné) ou la durée cumulée
NOTE: Le CHRONOMÈTRE peut enregistrer des tours d’une durée maximale de
99:59:59.99 (99 heures.59 minutes:59.99
secondes). Lorsque le CHRONOMÈTRE atteint la valeur maximale indiquée,
maintenez le bouton S2 enfoncé pour le
remettre à zéro.
NOTE: Vous pouvez laisser le CHRONOMÈTRE en marche tout en changeant de
mode. Dans le mode AFFICHAGE NORMAL
DE L’HEURE, le témoin CHRONOMÈTRE apparaît sur l’écran pour vous rappeler que
le chrono est en marche.
Enregistrement d’un tour:
Dans le mode CHRONOMÈTRE,
1.Lorsque le chronomètre a fini de compter,
maintenez le bouton S4 enfoncé. Le message “HOLD TO SAVE” s’affiche pendant 2
secondes environ.
2.Si la mémoire n’est pas pleine, la montre
enregistre les données du tour et la
mémoire de tours disponible est affichée.
Si l’espace mémoire n’est pas suffisant, la durée du tour est enregistrée ainsi que le
nombre maximum de tours intermédiaires
précédents et le message “FULL” apparaît
sur l’écran.
UTILISATION DU MODE RAPPEL:
1.Appuyez sur le bouton S3 pour sélectionner le mode RAPPEL (RECALL).
2.Si des tours sont enregistrés, la date (jour
de la semaine, date et mois) correspondant aux données enregistrées clignote
sur la ligne su périeure de l’écran.
S’il n’existe pas de tour en mémoire, le
message“no DATA” apparaît.
3.Appuyez sur le bouton S1 pour faire défiler
les différentes dates correspondant à
différents tours enregistrés. L’écran
n’affiche aucune donnée si aucun tour
n’est enregistré.
4.Lorsque l’écran affiche la date du tour
recherché, appuyez sur le bouton S2 pour
sélectionner cette date.
5.Appuyez sur le bouton S1 pour faire défiler
l’information détaillée relative au tour
sélectionné dans l’ordre suivant: durée du
tour (TOTAL), tour le plus rapide (BEST),
tour le plus lent (SLOW) et enregistrements individuels du tour dans l’ordre.
®
Pour efface les données de tous les tours:
Dans le mode RAPPEL,
Dans le mode sélection du tour, lorsque
la date correspondant des données
enregistrées clignote, maintenez le bouton
S4 enfoncé. Le message “ALL DEL” s’affiche
pendant environ 2 secondes. Toutes les données des tours sont effacées et la mémoire
disponible restante est affichée sur l’écran.
NOTE: Lorsque la montre affiche le tour
le plus rapide/le plus lent, le message
“BEST”/“SLOW” et le numéro du tour correspondant s’affichent en alternance toutes
les deux secondes sur la ligne supérieure.
NOTE: Lorsque la montre affiche un tour
individuel, appuyez sur le bouton S4 pour
alterner entre le format LAP ou SPL.
RÉGLAGE DE LA MINUTERIE:
1. Appuyez sur le bouton S3 pour sélectionner le mode MINUTERIE (TIMER). Le
mode actuel de la MINUTERIE est affiché
– compteur arrêté, compteur en cours ou
réinitialisé.
2. Lorsque la MINUTERIE est arrêtée,
appuyez une fois sur le bouton S2 pour la
réinitialiser. Lorsqu’elle est en marche,
appuyez sur le bouton S2 pour l’arrêter
avant de la réinitialiser.
3. Lorsque la MINUTERIE est réinitialisée, maintenez le bouton S2 enfoncé.
Le message “TIMER SET” s’affiche et le
compte à rebours “INT-01” clignote.
4. Appuyez sur le bouton S1 pour sélectionner le compte à rebours à régler.
5. Appuyez une fois sur le bouton S3. Les
unités des heures clignotent.
6. Appuyez une fois sur le bouton S1 pour
faire défiler les chiffres une unité après
l’autre. Gardez le bouton enfoncé pour
faire défiler les unités rapidement.
7. Appuyez sur le bouton S3 et les unités
des minutes clignoteront.
8. Appuyez sur le bouton S1 pour régler les
minutes.
9. Appuyez sur le bouton S3: les secondes
clignot-eront.
10.Appuyez sur le bouton S1 pour régler les
secondes.
11.Appuyez une fois sur le bouton S3.
L’option de fin de cycle* clignote.
12.Appuyez sur le bouton S1 pour sélectionner le mode compte à rebours – compte
à rebours–arrêt(CD-STP), compte à
rebours – compte à rebours–répétition
(CD-REP) et compte à rebours – minuterie (CD-UP).
13.Une fois tous les réglages terminés,
appuyez sur le bouton S2 pour les
confirmer.
Pour remettre tous les comptes à rebours
à zéro:
Dans le mode MINUTERIE,
Lorsque la MINUTERIE est arrêtée,
maintenez le bouton S2 enfoncé. Le message “CLR” s’affiche et tous les comptes à
rebours sont remis à zéro.
NOTE*: Description des options de fin
de cycle:
a)Compte à rebours – compte à rebours–
arrêt (CD-STP) - La MINUTERIE s’arrête
lorsque le compte à rebours atteint zéro.
b)Compte à rebours – minuterie (CDUP) - Lorsque le compte à rebours
est terminé, la MINUTERIE se FRANÇAIS
met à compter jusqu’à un maximum de 9
heures 59 minutes et 59 secondes.
c)Compte à rebours – compte à rebours–
répétition (CD-REP): le compte à rebours
recommence lorsqu’il atteint zéro.
NOTE: La MINUTERIE peut atteindre une
durée maximale de 23 heures 59 minutes et
59 secondes.
UTILISATION DE LA MINUTERIE:
1.Appuyez sur le bouton S3 pour sélectionner le mode MINUTERIE (TIMER). Le
mode actuel de la MINUTERIE est affiché
– compteur arrêté, compteur en cours ou
réinitialisé.
2.Pour reprendre un décompte, appuyez sur
le bouton S1 afin que le compte à rebours
recom-mence là où il s’était arrêté.
3.Pour démarrer un nouveau décompte, réinitialisez d’abord la MINUTERIE. Appuyez
sur le bouton S2 pour réinitialiser le(s)
compte(s) à rebours sur la valeur réglée
par défaut.
4.Lorsque le compte à rebours 1 atteint
“zéro” et qu’aucun autre compte à rebours
n’est réglé sur une valeur supérieure à
zéro, la MINUTERIE s’arrête et une sonnerie d’alerte retentit.
Lorsqu’un compte à rebours atteint “zéro”
et qu’un ou plusieurs autres comptes
à rebours sont réglés sur une valeur
supérieure à zéro, une sonnerie d’alerte
retentit et le compte à rebours suivant
commence.
5.Pour arrêter la minuterie, appuyez sur le
bouton S2. Appuyez sur le bouton S1 pour
qu’elle reprenne là où elle s’était arrêtée.
6.Pour réinitialiser la MINUTERIE, appuyez
sur le bouton S2 pour l’arrêter. Appuyez à
nouveau sur le bouton S2 pour réinitialiser
les comptes à rebours sur la valeur réglée
par défaut.
2. Appuyez sur le bouton S2 jusqu’à ce que
le message “ALARM SET” s’affiche et le
numéro de l’alarme clignote.
3. Appuyez sur le bouton S1 pour sélectionner l’alarme à régler.
4. Appuyez une fois sur le bouton S3. Les
unités des heures clignotent.
5. Appuyez une fois sur le bouton S1 pour
augmenter les unités des heures d’une
unité. Gardez le bouton enfoncé pour les
faire défiler rapidement.
6. Appuyez une fois sur le bouton S3. Les
unités des minutes clignotent.
7. Appuyez sur le bouton S1 pour régler les
unités des minutes.
8. Appuyez une fois sur le bouton S3. La
fréquence d’alarme clignote.
9. Appuyez sur le bouton S1 pour basculer
entre l’alarme quotidienne (DAILY),
alarme du dimanche (SU WKY), du lundi
(MO WKY) … du samedi (SA WKY).
10.Après avoir terminé les réglages, appuyez sur le bouton S2 pour confirmer. L’ALARME est automa tiquement
ACTIVÉE.
NOTE: Dans le format d’affichage 12 heures,
“PM” apparaît sur l’écran lorsqu’il est entre
12:00 P.M à 23:59 P.M.
ACTIVATION/DÉSACTIVATION DE
L’ALARME:
1. Appuyez sur le bouton S3 pour sélectionner le mode ALARME.
2. Appuyez sur le bouton S2 pour alterner
entre l’ALARME 1 (ALM1) et l’ALARME 2
(ALM2).
3. Appuyez sur le bouton S1 pour ACTIVER
et DÉSACTIVER l’ALARME.
4. Lorsque l’ALARME est DÉSACTIVÉE, le
message “OFF” apparaît.
Lorsque l’ALARME est ACTIVÉE, le
témoin d’ALARME
apparaît.
NOTE: Vous pouvez laisser la MINUTERIE
activée même si vous affichez d’autres
modes. Dans le mode AFFICHAGE NORMAL
DE L’HEURE, le témoin de la MINUTERIE
est affiché sur l’écran pour rappeler que la
minuterie est activée.
SONNERIE DE L’ALARME:
Lorsque l’alarme est activée, une sonnerie
retentit et la lumière clignote à l’heure
d’alarme réglée. Pour arrêter la sonnerie et
éteindre la lumière, appuyez sur n’importe
quel bouton.
REGLAGE DU MINUTEUR DE CHALEUR:
1. Appuyez sur le bouton S3 pour sélectionner le mode HEAT TIMER (MINUTEUR DE
CHALEUR).
2. Appuyez et maintenez le bouton S2, le
message “HT TMR SET” (REGLAGE DU
MINUTEUR DE CHALEUR) s’affichera
3. Appuyez sur le bouton S2 pour modifier
le réglage du minuteur entre 15, 20, 25,
30 et 35 minutes.
Si vous n’arrêtez pas la sonnerie de
l’alarme, lorsque celle-ci est terminée,
l’horloge passe automatiquement au mode
veille. L’ALARME sonne à nouveau au bout
de 5 minutes.
UTILISATION DU MINUTEUR DE CHALEUR:
1. Appuyez sur le bouton S3 pour sélectionner le mode HEAT TIMER (MINUTEUR DE
CHALEUR).
2. Le minuteur de chaleur affichera le statut
en cours –compteur arrêté, compteur en
cours ou réinitialisé.
3. Pour réactiver le compteur, appuyez sur
le bouton S1 et le compteur se remettra
en marche à partir du point où il a été
arrêté.
4. Pour démarrer de nouveau le compteur,
réinitialisez tout d’abord le minuteur.
Appuyez sur le bouton S1 pour arrêter le
compteur puis appuyez sur le bouton S2
pour réinitialiser le minuteur.
5. Lorsque le compte à rebours atteint zéro,
une tonalité sonore sera émise.
NOTE: Lorsque la montre est dans le mode
veille, le témoin de l’ALARME
continue à
clignoter dans le mode AFFICHAGE NORMAL DE L’HEURE ou dans le mode ALARME.
Pour désactiver le mode veille, appuyez sur
le bouton S3 afin de sélectionner le mode
ALARME, puis appuyez sur le bouton S1
pour désactiver l’ALARME.
UTILISATION DU RETRO ECLAIRAGE:
Appuyez sur le bouton S4 pour activer le
rétro éclairage durant 3 secondes.
REMARQUE : Vous pouvez laisser le
minuteur de chaleur en marche tout en
permutant sur un autre mode.
RÉGLAGE DE L’HEURE D’ALARME:
1. Appuyez sur le bouton S3 pour sélectionner le mode ALARME.
Pour réduire l’émission de carbone
dans l’atmosphère, ces instructions
Freestyle sont imprimées avec des
encres de soja sur du papier recyclé.
FS1152-STRIDE-AG7891-R04
Pour effacer les données d’un tour
individuel:
Dans le mode RAPPEL,
Lorsque le tour est sélectionné, maintenez
le bouton S2 enfoncé. Le message “HOLD
TO DEL” apparaît pendant 2 secondes
environ. Les données correspondant au tour
de la date sélectionnée sont effacées.
®
Stride
S4
S2
S3
S1
S5
S1 – Tasto start/giro
S2 – Tasto stop/reset
S3 – Tasto modo/successivo
S4 – Tasto illuminazione
S5 – Tasto giro
FUNZIONE SPECIALE:
Questo prodotto Freestyle garantisce la
caratteristica unica Hydro Pushers®: questi
pulsanti possono essere premuti sott’acqua
ad una pressione dinamica (non profondità
di acqua) di 3 ATM.
MODI DI VISUALIZZAZIONE:
L’orologio ha sei modalità di display: ORA
NORMALE, CRONOMETRO (CHRONO),
RICHIAMO (RECALL), TIMER,TIMER IMMERSIONE e ALLARME.
Per cambiare da un modo di visualizzazione
a un altro, premere il tasto S3 una volta.
PER IMPOSTARE L’ORA E IL CALENDARIO:
1. Premere il tasto S3 per selezionare il
modo ORA NORMALE (NORMAL TIME).
2. Tenere premuto il tasto S1 per commutare fra fuso orario 1 (T1) e fuso orario
2 (T2).
3. Tenere premuto il tasto S2, e il messaggio “HOLD TO SET” si visualizza per circa
due secondi, e le impostazioni del fuso
orario lampeggiano.
4. Premere il tasto S1 per selezionare il
fuso orario 1 (T1) o il fuso orario 2 (T2)
per impostare.
5. Premere il tasto S3 una volta, le digitazionI dell’ora lampeggiano.
6. Premere il tasto S1 una volta per aumentare le digitazioni delle ore di una unità.
Tenendo premuto il tasto si accelera il
processo.
7. Premere il tasto S3 una volta, e le
digitazioni dei minuti lampeggiano.
8. Premere il tasto S1 per impostare le
digitazioni dei minuti.
9. Premere il tasto S3 una volta, e le
digitazioni dei secondi lampeggiano.
10.Premere il tasto S1 per resettare le
digitazioni dei secondi su zero.
11.Premere il tasto S3 una volta, e le
digitazioni del mese lampeggiano.
12.Premere il tasto S1 per impostare le
digitazioni del mese.
13.Premere il tasto S3 una volta, e le
digitazioni della data lampeggiano.
14.Premere il tasto S1 per impostare le
digitazioni della data.
15.Premere il tasto S3 una volta, e le
digitazioni dell’anno lampeggiano.
16.Premere il tasto S1 per impostare le
digitazioni dell’anno.
17.Premere il tasto S3 una volta, e le impostazioni del formato dell’ora lampeggiano.
18.Premere il tasto S1 per commutare fra
il formato dodici ore (12HR) e il formato
ventiquattr’ore (24HR).
19.Premere il tasto S3 una volta, e le
impostazioni del formato della data
ITALIANO
lampeggiano.
20.Premere il tasto S1 accomodare fra il
formato mese-data (MM-DD) e il formato
data-mese (DD-MM).
21.Premere il tasto S3 una volta, e le impostazioni della suoneria oraria (CHIME)
lampeggiano.
22.Premere il tasto S1 per commutare fra le
impostazioni della suoneria attivata (ON)
e disattivata (OFF).
23.Premere il tasto S3 una volta, e le
impostazioni del bip (BEEP) lampeggiano.
24.Premere il tasto S1 per commutare fra le
impostazioni del bip attivato il disattivato
(ON e OFF).
25.Dopo aver terminato tutte le impostazioni, premere il tasto S2 per confermare.
NOTA: nel formato dodici ore, le digitazioni
dell’ora sono identificate da “PM” per 12:0023:59.
NOTA: il giorno della settimana è automaticamente calcolato.
NOTA: la gamma delle digitazioni dell’anno è
dal 2008 al 2099.
PER USARE IL CRONOMETRO:
1. Premere il tasto S3 per selezionare il
modo CRONOMETRO (CHRONO).
2. Si visualizza il numero massimo di giri
che può essere memorizzato in una
nuova sessione di allenamento. Se la
memoria dei giri è piena, si visualizza il
messaggio “FULL”, ed è emesso un bip.
3. Il CRONOMETRO è successivamente
visualizzato nello stato corrente – ermo,
conteggio o reset.
4. Per ripristinare un conteggio, premere
il tasto S1 per ripristinare da dove si era
rimasti.
5. Per ripristinare il nuovo conteggio, resettare prima il CRONOMETRO su zero.
Tenere premuto il tasto S2, e il messaggio “HOLD TO CLR” si visualizza per circa
due secondi, e il contatore sarà resettato
su zero.
Per cambiare il formato della visualizzazione
del CRONOMETRO:
Nel modo CRONOMETRO,
1. Assicurarsi che il CRONOMETRO sia nel
modo resettaggio, e che non ci sia nessuna registrazione di giri precedenti.
2. Premere il tasto S4 per comunicare fra
formato del LAP o il formato SPL.
3. Se si seleziona il formato LAP, il tempo
del giro (tempo del giro individuale) è
visualizzato.
Se si seleziona il formato SPL, si
visualizza il tempo intermedio (tempo
cumulativo sul giro).
Per misurare il tempo trascorso:
Nel modo CRONOMETRO,
1.Premere il tasto S1 per iniziare il conteggio.
2.Per interrompere il conteggio, premere il
tasto S2. Premere il tasto S1 per ripristinare da dove si era rimasti.
3.Per resettare su zero, premere il tasto
S2 per interrompere il conteggio, poi
tenere premuto il tasto S2, si visualizza il
messaggio “HOLD TO CLR”, per circa due
secondi, e il contatore è resettato su zero.
Per misurare il tempo intermedio:
Nel modo CRONOMETRO,
1.Premere il tasto S1 per iniziare il conteggio.
2.Mentre il CRONOMETRO è in funzione,
premere il tasto S1/S5 una volta per
registrare un giro.
3.Secondo il formato di visualizzazione
scelto dal CRONOMETRO, il tempo del giro
singolo del giro precedente (se si è scelto
il formato LAP) o il tempo cumulativo
sul giro (se sia scelto il formato SPL) è
visualizzato. Il numero del giro precedente
è visualiz zato sulla riga superiore del
display.
Dopo dieci secondi, il tempo attualmente
accumulato e il numero del giro corrente
sono visualizzati.
4.Ripetere il passaggio precedente, fino a
che tutti i giri sono stati registrati.
5.Per interrompere il conteggio, premere il
tasto S2. È visualizzato il tempo totale del
giro accumulato.
6.Per resettare, tenere premuto il tasto S2, e
il messaggio “HOLD TO CLR” si visualizza
per circa due secondi, e il contatore sarà
resettato.
Per usare il conto alla rovescia di cinque
secondi:
Nel modo CRONOMETRO,
1. Assicurarsi che il CRONOMETRO sia nel
modo resettaggio, e che non ci sia nessuna registrazione di giri precedenti.
2. Tenere premuto il tasto S2, il numero
“5” lampeggia per circa due secondi, poi
si attiva il conto alla roves cia di cinque
secondi.
3. Premere il tasto S1 per iniziare il conto
alla rovescia di cinque secondi.
4. Dopo cinque secondi (conto alla rovescia
su zero), è emesso un lungo bip, e il
CRONOMETRO è attivato.
NOTA: il CRONOMETRO può contare fino a
un tempo massimo di 99:59:59.99 (99 ore.59
minuti:59,99 secondi). Se il CRONOMETRO
ha raggiunto di tempo massimo specificato,
tenere premuto il tasto S2 per resettare il
CRONOMETRO su zero.
NOTA: si può lasciare il CRONOMETRO
in funzione, e commutare su altri modi di
funzionamento. In modo ORA NORMALE,
l’indicatore del CRONOMETRO
appare
come promemoria.
Per salvare la registrazione sul giro:
Nel modo CRONOMETRO,
1.Quando un conteggio è terminato, tenere
premuto il tasto S4, e si visualizza il
messaggio “HOLD TO SAVE” per circa
due secondi.
2.Se c’è memoria sufficiente, la registrazione sul giro sarà memorizzata,
insieme alla memoria sul giro disponibile
rimanente.
Se non c’è memoria sufficiente, la
registrazione sul giro sarà memorizzata
insieme a quanti più tempi intermedi
precedenti possibili, e si visualizza il messaggio “FULL”.
PER USARE IL MODO RICHIAMO:
1.Premere il tasto S3 per selezionare il
modo RICHIAMO (RECALL).
2.Se c’è un tempo sul giro memorizzato,
il timbro della data (che mostra il giorno
della settimana, la data e il mese) di
dati memorizzati, lampeggia sulla riga
superiore del display.
Se non c’è nessuna registrazione sul giro
memoriz zata, si visualizza il messaggio
“no DATA”.
3.Premere il tasto S1 per iniziare il ciclo dei
timbri della data delle registrazioni del
giro corrispon dente. Questo non ha alcun
effetto se non c’è una registrazione sul
giro memorizzata.
4.Quando una registrazione del giro desiderata è visualizzata, premere il tasto S2
per selezionare.
5.Premere il tasto S1 per iniziare il ciclo
dei dettagli della registrazione del giro
selezionato nell’ordine del tempo del giro
(TOTAL), giro più veloce (BEST), giro più
lento (SLOW) e le registrazioni vigili indi
viduali in sequenza.
®
Per cancellare tutte le registrazioni sul giro:
Nel modo RICHIAMO,
Nella pagina di selezione della registrazione
del giro, dove il timbro della data di alcuni
dati memorizzati lampeggia, tenere premuto
il tasto S4. Il messaggio “ALL DEL” sarà
visualizzato per circa due secondi. Tutte le
registrazioni sul giro saranno cancellate, e
si visualizza la memoria sul giro disponibile
rimanente.
NOTA: quando si visualizza il giro più veloce/
più lento, sulla linea superiore del display
appare il messaggio “BEST”/”SLOW”, e il
numero del giro corrispondente commuta
ogni due secondi.
NOTA: quando si visualizza la registrazione
sul giro individuale, premere il tasto S4
accomodare fra il formato LAP e il formato
SPL.
PER IMPOSTARE IL TIMER:
1. Premere il tasto S3 per selezionare il
modo TIMER. Il TIMER è visualizzato
nello stato corrente – ermo, conteggio o
reset.
2. Se il TIMER è nella modalità interrotto,
premere il tasto S2 una volta per resettare il TIMER. Se il TIMER e è in funzione,
premere il tasto S2 prima, per interrompere il conteggio prima di resettare il
TIMER.
3. Quando il TIMER è nel modo resettaggio,
tenere premuto il tasto S2, e si visualizza
il messaggio “TIMER SET”, e la selezione
dell’intervallo del conto alla rovescia
“INT-01” lampeggia.
4. Premere il tasto S1 per selezionare la
selezione dell’intervallo del conto alla
rovescia da impostare.
5. Premere il tasto S3 una volta, le digitazioni dell’ora lampeggiano.
6. Premere il tasto S1 per aumentare le
digitazioni di una unità. Tenendo premuto
il tasto, il processo è accelerato.
7. Premere il tasto S3 una volta, e le
digitazioni dei minuti lampeggiano.
8. Premere il tasto S1 per impostare le
digitazioni dei minuti.
9. Premere il tasto S3 una volta, e le
digitazioni dei secondi lampeggiano.
10.Premere il tasto S1 per impostare le
digitazioni dei secondi.
11.Premere il tasto S3 una volta, e l’opzione
action-at-end* lampeggia.
12.Premere il tasto S1 per selezionare fra
Conto alla rovescia - Conto alla rovesciaStop (CD-STP), Conto alla rovescia
- Conto alla rovescia-Ripeti (CD-REP) e
Conto alla rovescia - Conteggio in avanti
(CD-UP).
13.Dopo aver terminato tutte le impostazioni, premere il tasto S2 per confermare.
Per impostare tutti i tempi di resettaggio dell’intervallo del conto alla rovescia
su zero:
Nel modo TIMER,
Quando il TIMER è interrotto, tenere
premuto il tasto S2. Si visualizza il messaggio “CLR”, e tutti i tempi di resettaggio dell’intervallo del conto alla rovescia
saranno impostati su zero.
NOTA*: illustrazione di tutte le opzioni
action-at-end:
a)Conto alla rovescia - Conto alla rovescia-
ITALIANO
Stop (CD-STP) – il TIMER si interrompe
quando il conto alla rovescia raggiunge
lo zero.
b)Conto alla rovescia - Conteggio in avanti
(CD-UP) – il TIMER conta un massimo di 9
ore 59 minuti e 59 secondi, quando il conto
alla rovescia raggiunge lo zero.
c)Conto alla rovescia - Conto alla rovesciaRipeti (CD-REP) – il TIMER ripete il conto
la rovescia quando il conto alla rovescia
raggiunge lo zero.
NOTA: il TIMER può essere impostato su un
massimo di 23 ore 59 minuti e 59 secondi.
PER USARE IL TIMER:
1.Premere il tasto S3 per selezionare il
modo TIMER. Il TIMER è visualizzato nello
stato corrente – ermo, conteggio o reset.
2.Per ripristinare un conteggio, premere
il tasto S1 per ripristinare da dove si era
rimasti.
3.Per ripristinare il nuovo conteggio, resettare prima il TIMER. Premere il tasto S2,
per resettare gli intervalli del conto alla
rovescia sul valore predefin ito.
4.Quando l’intervallo del conto alla rovescia
1 ha raggiunto lo zero, e non c’è nessun altro intervallo del conto rovescia
impostato su un valore diverso da zero,
il TIMER si interrompe e una melodia di
allerta del timer è emessa.
Se un intervallo del conto alla rovescia ha
raggiunto lo zero, e c’è un altro intervallo
del conto rovescia impostato su un valore
diverso da zero, è emessa una melodia
di allerta del timer, e il TIMER continua
sull’intervallo del conto alla rovescia successivo.
5.Per interrompere il conteggio, premere il
tasto S2. Premere il tasto S1 per ripristinare da dove si era rimasti.
6.Per presentare il TIMER, premere il tasto
S2 per interrompere il conteggio. Premere
il tasto S2 di nuovo, per resettare gli
intervalli del conto alla rovescia sul valore
predefinito.
Nota: si può lasciare il TIMER in funzione, e
commutare allo stesso tempo su altri modi
di funzionamento. In modo ORA NORMALE,
l’indicatore del TIMER
appare come
promemoria.
PER IMPOSTARE IL TIMER IMMERSIONE:
1. Premere il tasto S3 per selezionare la
modalità TIMER IMMERSIONE.
2. Premere e tenere premuto il tasto S2, apparirà il messaggio “HT TMR SET”.
3. Premere il tasto S2 per regolare
l’impostazione del timer tra 15, 20, 25, 30
e 35 minuti.
PER UTILIZZARE IL TIMER IMMERSIONE:
1. Premere il tasto S3 per selezionare la
modalità TIMER IMMERSIONE.
2. Il timer immersione apparirà quindi nel
suo stato attuale - ermo, conteggio o
reset.
3. Per riprendere un conteggio, premere il
tasto S1 per riprendere da dove era stato
interrotto.
4. Per iniziare un nuovo conteggio, ricaricare
il timer innanzitutto.
Premere il tasto S1 per interrompere il
conteggio, poi premere il tasto S2 per
ricaricare il timer immersione.
5. Dopo aver raggiunto lo zero in un conto
alla rovescia, un suono verrà emesso.
il messaggio “ALARM SET”, e il numero
per l’inserimento dell’allarme lampeggia.
3. Premere il tasto S1 per selezionare
l’inserimento dell’allarme da impostare.
4. Premere il tasto S3 una volta, e le
digitazioni dell’ora lampeggiano.
5. Premere il tasto S1 una volta per aumentare le digitazioni delle ore di una unità.
Tenendo premuto il tasto si accelera il
processo.
6. Premere il tasto S3 una volta, e le
digitazioni dei minuti lampeggiano.
7. Premere il tasto S1 per impostare le
digitazioni dei minuti.
8. Premere il tasto S3 una volta, e la
selezione della frequenza dell’allarme
lampeggia.
9. Premere il tasto S1 per eseguire un
ciclo su giornaliero (DAILY), domenica
settimanale (SU WKY), lunedì settimanale
(MO WKY)… sabato set timanale (SA
WKY).
10.Dopo aver terminato tutte le impostazioni, premere il tasto S2 per confermare.
L’allarme è automatica mente acceso.
NOTA: nel formato dodici ore, le digitazioni
dell’ora sono identificate da “PM” per 12:00
P.M a 23:59 P.M.
PER ATTIVARE/DISATTIVARE L’ALLARME:
1.Premere il tasto S3 per selezionare la
modalità ALARM.
2.Tenere premuto il tasto S2 per commutare
fra ALARM 1 (ALM 1) e ALARM 2 (ALM 2).
3.Premere il tasto S1 per commutare fra
allarme attivato e disattivato.
4.Se l’allarme è disattivato, si visualizza il
messaggio “OFF”.
Se l’allarme è attivato, si visualizza
l’indicatore dell’allarme .
QUANDO UN ALLARME SI ATTIVA:
Un segnale di allarme è emesso, e la
luce lampeggia allora designata, quando
l’allarme è attivato. Per interrompere il
segnale e la luce intermittente, premere un
tasto qualsiasi.
Se il segnale di allarme non è interrotto
dall’utente, l’orologio entra automaticamente nel modo di ritardo allarme (snooze).
L’allarme si attiva di nuovo dopo cinque
minuti.
Per disattivare il ritardo allarme (snooze),
premere il tasto S3 per selezionare il modo
allarme (ALARM), poi premere il tasto S1
per disattivare l’allarme.
NOTA: l’indicatore dell’allarme
continua
lampeggiare nel modo ORA NORMALE o
ALLARME, quando l’orologio è entrato nel
modo ritardo allarme (snooze).
COME UTILIZZARE LA RETROILLUMINAZIONE:
Premere il tasto S4 per accendere la retroilluminazione per circa 3 secondi.
NOTA: Si può lasciare scorrere il tempo sul
timer mentre si passa ad altre modalità
operative
PER IMPOSTARE L’ORA DI ALLARME:
1. Premere il tasto S3 per selezionare il
modo ALARM.
2. Tenere premuto il tasto S2, e si visualizza
Per ridurre l’impatto ambientale,
queste istruzioni Freestyle sono
stampate con inchiostri di soia su
carta riciclata .
FS1152-STRIDE-AG7891-R04
Per cancellare una registrazione di un giro
individuale,
Nel modo RICHIAMO,
Quando si seleziona la registrazione del
giro desiderata, tenere premuto il tasto S2,
e si visualizza il messaggio “HOLD TO DEL”
per circa due secondi. La registrazione sul
giro del timbro della data corrente sarà
cancellata.
®
Stride
S4
S2
S3
S1
S5
S1 – Botão Iniciar/Volta
S2 – Botão Parar/Configurar
S3 – Botão Modo/Seguinte
S4 – Botão de Luz
S5 – Botão Volta
CARACTERÍSTICAS ESPECIAIS:
Este produto Freestyle apresenta os únicos
Hydro Pushers®: estes botões de accionamento podem ser premidos debaixo de
água sob uma pressão de água dinâmica
(não profundidade de água) de 3 ATM.
MODOS DE VISUALIZAÇÃO:
O relógio tem seis modos de visualização:
HORA NORMAL, CRONÓGRAFO, RECUPERAR, TEMPORIZADOR, TEMPORIZADOR
DE CALOR e ALARME.
Para mudar de um modo de visualização
para outro, prima uma vez o botão S3.
AJUSTAR A HORA E O CALENDÁRIO:
1. Prima o botão S3 para seleccionar o
modo HORA NORMAL.
2. Prima e mantenha premido o botão S1
para alternar entre Fuso Horário 1 (F1)
e Fuso Horário 2 (F2).
3. Prima e mantenha premido o botão
S2, a mensagem “MANTER PREMIDO
PARA CONFIGURAR” será visualizada
cerca de 2 segundos e o Fuso Horário
configurado piscará.
4. Prima o botão S1 para seleccionar
Fuso Horário 1 (Fuso 1) ou Fuso
Horário 2 (Fuso 2) para configurar.
5. Prima o botão S3, os dígitos das horas
piscarão.
6. Prima o botão S1 para avançar uma
unidade os dígitos das horas. Se
mantiver o botão premido acelerará o
processo.
7. Prima o botão S3, os dígitos dos
minutos piscarão.
8. Prima o botão S1 para acertar os
dígitos dos minutos.
9. Prima o botão S3, os dígitos dos
segundos piscarão.
10. Prima o botão S1 para repor os dígitos
dos segundos a zero.
11. Prima o botão S3, os dígitos do mês
piscarão.
12. Prima o botão S1 para acertar os
dígitos do mês.
13. Prima o botão S3, os dígitos da data
piscarão.
14. Prima o botão S1 para acertar os
dígitos da data.
15. Prima o botão S3, os dígitos do ano
piscarão.
16. Prima o botão S1 para acertar os
dígitos do ano.
17. Prima o botão S3, a configuração do
formato das horas piscará.
18. Prima o botão S1 para alternar entre
o formato de 12 (12HR) e 24 horas
(24HR).
19. Prima o botão S3, a configuração do
formato da data piscará.
PORTUGUÊS
20. Prima o botão S1 para alternar entre o
formato mês-dia (MM-DD) e dia-mês
(DD-MM).
21. Prima o botão S3, a configuração do
sinal sonoro horário (SINAL SONORO)
piscará.
22. Prima o botão S1 para alternar entre
ON (ligado) e OFF (desligado) para a
configuração do sinal sonoro horário.
23. Prima o botão S3 uma vez, a configuração do “BIP” piscará.
24. Prima o botão S1 para alternar entre
ON (ligado) e OFF (desligado) para a
configuração do botão “bip”.
25. Após acabar de efectuar todos os
ajustes, prima o botão S2 para confirmar.
NOTA: No formato de 12 horas, os dígitos
das horas são identificados por PM entre
12:00 P.M.-11:59 P.M.
NOTA: O dia (da semana) é calculado
automaticamente.
NOTA: Os dígitos do ano variam entre
2008 e 2099.
UTILIZAR O CRONÓGRAFO:
1. Prima o botão S3 para seleccionar o
modo CRONÓGRAFO.
2. Será visualizado o número máximo de
voltas que pode ser armazenado num
novo exercício. Se a memória de voltas
estiver cheia, será visualizada a mensagem “CHEIA” e será emitido um som.
3. O cronógrafo será então visualizado no
seu estado actual – parado, a funcionar
ou reajustar.
4. Para retomar uma contagem interrompida, prima o botão S1 para retomar
a partir de onde parou.
5. Para iniciar uma nova contagem, em
primeiro lugar reponha o cronógrafo
a zero. Prima e mantenha premido o
botão S2, será visualizada a mensagem
“MANTER PREMIDO PARA CONFIGURAR” cerca de 2 segundos e o contador
será reposto a zero.
Para alterar o formato de visualização do
cronógrafo:
No modo CRONÓGRAFO,
1. Certifique-se de que o cronógrafo se
encontra no estado de configuração e
de que não existe qualquer gravação de
voltas anteriores.
2. Prima o botão S4 para alternar entre o
formato VOLTA e TPOPARC.
3. Se o formato VOLTA estiver seleccionado, será visualizado o tempo total
(tempo de voltas individuais).
Se o formato TPOPARC estiver seleccionado, será visualizado o tempo parcial
(tempo acumulado da volta).
Para medir o tempo decorrido:
No modo CRONÓGRAFO,
1. Prima o botão S1 para iniciar a
contagem.
2. Para parar a contagem, prima o botão
S2. Prima o botão S1 para retomar a
partir de onde partiu.
3. Para repor a zero, prima o botão S2 para
parar a contagem, em seguida prima
e mantenha premido o botão S2, será
visualizada a mensagem “MANTER
PREMIDO PARA CONFIGURAR” cerca
de 2 segundos e o contador será reposto
a zero.
Para a medição do tempo total:
No modo CRONÓGRAFO,
1. Prima o botão S1 para iniciar a
contagem.
2. Enquanto o cronógrafo estiver em funcionamento, prima o botão S1/S5 para
registar uma volta.
3. Consoante o formato de visualização do
cronógrafo seleccionado, o tempo total
da volta anterior (se estiver seleccionado o formato VOLTA) ou o tempo
acumulado da volta (se estiver seleccionado o formato TPOPARC). O número
da volta anterior ficará a piscar na linha
superior do ecrã.
Após 10 segundos, será visualizado o
tempo decorrido actual e o número de
volta actual.
4. Repita o último passo até que todas as
voltas tenham sido registadas.
5. Para parar a contagem, prima o botão
S2. Será visualizado o tempo total de
volta acumulado.
6. Para repor a zero, prima e mantenha
premido o botão S2, será visualizada a
mensagem “MANTER PREMIDO PARA
CONFIGURAR” cerca de 2 segundos e o
contador será reposto a zero.
Para iniciar a contagem regressiva inicial
de 5 segundos:
No modo CRONÓGRAFO,
1. Certifique-se de que o cronógrafo se
encontra no estado reconfiguração e
de que não existe qualquer gravação de
voltas anteriores.
2. Prima e mantenha premido o botão S2,
o número “5” piscará cerca de 2 segundos e depois a contagem regressiva
inicial de 5 segundos será activada.
3. Prima o botão S1 para iniciar a contagem regressiva de 5 segundos.
4. Após 5 segundos (contagem regressiva
até zero), será emitido um bip longo e o
cronógrafo será iniciado.
NOTA: O cronógrafo pode contar até
ao máximo de 99:59:59:99 (99horas, 59
minutos, 59:99 segundos). Se o cronógrafo
atingiu o tempo máximo conforme especificado, prima e mantenha premido o botão
S2 para repor o cronógrafo a zero.
NOTA: Pode deixar o cronógrafo em funcionamento enquanto muda para outros
modos de operação. No modo HORA
NORMAL, o indicador do cronógrafo
surgirá como um aviso.
Para guardar o registo de voltas:
No modo CRONÓGRAFO,
1. Ao acabar a contagem, prima e mantenha premido o botão S4, será visualizada
a mensagem “MANTER PREMIDO PARA
GUARDAR” cerca de 2 segundos.
2. Se houver memória suficiente, a
gravação de voltas será armazenado e
será visualizada a memória de voltas
restante disponível.
Se não houver memória suficiente, a
gravação de voltas será armazenada
junto com todas as parciais possíveis e
será visualizada a mensagem “CHEIA”.
UTILIZAR O MODO RECUPERAR:
1. Prima o botão S3 para seleccionar o
modo RECUPERAR.
2. Se houver gravação de voltas, o indicador de hora (mostrando o dia da semana, data e mês) da data armazenada
piscará na linha superior do ecrã.
Se não houver gravação de voltas, será
visualizada a mensagem “sem DADOS”.
3. Prima o botão S1 para visualizar os
indicadores de hora das voltas gravadas
correspondentes. Isto não tem efeito se
não houver voltas gravadas.
4. Quando a gravação de volta desejada
for visualizada, prima o botão S2 para
seleccionar.
5. Prima o botão S1 para visualizar os
detalhes da gravação de volta desejada
para que: tempo total (TOTAL), volta
mais rápida (MELHOR), volta mais lenta
(PIOR) e os tempos parciais gravados
por ordem sequencial.
®
Para eliminar todos as gravações de
voltas:
No modo RECUPERAR,
Na página de selecção da gravação de
volta, onde o indicador de hora de uma
data gravada se encontra a piscar, prima
e mantenha premido o botão S4. Será
visualizada a mensagem “ELIM TODOS”
cerca de 2 segundos. Todas as gravações
de voltas serão então eliminadas e a
restante memória de voltas disponível
será visualizada.
NOTA: Ao visualizar a volta mais rápida/
lenta, a mensagem “MELHOR”/”PIOR” e o
número de volta correspondente alternará
a cada 2 segundos na linha superior do
ecrã.
NOTA:Ao visualizar os tempos parciais
gravados, prima o botão S4 para alternar
entre o formato VOLTA e TPOPARC.
ACERTAR O TEMPORIZADOR:
1. Prima o botão S3 para seleccionar o
modo TEMPORIZADOR. O TEMPORIZADOR será visualizado no seu estado
actual – reajustar, a funcionar ou
parado.
2. Se o TEMPORIZADOR estiver
parado, prima o botão S2 uma vez
para reajustar o temporizador. Se
o temporizador estiver a funcionar,
prima o botão S2 para parar primeiro
a contagem antes de reajustar o
TEMPORIZADOR.
3. Quando o TEMPORIZADOR estiver num
estado de reajuste, prima e mantenha
premido o botão S2, será visualizada
a mensagem “TEMPORIZADOR CONFIGURADO” e piscará a selecção do
intervalo de contagem regressiva.
4. Prima o botão S1 para seleccionar a
selecção do intervalo de contagem
regressiva a configurar.
5. Prima o botão S3, os dígitos das horas
piscarão.
6. Prima o botão S1 para aumentar os
dígitos numa unidade. Se mantiver o
botão premido acelerará o processo.
7. Prima o botão S3, os dígitos dos
minutos piscarão.
8. Prima o botão S1 para acertar os
dígitos dos minutos.
9. Prima o botão S3, os dígitos dos
segundos piscarão.
10. Prima o botão S1 para acertar os
dígitos dos segundos.
11. Prima o botão S3, a opção “Acção no
final”* piscará.
12. Prima o botão S1 para seleccionar
Contagem regressiva-Contagem
regressiva-Parar (CTRG-PARAR),
Contagem regressiva-Contagem
regressiva-Repetir (CTRG-REP) e
Contagem regressiva-Contar até
(CONTAR ATÉ).
13. Após acabar de efectuar todos os
ajustes, prima o botão S2 para
confirmar.
Para configurar todos os tempos de reconfiguração dos intervalos da contagem
regressiva para zero:
Nos modos CRONÓGRAFO,
Quando o cronógrafo se encontra parado,
prima e mantenha premido o botão S2. A
mensagem “CONFIGURAR” será visual-
PORTUGUÊS
izada e os tempos de reconfiguração dos
intervalos da contagem regressiva serão
reposto a zero.
NOTA*: Ilustração das opções Acção no
final:
a) Contagem regressiva-Contagem
regressiva-Parar – o TEMPORIZADOR
parará quando a contagem atingir zero.
b) Contagem regressiva-Contar até – o
TEMPORIZADOR conta até um máximo
de 23 horas, 59 minutos e 59 segundos
quando a contagem regressiva atingir
zero.
c) Contagem regressiva-Repetir – o
TEMPORIZADOR repetirá a contagem
regressiva quando esta atingir zero.
NOTA: O TEMPORIZADOR pode ser
configurado até um máximo de 23 horas,
59 minutos e 59 segundos.
UTILIZAR O TEMPORIZADOR:
1. Prima o botão S3 para seleccionar o
modo TEMPORIZADOR. O temporizador
será visualizado no seu estado actual –
parado, a funcionar ou reajustar.
2. Para retomar uma contagem, prima
o botão S1 para retomar a partir de
onde parou.
3. Para iniciar uma nova contagem,
reconfigure primeiro o temporizador.
Prima de novo o botão S2 para reajustar
o intervalo da contagem regressiva para
o valor definido.
4. Quando o intervalo de contagem
regressivo 1 atingir zero e não houver
outro intervalo de contagem regressiva definida para o valor não zero, o
temporizador parará e será emitido um
som de alerta.
Se o intervalo de contagem regressivo
atingiu zero e houver outro intervalo de
contagem regressiva definida para o
valor não zero, será emitido um som de
alerta do intervalo do temporizador e o
temporizador continuará o intervalo de
contagem regressiva seguinte.
5. Para parar a contagem, prima o botão
S2. Prima o botão S1 para retomar a
partir de onde partiu.
6. Para reajustar o temporizador, prima o
botão S2 para parar a contagem. Prima
de novo o botão S2 para reajustar o
intervalo da contagem regressiva para o
valor definido.
NOTA: Pode deixar o temporizador em
funcionamento enquanto muda para outros modos de operação. No modo HORA
NORMAL, o indicador do temporizador
surgirá como um aviso.
ACERTAR O TEMPORIZADOR DE CALOR:
1. Prima o botão S3 para seleccionar o
modo TEMPORIZADOR DE CALOR.
2. Prima e mantenha premido o botão S2,
é visualizada a mensagem “TMR CL
AJUSTADO”.
3. Prima o botão S2 para alterar as
definições do temporizador entre 15, 20,
25, 30 e 35 minutos.
regressiva, será emitida uma melodia.
NOTA: Pode deixar o temporizador de
calor em funcionamento enquanto muda
para outros modos de operação.
CONFIGURAR A HORA DO ALARME:
1. Prima o botão S3 para seleccionar o
modo ALARME.
2. Prima e mantenha premido o botão
S2, a mensagem “ALARME CONFIGURADO” será visualizada e a entrada do
alarme piscará.
3. Prima o botão S1 para seleccionar a
entrada de alarme a configurar.
4. Prima o botão S3, os dígitos das horas
piscarão.
5. Prima o botão S1 para avançar uma
unidade os dígitos das horas. Se
mantiver o botão premido acelerará o
processo.
6. Prima o botão S3, os dígitos dos
minutos piscarão.
7. Prima o botão S1 para acertar os
dígitos dos minutos.
8. Prima o botão S3, a selecção da
frequência do alarme piscará.
9. Prima o botão S1 para optar por diário
(DIÁRIO), Domingo semanalmente
(DOM SEM), Segunda semanalmente
(SEG SEM) … Sábado sem (SAB SEM).
10. Após acabar de efectuar todos os
ajustes, prima o botão S2 para confirmar. O alarme será ligado automaticamente.
NOTA: No formato de 12 horas, os dígitos
das horas são identificados por PM entre
12:00P.M.11:59 P.M.
LIGAR (ON) / DESLIGAR (OFF) O ALARME:
1. Prima o botão S3 para seleccionar o
modo ALARME.
2. Prima o botão S2 para alternar entre
ALARME 1 (AL1) e ALARME 2 (AL2).
3. Prima o botão S1 para alternar entre
ligar e desligar o alarme.
4. Se o alarme estiver desligado, será
visível a mensagem “OFF”.
Quando o alarme está ON, surgirá o
indicador do alarme .
QUANDO UM ALARME DISPARA:
Será emitida uma melodia de alarme e a
luz piscará na hora designada aquando da
activação do alarme. Para parar a melodia
e desligar a luz, prima qualquer botão.
Quando não premido qualquer botão
após a melodia tocar, o relógio entrará
imediatamente no modo snooze. O alarme
disparará de novo 5 minutos depois.
Para desactivar o modo snooze, prima
o botão S3 para seleccionar o modo
ALARME, depois o botão prima S1 para
desactivar o alarme.
continuNOTA: O indicador do alarme
ará a piscar no modo HORA NORMAL e
ALARME quando o relógio se encontra no
modo snooze.
UTILIZAR A LUZ POSTERIOR:
UTILIZAR O TEMPORIZADOR DE CALOR:
Prima o botão S4 para ligar a luz posterior
1. Prima o botão S3 para seleccionar o
cerca de 3 segundos.
modo TEMPORIZADOR DE CALOR.
2. O temporizador de calor será então visualizado no seu estado actual – parado,
a funcionar ou reconfigurar.
3. Para retomar uma contagem interrompida, prima o botão S1 para retomar
a partir de onde parou.
4. Para iniciar uma nova contagem, carregue primeiro o temporizador de calor.
Prima o botão S1 para parar a contagem
Para reduzir a emissão de carbono,
e em seguida prima o botão S2 para
estas instruções Freestyle foram
carregar o temporizador de calor.
impressas com tinta de soja em papel
5. Quando chegar a zero numa contagem
reciclado.
FS1152-STRIDE-AG7891-R03
Para eliminar os tempos parciais
gravados:
No modo RECUPERAR,
Quando estiver seleccionada a gravação de
volta desejada, prima e mantenha premido
o botão S2, será visualizada a mensagem
“MANTER PREMIDO PARA ELIM” cerca de
2 segundos. A gravação de volta do actual
indicador de hora será eliminada.
®
Stride
S4
S2
S3
S1
S5
S1
S2
S3
S4
S5
– スタート/ラップボタン
– ストップ/リセットボタン
– モード/移動ボタン
– ライトボタン
– ラップボタン
日本語
と24時制(24HR) が切り替わりま
す。
19.S3 ボタンを1回押すと、
日付表示方
法が点滅ます。
20.S1 ボタンを押すと、
月-日 (MM-DD)
と 日-月(DD-MM) の表示方法が切
り替わります。
21.S3 ボタンを1回押すと、時報
(CHIME) 設定が点滅します。
22.S1 ボタンを押すと、時報のオンとオ
フが切り替わります。
23.S3 ボタンを1回押すと、
ボタン音
(BEEP) 設定が点滅します。
24.S1 ボタンを押すと、
ボタン音のオン
とオフが切り替わります。
25.設定すべての終了後、S2 ボタンを押
して確定します。
注意: 12時制では、12:00~23:59の
間、時の数字に
「PM」
が表示されます。
3. 選択しているクロノグラフ表示形式
により、先ほど記録したラップの個
別ラップタイム (LAP形式を選択し
た場合) または、
ラップタイムの合計
(SPL 形式を選択した場合) が表示
されます。先ほど記録したラップのラ
ップナンバーが、表示画面の上段で
点滅します。10秒後、現在のタイムの
合計および現在のラップナンバーが
表示されます。
4. 上の操作を繰返し、
ラップを全て記録
します。
5. 計測を停止するには、S2ボタンを押
します。
ラップタイムの合計が表示さ
れます。
6. ゼロにリセットするには、S2ボタンを
長押しすると、
「HOLD TO CLR」
の
文字が約2秒間表示され、
カウンター
がゼロにリセットされます。
5秒間カウントダウン・スタートを使用
するには:
クロノグラフモードで、
1. クロノグラフがリセット状態にあり、
注意: 年の数字は2008 から 2099ま
特別機能:
ラップ記録が残っていないことを確認
でです。
Freestyleの本製品にはHydro
します。
Pusher®が搭載されています。
これらの
2. S2ボタンを長押しすると、数字の
「5」
クロノグラフの使用:
ボタンは動水圧3ATM(水深ではありま
が約2秒間点滅した後5秒間カウント
1. S3ボタンを押して クロノグラフモー
せん)下で押すことができます。
ダウン・スタートが起動します。
ドを選択します。
3. S1 ボタンを押すと、5秒間のカウント
2. 新たに保存できるラップの最大回数
表示モード:
ダウンを開始します。
が表示されます。
この時ラップメモリ
この時計には次の6つの表示モードがあ
が一杯の場合は
「FULL」
の文字が表 4. 5秒 (ゼロまでカウントダウンした)
ります。時刻(NORMAL TIME)、
後ピーッと鳴り、クロノグラフが計測
示され、警告音が鳴ります。
クロノグラフ
(CHRONO)、
リコール
を開始します。
3. その時点でのストップウォッチの状態
(RECALL)、
タイマー(TIMER)、
ヒ
(停止/測定中/リセット)
が表示され
ートタイマー(HEAT TIMER),アラーム
注意:クロノグラフは、最長 99:59:59.99
ます。
(ALARM)。
(99時間59分59.99秒)まで計測できま
4. 計測を再開するには、S1ボタンを押
クロノグラフがこの最長時間に達した
すと停止したところから計測を再開し す。
表示モードを切り替えるには、S3ボタン
場合S2ボタンを長押しすると、
クロノグ
ます。
を1回押してください。
5. 新たに計測を開始するには、
まずクロ ラフをゼロにリセットします。
ノグラフをゼロにリセットします。
時刻およびカレンダーの設定:
注意: クロノグラフを走行させたまま、他
「HOLD
1. S3ボタンを押して 時刻モードを選択 S2ボタンを長押しすると、
の操作モードに切り替えることができま
TO CLR」
の文字が約2秒間表示さ
します。
す。時刻モードでは、
クロノグラフインジ
れ、
カウンターをゼロにリセットしま
2. S1ボタンを長押しすると、
タイムゾー
が表示されます。
ケータ
す。
ン 1 (T1) と タイムゾーン 2 (T2)
が切り替わります。
ラップ記録の保存:
クロノグラフ表示形式を変更するには:
3. S2ボタンを長押しすると、
「HOLD
クロノグラフモードで、
クロノグラフモードで、
TO SET」
の文字が約2秒間表示さ
ラ 1. 1回の計測が完了したら、S4ボタンを
れ、
タイムゾーン設定が点滅します。 1. クロノグラフがリセット状態にあり、
長押しします。
「HOLD TO SAVE」
ップ記録が残っていないことを確認し
4. S1 ボタンを押して設定するタイムゾ
の文字が約2秒間表示されます。
ます。
ーン1 (T1) または タイムゾーン 2
ラップ記録は
2. S4 ボタンを押すと、LAP形式とSPL 2. メモリが十分であれば、
(T2) を選択します。
保存され、残りのラップメモリの回数
形式が切り替わります。
5. S3 ボタンを1回押すと、時の数字が
が表示されます。
3. LAP形式を選択すると、
ラップタイム
点滅します。
メモリが不足した場合、以前のスプリ
(個別のラップタイム) が表示されま
6. S1ボタンを1回押すと、時の数字が1
ットを古いほうからできるだけ残して
す。
ずつ進みます。このボタンを長押しす
今回のラップ記録を保存し、
「FULL」
SPL形式を選択すると、
スプリットタ
ると、数字を早送りします。
の文字が表示されます。
イム (ラップタイムの合計) が表示さ
7. S3 ボタンを1回押すと、分の数字が
れます。
点滅します。
リコールモードの使用:
8. S1ボタンを押して、分の数字を設定
1. S3ボタンを押してリコールモードを
経過時間を計測するには:
します。
選択します。
9. S3 ボタンを1回押すと、秒の数字が クロノグラフモードで、
2. ラップ記録が保存されている場合、記
1. S1 ボタンを押すと計測を開始しま
点滅します。
録データの(曜日、
日、
月を示す)日付
す。
10.S1 ボタンを押すと、秒の数字が0に
スタンプが点滅します。
ラップ記録が
2. 計測を停止するには、S2 ボタンを押
リセットされます。
保存されていない場合、
「no DATA」
します。S1ボタンを押すと、停止した
11.S3 ボタンを1回押すと、
月の数字が
の文字が表示されます。
ところから計測を再開します。
点滅します。
3. S1ボタンを押すと、
ラップ記録の日付
まずS2ボ
12.S1 ボタンを押して、
月の数字を設定 3. ゼロにリセットするには、
スタンプが循環表示されます。
ラップ
タンを押して計測を停止し、次にS2
します。
記録がない場合、
この機能は作動し
ボタンを長押しすると、
「HOLD TO
13.S3 ボタンを1回押すと、
日の数字が
ません。
CLR」
の文字が約2秒間表示され、
カ
点滅します。
ウンターがゼロにリセットされます。 4. 見たい記録が表示されたら、S2ボタ
14.S1 ボタンを押して、
日の数字を設定
ンを押して選択します。
します。
5. S1 ボタンを押すと、選択したラップ
15.S3 ボタンを1回押すと、年の数字が スプリットタイムを計測するには:
記録の詳細が次の順序で循環表示
クロノグラフモードで、
点滅します。
されます:ラップタイム (TOTAL)、
16.S1 ボタンを押して、年の数字を設定 1. S1 ボタンを押すと計測を開始しま
最速ラップ (BEST)、最低速ラップ
す。
します。
(SLOW)、個別ラップ記録です。
17.S3 ボタンを1回押すと、時制の設定 2. クロノグラフの走行中に S1/S5 ボ
タンを1回押すと、ラップを記録しま
が点滅します。
す。
18.S1 ボタンを押すと、12時制 (12HR)
注意: 曜日は自動的に計算されます。
個別ラップ記録の消去:
b) カウントダウン-カウントアップ (CDリコールモードで、
UP) – タイマーは、0までカウントダ
該当するラップ記録を選択しS2ボタンを
ウンした後、最長9時間59分59秒ま
長押しすると、
「HOLD TO DEL」
の文字
でカウントアップします。
が約2秒間表示されます。該当する日付ス c) カウントダウン-カウントダウン-リピ
タンプのラップ記録が消去されます。
ート (CD-REP) – タイマーは、0まで
カウントダウンした後カウントダウン
ラップ記録全部の消去:
を繰り返します。
リコールモードで、
保存されたデータの日付スタンプが点滅 注意: タイマーは、最長で23 時間59 分
しているラップ記録選択画面でS4 ボタ
59 秒に設定することができます。
ンを長押しします。
「ALL DEL」
の文字が
約2秒間表示された後ラップ記録全部が タイマーの使用:
消去され、記録可能なラップメモリが表
1. S3ボタンを押してタイマーモードを
示されます。
選択します。
タイマーの現在の状態:
停止/測定中/リセットのどれかが表
注意: 最速または最低速ラップを表示す
示されます。
ると、表示画面の上段で、
「BEST」
または 2. 計測を再開するには、S1ボタンを押
「SLOW」
の文字と該当するラップナン
すと停止したところから計測を再開し
バーが2秒ごとに切り替わります。
ます。
3. 新たに計測を開始する場合、
まずタイ
注意: 個別ラップ記録を表示した状態で
マーをリセットします。S2ボタンを押
S4ボタンを押すと、LAP 形式とSPL 形
すと カウントダウン・インターバルが
式が切り替わります。
事前の設定値にリセットされます。
4. カウントダウン・インターバル1がゼ
タイマーの設定:
ロに達し、他のカウントダウン・インタ
1. S3ボタンを押してタイマーモードを
ーバルがすべてゼロ設定になってい
選択します。
タイマーの現在の状態:
る場合、
タイマーは停止し、
タイマー
停止/測定中/リセットのどれかが表
警告メロディーが鳴ります。
示されます。
カウントダウン・インターバルの1つ
2. タイマーが停止状態にある場合、S2
がゼロに達し、他にもカウントダウン・
ボタンを1回押すとタイマーをリセ
インターバルがゼロ以外の数値に設
ットします。
タイマーが走行中の場
定されている場合、
タイマーインター
合、S2ボタンを押すとタイマーをリセ
バル警告メロディが鳴り、
タイマー
ットする前段階として計測を停止し
は、
引き続き次のカウントダウン・イン
ます。
ターバルをカウントダウンします。
3. タイマーがリセット状態にある
5. 計測を停止するには、S2ボタンを押
場合、S2ボタンを長押しすると
します。S1ボタンを押すと停止したと
「TIMER SET」
の文字が表示され、
ころから計測を再開します。
カウントダウン・インターバルの選択 6. タイマーをリセットするには、
まずS2
肢「INT-01」が点滅します。
ボタンを押して計測を停止します。
4. S1ボタンを押して 設定するカウント
再度S2 ボタンを押すとカウントダウ
ダウン・インターバルを選択します。
ン・インターバルが事前の設定値にリ
5. S3 ボタンを1回押すと、時の数字が
セットされます。
点滅します。
6. S1ボタンを1回押すと 数字が1ずつ 注意: 他の操作モードに切り替えても、
タ
進みます。
ボタンを長押しすると早送 イマーをそのまま走行させておくことがで
りします。
きます。時刻モードでは、
タイマーインジ
7. S3ボタンを押すと、分の数字が点滅 ケータ が表示されます。
します。
8. S1ボタンを押して、分の数字を設定
ヒートタイマーの設定:
します。
1. S3ボタンを押してHEAT TIMERモ
9. S3ボタンを押すと、秒の数字が点滅
ードを選択します。
します。
2. S2ボタンを長押しすると、“HT TMR
10.S1ボタンを押して、秒の数字を設定
SET”の文字が表示されます。
します。
3. S2ボタンを押して、
タイマーの設定
11.S3ボタンを1回押すと、
タイマー後続
時間を15, 20, 25, 30, 35分から選
動作*のオプションが点滅します。
んでください。
12.S1ボタンを押して、次の3つから選
択します:カウントダウン-カウント
ヒートタイマーの使用:
ダウン-ストップ (CD-STP)、
カウン
1. S3ボタンを押してHEAT TIMERモ
トダウン-カウントダウン-リピート
ードを選択します。
(CD-REP) 、
カウントダウン-カウント 2. その時点でのヒートタイマーの状態(
アップ (CD-UP) です。
停止/計測中/リセット)
が表示されま
13.設定すべての終了後、S2ボタンを押
す。
して設定を確定します。
3. 停止したカウントを再開する場合は
S1ボタンを押します。
カウントダウン・インターバルタイムを全 4. 新しくカウントしなおす場合は、
ヒー
てゼロにリセットする:
トタイマーをリロードしてください。
タイマーモードで、
ヒートタイマーのリロードはS1ボタ
タイマーが停止の状態で、S2 ボタンを長
ンを押してカウントを停止してから
押しします。
「CLR」
の文字が表示され、
カ
S2ボタンを押します。
ウントダウン・インターバルタイムが全て 5. ヒートタイマーが0になるとお知らせ
ゼロにリセットされます。
音が鳴ります。
注意*: タイマー後続動作オプション
注:ヒートタイマーのカウントを継続し
の説明:
たまま他のモードに切り替えることが
a) カウントダウン-カウントダウン-ストッ できます。
プ (CD-STP) – タイマーは、0までカ
ウントダウンすると停止します。
日本語
アラーム時刻の設定:
1. S3ボタンを押してアラームモードを
選択します。
2. S2ボタンを長押しすると、
「ALARM
SET」
の文字が表示され、
アラーム入
力番号が点滅します。
3. S1ボタンを押して設定するアラーム
入力番号を選択します。
4. S3ボタンを1回押すと、時の数字が点
滅します。
5. S1ボタンを1回押すと、時の数字が1
ずつ進みます。このボタンを長押しす
ると、数字を早送りします。
6. S3 ボタンを1回押すと、分の数字が
点滅します。
7. S1ボタンを押して、
分の数字を設定し
ます。
8. S3 ボタンを1回押すと、
アラーム回
数選択肢が点滅します。
9. S1 ボタンを押すと、毎日 (DAILY) 、
毎週日曜 (SUWKY), 毎週月曜 (MO
WKY)… 毎週土曜 (SA WKY) が循
環表示されます。
10.設定すべての終了後、S2 ボタンを押
して設定を確定します。
アラームは、
自
動的にオンになります。
注意: 12時制では、12:00~23:59の間、
時の数字にPM が表示されます。
アラームのオン/オフ切り替え:
1. S3ボタンを押してALARMモードを
選択します。
2. S2ボタンを押すと、
アラーム 1
(ALM 1) とアラーム 2 (ALM 2) が
切り替わります。
3. S1 ボタンを押すとアラームのオンと
オフが切り替わります。
4. アラームをオフにすると、
「OFF」
の文
字が表示されます。
アラームをオンにすると、
アラームイ
が表示されます。
ンジケータ
アラームの作動:
アラームがオンの状態で指定時刻にな
ると、
アラーム音が鳴りライトが光りま
す。
どれかボタンを押すと、音とライトを
停止します。
ボタンによる停止を行わないでアラーム
音が鳴り終わると、
自動的にスヌーズモー
ドに入ります。
この場合、
アラームは5分後
に再作動します。
スヌーズモードを解除するには、S3ボ
タンを押してアラームモードを選択し、
次にS1ボタンを押してアラームを 解
除します。
注意: 時刻モードまたはアラームモードの
状態でスヌーズモードに入ると、
アラーム
が点滅を続けます。
インジケータ
バックライトを使う:
S4ボタンを押すとバックライトが約3秒
間点灯します。
カーボンフットプリントの減少を目的と
してFreestyleの取扱説明書は大豆イ
ンキとリサイクル紙を使用しています
FS1152-STRIDE-AG7891-R04
®