Transcript
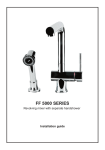
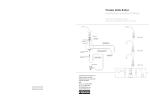
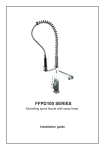
Operating and Exchange Instructions for Franke FRC05 Cartridges
Part No. W9223028
For use in Filter Model No. FRCNSTR/ FRC05
The system is tested for the following
performance claims as verified and
substantiated by test data:
•
Chlorine Reduction (Taste &
Odour)
•
Particulate reduction;
•
Turbidity reduction;
•
Cyst reduction (including Giardia
and live Crypto-sporidium);
Systems tested for Cyst Reduction may
be used on disinfected water that may
contain filterable Cysts. Do not use
where water is microbiologically unsafe
or of unknown quality without
adequate disinfection before or after
the system.
Cartridge Capacity: 1000 gallons
Rated Service Flow: 1.9 litres/min. (0.5
gallons/min)
Fitting Instructions
Detailed information on the removal
and re-installation of the filters is
supplied with your filter housing,
however changing the filter cartridge is
a simple matter:
1. Shut off the main water supply,
and turn the filtered drinking water
faucet to the ‘on’ position, to
release any pressure remaining in
the system.
DO NOT use any greases or
solvents containing
hydrocarbons to lubricate the
threads or seals on the unit.
Also avoid the use of strong
detergents or oxidising agents
when cleaning the housing.
Please note: The cartridge is
made of ceramic and therefore
fragile and can easily be damaged
if not handled carefully. Care
should be taken when screwing
the cartridge into the housing cap.
Be careful not to crossthread or
overtighten the cartridge.
5. Carefully screw the filter body
into the filter cap and wipe
the housing clean with a
damp cloth.
The filter should now be ready
for pressurisation.
6. With the tap/faucet in the on
For full warranty information
please visit
www.frankeksd.com
8. When the system has been
confirmed watertight, open
the tap and allow the water to
run for a minimum of 10
minutes to remove any loose
particles resulting from the
manufacture of the cartridge.
10. The filter is now ready for use
cartridge with clean water before
screwing the cartridge into the cap.
Allowing the unit to freeze will
invalidate the product
warranty.
and ensure that there is no
water leaking from the system
joints.
3. Unscrew the old filter cartridge
4. Moisten the ‘o’ rings on the new
If you plan to be away from home
for extended periods, or the filter
housing may be subject to the risk
of freezing, carry out stages 1,2
and 5. When the risk of freezing
subsides and you wish to use the
system again, turn the faucet on.
Gradually introduce the main
water supply until the flow from
the tap has stabilized. Run the
filtered water for 10 minutes to
flush the system and check
carefully for leaks. The system
should now be ready for use.
7. Close the filtered water faucet
9. Additionally, to allow the filter
from the cap, wrap in a plastic bag
or newspaper and discard with
your household waste.
When Leaving on Vacation
and to Winterize the Unit
position, gradually turn the
main water supply on until the
flow from the tap has been
stabilized.
2. Position a suitable container
beneath the housing to catch any
residual water. Unscrew the filter
body from the cap, empty the
water into the container and place
the body to one side.
24 June 2010
to be conditioned to the
source water, allow the unit to
stand unused for 24 hours and
then flush for a further 10
minutes.
and the filtered water can be
used for drinking and
preparing food.
Manufactured by Fairey Industrial Ceramics
Ltd for:
Franke
Kitchen Systems Division
Franke Luxury Products Group
3050 Campus Drive, Suite 500
Hatfield PA 19440, USA
Phone: 800 6265771
Website: www.frankeksd.com
Follow us on Twitter: twitter.com/FrankeCP