Transcript
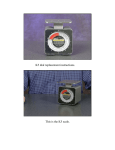
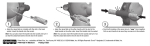
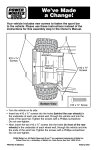
74765pr-0922 12/3/02 5:01 PM Page 1
#6 x 1/2" screw
Activity Panel
Radio Knobs
#12 x 1" screw
• Remove the two #6 x 1/2" screws from the activity panel on the dash.
Set the #6 x 1/2" screws aside for re-assembly.
• Lift to remove the activity panel from the dash.
• Insert and snap the radio knobs into the activity panel, as shown.
• From the back side of the activity panel, insert a #12 x 1" screw into
the end of each radio knob.
• While holding the radio knobs in place, tighten the screws with a
Phillips screwdriver. Do not over-tighten.
• Fit the tabs on the bottom of the activity panel into the notches in the
dash opening, as shown.
• Replace the #6 x 1/2" screws through the holes in the activity panel and
into the dash. Tighten the screws with a Phillips screwdriver. Do not
over-tighten.
Fisher-Price, Inc., a subsidiary of Mattel, Inc., East Aurora, NY 14052 U.S.A.
©2002 Mattel, Inc. All Rights Reserved. ® and ™ designate U.S. trademarks of Mattel, Inc.
Printed in U.S.A.
74765pr-0922