1
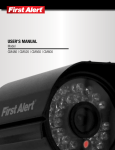
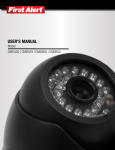
USER’S MANUAL
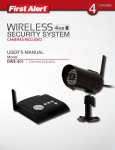
Wireless Camera System
Model
DW702M | D702MC
WELCOME
WELCOME
Thank you for choosing First Alert for your security needs!
For more than half a century, First Alert has made the home-safety and security products that
make your job easier. Our products are built to the highest standard which has earned us a
leadership role in the home-safety and security product categories. We are committed to serving
our customers, from the professionals who install our products, to the families and businesses
who count on them. First Alert has been helping families and businesses stay safe for over
50 years. By having a First Alert Security System, you’re taking the first step in protecting
your home or business from damage or theft. We’re watching, even when you’re not.
This manual is written for the DW702M wireless DVR system and the D702MC wireless camera
included in the system. It was accurate at the time it was completed. However, because
of our ongoing effort to constantly improve our products, additional features and functions
may have been added since that time and on-screen displays may change. We encourage
you to visit our website at www.firstalert.com to check for the latest manuals (English and
Spanish), firmware updates, downloads, other security camera products and announcements.
You’ll find this product line under Products >> Security Cameras >> Wireless Cameras.
© 2012 BRK Brands, Inc. All rights reserved. Distributed by BRK Brands, Inc., Aurora, Illinois 60504. BRK Brands, Inc. is a subsidiary of Jarden
Corporation (NYSE: JAH). First Alert® is a registered trademark of the First Alert Trust. Due to continuing product development, the product inside
the packaging may look slightly different than the one on the package. To obtain warranty service, contact the Consumer Affairs Division at
1-800-323-9005, Monday through Friday, 7:30 a.m. - 5 p.m., Central Standard Time.
Made in China
Page 2
TABLE OF CONTENTS
TABLE OF CONTENTS
Safety.. . . . . . . . . . . . . . . . . . . . . . . . . . . . . . . . . . . . . . . . . . . . . . . . . . . . . . . . . . . . . . . . . . . . . . . . . . . . . . . . . . . . . . . . . . . . . . . 4
Getting to Know Your System. . . . . . . . . . . . . . . . . . . . . . . . . . . . . . . . . . . . . . . . . . . . . . . . . . . . . . . . . . . . . . . 6
System Set Up - Installing Cameras. . . . . . . . . . . . . . . . . . . . . . . . . . . . . . . . . . . . . . . . . . . . . . . . . . . . . . . 7
System Operation. . . . . . . . . . . . . . . . . . . . . . . . . . . . . . . . . . . . . . . . . . . . . . . . . . . . . . . . . . . . . . . . . . . . . . . . . . . . . . . 8
View Mode Menu. . . . . . . . . . . . . . . . . . . . . . . . . . . . . . . . . . . . . . . . . . . . . . . . . . . . . . . . . . . . . . . . . . . . . . . . . . . . . . . . 9
Recording and Storage Menu.. . . . . . . . . . . . . . . . . . . . . . . . . . . . . . . . . . . . . . . . . . . . . . . . . . . . . . . . . 1 0 - 11
System Menu - Motion Record.. . . . . . . . . . . . . . . . . . . . . . . . . . . . . . . . . . . . . . . . . . . . . . . . . . . . . . . . . . . 1 2
System Menu - Clock Setting.. . . . . . . . . . . . . . . . . . . . . . . . . . . . . . . . . . . . . . . . . . . . . . . . . . . . . . . . . . . . . 1 3
System Menu - Pairing Operation. . . . . . . . . . . . . . . . . . . . . . . . . . . . . . . . . . . . . . . . . . . . . . . . . . . . . . . . 1 4
Technical Specifications. . . . . . . . . . . . . . . . . . . . . . . . . . . . . . . . . . . . . . . . . . . . . . . . . . . . . . . . . . . . . . . . . . . . . 1 5
Troubleshooting. . . . . . . . . . . . . . . . . . . . . . . . . . . . . . . . . . . . . . . . . . . . . . . . . . . . . . . . . . . . . . . . . . . . . . . . . . . . . . . . 1 6
Warranty........................................................................................................ 17
Page 3
SAFETY PRECAUTIONS
SAFETY PRECAUTIONS
•
•
•
•
•
•
Do not drop, puncture, or disassemble the cameras or DVR.
Do not tug on the power adapter. Use the plug to remove it from the wall.
Do not expose the cameras or DVR to high temperatures.
For your own safety, avoid using the DVR when there is a storm or lightning in your area.
Use the cameras and DVR with care. Avoid pressing hard on the cameras or DVR body.
Do not use power cable if it is crushed or damaged
FCC COMPLIANCE STATEMENT
This equipment has been tested and found to comply with the limits for an intentional radiator, pursuant to Part 15,
subpart C of the FCC rules. These limits are designed to provide reasonable protection against harmful interference in
a residential installation. This equipment generates, uses and can radiate radio frequency energy and, if not installed
and used in accordance with the instructions, may cause harmful interference to radio communications.
However, there is no guarantee that the interference will not occur in a particular installation. If this equipment does
cause harmful interference to radio or television reception, which can be determined by turning the equipment off
and on, the user is encouraged to try to correct the interference by one or more of the following measures:
• Reorient or relocate the receiving antenna.
• Increase the separation between the equipment and receiver.
• Connect the equipment into an outlet on a circuit different from that of the receiver.
• Consult the dealer or an experienced radio or TV technician for help.
Notice: Only peripherals complying with FCC limits may be attached to this equipment. Operation with
noncompliant peripherals or peripherals not recommended by First Alert / BRK Brands, Inc. is likely to
result in interference to radio and TV reception. Changes or modifications to the product, not expressly
approved by First Alert / BRK Brands, Inc., could void the user’s authority to operate the equipment.
We, First Alert / BRK Brands, Inc. declare under our sole responsibility that the device to which this declaration relates: Complies
with Part 15 of the FCC Rules. Operation is subject to the following two conditions: (1) this device may not cause harmful
interference, and (2) this device must accept any interference received, including interference that may cause undesired operation.
FCC Certification
This device contains a radio transmitter. Accordingly, it has been certified as compliant with 47 CFR Part 15 of the
FCC Rules for intentional radiators. Products that contain a radio transmitter are labeled with an FCC ID.
Page 4
GETTING TO KNOW YOUR SYSTEM
GETTING TO KNOW YOUR DW702M SECURITY CAMERA
Congratulations on purchasing your First Alert Security Camera product. First Alert has been helping families
and businesses stay safe for over 50 years. By having a First Alert Security Camera, you’re taking the first step
in protecting your home or business from damage or theft. We’re watching, even when you’re not.
CHECK PACKAGE CONTENTS
Model DW702M is a wireless monitor system. It includes a 7”monitor and (2) D702CM wireless cameras.
The system can accommodate up to 4 wireless cameras. Additional camera sold separately.
DW702M
•
•
•
•
Digital Wireless Camera (2)
7” LCD Digital Wireless Receiver (1)
Camera Stand (2)
Mounting Kit (2)
•
•
•
•
•
•
Remote Control (1)
Power Supply (3)
4 GB SD Card (1)
User’s Manual English (1)
User’s Manual Spanish (1)
PC Software
DIGITAL WIRELESS CAMERA
1. Antenna
2. EDS
1
3. Camera Lens
4. IR LED
5. Camera Stand
6. Pairing Key
7. Microphone
8
3
4
8. Alternate
Mounting Position
9
6
2
9. Power Adapter
7
5
Digital Wireless Receiver Button Functions
Button
1
2
3 4 5
Function 1
Function 2
CH
Press to Select
Channels 1,2,3
or 4
In Menu mode, Press
progressively as
needed to escape
out of the Menu
3
M - Menu/
OK button
Press to Enter
the Menu
Once in Menu, Press
to move further into
sub-menus
Press to confirm
menu selection
4
AN -
Press
successively
to adjust
Audio Down
In Quad Playback,
press to reverse
display 2 minutes
Selects previous
recording during
Playback
5
AN +
Press
successively to
adjust audio up
In Quad Playback,
press to forward
display 2 minutes
Allows selection of
next recording during playback
6
Headphone
1
Power On/
Off
2
6
Page 5
Function 3
GETTING TO KNOW YOUR SYSTEM
Remote Control
Press to Power the Monitor ON.
CH 1
CH 2
CH 3
CH 4
CH
Menu
Press to select Channel 1.
Press to select Channel 2.
Press to select Channel 3.
Press to select Channel 4.
Press to Exit Menu
Press to bring up Menu options or
to confirm a selection
Press to move selection downward
Press to move selection upward
_
+
Directions for Installing/Changing Batteries:
1.
Open battery compartment on back of remote and insert (1) 3V Lithium battery (provided).
2.
Ensure the battery is installed correctly with respect to polarity. (+ and -)
3.
Remove batteries from remote if batteries are not going to be used for an extended period of time.
4.
Remove used batteries promptly and replace all batteries of a set at the same time.
5.
Always purchase the correct size and grade of battery most suitable for intended use.
Indicates SD card is available
Indicates SD card is not available
Indicates cameras are Looping
through Channels
Indicates motion Record is
Engaged
1
Indicates the channel 1,2,3, or 4
Indicates Signal Strength
1
Indicates Single Camera View
Indicates Recording is taking
place
Indicates Quad View
Playback
Indicates Pause during Playback
Standby
Indicates temporary loss of signal
Free space
Indicates temporary buffering for
data storage
Page 6
SYSTEM SET UP - INSTALLING CAMERA
SETTING UP YOUR DW702M SECURITY SYSTEM
GENERAL PRECAUTIONS
• Use only the power supply provided with the system.
• Unplug the power supply when the system is not in use for extended periods.
• Do not place any of the equipment near a radiator, vent, or other place where it might be exposed to heat, moisture, dust, vibrations, or strong magnetic fields.
• Do not attempt to repair the camera. Contact a qualified technician or the dealer for service. Any change or modification may damage the equipment and invalidate the warranty.
• When installing the camera, follow manufacturer’s advice when using power tools, steps, ladders, etc. and wear suitable protective equipment (e.g., safety goggles) when drilling holes. Before drilling holes through a ceiling, check for hidden electricity cables and
water pipes.
INSTALLING THE CAMERA
1. Select the position for the camera and
secure the camera stand.
Mounting screws are supplied.
2. Screw the camera onto the bracket
3. Adjust camera to the proper view angle. Make sure the lens is upright relative to your subject. Tighten the thumb bolt.
4. Screw the antenna into place on the rear
of the camera. Adjust the antenna to an upright position.
Page 7
SYSTEM OPERATION
CONNECTION GUIDE
Connecting the Camera
1.
Connect the supplied power adapter (5V) to the power input on the camera.
2.
Plug the power adapter into a wall socket.
Connecting the Monitor
1.
Connect the supplied power adapter (5V) to the power input on the Monitor.
2.
Plug the power adapter into a wall socket.
3.
Press power button on the monitor for 2 seconds to power on.
OPERATING MENUS
This chapter provides information about the menu screens. The screens are used to control the various functions of the DVR
system. The user selects options from a series of menus and executes the actions by using the keypad on the IR controller.
The Main Menu display functions are divided in three categories
(View Mode, REC Store and Systems).
•
View Mode – Allows the user to set the viewing option on the monitor.
o
Split 4 – Quad View
o
Auto – Rotates camera viewed on monitors for 5 seconds alternating
o
Manual – Allows user to manually change camera to view
•
Rec Store – Allows the user access to recorded video and formatting of SD card settings.
o
Rec Files – Allows for lookup of recorded files
o
Store Format – Allows for formatting the SD card
•
Systems
o
Motion Record – Allows user to set record settings to record on motion, record all the time or to not record.
o
Clock Setting – Allows user to set system time
o
Pairing Camera – Allows user to pair camera to one of the 4 channels
Page 8
VIEW MODE MENU
View Mode Sub Menu
Press M from the Main Menu to access the View Mode menu options.
The View Mode Screen has three options as follows.
• MANUAL – Allows you to control which channel to be displayed; USE CH- & CH+ to move through channels.
• SPLIT 4 – Splits monitor screen into 4 quadrants showing all 4 channels at the same time.
• AUTO – The Monitor screen loops in 5 second intervals between channels.
Page 9
RECORDING & STORAGE MENU
REC – STORE Sub Menu
Press M from the Main Menu to access the REC Store menu options.
The Rec Store Sub-menu provides 2 selections:
•
Rec Files - allows you to view recorded files that reside on the SD card.
•
Store Format - provides the ability to format the SD card.
SCREEN 1
To Review a Recording:
1. Highlight Rec Store to bring up Record Search Video
Screen 1 screen.
2. Highlight Video on Record Search Video Screen 1 and
Press M.
3. Select Highlight using AN- or AN+ - Video to view from
Record Store Screen 2. Press M to select range.
4. Select – Highlight using AN- or AN+ - Video to view
from Record Store Screen 3. Press M to select Range.
5. Select – Highlight using AN- or AN+ - Video to view
from Record Store Screen 4. Press M to select
specific video.
SCREEN 2
NOTE:
The Monitor will play selected video.
Sample Progression:
1. Video
2. Year/Month/Day
3. Hour of Day
4. Hour/Min/Sec Camera which detected motion
When motion is set to ON, the playback menu looks the same except all 4 cameras
are shown with the Hour/Min/Sec.
SCREEN 3
Page 10
RECORDING & STORAGE MENU
Store Format Screen
To Format the SD card
Note: Formatting should be performed whenever a new SD card is to be used.
The formatting process
1. Store Format in the Rec Store Sub screen to bring up Formatting Confirmation screen.
Press M to confirm selection.
2. Highlight OK (or cancel if in error) to format the SD card. Press M to confirm selection.
3. The formatting in progress screen will appear on screen, followed by the Formatting complete screen when the
SD card formatting is completed.
SD Card
SD card is inserted into the back of the monitor.
1
2
3
4
Page 11
SYSTEM MENU MOTION RECORD
System Menu
The System Menu provides 3 options. The options include Motion Record settings, (setting of the
system time) Clock setting and Pairing Camera with the system.
Motion Record – allows the user to set
cameras to record for 5 seconds, 10
seconds, all of the time (on), or No
Record (OFF).
• 5 S – Records 5 seconds after
motion stops.
• 10S – Records 10 seconds after
motion stops.
• ON – Records continuously after
camera is activated by motion
• OFF – No Recording
To set Motion Record:
1. Highlight your choice using the AN+
and AN- buttons.
2. Confirm selection by Pressing M.
3. Press CH to escape the menu.
Page 12
CLOCK SETTING
Clock Setting
The clock setting menu allows the user to set the time for the system. To set the system time do
the following:
1. Highlight the Clock Setting selection from the Systems Sub Menu and press M.
2. The screen will display the Clock setting menu screen. From here you can set the Year, Month,
Day, Hour and Minute for the system. Use AN+ and AN- to move from Year, Month, Day, Hour
and Minute fields.
3. The field to change will be highlighted in RED.
4. Use the AN+ and AN- buttons to adjust the time and date settings.
5. Press M to move from Year, Month, Day, Hour fields. Press CH to confirm selection and exit
clock setting screen. Clock settings need to be reset if power is lost for more than 10 minutes.
Page 13
SYSTEM MENU - PAIRING OPERATION
Pairing Camera Sub Menu
1
2
3
4
Press M from the record store submenu.
1. Select camera to pair by highlighting camera channel in RED. Use AN- or AN+
to select camera.
2. Press M to start pairing process.
3. While screen shows
Open flap on camera power line and press button to pair.
System will show Success when pairing is complete.
Page 14
TECHNICAL SPECIFICATIONS
Technical Specifications
Camera
C5734VD
Image Sensor
NTSC: 1/4” Color CMOS
Horizontal Resolution
420 TVL
Active Pixels
649H x 583V
Pixel Size
6.0µm x 6.0µm
White Balance
Auto
Signal/Noise Ratio
≤50dB
Gain Control
Auto
Sensitivity
10V/Lux-Sec
Lens
3.6 mm
Viewing Angle
62º
Number of Night Visions LEDs
30 Blue LEDs
Minimum Illumination
0 Lux (IR On)
Night Vision On/Off
Auto Using EDS
Audio
Yes
Power Requirements
5 VDC @ 280mA (IR On)
IP Rating
IP54
Operating Temperature
-5c to 45c
Camera Dimensions
5 3/4” (H), 2 5/8” (W), 3 3/4” (D)
Camera Wtih Stand Dimensions
8” (H), 2 5/8” (W), 3 3/4” (D)
Monitor/Receiver
L0711DW
Video Screen
7” TFT LCD
Display Picture
Single or Quad Mode
Wireless Channels
4
Transmission Frequency
2400MHz to 2483.5MHz
Transmission Rate
3Mbps
Frame Rate
320 x 240 QVGA @ 25fps/640 x 480 VGA @ 20fps
Receiving Sensitivity
80±2dBm
Unobstructed Effective Range
>200M
Audio Output
Speaker
Effective Pixels
800*480
Memory Media
Up to 32GB (SDHC)
Record Format
SNX
Recording Trigger
Motion
Zero Interference
From: Bluetooth, Web Routers, Microwave Ovens, Cordless Phones
Power Requirements
5VDC @ 550mA
Operating Temperature
-5c to 45c
Receiver Dimensions (Antenna Up)
10 3/4” (H), 6 11/16” (W), 1 3/4” (D)
Receiver with Stand Dimensions
(Angle back one click, Full extension, Antenna up)
10 5/8” (H), 6 11/16” (W), 7 3/8” (D)
Software Revision Numbers
Receiver
V1.0
Page 15
TROUBLESHOOTING
Troubleshooting
Problem
Possible Causes
Remedies
No power supply to camera
If camera power status indicator light is
off, check power adapter and power cable
connection.
Channel is not linked up to camera
Move the camera closer to the receiver,
and connect the camera to the desired
channel. Go to “Camera Setup” in the
Menu. Use the “Pairing” sub-menu to
connect the camera to the receiver.
Service out of range
Move the camera closer to the receiver.
Signal is blocked
If possible, remove major obstacles in
between the camera and the receiver. Or,
relocate the camera to another location.
Antenna direction is limited
Adjust the camera antenna and receiver
position.
Signal has been blocked
If possible, remove major obstacles in
between the camera and receiver. Or,
relocate the camera to another location.
Strong radio signal nearby
Keep WIFI router away from the camera
and / or receiver.
Strong electromagnetic interference
nearby
Keep active appliances such as hair
dryers, heat fans, air conditioners, water
pumps, or microwave ovens away from the
camera and / or receiver.
Scan channel(s) has been turned OFF
Go to Menu; turn ON the channel(s).
System message shows
“No Signal”
Low or Unstable Signal
Channel(s) disappear during auto or
manual scan
Dim or overly bright image at night time Low Light vision distance is too short /
too far or a glass pane is too close.
Adjust the camera to have the view fit the
ideal distance: 15 to 24 Feet.
Recording does not work
No SD Card
Unlock the SD Card. Insert an SD Card
Motion detection does not work
Motion Detection record setting is set to
OFF
Set Motion Detection record period to 5
sec or 10 sec. You may also set the record
option to ON to record all the time.
Audio feedback
Camera and receiver are too close.
The camera has a high sensitivity
microphone. Keep the camera at least 10
feet away from the receiver. If the camera
must be within 10 feet of the receiver, keep
the volume down.
Place the camera and / or receiver antenna
at a new angle or readjust its position to
make an improvement.
Poor Image Quality
Remove obstacles between the camera
and receiver that might affect the signal
(e.g., furniture, cabinets, and walls.)
Interference
Relocate the camera closer to the receiver.
System Message Shows "Free Space"
Replace SD card or delete video files
SD Card Full
Reformat SD
Technical Information
Storage Data Management
SD Card Capacity
640 x 480 (VGA)
320 x 240 (QVGA)
1G
110 Minutes
165 Minutes
2G
250 Minutes
350 Minutes
8G
1070 Minutes
1450 Minutes
16G
2170 Minutes
2960 Minutes
Page 16
WARRANTY
Product Limited Warranty
BRK Brands, Inc., (“BRK”) the maker of First Alert® brand products warrants that for a period of one year from the date of purchase (the “Warranty Period”), this
product will be free from defects in material and workmanship. BRK, at its sole option, will repair or replace this product or any component of the product found
to be defective during the Warranty Period. Replacement or repair will be made with a new or remanufactured product or component. If the product is no longer
available, replacement may be made with a similar product of equal or greater value. This is your exclusive warranty.
This warranty is valid for the original retail purchaser only from the date of initial retail purchase and it not transferable. In order obtain warranty service, you
must keep the original sales receipt and proof of purchase in the form of the UPC code from the package. BRK dealers, service centers, or retail stores selling
BRK products do not have the right to alter, modify or any way change the terms and conditions of this warranty.
Warranty Exclusions
Parts and labor: 1 year limited (warranted parts do not include bulbs, LEDs, and batteries) This warranty does not apply to bulbs, LEDs, and batteries supplied
with or forming part of the product.
This warranty is invalidated if non-BRK accessories are or have been used in or in connection with the product or in any modification or repair is made to the
product.
This warranty does not apply to defects or damages arising by use of the product in other than normal (including normal atmospheric, moisture and humidity)
conditions or by installation or use of the product other than in strict accordance with the instructions contained in the product owner’s manual.
This warranty does not apply to defects in or damages to the product caused by (i) negligent use of the product, (ii) misuse, abuse, neglect, alteration, repair or
improper installation of the product, (iii) electrical short circuits or transients, (iv) usage not in accordance with product installation, (v) use of replacement part not
supplied by BRK, (vi) improper product maintenance, or (vii) accident, fire, flood or other Acts of God.
This warranty does not cover the performance or functionality of any computer software included in the package with the product. BRK makes no warranty that
the software provided with the product will function without interruption or otherwise be free of anomalies, errors, or “Bugs.” This warranty does not cover any
costs relating to removal or replacement of any product or software installed on your computer.
BRK reserves the right to make changes in design or to make additions to or improvements in its products without incurring any obligations to modify any product
which has already been manufactured. BRK will make every effort to provide updates and fixes to its software via its website. This warranty does not cover
any alteration or damage to any other software that may be or may become resident on the users system as a result of installing the software provided This
warranty is in lieu of other warranties, expressed or implied, and BRK neither assumes nor authorizes any person to assume for it any other obligation or liability in
connection with the sale or service of the product. In no event shall BRK be liable for any special or consequential damages arising from the use of the product or
arising from the malfunctioning or non-functioning of the product, or for any delay in the performance of this warranty due to any cause beyond its control.
BRK does not make any claims or warranties of any kind whatsoever regarding the product’s potential, ability, or effectiveness to prevent, minimize, or in any
way affect personal or property damage or injury. BRK is not responsible for any personal damage, loss, or theft related to the product or to its use for any harm,
whether physical or mental related thereto. Any and all claims or statements, whether written or verbal, by salespeople, retailers, dealers, or distributors to the
contrary are not authorized by BRK, and do not affect this provision of the warranty.
BRK’s responsibility under this, or any other warranty, implied or expressed, is limited to repair, replacement or refund, as set forth above. These remedies are the
sole and exclusive remedies for any breach of warranty. BRK is not responsible for direct, special, incidental, or consequential damages resulting from any breach
of warranty or under any other legal theory including but not limited to, loss profits, downtime, goodwill, damage to or replacement of equipment and property and
any costs of recovering, reprogramming or reproducing any program or data stored in or used with a system containing the product accompanying software.
BRK does not warrant the software will operate with any other software except that which is indicated. BRK cannot be responsible for characteristics of their
party hardware or software which may affect the operation of the software included
Except to the extent prohibited by applicable law, any implied warranty of merchantability or fitness for a particular purpose is limited in duration to the duration of
the above Warranty Period. Some states, provinces, or jurisdictions do not allow the exclusion or limitation of incidental or consequential damages or limitations
on how long an implied warranty lasts, so the above limitations or exclusion may not apply to you. This warranty gives you specific legal rights, and you may also
have other rights that vary from state to state, or province to province, or jurisdiction to jurisdiction.
Obtaining Service
If service is required, do not return the product to your retailer. In order to obtain warranty service, contact the Consumer Affairs Division at 1-800-323-9005,
7:30 a.m. – 5:00 p.m. Central Standard Time, Monday through Friday. To assist us in serving you, please have the model number and date of purchase available
when calling.
After contracting the Consumer Affairs Division and it is determined that the product should be returned for Warranty Service, please mail the product to:
BRK Brands, INC. / 3901 Liberty Street Road / Aurora , IL 60504-8122
Page 17
©2012 BRK Brands, Inc.
a Jarden Corporation Company (NYSE:JAH)
3901 Liberty Street Road, Aurora, IL 60504-8122
Phone: 630-851-7330 Tech Services: 800-323-9005
www.firstalert.com
M08-0433-000