Transcript
IR Measurements
User's Manual
1.
2.
3.
Pocket InfraRed Thermometer
Model IR201A
Introduction
Congratulations on your purchase of Extech’s IR201A Pocket InfraRed
Thermometer. This device is used to take non-contact temperature
measurements simply by pointing the meter and pressing a button. This
meter, with proper care, will provide years of safe reliable service.
Description
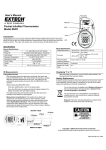
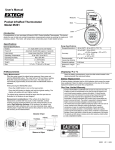
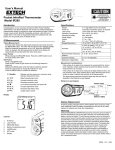
1
Infrared sensor
2
Laser Pointer
3
Measurement button
4
Laser button
5
Max/Set button
6
Battery compartment (rear)
7
LCD display
8
Lanyard attachment point
1
2
3
4
5
6
7
Point the meter toward the surface to be measured
Press and hold the MEASURE button. The meter will turn ON,
“SCAN” will blink and the measured temperature will be displayed.
Release the MEASURE button and the last reading will be held
(HOLD will appear) in the display for approximately 6 second and
then the meter will turn off.
4.
In the measure mode, press the LASER button to turn the laser
pointer on or off.
5.
Press the MAX button to display and hold the highest reading. The
display will update with each higher reading.
Measurement considerations:
•
The thermometer must be acclimated to ambient temperature for
accurate measurements. Allow approximately 30 minutes
acclimation time when the storage area and use area have a large
temperature differential.
•
If known, adjust the emissivity value to match the emissivity of the
surface being measured. If unknown, use 0.95.
•
The surface measured should be cleaned of frost, dust or other
materials before accurate measurements can be made.
•
Recommended measuring distance is 2” to 36” (5cm to 91cm)
•
Apply black tape or paint to highly reflective surfaces to increase the
emissivity and improve the accuracy of the measurement.
•
The object being measured should be larger than the spot size as
illustrated in the distance to spot diagram.
8
Setup
The Setup mode allows for setting: Max or Min display, °C or °F display,
Emissivity value, Lock continuous mode, High alarm limit and Alarm On/Off.
Enter the Setup mode by taking a measurement then press the MAX button
to step through and adjust the features. Each press of the MAX button
advances to the next feature.
1
Press the Measure button to turn the meter on.
2
Press the MAX button to step to the Max/Min selection. Press the
LASER button to set either MIN or MAX (blinking) and then press
the Measure button to confirm the selection
3
Press the MAX button to step to the C/F selection. Press the LASER
button to set either C or F (blinking) and then press the Measure
button to confirm the selection.
4
Press the MAX button to step to the Ems (emissivity) increase ▲
selection. Press the LASER button to increase the ε (blinking) value
and then press the Measure button to confirm the selection.
5
Press the MAX button to step to the Ems (emissivity) decrease ▼
selection. Press the LASER button to decrease the ε (blinking) value
and then press the Measure button to confirm the selection.
6
Press the MAX button to step to the LOCK selection. Press the
LASER button to set LOCK On and then Press & Hold the Measure
button for two seconds to begin continuous measurements. Press
the LASER button to cancel the LOCK mode.
7
Press the MAX button to step to the Hl (High Limit) increase ▲
selection. Press the LASER button to increase the value and then
press the Measure button to confirm the selection.
8
Press the MAX button to step to the Hl (High Limit) decrease ▼
selection. Press the LASER button to decrease the value and then
press the Measure button to confirm the selection.
9
Press the MAX button to step to the Alarm On/Off selection. Press
the LASER button to set either ON or OFF and then press the
Measure button to confirm the selection.
Battery Replacement
The battery icon appears when the batteries need replacing. Open the
battery compartment on the rear of the meter, replace the batteries and
close the compartment.
You, as the end user, are legally bound (EU Battery
ordinance) to return all used batteries, disposal in the
household garbage is prohibited! You can dispose of your
used batteries at collection points in your community or
wherever batteries are sold!
Disposal: Follow the valid legal stipulations in respect of the
disposal of the device at the end of its lifecycle
Specifications
Display
Power off
Laser power
Distance to Target Ratio
Emissivity settings
Operating Temperature
Operating Humidity
Power Supply
Weight
Size
3 ½ -digit (2000 count) LCD display
Automatic shutoff after approx. 8 seconds
Laser power less than 1mW (red)
6:1
0.10 to 1.0 adjustable
0 to 50°C (32 to 122°F)
Max. 80% RH
2 x AAA battery
76g / 2.7 oz.
94 x 51 x 25 mm (3.7 x 2 x 1")
Range Specifications
o
Ranges(Resolution) -30 to 270°C / -22 to 518 F (0.1°C/F)
Accuracy
± (2.5% of reading + 2ºC or 4ºF)
Copyright © 2011 Extech Instruments Corporation (a FLIR company)
All rights reserved including the right of reproduction in whole or in part in any form.
www.extech.com
IR201A-EU-EN V1.0 02/11