1
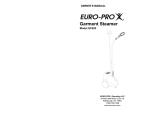
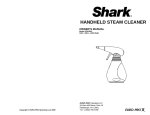
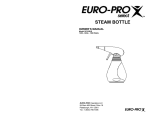
One (1) YEAR LIMITED WARRANTY
EURO-PRO Operating LLC warrants this product to be free from defects in material and
workmanship for a period of one (1) year from the date of purchase when utilized for normal
household use.
If your appliance fails to operate properly while in use under normal household conditions within
the warranty period, return the complete appliance and accessories, freight prepaid to EUROPRO Operating LLC, 94 Main Mill Street, Door 16, Plattsburgh, NY 12901. If the appliance is
found by EURO-PRO Operating LLC to be defective in material or workmanship, EURO-PRO
Operating LLC will repair or replace it free of charge. Proof of purchase date and $7.00 to cover
the cost of return shipping and handling must be included. *
Steamer Steam Cleaner
Use and Care Instructions
Model EP63CH
The liability of EURO-PRO Operating LLC is limited solely to the cost of the repair or replacement
of the unit at our option. This warranty does not cover normal wear of parts and does not apply to
any unit that has been tampered with or used for commercial purposes. This limited warranty
does not cover damage caused by misuse, abuse, negligent handling or damage due to faulty
packaging or mishandling in transit.
This warranty is extended to the original purchaser of the unit and excludes all other legal and/or
conventional warranties. The responsibility of EURO-PRO Operating LLC if any, is limited to the
specific obligations expressly assumed by it under the terms of the limited warranty. In no event
is EURO-PRO Operating LLC liable for incidental or consequential damages of any nature
whatsoever. Some states do not permit the exclusion or limitation of incidental or consequential
damages, so the above may not apply to you.
This warranty gives you specific legal rights, and you may also have other rights which vary from
state to state.
*Important: Carefully pack item to avoid damage in shipping. Be sure to include proof of
purchase date and to attach tag to item before packing with your name, complete address
and phone number with a note giving purchase information, model number and what you
believe is the problem with item. We recommend you insure the package (as damage in
shipping is not covered by your warranty). Mark the outside of your package “ATTENTION
CUSTOMER SERVICE”.
yyyyyyyyyyyyyyyyyyyyyyyyyyyyyyyyyyyyyyyyyyyyyyyyyyyyyyyyyyyyyyyyyyy
OWNERSHIP REGISTRATION CARD
Please fill out and mail the product registration card within ten (10) days of purchase. The
registration will enable us to contact you in the unlikely event of a product safety notification. By
returning this card you acknowledge to have read and understood the instructions for use, and
warnings set forth in the accompanying instructions.
RETURN TO:
EURO-PRO Operating LLC, 94 Main Mill Street, Door 16, Plattsburgh, NY 12901
EP63CH
_____________________________________________________________________
Appliance model
_____________________________________________________________________
Date purchased
Name of store
_____________________________________________________________________
Owner’s name
_____________________________________________________________________
Address
City
State
Zip code
EURO-PRO Operating LLC
94 Main Mill Street, Door 16
Plattsburgh, NY 12901
Tel.: 1 (800) 798-7398
IMPORTANT SAFETY INSTRUCTIONS
Mattresses and Pillows
Reducing the amount of dust mites in your home may reduce discomfort for
some people with dust allergies. The EURO-PRO Steam Cleaner can reduce
the amount of dust mites found on the surfaces of cushions and mattresses in
your home.
1. Use steam cleaner with steam brush attachment (you can remove the
brush) or use without any attachment, simply directing the steam flow to the
surface being treated.
Note: To reduce the amount of dust mites, treat surface with steam for
minimum 20 seconds holding the steam outlet less than 2 inches from surface.
For large mattresses it may be necessary to lean them securely against a wall
and begin steaming surface in same manner as steaming garments and
fabrics.
2. Vacuum thoroughly after surface is completely dry.
Additional Uses
1. Attaching Small Towel
Fig. 4
Additional cleaning and sanitizing can be
done on some upholstery and hard surfaces
by attaching a cut out piece of a towel to the
triangle brush.
a. Cut a square piece of towel approximately
6 inches by 6 inches.
b. Place over triangle brush when it is
attached to the steam brush attachment.
c. Bunch up excess towel, then hold in place
by sliding over a tight rubber band. If
rubber band is too large, double or triple
over until tight.
CAUTION: Towel must be tightly wrapped
or steam can escape towards
hands and cause scalding.
2. Soften glazing putty on windows.
After Use
3. Soften and remove gum and adhesives.
• Remove the water tank, empty and replace it.
• Store your EURO-PRO Steam Cleaner in a dry area.
EURO-PRO Customer Service
1-800-798-7398
8
When using an electrical appliance, basic precautions should be observed,
including the following: Read all instructions carefully before using
EURO-PRO Steamer Steam Cleaner
Warning: To reduce the risk of fire, electric shock, or injury:
1. Do not direct steam at people, animals, or at electrical outlets.
2. To reduce the risk of contact with hot water, emitting from steam vents, check appliance before
each use by holding it away from body and operating steam button.
3. Use appliance only for its intended use as described in this instruction book.
4. To reduce the risk of electric shock, do not immerse the appliance in water or other liquids.
Store indoors. Do not expose the appliance to rain.
5. Use only extension cords UL-rated or cUL at 15 amperes. Cords rated for less amperage may
overheat. Care should be taken to arrange the cord so that the cord cannot be pulled or tripped
over.
6. Never yank cord to disconnect from outlet, instead grasp plug and pull to disconnect.
7. Do not allow cord to touch hot surfaces. Let appliance cool completely before putting away.
Loop cord loosely around appliance when storing.
8. Always disconnect appliance from electrical outlet when filling with water or emptying, when
changing attachments and when not in use.
9. Do not leave garment steamer unattended when plugged in.
10. Do not leave garment steamer connected to an electrical outlet when not in use.
11. Do not attempt to use the garment steamer without water in the tank.
12. Do not operate the appliance with damaged cord or plug.
13. Do not use garment steamer if it has been dropped, damaged, left outdoors or dropped into
water.
14. Never operate this appliance if it has a damaged cord or plug, if it is not working properly, or if it
has been dropped, damaged or dropped in water. Return the appliance for service or repair to
EURO-PRO Operating LLC, 94 Main Mill Street, Door 16, Plattsburgh, NY 12901.
15. Do not handle garment steamer with wet hands.
16. Do not pull or carry by cord, use cord as a handle, close door on cord, pull cord around sharp
corners or edges, or expose cord to heated surfaces.
17. Do not put any object into appliance openings, use with blocked opening, or restrict air flow.
18. Do not use appliance in an enclosed space filled with vapours given off by oil based paint, paint
thinner, some moth proofing substances, flammable dust, or other explosive or toxic vapours.
19. Do not allow to be used as a toy. Keep out of the reach of children.
20. Close supervision is necessary for any appliance being used by or near children. Do not leave
appliance unattended while connected.
21. Burns could occur from touching hot metal parts, hot water or steam. Use care when you turn a
steam appliance upside down - there may be hot water in the reservoir.
22. Do not use on leather, wax polished furniture or floors, synthetic fabrics, velvet or other delicate,
steam sensitive materials.
23. Use only manufacturer’s recommended attachments - use of attachments not provided or sold by
EURO-PRO may cause fire, electric shock or injury
24. Fill with cool water only - do not add anything except cool water or you will cause damage to the
heating element. Use water only, any other liquid may be dangerous.
25. Never steam clothing while wearing them.
IMPORTANT NOTICE
This appliance has a polarized plug (one blade is wider than the other). To
reduce the risk of electric shock, this plug will fit in a polarized outlet only one
way. If the plug does not fit fully in the outlet, reverse the plug. If it still does not
fit, contact a qualified electrician. Do not modify the plug in any way.
SAVE THESE INSTRUCTIONS
FOR HOUSEHOLD USE ONLY
1
Using the Steam Cleaner Tools (Attachments)
CAUTION: Before removing or attaching a tool, make certain that the
Steam Cleaner is disconnected from power source.
CAUTION:
The force and heat of the steam may adversely affect certain materials.
Always check the suitability of using the steam cleaner on a surface by
carrying out a preliminary test on a hidden area.
Examples for guidance only: - Varnished wood or glossy leather can be
bleached by the effects of steam.
- Shiny plastic materials risk being tarnished.
- Acrylic, velvets and linen are very sensitive
to the temperature of steam.
The manufacturer accepts no responsibility for damage caused to objects,
materials, animals or persons due to the inappropriate use of steam, and
through ignoring the advice and recommendations set down in the Use
and Care Instruction Book.
A. Large Squeegee
B. Steam Brush Attachment with 3 Small Brushes and 1 Large Triangle Brush.
C. Garment Steamer Attachment.
A. SQUEEGEE ATTACHMENT can be fitted with large squeegee. See Fig. 3
Loosen squeegee screw and slide in squeegee, then tighten screw until
locked in place. The attachment is used for cleaning windows, mirrors,
glass, bathroom tile and other large hard surfaces. Connect squeegee
attachment to main unit by sliding together until locked in place. To
release, press grey attachment release button on bottom of main unit.
CAUTION: Thermal shock can shatter glass surfaces. Before steam cleaning
these surfaces, carefully warm the surface by directing steam on
surface from a distance of no less than 4-6 inches.
Note: When using squeegee attachment, apply steam liberally, then wipe dry
with squeegee. Keep towel handy and wipe excess water accumulated on
bottom of window. Take care to dry squeegee after every pass. It might also
be necessary, when finished, to wipe the bottom area where liquid may have
accumulated.
B. STEAM BRUSHES attach to tip of Steam Brush Attachment. The three
(3) small brushes are labeled A, B, C so you can choose different areas of
the home to use each one. For example, Bathroom, Kitchen & Garage.
Connect Steam Brush Attachment to main unit by sliding together until
locked in place. To release, press grey Attachment Release Button on
bottom of main unit. Steam Brush Attachment offers a concentrated flow
of steam for cleaning hard to reach surfaces like crevices and also
scrubbing imbedded dirt while treating a surface with steam.
C. GARMENT STEAMER ATTACHMENT can be used to steam out
wrinkles in clothing or curtains. Connect Garment Steamer Attachment to
main unit by sliding together until locked in place. To release, press grey
Attachment Release Button on bottom of main unit.
CAUTION: Only press steam push button intermittently (once every second
or once every 2 seconds otherwise you may get hot water
exiting from steam holes. Press steam push button and wait for
steam pressure to begin reducing before pressing steam push
button again. You will achieve a rhythm where continuous and
powerful steam flow can be achieved.
2
7
Cleaning Hard Surfaces with the EURO-PRO Steam Cleaner
• High temperature steam can make it easier to remove stubborn household dirt
from hard surfaces. Use your EURO-PRO Steam Cleaner to loosen and remove
hardened food, mildew, soap scum, dirt and grime in all areas of your home
without using any cleaning solution.
WARNING: To reduce risk of
injury from steam, never point
Garment Steamer at people,
animals or electrical outlet.
WARNING:
Never
add
anything except cool water to
tank. Use water only, any other
liquid may be dangerous.
• Steam dissolves dirt on windows and mirrors. You can have your windows and
mirrors sparkling clean without using any chemical glass cleaners which often
leave a residue.
• High temperature “dry” steam can reduce the amount of germs, mold and mildew
on hard non-porous surfaces in your home. The kitchen, bathroom and nursery
are areas in your home where you might find fungus and bacteria. Regularly
sanitizing hard surfaces in these areas in your home can reduce bacteria and
odors. Use the EURO-PRO Steam Cleaner regularly to sanitize toilet bowls,
changing tables, counter tops, sinks, diaper pails and other hard non-porous
surfaces.
J. Garment Steamer Attachment
L. Large Squeegee
M. 20 Foot Power Cord
N. Attachment Release Button
O. Crevice Between Main Unit &
Steam Brush Attachment
P. Water Tank Base
Q. Squeegee Screw
A. Base of Main Unit
B. Steam Push Button
C. Power Light
D. Indicator Light
E. Window Cleaning Attachment
F. Steam Brush Attachment
G. Small Steam Brush
H. Large Triangle Steam Brush
I. Removable Water Tank
Sanitizing with the EURO-PRO Steam Cleaner
To reduce dust mites and to sanitize, treat surfaces with steam for 20 seconds,
holding the steam outlet less than 2 inches away from the surface.
WARNING: High temperature steam from the EURO-PRO Steam Cleaner
can reduce bacteria and dust mites in your home, however, the steam may
not reach and/or kill all bacteria and dust mites on a specific surface being
treated. Therefore, some bacteria can remain after surface has been
treated with hot steam.
Note: You may have some water exit on first burst. This is normal,
just keep pushing the steam button intermittently and you will
obtain a continuous flow of steam.
6
3
Filling the Water Tank
Operating Your EURO-PRO Steam Cleaner
Your EURO-PRO Steamer Steam Cleaner is a very versatile tool. Used
correctly it will help make many household cleaning tasks faster and easier.
Be sure to carefully read all the information contained in this booklet before
using this appliance.
WARNING: With steam brush attachment assembled on unit - Do
not press Steam Push Button more than once per
second. Pressing steam push button quickly may
cause hot water to accumulate between attachment and
main unit which could then leak through crevice and
burn user’s hand.0
CAUTION: Press steam
push button intermittently no
more than once every 1 or 2
seconds. Rapid pressing in
succession will cause water
leaking. Wait for steam
pressure to reduce before
pressing steam push button
again. By pressing
intermittently you will note a
rhythm for maintaining a
continuous flow of steam
without any water dripping
or leaking.
WARNING:
The Water Tank is the blue translucent tank at the end of the Garment Steamer.
See Fig. 2.
1. Remove the Tank by unscrewing it from the base unit by turning in a counter
clockwise motion.
2. Remove the Water Tank base by turning in a counter clockwise motion.
3. With cool water*, fill Water Tank completely and then replace water tank base
by turning in a clockwise motion until snug.
4. To reattach water tank to main unit, line up water tank fittings with fittings
receptacles on main unit. Push water tank in, then turn in a clockwise motion.
*Note: We suggest mixing distilled water or demineralized water with tap water 1part tap water to 3 parts distilled or demineralized water. Doing so will
lengthen the life of the Steamer.
CAUTION:
CAUTION: First usage may
require 6-10 rapid pushes on
steam push button before steam
exits. Keep pressing for a few
seconds until steam has
developed from first rapid
depressing of steam push
button, then you can continue
intermittent pressing of steam
push button.
keep pushing the steam button intermittently and you will obtain a
continuous flow of steam.
Never add anything except cool water or you will cause damage
to the heating element. Use water only, any other liquid may
be dangerous.
Power Cord
Before usage, remember to completely untangle or unwrap the full length of the
power cord.
Power Light/Indicator Light
The red light will illuminate when power is on - (unit is plugged into socket), green
light will go on and off during usage. Maximum temperature is achieved when green
light is illuminated. Before pushing steam push button the first time per usage, wait
until green light is illuminated. Following first usage, green light will go on and off. If
too much water is exiting steam holes, you are pressing steam push button too
rapidly. Stop pushing steam push button and wait for green light. Do not press
steam push button more than once per second or once per 2 seconds.
Note:
Note: You may have some water exit on first burst. This is normal, just
Always disconnect (unplug) the Garment Steamer from power
source before filling with water.
You may have some water exit on first burst. This is normal, just keep
pushing the steam button intermittently and you will obtain a continuous flow
of steam.
Steam Push Button
The steam push button is pumping water to the heating element. Continuous
steam can be attained if steam push button is depressed intermittently once every
one or two seconds. You will notice a rhythm can be maintained while pressing
steam push button which will maximize steam performance. Press steam push
button and wait until you see steam pressure reduced then press steam push
button again (approximately once every one or two seconds).
Important Note: After refilling or before each usage, it may take 6-10 presses on the
steam push button before steam will begin to exit. Press steam push button
repeatedly until first steam exists, then patiently press steam push button not more
than once every one or two seconds and eventually a momentum of steam will
develop. If you press too many times before steam exits, hot water may accumulate
and burn user’s hand if steam brush attachment is assembled on main unit.
4
5