1
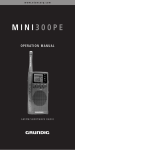
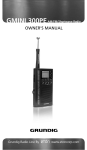
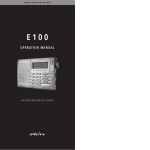
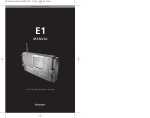
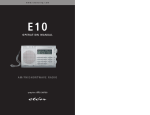
www.etoncorp.com
Mini300PE
O P E R AT I O N M A N UA L
A M / F M / S H O RT WAV E R A D I O
M I N I 3 0 0 P E O P E R AT I O N M A N UA L
TABLE OF CONTENTS
NEED HELP? HERE’S HOW
TO CONTACT US:
• From the United States: (800) 872-2228
• From Canada: (800) 637-1648
• From Everywhere Else: (650) 903-3866
• Email: [email protected]
• Internet: www.etoncorp.com
2
1
page
BASIC CONTROLS ...........................................................
4
2
BATTERIES ......................................................................
6
3
POWER ON/OFF/ VOLUME ..............................................
7
4
FM RADIO .....................................................................8
5
AM/SW1-8 RADIO .........................................................8
6
ANTENNA .....................................................................9
7
CLOCK .............................................................................
10
8
ALARM ............................................................................
12
9
SLEEP FUNCTION ............................................................
14
10
INTRODUCTION TO SHORTWAVE ................................................
16
11
SHORTWAVE BANDS .....................................................17
12
GUIDELINES ...................................................................
18
13
STATIONS ...............................................................................
20
14
SERVICE INFORMATION .............................................................
22
15
ONE YEAR LIMITED WARRANTY ...............................................
23
3
M I N I 3 0 0 P E O P E R AT I O N M A N UA L
1 BASIC CONTROLS
4
1
ANTENNA
2
DISPLAY
3
HOUR
4
MINUTES
5
TUNNING KNOB
6
VOLUME KNOB
7
POWER
8
SLEEP
9
ALARM
10
TIME
11
BATTERY COVER
12
EAR PHONE JACK
13
BAND SWITCH
5
M I N I 3 0 0 P E O P E R AT I O N M A N UA L
2 BATTERIES
3 POWER ON/OFF/ VOLUME
Remove the battery compartment’s cover by pushing the
cover in the direction of arrow. Install two ‘AA’ batteries
according to the polarity. For easy removal, place the batteries on top of lift out ribbon. If the sound becomes low or distorted, replace with new batteries. If the radio will not be
used for a long time, remove all the batteries to prevent possible battery leakage.
Turn the radio on by pressing the POWER button (7). Use the
volume knob (6) to adjust the volume.
9
6
8
7
7
M I N I 3 0 0 P E O P E R AT I O N M A N UA L
4 FM RADIO
Select the FM band by using the band selector switch (13).
Use the tuning knob (5) to tune the radio to the desired frequency.
6 ANTENNA
A. For AM (MW) the radio uses an internal, directional,
ferrite bar antenna. Rotate the radio for best reception.
B. For FM/SW, fully extend the telescopic antenna (1). For
FM, rotate the antenna for best reception.
5 AM/SW1-8 RADIO
Select the desired band, AM or SW 1-7, by using the band
selector switch (13). Turn the tuning knob (5) to the desired
frequency, which appears in the display (2) or just tune
around and listen for stations. Note that MW appears in the
display when AM is selected, as the AM band is called MW
for medium wave in some parts of the world. SW appears in
the display when SW1-8 is selected.
8
9
M I N I 3 0 0 P E O P E R AT I O N M A N UA L
7 CLOCK
The clock displays time in 12 hour, AM/PM format. While
keeping the TIME button (10) pressed, set the correct hour
and minutes with the HOUR (3) and MINUTE (4) buttons.
They can be pressed with quick, short presses to advance
slowly or they can be kept pressed down to advance rapidly.
When finished, release the TIME button
3
4
10
10
11
M I N I 3 0 0 P E O P E R AT I O N M A N UA L
8 ALARM
With the radio turned off, keeping the ALARM button (9)
pressed, set the correct wake up hour and minutes with the
HOUR (3) and MINUTE (4). They can be pressed with quick,
short presses to advance slowly or they can be kept pressed
rapidly. When finished, release the ALARM button and this
will cause the loudspeaker symbol appears in the display.
If you want to deactivate the alarm, press the ALARM button
(9) again and the loudspeaker symbol will disappear from the
display.
When the activated alarm turns the radio on, it can be turned
off by pressing the ALARM button (9) again. The Power button (7) cannot be used for this purpose.
3
4
9
While the radio is playing in alarm mode and without any
manual interruption to deactivate the alarm, it will turn off
automatically after 60 minutes.
12
13
M I N I 3 0 0 P E O P E R AT I O N M A N UA L
9 SLEEP FUNCTION
The sleep function enables the radio to play for a specified
time before automatically shutting off (from 1 hour 59 minutes to just one minute).
Note: The sleep function cannot be activated again within 2
minutes after this function was deactivated before.
With the radio turned off, press and do not release the SLEEP
button (8). This turns the radio on and “0:59” appears in the
display. This also activates the sleep timer activation symbol
in the display.
3
4
To set SLEEP function for 59 minutes, release the SLEEP button. To set SLEEP function as desired, continue to keep the
SLEEP button pressed and use the HOUR and MINUTE buttons to adjust the sleep time for you needs. When finished,
release the SLEEP button.
While it is playing in sleep mode, it can be turned off by
pressing the SLEEP button. The power button (7) cannot be
used for this purpose. The sleep timer activation symbol will
disappear from the display. If the POWER button is pressed,
you need to press SLEEP button again to deactivate the
SLEEP function (The symbol will disappear from display) and
press POWER button again to turn off the radio.
14
8
15
M I N I 3 0 0 P E O P E R AT I O N M A N UA L
10 INTRODUCTION TO SHORTWAVE
Shortwave enables you to hear stations from around the
world. Now that you have a shortwave radio, no doubt you’ll
want to hear worldwide stations right away. If you’re new to
shortwave, please take some time to learn the basics outlined
below. To successfully listen to shortwave stations you must
know how to find them. They are found in the shortwave
‘bands’. On the Mini 300, the shortwave bands are numbered 1-7. The chart below and the one on the back of the
radio show the relationship of bands 1-7 to their official
names and the frequency ranges covered by them.
16
11 SHORTWAVE BANDS
MINI 300
SWITCH
SETTING
OFFICIAL
SHORT-WAVE
BAND NAME
FREQUENCY
RANGE
IN MHz
FREQUENCY
RANGE
IN MHz
SW1
49 meters
5.950-6.20
5.950-6.20
SW2
41 meters
7.10-7.30
7.10-7.30
SW3
31 meters
9.50-9.95
9.50-9.95
SW4
25 meters
11.600-12.100
11.600-12.100
SW5
22 meters
13.600-13.800
13.600-13.800
SW6
19 meters
15.10-15.80
15.10-15.80
SW7
16 meters
17.500-17.90
17.500-17.90
17
M I N I 3 0 0 P E O P E R AT I O N M A N UA L
12 GUIDELINES
HERE ARE SOME GENERAL GUIDELINES
summer shortwave.
• Holding the radio while listening to shortwave will
• In general, the bands with frequencies below 13 MHz
improve signal strengths.
are better at night and the bands with frequencies above
13 MHz are best during the day. This guideline, while
approximate, is a useful general rule of thumb.
• Getting close to a window may substantially improve
your reception because the construction materials of
some buildings do not let signals in very well. Signals
• During the day, listen in SW5-7. These may start getting
good just before sunrise and may stay good all day, until
just after sunset.
• At night, listen in SW1-4. These may start getting good
just before sunset and may stay good all night, until just
after sunrise.
• Around sunrise and sunset, both the day and night
penetrate wood frame buildings easiest, while concrete
and brick buildings usually block signals. If you are in a
building with one or more stories above you, signals can
also be impaired in strength. In such a situation, get as
close to a window as possible while listening.
• These guidelines can be used worldwide and are not
dependent on location.
bands might be good, sometimes exceptionally good.
• Winter shortwave is generally somewhat better than
18
19
M I N I 3 0 0 P E O P E R AT I O N M A N UA L
13 STATIONS
H O W T O I D E N T I F Y W H AT Y O U ’ R E L I S T E N I N G T O A N D H O W T O F I N D S TA T I O N S T H AT Y O U W A N T T O H E A R
For this, you’ll need to use a shortwave directory. We recommend the use of a comprehensive shortwave directory, especially if you want to hear specific countries or to identify the
station you’re listening to. Such a directory will alphabetically
list the countries broadcasting on shortwave, showing their
language, target area, broadcast time and frequency that is
used. The easiest to use shortwave directory is PASSPORT TO
WORLD BAND RADIO, available in major bookstores and
directly from the publisher. Published by International
Broadcasting Services, Ltd., Box 300, Penn's Park,
Pennsylvania 18943 (www.passband.com). This publication
has separate chapters for English and non-English broadcasts,
titled World-Wide Broadcasts In English and Voices From
Home.
20
21
M I N I 3 0 0 P E O P E R AT I O N M A N UA L
14 SERVICE INFORMATION
15 ONE YEAR LIMITED WARRANTY
You may contact the Etón Service Department for additional
information or assistance by calling toll-free Monday through
Friday, 8:30am - 4:00pm Pacific Standard Time:
Etón warrants to the original purchaser this product shall be
free from defects in material or workmanship for one year
from the date of original purchase. During the warranty period Etón or an authorized Etón service facility will provide,
free of charge, both parts and labor necessary to correct
defects in material and workmanship. At their option, Etón
may replace a defective unit.
1-800-872-2228 (United States)
1-800-673-1648 (Canada)
Call for a Return Authorization prior to shipping your unit.
Should you want to return your unit for service, pack the
receiver carefully using the original carton or other suitable
container. Write your return address clearly on the shipping
carton and on an enclosed cover letter describing the service
required, symptoms or problems. Also, include your daytime
telephone number and a copy of your proof of purchase. The
receiver will be serviced under the terms of the Etón Limited
Warranty and returned to you.
22
1. Complete and send in the Warranty Registration Card
within ten (10) days of purchase.
2. Call Etón or the nearest authorized service facility, as
soon as possible after discovery of a possible defect.
Have ready:
(a) the model and serial number.
(b) the identity of the seller and the approximate date of
purchase.
(c) a detailed description of the problem, including details
on the electrical connection to associated equipment and
the list of such equipment.
23
M I N I 3 0 0 P E O P E R AT I O N M A N UA L
15 ONE YEAR LIMITED WARRANTY
3. Etón will issue a Return Authorization number and the
address to which the unit can be shipped. Ship the unit in
its original container or equivalent, fully insured and shipping charges prepaid.
Correct maintenance, repair, and use are important to obtain
proper performance from this product. Therefore carefully
read the Instruction Manual. This warranty does not apply to
any defect that Etón determines is due to:
continued
other remedy and no claim for incidental or consequential
damages, losses, or expenses. Some states do not allow limitations on how long an implied warranty lasts or do not
allow the exclusions or limitation of incidental or consequential damages, so the above limitation and exclusion may not
apply to you. This warranty give you specific legal rights and
you may also have other rights which vary from state to
state.
For service information contact:
1. Improper maintenance or repair, including the installation
of parts or accessories that do not conform to the quality
and specification of the original parts.
2. Misuse, abuse, neglect or improper installation.
Etón Corporation
1015 Corporation Way
Palo Alto, CA 94303
U.S.A.
3. Accidental or intentional damage.
4. Battery leakage.
All implied warranties, if any, including warranties of merchantability and fitness for a particular purpose, terminate
one (1) year from the date of the original purchase.
The foregoing constitutes Etón entire obligation with respect
to this product, and the original purchaser shall have no
24
25
M I N I 3 0 0 P E M A N U E L D ' O P É R AT I O N
TABLE DES MATIÈRES
1
page
FONCTIONNEMENT ÉLÉMENTAIRE ...................................
28
2
INSTALLATION DES PILES ..........................................................
30
3
MISE EN MARCHE/ARRÊT ..............................................
31
NOUS CONTACTER:
4
ÉCOUTE DE LA FM ..............................................................
32
5
ÉCOUTE DE AM/SW1-7 ...................................................
32
• From the United States: (800) 872-2228
6
UTILISATION DE L’ANTENNE .......................................................
33
• From Canada: (800) 637-1648
7
RÉGLAGE DE L’HORLOGE ........................................................
34
• From Everywhere Else: (650) 903-3866
8
RÉGLAGE DE L’ALARME .......................................................
36
• Email: [email protected]
9
RÉGLAGE DE LA FONCTION SOMMEIL .......................................
38
10
INTRODUCTION AUX ONDES COURTES .....................................
40
11
BANDS DES ONDES COURTES .....................................................
41
12
DIRECTIVES ...................................................................42
13
STATIONS .............................................................................
44
14
RENSEIGNEMENTS SUR LES SERVICES ..........................
46
15
LA GARANTIE LIMITÉE DE UN AN .................................47
VOUS AVEZ BESOIN
D’AIDE? VOICI COMMENT
• Internet: www.etoncorp.com
26
27
M I N I 3 0 0 P E M A N U E L D ' O P É R AT I O N
1 FONCTIONNEMENT ÉLÉMENTAIRE
28
1
ANTENNE
2
AFFICHAGE
3
HEURE
4
MINUTES
5
BOUTON D’ACCORD
6
BOUTON DU VOLUME SONORE
7
POWER (MARCHE/ARRÊT)
8
SLEEP (SOMMEIL)
9
9 ALARM (ALARME)
10
TIME (HEURE)
11
COUVERCLE DU COMPARTIMENT À PILES
12
CONNECTEUR POUR ÉCOUTEURS
13
SÉLECTEUR DE GAMMES D’ONDES
29
M I N I 3 0 0 P E M A N U E L D ' O P É R AT I O N
2 INSTALLATION DES PILES
3 MISE EN MARCHE/ARRÊT
Enlevez le couvercle du compartiment à piles en poussant le
couvercle dans le sens de la flèche. Installez deux piles ‘AA’
suivant le schéma de polarité. Pour les enlever facilement,
placez les piles sur le ruban. Si le son devient faible ou distordu, remplacez les piles par des piles neuves. Si la radio n’est
pas utilisée pendant une longue période de temps, enlevez
toutes les piles pour éviter une fuite possible d’acide des
piles. Pour de meilleurs résultats, utilisez des piles alcalines.
Mettez la radio en marche en appuyant sur le bouton POWER
(7). Utilisez le bouton du volume sonore (6) pour régler le volume.
9
30
8
7
31
M I N I 3 0 0 P E M A N U E L D ' O P É R AT I O N
4 ÉCOUTE DE LA FM
Choisissez la bande FM en utilisant le sélecteur de gammes
d’ondes (13). Utilisez le bouton d’accord (5) pour choisir la
fréquence désirée sur votre radio.
6 UTILISATION DE L’ANTENNE
1. Pour AM (MW), la radio utilise une antenne à barre
ferrite, directionnelle, intégrée. Tournez la radio pour
obtenir la meilleure réception.
2. Pour FM/SW, déployez l’antenne télescopique (1) au
maximum. Pour la FM, tournez-la pour obtenir la
5 ÉCOUTE DE AM/SW1-7
meilleure réception.
Choisissez la bande AM or SW 1-7, en utilisant le sélecteur de
gammes d’ondes (13). Tournez le bouton d’accord (5) sur la
fréquence désirée qui apparaît sur l’affichage (2), ou tourner
simplement le bouton d’accord dans un sens ou dans l’autre
pour écouter les différentes stations. Notez que “MW” apparaît sur l’affichage lorsque AM est sélectionné puisque la
bande AM est appelée MW de l’anglais « medium wave »
(ondes moyennes) dans certaines parties du monde. “SW”
apparaît sur l’affichage lorsque SW1-7 est sélectionné.
32
33
M I N I 3 0 0 P E M A N U E L D ' O P É R AT I O N
7 RÉGLAGE DE L’HORLOGE
L’horloge affiche l’heure en format 12 heures, AM et PM. Tout
en gardant le bouton TIME (10) appuyé, réglez l’heure et les
minutes correctes avec les boutons HOUR (3) et MINUTE (4).
Utilisez des pressions rapides et courtes ou gardez les boutons appuyés pour avancer l’heure. Lorsque vous avez fini,
relâchez le bouton TIME.
3
4
10
34
35
M I N I 3 0 0 P E M A N U E L D ' O P É R AT I O N
8 RÉGLAGE DE L’ALARME
Avec la radio à l’arrêt, appuyez sur le bouton ALARM (9) tout
en appuyant simultanément sur les boutons HOUR (3) et
MINUTE (4) pour régler l’heure et les minutes du réveil.
Utilisez des pressions rapides et courtes ou gardez les boutons appuyés pour avancer l’heure. Lorsque vous avez fini,
relâchez le bouton ALARM et cela causera l’apparition du
symbole haut-parleur sur l’affichage. Si vous voulez désactiver l’alarme, appuyez à nouveau sur le bouton ALARM (9) et
le symbole haut-parleur disparaîtra de l’affichage.
Lorsque l’alarme activée met la radio en marche, elle peut
aussi être mise à l’arrêt en appuyant sur le bouton ALARM
(9).
3
4
9
Pendant que la radio est en marche dans le mode d’alarme,
sans aucune interruption manuelle pour désactiver l’alarme,
elle se mettra automatiquement à l’arrêt après 60 minutes.
SYMBOLE D’ACTIVATION DE L’ALARME
36
37
M I N I 3 0 0 P E M A N U E L D ' O P É R AT I O N
9 RÉGLAGE DE LA FONCTION
SOMMEIL
La fonction sommeil permet à la radio d’être en marche pendant une durée spécifiée (de 1 heure 59 minutes jusqu’à une
minute seulement) avant de se mettre automatiquement à
l’arrêt.
Avec la radio à l’arrêt, appuyez sur le bouton SLEEP (8) et ne
le relâchez pas. Cela met la radio en marche et “0:59” apparaît sur l’affichage. Cela rend aussi actif le symbole d’activation de minuterie sommeil sur l’affichage.
à nouveau sur le bouton POWER pour mettre la radio à l’arrêt.
NOTE: La fonction sommeil ne peut pas être activée à nouveau dans les 2 minutes après que cette fonction a été désactivée.
3
Pour régler la fonction sommeil pour 59 minutes, relâchez
immédiatement le bouton SLEEP. Pour personnaliser le sommeil, gardez le bouton SLEEP appuyé et utilisez les boutons
HEURE et MINUTE pour régler l’heure sommeil suivant vos
besoins. Lorsque vous avez fini, relâchez le bouton SLEEP.
Pendant que la radio est en marche dans le mode sommeil, le
fait d’appuyer sur le bouton SLEEP la mettra à l’arrêt et le
symbole d’activation de minuterie sommeil disparaîtra de l’affichage. Si le bouton POWER est appuyé, vous devrez appuyer
à nouveau sur le bouton SLEEP pour désactiver la fonction
SOMMEIL (Le symbole disparaîtra de l’affichage) et appuyez
38
4
8
39
M I N I 3 0 0 P E M A N U E L D ' O P É R AT I O N
10 INTRODUCTION AUX ONDES
COURTES
Les ondes courtes vous permettent d’écouter des stations
situées tout autour du monde. Maintenant que vous possédez
une radio à ondes courtes, aucun doute que vous voudrez
aussitôt écouter des stations du monde entier. Si vous êtes un
novice en matière d’ondes courtes, veuillez consacrer un peu
de temps pour apprendre les principes fondamentaux
exposés brièvement ci-dessous. Pour écouter avec succès les
stations en ondes courtes, vous devez savoir comment les
trouver. Elles se trouvent dans les ‘bandes’ d’ondes courtes.
Sur le Mini 300, les bandes d’ondes courtes sont numérotées
de1 à 7. Le tableau ci-dessous et celui au dos de la radio
montre la correspondance des bandes 1-7 avec leurs noms
officiels et leurs gammes de fréquences couvertes par cellesci.
40
11 BANDS DES ONDES COURTES
RÉGLAGE DU
SÉLECTEUR
DU MINI 300
NOM OFFICIEL DE
LA BANDE D’ONDES COURTES
GAMME DES
FRÉQUENCES EN
MHz
GAMME DES
FRÉQUENCES EN
KHz
SW1
49 mètres
5.950-6.20
5950- 6200
SW2
41 mètres
7.10-7.30
7100- 7300
SW3
31 mètres
9.50-9.95
9500- 9950
SW4
25 mètres
11.600-12.100
11600-12100
SW5
22 mètres
13.600-13.800
13600-13800
SW6
19 mètres
15.10-15.80
15100-15800
SW7
16 mètres
17.500-17.90
17500-17900
41
M I N I 3 0 0 P E M A N U E L D ' O P É R AT I O N
12 DIRECTIVES
V O I V I I C I Q U E L Q U E S I N D I C AT I O N S
GÉNÉRALES
• En général, les bandes avec des fréquences en dessous
de 13 MHz sont meilleures pendant la nuit et les bandes
avec des fréquences au-dessus de 13 MHz sont meilleures
pendant la journée. Cette indication, quoique approximative, est un truc général pratique.
• Pendant la journée, écoutez sur les bandes SW5 à 7.
Celles-ci peuvent commencer à devenir bonnes juste
avant le lever du soleil et peuvent rester bonnes toute la
journée, jusqu’après le coucher du soleil.
• La nuit, écoutez sur les bandes SW1 à 4. Celles-ci
peuvent commencer à devenir bonnes juste avant le
coucher du soleil et peuvent rester bonnes toute la nuit,
jusqu’après le lever du soleil.
• Au lever et au coucher du soleil, les bandes de la nuit
et de la journée peuvent toutes deux être bonnes, même
quelques fois exceptionnellement bonnes.
42
• Les ondes courtes en hiver sont généralement un peu
meilleures qu’en été.
• Le fait de tenir la radio tout en écoutant les ondes
courtes améliorera la puissance du signal.
• Le fait de se rapprocher d’une fenêtre peut améliorer
considérablement votre réception parce que les matériaux
de construction utilisés dans certains bâtiments ne laissent pas très bien passer les signaux. Les signaux
pénètrent plus facilement les bâtiments à charpentes en
bois, tandis que les bâtiments en briques et en béton bloquent généralement les signaux. Si vous êtes dans un
bâtiment avec un ou plusieurs étages au-dessus de vous,
la puissance des signaux peut aussi être affaiblie. Dans
une telle situation, placez-vous le plus près possible d’une
fenêtre tout en écoutant.
• Ces indications peuvent être utilisées dans le monde
entier et ne dépendent pas de l’endroit où vous vous trouvez.
43
M I N I 3 0 0 P E M A N U E L D ' O P É R AT I O N
13 STATIONS
COMMENT IDENTIFIER CE QUE VOUS
ÉCOUTEZ ET COMMENT TROUVER LES
S TAT I O N S Q U E V O U S V O U L E Z
ECOUTER ?
Pour cela, vous devrez utiliser un répertoire des ondes courtes. Nous recommandons l’utilisation d’un répertoire détaillé
des ondes courtes, surtout si vous voulez écouter des pays
particuliers ou pour identifier la station que vous êtes en train
d’écouter. Un tel répertoire classera par ordre alphabétique
les pays émettant sur ondes courtes, indiquant leur langue, la
région visée, l’heure d’émission et la fréquence qui est utilisée. Le répertoire le plus facile à utiliser est PASSPORT TO
WORLD BAND RADIO, disponible chez les grands libraires et
directement auprès de la maison d’édition. Publié par
International Broadcasting Services, Ltd., Box 300, Penn's
Park, Pennsylvania 18943; www.passband.com. Cette publication comporte des chapitres séparés pour les émissions qui
sont en anglais et celles qui ne le sont pas, intitulés WorldWide Broadcasts In English and Voices From Home. (Émissions du Monde en Anglais et Voix de Chez Nous)
44
45
M I N I 3 0 0 P E M A N U E L D ' O P É R AT I O N
14 RENSEIGNEMENTS SUR LES
SERVICES
15 LA GARANTIE LIMITÉE DE
UN AN
Pour obtenir de plus amples renseignements ou de l’assistance, vous pouvez contacter le Service des réparations de
Etón en appelant les numéros sans frais suivant, du lundi au
vendredi, de 8 h 30 à 16 h, heure normale du Pacifique:
Etón garantit à l’acheteur initial que ce produit sera exempt
de tout défaut de matériau ou de main-d’oeuvre pendant une
année à partir de la date de l’achat initial.
1-800-872-2228 (AUX ÉTATS-UNIS)
1-800-673-1648 (AU CANADA)
Veuillez appeler pour obtenir un Numéro d’autorisation de
retour avant d’expédier votre appareil. Si vous voulez renvoyer votre appareil pour le faire réparer, emballez soigneusement le récepteur en utilisant sa boîte d’origine ou une autre
boîte appropriée. Inscrivez lisiblement votre adresse de retour
sur la boîte d’expédition et sur la lettre jointe qui décrit la
réparation nécessaire, les symptômes ou les problèmes.
Veuillez inclure aussi le numéro de téléphone où l’on peut
vous joindre pendant la journée, ainsi qu’une copie de votre
preuve d’achat. Le récepteur sera réparé selon les modalités
de la Garantie limitée de Etón et vous sera retourné.
46
Pendant la durée de la garantie, Etón ou un centre accrédité
de réparation Etón fournira, gratuitement, les pièces et la
main-d’oeuvre nécessaires pour corriger les vices de matériau
et de main-d’oeuvre. En outre, Etón peut choisir de remplacer
un appareil défectueux.
1. Remplissez et envoyez la Fiche d’enregistrement de la
garantie dans les dix (10) jours qui suivent la date de
l’achat.
2. Appelez Etón ou le centre accrédité de réparation le
plus proche, aussitôt que possible après la découverte
d’une possibilité de vice. Soyez prêt à donner :
(a) le numéro de modèle et le numéro de série.
(b) le nom du revendeur et la date approximative de
l’achat.
(c) une description détaillée du problème, y compris les
détails sur les branchements électriques à l’équipement
associé et la liste de cet équipement.
47
M I N I 3 0 0 P E M A N U E L D ' O P É R AT I O N
15 LA GARANTIE LIMITÉE DE
UN AN
1. Etón vous donnera un numéro d’Autorisation de retour
et l’adresse à laquelle vous pouvez envoyer l’appareil.
Envoyez l’appareil dans sa boîte d’origine ou une boîte
équivalente, entièrement assuré et les frais de port payés
à l’avance.
Un entretien, des réparations et une utilisation corrects sont
importants pour obtenir un bon fonctionnement de ce produit. Veuillez donc lire soigneusement ce Mode d’emploi.
Cette garantie ne s’applique pas aux défauts qui, selon l’évaluation de Etón, ont été provoqués par :
1. un entretien ou des réparations incorrects, y compris
l’installation de pièces ou d’accessoires qui ne sont pas
conformes à la qualité et aux spécifications des pièces
d’origine.
2. une utilisation incorrecte, abusive ou négligente, ou
une installation incorrecte.
3. des dégâts accidentels ou intentionnels.
4. une fuite des piles.
Toutes les garanties implicites, le cas échéant, y compris les
garanties de valeur marchande et d’aptitude à une utilisation
48
continué
particulière, cessent une (1) année après la date de l’achat
initial.
Ce qui précède constitue l’ensemble des obligations de Etón
envers ce produit, et l’acheteur initial n’aura aucun autre
recours ni réclamation pour des dommages indirects ou consécutifs, des pertes ou des dépenses. Certains états n’autorisent aucune limitation sur la durée d’une garantie
implicite ou ne permettent pas les exclusions ou les limitations sur les dommages indirects ou consécutifs, et donc les
limitations et exclusions ci-dessus peuvent ne pas s’appliquer
à vous.
Cette garantie vous donne des droits juridiques précis, et
vous pouvez également avoir d’autres droits qui varient d’état en état.
Pour obtenir de plus amples renseignements sur les services,
contactez :
Etón Corporation
1015 Corporation Way
Palo Alto, CA 94303
États-Unis
49
MINI 300PE BENUTZERHANDBUCH
INHALTSVERZEICHNIS
Sie benötigen Hilfe? Hier
ist, wie uns zu berühren:
• Telefon: 49 (0) 89 35874-354
• Faksimile: 49 (0) 89 35874-103
• Email: [email protected]
• Internet: www.etoncorp.com
50
1
seite
BEDIENELEMENTE ...........................................................
52
2
BATTERIEN EINSETZEN ..............................................................
54
3
RADIO EIN- UND AUS- SCHALTEN ............................ 55
4
EMPFANG VON UKW ................................................. 56
5
EMPFANG VON MW BZW. KW 1-7 ....................................
56
6
GEBRAUCH DER ANTENNE ................................................
57
7
STELLEN DER UHR ...........................................................
58
8
STELLEN DER WECKZEIT ........................................................
60
9
STELLEN DER EINSCHLAFZEIT-AUTOMATIK (SLEEP) ...........
62
10
EINFÜHRUNG IN DIE KURZWELLE ...............................SHORT
64
11
KURZWELLENBÄNDER .....................................................
65
12
RICHTLINIEN ...................................................................
66
13
STATIONEN .......................................................................
68
14
INFORMATIONEN ZUR WARTUNG ................................70
15
EINJÄHRIGE EINGESCHRÄNKTE GARANTIE ...................
71
51
MINI 300PE BENUTZERHANDBUCH
1 BEDIENELEMENTE
52
1
ANTENNE
2
ANZEIGE
3
STUNDEN
4
MINUTEN
5
KNOPF ZUR SENDEREINSTELLUNG
6
LAUTSTÄRKENREGLER
7
EIN/AUS (POWER)
8
EINSCHLAFZEIT-AUTOMATIK (SLEEP)
9
WECKFUNKTION (ALARM)
10
ZEIT
11
BATTERIEFACHABDECKUNG
12
KOPFHÖRERBUCHSE
13
BANDSCHALTER
53
MINI 300PE BENUTZERHANDBUCH
2 BATTERIEN EINSETZEN
3 RADIO EIN- UND AUS- SCHALTEN
Die Abdeckung des Batteriefachs durch Drücken in
Pfeilrichtung abnehmen. Zwei ‚AA’ -Batterien einsetzen.
Dabei die in der Abbildung gezeigte Polarität beachten. Zum
leichten späteren Entnehmen die Batterien so einsetzten, dass
das Band zur Entnahme unter den Batterien zu liegen kommt.
Wenn der Klang leise oder verzerrt wirkt, neue Batterien einsetzen. Wenn das Gerät für längere Zeit nicht gebraucht wird,
alle Batterien entnehmen, um ein mögliches Auslaufen der
Säure zu verhindern. Alkalibatterien erbringen die beste
Leistung.
Das Radio durch Drücken des Knopfs mit der Bezeichnung
POWER (7) einschalten. Die Lautstärke mit dem Knopf zur
Lautstärkenregelung (6) einstellen.
9
54
8
7
55
MINI 300PE BENUTZERHANDBUCH
4 EMPFANG VON UKW
6 GEBRAUCH DER ANTENNE
Mit dem Schalter zur Bandwahl das UKW-Band (13) wählen.
Mit dem Knopf zur Sendereinstellung (5) das Radio auf die
gewünschte Frequenz stellen.
1. Das Radio verfügt über eine interne Ferrit- Richtantenne
für den Empfang der MW. Um den besten Empfang zu
erzielen, muss das Radio gedreht werden.
2. Zum Empfang von UKW und KW die teleskopische
5 EMPFANG VON MW BZW. KW 1-7
Antenne (1) vollständig ausziehen. Für besten Empfang in
UKW die Antenne drehen.
Das gewünschte Band - MW oder KW 1-7 - mit dem Schalter
zur Bandwahl (13) einstellen. Den Knopf zur Sendereinstellung
(5) auf die gewünschte Frequenz einstellen. Die Frequenz kann
in der Anzeige (2) gesehen werden. Sender können auch einfach nach Gehör gesucht werden. Anmerkung: In der Anzeige
wird MW sichtbar, wenn AM gewählt ist. Der Grund dafür ist,
dass das AM-Band in manchen Teilen der Welt MW (für
Mittelwelle) genannt wird. In der Anzeige wird SW (Short
Wave) gezeigt, wenn KW 1-7 gewählt ist.
56
57
MINI 300PE BENUTZERHANDBUCH
7 STELLEN DER UHR
Die Uhr zeigt die Zeit im 12-Stundenformat mit AM und PM
an. Die richtige Uhrzeit (Stunden und Minuten) mit den
Knöpfen STUNDE (3) und MINUTE (4) einstellen, wobei der
Knopf ZEIT (10) gedrückt gehalten wird. Um die Zeit weiterzustellen können die Knöpfe kurz und schnell hintereinander gedrückt oder gedrückt gehalten werden. Nach vollendeter Einstellung den Knopf ZEIT loslassen.
3
4
10
58
59
MINI 300PE BENUTZERHANDBUCH
8 STELLEN DER WECKZEIT
Bei ausgeschaltetem Radio den Knopf ALARM (9) gedrückt
halten und gleichzeitig durch Drücken der Knöpfe STUNDE (3)
und MINUTE (4) die richtige Weckzeit (Stunden und Minuten)
einstellen. Um die Zeit weiterzustellen können die Knöpfe
kurz und schnell hintereinander gedrückt oder gedrückt
gehalten werden. Nach vollendeter Einstellung den Knopf
ALARM loslassen. Jetzt erscheint das Lautsprechersymbol in
der Anzeige. Zur Deaktivierung der Weckfunktion den Knopf
ALARM (9) noch einmal drücken. Das Lautsprechersymbol
wird dadurch ausgeblendet.
Wenn die aktivierte Weckfunktion das Radio einschaltet, kann
es durch Drücken des Knopfs ALARM (9) wieder ausgeschaltet werden.
3
4
9
Wenn das Radio im Weckfunktionsmodus ist, schaltet es sich
nach 60 Minuten automatisch ab, wenn die Weckfunktion
nicht zuvor manuell deaktiviert wurde.
SYMBOL FÜR AKTIVIERTE WECKFUNKTION
60
61
MINI 300PE BENUTZERHANDBUCH
9 STELLEN DER EINSCHLAFZEITAUTOMATIK (SLEEP)
Mit der Einschlafzeit-Automatik schaltet sich das Radio
automatisch ab, nachdem es für einen bestimmten Zeitraum
eingeschaltet war (von 1 Stunde und 59 Minuten bis zu nur 1
Minute).
den, muss zunächst der Knopf SLEEP noch einmal gedrückt
werden, um die Einschlafzeit-Automatik zu deaktivieren (das
Symbol wird aus der Anzeige ausgeblendet). Dann den
Knopf POWER drücken, um das Radio auszuschalten.
Bei ausgeschaltetem Radio den Knopf SLEEP (8) drücken und
nicht loslassen. Dadurch wird das Radio eingeschaltet. Auf
der Anzeige erscheint „0:59“. Außerdem wird in der Anzeige
das Symbol für die Einschlafzeit-Automatik (Sleep) eingeblendet.
HINWEIS: Die Einschlafzeit-Automatik kann bis zu 2
Minuten nach der Deaktivierung dieser Funktion nicht wieder
aktiviert werden.
Wenn die Einschlafzeit-Automatik auf 59 Minuten eingestellt
werden soll, den Knopf SLEEP sofort loslassen. Wenn die Zeit
geändert werden soll, den Knopf SLEEP gedrückt halten und
die Einschlafzeit mit den Knöpfen STUNDE und MINUTE je
nach Bedarf einstellen. Nach vollendeter Einstellung den
Knopf SLEEP loslassen.
Wenn das Radio im Einschlafzeit-Modus läuft, kann es durch
einen Druck auf den Knopf SLEEP ausgeschaltet werden. Das
Symbol für die Einschlafzeit-Automatik wird dann aus der
Anzeige ausgeblendet. Soll der Knopf POWER gedrückt wer-
62
3
4
8
63
MINI 300PE BENUTZERHANDBUCH
10 EINFÜHRUNG IN DIE KURZWELLE
Über Kurzwelle können Sender aus der ganzen Welt gehört
werden. Da Sie jetzt ein Kurzwellenradio besitzen, möchten
Sie sicherlich gleich Kurzwellensender aus der ganzen Welt
hören. Wenn Sie keine Erfahrung mit Kurzwelle haben,
nehmen Sie sich bitte etwas Zeit, um die unten beschriebenen
Grundlagen zu lernen. Wenn man erfolgreich
Kurzwellensender hören möchte, muss man wissen, wie man
sie finden kann. Sie können in Kurzwellen- ‚Bändern’ gefunden werden. Auf dem Mini 300 sind die Kurzwellenbänder
von 1 bis 7 nummeriert. Die Tabelle unten und auf der
Rückseite des Radios zeigen das die Bänder 1 bis 7 mit ihren
offiziellen Bezeichnungen und den Frequenzbereichen, die
durch sie abgedeckt werden.
64
11 KURZWELLENBÄNDER
MINI 300
SCHALTERSTELLUNG
OFFIZIELLE BEZEICHNUNG DES
KURZWELLENBANDS
FREQUENZBEREICH
IN MHz
FREQUENZBEREICH
IN kHz
SW1
49 mètres
5.950-6.20
5950- 6200
SW2
41 mètres
7.10-7.30
7100- 7300
SW3
31 mètres
9.50-9.95
9500- 9950
SW4
25 mètres
11.600-12.100
11600-12100
SW5
22 mètres
13.600-13.800
13600-13800
SW6
19 mètres
15.10-15.80
15100-15800
SW7
16 mètres
17.500-17.90
17500-17900
65
MINI 300PE BENUTZERHANDBUCH
12 RICHTLINIEN
HIER EINIGE ALLGEMEINEN RICHTLINIEN
• Im Allgemeinen sind die Bänder mit Frequenzen unter
13 MHz während der Nacht und die Bänder mit
Frequenzen über 13 MHz während des Tages besser. Diese
Richtlinie trifft nicht immer zu, kann aber als nützliche allgemeine Faustregel dienen.
• Während des Tages kann KW 5-7 gehört werden. Diese
Bänder können kurz vor Sonnenaufgang gut werden und
den ganzen Tag lang, bis kurz nach Sonnenuntergang, gut
bleiben.
• Während der Nacht kann KW 1-4 gehört werden. Diese
Bänder können kurz vor Sonnenuntergang gut werden
und die ganze Nacht lang, bis kurz nach Sonnenaufgang,
gut bleiben.
• Im Winter ist der Kurzwellenempfang im Allgemeinen
etwas besser als im Sommer.
• Die Signalstärke der Kurzwelle wird besser, wenn das
Radio in den Händen gehalten wird.
• Der Empfang kann sich wesentlich verbessern, wenn
man sich neben ein Fenster stellt, da sich die Materialien
mancher Gebäude nicht leicht von den Signalen durchdringen lassen. Die Signale dringen am besten durch
Gebäude aus Holz, während Beton- und Steingebäude im
Allgemeinen Signale blockieren. Wenn Sie sich in einem
Gebäude befinden und ein oder mehrere Stockwerke über
sich haben, kann das Signal in der Stärke ebenfalls negativ beeinflusst werden. In diesem Fall während des Hörens
so nahe wie möglich an ein Fenster gehen.
• Diese Richtlinien können weltweit verwendet werden
und hängen nicht von dem Standort ab.
• Während des Sonnenauf- und Sonnenuntergangs
können sowohl die Tages- als auch die Nachtbänder gut
sein, manchmal ungewöhnlich gut.
66
67
MINI 300PE BENUTZERHANDBUCH
13 STATIONEN
WIE KANN MAN ERKENNEN, WELCHEN
SENDER MAN HÖRT UND WIE FINDET
MAN BESTIMMTE SENDER
Hierzu ist ein Kurzwellenverzeichnis erforderlich. Der
Gebrauch eines umfassenden Kurzwellenverzeichnis wird
empfohlen, besonders wenn bestimmte Länder empfangen
werden sollen oder eine Bestimmung der empfangenen
Sender gewünscht ist. Ein derartiges Verzeichnis führt die
Länder, die in Kurzwelle senden, alphabetisch auf, zusammen
mit ihrer Sprache, dem Zielgebiet, den Sendezeiten und der
Häufigkeit, mit der sie verwendet werden. Das gebrauchsfreundlichste Kurzwellenverzeichnis ist PASSPORT TO WORLD
BAND RADIO, das in größeren Buchhandlungen und vom
Verlag direkt erhältlich ist. Veröffentlicht von International
Broadcasting Services, Ltd., Box 300, Penn's Park,
Pennsylvania 18943, USA; www.passband.com. In dieser
Publikation finden sich getrennte Kapitel für englische und
nicht-englische Sendungen mit dem Titel ‚World-Wide
Broadcasts In English and Voices From Home’.
68
69
MINI 300PE BENUTZERHANDBUCH
14 INFORMATIONEN ZUR WARTUNG
Sie können den Etón technischen kundendienst für weitere
informationen oder hilfe durch erreichen uns an berühren:
Telefon: 49 (0) 89 35874-354
Faksimile: 49 (0) 89 35874-103
Vor dem Einschicken des Geräts per Telefon eine
Rückgabegenehmigung anfordern. Wenn Sie Ihr Gerät zur
Wartung einschicken möchten, den Empfänger sorgfältig im
Originalkarton oder einen anderen geeigneten Behälter verpacken. Den Absender deutlich auf dem Verpackungskarton
und einem beigelegten Begleitschreiben angeben. In dem
Schreiben sollte die Art der notwendigen Wartung, die
Symptome oder die Probleme erwähnt werden. Auch eine
Telefonnummer angeben, unter der Sie tagsüber zu erreichen
sind, sowie eine Kopie des Kaufnachweises. Der Empfänger
wird unter den Bedingungen der eingeschränkten Garantie
von Etón gewartet und an Sie zurückgeschickt.
15 EINJÄHRIGE EINGESCHRÄNKTE
GARANTIE
Etón garantiert dem ursprünglichen Käufer, dass dieses
Produkt frei von Material- oder Verarbeitungsmängeln ist.
Diese Garantie gilt für ein Jahr ab Kaufdatum.
Während der Garantieperiode stellt Etón oder eine von Etón
autorisierte Servicestelle kostenlos Teile und Arbeitszeit bereit,
die zur Behebung von Material- und Verarbeitungsmängeln
notwendig sind. Etón kann ein schadhaftes Gerät nach eigenem Ermessen ersetzen.
1. Füllen Sie die Garantie-Registrierungskarte innerhalb
von zehn (10) Tagen nach Kauf aus.
2. Rufen Sie Etón oder die nächste Servicestelle sobald
wie möglich an, wenn Sie einen Mangel feststellen.
Halten Sie Folgendes bereit:
(a) Modell und Seriennummer.
(b) Namen des Händlers und das ungefähre Kaufdatum.
(c) Eine genaue Beschreibung des Problems, einschließlich
Details über die elektrischen Verbindungen zu anderen
Geräten und eine Liste dieser Geräte.
3. Etón stellt eine Rückgabegenehmigungsnummer aus
und teilt die Adresse mit, an die das Gerät geschickt wer-
70
71
MINI 300PE BENUTZERHANDBUCH
15 EINJÄHRIGE EINGESCHRÄNKTE
GARANTIE
den kann. Das Gerät im Originalkarton oder einem
anderen geeigneten Behälter schicken. Eine volle
Versicherung abschließen und das Porto im Voraus
bezahlen.
Eine sachgemäße Wartung, Reparatur und der richtige
Gebrauch sind wichtig, damit das Gerät eine entsprechende
Leistung bringen kann. Lesen Sie daher die
Gebrauchsanleitung sorgfältig. Diese Garantie gilt für keine
Schäden, die nach Ermessen von Etón auf folgende Gründe
zurückzuführen sind:
1. Unsachgemäße Wartung oder Reparatur, einschließlich
der Installation von Teilen oder Zubehör, die nicht der
Qualität und den Spezifikationen der Originalteile
entsprechen.
2. Unsachgemäße Behandlung, Missbrauch,
Vernachlässigung oder falsche Installation.
3. Versehentliche oder mutwillige Beschädigung.
4. Auslaufende Batterien.
Alle stillschweigenden Garantien, falls solche bestehen, einschließlich Garantien der Marktfähigkeit und der Eignung für
72
fortgesetzt
einen bestimmten Zweck, laufen ein (1) Jahr nach dem
ursprünglichen Kaufdatum aus.
Das oben Erwähnte stellt die vollständige Verpflichtung von
Etón bezüglich dieses Produkts dar. Der ursprüngliche Käufer
ist zu keiner anderen Behebung berechtigt und hat keinen
Anspruch für zufällige oder Folgeschäden, Verluste oder
Ausgaben. In manchen Staaten ist eine Beschränkung der
Länge stillschweigender Garantien oder der Ausschluss
beiläufig entstandener bzw. Folgeschäden nicht zulässig. Die
obige Beschränkung trifft also für Sie eventuell nicht zu.
Diese Garantie erkennt Ihnen bestimmte gesetzliche Rechte
zu. Sie haben eventuell auch andere Rechte, die von Staat zu
Staat verschieden sind.
Für Informationen über unseren service:
EEtón Europe
World Wide Business Centres
Leopoldstr. 236
D-80807 München
Germany
73
www.etoncorp.com
From the United States: (800) 872-2228
From Canada: (800) 637-1648
From Everywhere Else: (650) 903-3866
Email: [email protected]
Internet: www.etoncorp.com
Etón Corporation
1015 Corporation Way
Palo Alto, California 94303
USA