1
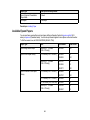
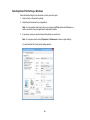
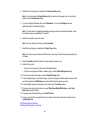
WF-100 User's Guide
Contents
WF-100 User's Guide................................................................................................................................... 9
Product Basics ..........................................................................................................................................
Using the Control Panel .....................................................................................................................
Control Panel Buttons....................................................................................................................
The LCD Screen............................................................................................................................
Status Icons...................................................................................................................................
Changing LCD Screen Language..................................................................................................
Turning On Quiet Mode .................................................................................................................
Product Parts Locations .....................................................................................................................
Printer Parts - Top .........................................................................................................................
Printer Parts - Inside and Bottom...................................................................................................
Battery Charging ................................................................................................................................
Charging the Battery Using the AC Adapter ..................................................................................
Charging the Battery Using the USB Cable ...................................................................................
The Power Off and Sleep Timers .......................................................................................................
Changing the Power Off Timer Setting ..........................................................................................
Changing the Sleep Timer Setting .................................................................................................
Epson Connect Solutions for Smartphones, Tablets, and More .........................................................
Using Epson Email Print ...............................................................................................................
Using the Epson iPrint Mobile App ................................................................................................
Using Epson Remote Print ...........................................................................................................
Using AirPrint ....................................................................................................................................
Using Google Cloud Print ...................................................................................................................
Setting Up Google Cloud Print on a Chromebook .........................................................................
10
10
10
11
11
12
13
14
15
16
16
17
18
18
19
20
21
21
22
22
23
23
24
Wi-Fi Networking .......................................................................................................................................
Wi-Fi Infrastructure Mode Setup.........................................................................................................
Selecting Wireless Network Settings from the Control Panel ........................................................
Wi-Fi Direct Mode Setup ....................................................................................................................
Enabling Wi-Fi Direct Mode ...........................................................................................................
Wi-Fi Protected Setup (WPS).............................................................................................................
26
26
27
29
30
32
3
Using WPS to Connect to a Network .............................................................................................
Printing a Network Status Sheet.........................................................................................................
Changing or Updating Network Connections .....................................................................................
Accessing the Web Config Utility ...................................................................................................
Changing a USB Connection to a Wi-Fi Connection......................................................................
Connecting to a New Wi-Fi Router ................................................................................................
Disabling Wi-Fi Features ...............................................................................................................
32
33
34
34
35
35
36
Loading Paper ...........................................................................................................................................
Loading Paper and Envelopes ...........................................................................................................
Selecting the Paper Source Settings - Control Panel .........................................................................
Turning Off the Paper Setting Alert.....................................................................................................
Paper Loading Capacity .....................................................................................................................
Available Epson Papers .....................................................................................................................
Borderless Paper Type Compatibility .................................................................................................
Paper or Media Type Settings ............................................................................................................
37
37
39
40
41
42
43
44
Printing from a Computer .........................................................................................................................
Printing with the Standard Epson Printer Software - Windows ...........................................................
Selecting Basic Print Settings - Windows ......................................................................................
Print Quality Options - Windows ...............................................................................................
Multi-Page Printing Options - Windows.....................................................................................
Selecting Double-sided Printing Settings - Windows .....................................................................
Double-sided Printing Options - Windows.................................................................................
Selecting Additional Layout and Print Options - Windows .............................................................
Custom Color Correction Options - Windows............................................................................
Image Options and Additional Settings - Windows....................................................................
Header/Footer Settings - Windows ...........................................................................................
Selecting a Printing Preset - Windows...........................................................................................
Selecting Extended Settings - Windows ........................................................................................
Extended Settings - Windows ...................................................................................................
Printing Your Document or Photo - Windows.................................................................................
Selecting Default Print Settings - Windows....................................................................................
Changing the Language of the Printer Software Screens .........................................................
Changing Automatic Update Options ............................................................................................
45
45
46
48
48
48
50
51
53
54
55
56
57
58
59
60
61
62
4
Printing with the Built-in Basic Driver - Windows ................................................................................
Installing the Basic Driver Software - Windows .............................................................................
Selecting Print Settings - Windows Basic Driver............................................................................
Printing with OS X ..............................................................................................................................
Selecting Basic Print Settings - OS X ............................................................................................
Print Quality Options - OS X......................................................................................................
Print Options - OS X..................................................................................................................
Selecting Page Setup Settings - OS X...........................................................................................
Selecting Print Layout Options - OS X ...........................................................................................
Managing Color - OS X..................................................................................................................
Color Matching and Color Options - OS X.................................................................................
Selecting Printing Preferences - OS X...........................................................................................
Printing Preferences - OS X......................................................................................................
Printing Your Document or Photo - OS X.......................................................................................
Checking Print Status - OS X ....................................................................................................
Adjusting Print Density .......................................................................................................................
Adjusting Color...................................................................................................................................
Cancelling Printing Using a Product Button........................................................................................
63
64
64
68
68
72
72
73
74
74
75
76
77
77
78
80
81
82
Replacing Ink Cartridges and Maintenance Boxes................................................................................. 83
Check Cartridge and Maintenance Box Status................................................................................... 83
Checking Cartridge and Maintenance Box Status on the LCD Screen .......................................... 83
Checking Cartridge and Maintenance Box Status with Windows .................................................. 84
Checking Cartridge and Maintenance Box Status with OS X......................................................... 87
Purchase Epson Ink Cartridges and Maintenance Box ...................................................................... 88
Ink Cartridge and Maintenance Box Part Numbers........................................................................ 88
Removing and Installing Ink Cartridges.............................................................................................. 89
Printing with Black Ink and an Expended Color Cartridge .................................................................. 92
Printing with an Expended Color Cartridge - Windows .................................................................. 93
Printing with an Expended Color Cartridge - OS X ........................................................................ 93
Conserving Low Black Ink with Windows ........................................................................................... 95
Replacing the Maintenance Box......................................................................................................... 95
Adjusting Print Quality.............................................................................................................................. 99
Print Head Maintenance..................................................................................................................... 99
5
Print Head Nozzle Check............................................................................................................... 99
Checking the Nozzles Using the Product Control Panel ........................................................... 99
Checking the Nozzles Using a Computer Utility ...................................................................... 102
Print Head Cleaning .................................................................................................................... 105
Cleaning the Print Head Using the Product Control Panel ...................................................... 105
Cleaning the Print Head Using a Computer Utility................................................................... 106
Print Head Alignment ....................................................................................................................... 109
Aligning the Print Head Using the Product Control Panel ............................................................ 109
Aligning the Print Head Using a Computer Utility......................................................................... 111
Cleaning the Paper Path Using the Product Control Panel .............................................................. 113
Transporting and Cleaning Your Product ............................................................................................. 115
Carrying and Transporting Your Product.......................................................................................... 115
Cleaning Your Product ..................................................................................................................... 116
Solving Problems ....................................................................................................................................
Checking for Software Updates........................................................................................................
Product Status Messages ................................................................................................................
Running a Product Check ................................................................................................................
Resetting Control Panel Defaults .....................................................................................................
Solving Power and Battery Problems ...............................................................................................
Product Does Not Turn on ...........................................................................................................
Product Does Not Turn Off ..........................................................................................................
Product Turns Off Automatically ..................................................................................................
Battery Does Not Charge From Computer...................................................................................
Solving Setup Problems ...................................................................................................................
Noise After Ink Installation ...........................................................................................................
Software Installation Problems ....................................................................................................
Solving Network Problems ...............................................................................................................
Product Cannot Connect to a Wireless Router or Access Point ..................................................
Network Software Cannot Find Product on a Network.................................................................
Product Does Not Appear in OS X Printer Window......................................................................
Cannot Print Over a Network.......................................................................................................
Solving Paper Problems...................................................................................................................
Paper Feeding Problems.............................................................................................................
6
117
117
118
120
121
122
123
123
123
124
124
124
125
125
126
127
128
128
129
129
Paper Jam Problems in the Rear Paper Feed .............................................................................
Paper Jam Problems Inside the Product .....................................................................................
Solving Problems Printing from a Computer.....................................................................................
Nothing Prints ..............................................................................................................................
Product Icon Does Not Appear in Windows Taskbar ...................................................................
Error After Cartridge Replacement ..............................................................................................
Printing is Slow ............................................................................................................................
Solving Page Layout and Content Problems ....................................................................................
Inverted Image.............................................................................................................................
Too Many Copies Print ................................................................................................................
Blank Pages Print ........................................................................................................................
Incorrect Margins on Printout.......................................................................................................
Border Appears on Borderless Prints ..........................................................................................
Incorrect Characters Print............................................................................................................
Incorrect Image Size or Position ..................................................................................................
Slanted Printout ...........................................................................................................................
Solving Print Quality Problems .........................................................................................................
White or Dark Lines in Printout ....................................................................................................
Blurry or Smeared Printout ..........................................................................................................
Faint Printout or Printout Has Gaps .............................................................................................
Grainy Printout.............................................................................................................................
Incorrect Colors ...........................................................................................................................
When to Uninstall Your Product Software ........................................................................................
Uninstalling Printing Software - Windows ....................................................................................
Uninstalling Product Software - OS X ..........................................................................................
Where to Get Help............................................................................................................................
130
131
132
132
133
133
134
135
136
136
136
137
137
138
139
139
140
140
141
142
143
144
145
145
146
146
Technical Specifications ........................................................................................................................
Windows System Requirements ......................................................................................................
OS X System Requirements.............................................................................................................
Printing Specifications ......................................................................................................................
Paper Specifications ........................................................................................................................
Printable Area Specifications ...........................................................................................................
Ink Cartridge Specifications..............................................................................................................
148
148
149
149
149
150
152
7
Dimension Specifications .................................................................................................................
Electrical Specifications ...................................................................................................................
Environmental Specifications ...........................................................................................................
Interface Specifications ....................................................................................................................
Network Interface Specifications ......................................................................................................
Safety and Approvals Specifications ................................................................................................
153
153
155
155
155
156
Notices ..................................................................................................................................................... 158
General Printer Safety Instructions................................................................................................... 158
Battery Safety Instructions........................................................................................................... 160
Ink Cartridge Safety Instructions.................................................................................................. 160
LCD Screen Safety Instructions................................................................................................... 161
Wireless Connection Safety Instructions ..................................................................................... 161
FCC Compliance Statement............................................................................................................. 161
Software Notice................................................................................................................................ 162
Trademarks ...................................................................................................................................... 162
Copyright Notice............................................................................................................................... 163
A Note Concerning Responsible Use of Copyrighted Materials................................................... 164
Default Delay Times for Power Management for Epson Products ............................................... 164
Copyright Attribution .................................................................................................................... 164
8
WF-100 User's Guide
Welcome to the WF-100 User's Guide.
For a printable PDF copy of this guide, click here.
9
Product Basics
See these sections to learn about the basic features of your product.
Using the Control Panel
Product Parts Locations
Battery Charging
The Power Off and Sleep Timers
Epson Connect Solutions for Smartphones, Tablets, and More
Using AirPrint
Using Google Cloud Print
Using the Control Panel
See these sections to learn about the control panel and select control panel settings.
Control Panel Buttons
The LCD Screen
Status Icons
Changing LCD Screen Language
Turning On Quiet Mode
Parent topic: Product Basics
Control Panel Buttons
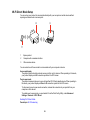
1
The
power button
2
The LCD screen
3
The arrow buttons and the OK button; navigate menus
10
5
The
cancel button; stops printing or returns to the previous screen
Parent topic: Using the Control Panel
The LCD Screen
1
Color Adjustment icon
2
Plain Paper Density Setting icon
3
Network status
4
Battery status
5
Ink and maintenance box status
Parent topic: Using the Control Panel
Status Icons
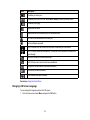
Status icons may be displayed on the LCD screen depending on the product's status.
Icons
Description
The battery is fully charged.
11
Icons
Description
The battery is running low.
The battery is too hot or too cold. Select Menu > Battery to check the battery status.
The battery is charging.
Approximate ink levels.
Approximate service life remaining for the maintenance box.
Ink is low or the maintenance box is nearly full.
An ink cartridge is expended.
A Wi-Fi network error has occurred or the product is searching for a connection.
A Wi-Fi connection has been established. The number of bars indicates the connection's
signal strength.
An Ad hoc connection has been established.
A Wi-Fi Direct mode connection has been established.
A Simple AP mode connection has been established.
Print density has been increased.
Color darkness has been increased.
Parent topic: Using the Control Panel
Changing LCD Screen Language
You can change the language used on the LCD screen.
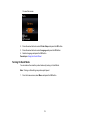
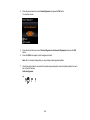
1. From the home screen, select Menu and press the OK button.
12
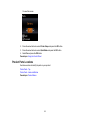
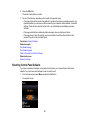
You see this screen:
2. Press the arrow buttons to select Printer Setup and press the OK button.
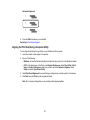
3. Press the arrow buttons to select Language and press the OK button.
4. Select a language and press the OK button.
Parent topic: Using the Control Panel
Turning On Quiet Mode
You can reduce the noise the product makes by turning on Quiet Mode.
Note: Turning on this setting may reduce print speed.
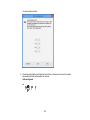
1. From the home screen, select Menu and press the OK button.
13
You see this screen:
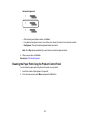
2. Press the arrow buttons to select Printer Setup and press the OK button.
3. Press the arrow buttons to select Quiet Mode and press the OK button.
4. Select On and press the OK button.
Parent topic: Using the Control Panel
Product Parts Locations
See these sections to identify the parts on your product.
Printer Parts - Top
Printer Parts - Inside and Bottom
Parent topic: Product Basics
14
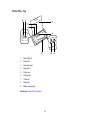
Printer Parts - Top
1
Micro USB port
2
Power inlet
3
Rear paper feed
4
Edge guide
5
Printer cover
6
Control panel
7
Output slot
8
Power light
9
Battery charging light
Parent topic: Product Parts Locations
15
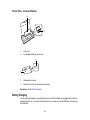
Printer Parts - Inside and Bottom
1
Inner cover
2
Ink cartridge holder (do not remove)
1
Maintenance box cover
2
Security lock slot (for an optional security cable)
Parent topic: Product Parts Locations
Battery Charging
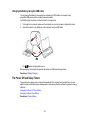
You can charge the battery by connecting the power cord and AC adapter, and plugging the product into
an electrical outlet. Or, you can connect the product to your computer (or other USB power source) using
the USB cable.
16
Battery status is indicated on the LCD screen.
Note the following:
• The battery is not a user-replaceable part.
• Even when the product is not in use, the battery runs down. Make sure you turn off the product when
you are not using it and charge the battery on a regular basis.
• The battery runs down faster in low temperature environments.
• Charge the battery within a range of 50 to 95 °F (10 to 35 °C). The battery may not charge fully or may
deteriorate if the environment is too hot or cold.
• It takes about 2.5 hours to fully charge the battery.
• If the battery runs out quickly even after it is fully charged, it may be at the end of its service life.
Contact Epson to replace the battery.
• The
battery charging light is orange during charging and turns off when the battery is fully
charged. The light flashes if the environment is too cold or too hot to charge the battery.
Charging the Battery Using the AC Adapter
Charging the Battery Using the USB Cable
Parent topic: Product Basics
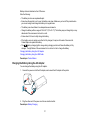
Charging the Battery Using the AC Adapter
You can charge the battery using the AC adapter.
1. Connect the power cord to the AC adapter, and connect the AC adapter to the printer.
2. Plug the other end of the power cord into an electrical outlet.
Parent topic: Battery Charging
17
Charging the Battery Using the USB Cable
You can charge the battery by connecting the included micro USB cable to a computer or any
compatible USB power source, including some automobiles.
For USB charging, the printer must be turned off or in sleep mode.
1. To charge from a computer, make sure the computer is on and not in sleep or hibernation mode.
2. Connect the printer to any USB port on the computer using the USB cable.
The
battery charging light turns on.
During charging, the computer recognizes the printer as a USB mass storage device.
Parent topic: Battery Charging
The Power Off and Sleep Timers
The product enters sleep mode or turns off automatically if it is not used for a period of time. You can
adjust the time period before power management, but increasing the time reduces the product's energy
efficiency.
Changing the Power Off Timer Setting
Changing the Sleep Timer Setting
Parent topic: Product Basics
18
Changing the Power Off Timer Setting
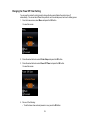
You can use the product's control panel to change the time period before the printer turns off
automatically. You can set two different time periods: one for external power, and one for battery power.
1. From the home screen, select Menu and press the OK button.
You see this screen:
2. Press the arrow buttons to select Printer Setup and press the OK button.
3. Press the arrow buttons to select Power Off Timer and press the OK button.
You see this screen:
4. Do one of the following:
• To set the timer when external power is in use, press the OK button.
19
• To set the timer when the product is running on the battery, press the arrow button to select
Battery Power and press the OK button.
5. Select the length of time after which you want the product to automatically turn off when it is not in
use. Then press the OK button.
Parent topic: The Power Off and Sleep Timers
Changing the Sleep Timer Setting
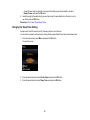
In sleep mode, the LCD screen turns off. Press any button to turn it back on.
You can use the product's control panel to change the time period before the product enters sleep mode.
1. From the home screen, select Menu and press the OK button.
You see this screen:
2. Press the arrow buttons to select Printer Setup and press the OK button.
3. Press the arrow buttons to select Sleep Timer and press the OK button.
20
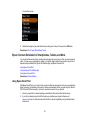
You see this screen:
4. Select the time period you want before the product goes to sleep. Then press the OK button.
Parent topic: The Power Off and Sleep Timers
Epson Connect Solutions for Smartphones, Tablets, and More
You can print documents, photos, emails, and web pages from your home, office, or even across the
globe. You can use your smartphone, tablet, or computer. Epson offers these solutions to print from
anywhere: Epson Email Print, Epson iPrint Mobile App, and Epson Remote Print.
Using Epson Email Print
Using the Epson iPrint Mobile App
Using Epson Remote Print
Parent topic: Product Basics
Using Epson Email Print
With Epson Email Print, you can print from any device that can send email, such as your smartphone,
tablet, or laptop. Just activate your product's unique email address. When you want to print, attach a
PDF, Microsoft Office document, or photo to an email and send it to your product.
1. Set up your product for network printing as described in this manual. See the link below.
2. If you did not already set up Email Print when you installed your product software, visit
epson.com/connect to learn more about Email Print, check compatibility, and get detailed setup
instructions.
21
3. Send an email with attachments to your product's Email Print address.
Note: Both the email and any attachments print by default. You can change these printing options by
logging into your Epson Connect account.
Parent topic: Epson Connect Solutions for Smartphones, Tablets, and More
Related topics
Wi-Fi Networking
Using the Epson iPrint Mobile App
Use this free Apple and Android app to print to nearby Epson networked products. The Epson iPrint
Mobile App lets you print PDFs, Microsoft Office documents, photos, and web pages over a wireless
network.
1. Set up your product on a network as described in this manual. See the link below.
2. Visit epson.com/connect to learn more about Epson iPrint and check the compatibility of your mobile
device.
3. Download Epson iPrint from the Apple App Store or Google Play.
4. Connect your mobile device to the same wireless network that your product is using.
5. Print from your mobile device to your Epson product.
Parent topic: Epson Connect Solutions for Smartphones, Tablets, and More
Related topics
Wi-Fi Networking
Using Epson Remote Print
With Epson Remote Print software on your Windows computer or laptop, you can print to an Epson
Email-enabled product anywhere in the world.
1. Set up your product for network printing as described in this manual. See the link below.
2. Visit epson.com/connect to learn more about Remote Print and how to download the software.
3. Download and install the Remote Print software.
4. Obtain the email address and optional access key of the Epson product you want to use for printing,
and enter this address during Remote Print setup.
5. Select the print command in your application and choose the Remote Print driver for your Epson
product.
22
Parent topic: Epson Connect Solutions for Smartphones, Tablets, and More
Related topics
Wi-Fi Networking
Using AirPrint
AirPrint allows you to wirelessly print to your AirPrint-enabled product from your iOS device running the
latest version of iOS, and from your Mac running OS X 10.7 or later.
Note: If you disabled paper configuration messages on your product control panel, you cannot use
AirPrint. See the link below to enable the messages, if necessary.
1. Set up your product for wireless printing as described in this manual. See the link below.
2. Connect your Apple device to the same wireless network that your product is using.
3. Print from your device to your product.
Note: For details, see the AirPrint page on the Apple website.
Parent topic: Product Basics
Related tasks
Selecting the Paper Source Settings - Control Panel
Related topics
Wi-Fi Networking
Using Google Cloud Print
With a Google Account, you can print from your Apple or Android device to your Epson product. You can
also print from Chromebooks and the Google Chrome browser without drivers or cables.
Set up your Epson product for network printing as described in this manual. See the link below.
23
Note: Make sure your Epson printer and computer are connected to the same network before starting
the Google Cloud Print setup.
1. Connect your device to the same network that your Epson product is using.
2. Print a network status sheet.
3. Locate your product's IP address on the network status sheet.
4. Enter the IP address into the address bar of a web browser.
5. Select the Google Cloud Print Services option.
Note: If you don't see the Google Cloud Print Services option, turn your product off and back on. If
the option still doesn't appear, select the Firmware Update option and follow the on-screen
instructions to update your product.
6. Click Register.
7. Select the checkbox to agree to the Usage Advisory and click Next.
8. Click OK to launch the sign-in page.
A separate browser window opens.
9. Enter your Google Account username and password and click Sign in, or, if you don't have an
account, click Sign up for a new Google Account and follow the on-screen instructions.
10. Click Finish printer registration to complete setup and print a test page.
Your product is now linked to your Google Account and can be accessed from any Chromebook,
computer, Apple or Android device with Internet access. Visit Epson Support for more information on
using Google Cloud Print, or the Google Cloud Print website for a list of supported apps.
Setting Up Google Cloud Print on a Chromebook
Parent topic: Product Basics
Related tasks
Printing a Network Status Sheet
Related topics
Wi-Fi Networking
Setting Up Google Cloud Print on a Chromebook
With a Google Account, you can print from a Chromebook without drivers or cables.
24
Set up your Epson product for network printing as described in this manual. See the link below.
Note: Make sure your Epson product is connected to your wireless network before starting the Google
Cloud Print setup.
1. Turn on your Chromebook and connect it to the same wireless network as your product.
Note: See your Chromebook's documentation for details on connecting to a network.
2. Do one of the following:
• Click Add to Cloud Print in the notification that appears in the corner of your Chromebook
screen.
Note: If you do not see a notification, check to see if a number appears in the status area at the
lower-right corner of the screen. Click this number to open the notifications menu, then click Add
to Cloud Print.
• Open a web browser and enter chrome://devices in the address bar. Skip to step 4.
3. Click Add Device.
4. Click the Register button that appears next to your product.
5. Click Register on the confirmation screen. Your product's LCD screen displays a confirmation
message.
6. Select OK or press the OK button on your product to confirm the Google Cloud Print connection and
print a test page.
Your product is now linked to your Google Account and can be accessed from any Chromebook,
iPhone, or Android phone with Internet access. For more information on using Google Cloud Print,
visit Epson Support.
Parent topic: Using Google Cloud Print
Related tasks
Printing a Network Status Sheet
Related topics
Wi-Fi Networking
25
Wi-Fi Networking
See these sections to use your product on a Wi-Fi network.
Wi-Fi Infrastructure Mode Setup
Wi-Fi Direct Mode Setup
Wi-Fi Protected Setup (WPS)
Printing a Network Status Sheet
Changing or Updating Network Connections
Wi-Fi Infrastructure Mode Setup
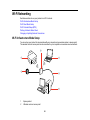
You can set up your product to communicate with your computer using a wireless router or access point.
The wireless router or access point can be connected to your computer over a wireless or wired network.
1
Epson product
2
Wireless router or access point
26
3
Computer with a wireless interface
4
Computer
5
Internet
6
Ethernet cable (used only for wired connection to the wireless router or access point)
Selecting Wireless Network Settings from the Control Panel
Parent topic: Wi-Fi Networking
Selecting Wireless Network Settings from the Control Panel
You can select or change wireless network settings using your product control panel.
To install your product on a wireless network, follow the instructions in the Quick Guide and install the
necessary software. The installer program guides you through network setup.
1. From the home screen, select Wi-Fi Setup and press the OK button.
You see this screen:
2. Select Wi-Fi Setup Wizard and press the OK button.
3. Do one of the following:
• Press the OK button to select the wireless network displayed.
• Press the
cancel button to select a different wireless network. Then, press the arrow buttons to
select the name of your wireless network and press the OK button. If you do not see your wireless
network's name, you can enter it manually.
27
Note: To enter the wireless network name manually, select Other SSID and press the OK button.
Enter your network name as described in the next step.
4. If you see the following screen, enter your wireless password (or network name and then password).
• Press the up and down arrow buttons to scroll through characters (including uppercase and
lowercase letters, symbols, and numbers). Then press the right arrow button to move to the next
character.
• To delete characters, press the left arrow.
• When you finish entering characters, press the OK button.
Note: The network name and password are case sensitive. Be sure to correctly enter uppercase and
lowercase letters, and numeric or special characters.
5. If you want to print a network setup report, press the OK button. (Otherwise, press the
button.)
cancel
Your product should now be connected to the network.
Note: If the Wi-Fi connection symbol does not appear on the LCD screen, you may have selected
the wrong network name or entered the password incorrectly. Repeat these steps to try again.
Parent topic: Wi-Fi Infrastructure Mode Setup
Related topics
Changing or Updating Network Connections
28
Wi-Fi Direct Mode Setup
You can set up your product to communicate directly with your computer or another device without
requiring a wireless router or access point.
1
Epson product
2
Computer with a wireless interface
3
Other wireless device
You can select one of these modes to communicate with your computer or device:
Access point mode
The product itself acts as the network access point for up to 4 devices. When operating in this mode,
your product displays an AP connection symbol on the LCD screen.
Peer-to-peer mode
The product communicates one-to-one with another Wi-Fi Direct capable device. When operating in
this mode, your product displays a Direct or D connection symbol on the LCD screen.
To disconnect a peer-to-peer mode connection, release the connection to your product from your
computer or other device.
To enable peer-to-peer mode, you must select it from the Web Config Utility, under Advanced
Settings > Services > Wi-Fi Direct.
Enabling Wi-Fi Direct Mode
Parent topic: Wi-Fi Networking
29
Related tasks
Accessing the Web Config Utility
Enabling Wi-Fi Direct Mode
You can enable Wi-Fi Direct mode to allow direct communication between your product and computer or
other devices without a wireless router or access point.
1. From the home screen, select Wi-Fi Setup and press the OK button.
You see this screen:
2. Press the arrow buttons to select Wi-Fi Direct Setup and press the OK button.
3. Select Connection Setup and press the OK button.
4. Press the down arrow button, then press the OK button to change the password.
Note: If you have already connected devices or computers to your product via Wi-Fi Direct, they will
be disconnected when you change the password.
30
5. Enter your new Wi-Fi Direct password.
Note: Your password must be at least 8 and no more than 22 characters long.
• Press the up and down arrow buttons to scroll through characters (including uppercase and
lowercase letters, symbols, and numbers). Then press the right arrow button to move to the next
character.
• To delete characters, press the left arrow.
• When you finish entering characters, press the OK button.
6. Press the OK button again.
You see a screen like this:
31
7. Use your computer or wireless device to select the Wi-Fi network name (SSID) displayed on the
LCD screen, then enter the password shown.
8. Press the OK button to exit.
You see the AP connection symbol on the LCD screen and should be able to print directly to your
product from your computer or device.
Note: If the AP connection symbol is not displayed on the LCD screen, Wi-Fi Direct mode is not
enabled. Repeat these steps to try again.
Parent topic: Wi-Fi Direct Mode Setup
Wi-Fi Protected Setup (WPS)
If your network uses a WPS-enabled wireless router or access point, you can quickly connect your
product to the network using Wi-Fi Protected Setup (WPS).
Note: To check if your router is WPS-enabled, look for a button labeled WPS on your router or access
point. If there is no hardware button, there may be a virtual WPS button in the software for the device.
Check your network product documentation for details.
Using WPS to Connect to a Network
Parent topic: Wi-Fi Networking
Using WPS to Connect to a Network
If you have a WPS-enabled wireless router or access point, you can use Wi-Fi Protected Setup (WPS) to
connect your product to the network.
1. Press the WPS button on your router.
2. From the home screen, select Wi-Fi Setup and press the OK button.
32
You see this screen:
3. Press the arrow buttons to select Push Button Setup (WPS) and press the OK button.
4. Follow the instructions on the LCD screen to complete WPS setup.
Your product should now display a Wi-Fi symbol on the LCD screen.
Parent topic: Wi-Fi Protected Setup (WPS)
Printing a Network Status Sheet
You can print a network status sheet to help you determine the causes of any problems you may have
using your product on a network.
1. From the home screen, select Menu and press the OK button.
2. Press the arrow buttons to select Network Settings and press the OK button.
33
You see this screen:
3. Press the arrow buttons to select Print Status Sheet and press the OK button.
4. Press the OK button to print the network status sheet.
(Press the
cancel button if you want to cancel the operation.)
Examine the settings shown on the network status sheet to diagnose any problems you have.
Parent topic: Wi-Fi Networking
Changing or Updating Network Connections
See these sections to change or update how your product connects to a network.
Accessing the Web Config Utility
Changing a USB Connection to a Wi-Fi Connection
Connecting to a New Wi-Fi Router
Disabling Wi-Fi Features
Parent topic: Wi-Fi Networking
Related tasks
Selecting Wireless Network Settings from the Control Panel
Accessing the Web Config Utility
You can select your product's network settings and confirm its operating status using a web browser.
You do this by accessing your product's built-in Web Config utility from a computer or other device that is
connected to the same network as your product.
34
1. Print a network status sheet.
2. Locate the IP Address for your product that is listed on the network status sheet.
3. On a computer or other device connected to the same network as your product, open a web
browser.
4. Enter your product's IP address into the address bar.
You see the available Web Config utility options.
Parent topic: Changing or Updating Network Connections
Related tasks
Printing a Network Status Sheet
Changing a USB Connection to a Wi-Fi Connection
If you have already connected your product to your computer using a USB connection, you can change
to a Wi-Fi connection or add a Wi-Fi connection to print wirelessly.
1. Do one of the following:
• If you want to use only a Wi-Fi connection, disconnect the USB cable from your product. With
Windows, also uninstall your product software.
• If you want to add a Wi-Fi connection in addition to a USB connection, leave the USB cable
connected to your product.
2. Download and install your product software from the Epson website using the instructions on the
Start Here sheet.
3. Download and install your product software from the Epson website using the instructions in the
Quick Guide.
Parent topic: Changing or Updating Network Connections
Connecting to a New Wi-Fi Router
If you change the wireless router you have been using on your network, you need to update your
product's Wi-Fi connection to the new router.
1. Do one of the following:
• Windows: Uninstall your product software.
• OS X: Go to the next step.
2. Download and install your product software from the Epson website using the instructions in the
Quick Guide.
35
Parent topic: Changing or Updating Network Connections
Disabling Wi-Fi Features
You may need to disable your product's Wi-Fi features if you change your network connection type or
need to solve a problem with your network connection.
Note: Before disabling Wi-Fi features, make a note of your product's SSID (network name) and
password, and any network settings selected for the Epson Connect services you may use.
1. From the home screen, select Wi-Fi Setup and press the OK button.
You see this screen:
2. Press the arrow buttons to select Disable Wi-Fi and press the OK button.
3. When you see the confirmation, press the OK button to disable Wi-Fi.
Parent topic: Changing or Updating Network Connections
36
Loading Paper
Before you print, load paper for the type of printing you will do.
Loading Paper and Envelopes
Selecting the Paper Source Settings - Control Panel
Turning Off the Paper Setting Alert
Paper Loading Capacity
Available Epson Papers
Borderless Paper Type Compatibility
Paper or Media Type Settings
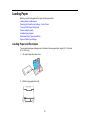
Loading Paper and Envelopes
You can load envelopes and paper up to this size in the rear paper feed: Legal (8.5 × 14 inches
[216 × 357 mm]).
1. Lift up and open the printer cover.
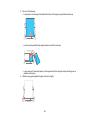
2. Slide the edge guide to the left.
37
3. Do one of the following:
• Load paper in the rear paper feed behind the tabs, with the glossy or printable side faceup.
• Load an envelope with the flap edge facedown and to left, as shown.
• Load one sheet of loose-leaf paper (or other paper with holes along the sides) with the glossy or
printable side faceup.
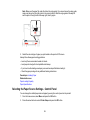
4. Slide the edge guide against the paper, but not too tightly.
38
Note: Make sure the paper fits under the tab on the edge guide. If you cannot move the edge guide,
make sure the part on the right side is in the correct position. Slide the edge guide all the way left
and the part on the right side all the way right, then try again.
5. Select the size and type of paper you just loaded on the product LCD screen.
Always follow these paper loading guidelines:
• Load only the recommended number of sheets.
• Load paper short edge first and printable side faceup.
• If you have trouble loading envelopes, press each envelope flat before loading it.
• Check the paper package for any additional loading instructions.
Parent topic: Loading Paper
Related references
Paper Loading Capacity
Paper Specifications
Selecting the Paper Source Settings - Control Panel
You can change the default paper size and paper type using the control panel on the product.
1. From the home screen, select Menu and press the OK button.
2. Press the arrow buttons to select Printer Setup and press the OK button.
39
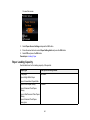
You see this screen:
3. Select Paper Source Settings and press the OK button.
Note: To turn off the automatic display of the paper settings screen after paper is loaded in the
printer, set the Paper Configuration setting to Off. If you do this, you will not be able to use AirPrint.
4. Select Paper Setup and press the OK button.
5. Select Paper Size and press the OK button.
6. Select the paper size you loaded and press the OK button.
7. Select Paper Type and press the OK button.
8. Select the paper type you loaded and press the OK button.
Parent topic: Loading Paper
Related references
Paper or Media Type Settings
Turning Off the Paper Setting Alert
The Paper Setting Alert warns you when the paper settings do not match the paper you loaded. You can
turn off this feature from the product's control panel.
1. From the home screen, select Menu and press the OK button.
2. Press the arrow buttons to select Printer Setup and press the OK button.
40
You see this screen:
3. Select Paper Source Settings and press the OK button.
4. Press the arrow buttons to select Paper Setting Alert and press the OK button.
5. Select Off and press the OK button.
Parent topic: Loading Paper
Paper Loading Capacity
See the table here for the loading capacity of the product.
Paper type
Load up to this many sheets
Plain paper
20 sheets
Epson Bright White Paper
Epson Presentation Paper Matte
Epson Photo Paper Glossy
5 sheets
Epson Premium Photo Paper
Glossy
Epson Ultra Premium Photo Paper
Glossy
Epson Premium Photo Paper
Semi-gloss
41
Paper type
Load up to this many sheets
Epson Premium Presentation
Paper Matte
1 sheet
Envelopes
1 envelope
Parent topic: Loading Paper
Available Epson Papers
You can purchase genuine Epson ink and paper at Epson Supplies Central at epson.com/ink3 (U.S.
sales) or epson.ca (Canadian sales). You can also purchase supplies from an Epson authorized reseller.
To find the nearest one, call 800-GO-EPSON (800-463-7766).
Paper Type
Size
Part number
Sheet count
Epson Bright White Paper
Letter (8.5 × 11 inches
[216 × 279 mm])
S041586
500
Epson Photo Paper Glossy
4 × 6 inches (102 × 152 mm)
S041809
50
S042038
100
S041141
20
S041649
50
S041271
100
S041808
40
S041727
100
5 × 7 inches (127 × 178 mm)
S041464
20
8 × 10 inches (203 × 254 mm)
S041465
20
Letter (8.5 × 11 inches
[216 × 279 mm])
S042183
25
S041667
50
Letter (8.5 × 11 inches
[216 × 279 mm])
Epson Premium Photo Paper
Glossy
4 × 6 inches (102 × 152 mm)
42
Paper Type
Part number
Sheet count
Epson Ultra Premium Photo Paper 4 × 6 inches (102 × 152 mm)
Glossy
S042181
60
S042174
100
5 × 7 inches (127 × 178 mm)
S041945
20
8 × 10 inches (203 × 254 mm)
S041946
20
Letter (8.5 × 11 inches
[216 × 279 mm])
S042182
25
S042175
50
Epson Premium Photo Paper
Semi-gloss
4 × 6 inches (102 × 152 mm)
S041982
40
Letter (8.5 × 11 inches
[216 × 279 mm])
S041331
20
Epson Presentation Paper Matte
Letter (8.5 × 11 inches
[216 × 279 mm])
S041062
100
Legal (8.5 × 14 inches
[216 × 357 mm])
S041067
100
8 × 10 inches (203 × 254 mm)
S041467
50
Letter (8.5 × 11 inches
[216 × 279 mm])
S041257
50
S042180
100
Epson Premium Presentation
Paper Matte
Size
Parent topic: Loading Paper
Borderless Paper Type Compatibility
You can print borderless photos on compatible paper types in compatible sizes:
Borderless Paper Types
• Epson Photo Paper Glossy
• Epson Premium Photo Paper Glossy
• Epson Ultra Premium Photo Paper Glossy
• Epson Premium Photo Paper Semi-gloss
Borderless Paper Size
• 4 × 6 inches (102 × 152 mm)
43
Parent topic: Loading Paper
Paper or Media Type Settings
Paper
Paper Type or Media Type
setting - standard driver
Media setting - built-in
basic driver
Plain paper
Plain Paper/Bright White Paper Plain paper
Epson Bright White Paper
Epson Ultra Premium Photo Paper
Glossy
Ultra Premium Photo Paper
Glossy
—
Epson Premium Photo Paper Glossy
Premium Photo Paper Glossy
Epson Premium Glossy
Epson Photo Paper Glossy
Photo Paper Glossy
—
Epson Premium Photo Paper Semi-gloss Premium Photo Paper SemiGloss
—
Epson Presentation Paper Matte
Premium Presentation Paper
Matte
Epson Matte
Envelope
—
Epson Premium Presentation Paper
Matte
Envelopes
Parent topic: Loading Paper
44
Printing from a Computer
Before printing from your computer, make sure you have set up your product and installed its software
as described in the Quick Guide.
Even if you have not installed the software, you can still print from a Windows computer using the built-in
basic driver.
Note: If you have an Internet connection, it is a good idea to check for updates to your product software
on Epson's support website. If you see a Software Update screen, select Enable automatic checking
and click OK. The update scans your system to see if you have the latest product software. Follow the
on-screen instructions.
Caution: If you are using the AC adapter, do not disconnect it while the product is operating. Printing
may slow down, which may cause a paper jam.
Printing with the Standard Epson Printer Software - Windows
Printing with the Built-in Basic Driver - Windows
Printing with OS X
Adjusting Print Density
Adjusting Color
Cancelling Printing Using a Product Button
Printing with the Standard Epson Printer Software - Windows
You can print with the standard Epson printer software using any Windows printing program, as
described in these sections.
Selecting Basic Print Settings - Windows
Selecting Double-sided Printing Settings - Windows
Selecting Additional Layout and Print Options - Windows
Selecting a Printing Preset - Windows
Selecting Extended Settings - Windows
Printing Your Document or Photo - Windows
Selecting Default Print Settings - Windows
Changing Automatic Update Options
Parent topic: Printing from a Computer
45
Selecting Basic Print Settings - Windows
Select the basic settings for the document or photo you want to print.
1. Open a photo or document for printing.
2. Select the print command in your application.
Note: You may need to select a print icon on your screen, the Print option in the File menu, or
another command. See your application's help utility for details.
3. If necessary, select your product name as the printer you want to use.
Note: You may also need to select Properties or Preferences to view your print settings.
You see the Main tab of your printer settings window:
46
4. Select the size of the paper you loaded as the Document Size setting.
Note: You can also select the User-Defined setting to create a custom paper size, but you will not
be able to use the Borderless setting.
5. If you are printing a borderless photo, select Borderless. You can click Settings to access
additional options for borderless printing.
Note: You must select a compatible borderless paper type and size to print without borders. Check
the borderless paper compatibility list for details.
6. Select the orientation of your document.
Note: If you are printing an envelope, select Landscape.
7. Select the type of paper you loaded as the Paper Type setting.
Note: The setting may not exactly match the name of your paper. Check the paper type settings list
for details.
8. Select the Quality setting that matches the print quality you want to use.
9. Select a Color option:
• To print a color document or photo, select the Color setting.
• To print text and graphics in black or shades of gray, select the Black/Grayscale setting.
10. To print on both sides of the paper, select a 2-Sided Printing option.
11. To print multiple pages on one sheet of paper, or print one image on multiple sheets of paper, select
one of the settings in the Multi-Page menu and select the printing options you want.
12. To print multiple copies and arrange their print order, select the Copies options.
13. To reduce noise during printing when you select Plain Paper/Bright White Paper, select Quiet
Mode (printing will be slower).
14. To preview your job before printing, select Print Preview.
15. To save your print job as a project that can be modified and combined with other print jobs, select
Job Arranger Lite.
Print Quality Options - Windows
Multi-Page Printing Options - Windows
47
Parent topic: Printing with the Standard Epson Printer Software - Windows
Related references
Borderless Paper Type Compatibility
Paper or Media Type Settings
Related tasks
Printing Your Document or Photo - Windows
Selecting Double-sided Printing Settings - Windows
Print Quality Options - Windows
You can select any of the available Quality options to fine-tune the quality of your print. Some settings
may be unavailable, depending on the paper type setting you have chosen.
Draft
For draft printing on plain paper.
Standard
For everyday text and image printing.
High
For text and graphics with high print quality.
Parent topic: Selecting Basic Print Settings - Windows
Multi-Page Printing Options - Windows
You can select any of the available options in the Multi-Page menu to set up your multi-page print job.
2-Up and 4-Up
Prints 2 or 4 pages on one sheet of paper. Click the Page Order button to select page layout and
border options.
2×1 Poster, 2×2 Poster, 3×3 Poster, 4×4 Poster
Prints one image on multiple sheets of paper to create a larger poster. Click the Settings button to
select image layout and guideline options.
Parent topic: Selecting Basic Print Settings - Windows
Selecting Double-sided Printing Settings - Windows
You can print on both sides of the paper by selecting one of the 2-Sided Printing options on the Main
tab.
48
Note: Some options may be pre-selected or unavailable, depending on other settings you have chosen
or if you are accessing the product over a network.
1. Select one of the following options for 2-Sided Printing:
• Manual (Long-edge binding) to print your double-sided print job by printing one side and
prompting you to flip the paper over on the long edge to print the other side.
• Manual (Short-edge binding) to print your double-sided print job by printing one side and
prompting you to flip the paper over on the short edge to print the other side.
2. Click the Settings button.
49
You see this window:
3. Select the double-sided printing options you want to use.
4. Click OK to return to the Main tab.
5. Print a test copy of your double-sided document to test the selected settings.
6. Follow any instructions displayed on the screen during printing.
Double-sided Printing Options - Windows
Parent topic: Printing with the Standard Epson Printer Software - Windows
Related tasks
Selecting Basic Print Settings - Windows
Double-sided Printing Options - Windows
You can select any of the available options on the 2-Sided Printing Settings window to set up your
double-sided print job.
50
Binding Edge Options
Select a setting that orients double-sided print binding in the desired direction.
Binding Margin Options
Select options that define a wider margin to allow for binding.
Booklet
Select the Booklet checkbox to print double-sided pages as a booklet.
Parent topic: Selecting Double-sided Printing Settings - Windows
Selecting Additional Layout and Print Options - Windows
You can select a variety of additional layout and printing options for your document or photo on the More
Options tab.
51
1. To change the size of your printed document or photo, select the Reduce/Enlarge Document
checkbox and select one of these sizing options:
• Select the Fit to Page option to size your image to fit the paper you loaded. Select the size of the
your document or photo as the Document Size setting, and the size of your paper as the Output
Paper setting. If you want to center your image on the paper, select the Center option.
• Select the Zoom to option to reduce or enlarge your document or photo by a specific percentage.
Select the percentage in the % menu.
2. Select one of the following Color Correction options:
• Select Automatic to automatically adjust the sharpness, brightness, contrast, and color saturation
for your image.
• Select Custom and click the Advanced button to manually adjust the color correction settings or
turn off color management in your printer software.
• Select Image Options to access additional settings for improving printed images.
Note: You can also select Color Universal Print settings.
3. To add the following features, click the Watermark Features button:
• Watermark: adds a visible watermark to your printout.
Note: Click the Add/Delete button to create your own watermark, and click the Settings button to
customize the watermark.
• Header/Footer: adds information such as the date and time to the top or bottom of your printout.
Note: Click the Settings button to customize the text and location of the header or footer.
4. Select any of the Additional Settings options to customize your print.
Custom Color Correction Options - Windows
Image Options and Additional Settings - Windows
Header/Footer Settings - Windows
Parent topic: Printing with the Standard Epson Printer Software - Windows
Related tasks
Printing Your Document or Photo - Windows
52
Custom Color Correction Options - Windows
You can select any of the available options in the Color Correction window to customize the image colors
for your print job.
Color Controls
Lets you select a Color Mode setting, individual settings for Brightness, Contrast, Saturation, and
Density, and individual color tones. Depending on the selected color mode, you can also adjust the
midtone density using the Gamma setting.
Fix Photo
Improves the color, contrast, and sharpness of flawed photos.
Note: Fix Photo uses a sophisticated face recognition technology to optimize photos that include
faces. For this to work, both eyes and the nose must be visible in the subject's face. If your photo
includes a face with an intentional color cast, such as a statue, you may want to turn off Fix Photo to
retain the special color effects.
53
ICM
Lets you manage color using installed color printing profiles.
No Color Adjustment
Turns off color management in your printer software so you can manage color using only your
application software.
Parent topic: Selecting Additional Layout and Print Options - Windows
Image Options and Additional Settings - Windows
You can select any of the Image Options and Additional Settings to customize your print. Some options
may be pre-selected or unavailable, depending on other settings you have chosen.
Image Options
Emphasize Text
Adjusts the weight of printed text to increase readability.
Emphasize Thin Lines
Adjusts the weight of printed lines to increase visibility.
Edge Smoothing
Smooths jagged edges in low-resolution images such as screen captures or images from the Web.
Fix Red-Eye
Reduces or removes red-eye in photos.
Print Text in Black
Prints colored text in black.
For Color Text
Prints colored text on a background pattern or underlined.
For Color Graphs and Images
Prints colored graphics and images with overlay patterns.
For Color Text, Graphs, and Images
Prints colored text, graphics, and images with overlay patterns.
Enhancement Options
Specifies Color Universal Print enhancement settings for text, graphics, and images.
Additional Settings Options
Rotate 180º
Prints the image rotated 180º from its original orientation.
54
High Speed
Speeds up printing but may reduce print quality.
Mirror Image
Flips the printed image left to right.
Parent topic: Selecting Additional Layout and Print Options - Windows
Header/Footer Settings - Windows
You can select any of the Header/Footer Settings options to add headers or footers when you print. The
items are available to print at the top or bottom of your pages, in either the left, right, or center of the
page.
Note: These settings are not saved with your document.
You can select to print the following information:
• User Name
• Computer Name
• Date
• Date/Time
• Collate Number (copy number)
Note: The user name, computer name, date, and time come from the Windows Control Panel on your
computer.
Parent topic: Selecting Additional Layout and Print Options - Windows
55
Selecting a Printing Preset - Windows
For quick access to common groups of print settings, you can select a printing preset on the Main or
More Options tab.
Note: You can create your own preset by clicking the Add/Remove Presets button.
1. Click the Main or More Options tab.
You see the available Printing Presets on the left:
2. Place your cursor over one of the Printing Presets to view its list of settings.
56
3. Click on a preset to change its settings, or use any of the available options on the screen to control
your printing presets.
4. To choose a preset for printing, select it.
5. Click OK.
Parent topic: Printing with the Standard Epson Printer Software - Windows
Selecting Extended Settings - Windows
You can select additional settings that apply to all the print jobs you send to your product.
1. Access the Windows Desktop and right-click the product icon in the Windows taskbar.
2. Select Printer Settings.
3. Click the Maintenance tab.
You see the maintenance options:
57
4. Click the Extended Settings button.
You see this window:
5. Select any of the extended settings to customize your print.
6. Click OK to close the Extended Settings window.
7. Click OK to close the printer software window.
Extended Settings - Windows
Parent topic: Printing with the Standard Epson Printer Software - Windows
Extended Settings - Windows
You can select from these settings on the Extended Settings window.
Enable EPSON Status Monitor 3
Enables product monitoring for ink and paper supplies and other issues.
Check Paper Width Before Printing
Prevents printing beyond the edges of the paper if the paper size setting is incorrect; may reduce print
speed.
Separator Page
Before each document, prints a separator page containing the title, user, date, and time.
Always Spool RAW Datatype
Increases print speed and may solve other printing problems.
58
Page Rendering Mode
Increases print speed when printing is extremely slow or the print head stops during printing.
Print as Bitmap
Increases print speed when printing is extremely slow or the print head stops during printing, and
other settings do not help.
Skip Blank Page
Ensures that your product does not print pages that contain no text or images.
Change Standard Resolution
Reduces the resolution of print data to correct printing problems.
Refine screening pattern
Prints graphics with a finer screening pattern.
Allow Applications to Perform ICM Color Matching
Allows applications to perform ICM color matching.
Always Use the Driver's Paper Source Setting
Prints using the paper source setting in the printer driver, rather than the setting in your application.
Parent topic: Selecting Extended Settings - Windows
Printing Your Document or Photo - Windows
Once you have selected your print settings, you are ready to save your settings and print.
1. Click OK to save your settings.
59
You see your application's Print window, such as this one:
2. Click OK or Print to start printing.
Parent topic: Printing with the Standard Epson Printer Software - Windows
Selecting Default Print Settings - Windows
When you change your print settings in a program, the changes apply only while you are printing in that
program session. If you want to change the print settings you use in all your Windows programs, you can
select new default print settings.
1. Access the Windows Desktop and right-click the product icon in the Windows taskbar.
2. Select Printer Settings.
60
You see the printer settings window:
3. Select the print settings you want to use as defaults in all your Windows programs.
4. Click OK.
These settings are now the defaults selected for printing. You can still change them as needed for
printing in any program session.
Changing the Language of the Printer Software Screens
Parent topic: Printing with the Standard Epson Printer Software - Windows
Changing the Language of the Printer Software Screens
You can change the language used on the Windows printer software screens.
1. Access the Windows Desktop and right-click the product icon in the Windows taskbar.
2. Select Printer Settings.
You see the printer settings window.
61
3. Click the Maintenance tab.
You see the maintenance options:
4. Select the language you want to use as the Language setting.
5. Click OK to close the printer software window.
The printer software screens appear in the language you selected the next time you access them.
Parent topic: Selecting Default Print Settings - Windows
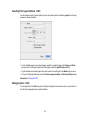
Changing Automatic Update Options
Your printer software for Windows automatically checks for updates to the product software. You can
change how often the software checks for updates or disable this feature.
1. Access the Windows Desktop and right-click the product icon in the Windows taskbar.
2. Select Software Update Settings.
62
You see this window:
3. Do one of the following:
• To change how often the software checks for updates, select a setting in the Check every menu.
• To disable the automatic update feature, select the Never option.
4. Click OK to exit.
Note: If you choose to disable the automatic update feature, you can check for updates manually.
Parent topic: Printing with the Standard Epson Printer Software - Windows
Related tasks
Checking for Software Updates
Printing with the Built-in Basic Driver - Windows
You can print from any Windows computer, even if you do not have the product CD or an Internet
connection, as described in these sections.
Installing the Basic Driver Software - Windows
Selecting Print Settings - Windows Basic Driver
Parent topic: Printing from a Computer
63
Installing the Basic Driver Software - Windows
You can use the included USB cable to connect the product to your computer and install the basic driver
from the product itself.
1. Make sure the product is not connected to the computer.
2. On the product's control panel, select Menu and press the OK button.
3. Use the arrow buttons to select WF-100 Basic Driver and press the OK button.
4. Follow the instructions on the LCD screen to connect the product and computer using the micro USB
cable and press the OK button.
5. Go to Computer or My Computer on the computer and double-click EPSON > SETUP.
6. Follow the on-screen instructions to complete the installation.
Parent topic: Printing with the Built-in Basic Driver - Windows
Selecting Print Settings - Windows Basic Driver
Select the settings for the document or photo you want to print.
1. Open a photo or document for printing.
2. Select the print command in your application.
Note: You may need to select a print icon on your screen, the Print option in the File menu, or
another command. See your application's help utility for details.
64
3. If necessary, select your product name as the printer you want to use.
Note: You may also need to select Properties or Preferences to view your print settings.
You see the Layout tab of your printer settings window:
4. Select the orientation of your document.
Note: If you are printing an envelope, select Landscape.
5. Select the page order and format for your document.
6. Click the Paper/Quality tab.
65
You see this screen:
7. Select the type of paper you loaded as the Media setting.
Note: The setting may not exactly match the name of your paper. Check the paper type settings list
for details.
8. Select a Color option:
• To print text and graphics in black or shades of gray, select the Black & White setting.
• To print a color document or photo, select the Color setting.
9. Click Advanced.
66
You see this screen:
10. Select the size of the paper you loaded as the Paper Size setting.
11. Click OK to save your settings.
12. On the next screen, click OK or Print to start printing.
Parent topic: Printing with the Built-in Basic Driver - Windows
Related references
Paper or Media Type Settings
Related tasks
Adjusting Print Density
Adjusting Color
67
Printing with OS X
You can print with your product using any OS X printing program, as described in these sections.
Note: If you have an Internet connection, it is a good idea to check for updates to your product software
on Epson's support website.
Selecting Basic Print Settings - OS X
Selecting Page Setup Settings - OS X
Selecting Print Layout Options - OS X
Managing Color - OS X
Selecting Printing Preferences - OS X
Printing Your Document or Photo - OS X
Parent topic: Printing from a Computer
Selecting Basic Print Settings - OS X
Select the basic settings for the document or photo you want to print.
1. Open a photo or document for printing.
2. Select the print command in your application.
Note: You may need to select a print icon on your screen, the Print option in the File menu, or
another command. See your application's help utility for details.
3. Select your product as the Printer setting.
4. If necessary, click the arrow next to the Printer setting or the Show Details button to expand the
print window.
68
You see the expanded printer settings window for your product:
Note: The print window may look different, depending on the version of OS X and the application
you are using.
5. Select the Copies and Pages settings as necessary.
Note: If you do not see these settings in the print window, check for them in your application before
printing.
69
6. Select the page setup options: Paper Size and Orientation.
Note: If you do not see these settings in the print window, check for them in your application before
printing. They may be accessible by selecting Page Setup from the File menu.
7. Select any application-specific settings that appear on the screen, such as those shown in the image
above for the Preview application.
8. Select Print Settings from the pop-up menu.
70
You see these settings:
9. Select the type of paper you loaded as the Media Type setting.
Note: The setting may not exactly match the name of your paper. Check the paper type settings list
for details.
10. Select the Print Quality setting you want to use.
11. Select any of the available print options.
Print Quality Options - OS X
Print Options - OS X
Parent topic: Printing with OS X
Related references
Paper or Media Type Settings
Related tasks
Selecting Page Setup Settings - OS X
Printing Your Document or Photo - OS X
71
Print Quality Options - OS X
You can select any of the available Print Quality options to fine-tune the quality of your print. Some
settings may be unavailable, depending on the paper type setting you have chosen.
Draft
For draft printing on plain paper.
Normal
For everyday text and image printing.
Fine
For text and graphics with good quality and print speed.
Quality
For text and graphics with increased quality and print speed.
High Quality
For photos and graphics with high print quality.
Best Quality
For the best print quality, but the slowest print speed.
Parent topic: Selecting Basic Print Settings - OS X
Print Options - OS X
You can select any of the print options to customize your print. Some options may be unavailable,
depending on other settings you have chosen.
Grayscale
Prints text and graphics in black or shades of gray.
Mirror Image
Lets you flip the printed image horizontally.
Note: If you select the Min option for the Expansion setting, you may see white borders on your printed
photo.
Parent topic: Selecting Basic Print Settings - OS X
72
Selecting Page Setup Settings - OS X
Depending on your application, you may be able to select the paper size and orientation settings from
the print window.
Note: If you do not see these settings in the print window, check for them in your application before
printing. They may be accessible by selecting Page Setup from the File menu.
1. Select the size of the paper you loaded as the Paper Size setting. If you are printing a borderless
photo, select the Borderless checkbox or a paper size with a Borderless option. You can also
select a custom setting to create a custom paper size, but the Quality setting will be limited to
Normal.
2. Select the orientation of your document or photo as shown in the print window.
Note: If you are printing an envelope, select the
icon.
Note: You can reduce or enlarge the size of the printed image by selecting Paper Handling from the
pop-up menu and selecting a scaling option.
Parent topic: Printing with OS X
Related references
Borderless Paper Type Compatibility
73
Selecting Print Layout Options - OS X
You can select a variety of layout options for your document or photo by selecting Layout from the popup menu on the print window.
• To print multiple pages on one sheet of paper, select the number of pages in the Pages per Sheet
pop-up menu. To arrange the print order of the pages, select a Layout Direction setting.
• To print borders around each page on the sheet, select a line setting from the Border pop-up menu.
• To invert or flip the printed image, select the Reverse page orientation or Flip horizontally settings.
Parent topic: Printing with OS X
Managing Color - OS X
You can adjust the Color Matching and Color Options settings to fine-tune the colors in your printout, or
turn off color management in your printer software.
74
1. Select Color Matching from the pop-up menu in the print window.
2. Select one of the available options.
3. Select Color Options from the pop-up menu in the print window.
Note: The available settings on the Color Options menu depend on the option you selected on the
Color Matching menu.
4. Select one of the available options.
Color Matching and Color Options - OS X
Parent topic: Printing with OS X
Color Matching and Color Options - OS X
You can select from these settings on the Color Matching and Color Options menus.
75
Color Matching Settings
EPSON Color Controls
Lets you manage color using controls in your printer software or turn off color management.
ColorSync
Prints using standard color profiles for your product and paper to help match image colors. You can
customize the conversion method and filter settings on the ColorSync pop-up menu in the print
window.
Color Options Settings
Manual Settings
Lets you select manual color adjustments. Click the arrow next to Advanced Settings and select
settings for Brightness, Contrast, Saturation, and individual color tones. You can also select a color
Mode setting for printing photos and graphics and the Fix Red-Eye setting to reduce or remove redeye in photos. Depending on the selected color mode, you can also adjust the midtone density using
the Gamma setting.
Fix Photo
Improves the color, contrast, and sharpness of flawed photos. Click the arrow next to Advanced
Settings and select the Fix Red-Eye setting to reduce or remove red-eye in photos.
Note: Fix Photo uses a sophisticated face recognition technology to optimize photos that include
faces. For this to work, both eyes and the nose must be visible in the subject's face. If your photo
includes a face with an intentional color cast, such as a statue, you may want to turn off Fix Photo to
retain the special color effects.
Off (No Color Adjustment)
Turns off color management in your printer software so you can manage color using only your
application software.
Parent topic: Managing Color - OS X
Selecting Printing Preferences - OS X
You can select printing preferences that apply to all the print jobs you send to your product.
1. In the Apple menu or the Dock, select System Preferences.
2. Select Print & Fax, Print & Scan, or Printers & Scanners, select your product, and select Options
& Supplies.
3. Select Driver or Options.
76
You see a screen like this:
4. Select any of the available printing preferences.
5. Click OK.
Printing Preferences - OS X
Parent topic: Printing with OS X
Printing Preferences - OS X
You can select from these settings on the Options or Driver tab.
Skip Blank Page
Ensures that your product does not print pages that contain no text or images.
High Speed Printing
Speeds up printing but may reduce print quality.
Parent topic: Selecting Printing Preferences - OS X
Printing Your Document or Photo - OS X
Once you have selected your print settings, you are ready to print.
77
Click Print at the bottom of the print window.
Checking Print Status - OS X
Parent topic: Printing with OS X
Checking Print Status - OS X
During printing, you can view the progress of your print job, control printing, and check ink cartridge
status.
1. Click the printer icon when it appears in the Dock.
78
You see the print status window:
2. Select the following options as necessary:
OS X 10.6/10.7:
• To cancel printing, click the print job and click the Delete icon.
• To pause a print job, click the print job and click the Hold icon. To resume a print job, click the print
job marked "Hold" and click the Resume icon.
• To pause printing for all queued print jobs, click the Pause Printer icon.
• To check ink status, click the Supply Levels icon.
OS X 10.8/10.9:
• To cancel printing, click the
• To pause a print job, click the
button.
button next to the print job.
button next to the print job. To resume a print job, click the
• To pause printing for all queued print jobs, click the large Pause button.
• To check ink status, click the Settings icon, then click the Supply Levels tab.
Parent topic: Printing Your Document or Photo - OS X
79
Adjusting Print Density
You can increase print density to darken your prints on plain paper. This is especially useful when you
print with the built-in basic driver, which does not include density adjustment settings.
Note: Increasing density may reduce print speed.
1. From the home screen, select Menu and press the OK button.
You see this screen:
2. Press the arrow buttons to select Plain Paper Density Setting and press the OK button.
You see this screen:
3. Press the arrow buttons to select +1 or +2 and press the OK button.
80
Parent topic: Printing from a Computer
Adjusting Color
You can use the product's control panel to make the colors in your prints lighter or darker. This is
especially useful when you print with the built-in basic driver, which does not include color adjustment
settings.
1. From the home screen, select Menu and press the OK button.
You see this screen:
2. Press the arrow buttons to select Color Adjustment and press the OK button.
You see this screen:
81
3. Do one of the following:
• To make the color darker, select +1 and press the OK button.
• To make the color lighter, select –1 and press the OK button.
Parent topic: Printing from a Computer
Cancelling Printing Using a Product Button
If you need to cancel printing, press the
cancel button on your product.
Parent topic: Printing from a Computer
82
Replacing Ink Cartridges and Maintenance Boxes
The maintenance box stores ink that gets flushed from the system during print head cleaning. When an
ink cartridge is expended or the maintenance box is at the end of its service life, you need to replace it.
You may also need to replace a cartridge that is more than six months old if your printouts do not look
their best, even after cleaning and aligning the print head.
Note: Please dispose of your used Epson branded ink cartridges and maintenance boxes responsibly
and in accordance with local requirements. If you would like to return your used ink cartridges and
maintenance boxes to Epson for proper disposal, please go to epson.com/recycle for more information.
Check Cartridge and Maintenance Box Status
Purchase Epson Ink Cartridges and Maintenance Box
Removing and Installing Ink Cartridges
Printing with Black Ink and an Expended Color Cartridge
Conserving Low Black Ink with Windows
Replacing the Maintenance Box
Check Cartridge and Maintenance Box Status
Your printer and its software will let you know when an ink cartridge is low or expended, or when the
maintenance box needs to be replaced.
Checking Cartridge and Maintenance Box Status on the LCD Screen
Checking Cartridge and Maintenance Box Status with Windows
Checking Cartridge and Maintenance Box Status with OS X
Parent topic: Replacing Ink Cartridges and Maintenance Boxes
Checking Cartridge and Maintenance Box Status on the LCD Screen
You can check the status of your ink cartridges and maintenance box on your product's LCD screen.
• If necessary, press the
cancel button to return to the home screen.
83
The ink and maintenance box status is displayed as shown:
Note: The displayed levels are approximate.
Parent topic: Check Cartridge and Maintenance Box Status
Related tasks
Removing and Installing Ink Cartridges
Replacing the Maintenance Box
Checking Cartridge and Maintenance Box Status with Windows
A low ink reminder appears if you try to print when ink is low, and you can check your cartridge or
maintenance box status at any time using a utility on your Windows computer.
1. To check your status, access the Windows Desktop, double-click the product icon in the Windows
taskbar, and click Details.
84
You see this window:
2. Replace or reinstall the maintenance box or any ink cartridge as indicated on the screen.
Note: If any of the cartridges installed in the product is broken, incompatible with the product model,
or improperly installed, Epson Status Monitor will not display an accurate cartridge status.
3. To disable the low ink reminder, right-click the product icon in the Windows taskbar and select
Monitoring Preferences.
85
You see this window:
4. Deselect the See Low Ink Reminder alerts checkbox at the bottom of the screen.
5. To disable promotional offers, deselect the Display Epson Offers checkbox.
6. Click OK.
Parent topic: Check Cartridge and Maintenance Box Status
Related tasks
Removing and Installing Ink Cartridges
86
Replacing the Maintenance Box
Checking Cartridge and Maintenance Box Status with OS X
You can check the status of your ink cartridges and maintenance box using a utility on your Mac.
1. In the Apple menu or the Dock, select System Preferences. Select Print & Fax, Print & Scan, or
Printers & Scanners, select your product, and select Options & Supplies. Select Utility and select
Open Printer Utility.
2. Select EPSON Status Monitor.
You see this window:
3. Do the following as necessary:
• You can update the ink cartridge and maintenance box status by clicking Update.
87
• Replace or reinstall the maintenance box or any ink cartridge as indicated on the screen.
Note: If any of the cartridges installed in the product is broken, incompatible with the product model,
or improperly installed, Epson Status Monitor will not display an accurate cartridge status.
Parent topic: Check Cartridge and Maintenance Box Status
Related tasks
Removing and Installing Ink Cartridges
Replacing the Maintenance Box
Purchase Epson Ink Cartridges and Maintenance Box
You can purchase genuine Epson ink, maintenance boxes, and paper at Epson Supplies Central at
epson.com/ink3 (U.S. sales) or epson.ca (Canadian sales). You can also purchase supplies from an
Epson authorized reseller. To find the nearest one, call 800-GO-EPSON (800-463-7766).
Note: This product uses only genuine Epson-brand cartridges. Other brands of ink cartridges and ink
supplies are not compatible and, even if described as compatible, may not function properly.
The cartridges included with the printer are designed for printer setup and not for resale. After some ink
is used for priming, the rest is available for printing. Yields vary considerably based on images printed,
print settings, paper type, frequency of use, and temperature. For print quality, a variable amount of ink
remains in the cartridge after the "replace cartridge" indicator comes on.
Ink Cartridge and Maintenance Box Part Numbers
Parent topic: Replacing Ink Cartridges and Maintenance Boxes
Ink Cartridge and Maintenance Box Part Numbers
Use these part numbers when you order or purchase a new maintenance box or ink cartridges.
Maintenance box part number: T2950
Note: For best printing results, use up a cartridge within 6 months of opening the package.
Ink color
Part number
Black
215
Color
215
88
Parent topic: Purchase Epson Ink Cartridges and Maintenance Box
Removing and Installing Ink Cartridges
Make sure you have your replacement cartridges handy before you begin. You must install new
cartridges immediately after removing the old ones.
Caution: Leave your old cartridges in the printer until you are ready to replace them to prevent the print
head nozzles from drying out. Do not open ink cartridge packages until you are ready to install the ink.
Cartridges are vacuum packed to maintain reliability.
1. Turn on your product.
• If an ink cartridge is expended, you see a message on the LCD screen. Note which cartridge need
to be replaced and press the OK button. Select the option to replace the ink cartridge and press
the OK button.
• If you are replacing a cartridge before you see a message on the LCD screen, select Menu >
Maintenance > Ink Cartridge Replacement. Then press the OK button.
2. Open the inner cover.
Caution: Do not move the print head by hand; otherwise, you may damage your product. Do not
touch the flat white cable inside the printer.
89
3. Push in the blue tab to unlock the ink cartridge you are replacing. Then lift the bottom of the ink
cartridge to remove it.
Warning: If ink gets on your skin, wash it thoroughly with soap and water. If ink gets into your eyes,
flush them immediately with water. If ink gets into your mouth, spit it out and see a doctor right away.
Keep ink cartridges out of the reach of children.
4. Recap the used ink cartridge using the cap that came with it.
Note: Dispose of used cartridges carefully. Do not take the used cartridge apart or try to refill it.
90
5. Remove the cartridge from the package and remove the yellow tape.
Caution: Do not touch the areas shown below. Doing so may prevent normal operation and printing.
6. Remove the cap from the cartridge and store it for later use.
Note: Save the cap so you can recap ink cartridges before storing or disposing of them.
Caution: Do not remove any other labels or seals, or ink will leak.
91
7. Insert the ink cartridge at a slight angle into the ink cartridge holder as shown. Then press the bottom
of the ink cartridge down until it clicks into place.
8. After you replace the cartridge or cartridges that need replacing, close the inner cover and press the
OK button.
The product starts priming the ink. This takes a few minutes. When you see a completion message
on the LCD screen, ink replacement is complete.
Note: Do not turn off the product while it is priming or you will waste ink. If you see an error screen
telling you an ink cartridge is installed incorrectly, open the inner cover and press the ink cartridge
down until it clicks into place. When you're finished, close the inner cover.
If you remove a low or expended ink cartridge, you cannot re-install and use the cartridge.
Caution: If you remove an ink cartridge for later use, recap the ink cartridge using the cap that came
with it to prevent the ink from drying out and to protect the surrounding area from getting smeared by ink.
Store the ink cartridge in the same environment as the product. Do not leave the product with the ink
cartridges removed for an extended period of time. Otherwise, ink remaining in the print head nozzles
may dry out and you may not be able to print.
Parent topic: Replacing Ink Cartridges and Maintenance Boxes
Related concepts
Purchase Epson Ink Cartridges and Maintenance Box
Printing with Black Ink and an Expended Color Cartridge
When the color ink cartridge is expended, you can temporarily continue printing from your computer
using black ink. Replace the expended color cartridge as soon as possible for future printing.
92
Printing with an Expended Color Cartridge - Windows
Printing with an Expended Color Cartridge - OS X
Parent topic: Replacing Ink Cartridges and Maintenance Boxes
Printing with an Expended Color Cartridge - Windows
If you see a message during printing telling you that you can temporarily print in black ink with an
expended color cartridge, you can cancel your print job and select settings to print on plain paper or on
an envelope.
Note: To use this feature, Epson Status Monitor must be enabled.
1. Click Cancel or Cancel Print to cancel your print job.
2. Load plain paper or an envelope in your product.
3. Access the print settings in your print application.
4. Click the Main tab.
5. Select Plain Paper/Bright White Paper or Envelope as the paper type setting.
6. Select the Black/Grayscale checkbox.
7. Click OK.
8. Print your document.
Epson Status Monitor 3 displays a print message.
9. Click Print in Black to print your document.
Parent topic: Printing with Black Ink and an Expended Color Cartridge
Printing with an Expended Color Cartridge - OS X
If printing stops, you can cancel your print job and select settings to temporarily print with only black ink
on plain paper or on an envelope.
1. Click the printer icon in the Dock.
2. If you see a message telling you that you can temporarily print with only black ink, click the Delete
icon to cancel your print job. (OS X 10.8/10.9: Click the
message is displayed, click OK.)
icon to cancel your print job. If an error
3. In the Apple menu or the Dock, select System Preferences. Select Print & Fax, Print & Scan, or
Printers & Scanners, select your product, and select Options & Supplies.
93
4. Select Driver or Options.
You see a screen like this:
5. Select On as the Permit temporary black printing setting.
6. Click OK.
7. Close the utility window.
8. Load plain paper or an envelope in your product.
9. Access the print settings in your print application.
10. Select Print Settings from the pop-up menu.
11. Select Plain Paper/Bright White Paper or Envelope as the paper type setting.
12. Select the Grayscale option.
13. Click Print to print your document.
Parent topic: Printing with Black Ink and an Expended Color Cartridge
94
Conserving Low Black Ink with Windows
The following window appears when black ink runs low and there is more color ink.
Note: The window appears only when you have selected Plain Paper/Bright White Paper as the paper
type setting, and depends on other selected print settings. To use this feature, Epson Status Monitor
must be enabled.
• Click Yes to use a mixture of color inks to create black, or No to continue using the remaining black ink
for the document you are printing.
• Click Disable this feature to continue using the remaining black ink.
Note: If you disable this feature, it remains disabled until you install a new black ink cartridge.
Parent topic: Replacing Ink Cartridges and Maintenance Boxes
Replacing the Maintenance Box
Make sure you have a new maintenance box before you begin.
Caution: Do not reuse a maintenance box that has been removed and left uninstalled for more than a
week. Keep the maintenance box away from direct sunlight.
95
1. Remove the new maintenance box from its package.
Caution: Do not touch the green chip on the maintenance box.
2. Turn off the product and disconnect the power cord and USB cable.
3. Close the cover and turn the product upside-down.
4. Press the tabs and remove the maintenance box cover.
96
5. Slide the maintenance box as shown and pull it out.
Note: Do not touch the sections shown. Doing so may prevent normal operation and cause ink to
leak.
Warning: If ink gets on your skin, wash it thoroughly with soap and water. If ink gets into your eyes,
flush them immediately with water. If ink gets into your mouth, spit it out and see a doctor right away.
Keep the maintenance box out of the reach of children and do not drink the ink.
6. Place the used maintenance box in the plastic bag that came with the new maintenance box. Seal
the bag and dispose of it carefully.
7. Place the new maintenance box into the holder and slide it into place.
8. Reattach the maintenance box cover.
97
Parent topic: Replacing Ink Cartridges and Maintenance Boxes
Related concepts
Purchase Epson Ink Cartridges and Maintenance Box
98
Adjusting Print Quality
If your print quality declines, you may need to run a utility to clean or align the print head.
Print Head Maintenance
Print Head Alignment
Cleaning the Paper Path Using the Product Control Panel
Print Head Maintenance
If your printouts become too light, or you see dark or light bands across them, you may need to clean the
print head nozzles. Cleaning uses ink, so clean the nozzles only if print quality declines.
You can check for clogged nozzles before you clean them so you don’t clean them unnecessarily.
Note: You cannot clean the print head if an ink cartridge is expended, and may not be able to clean it
when a cartridge is low. You must replace the cartridge first.
Print Head Nozzle Check
Print Head Cleaning
Parent topic: Adjusting Print Quality
Related topics
Replacing Ink Cartridges and Maintenance Boxes
Print Head Nozzle Check
You can print a nozzle check pattern to check for clogged nozzles.
Checking the Nozzles Using the Product Control Panel
Checking the Nozzles Using a Computer Utility
Parent topic: Print Head Maintenance
Checking the Nozzles Using the Product Control Panel
You can check the print head nozzles using the control panel on your product.
1. Load a few sheets of plain paper in the product.
2. From the Home screen, select Menu and press the OK button.
99
You see this screen:
3. Press the arrow buttons to select Maintenance and press the OK button.
4. Press the arrow buttons to select Nozzle Check and press the OK button.
You see this screen:
5. Press the OK button.
The nozzle check pattern is printed.
100
6. Check the printed pattern to see if there are gaps in the lines.
Print head is clean
Print head needs cleaning
7. Do one of the following:
• If there are no gaps, the print head is clean. Select No and press the OK button.
• If there are gaps or the pattern is faint, select Yes and press the OK button to continue. Follow the
instructions on the screen to clean the print head.
101
If you don’t see any improvement after cleaning the print head up to 2 times, turn the product off and wait
at least 6 hours. Then try cleaning the print head again. If quality still does not improve, one of the ink
cartridges may be old or damaged and needs to be replaced.
Parent topic: Print Head Nozzle Check
Related concepts
Print Head Cleaning
Related topics
Replacing Ink Cartridges and Maintenance Boxes
Checking the Nozzles Using a Computer Utility
You can check the print head nozzles using a utility on your Windows or Mac computer.
1. Load a few sheets of plain paper in the product.
2. Do one of the following:
• Windows: Access the Windows Desktop and right-click the product icon in the Windows taskbar.
• OS X: In the Apple menu or the Dock, select System Preferences. Select Print & Fax, Print &
Scan, or Printers & Scanners, select your product, and select Options & Supplies. Select
Utility and select Open Printer Utility.
3. Select Nozzle Check.
102
You see a window like this:
4. Click Print.
103
5. Check the printed pattern to see if there are gaps in the lines.
Print head is clean
Print head needs cleaning
6. If there are no gaps, click Finish.
If there are gaps or the pattern is faint, clean the print head.
Parent topic: Print Head Nozzle Check
104
Related concepts
Print Head Cleaning
Related topics
Replacing Ink Cartridges and Maintenance Boxes
Print Head Cleaning
If print quality has declined and the nozzle check pattern indicates clogged nozzles, you can clean the
print head.
Note: You cannot clean the print head if an ink cartridge is expended, and may not be able to clean it
when a cartridge is low. You must replace the cartridge first.
Cleaning the Print Head Using the Product Control Panel
Cleaning the Print Head Using a Computer Utility
Parent topic: Print Head Maintenance
Related tasks
Removing and Installing Ink Cartridges
Cleaning the Print Head Using the Product Control Panel
You can check the print head nozzles using the control panel on your product.
1. Load a few sheets of plain paper in the product.
2. From the home screen, select Menu and press the OK button.
You see this screen:
105
3. Press the arrow buttons to select Maintenance and press the OK button.
4. Press the arrow buttons to select Head Cleaning and press the OK button.
You see this screen:
5. Press the OK button to clean the print head. You see a message on the LCD screen during the
cleaning cycle.
Caution: Never turn off the product during a cleaning cycle or you may damage it.
When the cleaning cycle is finished, you see a message on the LCD screen.
6. Select Nozzle check and press the OK button.
7. Press the OK button again to run a nozzle check and confirm that the print head is clean.
If you don’t see any improvement after cleaning the print head up to 2 times, turn off the product and wait
at least 6 hours. Then try cleaning the print head again. If quality still does not improve, one of the ink
cartridges may be old or damaged and needs to be replaced.
Parent topic: Print Head Cleaning
Related tasks
Checking the Nozzles Using the Product Control Panel
Removing and Installing Ink Cartridges
Cleaning the Print Head Using a Computer Utility
You can clean the print head using a utility on your Windows or Mac computer.
1. Load a few sheets of plain paper in the product.
106
2. Do one of the following:
• Windows: Access the Windows Desktop and right-click the product icon in the Windows taskbar.
• OS X: In the Apple menu or the Dock, select System Preferences. Select Print & Fax, Print &
Scan, or Printers & Scanners, select your product, and select Options & Supplies. Select
Utility and select Open Printer Utility.
3. Select Head Cleaning.
You see a window like this:
4. Click Start to begin the cleaning cycle.
Caution: Never turn off the product or open the inner cover during a cleaning cycle or you may not
be able to print.
5. When the cleaning cycle is finished, you can check to see if the nozzles are clean; click Print Nozzle
Check Pattern and click Print.
107
6. Check the printed pattern to see if there are gaps in the lines.
Print head is clean
Print head needs cleaning
• If there are no gaps, click Finish.
• If there are gaps or the pattern is faint, click Clean to clean the print head again.
If you don’t see any improvement after cleaning the print head up to 2 times, turn off the product and wait
at least 6 hours. Then check the print head nozzles and try cleaning the print head again, if necessary. If
quality still does not improve, one of the ink cartridges may be old or damaged and needs to be replaced.
108
Parent topic: Print Head Cleaning
Related tasks
Checking the Nozzles Using a Computer Utility
Removing and Installing Ink Cartridges
Print Head Alignment
If your printouts become grainy or blurry, you notice misalignment of vertical lines, or you see dark or
light horizontal bands, you may need to align the print head.
Note: Banding may also occur if your print head nozzles need cleaning.
Aligning the Print Head Using the Product Control Panel
Aligning the Print Head Using a Computer Utility
Parent topic: Adjusting Print Quality
Aligning the Print Head Using the Product Control Panel
You can align the print head using the control panel on your product.
1. Load a few sheets of plain paper in the product.
2. From the home screen, select Menu and press the OK button.
You see this screen:
3. Press the arrow buttons to select Maintenance and press the OK button.
109
4. Press the arrow buttons to select Head Alignment and press the OK button.
You see this screen:
5. Press the arrow buttons to select Vertical Alignment or Horizontal Alignment and press the OK
button.
6. Press the OK button again to print an alignment sheet.
Note: Do not cancel printing while you are printing a head alignment pattern.
7. Check the printed pattern and select the number representing the most solid printed pattern for each
set on the LCD screen.
Vertical alignment
110
Horizontal alignment
8. Press the OK button when you are finished.
Parent topic: Print Head Alignment
Aligning the Print Head Using a Computer Utility
You can align the print head using a utility on your Windows or Mac computer.
1. Load a few sheets of plain paper in the product.
2. Do one of the following:
• Windows: Access the Windows Desktop and right-click the product icon in the Windows taskbar.
• OS X: In the Apple menu or the Dock, select System Preferences. Select Print & Fax, Print &
Scan, or Printers & Scanners, select your product, and select Options & Supplies. Select
Utility and select Open Printer Utility.
3. Select Print Head Alignment, then select the type of alignment you want to perform, if necessary.
4. Click Next, then click Print to print an alignment sheet.
Note: Do not cancel printing while you are printing a head alignment pattern.
111
You see a window like this:
5. Check the printed pattern and follow the instructions on the screen to choose the number
representing the best printed pattern for each set.
Vertical alignment
112
Horizontal alignment
• After choosing each pattern number, click Next.
• If no patterns are aligned in one or more of the sets, choose the closest one in each set and click
Realignment. Then print another alignment sheet and check it.
Note: Click Skip (where available) if you want to skip a particular alignment sheet.
6. When you are done, click Finish.
Parent topic: Print Head Alignment
Cleaning the Paper Path Using the Product Control Panel
You can clean the paper path using the control panel on your product.
1. Load a few sheets of plain paper in the product.
2. From the home screen, select Menu and press the OK button.
113
You see this screen:
3. Press the arrow buttons to select Maintenance and press the OK button.
4. Press the arrow buttons to select Paper Guide Cleaning and press the OK button.
5. Follow the on-screen instructions to clean the paper path.
6. Repeat as necessary until the paper comes out clean.
Parent topic: Adjusting Print Quality
114
Transporting and Cleaning Your Product
Follow the instructions in these sections to transport your product or clean it if necessary.
Carrying and Transporting Your Product
Cleaning Your Product
Carrying and Transporting Your Product
Follow these tips for traveling with your product:
• Charge the product before you leave.
• Make sure you take the USB cable for convenient charging on the road.
• Take extra ink cartridges and a spare maintenance box.
Caution: Observe the following precautions when carrying or transporting the product:
• When traveling by airplane, Epson recommends handling the product as a carry-on. Contact the
airline to confirm that you can take the product in the passenger cabin.
• Avoid strong impacts, which may damage the product.
• Leave the ink cartridges and maintenance box installed; otherwise, the print head may dry out or ink
may leak.
• Do not leave the product in direct sunlight, near heat sources, or inside cars or other hot locations. The
product may be deformed or ink may leak.
1. Turn off the product, and make sure the
2. Disconnect the AC adapter and USB cable.
3. Close the printer cover.
115
power light and the LCD screen turn off.
4. If you need to ship the product, place it in its original packing materials, if possible, or use equivalent
materials with cushioning around the product.
Note: When storing or transporting the product, place it as shown here:
If print quality has declined when you print again, clean and align the print head.
Parent topic: Transporting and Cleaning Your Product
Related concepts
Battery Charging
Purchase Epson Ink Cartridges and Maintenance Box
Print Head Cleaning
Print Head Alignment
Cleaning Your Product
To keep your product working at its best, you should clean it whenever necessary. Close the cover when
you are not using the product to protect it from dust.
Caution: Do not use a hard brush, benzene, alcohol, or paint thinner to clean the product or you may
damage it. Do not place anything on top of the product or use the cover as a writing surface, or it could
get permanently scratched. Do not use oil or other lubricants inside the product or let water get inside.
1. Turn off the product.
2. Unplug the power cable.
3. Disconnect any connected cables.
4. Remove all the paper.
5. Clean the outer case and control panel with a soft, dry cloth. Do not use any liquid or chemical
cleansers.
Parent topic: Transporting and Cleaning Your Product
116
Solving Problems
Check these sections for solutions to problems you may have using your product.
Checking for Software Updates
Product Status Messages
Running a Product Check
Resetting Control Panel Defaults
Solving Power and Battery Problems
Solving Setup Problems
Solving Network Problems
Solving Paper Problems
Solving Problems Printing from a Computer
Solving Page Layout and Content Problems
Solving Print Quality Problems
When to Uninstall Your Product Software
Where to Get Help
Checking for Software Updates
Periodically, it's a good idea to check Epson's support website for free updates to your product software.
You can select Download the Latest Software from the Home screen of this manual or visit Epson's
driver download site (U.S. downloads or Canadian downloads).
• Windows: Your printer software automatically checks for updates. You can also manually update the
software by selecting Software Update here:
• Accessing the Windows Desktop and right-clicking the product icon in the Windows taskbar
• On the Maintenance tab in the printer settings window
You can also update the software by selecting EPSON Software Updater in the EPSON or EPSON
Software program group, accessible by the Start button, or on the Start or Apps screens, depending
on your version of Windows.
• OS X: You can manually update the software by opening the Applications > Epson Software folder
and selecting EPSON Software Updater.
Parent topic: Solving Problems
117
Product Status Messages
If you see an error code on the LCD, see the solutions here to troubleshoot it.
LCD code Condition/solution
E-01
A printer error has occurred. Turn the product off and then back on again. If the error
continues, check for a paper jam. If there is no paper jam, contact Epson for support.
E-11
The ink pad is at the end of its service life. Turn off the product and contact Epson for
support.
E-12
The maintenance box is full. Turn off the product and replace the maintenance box.
E-13
The maintenance box is missing or not installed correctly. Turn off the product and install
the maintenance box.
E-14
The maintenance box is not recognized. Turn off the product and install the maintenance
box. If the error continues, replace the maintenance box.
E-21
A battery error has occurred, and the product has turned off automatically. Contact Epson
for support.
E-22
The battery is too cold, and the product has turned off automatically. Use the product
within a temperature range of 50 to 95 °F (10 to 35 °C).
E-23
The battery is too hot, and the product has turned off automatically. Use the product within
a temperature range of 50 to 95 °F (10 to 35 °C).
E-24
The battery is too low, and the product has turned off automatically. Charge the battery or
connect the AC adapter.
W-01
Paper is jammed in the rear paper feed. Remove the jammed paper, then press the OK
button.
W-02
Paper is jammed inside the product. Remove the jammed paper, then press the OK
button.
W-11
An ink pad is nearing the end of its service life. Contact Epson for support. (To continue
printing, press the OK button.)
W-12
An ink cartridge is installed incorrectly. Press down each of the ink cartridges gently to
make sure they are installed correctly.
W-13
An ink cartridge indicated on the LCD screen is not recognized. Replace the ink cartridge.
Epson recommends using genuine Epson ink cartridges.
118
LCD code Condition/solution
I-22
To establish a wireless connection using an access point, press the button on the access
point or click the button on the access point's wireless settings screen displayed on your
computer screen.
I-23
Enter the PIN code displayed on the LCD screen into the access point or computer within
two minutes. If you wait longer than two minutes, a time-out error occurs, the code
changes, and you must enter a new code.
I-31
To make wireless connection settings from your computer, insert your product CD into
your computer and follow the on-screen instructions.
I-41
The Paper Configuration setting must be turned on to use AirPrint.
I-81
The product is switching to battery power because the AC adapter is disconnected.
Printing may be slower when running on the battery.
Recovery
mode
An error has occurred during firmware updating. Connect your product using a USB cable
and try updating the firmware again. If you still receive this error message, contact Epson
for support.
Note: The ink pads in the printer collect, distribute, and contain the ink that is not used on printed pages.
During the life of your product it may reach a condition where either satisfactory print quality cannot be
maintained or the ink pads have reached the end of their usable life. The Epson Status Monitor, your
LCD, or lights on the control panel will advise you when these parts need replacing. If this happens
during the standard warranty of the product, the exchange of the product or replacement of the pads is
covered under the standard warranty. If the product is out of warranty, the pads can be replaced by any
Epson authorized service provider. The waste ink pads are not a user-replaceable part.
Parent topic: Solving Problems
Related concepts
Battery Charging
Related references
Where to Get Help
Related tasks
Selecting the Paper Source Settings - Control Panel
Related topics
Solving Network Problems
Replacing Ink Cartridges and Maintenance Boxes
119
Solving Paper Problems
Running a Product Check
Running a product check helps you determine if your product is operating properly.
1. Disconnect any interface cables connected to your product.
2. Load plain paper in the product.
3. From the home screen, select Menu and press the OK button.
You see this screen:
4. Press the arrow buttons to select Maintenance and press the OK button.
5. Press the arrow buttons to select Nozzle Check and press the OK button.
You see this screen:
120
6. Press the OK button.
The nozzle check pattern is printed.
7. Do one of the following, depending on the results of the product check:
• If the page prints and the nozzle check pattern is complete, the product is operating properly. Any
operation problem you may have could be caused by your computer, cable, software, or selected
settings. Check the other solutions in this book or try uninstalling and reinstalling your printer
software.
• If the page prints but the nozzle check pattern has gaps, clean or align the print head.
• If the page does not print, the product may have a problem. Check the other solutions in this
manual. If they do not work, contact Epson.
Parent topic: Solving Problems
Related concepts
Print Head Cleaning
Print Head Alignment
When to Uninstall Your Product Software
Related references
Where to Get Help
Resetting Control Panel Defaults
If you have a problem with settings on the product control panel, you can reset them to their factory
defaults. You can choose which settings to reset or reset them all.
1. From the home screen, select Menu and press the OK button.
You see this screen:
121
2. Press the arrow buttons to select Restore Default Settings and press the OK button.
3. Select one of these options and press the OK button:
• Network Settings: Resets all network settings.
• All Except Network: Resets all control panel settings, except for network settings.
• All Settings: Resets all control panel settings.
You see a confirmation screen.
4. Select Yes and press the OK button to reset the selected settings. (Select No and press the OK
button if you want to cancel the operation.)
Parent topic: Solving Problems
Solving Power and Battery Problems
Check these sections if you have power or battery problems.
Product Does Not Turn on
Product Does Not Turn Off
Product Turns Off Automatically
Battery Does Not Charge From Computer
Parent topic: Solving Problems
122
Product Does Not Turn on
If your product does not turn on, try these solutions:
• Hold down the
power button for a few seconds.
• Make sure the power cord is securely plugged in.
• Make sure the battery is charged.
Parent topic: Solving Power and Battery Problems
Related concepts
Battery Charging
Product Does Not Turn Off
If your product does not turn off, try this solution:
1. Disconnect the AC adapter and the USB cable.
2. Hold down the
power button and the
then release both buttons.
cancel button at the same time for more than 7 seconds,
3. To prevent the print head from drying out, turn the printer back on, then turn it off by pressing the
power button.
Parent topic: Solving Power and Battery Problems
Product Turns Off Automatically
If your product turns off automatically, try these solutions:
• The LCD screen turns off when the product goes into sleep mode. Press any button to turn the screen
on.
• The product's Power Off Timer turns it off when it is not in use. Press the
back on.
power button to turn it
• If the product was running on the battery, you may have to connect the AC adapter to charge the
battery. Press the
power button to turn the product back on.
Parent topic: Solving Power and Battery Problems
Related concepts
Battery Charging
Related topics
The Power Off and Sleep Timers
123
Battery Does Not Charge From Computer
If you are unable to charge your product by connecting it to a computer, try these solutions:
• Check the battery setting on the product control panel.
1. Disconnect the USB cable.
2. On the product control panel, select Menu > Battery > Battery Settings > USB Power Supply via
PC > On.
3. Turn the product off and reconnect the USB cable.
• Make sure the product is off or in sleep mode.
• Make sure the computer is on and not in sleep or hibernate mode.
• Connect the product directly to the computer and not to a USB hub.
Parent topic: Solving Power and Battery Problems
Related concepts
Battery Charging
Solving Setup Problems
Check these sections if you have problems while setting up your product.
Noise After Ink Installation
Software Installation Problems
Parent topic: Solving Problems
Noise After Ink Installation
If you hear noises from your product after installing ink, check the following:
• The first time you install the ink cartridge, the product must prime its print head. Wait until priming
finishes before you turn off the product, or it may prime improperly and use excess ink the next time
you turn it on.
• If the product's print head stops moving or making noise, and the charging process has not finished
after approximately 5 minutes, turn off your product. Turn it back on and check to see if charging is still
in progress. If it is still in progress, contact Epson for help.
Parent topic: Solving Setup Problems
Related references
Where to Get Help
124
Software Installation Problems
If you have problems while installing your product software, try these solutions:
• Make sure your product is turned on and any necessary cables are securely connected at both ends. If
you still have problems installing software, disconnect the cable and carefully follow the instructions in
the Quick Guide. Also make sure your system meets the requirements for your operating system.
• Close any other programs, including screen savers and virus protection software, and install your
product software again.
• In Windows, make sure your product is selected as the default printer and the correct port is shown in
the printer properties.
• If you see any error message or your software does not install correctly in Windows, you may not have
software installation privileges. Contact your System Administrator.
Parent topic: Solving Setup Problems
Related concepts
When to Uninstall Your Product Software
Related references
Windows System Requirements
OS X System Requirements
Solving Network Problems
Check these solutions if you have problems setting up or using your product on a network.
Note: Breakdown or repair of this product may cause loss of network data and settings. Epson is not
responsible for backing up or recovering data and settings during or after the warranty period. We
recommend that you make your own backup or print out your network data and settings.
Product Cannot Connect to a Wireless Router or Access Point
Network Software Cannot Find Product on a Network
Product Does Not Appear in OS X Printer Window
Cannot Print Over a Network
Parent topic: Solving Problems
Related references
Product Status Messages
125
Product Cannot Connect to a Wireless Router or Access Point
If your product has trouble finding or connecting to a wireless router or access point, try these solutions:
• If you are connecting the product via Wi-Fi Protected Setup (WPS) and the Wi-Fi icon on your
product's LCD is not lit or does not appear, make sure you select one of the WPS options from the
product control panel within 2 minutes of pressing the WPS button on your router.
• Make sure to place your product within contact range of your 2.4GHz router or access point.
Note: Avoid placing your product near a microwave oven, 2.4 GHz cordless phone, or large metal
object, such as a filing cabinet.
• Verify that your router or access point is operating correctly by connecting to it from your computer or
another device.
• You may need to disable the firewall and any anti-virus software on your wireless router or access
point.
• Check to see if access restrictions, such as MAC address filtering, are set on the router or access
point. If access restrictions are set, add your product's MAC address to your router's address list. To
obtain your product's MAC address, print a network status sheet. Then follow the instructions in your
router or access point documentation to add the address to the list.
• If your router or access point does not broadcast its network name (SSID), follow the instructions that
came with your product to enter your wireless network name manually.
• Make sure you are connected to a 2.4 GHz band and not 5 GHz.
• If your router or access point has security enabled, determine the kind of security it is using and any
required password or passphrase for connection. Then make sure to enter the exact WEP key or WPA
passphrase correctly.
• Check if your computer is restricting the available wireless channels. If so, verify that your wireless
access point is using one of the usable channels and change to a usable channel, if necessary.
• If you are using a Wi-Fi Direct connection that suddenly disconnects, the Wi-Fi direct password on
your device may have been changed. If necessary, delete the existing DIRECT-xxxxxxxx connection
settings from your device and enter a new password. See your device documentation for instructions.
• If you connected your product to a Windows computer using Wi-Fi Direct and it automatically selected
Access Point Mode, you may have trouble accessing a low-priority Internet connection. Check the
network connection or adapter settings in the Windows Control Panel and set the Internet metric
setting to 100 for your version of the Internet Protocol.
Parent topic: Solving Network Problems
126
Related concepts
Wi-Fi Direct Mode Setup
Related tasks
Selecting Wireless Network Settings from the Control Panel
Printing a Network Status Sheet
Related topics
Wi-Fi Networking
Network Software Cannot Find Product on a Network
If EpsonNet Setup cannot find your product on a network, try these solutions:
• Make sure your product is turned on and connected to your network. Verify connection using your
product control panel.
• Check if your network name (SSID) contains non-ASCII characters. Your product cannot display nonASCII characters.
• Make sure your product is not connected to a guest network.
• If necessary, reinstall your product software and try running EpsonNet Setup again:
1. Reset your product's network settings to their factory defaults.
2. Windows only: uninstall your product software.
3. Initialize your router following the instructions in your router documentation.
Note: If you are reading these instructions online, you will lose your Internet connection when you
initialize your router, so note the next step before initializing it.
4. Download your product software from the Epson website using the instructions in the Quick Guide.
• If you have replaced your router, reinstall your product software to connect to the new router.
Parent topic: Solving Network Problems
Related concepts
When to Uninstall Your Product Software
Related topics
Wi-Fi Networking
127
Product Does Not Appear in OS X Printer Window
If your product does not appear in the OS X printer window, try these solutions:
• Turn your product off, wait 30 seconds, then turn it back on again.
• If you are connecting the product via Wi-Fi Protected Setup (WPS) and the Wi-Fi icon on your
product's LCD is not lit, make sure you select one of the WPS options from the product control panel
within 2 minutes of pressing the WPS button on your router.
• If you are connecting the product wirelessly via EpsonNet Setup and the Wi-Fi icon does not appear lit
on your LCD screen, make sure your product software was installed correctly. If necessary, reinstall
your software.
Parent topic: Solving Network Problems
Related tasks
Uninstalling Product Software - OS X
Cannot Print Over a Network
If you cannot print over a network, try these solutions:
• Make sure that your product is turned on.
• Make sure you install your product's network software as described in your product documentation.
• Print a network status sheet and verify that the network settings are correct. If the network status is
Disconnected, check any cable connections and turn your product off and then on again.
• If you are using TCP/IP, make sure the product's IP address is set correctly for your network. If your
network does not assign IP addresses using DHCP, set the IP address manually.
• Make sure your computer and product are both using the same wireless network.
• If network printing is slow, print a network status sheet and check the signal strength. If it is poor, place
your product closer to your router or access point.
Note: Avoid placing your product near a microwave oven, 2.4 GHz cordless phone, or large metal
object, such as a filing cabinet.
• Check to see if your wireless router or access point has an enabled Privacy Separator function that is
preventing printing from a device over the network. See your router or access point documentation for
instructions on disabling the Privacy Separator function.
128
• If you are connecting the product wirelessly via EpsonNet Setup and the Wi-Fi connection icon is not
lit or does not appear on the product's LCD screen, make sure your product software was installed
correctly. If necessary, reinstall your software.
Parent topic: Solving Network Problems
Related concepts
When to Uninstall Your Product Software
Related tasks
Printing a Network Status Sheet
Related topics
Wi-Fi Networking
Solving Paper Problems
Check these sections if you have problems using paper with your product.
Paper Feeding Problems
Paper Jam Problems in the Rear Paper Feed
Paper Jam Problems Inside the Product
Parent topic: Solving Problems
Paper Feeding Problems
If you have problems feeding paper, try these solutions:
• Place the product on a flat surface.
• If the battery is running low, connect the AC adapter.
• If paper does not feed for printing, remove it. Then reload it in the rear paper feed against the right side
and beneath the tab. Slide the edge guide against the edge of the paper.
• If multiple pages feed at once, remove the paper, fan the edges to separate the sheets, and reload it.
• If paper jams when you print on both sides of the paper, try loading fewer sheets.
• Make sure your paper meets the specifications for your product.
• Make sure the paper size and paper type settings on the control panel are correct.
• For best results, follow these guidelines:
• Use new, smooth, high-quality paper that is not curled, creased, old, too thin, or too thick.
• Load paper in the rear paper feed printable side up.
129
• Follow any special loading instructions that came with the paper.
Parent topic: Solving Paper Problems
Related references
Paper Jam Problems in the Rear Paper Feed
Paper Jam Problems Inside the Product
Paper Specifications
Related topics
Loading Paper
Paper Jam Problems in the Rear Paper Feed
If paper has jammed in the rear paper feed, remove it as shown here.
Parent topic: Solving Paper Problems
Related references
Paper Jam Problems Inside the Product
130
Paper Jam Problems Inside the Product
If paper has jammed inside the product, follow the steps here.
1. Open the inner cover.
2. Remove the jammed paper.
Caution: Do not touch the flat white cable or translucent part inside the product.
3. Close the inner cover.
131
Parent topic: Solving Paper Problems
Related references
Paper Jam Problems in the Rear Paper Feed
Solving Problems Printing from a Computer
Check these sections if you have problems while printing from your computer.
Note: When printing using AirPrint, the available print settings are different from those covered in this
manual. See the Apple website for details.
Nothing Prints
Product Icon Does Not Appear in Windows Taskbar
Error After Cartridge Replacement
Printing is Slow
Parent topic: Solving Problems
Nothing Prints
If you have sent a print job and nothing prints, try these solutions:
• Make sure your product is turned on.
• Make sure any interface cables are connected securely at both ends.
• If you connected your product to a USB hub, make sure it is a first-tier hub. If it still does not print,
connect your product directly to your computer instead of the hub.
• Run a product check to see if a test page prints. If the test page prints, check to see if your product
software is installed correctly.
• On the product control panel, select Menu > Battery > Battery Settings > USB Power Supply via
PC > Off.
• If you are printing a large image, the computer may not have enough memory. Print the image at a
lower resolution or a smaller file size.
• In Windows, click Print Queue on the Maintenance tab in the printer settings window and check for
the following:
• Check if there are any stalled or paused print jobs. Cancel or unpause any jobs as necessary.
• Open the Printer menu and make sure the product is not offline.
• Open the Printer menu and set the product as the default printer, if necessary.
132
• In OS X, select System Preferences from the Apple menu or Dock, select Print & Scan or Printers
& Scanners, then double-click your printer icon. Check to see if any jobs are paused. Cancel or
unpause any jobs as necessary.
Parent topic: Solving Problems Printing from a Computer
Related tasks
Running a Product Check
Product Icon Does Not Appear in Windows Taskbar
If you do not see your product icon in the Windows taskbar, first try restarting your computer. If that does
not work, try this solution:
1. Do one of the following:
• Windows 8.x: Navigate to the Apps screen and select Control Panel > Hardware and Sound >
Devices and Printers.
• Windows 7: Click
and select Devices and Printers.
• Windows Vista: Click
, select Control Panel, and click Printer under Hardware and Sound.
• Windows XP: Click Start and select Printers and Faxes. (Or open the Control Panel, select
Printers and Other Hardware, if necessary, and Printers and Faxes.)
2. Right-click your product name, select Printing Preferences, and select your product name again if
necessary.
3. Click the Maintenance tab.
4. Click the Extended Settings button.
5. Select Enable EPSON Status Monitor 3, then click OK.
6. Click the Monitoring Preferences button.
7. Click the checkbox for the option that adds the shortcut icon to the taskbar.
8. Click OK to close the open program windows.
Parent topic: Solving Problems Printing from a Computer
Error After Cartridge Replacement
If you see an error light or error message after you replace an ink cartridge, follow these steps:
1. Make sure the print head is in the ink cartridge replacement position. (The ink cartridge holder should
be beneath the cutout in the product case.)
133
Note: If the print head is not in the ink cartridge replacement position, follow the instructions on
replacing an ink cartridge in this manual to move it.
2. Remove and reinsert the replaced ink cartridge, making sure to push it all the way into its slot.
3. Complete the ink cartridge installation steps.
Parent topic: Solving Problems Printing from a Computer
Related tasks
Removing and Installing Ink Cartridges
Printing is Slow
If printing becomes slow, try these solutions:
• Make sure your system meets the requirements for your operating system. If you are printing a highresolution image, you may need more than the minimum requirements. If necessary, increase your
system's memory.
• If you are using Windows 7, close the Devices and Printers window before you print.
• If you are using OS X, make sure you download and install the Epson printer driver.
• Make sure Quiet Mode is turned off.
• Clear space on your hard drive or run a defragmentation utility to free up existing space.
• Close any programs you are not using when you print.
• If your product is connected to a USB hub, connect it directly to your computer instead.
• Connect the AC adapter instead of running on the battery.
• If printing becomes slower after printing continuously for a long time, the product may have
automatically slowed down to protect the print mechanism from overheating or becoming damaged.
Let the product rest with the power on for 30 minutes, then try printing again.
For the fastest printing, select the following settings in your product software:
• Make sure the paper type setting matches the type of paper you loaded.
• Turn on any high speed settings in your product software.
• Select a lower print quality setting.
• On the product control panel, make sure Plain Paper Density Setting is set to Standard.
• Windows: Click the Maintenance tab, select Extended Settings, and select the following settings:
• Always Spool RAW Datatype
134
• Page Rendering Mode
• Print as Bitmap
Parent topic: Solving Problems Printing from a Computer
Related references
Windows System Requirements
OS X System Requirements
Paper or Media Type Settings
Related tasks
Turning On Quiet Mode
Adjusting Print Density
Selecting Basic Print Settings - Windows
Selecting Extended Settings - Windows
Selecting Basic Print Settings - OS X
Selecting Printing Preferences - OS X
Solving Page Layout and Content Problems
Check these sections if you have problems with the layout or content of your printed pages.
Note: When printing using AirPrint, the available print settings are different from those covered in this
manual. See the Apple website for details.
Inverted Image
Too Many Copies Print
Blank Pages Print
Incorrect Margins on Printout
Border Appears on Borderless Prints
Incorrect Characters Print
Incorrect Image Size or Position
Slanted Printout
Parent topic: Solving Problems
135
Inverted Image
If your printed image is inverted unexpectedly, try these solutions:
• Turn off any mirror or inversion settings in your printing application.
• Turn off the Mirror Image, Flip horizontally, or Reverse page orientation settings in your printer
software. (This option has different names, depending on your operating system version.)
Note: Leave these options turned on when you print on Epson Iron-on Cool Peel Transfer paper, if
available for your product.
Parent topic: Solving Page Layout and Content Problems
Related tasks
Selecting Additional Layout and Print Options - Windows
Selecting Basic Print Settings - OS X
Too Many Copies Print
Make sure that the Copies setting in your printing program or printer software is not set for multiple
copies.
Parent topic: Solving Page Layout and Content Problems
Blank Pages Print
If blank pages print unexpectedly, try these solutions:
• Make sure you selected the correct paper size settings in your printing program and printer software.
• If a blank page exists in a document you are printing and you want to skip printing it, select the Skip
Blank Page setting in your printer software, if available.
• Run a print head nozzle check to see if any of the nozzles are clogged. Then clean the print head, if
necessary.
• Make sure your product is selected as the printer in your printing program.
Parent topic: Solving Page Layout and Content Problems
Related concepts
Print Head Nozzle Check
Print Head Cleaning
136
Related tasks
Selecting Extended Settings - Windows
Selecting Basic Print Settings - Windows
Selecting Printing Preferences - OS X
Selecting Basic Print Settings - OS X
Incorrect Margins on Printout
If your printed page has incorrect margins, try these solutions:
• Make sure you selected the correct paper size settings in your printing program and printer software.
• Make sure you selected the correct margins for your paper size in your printing program.
• Make sure your paper is positioned correctly for feeding into the printer.
• Make sure the part on the right side of the rear paper feed slot is all the way on the right, then reload
paper.
You can use the preview option in your printer software to check your margins before you print.
Parent topic: Solving Page Layout and Content Problems
Related tasks
Loading Paper and Envelopes
Selecting Basic Print Settings - Windows
Selecting Basic Print Settings - OS X
Selecting Page Setup Settings - OS X
Selecting Print Settings - Windows Basic Driver
Border Appears on Borderless Prints
If you see a border on borderless prints, try these solutions:
• Make sure you are printing on a compatible borderless paper type and size.
Note: Do not select a custom paper size for borderless prints.
• Windows: Make sure you selected the Borderless setting in your printer software.
• OS X: Make sure you selected the Borderless checkbox or a paper size with a Borderless option in
your printer software.
137
• Adjust the Expansion setting to adjust the amount of image expansion on the edges of borderless
prints.
• Make sure the image size and the paper size are set correctly; if the image is small, the enlargement
may not be enough to cover the paper.
Parent topic: Solving Page Layout and Content Problems
Related references
Borderless Paper Type Compatibility
Related tasks
Selecting Basic Print Settings - Windows
Selecting Basic Print Settings - OS X
Selecting Page Setup Settings - OS X
Incorrect Characters Print
If incorrect characters appear in your prints, try these solutions before reprinting:
• Make sure any cables are securely connected at both ends.
• In Windows, delete all print jobs from the Windows Spooler:
• Windows 8.x: Navigate to the Apps screen and select Control Panel > Hardware and Sound >
Devices and Printers. Right-click your product name, select See what's printing, and select your
product name again, if necessary. Right-click the stalled print job, click Cancel, and click Yes.
• Windows 7: Click
and select Devices and Printers. Right-click your product name, select See
what's printing, and select your product name again, if necessary. Right-click the stalled print job,
click Cancel, and click Yes.
• Windows Vista: Click
and select Control Panel. Click Printer under Hardware and Sound,
right-click your product name, and select Open. Right click the stalled print job, click Cancel, and
click Yes.
• Windows XP: Click Start and select Printers and Faxes. (Or open the Control Panel, select
Printers and Other Hardware if necessary, and select Printers and Faxes.) Right-click your
product name, select Open, right-click the stalled print job, click Cancel, and click Yes.
• In Windows, delete all jobs from the Windows Spooler. Click Print Queue on the Maintenance tab in
the printer settings window, then cancel all stalled print jobs.
• If your product is connected to a USB hub, connect it directly to your computer instead.
138
• If your computer entered sleep mode the last time you printed, the next print job after your computer
exits sleep mode may contain garbled characters. Print your document again.
Parent topic: Solving Page Layout and Content Problems
Incorrect Image Size or Position
If your printed image is the wrong size or in the wrong position, try these solutions:
• Make sure you selected the correct paper size and layout settings in your printing program and printer
software.
• Make sure your paper is positioned correctly for feeding into the printer.
• Make sure the part on the right side of the rear paper feed slot is all the way on the right, then reload
paper.
You can use the preview option in your printer software to check your margins before you print.
Parent topic: Solving Page Layout and Content Problems
Related tasks
Selecting Basic Print Settings - Windows
Selecting Basic Print Settings - OS X
Selecting Page Setup Settings - OS X
Selecting Print Settings - Windows Basic Driver
Loading Paper and Envelopes
Slanted Printout
If your printouts are slanted, try these solutions:
• Slide the edge guide against the edge of the paper.
• Select a higher print quality setting in your printer software.
• Turn off any high speed settings in your product software.
• Align the print head.
• Make sure the product is not printing while tilted or at an angle.
Parent topic: Solving Page Layout and Content Problems
Related concepts
Print Head Alignment
139
Related tasks
Selecting Basic Print Settings - Windows
Selecting Basic Print Settings - OS X
Solving Print Quality Problems
Check these sections if your printouts have problems with print quality, but your image looks fine on your
computer screen.
Note: When printing using AirPrint, the available print settings are different from those covered in this
manual. See the Apple website for details.
White or Dark Lines in Printout
Blurry or Smeared Printout
Faint Printout or Printout Has Gaps
Grainy Printout
Incorrect Colors
Parent topic: Solving Problems
White or Dark Lines in Printout
If you notice white or dark lines in your prints (also called banding), try these solutions before you reprint:
• Run a nozzle check to see if any of the print head nozzles are clogged. Then clean the print head, if
necessary.
• Make sure the paper type setting matches the type of paper you loaded.
• Make sure you loaded the printable side of the paper correctly for your product.
• Turn off any high speed settings in your product software.
• Align the print head.
• You may need to replace the ink cartridges.
Parent topic: Solving Print Quality Problems
Related concepts
Print Head Nozzle Check
Print Head Cleaning
Print Head Alignment
140
Related references
Paper or Media Type Settings
Related tasks
Selecting Additional Layout and Print Options - Windows
Selecting Printing Preferences - OS X
Selecting Print Settings - Windows Basic Driver
Loading Paper and Envelopes
Related topics
Replacing Ink Cartridges and Maintenance Boxes
Blurry or Smeared Printout
If your printouts are blurry or smeared, try these solutions:
• Make sure your paper is not damp, curled, old, or loaded incorrectly in your product.
• Use a support sheet with special paper, or load special paper one sheet at a time.
• Make sure your paper meets the specifications for your product.
• Use Epson papers to ensure proper saturation and absorption of genuine Epson inks.
• Make sure the paper type setting in your product software matches the type of paper you loaded.
• Make sure you loaded the printable side of the paper correctly for your product.
• Remove each sheet from the output tray as it is printed.
• Avoid handling printouts on glossy paper right after printing to allow the ink to set.
• Turn off any high speed settings in your product software.
• If you print on both sides of a sheet of paper, smudges may appear on the reverse side of heavily
saturated or dark images. If one side of a sheet will contain a lighter image or text, print that side first.
• Run a nozzle check to see if any of the print head nozzles are clogged. Then clean the print head, if
necessary.
• Align the print head.
• Clean the paper path.
Note: Your product will not operate properly while tilted at an angle. Place it on a flat, stable surface that
extends beyond the base of the product in all directions.
141
Parent topic: Solving Print Quality Problems
Related concepts
Print Head Nozzle Check
Print Head Cleaning
Related references
Paper Specifications
Related tasks
Selecting Basic Print Settings - Windows
Selecting Additional Layout and Print Options - Windows
Selecting Basic Print Settings - OS X
Selecting Printing Preferences - OS X
Selecting Print Settings - Windows Basic Driver
Cleaning the Paper Path Using the Product Control Panel
Loading Paper and Envelopes
Faint Printout or Printout Has Gaps
If your printouts are faint or have gaps, try these solutions:
• Run a nozzle check to see if any of the print head nozzles are clogged. Then clean the print head, if
necessary.
• The ink cartridges may be old or low on ink, and you may need to replace them.
• Make sure the paper type setting matches the type of paper you loaded.
• Make sure your paper is not damp, curled, old, or loaded incorrectly in your product.
• On the product control panel, select Menu > Plain Paper Density Setting and adjust the density.
• On the product control panel, select Menu > Color Adjustment and adjust the color.
• Align the print head.
• Clean the paper path.
Parent topic: Solving Print Quality Problems
Related concepts
Print Head Nozzle Check
Print Head Cleaning
Print Head Alignment
142
Related references
Paper or Media Type Settings
Related tasks
Cleaning the Paper Path Using the Product Control Panel
Loading Paper and Envelopes
Related topics
Replacing Ink Cartridges and Maintenance Boxes
Grainy Printout
If your printouts are grainy, try these solutions:
• Make sure you loaded the printable side of the paper correctly for your product.
• Select a higher print quality setting and turn off any high speed settings in your product software.
• Run a nozzle check to see if any of the print head nozzles are clogged. Then clean the print head, if
necessary.
• Align the print head.
• You may need to increase the image resolution or print a smaller size; see your software
documentation.
• If you enlarged the image in an image-editing program, you need to increase the resolution setting to
retain a high image quality. Increase the resolution by the same amount you increased the image size.
For example, if the resolution is 300 dpi (dots per inch) and you will double the image size later,
change the resolution setting to 600 dpi.
Note: Higher resolution settings result in larger file sizes, which take longer to process and print.
Consider the limitations of your computer system when selecting a resolution, and select the lowest
possible resolution that produces acceptable quality to keep file sizes manageable.
Parent topic: Solving Print Quality Problems
Related concepts
Print Head Nozzle Check
Print Head Cleaning
Print Head Alignment
Related tasks
Loading Paper and Envelopes
143
Selecting Basic Print Settings - Windows
Selecting Additional Layout and Print Options - Windows
Selecting Basic Print Settings - OS X
Selecting Printing Preferences - OS X
Selecting Print Settings - Windows Basic Driver
Incorrect Colors
If your printouts have incorrect colors, try these solutions:
• Make sure the Black/Grayscale or Grayscale setting is not selected in your printer software.
• Run a nozzle check to see if any of the print head nozzles are clogged. Then clean the print head, if
necessary.
• The ink cartridges may be old or low on ink, and you may need to replace them.
• Your printed colors can never exactly match your on-screen colors. However, you can use a color
management system to get as close as possible. Try using the color management options in your
printer software.
• For best results, use genuine Epson ink and paper.
• On the product control panel, select Menu > Color Adjustment and adjust the color.
Parent topic: Solving Print Quality Problems
Related concepts
Print Head Nozzle Check
Print Head Cleaning
Related references
Available Epson Papers
Related tasks
Selecting Basic Print Settings - Windows
Selecting Additional Layout and Print Options - Windows
Selecting Basic Print Settings - OS X
Managing Color - OS X
Selecting Print Settings - Windows Basic Driver
Adjusting Color
Related topics
Replacing Ink Cartridges and Maintenance Boxes
144
When to Uninstall Your Product Software
If you have a problem that requires you to uninstall and re-install your software, follow the instructions for
your operating system.
Uninstalling Printing Software - Windows
Uninstalling Product Software - OS X
Parent topic: Solving Problems
Uninstalling Printing Software - Windows
You can uninstall and then re-install your printer software to solve certain problems.
1. Turn off the product.
2. Disconnect any interface cables.
3. Do one of the following:
• Windows 8.x: Navigate to the Apps screen and select Control Panel > Programs > Programs
and Features. Select the uninstall option for your Epson product, then select Uninstall/Change.
Note: If you see a User Account Control window, click Yes or Continue.
In the next window, select your product, if necessary, and click OK. Then follow any on-screen
instructions.
• Windows (other versions): Click
or Start, and select All Programs or Programs. Select
Epson, select your product, then click EPSON Printer Software Uninstall.
Note: If you see a User Account Control window, click Yes or Continue.
In the next window, select your product, if necessary, and click OK. Then follow any on-screen
instructions.
4. Restart your computer, then re-install your software.
Note: If you find that re-installing your product software does not solve a problem, contact Epson.
Parent topic: When to Uninstall Your Product Software
145
Uninstalling Product Software - OS X
In most cases, you do not need to uninstall your product software before re-installing it. However, you
can download the Uninstaller utility from the Epson support website to uninstall your product software as
described here.
Note: If you find that re-installing your product software does not solve a problem, contact Epson.
1. To download the Uninstaller utility, visit the Epson download site (U.S. downloads or Canadian
downloads).
2. Follow the instructions on the screen to install the Uninstaller utility.
3. Quit all applications currently running on your Mac.
4. Double-click the Uninstaller icon.
5. Select the checkbox for each software program you want to uninstall.
6. Click Uninstall.
7. Follow the on-screen instructions to uninstall the software.
8. To reinstall your product software, see the Quick Guide for instructions.
Note: If you uninstall the printer driver and your product name remains in the Print & Fax, Print & Scan,
or Printers & Scanners window, select your product name and click the – (remove) icon to remove it.
Parent topic: When to Uninstall Your Product Software
Where to Get Help
If you need to contact Epson for technical support services, use the following support options.
Internet Support
Visit Epson's support website at epson.com/support (U.S.) or epson.ca/support (Canada) for solutions to
common problems. You can download drivers and documentation, get FAQs and troubleshooting
advice, or e-mail Epson with your questions.
Speak to a Support Representative
Before you call Epson for support, please have the following information ready:
• Product name
• Product serial number (located on a label on the product)
146
• Proof of purchase (such as a store receipt) and date of purchase
• Computer configuration
• Description of the problem
Then call:
• U.S.: (562) 276-7202, 6 AM to 8 PM, Pacific Time, Monday through Friday, and 7 AM to 4 PM, Pacific
Time, Saturday
• Canada: (905) 709-2567, 6 AM to 8 PM, Pacific Time, Monday through Friday, and 7 AM to 4 PM,
Pacific Time, Saturday
Days and hours of support are subject to change without notice. Toll or long distance charges may
apply.
Purchase Supplies and Accessories
You can purchase genuine Epson ink and paper at Epson Supplies Central at epson.com/ink3 (U.S.
sales) or epson.ca (Canadian sales). You can also purchase supplies from an Epson authorized reseller.
To find the nearest one, call 800-GO-EPSON (800-463-7766).
Parent topic: Solving Problems
147
Technical Specifications
These sections list the technical specifications for your product.
Note: Epson offers a recycling program for end of life products. Please go to this site for information on
how to return your products for proper disposal.
Windows System Requirements
OS X System Requirements
Printing Specifications
Paper Specifications
Printable Area Specifications
Ink Cartridge Specifications
Dimension Specifications
Electrical Specifications
Environmental Specifications
Interface Specifications
Network Interface Specifications
Safety and Approvals Specifications
Windows System Requirements
To use your product and its software, your computer should use one of these Microsoft operating
systems:
• Windows 8.x
• Windows 7
• Windows Vista
• Windows XP Professional x64 Edition
• Windows XP SP3
• Windows Server 2012R2*
• Windows Server 2012*
• Windows Server 2008R2*
• Windows Server 2008*
148
• Windows Server 2003R2*
• Windows Server 2003*
* Windows Server supports only the printer driver; any additional included software is not supported.
Note: Visit Epson's support website at epson.com/support (U.S.) or epson.ca/support (Canada) for the
latest in compatibility and drivers for your product.
Parent topic: Technical Specifications
OS X System Requirements
To use your product and its software, your Mac should use one of these operating systems:
• OS X 10.9.x
• OS X 10.8.x
• OS X 10.7.x
• OS X 10.6.x
Note: Visit Epson's support website at epson.com/support (U.S.) or epson.ca/support (Canada) for the
latest in compatibility and drivers for your product.
Parent topic: Technical Specifications
Printing Specifications
Paper path
Rear paper feed, top entry
Rear paper feed capacity
Approximately 20 sheets at 17 lb (64 g/m2) to 24 lb (90 g/m2)
Parent topic: Technical Specifications
Paper Specifications
Use paper under normal conditions:
• Temperature: 50 to 95 ºF (10 to 35 ºC)
• Humidity: 20 to 80% RH
149
Note: Since the quality of any particular brand or type of paper may be changed by the manufacturer at
any time, Epson cannot guarantee the quality of any non-Epson brand or type of paper. Always test a
sample of paper stock before purchasing large quantities or printing large jobs.
Single-sheets
Size
A4 (8.3 × 11.7 inches [210 × 297 mm])
Letter (8.5 × 11 inches [216 × 279 mm])
Legal (8.5 × 14 inches [216 × 357 mm])
A6 (4.1 × 5.8 inches [105 × 148 mm])
3.5 × 5 inches (89 × 127 mm)
4 × 6 inches (102 × 152 mm)
5 × 7 inches (127 × 178 mm)
8 × 10 inches (203 × 254 mm)
Paper types
Plain paper and paper distributed by Epson
Weight
17 lb (64 g/m2) to 24 lb (90 g/m2)
Envelopes
Size
No. 10 (4.1 × 9.5 inches [105 × 241 mm])
Paper types
Plain bond paper
Weight
20 lb (75 g/m2) to 24 lb (90 g/m2)
Parent topic: Technical Specifications
Printable Area Specifications
Note: Print quality may decline in the shaded areas shown here due to the printer mechanism.
150
Single sheets - normal printing
1
Margin: 0.12 inch (3 mm) minimum (left and right margins 0.24 inch [6 mm] on letter and legal size
paper)
2
Quality border/top: 1.42 inches (36 mm) minimum
3
Quality border/bottom: 1.46 inches (37 mm) minimum
Single sheets - borderless printing
1
Quality border/top: 1.54 inches (39 mm) minimum
151
2
Quality border/bottom: 1.57 inches (40 mm) minimum
Envelopes
1
Left/right margins: 0.12 inch (3 mm) minimum
2
Top/bottom margins: 0.20 inch (5 mm) minimum
3
Quality border/right: 0.71 inch (18 mm) minimum
4
Quality border/left: 1.42 inches (36 mm) minimum
Parent topic: Technical Specifications
Ink Cartridge Specifications
Note: This product uses only genuine Epson-brand cartridges. Other brands of ink cartridges and ink
supplies are not compatible and, even if described as compatible, may not function properly.
The cartridges included with the printer are designed for printer setup and not for resale. After some ink
is used for priming, the rest is available for printing. Yields vary considerably based on images printed,
print settings, paper type, frequency of use, and temperature. For print quality, a variable amount of ink
remains in the cartridge after the "replace cartridge" indicator comes on.
Color
Tri-color, Black
152
Cartridge life
Opened package: 6 months
Unopened package: do not use if the date on the package has
expired
Temperature
Storage: –22 to 104 °F (–30 to 40 °C)
1 month at 104 °F (40 °C)
Ink freezes at 3.2 °F (–16 °C)
Ink thaws and is usable after 3 hours at 77 °F (25 °C)
Note: For best printing results, use up a cartridge within 6 months of opening the package.
Parent topic: Technical Specifications
Related references
Ink Cartridge and Maintenance Box Part Numbers
Dimension Specifications
Height
Stored: 2.4 inches (61 mm)
Printing: 8.5 inches (217 mm)
Width
Stored: 12.2 inches (309 mm)
Printing: 12.2 inches (309 mm)
Depth
Stored: 6.1 inches (154 mm)
Printing: 9.1 inches (232 mm)
Weight
3.5 lb (1.6 kg)
(without ink cartridges)
Parent topic: Technical Specifications
Electrical Specifications
AC Adapter
AC adapter model
A461H
153
Input
AC100–240V, 1A, 50–60Hz
Output
DC24V, 1A
Printer Using the AC Adapter
Rated DC input voltage
DC24V
Rated DC input current
Not charging battery: 0.6A
Charging battery: 0.7A
Power consumption
Not charging battery:
(USB Connection)
Printing: Approximately 11 W (ISO/IEC24712)
Ready mode: Approximately 4 W
Sleep mode: Approximately 1.3 W
Power off mode: Approximately 0.3 W
Charging battery:
Printing: Approximately 14 W (ISO/IEC24712)
Ready mode: Approximately 14 W
Sleep mode: Approximately 12 W
Power off mode: Approximately 11 W
Battery
Type
Li-ion
Rated power supply voltage
3.6V
Capacity of current
1860 mAh
Continuous number of prints
Color: Approximately 50 sheets
Monochrome: Approximately 100 sheets
(A4 ISO/IEC24712, fully-charged at 77 °F [25 °C])
154
Charging time
AC adapter: Approximately 2.5 hours
USB port (5V/0.5A): Approximately 10 hours
USB port (5V/1.5A): Approximately 2.5 hours
(Power off at 77 °F [25 °C])
Parent topic: Technical Specifications
Environmental Specifications
Temperature
Recommended operating: 50 to 95 °F (10 to 35 °C)
Guaranteed using the AC adapter: 32 to 104 °F (0 to 40 °C)
Guaranteed running on battery: 41 to 104 °F (5 to 40 °C)
Storage: –22 to 140 °F (–30 to 60 °C)
1 week at 140 °F (60 °C)
Humidity
Operating: 20 to 80% RH
(non-condensing)
Storage: 5 to 85% RH
Parent topic: Technical Specifications
Interface Specifications
One Hi-Speed USB port for a computer
Parent topic: Technical Specifications
Network Interface Specifications
Wi-Fi
Standards
IEEE 802.11 b/g/n
Security
WEP (64/128 bit)
WPA-PSK (AES); complies with WPA2 with support for WPA/WPA2
Personal
Frequency range
2.4 GHz
155
Coordination modes
Infrastructure mode
Ad hoc mode (not supported for IEEE 802.11n)
Wi-Fi Direct (not supported for IEEE 802.11b)
Note: Simple AP mode is compatible with Wi-Fi infrastructure mode.
Security Protocol
SSL/TLS: HTTPS Server/Client, IPPS
Parent topic: Technical Specifications
Safety and Approvals Specifications
Product
United States
Safety: UL60950-1
EMC: FCC part 15 Subpart B class B
Canada
Safety: CAN/CSA C22.2 No. 60950-1
EMC: CAN/CSA-CEI/IEC CISPR 22 Class B
This equipment contains the following wireless module:
• Manufacturer: Askey Computer Corporation.
• Type: WLU6320-D69 (RoHS)
This product conforms to Part 15 of FCC Rules and RSS-210 of the IC Rules. Epson cannot accept
responsibility for any failure to satisfy the protection requirements resulting from a non-recommended
modification of the product. Operation is subject to the following two conditions: (1) this device may not
cause harmful interference, and (2) this device must accept any interference received, including
interference that may cause undesired operation of the device.
To prevent radio interference to the licensed service, this device is intended to be operated indoors and
away from windows to provide maximum shielding. Equipment (or its transmit antenna) that is installed
outdoors is subject to licensing.
156
AC adapter
United States
Safety: UL60950-1
EMC: FCC part 15 Subpart B class B
Canada
Safety: CAN/CSA C22.2 No. 60950-1
EMC: CAN/CSA-CEI/IEC CISPR 22 Class B
Parent topic: Technical Specifications
157
Notices
Check these sections for important notices about your product.
Note: Epson offers a recycling program for end of life products. Please go to this site for information on
how to return your products for proper disposal.
General Printer Safety Instructions
FCC Compliance Statement
Software Notice
Trademarks
Copyright Notice
General Printer Safety Instructions
• Be sure to follow all warnings and instructions marked on the printer.
• Use only the power cord, AC adapter, and USB cable that comes with the printer. Use of other cords
or cables may cause fires or shock. Do not use the power cord, AC adapter, or cable with any other
equipment.
• Use only the type of power source indicated on the AC adapter's label.
• Place the printer near a wall outlet where the plug can be easily unplugged.
• Avoid plugging the printer into an outlet on the same circuit as a photo copier or air control system that
regularly switches on and off, or on an outlet controlled by a wall switch or timer.
• Do not let the power cord become damaged or frayed.
• If you use an extension cord with the printer, make sure the total ampere rating of the devices plugged
into the extension cord does not exceed the cord's ampere rating. Also, make sure the total ampere
rating of all devices plugged into the wall outlet does not exceed the wall outlet's ampere rating.
• Always turn off the printer using the power button, and wait until the power light stops flashing before
unplugging the printer or cutting off power to the electrical outlet.
• Place the printer on a flat, stable surface that extends beyond its base in all directions. It will not
operate properly if it is tilted or at an angle.
• Leave enough space in front of the printer for the paper to be fully ejected.
• Avoid locations that are subject to rapid changes in heat or humidity, shocks or vibrations, or dust.
• Do not place the printer near a radiator or heating vent or in direct sunlight.
158
• Leave enough room around the printer for sufficient ventilation. Do not block or cover openings in the
case or insert objects through the slots.
• Keep the printer away from potential sources of electromagnetic interference, such as loudspeakers or
the base units of cordless telephones.
• Do not touch the flat white cable inside the printer.
• Do not move the print head by hand; this may damage the printer.
• Do not spill liquid on the printer or AC adapter and do not handle the printer or AC adapter with wet
hands.
• Do not insert objects into the slots in the printer.
• Do not use aerosol products that contain flammable gases inside or around the printer. Doing so may
cause fire.
• Except as specifically explained in your documentation, do not attempt to service the printer yourself.
• Unplug the printer and refer servicing to qualified service personnel under the following conditions: if
the power cord or plug is damaged; if liquid has entered the product; if the product has been dropped
or the case damaged; if the product does not operate normally or exhibits a distinct change in
performance. Adjust only those controls that are covered by the operating instructions.
• If damage occurs to the plug, replace the cord set or consult a qualified electrician. If there are fuses in
the plug, make sure you replace them with fuses of the correct size and rating.
• Leave the ink cartridges installed. Removing the cartridges can dehydrate the print head and may
prevent the printer from printing.
• Before transporting the printer, make sure that the print head is in the home (far right) position and the
ink cartridges are in place.
• The printer includes a built-in battery. When disposing of the printer, make sure to follow local battery
disposal regulations.
Warning: The cords included with this product contain chemicals, including lead, known to the State of
California to cause birth defects or other reproductive harm. Wash hands after handling. (This notice is
provided in accordance with Proposition 65 in Cal. Health & Safety Code § 25249.5 and following.)
Battery Safety Instructions
Ink Cartridge Safety Instructions
LCD Screen Safety Instructions
Wireless Connection Safety Instructions
Parent topic: Notices
159
Battery Safety Instructions
• If the battery is not fully charged within the specified time, stop charging. Otherwise, the battery could
become hot, emit smoke, rupture, or catch fire.
• Do not place the product in a microwave oven or high-pressure container. Otherwise, the battery could
become hot, emit smoke, rupture, or catch fire.
• If battery acid gets into your eyes or on your skin, immediately rinse the affected area thoroughly with
water and seek medical treatment. Otherwise, permanent eye damage could result.
• If liquid leaks from the product (or the product has a bad odor), move the product away from
flammable objects. Otherwise, electrolyte leaked from the battery will catch fire or cause smoke or
flame.
• Do not drop or throw the product or subject it to strong shocks. Otherwise, the battery could leak or the
protection circuit in the battery could be damaged.
• Do not use the product if it is leaking or damaged in any way.
• Do not leave the product in a vehicle. Otherwise, the battery could overheat.
Parent topic: General Printer Safety Instructions
Ink Cartridge Safety Instructions
• Keep ink cartridges out of the reach of children and do not drink the ink.
• Be careful when you handle used ink cartridges; there may be ink remaining around the ink supply
port. If ink gets on your skin, wash it off with soap and water. If it gets in your eyes, flush them
immediately with water.
• Do not put your hand inside the product or touch any cartridges during printing.
• Install a new ink cartridge immediately after removing an expended one. Leaving cartridges
uninstalled can dry out the print head and may prevent the product from printing.
• Do not touch the green IC chip on the side of the cartridge. This may prevent normal operation.
• Do not shake cartridges after opening their packages; this can cause them to leak.
• If you remove an ink cartridge for later use, recap the ink cartridge using the cap that came with it to
prevent the ink from drying out and to protect the surrounding area from getting smeared by ink.
• Use an ink cartridge before the date printed on its package.
• Do not dismantle an ink cartridge. This could damage the print head.
• Store ink cartridges in a cool, dark place.
160
• After bringing an ink cartridge inside from a cold storage site, allow it to warm up at room temperature
for at least three hours before using it.
• Store ink cartridges with their labels facing up. Do not store cartridges upside down.
Parent topic: General Printer Safety Instructions
LCD Screen Safety Instructions
• Use only a dry, soft cloth to clean the LCD screen. Do not use liquid or chemical cleansers.
• If the LCD screen is damaged, contact Epson. If the liquid crystal solution gets on your hands, wash
them thoroughly with soap and water. If the liquid crystal solution gets into your eyes, flush them
immediately with water. If discomfort or vision problems remain after a thorough flushing, see a doctor
immediately.
• Do not press too hard on the LCD screen.
• Do not use a pointy or sharp object, such as a pen or your fingernail, to operate the LCD screen.
Parent topic: General Printer Safety Instructions
Wireless Connection Safety Instructions
Radio waves from this product may adversely affect the operation of medical equipment or automatically
controlled devices, such as pacemakers, automatic doors or fire alarms. When using this product near
such devices or inside a medical facility, follow the directions from authorized staff members at the
facility, and follow all posted warnings and directions on the device to avoid causing an accident.
Parent topic: General Printer Safety Instructions
FCC Compliance Statement
For United States Users
This equipment has been tested and found to comply with the limits for a Class B digital device, pursuant
to Part 15 of the FCC Rules. These limits are designed to provide reasonable protection against harmful
interference in a residential installation. This equipment generates, uses, and can radiate radio
frequency energy and, if not installed and used in accordance with the instructions, may cause harmful
interference to radio or television reception. However, there is no guarantee that interference will not
occur in a particular installation. If this equipment does cause interference to radio and television
reception, which can be determined by turning the equipment off and on, the user is encouraged to try to
correct the interference by one or more of the following measures:
• Reorient or relocate the receiving antenna.
• Increase the separation between the equipment and receiver.
161
• Connect the equipment into an outlet on a circuit different from that to which the receiver is connected.
• Consult the dealer or an experienced radio/TV technician for help.
WARNING
The connection of a non-shielded equipment interface cable to this equipment will invalidate the FCC
Certification or Declaration of this device and may cause interference levels which exceed the limits
established by the FCC for this equipment. It is the responsibility of the user to obtain and use a shielded
equipment interface cable with this device. If this equipment has more than one interface connector, do
not leave cables connected to unused interfaces. Changes or modifications not expressly approved by
the manufacturer could void the user’s authority to operate the equipment.
For Canadian Users
CAN ICES-3(B)/NMB-3(B)
Parent topic: Notices
Software Notice
1. This printer product includes open source software programs according to the license terms of each
open source software program.
2. We provide the source code of some of such open source software until five (5) years after the
discontinuation of same model of this printer product. If you desire to receive the source code above,
please contact the customer support of your region. You shall comply with the license terms of each
open source software program.
3. The open source software programs are WITHOUT ANY WARRANTY; without even the implied
warranty of MERCHANTABILITY AND FITNESS FOR A PARTICULAR PURPOSE. See the license
agreements of each open source software program for more details, which are described in OSS.pdf
on the Epson support site.
4. The license terms of each open source software program are described in OSS.pdf on the Epson
support site.
Parent topic: Notices
Trademarks
EPSON® and Supplies Central® are registered trademarks, EPSON Exceed Your Vision is a registered
logomark, and Epson ConnectTM is a trademark of Seiko Epson Corporation.
Epson StoreSM is a service mark of Epson America, Inc.
Epson iPrintTM and Remote PrintTM are trademarks of Seiko Epson Corporation.
162
Apple, iPhone, Mac, and OS X are trademarks of Apple Inc., registered in the U.S. and other countries.
AirPrint and the AirPrint logo are trademarks of Apple Inc.
Google is a registered trademark and Android, Chromebook, Google Chrome, Google Cloud Print, and
Google Drive are trademarks of Google Inc.
Wi-Fi Direct® is a registered trademark of Wi-Fi Alliance®.
General Notice: Other product names used herein are for identification purposes only and may be
trademarks of their respective owners. Epson disclaims any and all rights in those marks.
Parent topic: Notices
Copyright Notice
All rights reserved. No part of this publication may be reproduced, stored in a retrieval system, or
transmitted in any form or by any means, electronic, mechanical, photocopying, recording, or otherwise,
without the prior written permission of Seiko Epson Corporation. The information contained herein is
designed only for use with this Epson product. Epson is not responsible for any use of this information as
applied to other products.
Neither Seiko Epson Corporation nor its affiliates shall be liable to the purchaser of this product or third
parties for damages, losses, costs, or expenses incurred by purchaser or third parties as a result of:
accident, misuse, or abuse of this product or unauthorized modifications, repairs, or alterations to this
product, or (excluding the U.S.) failure to strictly comply with Seiko Epson Corporation's operating and
maintenance instructions.
Seiko Epson Corporation shall not be liable for any damages or problems arising from the use of any
options or any consumable products other than those designated as Original Epson Products or Epson
Approved Products by Seiko Epson Corporation.
Seiko Epson Corporation shall not be held liable for any damage resulting from electromagnetic
interference that occurs from the use of any interface cables other than those designated as Epson
approved Products by Seiko Epson Corporation.
This information is subject to change without notice.
A Note Concerning Responsible Use of Copyrighted Materials
Default Delay Times for Power Management for Epson Products
Copyright Attribution
163
Parent topic: Notices
A Note Concerning Responsible Use of Copyrighted Materials
Epson encourages each user to be responsible and respectful of the copyright laws when using any
Epson product. While some countries' laws permit limited copying or reuse of copyrighted material in
certain circumstances, those circumstances may not be as broad as some people assume. Contact your
legal advisor for any questions regarding copyright law.
Parent topic: Copyright Notice
Default Delay Times for Power Management for Epson Products
This product will enter sleep mode after a period of nonuse. This is to ensure that the product meets
Energy Star standards of energy efficiency. More energy savings can be achieved by setting the time to
sleep to a shorter interval.
Parent topic: Copyright Notice
Copyright Attribution
© 2014 Epson America, Inc.
10/14
CPD-41557
Parent topic: Copyright Notice
164