1
PRODUCT REVIEW KIT
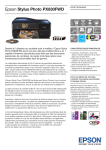
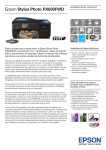
The All-in-one for the serious photographer
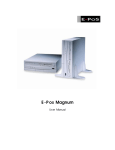
Epson Stylus Photo PX700W
•
Print photos that exceed lab quality w ith Epson Claria Photographic Ink.
•
Integrated w ireless and Ethernet for shared printing and sc anning.
•
Dedic ated dual A4 and photo paper tray s.
•
Print direc tly onto suitable CDs and DV Ds.
•
Print from memory c ards or Pic tBridge w ithout using a PC
•
Save money w ith individual inks – only replace the colour you use.
Contents
Achieving the best results using the Epson Stylus PX700W .............................................................2
Driver Settings.....................................................................................................................................3
Softw are ..............................................................................................................................................5
Epson Scan .........................................................................................................................................7
Features ............................................................................................................................................11
Wi-Fi and Ethernet ............................................................................................................................14
Ink Cartridges and ISO Yields ..........................................................................................................16
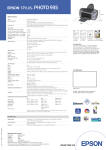
Full Product Specifications ...............................................................................................................17
PRODUCT REVIEW KIT
Achieving the best results using the Epson Stylus Photo PX700W
Make sure you select the correct driver and media settings.
Select Text mode for printing high-quality text documents, or Photo for high-quality
photos.
Choose the correct paper settings - e.g. select 'Premium Glossy Photo Paper' for the best
photo quality on glossy paper.
To achieve high quality photo prints, it is recommended that Epson media is used.
Choose the 'Borderless' photo setting to get true edge-to-edge printing without any
white borders.
This Epson printer includes a permanent Micro PiezoTM print head. This means that a
head alignment should not be required during the set-up process.
Page 2 of 17
PRODUCT REVIEW KIT
Settings
Shortcuts
The Shor tcut menu below can be used to make a quick and easy selection of the pr int settings r equir ed.
When each pr inting pr eset is select ed, a br ief description of the setting is giv en.
Driver Settings
The dr iver settings can be contr olled manually t oo. It is impor tant to select t he appr opr iate settings
befor e pr inting, to achieve the best r esults. Star t by selecting the Main tab in the dr iver .
Text Printing
Select Dr aft on the pr inter dr iver for economical high
speed text pr inting.
Select Text mode for pr inting high-quality text
documents.
Select Text & Image for pr inting high-quality c olour
documents with images.
Photo Printing
Select Dr aft mode for pr inting photo pr oofs.
Select Photo mode for standar d day-to-day photogr aphic
pr inting.
Select Best Photo mode for high-quality photogr aphic
pr inting, such as album images.
Media Settings
Page 3 of 17
PRODUCT REVIEW KIT
To get the best fr om an Epson pr inter , it is impor tant to
choose the cor r ect media setting.
This can be done by selecting t he appr opriate media fr om the
dr op-down menu (see image to t he left).
For optimum photo quality, Epson Pr emium Glossy Photo Paper
is r ecommended
Epson PhotoEnhance
When selected, Epson PhotoEnhance automatically adjusts colour and contr ast to your photos to ensur e
per fect r esults. It is a default setti ng for pr inting photos on glossy media, howev er as you can see below,
it can be tur ned off by clicking on the tick box.
Before
After
Page 4 of 17
PRODUCT REVIEW KIT
Software
Epson Easy Photo Print
Epson Easy Photo Pr int is a softwar e which is i nc luded with all Epson i nkjet pr inter s. It offer s easy-to-use
functions such as PhotoEnhanc e, r ed-eye r emoval and adding fr ames.
To access, go to St art, All Programs, Epson Softw are and select Epson Easy Photo Print.
Select the i mage or images then c lick the Next Step button on the bottom r ight
Red-Eye Removal
You can c lick on Red-Eye Fix All
(cir cled her e in blue) for automatic
r ed-eye r emoval.
Please note that this function will not
show a pr eview on your scr een;
however , the image wi ll be pr inted
without r ed-eye.
You can also manually or automatically
r emove r ed-eye, with a pr eview, by
clicking on the Image Cor r ect button
(cir cled in r ed).
Image Cor r ect will take y ou to t he
scr een shown her e. You can t hen
choose to r emove r ed-eye manually
(cir cled in Gr een) or automatically
(cir cled in Yellow).
Page 5 of 17
PRODUCT REVIEW KIT
PhotoEnhance
PhotoEnhance can also be accessed via Epson Easy Photo Pr int as you can see below (cir cled in r ed).
Once it is select ed, you can t hen choose t he pr eferr ed Scene Correction
(cir cled in blue).
With PhotoEnhance and Red-Eye Fix
(Auto) selected, the i mage c an be
pr eviewed befor e pr inting.
This is also avai lab le as a stand-alone featur e
Page 6 of 17
PRODUCT REVIEW KIT
Epson Scan
Epson Scan is a TWAIN Dr iver that can be accessed as a stand-alone deskt op application or thr ough a
thir d par ty imaging pr ogr am.
It can be used for scanning documents and images and ther e ar e thr ee modes.
The fir st option is Full Auto Mode which is the default
setting, ensur ing that scanning is simp le.
The dr iver automatically r ecognises t he type of media and
scans to an ideal pr e-set r esolution wit h one pr ess of the
“Scan” button. Additionally, the dr iver pinpoints the media
on the flatbed and aut omatically cr ops and adjusts the
image.
Another option is Home Mode which featur es scan settings
such as automatic sizing and document type.
This is ideal for advanced amat eur s.
You wi ll be ab le to access Epson Easy Photo Fix™ (cir cled
her e in r ed) via this mode. It consists of Colour
Restor ation, Backlight C orr ection and Dust R emoval.
These functions can be used to r estor e colour , r emove dust
and corr ect backlight to damaged images.
Page 7 of 17
PRODUCT REVIEW KIT
The thir d option is Professional Mode which allows
complete user contr ol of scan settings and advanc ed
contr ols, suc h as hist ogr am adjustment and tone
corr ection.
Other featur es include aut omatic exposur e, multiple cr op
fr ames, densitometer and a document mode avai lab le for
mor e advanced user s.
Images and documents can also be pr eviewed fir st befor e
scanning.
As you scr oll down, Epson Easy Phot o Fix™ is also avai lab le
in this mode.
Pr eview Scr een
Page 8 of 17
PRODUCT REVIEW KIT
The Epson Scan dr iver allows you t o pr eview images or documents befor e scanning in bot h the Home and
Pr ofessional modes. This can be done by pr essing the Preview button and it is especially useful when
using the colour r estor ation function as can be seen below.
Pr eview without Colour Restor ation:
Pr eview with C olour Restor ation tur ned on:
Page 9 of 17
PRODUCT REVIEW KIT
Scanning Multiple Images
Multiple images can be scanned by placing them appr oximately 2mm apar t on the scan bed (number of
images wi ll depend on t he size).
To do this, make sur e that Thumbnail (cir cled in r ed below) is selected befor e pr oceeding.
The image or images can then be pr eviewed as you can see above and then scanned. These wi ll
automatically be saved into separ ate files.
Page 10 of 17
PRODUCT REVIEW KIT
Features
PC-Free (Standalone) Functions Include:
•
Pr int photos via a memor y car d or PictBr idge
•
Pr int photos fr om movies
•
Copy documents, photos and CD/DV D ar twor k
•
Restor e, r epair or enhance photos with r ed-eye r emoval and Phot oEnhance
•
Pr int onto suit able DV Ds/CDs
•
Pr int photo gr eeting car ds
•
Pr int bespoke stationer y
•
Pr int an index sheet
•
Cr op and enlar ge images fr om memor y car d
Copying:
To make a copy, make sur e the LCD menu shows “C opy”, (use the Home butt on to change to C opy if
necessar y). Place the or iginal face down on the flat bed then pr ess Star t.
If you want t o make a copy quickly and do not need high quality, you can pr int using the “dr aft” setting.
The pr int quality is mar ginally r educed, but the speed incr eases. To do this you must:
-
Pr ess the Home button t o enter main menu, scr oll t o Copy then pr ess OK.
Pr ess the Menu button to enter the settings scr een
Select Paper and Copy Settings pr ess OK .
Scr oll to Qu ality, pr ess OK, pr ess the r ight arr ow on the contr ol panel to c hange to t he selection
and then use the up and down ar r ows to choose “Dr aft”
Loading Media – CD/DVDs:
You can pr int on suitab le C Ds and DV Ds. Unlike pr evious Epson models t his CD/DV D holder is fully
automated. Do not pull or hand le the CD/DV D holder manually. Follow the below i nstr uctions to load a
CD/DV D.
Page 11 of 17
PRODUCT REVIEW KIT
Printing on CDs/DVDs
Pr inting on a CD/CV D couldn’t be easier with the Epson Sty lus Photo PX700W
-
Scr oll to pr efer ed pr int layout pr ess OK.
Select r equir ed photo pr ess OK
Adjust inner and outer diameter s with scr oll contr ols to suit the C D/DV D pr intable
sur face ar ea.
Select Test print on A4 paper to have an idea of end pr oduct (optional)
Once happy select Print on a CD/DVD.
Loading Media - Paper
The Epson Stylus Photo PX700W has a media paper tr ay which gives the advantage of being ab le t o hold
two media types simultaneously. This means t hat you can easi ly select the c opied media for your pr int
job fr om the dr iver without manually swapping the media. See below for clear instr uctions for loading
paper into the tr ay.
Page 12 of 17
PRODUCT REVIEW KIT
Other Modes
Ther e ar e a number of other inter esting modes outside t he key Photo, Fax, Copy and Scan functi ons.
These ar e:
Print Ruled Papers:
This function allows y ou t o pr int bespoke stationer y
-
Select Home
Scr oll to Print Ruled Paper
Select pr efer ed output. If the Note Pad function is selected then you can c hoose the
photo r equir ed as backgr ound befor e pr inting.
Ensur e that A4 paper is loaded into the paper tr ay.
Select number of copies
Pr ess Start.
Integrated Wi-Fi and Ethernet
Page 13 of 17
PRODUCT REVIEW KIT
Wi-Fi and Ether net ar e now i ntegr ated within t he pr inter r emoving the need for an exter nal
dongle. This allows you t o shar e the pr inter between sev er al user s in your home.
Ther e is an easy i nstallation pr ocess called EpsonNet EasyInstall which guides you st ep by step
when setti ng up the wir eless connecti on between your pr inter and computer s.
Your fir ewall or anti-spywar e softwar e may display war nings dur ing installation. Cr eate an
exception for EpsonNet EasyI nstall to allow it to car r y out networ k configur ations:
For W indow s XP Service Pack 2 or later
Confir m that the pub lisher is SEIKO EPSON, and then c lick Unblock.
For Mac OS X 10.5.1 or later
Configur e the Application Fir ewall to allow acc ess for EpsonNet EasyInst all.
It is necessar y to hav e an Ether net (wir ed) connection dur ing installation to c onfigur e your
pr inter to communicat e via Wir eless LAN. Select the fir st method, connect an Ether net cab le,
switch on the pr inter and click Next
- Select a pr inter
Page 14 of 17
PRODUCT REVIEW KIT
-
Select a connection type
Choose a wir eless networ k
Enter your WEP Key or WPA passwor d – both ar e case sensitive
Check that Obtain an IP address Start is set to Automatic
Confir m settings ar e complet e
ISO Yield
Page 15 of 17
PRODUCT REVIEW KIT
Epson Stylus Photo PX700W
INK CARTRIDGES
Codes
ISO Yield
Recommended Inks
Black
T0801
Approx. 355 pages
Cyan
T0802
Approx. 890 pages
Magenta
T0803
Approx. 435 pages
Yellow
T0804
Approx. 660 pages
Light Cyan
T0805
Approx. 335 pages
Light Magenta
T0806
Approx. 660 pages
Black
T0791
Approx. 570 pages
Cyan
T0792
Approx. 1475 pages
Magenta
T0793
Approx. 720 pages
Yellow
T0794
Approx. 1070 pages
Light Cyan
T0795
Approx. 540 pages
Light Magenta
T0796
Approx. 1020 pages
Also Available
The above page yields wer e based on ISO/IEC 24711 and 24712 and measur ed using the following colour
page test suit e.
Full Product Specifications
Page 16 of 17
PRODUCT REVIEW KIT
Page 17 of 17