1
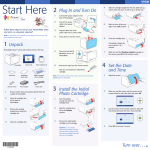
Start Here
®
2 Plug In and Turn On
PictureMate ZoomTM
(PM 290)
1
2
3
Follow these steps to set up your PictureMate Dash
or Zoom and print –no computer required!
Note: PictureMate Dash is shown throughout, but the steps are the
same for PictureMate Zoom. To print from your computer, see the
Basics book and your CD after completing these steps.
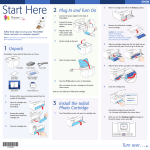
1 Unpack
2
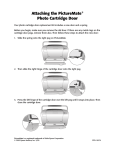
Slide the cartridge lever left to the Release position.
3
Remove the initial photo cartridge
from its package.
PictureMate DashTM
(PM 260)
4
Connect the power adapter to the back of
PictureMate.
Connect the power
cable to the power
adapter.
Plug the other end
of the power cable
into a power outlet.
Caution: Do not install a
different PictureMate
cartridge for initial setup.
Install only the initial photo cartridge
that came with your PictureMate.
Flip the handle to the back.
4
Slide the cartridge straight into the slot, label side up,
until it clicks into place. It will not go in all the way.
5
Slide the lever all the way right, to the Lock position.
6
Close the cartridge door.
PictureMate® comes with all these items in the box.
PictureMate
Power adapter
PictureMate
photo paper
Basics book
5
Open the paper support.
I/ On
button
Power cable
Initial PictureMate
photo cartridge
6
Press the On button to turn on PictureMate.
After a moment, you see
this on the photo
viewer screen:
Printer Software CD
1
Remove all the tape and packing material from the
outside of PictureMate.
2
Open the cartridge door
on the back of
PictureMate.
Now you can install your initial photo cartridge.
3
Remove the packing
material from inside the
cartridge slot.
3
4
Close the cartridge door.
PictureMate charges the print head for
3 to 4 minutes and displays the screen above.
1
Install the Initial
Photo Cartridge
7
When you see the
Charging complete
message on the photo
viewer screen, press OK.
Turn PictureMate around and open the cartridge door.
Press here
*411058000*
*411058000*
Turn over
Start Here
®
2 Plug In and Turn On
PictureMate ZoomTM
(PM 290)
1
2
3
Follow these steps to set up your PictureMate Dash
or Zoom and print –no computer required!
Note: PictureMate Dash is shown throughout, but the steps are the
same for PictureMate Zoom. To print from your computer, see the
Basics book and your CD after completing these steps.
1 Unpack
2
Slide the cartridge lever left to the Release position.
3
Remove the initial photo cartridge
from its package.
PictureMate DashTM
(PM 260)
4
Connect the power adapter to the back of
PictureMate.
Connect the power
cable to the power
adapter.
Plug the other end
of the power cable
into a power outlet.
Caution: Do not install a
different PictureMate
cartridge for initial setup.
Install only the initial photo cartridge
that came with your PictureMate.
Flip the handle to the back.
4
Slide the cartridge straight into the slot, label side up,
until it clicks into place. It will not go in all the way.
5
Slide the lever all the way right, to the Lock position.
6
Close the cartridge door.
PictureMate® comes with all these items in the box.
PictureMate
Power adapter
PictureMate
photo paper
Basics book
5
Open the paper support.
I/ On
button
Power cable
Initial PictureMate
photo cartridge
6
Press the On button to turn on PictureMate.
After a moment, you see
this on the photo
viewer screen:
Printer Software CD
1
Remove all the tape and packing material from the
outside of PictureMate.
2
Open the cartridge door
on the back of
PictureMate.
Now you can install your initial photo cartridge.
3
Remove the packing
material from inside the
cartridge slot.
3
4
Close the cartridge door.
PictureMate charges the print head for
3 to 4 minutes and displays the screen above.
1
Install the Initial
Photo Cartridge
7
When you see the
Charging complete
message on the photo
viewer screen, press OK.
Turn PictureMate around and open the cartridge door.
Press here
*411058000*
*411058000*
Turn over
Start Here
®
2 Plug In and Turn On
PictureMate ZoomTM
(PM 290)
1
2
3
Follow these steps to set up your PictureMate Dash
or Zoom and print –no computer required!
Note: PictureMate Dash is shown throughout, but the steps are the
same for PictureMate Zoom. To print from your computer, see the
Basics book and your CD after completing these steps.
1 Unpack
2
Slide the cartridge lever left to the Release position.
3
Remove the initial photo cartridge
from its package.
PictureMate DashTM
(PM 260)
4
Connect the power adapter to the back of
PictureMate.
Connect the power
cable to the power
adapter.
Plug the other end
of the power cable
into a power outlet.
Caution: Do not install a
different PictureMate
cartridge for initial setup.
Install only the initial photo cartridge
that came with your PictureMate.
Flip the handle to the back.
4
Slide the cartridge straight into the slot, label side up,
until it clicks into place. It will not go in all the way.
5
Slide the lever all the way right, to the Lock position.
6
Close the cartridge door.
PictureMate® comes with all these items in the box.
PictureMate
Power adapter
PictureMate
photo paper
Basics book
5
Open the paper support.
I/ On
button
Power cable
Initial PictureMate
photo cartridge
6
Press the On button to turn on PictureMate.
After a moment, you see
this on the photo
viewer screen:
Printer Software CD
1
Remove all the tape and packing material from the
outside of PictureMate.
2
Open the cartridge door
on the back of
PictureMate.
Now you can install your initial photo cartridge.
3
Remove the packing
material from inside the
cartridge slot.
3
4
Close the cartridge door.
PictureMate charges the print head for
3 to 4 minutes and displays the screen above.
1
Install the Initial
Photo Cartridge
7
When you see the
Charging complete
message on the photo
viewer screen, press OK.
Turn PictureMate around and open the cartridge door.
Press here
*411058000*
*411058000*
5
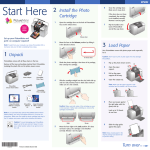
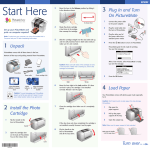
4 Load Paper
PictureMate comes with genuine Epson® glossy photo paper
made especially for printing lab quality photos.
Caution: Don’t load or print on plain paper; this may damage
PictureMate.
1
1
Move the handle to the back
and open the paper support,
if necessary.
Remove the memory card containing photos from
your digital camera.
Insert a Memory
Card
2
2
1
Press the
2
Press to select Print Settings, then press OK. 3
Press OK to select Layout.
4
Press or to select the
layout you want, then press
OK.
Insert your memory card into the correct slot on
PictureMate.
Menu button.
Memory card light
SD™ (Secure Digital)
SDHC™ (High Capacity)
mini SD™ *
mini SDHC *
micro SD *
micro SDHC *
MMC™ (MultiMediaCard™)
xD Picture Card™
xD Picture Card (Type M and Type H)
Sony Memory Stick® **
Memory Stick Duo™ *
Memory Stick Micro *
Memory Stick PRO™
Memory Stick PRO Duo™ *
MagicGate™ Memory Stick **
MagicGate Memory Stick Duo™ *
Top
Select a Layout
Press the corner of
the output tray to
open it.
Microdrive™
®
CompactFlash (Type I and II)
Crop Your Photos
You can press the Zoom
button to enlarge your image
up to 5 times.
You can select the area you
want to print, and PictureMate
will crop out the rest. This
does not change your original
image.
Bottom
* Adapter required
**Maximum capacity 128MB
3
Slide the edge guides outward.
3
Push the card in until it stops (it won’t go in all the way). The memory card light flashes and
PictureMate tells you how many photos are
on the card.
Note: Insert just one card at a time. PictureMate will
not read multiple cards at once.
4
5
Load up to 20 sheets at a time. Fan the sheets to
slightly separate them.
Place your paper into the slot between the edge
guides with the glossy side up. Slide the edge guides
inward slightly.
Load glossy side up
6
Raise the photo viewer screen.
6
PictureMate’s photo viewer screen makes it easy to select the
photos you want to print, choose a layout, and even crop.
Select Some Photos
1
Press
2
Press OK to select a photo for printing.
3
To print more than one
copy, press to increase
the number. Press to
decrease it.
4
Note: Keep unused paper in the original package and store it flat to
prevent curling.
Print Your Photos
5
or
to view your photos.
To select more photos,
press
or to view them and press OK to
select one. Repeat step 3 to select more copies, if necessary.
Press Print and use or to review your selected
photos. Then press Print again to print.
More on PictureMate
Check your printed manual
See the Basics book for instructions on
printing from PictureMate, your computer,
and other devices. Also learn how to save
photos to or print photos from a CD,
replace your Print Pack (photo paper and
photo cartridge), take care of PictureMate,
and solve problems.
Check your on-screen manual
After you install your PictureMate software from
the CD, you’ll see an icon for your PictureMate
User’s Guide on your computer screen. Double-click
that icon for comprehensive instructions on using
PictureMate and its software.
Note: For information on possible software updates for PictureMate,
go to epson.com/support, select Printers, and select your product
under Personal Photo Lab. Then check for updated software in the
Drivers & Downloads section.
Caution: To avoid damaging your PictureMate, keep
it out of the sun and don’t leave it in your car or other
location where it can get too hot or too cold.
Epson and PictureMate are registered trademarks and Exceed Your Vision is a
trademark of Seiko Epson Corporation.
General Notice: Other product names used herein are for identification purposes
only and may be trademarks of their respective owners. Epson disclaims any and
all rights in those marks.
© 2007 Epson America, Inc. 5/07
CPD-23838
Printed in XXXXXX XX.XX-XX XXX
5
4 Load Paper
PictureMate comes with genuine Epson® glossy photo paper
made especially for printing lab quality photos.
Caution: Don’t load or print on plain paper; this may damage
PictureMate.
1
1
Move the handle to the back
and open the paper support,
if necessary.
Remove the memory card containing photos from
your digital camera.
Insert a Memory
Card
2
2
1
Press the
2
Press to select Print Settings, then press OK. 3
Press OK to select Layout.
4
Press or to select the
layout you want, then press
OK.
Insert your memory card into the correct slot on
PictureMate.
Menu button.
Memory card light
SD™ (Secure Digital)
SDHC™ (High Capacity)
mini SD™ *
mini SDHC *
micro SD *
micro SDHC *
MMC™ (MultiMediaCard™)
xD Picture Card™
xD Picture Card (Type M and Type H)
Sony Memory Stick® **
Memory Stick Duo™ *
Memory Stick Micro *
Memory Stick PRO™
Memory Stick PRO Duo™ *
MagicGate™ Memory Stick **
MagicGate Memory Stick Duo™ *
Top
Select a Layout
Press the corner of
the output tray to
open it.
Microdrive™
®
CompactFlash (Type I and II)
Crop Your Photos
You can press the Zoom
button to enlarge your image
up to 5 times.
You can select the area you
want to print, and PictureMate
will crop out the rest. This
does not change your original
image.
Bottom
* Adapter required
**Maximum capacity 128MB
3
Slide the edge guides outward.
3
Push the card in until it stops (it won’t go in all the way). The memory card light flashes and
PictureMate tells you how many photos are
on the card.
Note: Insert just one card at a time. PictureMate will
not read multiple cards at once.
4
5
Load up to 20 sheets at a time. Fan the sheets to
slightly separate them.
Place your paper into the slot between the edge
guides with the glossy side up. Slide the edge guides
inward slightly.
Load glossy side up
6
Raise the photo viewer screen.
6
PictureMate’s photo viewer screen makes it easy to select the
photos you want to print, choose a layout, and even crop.
Select Some Photos
1
Press
2
Press OK to select a photo for printing.
3
To print more than one
copy, press to increase
the number. Press to
decrease it.
4
Note: Keep unused paper in the original package and store it flat to
prevent curling.
Print Your Photos
5
or
to view your photos.
To select more photos,
press
or to view them and press OK to
select one. Repeat step 3 to select more copies, if necessary.
Press Print and use or to review your selected
photos. Then press Print again to print.
More on PictureMate
Check your printed manual
See the Basics book for instructions on
printing from PictureMate, your computer,
and other devices. Also learn how to save
photos to or print photos from a CD,
replace your Print Pack (photo paper and
photo cartridge), take care of PictureMate,
and solve problems.
Check your on-screen manual
After you install your PictureMate software from
the CD, you’ll see an icon for your PictureMate
User’s Guide on your computer screen. Double-click
that icon for comprehensive instructions on using
PictureMate and its software.
Note: For information on possible software updates for PictureMate,
go to epson.com/support, select Printers, and select your product
under Personal Photo Lab. Then check for updated software in the
Drivers & Downloads section.
Caution: To avoid damaging your PictureMate, keep
it out of the sun and don’t leave it in your car or other
location where it can get too hot or too cold.
Epson and PictureMate are registered trademarks and Exceed Your Vision is a
trademark of Seiko Epson Corporation.
General Notice: Other product names used herein are for identification purposes
only and may be trademarks of their respective owners. Epson disclaims any and
all rights in those marks.
© 2007 Epson America, Inc. 5/07
CPD-23838
Printed in XXXXXX XX.XX-XX XXX
5
4 Load Paper
PictureMate comes with genuine Epson® glossy photo paper
made especially for printing lab quality photos.
Caution: Don’t load or print on plain paper; this may damage
PictureMate.
1
1
Move the handle to the back
and open the paper support,
if necessary.
Remove the memory card containing photos from
your digital camera.
Insert a Memory
Card
2
2
1
Press the
2
Press to select Print Settings, then press OK. 3
Press OK to select Layout.
4
Press or to select the
layout you want, then press
OK.
Insert your memory card into the correct slot on
PictureMate.
Menu button.
Memory card light
SD™ (Secure Digital)
SDHC™ (High Capacity)
mini SD™ *
mini SDHC *
micro SD *
micro SDHC *
MMC™ (MultiMediaCard™)
xD Picture Card™
xD Picture Card (Type M and Type H)
Sony Memory Stick® **
Memory Stick Duo™ *
Memory Stick Micro *
Memory Stick PRO™
Memory Stick PRO Duo™ *
MagicGate™ Memory Stick **
MagicGate Memory Stick Duo™ *
Top
Select a Layout
Press the corner of
the output tray to
open it.
Microdrive™
®
CompactFlash (Type I and II)
Crop Your Photos
You can press the Zoom
button to enlarge your image
up to 5 times.
You can select the area you
want to print, and PictureMate
will crop out the rest. This
does not change your original
image.
Bottom
* Adapter required
**Maximum capacity 128MB
3
Slide the edge guides outward.
3
Push the card in until it stops (it won’t go in all the way). The memory card light flashes and
PictureMate tells you how many photos are
on the card.
Note: Insert just one card at a time. PictureMate will
not read multiple cards at once.
4
5
Load up to 20 sheets at a time. Fan the sheets to
slightly separate them.
Place your paper into the slot between the edge
guides with the glossy side up. Slide the edge guides
inward slightly.
Load glossy side up
6
Raise the photo viewer screen.
6
PictureMate’s photo viewer screen makes it easy to select the
photos you want to print, choose a layout, and even crop.
Select Some Photos
1
Press
2
Press OK to select a photo for printing.
3
To print more than one
copy, press to increase
the number. Press to
decrease it.
4
Note: Keep unused paper in the original package and store it flat to
prevent curling.
Print Your Photos
5
or
to view your photos.
To select more photos,
press
or to view them and press OK to
select one. Repeat step 3 to select more copies, if necessary.
Press Print and use or to review your selected
photos. Then press Print again to print.
More on PictureMate
Check your printed manual
See the Basics book for instructions on
printing from PictureMate, your computer,
and other devices. Also learn how to save
photos to or print photos from a CD,
replace your Print Pack (photo paper and
photo cartridge), take care of PictureMate,
and solve problems.
Check your on-screen manual
After you install your PictureMate software from
the CD, you’ll see an icon for your PictureMate
User’s Guide on your computer screen. Double-click
that icon for comprehensive instructions on using
PictureMate and its software.
Note: For information on possible software updates for PictureMate,
go to epson.com/support, select Printers, and select your product
under Personal Photo Lab. Then check for updated software in the
Drivers & Downloads section.
Caution: To avoid damaging your PictureMate, keep
it out of the sun and don’t leave it in your car or other
location where it can get too hot or too cold.
Epson and PictureMate are registered trademarks and Exceed Your Vision is a
trademark of Seiko Epson Corporation.
General Notice: Other product names used herein are for identification purposes
only and may be trademarks of their respective owners. Epson disclaims any and
all rights in those marks.
© 2007 Epson America, Inc. 5/07
CPD-23838
Printed in XXXXXX XX.XX-XX XXX