1
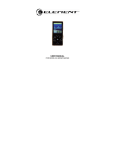
Digital Photo Frame EFG272 USER MANUAL A271.indd 1 7/28/08 1:53:26 PM Important Safety Precautions: Always follow these basic safety precautions when using your Digital Photo Frame (DPF). 7KLVZLOOUHGXFHWKHULVNRI¿UHHOHFWULFVKRFNDQGLQMXUy. • • • • • 'RQRWGURSRUVXEMHFWWKLVSURGXFWWRMDUULQJRUVWURQJYLEUDWLRQV • The LCD panel is made of plastic and can be easily damaged. If the panel is damaged be cautious of VKDUSREMHFWV A271.indd 2 Do not expose this product to rain or moisture. Do not expose this product to extreme heat. Power off the Digital Photo Frame before performing care and maintenance. Clean the outer surface or the screen of the Digital Photo Frame with a soft cloth. Do not use liquid cleaners. 7/28/08 1:53:27 PM Table of Contents 1. Introduction.......................................................................................................................................................................4 2. Features.............................................................................................................................................................................4 3. What’s In the Box .............................................................................................................................................................5 6SHFL¿FDWLRQV ...................................................................................................................................................................5 5. Product Diagram...............................................................................................................................................................6 6. Using Your Digital Photo Frame......................................................................................................................................7 • Use the Control Buttons................................................................................................................................................7 • Charging the Battery .....................................................................................................................................................7 • Select Slide Show Mode or USB Mode ........................................................................................................................8 • Viewing Photos and Entering Display Adjustment Menu ............................................................................................10 • Setup Menu ................................................................................................................................................................ 11 • Setting Interval ............................................................................................................................................................ 11 • Setting Effect...............................................................................................................................................................12 • Setting Brightness.......................................................................................................................................................12 • Setting Language........................................................................................................................................................13 • Setting Current Time ...................................................................................................................................................13 • Resetting to Default Settings ......................................................................................................................................14 7. Copying Pictures from the SD card ..............................................................................................................................15 8. Deleting Pictures from Internal Memory without using the PC..................................................................................16 9. Storage Capacities .........................................................................................................................................................17 10. Frequently Asked Questions.......................................................................................................................................18 11. Limited Warranty ..........................................................................................................................................................19 12. FCC Statement..............................................................................................................................................................21 A271.indd 3 7/28/08 1:53:28 PM Introduction Welcome to the Element Multimedia Photo Frame! Simply connect your Digital Photo Frame to your computer to download images and then play. It’s as easy as that. Features The Digital Photo Frame includes following key features: ¸2.7 inch TFT LCD screen ¸16:9 display ¸Resolution: 480 X 234 pixels ¸Multi-language operation menu ¸%XLOWLQFKDUJHDEOH/LORQEDWWHU\FKDUJHGYLD86%FDEOH ¸Clock Function 4 A271.indd 4 7/28/08 1:53:28 PM What’s In the Box • • • • • Digital Photo Frame User Guide USB Cable Warranty Card Stand 6SHFL¿FDWLRQV Panel Size 2.7 inches Screen Resolution (Pixels) 480 X 23 4 Brightness 150 cd/m2 Contrast Ratio 150:1 Horizontal / Vertical Viewing Angle 40 / 40 ; 10 / 30 Screen Size Mode 16 : 9 File Format Type JPEG 5 A271.indd 5 7/28/08 1:53:29 PM Product Diagram 5 4 3 2 1 6 7 1. 2. 3. 4. 5. Power Button Shift Left Button Enter Button Shift Right Button Menu Button 6. SD Card Slot 7. USB Port 6 A271.indd 6 7/28/08 1:53:33 PM Using Your Digital Photo Frame (DPF) Use the Control Buttons: POWER Power on or off Move the selection up or left, display the previous photo, set time value ENTER (QWHUVKRUWFXWPHQXRUVXEPHQXFRQ¿UPWKHKLJKOLJKWHGRSWLRQ 0RYHWKHVHOHFWLRQXSRUULJKWGLVSOD\WKHQH[WSKRWRVHWWLPHYDOXH MENU (QWHU³6HWXS´PHQXLQDQ\PRGHH[LWVHWXSPHQX Charging the Battery: A built-in FKDUJHDEOH Li-Ion battery is supplied with your IUDPH It can offer about 2 hours YLHZLQJ on your GLJLWDO IUDPH To FKDUJH the battery, simply connect your frame to the USB port of your computer After FRQQHFWLQJ the system will be in a FKDUJLQJ state automatically With the unit off, the battery will fully FKDUJH in DSSUR[LPDWHO\ 2 KRXUV If the unit is turned on, the battery will be fully FKDUJHG in DSSUR[LPDWHO\KRXUV NOTE: While FKDUJLQJ the battery when your frame is turned OFF an indicator will not appear on the VFUHHQ The DPF is continuously FKDUJLQJ UHJDUGOHVV of the mode VHOHFWHG When the battery is LCD IXOO\FKDUJHGLWZLOODXWRPDWLFDOO\VWRSFKDUJLQJ 7 A271.indd 7 7/28/08 1:53:35 PM Select Slide Show Mode or USB Mode: When you first connect your Digital Photo Frame (DPF) to the computer, the DPF will automatically enter the charging state. While the DPF is is powered on and connected to the computer via the USB cable, a pop up window is displayed on the screen. Use the arrow keys to select an option and the “ENTER” key to confirm your selection. Slide Show USB Device Slide Show Mode: You can view pictures or set system settings. USB Mode: A Removable Disk drive labeled “Element” will appear on your PC. Double click on the removable disk to open the window and you will see a folder named “Element”. Double click on the folder to open it. Picture files that have been downloaded to the DPF will appear. You can copy pictures from your computer to this folder directly or you can create a new folder with in the Element folder. Also, you can delete pictures stored on your frame from this folder. When copying pictures to your frame, the system will auto-resize the pictures to make them fit to your frame’s screen resolution. When you are done copying or deleting the pictures on the DPF, restart the DPF, and select slideshow to view your pictures. 8 A271.indd 8 7/28/08 1:53:37 PM NOTE: 1. In Windows XP, Windows Media Player 11 (WMP11) must be installed. If your XP system already has service pack 2 installed, your WMP is automatically upgraded to version 11. You can download WMP 11 from www.microsoft.com. The current link to WMP 11 is located at: http://www.microsoft. com/windows/windowsmedia/player/11/default.aspx 2. If you are using Windows 2000, you can only copy pictures to your DPF by copying them from an SD card. Please see the section on “copying pictures from SD card” on page 15. 3. You can copy a folder into your DPF directly. If you want to delete the folder, please do remember to GHOHWHDOO¿OHVLQWKHIROGHU¿UVWWKHQ\RXFDQGHOHWHWKHIROGHU. 4. The DPF might be recognized as a Digital Still Camera or other devices depending on the drivers installed on the Windows operating system. 9 A271.indd 9 7/28/08 1:53:40 PM Viewing Photos and Entering Display Adjustment Menu 1. Press and hold the POWER button until the DPF is powered on. The system will enter Slide Show mode automatically. button to select previous picture or press the 2. Press the thumbnail 16:9 4:3 manual play clock on button to select next picture. 3. In “SLIDE SHOW” mode, press the ENTER display adjustment menu. Press the select one display mode and press the 4. Press the button to enter or ENTER button to EXWWRQWRFRQ¿UP button again to turn the frame off. POWER Option Description Thumbnail Enter thumbnail screen. Up to 6 pictures can be displayed at a time. 16: 9 Display the picture in 16:9 display mode 4:3 Display the picture in 4:3 display mode Manual Play / Slide Show Display one single picture all the time / Start Slide Show Clock On / Off Display the time setting on the LCD screen 10 A271.indd 10 7/28/08 1:53:43 PM Setup Menu: 1. Press the MENU button in slide show mode to enter “SETUP” mode. 2. Press the MENU button again to exit Setup mode. button or the button to scroll 3. In “SETUP” mode, press the up and down through menu options. 4. Press the ENTER button to enter. button or the button to select the item you want 5. Press the and press the ENTER WRFRQ¿UP 2008-07-03 19:41 Interval Effect Brightness Language Set time Default Setting Interval: 1. Press the 2. Press the button or the ENTER 4. Press the button to enter. button or the 3. Press the ENTER 5. Or press the button to select “INTERVAL”. button to select the desired setting. 2008-07-03 19:41 Interval Slow Effect Normal BrightnessFast Language Set time Default EXWWRQWRFRQ¿UPDQGVDYH\RXUFKRLFH MENU EXWWRQWRH[LWZLWKRXWVDYLQJ 11 A271.indd 11 7/28/08 1:53:48 PM Setting Effect: 1. Press the 2. Press the button or the ENTER 4. Press the button to enter. button or the 3. Press the ENTER 5. Or press the Interval Effect button to select “EFFECT”. button to select the desired setting. 2008-07-03 19:41 Random Brightness Wipe up Language Wipe down Set time Wipe right Default Wipe left EXWWRQWRFRQ¿UPDQGVDYH\RXUFKRLFH MENU EXWWRQWRH[LWZLWKRXWVDYLQJ Setting Brightness: 1. Press the 2. Press the button or the ENTER button or the 3. Press the 4. Press the ENTER 5. Or press the button to select “BRIGHTNESS”. button to enter. button to select the desired setting. 2008-07-03 19:41 Interval Effect Brightness Language Set time Default EXWWRQWRFRQ¿UPDQGVDYH\RXUFKRLFH MENU EXWWRQWRH[LWZLWKRXWVDYLQJ 12 A271.indd 12 7/28/08 1:53:53 PM Setting Language: 1. Press the 2. Press the button or the ENTER 4. Press the button to enter. button or the 3. Press the ENTER 5. Or press the button to select “Language”. button to select the desired setting. 2008-07-03 19:41 Interval English Spanish Effect French BrightnessDutch Language Italian Set time Portuguese Default EXWWRQWRFRQ¿UPDQGVDYH\RXUFKRLFH MENU EXWWRQWRH[LWZLWKRXWVDYLQJ Setting Current Time: 1. Press the button or the 2. Press the ENTER 3. Press the MENU button to select “SET TIME”. button to enter. EXWWRQWRVHOHFWD¿HOGVXFK\HDrPRQWKGD\ 2008-07-03 19:41 Interval Effect Brightness 2008/12/12 Language 09:17 Set time Default KRXUDQGPLQXWH 4. Press the button or the EXWWRQWRDGMXVWWKHYDOXHLQWKH ¿HOG 5. Press the ENTER EXWWRQWRFRQ¿UPDQGVDYH\RXUFKRLFH 13 A271.indd 13 7/28/08 1:53:58 PM Resetting to Default Settings: 1. Press the button or the button to select “Default”. 2. Press the ENTER EXWWRQWRHQWHU7KHFXUUHQWVRIWZDUHYHUVLRQZLOO appear on LCD screen. 3. Press the 4. Press the MENU button or the ENTER 2008-07-03 19:41 Interval Effect Brightness Language Set time V1.00 YES Default No button to select the desired setting. EXWWRQWRFRQ¿UPDQGVDYH\RXUFKRLFH3UHVVWKH button to exit. 14 A271.indd 14 7/28/08 1:54:01 PM Copying Pictures from the SD card 1. Insert a SD card into SD card slot. 2. Press and hold the POWER button until the DPF power on. System will enter Slide Show mode automatically. 3. Press the ENTER thumbnail 16:9 4:3 manual play Clock On EXWWRQWRHQWHUGLVSOD\DGMXVWPHQWPHQX 4. Press the or button to select “Thumbnail” and press the ENTER EXWWRQWRFRQ¿UP 5. System enters thumbnail display mode. 6. Press the 7. Press the or MENU button to select the picture you want to copy. button. Copy to...? yes no 8. A pop-up window will appear on LCD screen. 9. Press the 10. Press the or ENTER button to select the desired setting. EXWWRQWRFRQ¿UP\RXUFKRLFH 15 A271.indd 15 7/28/08 1:54:20 PM Deleting Pictures from Internal Memory without using the PC 1. Press and hold the POWER button until the DPF power on. System will enter Slide Show mode automatically. 2. Press the ENTER EXWWRQWRHQWHUGLVSOD\DGMXVWPHQWPHQX or button to select “Thumbnail” and press the 3. Press the ENTER EXWWRQWRFRQ¿UP thumbnail 16:9 4:3 manual play Clock On 4. System enters thumbnail display mode. 5. Press the delete. 6. Press the or MENU button to select the picture you want to button. 7. A pop-up window will appear on LCD screen. delete photo? 8. Press the 9. Press the or ENTER button to select the desired setting. yes no EXWWRQWRFRQ¿UP\RXUFKRLFH 16 A271.indd 16 7/28/08 1:54:33 PM Storage Capacities The chart below indicates the approximate number of pictures your Digital Photo Frame can hold at each setting based on the internal memory. Resolution 10 M Compression Internal Memory with driver 1.4M High Approx. 35 High Approx. 40 High Approx. 45 High Approx. 60 ( 3648 X 2736 ) 5M ( 2560 X 1920 ) 3M ( 2048 X 1536 ) 480 X 234 Note: 6FHQH FRPSOH[LW\ DIIHFWVDSLFWXUH¶V¿OH VL]H7KHUHIRUH WKHQXPEHU RISLFWXUHV \RXU 'LJLWDO 3KRWR )UDPHFDQVWRUHPD\YDU\ 17 A271.indd 17 7/28/08 1:54:34 PM Frequently Asked Questions 1. 2. 3. 4. 5. 18 A271.indd 18 Question: What kind of photos does this device support? Answer: Only the JPEG format is compatible with this Frame, which is the standard format for nearly all digital cameras. Question: Why does the system not respond when the power is turned on? Answer: Make sure your digital frame is fully charged. Connect your frame to a computer by the USB cable and power it on again. Question: Why is the picture display slower with some pictures and faster with others? Answer: Higher resolution pictures load more slowly. Try using lower resolution pictures. Question: How do I restart my Digital Photo Frame? Answer: When using your DPF on battery power, remember to always charge your unit when it is out of power BEFORE using it again. Do not attempt to use the unit when the battery is low as it may cause the DPF to malfunction and the DPF might not be able to power on correctly. If this occurs, please follow the recovery steps below. (1) Detach the main unit by pushing inside. (See diagram) (2) Depress the RESET hole gently by a paper clip or ballpoint pen. (3) Connect the unit with the USB cable to your computer. (4) Press the POWER button to turn on the unit. (5) Do not disconnect the USB cable until the unit is fully charged. RESET POWER Hole Question: I used a different USB cable and the DPF cannot connect to the PC now. Answer: Some USB cables are 2 wire and will not work with the DPF, please use the USB cable supplied with the unit. 7/28/08 1:54:36 PM Limited Warranty Grand City (Hong Kong) Ltd. warrants to the orignial purchaser of this product, that should the product or any part thereof be proven defective in material or workmanship within 90 days from the date of the original purchase, such defects will be replaced or repaired without charge for parts or labor. This Warranty covers manufacturing defects in materials and workmanship encountered in the normal, non-commercial use of the Product, and does not cover consumer instruction, delivery, installation, set-up, adjustments, signal reception problems, cosmetic damage or damge due to acts of nature, accident, misuse, abuse, neglignence, commmercial use or modification of, or to any part of the Product. This Warranty applies to the original consumer only and does not cover products sold AS IS or WITH ALL FAULTS, or consumables (e.g., fuses, batteries, bulbs etc), and the Warranty is invalid if the factory-applied serial number has been altered or removed from the Product. This Warranty is valid only in the Untied States, and only applies to Products purchased and serviced in the United States. 19 A271.indd 19 7/28/08 1:54:38 PM THERE ARE NO EXPRESS WARRANTIES OTHER THAN THOSE EXPRESSLY DESCRIBED ABOVE, AND NO WARRANTIES WHETHER EXPRESSED OR IMPLIED, INCLUDING, BUT NOT LIMITED TO, ANY IMPLIED WARRANTIES OF MERCHANTABILITY OR FITNESS FOR A PARTICULAR PURPOSE, SHALL APPLY AFTER THE EXPRESS WARRANTY PERIOD STATED ABOVE, AND NO OTHER EXPRESS WARRANTY OR GUARANTEE GIVEN BY ANY PERSON, FIRM OR ENTITY WITH RESPECT TO THE PRODUCT SHALL BE BINDING ON GRAND CITY. REPAIR, REPLACEMENT OR REFUND IS THE EXCLUSIVE REMEDY OF THE CONSUMER. GRAND CITY SHALL NOT BE LIABLE FOR ANY INCIDENTAL OR CONSEQUENTIAL DAMAGES CAUSED BY THE USE, MISUSE OR INABILITY TO USE THE PRODUCT. NOTWITHSTANDING THE FOREGOING, CONSUMER’S RECOVERY AGAINST GRAND CITY SHALL NOT EXCEED THE PURCHASE PRICE OF THE PRODUCT SOLD BY GRAND CITY. THIS WARRANTY SHALL NOT EXTEND TO ANYONE OTHER THAN THE ORIGINAL CONSUMER WHO PURCHASED THE PRODUCT AND IS NOT TRANSFERABLE. Questions or Comments: Toll free number: 1-866-823-1671 Support website: www.elementelectronics.com Support email: [email protected] 20 A271.indd 20 7/28/08 1:54:39 PM FCC Statement FCC Part 15 Information 7KLVHTXLSPHQWKDVEHHQWHVWHGDQGIRXQGWRFRPSO\ZLWKWKHOLPLWVIRUD&ODVV%GLJLWDOGHYLFHSXUVXDQW WR3DUWRIWKH)HGHUDO&RPPXQLFDWLRQ&RPPLVVLRQ)&&5XOHV7KHVHOLPLWVDUHGHVLJQHGWRSURYLGH reasonable protection against harmful interference in a residential installation. 7KLVHTXLSPHQWJHQHUDWHVXVHVDQGFDQUDGLDWHUDGLRIUHTXHQF\HQHUJ\DQGLIQRWLQVWDOOHGDQGXVHG LQDFFRUGDQFHZLWKWKHLQVWUXFWLRQVPD\FDXVHKDUPIXOLQWHUIHUHQFHWRUDGLRFRPPXQLFDWLRQV+RZHYHU there is no guarantee that interference will not occur in a particular installation. If this equipment does FDXVH KDUPIXO LQWHUIHUHQFH WR UDGLR RU WHOHYLVLRQ UHFHSWLRQ ZKLFK FDQ EH GHWHUPLQHG E\ WXUQLQJ WKH HTXLSPHQW RII DQG RQ WKH XVHU LV HQFRXUDJHG WR WU\ WR FRUUHFW WKH LQWHUIHUHQFH E\ RQH RU PRUH RI WKH following measures: 5HRULHQWRUUHORFDWHWKHUHFHLYLQJDQWHQQD ,QFUHDVHWKHVHSDUDWLRQEHWZHHQWKHHTXLSPHQWDQGUHFHLYHU &RQQHFW WKH HTXLSPHQW WR DQ RXWOHW RQ D FLUFXLW GLIIHUHQW IURP WKDW WR ZKLFK WKH UHFHLYHU LV connected. • Consult the dealer or an experienced radio/TV technician for help. WARNING: &KDQJHVRUPRGL¿FDWLRQVWRWKLVXQLWQRWH[SUHVVO\DSSURYHGE\WKHSDUW\UHVSRQVLEOHIRUFRPSOLDQFHFRXOG YRLGWKHXVHU¶VDXWKRULW\WRRSHUDWHWKHHTXLSPHQW 21 A271.indd 21 7/28/08 1:54:39 PM Part No.: A271.indd 22 OMEFG272 US001 Made in China 7/28/08 1:54:39 PM