1
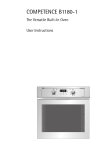
COMPETENCE B5741-4
Built-In Electric Oven
User information
Dear Customer,
Please read this user information carefully and keep it to refer to later.
Please pass the user information on to any future owner of the appliance.
1
3
2
2
The following symbols are used in the text:
Safety instructions
Warning! Information that affects your personal safety.
Important! Information that prevents damage to the appliance.
Useful tips and hints
Environmental information
Contents
Operating Instructions . . . . . . . . . . . . . . . . . . . . . . . . . . . . . . . . . . . . .
5
Safety instructions. . . . . . . . . . . . . . . . . . . . . . . . . . . . . . . . . . . . . . . . . . . . . .
5
Disposal . . . . . . . . . . . . . . . . . . . . . . . . . . . . . . . . . . . . . . . . . . . . . . . . . . . . . . .
6
Description of the Appliance . . . . . . . . . . . . . . . . . . . . . . . . . . . . . . . . . . . . .
General Overview. . . . . . . . . . . . . . . . . . . . . . . . . . . . . . . . . . . . . . . . . . . . . . . .
Control Panel . . . . . . . . . . . . . . . . . . . . . . . . . . . . . . . . . . . . . . . . . . . . . . . . . . .
Oven Features. . . . . . . . . . . . . . . . . . . . . . . . . . . . . . . . . . . . . . . . . . . . . . . . . . .
Oven Accessories . . . . . . . . . . . . . . . . . . . . . . . . . . . . . . . . . . . . . . . . . . . . . . . .
7
7
8
8
9
Before using for the first time . . . . . . . . . . . . . . . . . . . . . . . . . . . . . . . . . . . 10
Setting and changing the current time. . . . . . . . . . . . . . . . . . . . . . . . . . . . . . 10
Initial Cleaning. . . . . . . . . . . . . . . . . . . . . . . . . . . . . . . . . . . . . . . . . . . . . . . . . . 11
Operating the Oven . . . . . . . . . . . . . . . . . . . . . . . . . . . . . . . . . . . . . . . . . . . . .
Switching the Oven On and Off . . . . . . . . . . . . . . . . . . . . . . . . . . . . . . . . . . . .
Speedcook. . . . . . . . . . . . . . . . . . . . . . . . . . . . . . . . . . . . . . . . . . . . . . . . . . . . . .
Oven Functions. . . . . . . . . . . . . . . . . . . . . . . . . . . . . . . . . . . . . . . . . . . . . . . . . .
Inserting the shelf and roasting pan . . . . . . . . . . . . . . . . . . . . . . . . . . . . . . . .
Attaching/Removing the Grill Pan Handle . . . . . . . . . . . . . . . . . . . . . . . . . . .
Clock Functions . . . . . . . . . . . . . . . . . . . . . . . . . . . . . . . . . . . . . . . . . . . . . . . . .
Other Functions . . . . . . . . . . . . . . . . . . . . . . . . . . . . . . . . . . . . . . . . . . . . . . . . .
Switching off the display . . . . . . . . . . . . . . . . . . . . . . . . . . . . . . . . . . . . . .
Oven child safety device . . . . . . . . . . . . . . . . . . . . . . . . . . . . . . . . . . . . . . .
Oven safety cut-out. . . . . . . . . . . . . . . . . . . . . . . . . . . . . . . . . . . . . . . . . . .
12
12
15
16
17
18
19
25
25
25
26
Usage, Tables and Tips . . . . . . . . . . . . . . . . . . . . . . . . . . . . . . . . . . . . . . . . . .
Baking . . . . . . . . . . . . . . . . . . . . . . . . . . . . . . . . . . . . . . . . . . . . . . . . . . . . . . . . .
Baking Tables . . . . . . . . . . . . . . . . . . . . . . . . . . . . . . . . . . . . . . . . . . . . . . . .
Table: Desserts . . . . . . . . . . . . . . . . . . . . . . . . . . . . . . . . . . . . . . . . . . . . . . .
Table for Bakes and Gratins. . . . . . . . . . . . . . . . . . . . . . . . . . . . . . . . . . . . .
Frozen Ready Meals Table . . . . . . . . . . . . . . . . . . . . . . . . . . . . . . . . . . . . . .
Roasting . . . . . . . . . . . . . . . . . . . . . . . . . . . . . . . . . . . . . . . . . . . . . . . . . . . . . . .
Table: Meat, roasting, casseroles. . . . . . . . . . . . . . . . . . . . . . . . . . . . . . . . .
Table: Roasting, casseroles, au gratin . . . . . . . . . . . . . . . . . . . . . . . . . . . . .
Grill sizes. . . . . . . . . . . . . . . . . . . . . . . . . . . . . . . . . . . . . . . . . . . . . . . . . . . . . . .
Grilling table . . . . . . . . . . . . . . . . . . . . . . . . . . . . . . . . . . . . . . . . . . . . . . . . .
Defrosting . . . . . . . . . . . . . . . . . . . . . . . . . . . . . . . . . . . . . . . . . . . . . . . . . . . . . .
Defrosting table . . . . . . . . . . . . . . . . . . . . . . . . . . . . . . . . . . . . . . . . . . . . . .
Making preserves . . . . . . . . . . . . . . . . . . . . . . . . . . . . . . . . . . . . . . . . . . . . . . . .
27
27
29
33
34
34
35
36
37
39
39
40
40
41
3
Cleaning and care . . . . . . . . . . . . . . . . . . . . . . . . . . . . . . . . . . . . . . . . . . . . . .
Outside of the appliance. . . . . . . . . . . . . . . . . . . . . . . . . . . . . . . . . . . . . . . . . .
Oven interior . . . . . . . . . . . . . . . . . . . . . . . . . . . . . . . . . . . . . . . . . . . . . . . . . . .
Pyrolytic cleaning . . . . . . . . . . . . . . . . . . . . . . . . . . . . . . . . . . . . . . . . . . . . . . .
Shelf Support Rails . . . . . . . . . . . . . . . . . . . . . . . . . . . . . . . . . . . . . . . . . . . . . .
Oven Lighting . . . . . . . . . . . . . . . . . . . . . . . . . . . . . . . . . . . . . . . . . . . . . . . . . . .
Oven Door. . . . . . . . . . . . . . . . . . . . . . . . . . . . . . . . . . . . . . . . . . . . . . . . . . . . . .
Oven Door Glass . . . . . . . . . . . . . . . . . . . . . . . . . . . . . . . . . . . . . . . . . . . . . . . . .
43
43
43
44
45
46
47
48
What to do if … . . . . . . . . . . . . . . . . . . . . . . . . . . . . . . . . . . . . . . . . . . . . . . . . 50
Electrical Connection . . . . . . . . . . . . . . . . . . . . . . . . . . . . . . . . . . . . . . . . . . . 52
Installation Instructions . . . . . . . . . . . . . . . . . . . . . . . . . . . . . . . . . . .
53
Safety information for the installer. . . . . . . . . . . . . . . . . . . . . . . . . . . . . . . . . 53
Warranty conditions . . . . . . . . . . . . . . . . . . . . . . . . . . . . . . . . . . . . . . .
Service and Spare Parts
4
57
. . . . . . . . . . . . . . . . . . . . . . . . . . . . . . . . . . . 59
Operating Instructions
1 Safety instructions
5
This appliance conforms with the following EU Directives:
– 73/23/EEC dated 19.02.1973 Low Voltage Directive
– 89/336/EEC dated 03.05.1989 EMC Directive inclusive of Amending
Directive 92/31/EEC
– 93/68/EEC dated 22.07.1993 CE Marking Directive
Electrical safety
• This appliance must be connected by a qualified electrician only.
• In the event of a fault or damage to the appliance: take the fuses out
or switch off.
• Repairs to the appliance must only be carried out by qualified
service engineers. Considerable danger may result from improper repairs. If repairs become necessary, please contact your local Service
Force Centre.
Child Safety
• Never leave children unsupervised when the appliance is in use.
Safety whilst Using
• This appliance is intended to be used for cooking, roasting and baking
food in the home.
• Take care when connecting electric appliances to sockets nearby. Do
not allow connecting leads to come into contact with or to catch beneath the hot oven door.
• Warning: Risk of burns! The interior of the oven becomes hot during use.
• Using ingredients containing alcohol in the oven may create an alcohol-air mixture that is easily ignited. In this case, open the door carefully. Do not have embers, sparks or naked flames in the vicinity when
opening the door.
5
How to avoid damage to the appliance
• Do not line the oven with aluminium foil and do not place baking
trays, pots, etc. on the oven floor, as the heat that builds up will damage the oven enamel.
• Fruit juices dripping from the baking tray will leave stains, which you
will not be able to remove. For very moist cakes, use a deep tray.
• Do not put any strain on the oven door when open.
• Never pour water directly into the oven when it is hot. This could
cause damage to the enamel and discoloration.
• Rough handling, especially around the edges of the front panel, can
cause the glass to break.
• Do not store any flammable materials inside the oven. These could ignite when the oven is switched on.
• Do not store any moist foods inside the oven. This could damage the
oven enamel.
Disposal
2
2
1
6
Packaging material
The packaging materials are environmentally friendly and can be recycled. The plastic components are identified by markings, e.g. >PE<,
>PS<, etc. Please dispose of the packaging materials in the appropriate
container at your local waste disposal facilities.
Old appliance
W
The symbol
on the product or on its packaging indicates that this
product may not be treated as household waste. Instead it shall be
handed over to the applicable collection point for the recycling of electrical and electronic equipment. By ensuring this product is disposed of
correctly, you will help prevent potential negative consequences for the
environment and human health, which could otherwise be caused by
inappropriate waste handling of this product. For more detailed information about recycling of this product, please contact your local city
office, your household waste disposal service or the shop where you
purchased the product.
Warning: Before disposing of old appliances please make them inoperable so that they cannot be a source of danger.
To do this, disconnect the appliance from the mains supply and remove the mains cable from the appliance.
Description of the Appliance
General Overview
Control panel
Door
handle
Full glass
door
7
Control Panel
Oven power indicator
Oven power indicator
Temperature / Time Display
Oven Functions
Temperature/Time selection
Function buttons
Oven Features
Top heat and heating elements
Oven lighting
Shelf positions
Fan heating element
Fan
Bottom heat
Oven shelf runners, removable
8
Oven Accessories
Shelf
For dishes, cake tins, items for
roasting and grilling.
Baking Shelf
For baking or for collecting fat
Grill pan with handle
Support for the grill tray as a collecting vessel for fat
Grill tray
Insert for the grill pan for grilling
smaller amounts of food
9
Before using for the first time
Setting and changing the current time
3
The oven only operates when the time has been set.
When the appliance has been connected to the electrical supply or
when there has been a power cut,
the function indicator Time
flashes automatically.
1. To change a time that has already
been set, press the Select
button
repeatedly until the function indicator Time flashes.
2. Using the / control knob, set
the current time.
After approx. 5 seconds, the clock
stops flashing and the clock displays
the time of day set.
3
10
The appliance is now ready to use.
The time can only be modified, if
the child safety device is deactivated, neither of the Countdown ,
Cook time or End time clock
functions and no oven function is
set.
Initial Cleaning
1
3
Before using the oven for the first time you should clean it thoroughly.
Caution: Do not use any caustic, abrasive cleaners! The surface could
be damaged.
To clean any metal front panels use commercially available cleaning
agents.
1. Turn the oven function switch to oven lighting .
2. Remove all accessories and the shelf support rails and wash them with
warm water and washing up liquid.
3. Then wash out the oven with warm water and washing-up liquid and
dry.
4. Wipe the front of the appliance with a damp cloth.
11
Operating the Oven
Switching the Oven On and Off
Temperature / Time
Display
Oven power indicator
Oven power indicator
Speedcook
Heat indicator
Button Speedcook
Oven Functions
Change display
Switching the oven on
Turn the oven functions control
knob to the desired function. The
oven power indicator lights up. The
temperature display shows the suggested temperature for the oven
function selected.
The oven starts to heat up.
When the temperature set is
reached, an audible signal sounds.
12
Temperature/Time selection
Changing the oven
temperature
Use the / control knob to raise
or lower the temperature.
The setting changes in steps of 5 °C.
Switching the oven off
To turn the oven off, turn the oven
functions dial to the OFF position.
3
Cooling fan
The fan switches on automatically in order to keep the appliance’s surfaces cool. When the oven is switched off, the fan continues to run to
cool the appliance down, then switches itself off automatically.
13
3
Heat indicator
Indicates warming up
When the oven function has been
switched on the bars that slowly
light up one after the other indicate
how far the oven has heated up.
Fast heat indicator
When the fast heat function has
been switched on
the bars
that flash one after the other indicate that fast heat is operating. In
addition the bars next to the
symbol
light up.
Residual heat indicator
When the oven has been switched
off, the bars that are still lit indicate
the remaining residual heat in the
oven.
14
Speedcook
1
3
After an oven function is selected, with the use of the additional
function Speedcook
the empty oven can be pre-heated in a relatively short time.
Important: Do not put the food to be cooked into the oven, until
Speedcook is completed and the oven is operating using the desired
function.
1. Set the desired oven function (e. g. Conventional Cooking ). If necessary, change the suggested temperature.
2. Press the Speedcook button. The bars next to the symbol
light
up.
When the bars flash one after another it shows that Speedcook is operating.
When the temperature set is reached, the bars of the heat indicator
light up and the bars next to the symbol
go out. An audible signal sounds.
The oven now continues heating according to the pre-set oven function and temperature. You can now place the food in the oven.
The Speedcook function can be switched on with the oven functions
Ventitherm ® Precision Fan Cooking , Pizza Setting , Conventional
Cooking and Rotitherm Roasting .
15
Oven Functions
The oven has the following functions:
Oven function
16
Use
Heating element/
fan
Oven Light
With this function you can light
up the oven interior, e.g. for
cleaning.
---
Full Width Dual
Grill
For grilling flat food items in
Grill, top heat
large quantities and for toasting.
Conventional
Cooking
For baking and roasting on one
oven level.
Top heat, bottom
heat
Ventitherm ®
Precision
Fan Cooking
For baking on up to three oven
levels at the same time.
Set the oven temperatures 20-40
°C lower than when using Conventional.
Top heat, bottom
heat, rear wall
heating element,
fan
Rotitherm
Roasting
For roasting larger joints of meat Grill, top heat, fan
or poultry on one oven shelf.
The function is also suitable for
browning and gratinating.
Pizza Setting
For baking on up to two oven
levels.
Set the oven temperatures 20-40
°C lower than when using Conventional.
Top heat, bottomheat, fan
Fan Controlled
Defrosting
For defrosting e. g. gateaux and
flans, butter, bread, fruit or other
frozen foods.
Fan
Pyroluxe ®
Cleaning
For automatic pyrolytic cleaning Top heat,
of the oven. It burns off residues bottomheat, fan
in the oven, which can then be removed with a cloth when the
oven has cooled down. The oven is
heated to approx. 500 °C.
Inserting the shelf and roasting pan
3
Anti-tip device
All insertable components have a small curved indentation on their left
and right edges. This indentation serves as an anti-tip device and must
always point towards the back of the oven.
Inserting roasting pan:
The anti-tip device must point towards the back of the oven.
Inserting the shelf:
Insert the shelf so that the two
guide bars point upwards. The antitip device must point downwards
and be at the back of the oven interior.
Inserting the shelf and the roasting pan:
When using the shelf and the roasting pan together, insert the shelf’s
anti-tip device exactly into the indentations in the tray.
17
Attaching/Removing the Grill Pan Handle
The handle is particularly useful for removing the grill pan and tray
more easily from the hot oven.
1
1
18
Attaching the handle
Insert the handle at an angle from
above into the recess in the side of
the grill pan (1) press and hold the
release button, lift the handle gently and then lower it (2) let go of
the release button.
Warning: Risk of burning!
Important: Check that the handle is
securely attached!
Removing the handle
Press the release button on the top
of the handle (1) and lift up the
handle (2) to remove it.
Important: Never leave the handle
in the heated oven! Overheating
can cause the handle to deform or
break, and may cause an injury.
Clock Functions
Temperature / Time Display
Clock function lights
Selector Button
Change display
Cook time
To set how long the oven is to be in use.
End time
To set when the oven is to switch off again.
Countdown
To set a countdown. A signal sounds after the time has elapsed.
This function does not affect the operation of the oven.
Time
To set, change or check the time
(See also section “Before Using for the First Time”).
19
3
3
20
How to use the clock functions
• After a clock function has been selected, the corresponding function
indicator flashes for about 5 seconds. During this period, the desired
times can be set or modified using the / dial.
• When the desired time has been set, the function indicator continues
to flash for approx. 5 seconds. After that the function indicator is
then lit. The set time begins to run in the background.
• When the clock functions Cook time and End time have been
completed, the oven functions dial must be turned back to “0”.
• Using the Display
button, you can switch between the oven temperature and the time.
Checking the time set or remaining
Press the Select button repeatedly, until the appropriate clock function flashes and the time set or remaining is displayed.
Countdown
1. Press the Select button repeatedly until the function indicator
Countdown flashes.
2. Using the / control knob set
the desired countdown
(max. 99.00minutes).
The function Countdown indicator
lights up.
When 90% of the time set has
elapsed, an audible signal sounds.
When the time has elapsed, “00.00”
and the function indicator flash. An
audible signal sounds.
To stop the flashing and the audible
signal:
Press any button.
21
Cook time
1. Select the oven function and temperature.
2. Press the Select button repeatedly until the function indicator Cook
time flashes.
3. Using the / control knob set
the desired cooking time
(max. 09.59hours).
The Cook time function indicator
lights up and the oven comes on
immediately.
When the time has elapsed, “00.00”
and the function indicator flash. An
audible signal sounds for 2 minutes.
The oven switches itself off.
To stop the flashing and the audible
signal:
Turn the oven functions dial to “0”.
22
End time
1. Select the oven function and temperature.
2. Press the Select button repeatedly until the End time function indicator flashes.
3. Using the / control knob set
the desired switch-off time.
The End time function indicator
lights up and the oven comes on
immediately.
When the time has elapsed, “00.00”
and the function indicator flash. An
audible signal sounds for 2 minutes.
The oven switches itself off.
To stop the flashing and the audible
signal:
Turn the oven functions dial to “0”.
23
3
Cook time
and End time
combined
Cook time and End time can be used simultaneously, if the oven is
to be switched on and off automatically at a later time.
1. Select the oven function and temperature.
2. Using the Cook time function, set
the time that the dish needs to
cook.
In this example, 1 hour.
3. Using the End time function, set
the time at which the dish should
be ready.
In this case, 14:05.
The Cook time and End time
function indicators light up and the
temperature is shown in the display.
In this example, 200°C.
The oven switches on automatically
at the time calculated.
In this case, at 13:05.
And switches itself off again when
the cook time entered has elapsed.
In this case, at 14:05.
24
Other Functions
Switching off the display
2
3
You can save energy by switching off the clock display.
Switching off the clock display
1. Turn the / control knob to the
right and hold it.
2. In addition press the Select button until the display goes out.
As soon as the appliance is switched
on again, the display comes on automatically.
When the appliance is next
switched off, the clock display goes
out again.
To have the clock display on permanently again, you must set the clock
again.
Switching on the clock display
1. Turn the / control knob to the right and hold it.
2. In addition press the Select button, until the display appears again.
Oven child safety device
3
The oven is fitted with a child safety device. As soon as the child safety
device is activated, the oven cannot be switched on.
For the child safety device to be activated, none of the oven functions
must be currently selected.
Activating the child safety device
1. Turn the / dial to the left and
hold it.
2. In addition press the Select button until “SAFE” appears in the display.
The child safety device is now activated.
25
Deactivating the child safety
device
1. Turn the / dial to the left and hold it.
2. In addition press and hold the Select button, until “SAFE” disappears
from the display.
The child safety device is now deactivated and the oven is again ready
for use.
Oven safety cut-out
3
If not switched off after a certain time, or if the temperature is not
modified, the oven switches off automatically.
The last temperature set flashes in the temperature display.
The oven switches off when the oven temperature is:*
30 - 120°C after
12.5 hours
120 - 200°C after
8.5 hours
200 - 250°C after
5.5 hours
250 - Max °C after
1.5 hours
3
26
Switching on after a safety cut-out
Switch the oven off completely.
It can then be switched on again.
The safety cut-out is cancelled if the clock function Cook time
End time is set.
*Not with the Rotitherm Roasting oven function.
or
Usage, Tables and Tips
Baking
Oven function: Ventitherm ® Precision Fan Cooking
tional Cooking
or Conven-
Baking tins
• For Conventional Cooking dark metal and non-stick tins are suitable.
• For Ventitherm ® Precision Fan Cooking bright metal tins are also
suitable.
Oven levels
• Baking with Conventional Cooking is possible on one oven level.
• Using Ventitherm ® Precision Fan Cooking you can bake on up to 3
baking trays at the same time:
1 baking tray:
e.g. oven level 3
1 cake tin:
e.g. oven level 1
2 baking trays:
e. g. oven levels 1 and 3
3 baking trays:
oven levels 1, 3 and 5
27
3
2
28
General Instructions
• Insert the tray with the bevel at the front.
• With Conventional Cooking or Ventitherm ® Precision
Fan Cooking you can also bake with two tins next to one another
on the oven shelf at the same time. This does not significantly increase baking time.
When frozen foods are used the trays inserted may distort during cooking. This is due to the large difference in temperature between the
freezing temperature and the temperature in the oven. Once the trays
have cooled the distortion will disappear again.
How to use the Baking Tables
The tables give the required temperature settings, baking times and
oven shelf levels for a selection of typical dishes.
• Temperatures and baking times are for guidance only, as these will
depend on the consistency of pastry or mixture, the number and the
type of baking tin.
• We recommend using the lower temperature the first time and then
if necessary, for example, if a deeper browning is required, or baking
time is too long, selecting a higher temperature.
• If you cannot find the settings for a particular recipe, look for the
one that is most similar.
• If baking cakes on baking trays or tins on more than one level, baking
time can be extended by 10-15 minutes.
• Moist recipes (for g. pizzas, fruit flans, etc.) are baked on one level.
• Cakes and pastries at different heights may brown at an uneven rate
at first. If this occurs, please do not change the temperature setting. Different rates of browning even out as baking progresses.
With longer baking times, you can switch the oven off about 10 minutes before the end of the baking time, in order to utilise the residual
heat.
Unless otherwise stated, the values given in the tables assume that
cooking is started with the oven cold.
Baking Tables
Cakes,
Biscuits, Bread, Pies
Oven functions
Shelfposition
Time
Temperature
Hr. : Min.
ºC
Using cake tins
Cakes in Pound Cake tins
Pizza Setting
1
150-160
1:00-1:10
Sandcakes/
Cakes in loaf tins
Pizza Setting
1
150-160
1:15-1:30
Madeira cake
Pizza Setting
1
150-160
1:00-1:10
Dundee cake
Pizza Setting
1
130-140
2:30-3:00
Conventional
Cooking
1
140-150
Pizza Setting
1
130
Conventional
Cooking
1
130-140
Pizza Setting
2
160
Conventional
Cooking
2
180-190
Pastry cases
Pizza Setting
3
180-190
0:10-0:25
Bakewell tart
Pizza Setting
2
160-170
0:45-0:55
Swiss roll
Conventional
Cooking
3
Flans & quiches
Pizza Setting
2 or 1
170-180
Conventional
Cooking
2
180-200
Pizza Setting
3
140-150
Conventional
Cooking
3
150-170
Pizza Setting
3
150-170
Conventional
Cooking
3
180-200
Pizza Setting
3
140-150
Conventional
Cooking
3
150-170
Large Christmas cake
(10“)
Victoria Sandwich
4:30-5:00
0:25-0:35
180-2001) 0:10-0:15
0:30-0:50
Using baking sheets
Short bread
Biscuits
Macaroons
0:40-0:50
0:15-0:25
0:25-0:35
29
Cakes,
Biscuits, Bread, Pies
Oven functions
Shelfposition
Time
Temperature
Hr. : Min.
ºC
Apple strudel
Pizza Setting
2
170-1801) 0:30-0:50
Choux pastry buns
Conventional
Cooking
3
200-2101) 0:20-0:35
Buns / cup cakes
Pizza Setting
3
150-1601) 0:25-0:35
Conventional
Cooking
3
190-210
Pizza Setting
3
200
Conventional
Cooking
3
220-240
Meringues
Conventional
Cooking
3
100-120
Sausage rolls
Pizza Setting
3
170-1801) 0:20-0:35
Conventional
Cooking
3
210-220
Pizza Setting
4
180-200
Conventional
Cooking
4
200-200
Wholemeal bread
Conventional
Cooking
1
220-240
0:40-0:45
White bread
Conventional
Cooking
1
210-230
0:40-0:45
Scones
Pizza
0:10-0:15
3:30-4:30
0:30-0:50
Bread
1) Pre-heat oven
30
Baking on more than one oven level
Pizza
Setting
Ventitherm
® Precision
Fan Cooking
Type of baking
Shelf positions from
bottom
2 levels
3 levels
Temperature in
°C
Time
Hours:
Mins.
Cakes/pastries/biscuits on baking trays
Cream puffs/Eclairs
1/4
---
160-1801)
0:35-0:60
Dry streusel cake
1/3
---
140-160
0:30-0:60
Short pastry biscuits
1/3
1/3/5
150-160
0:15-0:35
Viennese whirls
1/3
1/3/5
140
0:20-0:60
Biscuits made with sponge
mixture
1/3
---
160-170
0:25-0:40
Pastries made with egg
white, meringues
1/3
---
80-100
2:10-2:50
Macaroons
1/3
---
100-120
0:40-1:20
Biscuits made with yeast
dough
1/3
---
160-170
0:30-0:60
Puff pastries
1/3
---
170-1801)
0:30-0:50
Rolls
1/4
---
160
0:30-0:45
Biscuits
Small cakes (20per tray)
1/4
---
1)
140
0:25-0:40
1) Pre-heat the oven!
31
Tips on Baking
Baking results
Possible cause
Remedy
The cake is not
browned enough at
the bottom
Wrong shelf level
Place cake on a lower shelf
The cake sinks (becomes soggy, lumpy,
streaky)
Oven temperature too high
Use a slightly lower temperature setting
Baking time too short
Increase baking time
Baking times cannot be reduced by setting higher
temperatures
Too much liquid in the dough/
mixture
Use less liquid
Pay attention to mixing
times, especially if using
mixing machines
Oven temperature too low
Increase oven temperature
Baking time too long
Shorten baking time
Cake is too dry
Cake browns unevenly Oven temperature too high
and baking time too short
Set a lower temperature and
increase baking time
Dough/mixture is unevenly dis- Spread the dough/mixture
tributed
evenly on the baking tray
Cake is not cooked
within the baking
time set
32
Temperature too low
Use a slightly higher temperature setting
Table: Desserts
Ventitherm ® Precision
Fan Cooking
Time
Desserts
Shelf
position
Temperature °C
Hr. : Min.
Apple pie
2
180-190
0:45-050
Rice pudding
2
130-140
2:00-2:30
Fruit crumble
2
160
0:50-1:10
Pineapple upside down cake
2
160
0:35-0:45
Pavlova
2
130
1:00-1:10
Baked custard
2
150-160
0:45-1:00
Baked apples
2
160-170
0:40-1:00
Bread and butter pudding
2
170-180
0:40-0:55
Apple charlotte
2
180-190
0:40-0:55
2
170-1901)
0:30-0:45
Soufflé - sweet/savoury
1) Pre-heat oven
33
Table for Bakes and Gratins
Dish
Oven function
Shelf
position
Temperature
°C
Time
Hr: Mins.
Pasta bake
Conventional
Cooking
1
180-200
0:45-1:00
Lasagne
Conventional
Cooking
1
180-200
0:25-0:40
Vegetables au gratin1)
Rotitherm Roasting
1
160-170
0:15-0:30
Baguettes topped with
melted cheese1)
Rotitherm Roasting
1
160-170
0:15-0:30
Sweet bakes
Conventional
Cooking
1
180-200
0:40-0:60
Fish bakes
Conventional
Cooking
1
180-200
0:30-1:00
Rotitherm Roasting
1
160-170
0:30-1:00
Stuffed vegetables
1) Pre-heat the oven
Frozen Ready Meals Table
Food to be
cooked
Oven function
Shelf
position
Temperature
°C
Time
Frozen pizza
Conventional
Cooking
3
as per manufacturer’s instructions
as per manufacturer’s instructions
Chips1)
(300-600 g)
Rotitherm
Roasting
3
200-220
15-25 mins.
Baguettes
Conventional
Cooking
3
as per manufacturer’s instructions
as per manufacturer’s instructions
Fruit flans
Conventional
Cooking
3
as per manufacturer’s instructions
as per manufacturer’s instructions
1) Comments: Turn chips 2 or 3 times during cooking
34
Roasting
Oven function: Ventitherm ® Precision Fan Cooking
tional Cooking
or Rotitherm Roasting .
, Conven-
Roasting dishes
• Any heat-resistant ovenware is suitable for roasting. (Please read the
manufacturer's instructions.)
• Large roasting joints can be cooked directly in the tray or on the
shelf with the tray placed below
• For all lean meat, we recommend roasting these in a roasting tray
with a lid. This makes the meat more succulent.
• All types of meat, that can be browned or have crackling, can be
roasted in the roasting tin without the lid.
3
Tips on using the roasting chart
The figures in the following table are for guidance only.
• We recommend cooking meat and fish over 1 kg in weight in the
oven.
• To prevent escaping meat juices or fat from burning on to the pan,
we recommend placing some water in the roasting pan.
• Turn the meat as required (after about 1/2 - 2/3 of cooking time).
• Baste large roasting joints and poultry several times during the cooking time. This will give better roasting results.
• Switch off the oven approx. 10 minutes prior to the end of the cooking time in order to use the residual heat.
35
Table: Meat, roasting, casseroles
Shelf
position
Temperature
°C
Rotitherm
Roasting
2
170-180
0:30-0:35
per 450 g/1 lb
plus 30-35 mins
Rotitherm
Roasting
2
160-170
0:35-0:40
per 450 g/1 lb
plus 15-20 mins
-rare
Rotitherm
Roasting
3 or 2
150-1601)
0:15-0:20
per 450 g/1 lb
plus 15-20 mins
-medium
Rotitherm
Roasting
3 or 2
150-160
0:20-0:25
per 450 g/1 lb
plus 25-25 mins
-well done
Rotitherm
Roasting
2
150-160
0:30-0:35
per 450 g/1 lb
plus 25-30 mins
- small
Ventitherm ®
Precision
Fan Cooking
3
2001)
0:10-0:15
- large
Ventitherm ®
Precision
Fan Cooking
2
180 -1901)
0:30-0:40
Lamb
Rotitherm
Roasting
2
150-160
0:30-0:35
per 450 g/1 lb
plus 30-35 mins
Veal
Rotitherm
Roasting
2
170-180
0:30-0:35
per 450 g/1 lb
plus 30-35 mins
Meat
Oven functions
Time
Hr. : Min.
Pork
Shoulder; leg; rolled;
boned spare rib;
loin of pork
Beef
Inexpensive cuts
Prime cuts
Yorkshire pudding
1) Pre-heat oven
36
Table: Roasting, casseroles, au gratin
Poultry, Game,
Fish, Vegetables
Quantity
approx.
Oven function
Shelf
position
TemperaTime
ture
Hr. : Min.
°C
Casseroles, miscellaneous
Casseroles
1 kg/2 lbs
Ventitherm
® Precision
Fan Cookin
g
2
150
2:30-3:00
1 kg/2 lbs
Conventional
Cooking
2
160-170
Lancashire
Hot Pot
1 kg/2 lbs
Conventional
Cooking
2
180-190
2:15-2:30
Moussaka
1 kg/2 lbs
Ventitherm
® Precision
Fan Cookin
g
2
170-180
0:40-0:50
Meat Loaf
675 g/1.5 lbs
Rotitherm
Roasting
2
160-170
1:00-1:10
Chicken
1 kg/2 lbs
Rotitherm
Roasting
2
190-210
0:50-1:10
Chicken
1.5 kg/3 lbs
Rotitherm
Roasting
1
190-210
1:15-1:30
Duck
1.5-2 kg/
3.5-4 lbs
Rotitherm
Roasting
1
180-200
1:15-1:45
Goose
3.5-5 kg/
8-10 lbs
Rotitherm
Roasting
1
160-180
2:30-3:30
Turkey
2.5-3.5 kg/
5-7 lbs
Rotitherm
Roasting
1
160-180
1:45-2:30
Turkey
4-6 kg/
8-13 lbs
Rotitherm
Roasting
1
140-160
2:30-4:00
Pheasant, Wild
Duck, Rabbit
1 kg/2 lbs
Conventional
Cooking
3 or 2
210-220
0:30-1:00
Rotitherm
Roasting
3 or 2
200-220
0:30-0:50
Poultry / Game
Partridge/Pigeon per
300-500g
37
Poultry, Game,
Fish, Vegetables
Quantity
approx.
Oven function
Shelf
position
TemperaTime
ture
Hr. : Min.
°C
Fisch (baked, steamed)
Whole fish
1-1.5 kg/
2-3 lbs
Conventional
Cooking
2
210-220
0:45-1:15
Fish pies, bakes
750 g-1 kg/
1.5-2 lbs
Rotitherm
Roasting
3 or 2
180-200
0:30-1:00
---
Ventitherm
® Precision
Fan Cookin
g
2
180-190
0:30-1:00
Au gratin dishes ---
Rotitherm
Roasting
3
180-190
0:15-0:45
Vegetables
Stuffed pepper/
aubergines
38
Grill sizes
1
3
Oven function: Full Width Dual Grill
setting
with maximum temperature
Important: Always grill with the oven door closed.
The empty oven should always be pre-heated with the grill functions
for 5 minutes.
• When grilling, use the oven shelf and drip pan together.
• The grilling times are for guidance only.
• Grilling is particularly suitable for flat pieces of meat or fish.
Grilling table
Food to be grilled
Oven level
Grilling time
1st side
2nd side
Burgers
4
8-10 mins.
6-8 mins.
Pork fillet
4
10-12 mins.
6-10 mins.
Sausages
4
8-10 mins.
6-8 mins.
Filet steaks, veal steaks
4
6-7 mins.
5-6 mins.
Filet of beef, roast beef
(approx. 1 kg)
3
10-12 mins.
10-12 mins.
Toast1)
3
2-3 mins.
2-3 mins.
Toast with topping
3
6-8 mins.
---
1) Use the grill pan without the drip tray.
39
Defrosting
Oven function: Fan Controlled Defrosting
ting)
(no temperature set-
• Unpack the food and place it on a plate on the oven shelf.
• Do not cover with a plate or bowl, as these can substantially lengthen
the defrosting time.
• For defrosting, place the shelf on the 1st oven level from the bottom.
Defrosting table
Food
Further defrosting
time (mins.)
Comments
Chicken, 1000 g
100-140
20-30
Place the chicken on an upturned
saucer placed on a large plate.
Halfway through the time, turn it
over
Meat, 1000 g
100-140
20-30
Halfway through the time, turn it
over
Meat, 500 g
90-120
20-30
Halfway through the time, turn it
over
Trout, 150g
25-35
10-15
---
Strawberries,
300g
30-40
10-20
---
Butter, 250g
30-40
10-15
---
Cream, 2 x 200g
80-100
10-15
Cream that is still slightly frozen in
part can still be whipped
60
60
Flan/gateau,
1400g
40
Defrosting time
Min.
---
Making preserves
Oven function: Pizza Setting
• For preserving, use only commercially available preserve jars of the
same size.
• Jars with twist-off or bayonet type lids and metal tins are not
suitable.
• When making preserves, use the first shelf position from the bottom.
• Use the shelf for making preserves. There is enough room on this for
up to six 1-litre preserving jars.
• The jars should all be filled to the same level and clamped shut.
• Place the jars on the shelf in such a way that they are not touching
each other.
• Pour approx. 1/2 litre of water into the shelf, so that there is sufficient moisture in the oven.
• As soon as the liquid in the first jars starts to simmer (after approx.
35-60 minutes for 1 litre jars), switch off the oven or adjust the temperature to 100°C (see table).
41
Preserves table
The times and temperatures for making preserves are for guidance only
.
Preserve
Temperature
in°C
Cooking time
until simmering
in mins.
Continue to
cook at 100°C
in mins.
Strawberries, blueberries,
raspberries, ripe gooseberries
150-160
35-45
---
Unripe gooseberries
150-160
35-45
10-15
150-160
35-45
10-15
Carrots1)
150-160
50-60
5-10
Mushrooms1)
150-160
40-60
10-15
Cucumbers
150-160
50-60
---
Mixed pickles
150-160
50-60
15
Kohlrabi, peas, asparagus
150-160
50-60
15-20
Beans
150-160
50-60
---
Soft fruit
Stone fruit
Pears, quinces, plums
Vegetables
1) Leave standing in oven when switched off
42
Cleaning and care
1
Warning: For cleaning, the appliance must be switched off and cooled
down.
Warning: For safety reasons, do not clean the appliance with steam jet
or high-pressure cleaning equipment.
Important: Do not use any abrasive cleaners, sharp scrapers or
abrasive items.
Outside of the appliance
• Wipe the front of the appliance with a soft cloth and a solution of
washing-up liquid and warm water.
• With metal fronts use the cleaners that are commercially available.
Oven interior
1
3
Warning: make sure the oven is switched off and has cooled down before cleaning.
Clean the appliance after each use. In this way, dirt is easier to clean off
and is not allowed to burn on. Residues that are not removed may
cause changes to the surface colour when Pyroluxe ® Cleaning is used.
1. For cleaning, turn the oven light on.
2. After every use, wipe the oven with a solution of water and washing-up
liquid and allow to dry.
3
1
In the event of stubborn dirt, clean using Pyroluxe ® Cleaning.
Important! If you use an oven spray, please follow the manufacturer’s
instructions exactly.
43
Pyrolytic cleaning
1
1
3
3
3
Warning: The oven gets very hot during this process. Keep small children away.
Important! All removable parts including the side rails must be removed from the oven before using the pyroluxe function.
If you use the oven shelf runners that are available as special accessories, these must be removed before pyrolytic cleaning.
If the oven shelf runners are still in place, ‘C1’ appears in the time display.
The pyroluxe process then cannot be started due to a safety cut-out
that protects the oven shelf runners.
Pyroluxe
1. First remove the worst of the residue manually.
2. Select oven function Pyroluxe ® Cleaning .
– “3:15” appears in the display,
– Cook time flashes for approx. 5 seconds.
Pyrolytic cleaning then starts.
The Oven Light does not work.
When the temperature set is reached, the door is locked.
The bars of the heat indicator light up, until the door is unlocked again.
Changing the length of the Pyroluxe
1. Proceed as described in the section Pyroluxe
2. As long as Cook time is flashing select the desired length of the pyroluxe using or :
“2:15” or “3:15”.
Cook time flashes for approx. 5 seconds.
Pyrolytic cleaning then starts.
If Cook time is no longer flashing, press the Select
and then perform the setting procedure.
button again
Changing the Pyroluxe switch off time
The Pyroluxe switch off time can be changed using the End time
clock function (within 2 minutes of setting the Pyroluxe).
When are the different pyroluxes set:
P2 - 2:15 = Pyroluxe Quick: For a light degree of soiling,
P1 - 3:15 = Pyroluxe Intensive: For a heavy degree of soiling.
44
Shelf Support Rails
The shelf support rails on the left and right hand sides of the oven can
be removed for cleaning the side walls.
Removing the shelf support rails
First pull the front of the rail away
from the oven wall (1) and then unhook at the back (2).
3
Fitting the shelf support rails
Important! The rounded ends of
the guide rails must be pointing forwards!
To re-insert, first hook the rail into
place at the back (1) and then insert
the front and press into place (2).
45
Oven Lighting
1
3
Warning: There is a danger of electric shock! Prior to changing the
oven light bulb:
– Switch off the oven!
– Disconnect from the electricity supply.
Place a cloth on the oven floor to protect the oven light and glass cover.
Replacing the oven light bulb/
cleaning the glass cover
1. Remove the glass cover by turning
it anti-clockwise and then clean it.
2. If necessary:
Replace bulb with a 40 watt,
230 V, 300 °C heat-resistant
oven light bulb.
3. Refit the glass cover.
46
Oven Door
The oven door of your appliance may be removed for cleaning.
Removing the oven door
1. Open the oven door completely.
2. Completely fold back the brasscoloured clamping lever on both
door hinges.
3. Grip the oven door with both hands
on the sides and close it to about
3/4 going past the point of resistance.
4. Pull the door away from the oven
(Caution: heavy!).
5. Place the door, with the outer surface downwards, on a soft, flat surface, for example a blanket, to avoid
scratches.
Hanging the oven door
1. With both hands take hold of the
sides of the door from the side on
which the handle is positioned.
2. Hold the door at an angle of
approx. 60°.
3. Slide the door hinges simultaneously as far as possible into the two
slots on the right and left at the
bottom of the oven.
4. Lift the door up until resistance is
met and then open fully.
5. Lift the brass-coloured clamping levers on both door hinges back to
their original position.
6. Close the oven door.
47
Oven Door Glass
1
1
The oven door is fitted with four glass panels mounted one behind the
other. The inner panels can be removed for cleaning.
Caution: The following steps are to be performed only when the oven
door has been removed. If the glass is removed while the door is attached, the lighter weight may cause it to spring up and cause injury.
Important! Rough handling of the glass, especially at the edges of the
front plate, may cause it to break.
Removing the upper-most glass panel
1. Remove the door and, with the handle downwards, lower it onto a soft,
even surface.
2. Grasp the upper panel of glass underneath and push it against the
pressure spring and towards the
oven door handle until it comes free
(á).
3. Hold the panel gently underneath
and slide it out (à).
Removing the centre glass panels
1. Grasp the centre panels of glass by
their lower edges one after another
and push them towards the oven
door handle until they come
free (á).
2. Hold the panels gently underneath
and slide them out (à).
Clean the door glass
48
Replacing the centre glass panels
1. Insert the centre panels at an angle
from above into the section of the
door in which the handle is located,
one after the other (á).
2. Lower the centre panels down and
push them towards the lower edge
of the door as far under the retaining frame as they will go (à).
Replacing the upper glass panel
1. From above, insert the upper-most
panel at an angle into the section of
the door in which the handle is located (á).
2. Lower the panel. Place the glass
against the pressure spring at the
handle, and in front of the retaining
frame at the lower edge of the door.
Push it into the frame (à).
The glass plates must be firmly attached.
Re-hang the door
49
What to do if …
Problem
The oven does not heat up
Possible cause
Remedy
The oven is not switched on
Switch the oven on
The clock has not been set
Set the current time on the
clock
The required settings have
not been set
Check the settings
The oven’s safety cut-out has See “Safety cut-out”
been tripped
The fuse in the house’s electrical wiring (fuse box) has
been tripped
Check fuse. If the fuses trip
repeatedly, please call an authorised electrician
The oven lighting is not operating
The oven bulb is faulty
Change the oven bulb
Pyroluxe is not working
(“C1” appears in the display)
The oven shelf supports have Remove oven shelf support
not been removed
The oven door is locked
Appliance is not connected
Connect the appliance to the
to the electricity; door lock is electrical supply and wait at
activated
least 10 seconds until the red
temperature pilot light goes
out
In the clock display you see:
E001
E020 (when operating normally)
E021
Temperature outside the per- Please contact your local
mitted range
Service Force Centre.
In the clock display you see:
E020 (when pyroluxe is operating)
Door is not closed properly
In the clock display there ap- Fault in the electronics
pears a fault code that is not
listed above
50
Close the door properly and
start the pyroluxe again
If displayed again, please
contact your local Service
Force Centre.
Switch off the appliance via
the house fuse or the safety
switch in the fuse box and
switch it on again.
If displayed again, please
contact your local Service
Force Centre.
1
3
3
If you are unable to remedy the problem by following the above
suggestions, please contact your local Service Force Centre.
Warning! Repairs to the appliance are only to be carried out by qualified service engineers. Considerable danger to the user may result from
improper repairs.
If the appliance has been wrongly operated, the visit from the service
technician or dealer may not take place free of charge, even during the
warranty period.
Advice on cookers with metal fronts:
Because of the cold surface at the front of the cooker, opening the
oven door during (or just after) baking or roasting may cause the
glass to steam up.
51
Electrical Connection
The oven is designed to be connected to 230-240V~(50Hz) electricity
supply.
The oven has an easily accessible terminal block which is marked as
follows:
Letter L
Live terminal
Letter N
Neutral terminal
E
Earth terminal
1
This oven must be earthed!
The cable used to connect the oven to the electrical supply must
comply to the specifications given below.
For UK use only
Connection
via
Cooker Control Circuit
Min. size
Cable/flex
2,5 mm2
Cable/flex
type
PVC/PVC
twin and earth
Fuse
min: 15A
max: 20A
It is necessary that you install a double pole switch between the oven
and the electricity supply (mains), with a minimum gap of 3mm
between the switch contacts and of a type suitable for the required
load in compliance with the current regulations.
The switch must not break the yellow and green earth cable at any
point.
Important
After installation and connecting, the cable must be placed so that it
cannot at any point reach a temperature of more than 50°C above the
ambient temperature.
Before the oven is connected, check that the main fuse and the domestic installation can support the load; and that the power supply is properly earthed.
The manufacturer declines any responsibility should these safety
measures not be carried out.
52
Installation Instructions
1
1
Attention: The new appliance may only be installed and connected by
a registered expert.
Please comply with this. If you do not, any damage resulting is not covered by the warranty.
Safety information for the installer
• The electrical installation is to be set up so that the appliance can be
isolated from the mains with a minimum 3mm all-pole contact separation.
Suitable separation devices include e.g. cut-outs, fuses (screw fuses
are to be taken out of the holder), RCD’s and contactors.
• Anti-shock protection must be provided by the installation.
• The built-in unit must meet the stability requirements of DIN 68930.
• Built-in ovens and built-in cooking surfaces are fitted with special
connection systems. For safety reasons, they must only be combined
with appliances from the same manufacturer.
53
54
55
56
Warranty conditions
Great Britain
Standard guarantee conditions
We, AEG, undertake that if within 12 months of the date of the purchase this AEG appliance or
any part thereof is proved to be defective by reason only of faulty workmanship or materials, we
will, at our discretion repair or replace the same FREE OF CHARGE for labour, materials or carriage
on condition that:
• The appliance has been correctly installed and used only on the electricity or gas supply stated
on the rating plate.
• The appliance has been used for normal domestic purposes only, and in accordance with the
manufacturer's operating and maintenance instructions.
• The appliance has not been serviced, maintained, repaired, taken apart or tampered with by any
person not authorised by us.
• All service work under this guarantee must be undertaken by a Service Force Centre. Any appliance or defective part replaced shall become the Company's property.
• This guarantee is in addition to your statutory and other legal rights.
• Home visits are made between 8.30am and 5.30pm Monday to Friday. Visits may be available
outside these hours in which case a premium will be charged.
Exclusions
This guarantee does not cover:
• Damage or calls resulting from transportation, improper use or neglect, the replacement of any
light bulbs or removable parts of glass or plastic.
• Costs incurred for calls to put right an appliance which is improperly installed or calls to appliances outside the United Kingdom.
• Appliances found to be in use within a commercial environment, plus those which are subject
to rental agreements.
• Products of AEG manufacture which are not marketed by AEG.
European Guarantee
If you should move to another country within Europe then your guarantee moves with you to
your new home subject to the following qualifications:
• The guarantee starts from the date you first purchased your product.
• The guarantee is for the same period and to the same extent for labour and parts as exists in
the new country of use for this brand or range of products.
• This guarantee relates to you and cannot be transferred to another user.
• Your new home is within the European Community (EC) or European Free Trade Area.
• The product is installed and used in accordance with our instructions and is only used domestically, i.e. a normal household.
• The product is installed taking into account regulations in your new country.
Before you move please contact your nearest Customer Care centre, listed below, to give them details of your new home. They will then ensure that the local Service Organisation is aware of your
move and able to look after you and your appliances.
France
Germany
Italy
Sweden
UK
Senlis
Nürnberg
Pordenone
Stockholm
Slough
+33 (0) 3 44 62 29 29
+49 (0) 800 234 7378
+39 (0) 800 117511
+46 (0) 8 672 5360
+44 (0) 1753 219899
57
58
Service and Spare Parts
If the event of your appliance requiring service, or if you wish to purchase spare parts, please contact Service Force by telephoning:
0870 5 929 929
Your telephone call will be automatically routed to the Service Force
Centre covering your post code area.
For the address of your local Service Force Centre and further information about Service Force, please visit the website at
www. serviceforce.co.uk
Before calling out an engineer, please ensure you have read the details
under the heading „What to do if...“
When you contact the Service Force Centre you will need to give the
following details:
1. Your name, address and post code.
2. Your telephone number.
3. Clear and concise details of the fault.
4. The model and serial number of the appliance (found on the rating
plate)
5. The purchase date.
Please note that a valid purchase receipt or guarantee documentation is
required for in-guarantee service
calls.
Customer Care
For general enquiries concerning
your AEG appliance, or for further
information on AEG products please
contact our Customer Care Department by letter or telephone at the
address below or visit our website at www.aeg.co.uk.
Customer Care Department For Customer Service in the Republic
of Ireland please contact us at the adAEG Domestic Appliances
dress below:
55-77 High Street
AEG/ Electrolux Group (Ire) Ltd
Slough
Long Mile Road/ Dublin 12
Berkshire, SL1 1DZ
Republic of Ireland
Tel: 08705 350350 (*)
Tel: +353 (0) 1 4090754
Email: [email protected]
(*) Calls may be recorded for training purposes
59
From the Electrolux Group. The world´s No.1 choice.
The Electrolux Group is the world´s largest producer of powered appliances for kitchen, cleaning and outdoor
use. More than 55 million Electrolux Group products (such as refrigerators, cookers, washing machines,
vacuum cleaners, chain saws and lawn mowers) are sold each year to a value of approx. USD 14 billion in more
than 150 countries around the world.
AEG Hausgeräte GmbH
Postfach 1036
D-90327 Nürnberg
http://www.aeg.hausgeraete.de
© Copyright by AEG
822 926 254-A-071204-02
Subject to change without notice