1
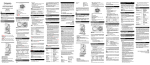
USB 2.0 LAN Docking Station
Replicator 2.O
english
User’s Guide
USB 2.0 LAN Docking Station
deutsch
Bedienungsanleitung
USB 2.0 LAN Docking Station
français
Guide d’utilisation
Station d’accueil USB 2.0 LAN
español
Manual de instrucciones
USB 2.0 LAN Docking Station
italiano
Manuale d’uso
Stazione di docking USB 2.0 per LAN
www.dicota.com
english
Table of contents
Introduction ......................................................
Driver installation ..............................................
Making sure installation was successful ................
Removing drivers ..............................................
Notes
• For the Replicator 2.0 working under stable environment, please be sure to use the power adaptor.
• When the USB 2.0 HUB ports become overloaded,
please refresh or re-plug the Replicator 2.0 into the
Notebook to active the ports.
1
2
5
5
Introduction
Thanks for choosing the Replicator 2.0. It offers a simple, flexible and highly scalable connectivity solution
between the Notebook and any USB 1.0/1.1/2.0 compliant devices. The Replicator 2.0 adds one 4-Ports
USB 2.0 HUB; 2 PS/2 ports; 1 RS232 port; 1 USB
2.0 LAN port, which supports 10/100 Mbps transfer
rate.
Of course the Replicator 2.0 can connect the latest
higher performance peripherals, such as high-resolution video conferencing cameras, scanners and printers. You can enjoy the Replicator 2.0 to extend your
USB 2.0 devices.
Driver installation
• Windows 2000/XP
Step 1:
• Insert the Driver CD into the CD-ROM drive.
• Double click the “USBPR2.0_4.00.exe” program of
Driver CD to install.
Step 2: Select the language to continue.
System requirements
• USB 2.0 host controller
• Windows 2000/XP
Package contents:
• 1 x USB 2.0 Replicator 2.0
• 1 x USB 2.0 A to B type cable (1800 mm)
• 1 x AC Power Adapter (DC 5 V/3 A)
• 1 x Driver CD
• 1 x User’s manual
LED indicator description:
Step 3: Click “Next” to continue.
• Good link status
– When the USB Replicator 2.0 is connected to the
PC or Notebook, all of the LED indicators will turn
on. (Note: The Ethernet Linked to the Network or
Internet)
• Power LED indicator
– When just the power adapter is plugged into the
Replicator 2.0, the POWER LED indicator and
PS/2 LED will turn on.
• Ethernet LED indicator
– When the Ethernet works correctly, the LED indicator will turn on the red LED.
– When the Ethernet work under 100 Mbps Network, the LED indicator will turn on the red and
green LED at the same time.
2
Step 4: Click “Next” to continue.
Step 6a: Select “Yes” and click “Finish”.
Step 5a: Click “Yes” to continue.
(Under Windows 2000)
Step 6b: Click “Finish” to complete the driver installation.
Step 5b: Click “Continue Anyway” to continue.
(Under Windows XP)
3
Step 7a:
• Plug the USB A type of USB 2.0 cable Replicator
2.0.
• Plug the USB B type of USB 2.0 cable into the USB
2.0 HUB ports of your PC or Notebook.
• Click “Yes” to continue. (Under Windows 2000)
Step 8: Click “Continue Anyway” to continue.
Step 9: Click “Finish” to complete the “ADM851X
USB To Fast Ethernet Adapter” driver installation.
Step 7b:
• It will show a new hardware device “ADM851X USB
To Fast Ethernet Adapter”. (Under Windows XP)
• Select “Install the software automatically” item.
• Click “Next” to continue.
4
Make sure the installation was successfully
Driver un-installation
• Windows 2000/XP
• Windows 2000/XP
Step 1:
• To make sure you have installed the Replicator 2.0
successfully, please move the cursor to “My computer” → “Control Panel” → “System Properties”
→ “Hardware” → “Device Manager”.
• Double click the “Human Interface Devices”; it will
show the “HID-compliant device” x 2 and “USB
Human Interface” x 2.
• Double click the “Keyboards”; it will show the “HIDkeyboard Device”.
• Double click the “Mice and other pointing devices”; it will show the “HID-complaint mouse”.
• Double click the “Network adapters”; it will show
the “ADM851X USB To Fast Ethernet Adapter”.
• Double click the “Ports (COM & LPT)”; it will show
the “Prolific USB-to-Serial Com Port (COMx)”.
• Double click the “Universal Serial Bus controllers”; it will show the “Generic USB HUB”.
Step 1:
• Start menu:
Please click “Start” → “Control Panel” → “Add or
Remove Programs”. (Windows XP only)
Classic start menu:
Please click “Start” → “Settings” → “Control Panel” → “Add or Remove Programs”. (Windows
2000/XP only)
• Select “USB 2.0 Business Port Replicator” item.
• Click “Change/Remove” button.
Step 2: Click “OK” to continue.
In the Windows 2000 operating system it is possible that the modem will not appear in the “Safely
Remove Hardware”-icon in the task bar and therefore cannot be stopped. If an “Unsafe removal of
device” alert message appears please ignore it
with reference to your modem. There will be no
effect on your modem and it will continue to function as normal.
5
Step 3: Click “Finish” to complete the driver un-installation.
Cerificate
FCC
This equipment has been tested and found to comply
with Part 15 of the FCC rules. Operation is subject to
the following two conditions:
• this device may not cause harmful interference
• this device must accept any interference received.
Including interference that may cause undesired operation.
CE-Certificate
This equipment is in compliance with the requirements
of the following regulations: EN 55 022: CLASS B.
Disclaimer
Information in this document is subject to change
without notice. The manufacturer does not make any
representations or warranties (implied or otherwise)
regarding the accuracy and completeness of this document and shall in no event be liable for any loss of
profit or any commercial damage, including but not
limited to special, incidental, consequential, or other
damage. No part of this document may be reproduced
or transmitted in any form by any means, electronic or
mechanical, including photocopying, recording or information recording and retrieval systems without the
express written permission of the manufacturer.
Customer service:
If you encounter any problem with your Replicator
2.0, please contact our local subsidiary, partner or
dealer, or send us your inquiry to [email protected].
2 years warranty. Please find the complete text in
our guarantee on the internet: www.dicota.com.
All the products and software mentioned above are
registered trademarks of their respective owners.
Errors excepted.
6
deutsch
• Für einen stabilen Betrieb des Replicator 2.0 verwenden Sie bitte das mitgelieferte Netzteil.
• Wenn es zu einer Überlastung der Anschlüsse des
USB 2.0 HUBs kommt, führen Sie ein Reset des
Replicator 2.0 durch, oder trennen Sie diesen kurzzeitig vom Notebook und schließen Sie ihn anschließend wieder an.
Inhalt
Einführung ........................................................ 7
Installieren der Treiber........................................ 7
Überprüfen der erfolgreichen Installation ............ 10
Deinstallieren der Treiber .................................. 10
Einführung
Vielen Dank, dass Sie sich für den Replicator 2.0 entschieden haben. Er ermöglicht eine einfache, flexible und
hoch skalierbare Connectivity-Lösung zwischen Ihrem PC
und allen USB 1.0/1.1/2.0-kompatiblen Geräten. Der Replicator 2.0 bietet: 4 USB 2.0-Anschlüsse, 2 PS/2-Anschlüsse, 1 seriellen Anschluss (RS 232) und 1 USB 2.0
LAN-Anschluss, der Übertragungsraten von 10/100
Mb/s unterstützt. Mit dem Replicator 2.0 können Sie die
neuesten leistungsfähigen USB 2.0 Peripheriegeräte, wie
hoch auflösende Videokonferenzkameras, Scanner und
Printer zusammen mit Ihren vorhandenen Geräten mit seriellen, USB 1.1-und PS/2-Anschlüssen verwenden. Der
Replicator 2.0 erspart Ihnen Zeit und reduziert den Verschleiß Ihres Notebooks, da er ein ständiges Wechseln
der Anschlüsse überflüssig macht.
Installieren der Treiber
• Windows 2000/XP
Schritt 1:
• Legen Sie die Treiber-CD-ROM in das CD-Laufwerk
ein. Die Installation startet automatisch. Sollte die Installation nicht selbständig starten:
• Doppelklicken Sie auf „Arbeitsplatz“ und klicken Sie anschließend auf das CD-Laufwerk. Die Installation startet
jetzt automatisch. Anderenfalls doppelklicken Sie auf den
Ordner „Driver“ und anschließend auf „setup.exe“.
Schritt 2: Bitte wählen Sie die Sprache aus, um fortzufahren.
Systemanforderungen
• Freier USB 2.0-Anschluß
• Windows 2000/XP
Packungsinhalt:
• 1 x USB 2.0 LAN Dock
• 1 x USB 2.0-Verbindungskabel A/B (1800 mm)
• 1 x Wechselspannungs-Netzteil (5V/3A)
• 1 x Treiber-CD-ROM
• 1 x Benutzerhandbuch
LED-Anzeigen:
• Verbindungsstatus
– Wenn der Replicator 2.0 an einen Desktop-PC
oder ein Notebook angeschlossen wird, leuchten
alle LED-Anzeigen auf (mit Ausnahme der Anzeige
„10/100M Link“, die nur bei angeschlossenem
Ethernet leuchtet).
• LED-Anzeige POWER
– Wenn nur das Netzteil an den Replicator 2.0
angeschlossen ist, leuchten die LED-Anzeigen
POWER und PS/2 auf.
• LED-Anzeige ETHERNET
– Wenn eine Ethernet-Verbindung besteht, leuchtet
die LED-Anzeige LAN rot.
– Wenn eine Ethernet-Verbindung mit 100 Mb/s besteht, blinkt die LED-Anzeige LAN rot und grün.
Hinweise
Schritt 3: Klicken Sie auf „Weiter“, um fortzufahren.
7
Schritt 4: Klicken Sie auf „Weiter“, um fortzufahren.
Schritt 6a: Klicken Sie auf „Ja“ und anschließend auf
„Fertig stellen“.
Schritt 5a: Klicken Sie auf „Ja“, um fortzufahren.
(Unter Windows 2000).
Schritt 6b: Klicken Sie auf „Fertig stellen“ um die
Installation zu beenden.
Schritt 5b: Klicken Sie auf „Trotzdem fortfahren“
um fortzufahren (Unter Windows XP)
8
Schritt 7a:
• Stecken Sie den USB-Stecker Typ A (flacher Stecker)
von einem USB-Kabel Version 2.0 in den Replicator.
• Stecken Sie den USB-Stecker Typ B von dem USBKabel Verson 2.0 in einen freien Port Ihres Rechners oder Notebooks ein.
• Klicken Sie auf „Ja“, um fortzufahren.
(Unter Windows 2000).
Schritt 8: Klicken Sie auf „Trotzdem fortfahren“,
um fortzufahren.
Schritt 9: Klicken Sie auf „Fertigstellen“, um die
Installation des „ADM851X USB To Fast Ethernet
Adapter“-Treibers abzuschließen.
Schritt 7b:
• Dann wird „ADM851X USB to Fast Ethernet
Adapter“ angezeigt. (Unter Windows XP).
• Wählen Sie „Software automatisch installieren“
aus.
• Klicken Sie auf „Weiter“, um fortzufahren.
9
Überprüfen der erfolgreichen Installation
Deinstallieren der Treiber
• Windows 2000/XP
• Windows 2000/XP
Schritt 1:
• Um zu überprüfen, ob die Installation des Replicator
2.0 erfolgreich war, wählen Sie „Arbeitsplatz“ →
„Systemsteuerung“ → „System“ → „Hardware“
→ „Gerätemanager“.
• Durch Doppelklicken auf „Eingabegeräte (Human
Interface Devices)“ werden je zwei Einträge für
„HID-konformes Gerät“ und „USB-Eingabegerät“
angezeigt.
• Durch Doppelklicken auf „Tastaturen“ wird der Eintrag „HID-Tastatur“ angezeigt.
• Durch Doppelklicken auf „Mäuse und andere Zeigegeräte“ wird der Eintrag „HID-kompatible Maus“
angezeigt.
• Durch Doppelklicken auf „Netzwerkadapter“ wird
der Eintrag „ADM851X USB To Fast Ethernet
Adapter“ angezeigt.
• Durch Doppelklicken auf „Anschlüsse (COM und
LPT)“ wird der Eintrag „Prolific USB-to-Serial Com
Port (COMx)“ angezeigt.
• Durch Doppelklicken auf „Universal Serial BusController“ werden die Einträge „Standard-USBHUB und USB-Verbundgerät“ angezeigt.
Schritt 1:
• Startmenü:
Klicken Sie auf „Start“ → „Systemsteuerung“ →
„Software“ (nur Windows XP)
Klassisches Startmenü:
Klicken Sie auf „Start“ → „Einstellungen“ →
„Systemsteuerung“ → „Software“ (nur Windows
2000/XP)
• Wählen Sie den Eintrag „Replicator 2.0“.
• Klicken Sie auf die Schaltfläche „Bearbeiten/Entfernen“.
Schritt 2: Klicken Sie auf „OK“, um fortzufahren.
Unter dem Betriebssystem Windows 2000 kann
es vorkommen, daß das Modem nicht unter dem
Icon-„Hardware sicher entfernen“ in der Taskleiste
auftaucht und aus diesem Grund nicht gestoppt
werden. Sollte ein Warnhinweis „Unsichere Entfernung von Hardware“ auftauchen, dann ignorieren Sie ihn bitte. Der Vorgang hat keine negative
Auswirkung auf das Modem und es wird weiterhin
normal funktionieren.
10
Step 3: Klicken Sie auf „Fertig stellen“, um die
Deinstallation abzuschließen.
Zertifikate
FCC
Dieses Gerät wurde getestet und entspricht dem
Part 15 der FCC Regularien. Der Betrieb des Geräts unterliegt zwei Bedingungen:
• Das Gerät darf keine schadhafte Störungen hervorrufen.
• Das Gerät muß jede Art von Störung akzeptieren,
auch dann wenn diese Störung den eigenen Betrieb einschränkt.
Haftungsausschluß
Die Information in diesem Dokument kann sich ohne
Vorankündigung ändern. Der Hersteller gewährt
keine Zusagen oder Garantien, weder implizit noch
explizit, in Bezug auf die Genauigkeit oder Vollständigkeit dieses Dokuments und übernimmt in keinster Weise eine Haftung für Verlust oder entgangenen Gewinn oder sonstige kommerzielle Schäden,
die einschließen jedoch nicht beschränkt sind auf
spezielle, zufällige, Folge- oder sonstigen Geschäftsschaden. Dieses Dokument darf weder in Teilen
noch als Ganzes in irgendeiner Form reproduziert
oder übermittelt werden weder mechanisch, noch
per Fotokopie oder durch Speicherung, Informationsspeicherung und Informationszugangssysteme
ohne die schriftliche Erlaubnis des Herstellers.
Kundendienst:
Sollten Sie Probleme im Umgang mit dem Replicator 2.0 haben, dann setzen Sie sich mit Ihrem örtlichen Händler oder Distributor in Verbindung. Ansonsten können Sie uns unter [email protected]
kontaktieren.
2 Jahre Garantie. Sie finden den vollständigen Text
zu unseren Garantiebedingungen im Internet:
www.dicota.com.
Alle in diesem Dokument erwähnten Produkte und
Software sind registrierte Marken und gehören
dem jeweiligen Markeninhaber. Fehler vorbehalten.
11
français
Table des matières
Introduction ....................................................
Installation du pilote..........................................
Vérification de l’installation ................................
Désinstallation des pilotes ................................
Remarques
• Pour une utilisation stable du Replicator 2.0 , veuillez
utiliser l’adaptateur secteur fourni.
• Quand les ports du HUB USB 2.0 sont surchargés,
veuillez actualiser ou débrancher puis rebrancher le
Replicator 2.0 sur l’ordinateur pour réinitialiser les
ports.
12
12
15
15
Introduction
Vous avez choisi le Replicator 2.0 et nous vous en
remercions. Il offre une solution de connectivité simple,
flexible et évolutive pour ordinateurs personnels et dispositifs USB 1.0/1.1/2.0. Le Replicator 2.0 vous apporte:
4 ports USB 2.0; 2 ports PS/2; 1 port série RS232 et
1 port USB 2.0 LAN qui prend en charge des transferts
à 10/100 Mbps. Le Replicator 2.0 peut connecter les
périphériques USB 2.0 haute performance les plus
récents, tels que les caméras de vidéoconférence haute
définition, les scanners et les imprimantes tout en vous
permettant d’utiliser vos dispositifs USB 1.1, série et
P/S2 existants. Le Replicator 2.0 élimine les temps
morts lors des dé/branchements et réduit la détérioration de votre ordinateur portable.
Installation du pilote
• Windows 2000/XP
Étape 1:
• Insérez le CD du pilote dans le lecteur CD-ROM pour
lancer l’installation du pilote automatiquement. En
cas d’échec:
• Cliquez deux fois sur «Poste de travail», puis cliquez deux
fois sur l’icône du lecteur CD-ROM pour lancer automatiquement l’installation du pilote. En cas d’échec: Cliquez
deux fois sur le dossier du pilote et cliquez deux fois sur
«setup.exe».
Étape 2: Sélectionnez la langue pour continuer.
Configuration système
• Port USB 2.0 disponible
• Windows 2000/XP
Contenu:
• 1 x Dock USB 2.0 LAN
• 1 x Câble USB 2.0 de type A vers B (1800 mm)
• 1 x Adaptateur secteur CA (CC 5 V/3 A)
• 1 x CD du pilote
• 1 x Guide de l’utilisateur
Description du statut du témoin LED:
• Statut de liaison réussie
– Quand le Replicator 2.0 se connecte sur un ordinateur personnel ou un ordinateur portable, tous
les témoins LED s’allument (sauf le témoin de liaison 10/100 M, qui ne s’allume qu’au branchement d’Ethernet).
• Témoin POWER
– Quand l’adaptateur secteur uniquement est branché dans le Replicator 2.0 , le témoin POWER et le
témoin P/S2 s’allument.
• Témoin ETHERNET
– Quand la liaison Ethernet est établie, le témoin LAN
rouge s’allume.
– Quand la liaison Ethernet tourne à 100 Mbps, le
témoin LAN rouge et vert clignote.
Étape 3: Cliquez sur «Suivant» pour continuer.
12
Étape 4: Cliquez sur «Suivant» pour continuer.
Étape 6a: Cliquez sur «Oui», puis sur «Terminer».
Étape 5a: Cliquez sur «Oui», puis sur «Terminer».
(sous Windows 2000)
Étape 6b: Cliquez sur «Terminer» pour terminer
l’installation.
Étape 5b: Cliquez sur «Continuer» pour poursuivre
(sous Windows XP)
13
Étape 7a:
• Raccordez le port USB de type A du câble USB 2.0
du Replicator 2.0.
• Raccordez le port USB de type B du câble USB 2.0
sur les ports du HUB USB 2.0 de votre PC ou ordinateur portable.
• Cliquez sur «Oui» pour continuer.
(Sous Windows 2000)
Étape 8: Cliquez sur «Continuer» pour poursuivre.
Étape 9: Cliquez sur «Terminer» pour terminer
l’installation du pilote du périphérique «ADM851X
USB To Fast Ethernet Adapter».
Étape 7b:
• Le nouveau périphérique «ADM851X USB To Fast
Ethernet Adapter» s’affiche alors.
(Sous Windows XP)
• Sélectionnez «Installer le logiciel automatiquement»
• Cliquez sur «Suivant» pour continuer.
14
Vérification de l’installation
Désinstallation des pilotes
• Windows 2000/XP
• Windows 2000/XP
Étape 1:
• Pour vérifier l’installation réussie du Replicator 2.0,
veuillez déplacer votre curseur sur «Poste de travail» → «Panneau de configuration» → «Système»
→ «Matériel» → «Gestionnaire de périphériques».
• Cliquez deux fois sur «Périphériques d'interface
utilisateur (HID)» pour afficher «Périphérique conforme aux Périphériques d'interface utilisateur
(HID)» x 2 et «Périphérique d'interface utilisateur
USB» x 2.
• Cliquez deux fois sur «Claviers» pour afficher «Claviers HID».
• Cliquez deux fois sur «Souris et dispositifs de pointage» pour afficher «Souris conforme aux Périphériques d'interface utilisateur (HID)».
• Cliquez deux fois sur «Adaptateurs réseau» pour
afficher «ADM851X USB To Fast Ethernet Adapter».
• Cliquez deux fois sur «Ports (COM & LPT)» pour afficher «Prolific USB-to-Serial Com Port (COMx)».
• Cliquez deux fois sur «Contrôleurs de bus USB»
pour afficher «Concentrateur USB générique» et
«Périphérique USB composite générique».
Étape 1:
• Menu Démarrer:
Veuillez cliquer sur «Démarrer» → «Panneau de
configuration» → «Ajout/Suppression de programmes». (Windows XP uniquement)
Menu Démarrer classique:
Veuillez cliquer sur «Démarrer» → «Paramètres»
→ «Panneau de configuration» → «Ajout/Suppression de programmes». (Windows 2000/XP
uniquement)
• Sélectionnez «Replicator 2.0».
• Cliquez sur le bouton »Modifier» ou »Supprimer».
Étape 2: Cliquez sur «OK» pour continuer.
Sous Windows 2000, il est possible que le modem
n’apparaisse pas dans l’application «Supprimer le
périphérique en toute sécurité» dont l’icône se
situe dans la barre des tâches. Par conséquent, il
ne peut pas être arrêté. Si le message d’avertissement «Suppression dangereuse d’un périphérique» s’affiche, ignorez-le s’il s’agit de votre modem. Ce dernier n’en sera pas affecté et continuera à fonctionner normalement.
15
Étape 3: Cliquez sur «Terminer» pour terminer la
désinstallation du pilote.
Certifications
FCC
Cet appareil a fait l’objet d’essais et est conforme
aux dispositions du chapitre 15 du réglement de la
FCC. Son utilisation est soumise aux deux conditions
suivantes:
• Cet appareil ne peut pas provoquer d’interférences
nuisibles.
• L’appareil doit résister à toutes interférences, y
compris celles pouvant provoquer un fonctionnement incorrect
Clause de non responsabilité
Les informations contenues dans le présent document peuvent être modifiées sans avertissement
préalable. Le fabricant ne garantit en aucune manière l’exactitude ou l’intégralité des informations contenues dans le présent document et ne sera en aucun cas tenu responsable en cas de perte, de
manque à gagner, ou d’autres dommages commerciaux, y compris notamment de dommages commerciaux accidentels, indirects ou autres. Ce document ne peut être reproduit, en totalité ou en
partie, sous quelque forme que ce soit, ni transmis,
que ce soit par un moyen mécanique, par photocopie ou par enregistrement, enregistrement d’informations ou système d’accès à des données sans l’autorisation écrite du fabricant.
Service client:
En cas de problème de fonctionnement du Replicator 2.0, nous vous conseillons de contacter
votre revendeur ou distributeur local. Vous pouvez également nous contacter par mail [email protected].
Garantie 2 ans. Notre site Web comporte l’intégralité des conditions de garantie: www.dicota.com.
Tous les produits et logiciels mentionnés dans ce
document sont des marques déposées et sont la
propriété de leurs détenteurs respectifs. Sous toutes réserves.
16
español
Índice
Introducción ....................................................
Instalación de controladores ..............................
Comprobación de que la instalación
ha sido correcta ..............................................
Eliminación de controladores ............................
Notas
• Para un uso estable de Replicator 2.0, utilice el
adaptador de CA suministrado.
• Cuando se produce una sobrecarga de los puertos
del concentrador USB 2.0, actualice o desconecte y
vuelva a conectar Replicator 2.0 al ordenador para
restablecer los puertos.
17
17
20
20
Introducción
Gracias por haber elegido Replicator 2.0 . Ofrece una solución de conectividad ampliable, flexible y simple entre el
PC y cualquier dispositivo compatible con USB
1.0/1.1/2.0. Replicator 2.0 añade: 4 puertos USB
2.0; 2 puertos PS/2; 1 puerto serie RS232 y 1 puerto
LAN USB 2.0 compatible con velocidades de transferencia de 10/100 Mbps. Replicator 2.0 puede conectarse
a los periféricos USB 2.0 de alto rendimiento más
recientes como cámaras para videoconferencia de alta
resolución, escáneres e impresoras al mismo tiempo que
permite seguir usando dispositivos USB 1.1, serie y
PS/2. Replicator 2.0 elimina el tedio de conectar y desconectar con lo que se ahorra tiempo y se reduce el desgaste de las conexiones del portátil.
Instalación de controladores
• Windows 2000/XP
Paso 1:
• Introduzca el CD de controladores en la unidad de
CD-ROM y la instalación de controladores se iniciará
automáticamente. De no ser así:
• Haga doble clic en “Mi PC” y, a continuación, haga
doble clic en la unidad de CD-ROM; la instalación de
controladores se iniciará automáticamente. De no
ser así, haga doble clic en la carpeta Driver y haga
doble clic en “setup.exe”.
Paso 2: Para continuar seleccione el idioma.
Requisitos del sistema
• Puerto USB 2.0 disponible
• Windows 2000/XP
Contenido de la caja:
• 1 x USB 2.0 LAN Dock
• 1 x Cable USB 2.0 de tipo A a B (1800 mm)
• 1 x Adaptador de CA (CC 5 V/3 A)
• 1 x CD de controladores
• 1 x Manual del usuario
Descripción de los indicadores LED:
• Estado de buena conexión
– Al conectar Replicator 2.0 a un PC de sobremesa
o a un portátil, se iluminan todos los indicadores
LED (salvo el LED “10/100M Link” LED, que sólo
se ilumina si se realiza la conexión a Ethernet).
• Indicador LED POWER
– Al conectar sólo el adaptador de CA a Replicator
2.0 , se iluminan el indicador LED POWER y el
PS/2.
• Indicador LED ETHERNET
– Cuando existe una conexión Ethernet, el indicador
LED LAN se vuelve de color rojo.
– Cuando existe una conexión Ethernet a 100 Mbps,
el indicador LED LAN parpadea de color rojo y
verde.
Paso 3: Haga clic en “Siguiente” para continuar.
17
Paso 4: Haga clic en “Siguiente” para continuar.
Paso 6a: Haga clic en “Sí” y en “Finalizar”.
Paso 5a: Para continuar haga un clic en “Sí”
(bajo Windows 2000)
Paso 6b: Para concluir la instalación haga un clic en
“Terminar”.
Paso 5b: Para continuar haga un clic en “Terminar
no obstante” (bajo Windows XP)
18
Paso 7a:
• Ponga el chufe USB tipo A (enchufe plano) de un
cable USB versión 2.0 en el Replicator.
• Ponga el enchufe USB tipo B del cable USB versión
2.0 en un portal de su ordenador o portátil.
• Para continuar haga un clic en “Sí”.
(Bajo Windows 2000).
Paso 8: Para seguir haga un clic en “Continuar a pesar de todo”.
Paso 9: Haga un clic en “Concluir” para cerrar la
instalación del adaptador “ADM851X USB to Fast
Ethernet Adapter”.
Paso 7b:
• Después es mostrado “ADM851X USB to Fast
Ethernet Adapter”.
(Bajo Windows XP).
• Seleccione “Instalar Software utomáticamene”.
• Para seguir haga un clic en “Continuar”.
19
Comprobación de que la instalación ha sido
correcta
Eliminación de controladores
• Windows 2000/XP
Paso 1:
• Menú Inicio:
Haga clic en “Inicio” → “Panel de control” →
“Agregar o quitar programas” (sólo Windows XP
Menú Inicio clásico:
Haga clic en “Inicio” → “Configuración” → “Panel
de control” → “Agregar o quitar programas” (sólo Windows 2000/XP)
• Seleccione el elemento “Replicator 2.0”.
• Haga clic en el botón “Cambiar o quitar”.
• Windows 2000/XP
Paso 1:
• Para asegurarse de que ha instalado Replicator
2.0 correctamente, desplace el cursor hasta “Mi
PC” → “Panel de control” → “Sistema” → “Hardware” → “Administrador de dispositivos”.
• Haga doble clic en “Dispositivos de interfaz de
usuario (HID)”; se mostrará “Dispositivo compatible con HID” x 2 y “Dispositivo de interfaz humana USB” x 2.
• Al hacer doble clic en “Teclados”, se mostrará
“Dispositivo de teclado HID”.
• Al hacer doble clic en “Mouse y otros dispositivos
señaladores”, se mostrará “Mouse compatible
con HID”.
• Al hacer doble clic en “Adaptadores de red”, se
mostrará “DM851X USB To Fast Ethernet Adapter”.
• Al hacer doble clic en “Puertos (COM & LPT)”; se
mostrará “Prolific USB-to-Serial Com Port
(COMx)”.
• Al hacer doble clic en “Controladoras de bus serie
universal (USB)”, se mostrará “Concentrador
USB genérico” y “Dispositivo compuesto USB”.
Paso 2: Haga clic en “Aceptar” para continuar.
En el sistema operativo Windows 2000 puede suceder que el Modem no aparezca en el listón de tareas bajo el Icono “Eliminar Hardware con seguridad”, por cuyo motivo no puede ser parado. Si
apareciera la advertencia “Eliminación insegura de
Hardware” ignórelo entonces. El proceso no tiene
influencia negativa alguna sobre el Modem y continuará funcionando normalmente.
20
Paso 3: Haga clic en “Finalizar” para completar la
desinstalación del controlador.
Certificaciones
FCC
Este aparato ha sido probado y responde a la parte
15 de las regulaciones FCC. El funcionamiento del
aparato está sujeto a dos condiciones:
• El aparato no debe originar perturbaciones nocivas.
• El aparato debe aceptar todo tipo de perturbación, incluso si la perturbación limita el propio funcionamiento.
Exclusión de responsabilidad
La información del presente documento puede ser
modificada sin previo aviso. El fabricante no concede ningún tipo de promesa o garantía, ni implícita
ni explícita, con respecto a la exactitud o integridad
del presente documento y no acepta absolutamente
ninguna responsabilidad por pérdidas o beneficios
perdidos o cualquier otro daño comercial, los cuales no están limitados solamente a daños especiales, casuales consecuentes o demás daños
comerciales. El presente documento no puede ser
reproducido por medio alguno en su todo o en parte, mecánicamente, por fotocopia o por memorización, memorización informativa y sistemas de información, sin la autorización expresa del fabricante.
Servicio al cliente:
Si tuviera Ud. algún problema en el servicio del
Replicator 2.0, póngase entonces en contacto con
el comerciante o distribuidor de su localidad. De
lo contrario, Ud. puede contactarnos bajo
[email protected].
2 años de garantía. Podrá ver el texto completo sobre nuestras condiciones de garantía en Internet:
www.dicota.com.
Todos los productos y Software mencionados en el
presente documento son marcas registradas, las
cuales son propiedad de los respectivos titulares de
las marcas. Salvo errores.
21
italiano
Sommario
Introduzione ....................................................
Installazione dei driver ......................................
Verifica dell’installazione ....................................
Rimozione dei driver ........................................
Note
• Per assicurare il corretto funzionamento di USB 2.0
Port Replicator II, utilizzare l’adattatore fornito.
• Se si verifica un sovraccarico delle porte dell’HUB
USB 2.0, aggiornare la connessione oppure scollegare e ricollegare Replicator 2.0 al Notebook in
modo che le porte vengano reimpostate.
22
22
25
25
Introduzione
Replicator 2.0 rappresenta una soluzione semplice, flessibile e ad alto livello di scalabilit per il collegamento di PC
a qualsiasi periferica compatibile USB 1.0/1.1/2.0.
Replicator 2.0 viene fornito con: 4 porte USB 2.0, 2 porte PS/2, 1 porta seriale RS232 e 1 porta LAN USB 2.0
che supporta una velocit di trasferimento di 10/100
Mbps. Replicator 2.0 supporta il collegamento a periferiche USB 2.0 ad alte prestazioni dell'ultima generazione
quali video camere per videoconferenze, scanner e stampanti ad alta risoluzione utilizzando le periferiche USB
1.1, seriali e PS/2 esistenti. Replicator 2.0 elimina la necessit di collegare e scollegare periferiche dal computer,
con un conseguente risparmio di tempo e un minor deterioramento nel caso di computer portatili.
Installazione dei driver
• Windows 2000/XP
Passaggio 1:
• Inserire il CD dei driver nell’unit CD-ROM. Il programma di installazione dei driver verr avviato automaticamente. In caso contrario:
• Fare doppio clic su Risorse del Notebook, quindi fare
doppio clic sull’unit CD-ROM: il programma di installazione dei driver verr avviato automaticamente. In
caso contrario, fare doppio clic sulla cartella Driver
e quindi su setup.exe.
Passaggio 2: Sceglite la lingua per continuare.
Requisiti del sistema
• Porta USB 2.0 disponibile
• Windows 2000/XP
Contenuto della confezione:
• 1 x Unit Multi Dock LAN USB 2.0
• 1 x Cavo A/B USB 2.0 (1800 mm)
• 1 x Adattatore CA (5 V/3 A CC)
• 1 x CD dei driver
• 1 x Manuale dell’utente
Descrizione dell’indicatore LED:
• Collegamento ottimale
– Quando Replicator 2.0 viene collegato a un PC
desktop o portatile, si illuminano tutti gli indicatori
LED ad eccezione di quello relativo al collegamento
a 10/100 Mbps, che si illumina solo quando la
periferica collegata a una rete Ethernet.
• LED di accensione
– Quando a Replicator 2.0 collegato solo l’adattatore
di alimentazione, si illuminano il LED di alimentazione e il LED PS/2.
• LED Ethernet
– Quando la periferica viene collegata a una rete
Ethernet, il LED LAN diventa rosso.
– Nel caso di un collegamento Ethernet a 100 Mbps,
il LED LAN lampegger in rosso e in verde.
Passaggio 3: Fare clic su “Avanti” per continuare.
22
Passaggio 4: Fare clic su “Avanti” per continuare.
Passaggio 6a: Fare clic su “Si” e quindi su “Fine”.
Passaggio 5a: Clic su “Si” per proseguire.
(con Windows 2000)
Passaggio 6b: Clic su “Continuare ugualmente” per
completare l'installazione.
Passaggio 5b: Cliccate “Continuare” per continuare
(sotto Windows XP).
23
Passaggio 7a:
• Collegate il connettore USB di tipo A (connettore
piatto) del cavo USB versione 2.0 al Replicator.
• Collegate il connettore USB di tipo B del cavo USB
versione 2.0 a una porta abilitata del vostro calcolatore o Notebook.
• Cliccate sul tasto “Sì” per continuare. (con Windows
2000).
Passaggio 8: Cliccate “Continuare” per continuare.
Passaggio 9: Cliccate sul tasto “Completare”, per
concludere l’installazione del driver “ADM851X USB
To Fast Ethernet Adapter”.
Passaggio 7b:
• Segue l’indicazione “ADM851X USB to Fast Ethernet Adapter” (con Windows XP).
• Scegliete “Installiare automaticamente il software”.
• Cliccate “Continuare” per continuare.
24
Verifica dell'installazione
Rimozione dei driver
• Windows 2000/XP
• Windows 2000/XP
Passaggio 1:
• Per verificare che Replicator 2.0 sia stato installato
correttamente, selezionare “Risorse del computer” → “Panello di controllo” → “Sistema” →
“Hardware” → “Gestione periferiche”.
• Fare doppio clic su “Human Interface Device
(HID)”: verranno visualizzate due opzioni per “Periferica compatibile HID” e due opzioni per “Periferica USB Human Interface”.
• Se si fa doppio clic su “Tastiere” verr visualizzata
l’opzione “Tastiera HID”.
• Se si fa doppio clic su “Mouse e altre periferiche di
puntamento” verr visualizzata l’opzione “Mouse
compatibile HID”.
• Se si fa doppio clic su “Schede di rete” verr visualizzata l’opzione “ADM851X USB To Fast Ethernet
Adapter”.
• Se si fa doppio clic su “Porte (COM e LPT)” verr
visualizzata l’opzione “Prolific USB-to-Serial Com
Port (COMx)”.
• Se si fa doppio clic su “Controller USB (Universal
serial bus)” verranno visualizzate le opzioni “HUB
USB generico” e “Periferica USB composita”.
Passaggio 1:
• Menu di avvio:
Fare clic sul pulsante “Start” → “Panello di Controllo” → “Installazione applicazioni”. (Solo Windows XP)
Menu di avvio classico:
Fare clic sul pulsante “Start” → “Impostazioni” →
“Panello di controllo” → “Installazione applicazioni”. (Solo Windows 2000 e Windows XP)
• Selezionare “Replicator 2.0”.
• Fare clic su “Cambia/Rimuovi”.
Passaggio 2: Fare clic su “OK” per continuare.
Con il sistema operativo Windows 2000 il modem
potrebbe eventualmente non apparire sotto l’icona
„rimozione sicura dell’hardware“ nel driver e per
questo motivo potrebbe non essere fermato. In caso della segnalazione „eliminazione dell’hardware
non sicura“ si prega di ignorarla. Questo processo
non ha nessun effetto negativo sul modem che
continuerà a funzionare regolarmente.
25
Passaggio 3: Fare clic su “Fine” per completare la
disinstallazione dei driver.
Certificazioni
FCC
L’apparecchio è stato collaudato e risponde alla parte 15 del regolamento FCC. L’esercizio dell’unità
presuppone due condizioni:
• L’apparecchio non deve provocare interferenze
dannose.
• L’apparecchio deve essere in grado di resistere a
ogni tipo di interferenza, anche se questa interferenza limita il proprio esercizio.
Esclusione dalla responsabilità
Le informazioni contenute nel documento sono soggette a modifica senza preavviso. Il produttore dell’apparecchio non da alcuna garanzia implicita o
esplicita in merito alla correttezza o alla completezza del presente documento e non si assume in alcun modo una responsabilità per la perdita di utili o
altri danni commerciali, ad inclusione ma non limitatamente a danni commerciali specifici, casuali, conseguenti o di altro tipo. Non è permesso riprodurre
o trasmettere il presente documento in parte o in
tutto in modo meccanico, in forma di fotocopia o
salvandolo come file su sistemi di registrazione di informazioni e sistemi di accesso a informazioni senza l’espresso assenso per iscritto del produttore.
Servizio di assistenza:
Qualora dovessero nascere difficoltà con l’esercizio
del vostro Replicator 2.0, vi preghiamo di mettervi
in contatto con il vostro rivenditore o distributore
locale. Inoltre potete sempre contattarci tramite
[email protected].
2 anni di garanzia Troverete il testo completo delle
nostre condizioni di garanzia in internet sul sito:
www.dicota.com.
Tutti i prodotti e la software sopraindicati sono
marchi registrati dei rispettivi titolari. Con riserva di
errori.
26