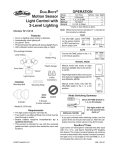
1
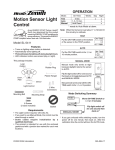
Motion
Sensor Light
Control
As an ENERGY STAR® Partner, Heath®/Zenith has determined that this product meets
the ENERGY STAR® guidelines for energy
efficiency. This product is ENERGY STAR®
compliant when used with 120 Watt bulbs.
Mode:
Test
Auto
Manual
On-Time:
5 Sec
1, 5, 10 min.
Until Dawn*
x
x
x
x
Note: When first turned on wait about 1 1/2 minutes for
the circuitry to calibrate.
TEST
ON-TIME
AUTO
Put the ON-TIME switch in the 1, 5,
or 10 minute position.
ON-TIME
10 5 1 TEST
This package includes:
MANUAL MODE
Manual mode only works at night
because daylight returns the sensor
to AUTO.
Rubber Plug
Lamp Holders
2 Shells
Flip the light switch off for one second
then back on to toggle between AUTO
and MANUAL MODE.
6 Screws
(3 sizes included)
... back on.
Mode Switching Summary
Mounting Strap
Mounting Bolt
Plastic
Hanger
1 Second OFF
then...
Manual mode works only with the
ON-TIME switch in the 1, 5, or 10
position.
Gasket
Light Control
2 Wire
Connectors
TEST
AUTO
Requirements
• The Light Control requires 120-volts AC.
• If you want to use Manual Mode, the control must be
wired through a switch.
• Some codes require installation by a qualified
electrician.
• This product is intended for use with the enclosed
gasket and with a junction box marked for use in wet
locations.
© 2006 DESA Specialty Products™
Night
10 5 1 TEST
Turns on lighting when motion is detected.
Automatically turns lighting off.
Photocell keeps the lighting off during daylight hours.
LED indicates motion was sensed (day or night).
Sensor
Day
* resets to Auto Mode at dawn.
Features
Cover
Plate
Works:
Put the ON-TIME switch on the bottom
of the sensor in the TEST position.
Model SH-5412
•
•
•
•
OPERATION
MANUAL MODE
Move ON-TIME Switch to
1, 5, or 10 minutes
Flip light switch off
for one second then
back on*
* If you get confused while switching modes, turn the
power off for one minute, then back on. After the calibration time the control will be in the AUTO mode.
598-1158-01
INSTALLATION
❒ Twist the junction box wires and fixture wires together
as shown. Secure with wire connectors.
For easy installation, select an existing light with a wall
switch for replacement.
Mounting
Strap
White to
White
Black to
Black
Rubber
Plug
Wall Mount
Eave Mount
Mounting
Bolt
For under eave installation, the sensor head must
be rotated as shown in the next two steps for proper
operation and to avoid the risk of electrical shock.
Gasket
For eave mount only:
Junction box ground wire to
green ground screw on fixture.
❒ Swing the sensor head towards the clamp screw
joint.
Controls
Clamp Screw
MOUNT THE LIGHT CONTROL
❒ Align the Light Control cover plate and cover plate
gasket. Secure with the mounting bolt.
❒ Align the three slots in the decorative shell with the
lamp holder pins. Push the shell in and then twist
clockwise to lock. Repeat for other shell.
❒ Then rotate the sensor head clockwise 180° so the
controls face down.
Shell Slot
Controls
❒ Push the Rubber Plug firmly into place.
❒ If a wet location junction box was not used, caulk
the wall plate mounting surface with silicone
weather sealant.
Controls
If the sensor pops out of the ball joint, loosen the
clamp screw and push the sensor back into the ball
joint. Tighten the clamp screw when done.
To avoid water damage and
electrical shock, keep lamp
holders 30° below horizontal.
WIRE THE LIGHT CONTROL
❒ Turn power off at the fuse or circuit breaker.
❒ Remove the existing light fixture.
❒ Install the mounting strap as shown using two screws
that fit your junction box.
❒ The plastic hanger can be used to hold the fixture
while wiring. The small end of the plastic hanger
can be threaded through the hole in the center of
the cover plate. The small end then goes into one
of the slots on the mounting strap.
❒ Route the Light Control’s wires through the large
gasket holes.
Lock Nut
Lens
Keep lamps at least
1" (2.5 cm) from the
sensor. Do not allow
the lamps to block
the lens.
❒ Adjust the lamp holders by loosening the lock nuts
but do not rotate the lamp holders more than 180°
from the factory setting. When screwing in the
floodlamps, do not overtighten.
2
598-1158-01
TEST AND ADJUSTMENT
❒ Turn on the circuit breaker and light switch.
NOTE: Sensor has a 1 1/2 minute warm up period
before it will detect motion. When first turned
on, wait 1 1/2 minutes.
❒ Turn the RANGE control to the mid position and the
ON-TIME control to the TEST position.
RANGE
ON-TIME
ON-TIME
10 5 1 TEST
10 5 1 TEST
MINUTES
RANGE
MIN
MAX
MIN
MAX
Aim Sensor
Down for Short
Coverage
Aim Sensor
Higher for Long
Coverage
WARNING: Risk of fire. Do not aim the lamps
at a combustible surface within 3 ft. (1 m).
SPECIFICATIONS
Range . . . . . . . . . . . . Up to 70 ft. (21 m) [varies with
surrounding temperature].
Sensing Angle . . . . . . Up to 180°
Electrical Load . . . . . . Up to 300 Watt Maximum Incandescent [Up to 150 Watt
maximum each lamp holder.]
Power Requirements . 120 VAC, 60 Hz
Operating Modes . . . . TEST, AUTO, and MANUAL
MODE
Time Delay . . . . . . . . 1, 5, 10 minutes
Range . . . . . . . . . . . . Adjustable
180°
8 ft.
(2.4 m)
70 ft.
(21 m)
Maximum
Coverage Angle
DESA Specialty Products™ reserves the right to discontinue products and to change specifications at any
time without incurring any obligation to incorporate
new features in products previously sold.
The detector is most sensitive to motion across its field
of view.
Motion
Sensor
598-1158-01
Ball
Joint
❒ Set the amount of TIME you want the lights to stay
on after motion is detected (1, 5, or 10 minutes).
• Objects that change temperature rapidly, such as
heating vents and air conditioners. These heat
sources could cause false triggering.
• Areas where pets or traffic may trigger the control.
• Nearby large, light-colored objects reflecting light
may trigger the shut-off feature. Do not point other
lights at the sensor.
Least Sensitive
❒ Walk through the coverage
area noting where you are
when the lights turn on (also,
the LED will flash several times
when motion is detected). Move
the sensor head up, down, or
sideways to change the coverage area. Keep the sensor at
least 1" (2.5 cm) away from
the lamps.
❒ Secure the sensor head by
tightening the clamp screw.
Do not overtighten the screw.
Avoid aiming the control at:
Motion
Clamp
Screw
❒ Adjust the RANGE as needed.
RANGE set too high may
increase false triggering.
Bottom of Sensor
Maximum Range
❒ Loosen the clamp screw in the
sensor ball joint and gently
rotate the sensor.
Most Sensitive
3
TROUBLESHOOTING GUIDE
SYMPTOM
POSSIBLE CAUSE
SYMPTOM
POSSIBLE CAUSE
Lights will not come
on.
1. Light switch is turned off.
2. F l o o d l i g h t i s l o o s e o r
burned out.
3. Fuse is blown or circuit breaker
is turned off.
4. Daylight turn-off is in effect (recheck after dark).
5. Incorrect circuit wiring, if this is a
new installation.
6. Re-aim the sensor to cover desired area.
Lights stay on
continuously.
1. A flood lamp is positioned too close to
the sensor or pointed at nearby objects
that cause heat to trigger the sensor.
(Reposition the lamp away from the
sensor or nearby objects).
2. Light Control is pointed toward a heat
source like an air vent, dryer vent, or
brightly-painted heat-reflective surface. (Reposition sensor).
3. Light Control is in Manual Mode.
(Switch to Auto.)
Lights come on
in daylight.
1. Light Control may be installed in
a relatively dark location.
2. L i g h t C o n t r o l i s i n Test.
(Set control switch to an
ON-TIME position).
Lights flash on
and off.
Lights come on
for no apparent
reason.
1. Light Control may be sensing
small animals or automobile traffic (re-aim sensor).
2. R a n g e i s s e t t o o h i g h .
(Reduce Range).
1. Heat or light from the lamps may be
turning the Light Control on and off.
(Reposition the lamps away from the
sensor).
2. Heat being reflected from other objects
may be affecting the sensor. (Reposition sensor).
3. Light Control is in the Test mode and
warming up. (Flashing is normal under
these conditions).
4. Light may be leaking through the
floodlamp reflectors. (Make sure the
metal lamp protectors are installed.)
TECHNICAL SERVICE
Please call 1-800-858-8501 for assistance before returning product to store.
If you experience a problem, follow this guide. You may also want to visit our Web site at: www.desatech.com. If the
problem persists, call* for assistance at 1-800-858-8501, 7:30 AM to 4:30 PM CST (M-F). You may also write* to:
DESA Specialty Products™
P.O. Box 90004, Bowling Green, KY 42102-9004
ATTN: Technical Service Specialty Products
* If contacting Technical Service, please have the following information available: Model Number, Date of Purchase, and Place of Purchase.
No Service Parts Available for this Product
TEN YEAR LIMITED WARRANTY
This is a “Limited Warranty” which gives you specific legal rights. You may also have other rights which vary from state
to state or province to province.
For a period of ten years from the date of purchase, any malfunction caused by factory defective parts or workmanship
will be corrected at no charge to you.
Not Covered - Repair service, adjustment and calibration due to misuse, abuse or negligence, light bulbs, batteries,
and other expendable items are not covered by this warranty. Unauthorized service or modification of the product or of
any furnished component will void this warranty in its entirety. This warranty does not include reimbursement for inconvenience, installation, setup time, loss of use, unauthorized service, or return shipping charges.
This warranty covers only DESA Specialty Products™ assembled products and is not extended to other equipment and
components that a customer uses in conjunction with our products.
THIS WARRANTY IS EXPRESSLY IN LIEU OF ALL OTHER WARRANTIES, EXPRESS OR IMPLIED, INCLUDING ANY
WARRANTY, REPRESENTATION OR CONDITION OF MERCHANT ABILITY OR THAT THE PRODUCTS ARE FIT FOR
ANY PARTICULAR PURPOSE OR USE, AND SPECIFICALLY IN LIEU OF ALL SPECIAL, INDIRECT, INCIDENTAL,
OR CONSEQUENTIAL DAMAGES.
REPAIR OR REPLACEMENT SHALL BE THE SOLE REMEDY OF THE CUSTOMER AND THERE SHALL BE NO LIABILITY
ON THE PART OF DESA SPECIALTY Products™ FOR ANY SPECIAL, INDIRECT, INCIDENTAL, OR CONSEQUENTIAL
DAMAGES, INCLUDING BUT NOT LIMITED TO ANY LOSS OF BUSINESS OR PROFITS, WHETHER OR NOT FORESEEABLE. Some states or provinces do not allow the exclusion or limitation of incidental or consequential damages, so the
above limitation or exclusion may not apply to you. Proof of purchase is required for warranty claims.
4
598-1158-01
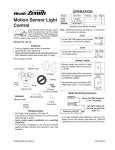
Control de luz
del detector de
movimiento
FUNCIONAMIENTO
Modalidad: tiempo encendido Trabaja: Día Noche
Prueba
Autom.
Manual
Como socio de ENERGY STAR®, Heath®/
Zenith ha determinado que este producto
cumple con las pautas de ENERGY STAR®
con respecto a eficiencia de energía. Este
producto está en conformidad con ENERGY STAR® cuando se usa con focos
de 120 vatios.
x
x
x
Nota: Cuando lo prenda por primera vez espere 1 1/2
minutos para que el circuito se claibre.
Para PRUEBA:
Ponga el interruptor de tiempo (ONTIME), al fondo del detector, en la
posición de prueba (TEST).
Características
Prende la luz cuando detecta movimiento.
Apaga la luz automáticamente.
La fotocélula mantiene la luz apagada durante el día.
LED indica que se ha detectado movimiento (durante
el día o la noche).
Portalámparas
Ponga el interruptor de tiempo
(ON-TIME) en la posición de
1, 5 ó 10 minutos.
ON-TIME
10 5 1 TEST
El modo manual funciona sólo por la
noche porque la luz del día pone al
detector en modo AUTOMATICO.
Colgador plástico
Apague el interruptor por un segundo y
vuélvalo a prender para conmutar entre
MODO AUTOMATICO y MANUAL.
Detector
Control de luz
10 5 1 TEST
Para MODO MANUAL:
Enchufe de caucho
Placa
cubertora
ON-TIME
Para AUTOMATICO:
Este paquete tiene:
1 perno
x
*Se pone en Automático al amanecer.
Modelo SH-5412
•
•
•
•
5 seg.
1, 5 ó 10 min.
Hasta el
amanecer*
2 conectores
de alambre
1 segundo
APAGADO
luego...
El modo manual funciona sólo con el
interruptor ON-TIME en la posición
1, 5 ó 10.
Lámina de montaje
...préndalo.
Resumen de las modalidades del
interruptor
Empaque
2 protectores
6 tornillos
(3 dimensiones)
PRUEBA
Requisitos
AUTOM.
• El Control de Luz requiere 120 VCA.
• Para usar el Sobrecontrol Manual, conecte el control
con un interruptor.
• Algunos códigos requieren instalación por un
electricista calificado.
• Se recomienda usar este producto con el empaque
provisto y con una caja de empalme marcada para
uso en lugares húmedos.
©
2006 DESA Specialty Products™
598-1158-01
MODO
MANUAL
Mueva el interruptor de tiempo
(ON-TIME) a 1, 5 ó 10 minutos
Apague el interruptor por
un segundo y préndalo de
nuevo*
* Si se confunde mientras cambia de fases, apague
la electricidad por un minuto y préndala de nuevo.
Después del tiempo de calibración el control estará
en fase AUTO(MATICA).
5
598-1158-01 S
INSTALACION
❒ Conecte los cables de la caja de empalme con los
cables del aparato de luz, como se muestra. Tuérazalos
juntos y asegúrelos con un conector de cables.
lámina de Blanco a
Negro a
Montaje
Negro
Blanco
Enchufe
de Caucho
Para una fácil instalación escoja una luz con un
interruptor de pared.
Montaje en pared
Montaje en alero
Perno de
Montaje
Para instalarlo bajo el alero, la cabeza del detector
debe ser girada como se muestra en los dos pasos
siguientes para evitar el riesgo de un choque eléctrico.
Empaquetadura
Sólo para montaje eléctrico:
Cable de a tierra de la caja de empalme
al tornillo verde de a tierra del aparato.
❒ Gire la cabeza del detector hacia la unión del tornillo
sujetador.
Controles
Tornillo Sujetador
INSTALE EL CONTROL DE LUZ
❒ Alinee la placa cubertora del Control de Luz con
el empaque de la placa cubertora. Asegure con el
perno de montaje.
❒ Alinee las tres ranuras del casco decorativo con los
sujetadores de la lámpara. Empuje el casco hacia
adentro y gírelo hacia la derecha para asegurarlo.
Haga lo mismo con el otro casco.
❒ Entonces gire la cabeza del detector hacia la
derecha por 180° hasta que los controles miren
hacia abajo.
Controles
Ranura del protector
❒ Empuje el tapón de caucho firmemente hasta que encaje.
❒ Si no se usó una caja de empalme para sitio mojado,
calafatee la superficie de montaje de la placa de pared
con un sellador de silicona contra la intemperie.
Controles
Si el detector se sale de la unión esférica, afloje el tornillo
sujetador y empuje el detector hacia dentro de la unión
esférica. Apriete el tornillo sujetador cuando termine.
Para evitar daño causado por el agua y riesgo de
electrocución, mantenga los portalámparas a 30°
debajo de la línea horizontal.
CONECTE EL CONTROL DE LUZ
❒
❒
❒
❒
ADVERTENCIA: Apague la energía en el fusible
o cortacircuitos.
Quite el aparato de luz existente.
Instale la lámina de montaje a la caja de empalme usando tornillos apropiados para la caja de empalme.
Se puede usar el colgador plástico para sostener
el aparato mientras se instala el cableado. El extremo pequeño del colgador se puede pasar por
el agujero en el centro de la placa cubertora. El
extremo pequeño va luego dentro de las ranuras
de la lámina de montaje.
Pase todos los cables del aparato por los agujeros
grandes del empaque, como se muestra.
Contratuercas
Placa
translúcida
Mantenga las lámparas
por lo menos a 2.5 cm
del detector. No deje que
las lámparas bloqueen la
placa translúcida.
❒ Ajuste los portalámparas aflojando las contratuercas, pero no los gire más de 180° de la calibración
hecha en fábrica. Cuando atornille los proyectores
no los apriete demasiado.
6
598-1158-01
PRUEBA Y AJUSTE
❒ Prenda el cortacircuitos y el interruptor de luz.
NOTA:
El detector tiene un período de cerca de 1 1/2
minutos de calentamiento antes de detectar
movimiento. Cuando lo prenda por primera
vez, espere 1 1/2 minutos.
❒ Gire el control RANGE a la posición media y el
control ON-TIME a la posición TEST.
RANGE
ON-TIME
ON-TIME
10 5 1 TEST
10 5 1 TEST
MINUTES
MAX
MIN
MAX
Evite apuntar el control hacia:
ESPECIFICACIONES
Angulo de
Cobertura Máxima
El detector es menos sensible del movimiento que se
dirige hacia él.
DESA Specialty Products™ se reserva el derecho de
descontinuar productos y de cambiar especificaciones
a cualquier momento sin incurrir en ninguna obligación
de tener que incorporar nuevas características en los
productos vendidos con anterioridad.
Movimiento
Detector
598-1158-01
Apunte el
detector más
arriba para
mayor cobertura
Alcance . . . . . . . . . . . . . . . . Hasta 70 pies (21 m) [varía
de acuerdo a la temperatura que le rodea]
Ángulo de sensibilidad. . . . . Hasta 180˚
Carga eléctrica . . . . . . . . . . Hasta 300 vatios máximo
de luz incandescente
[hasta 150 vatios máximo
por cada portalámparas].
Requisitos de potencia . . . . 120 V ca, 60 Hz
Modos de operación . . . . . . PRUEBA, AUTOMATICO,
y MODO MANUAL
Retardo de Tiempo . . . . . . . 1, 5, 10 minutos
Alcance . . . . . . . . . . . . . . . . Ajustable
70 pies
(21 m)
Lo menos sensible
Apunte el
detector hacia
abajo para poca
cobertura
ADVERTENCIA: Riesgo de incendio. No apunte
las lámparas a superficies combustibles dentro
de un 3 pies (1 m).
180°
Movimiento
Unión
Esférica
❒ Fije el período de tiempo (ON-TIME) que la luz debe
quedarse prendida después de detectar movimiento
(1, 5 ó 10 minutos).
• Objetos que cambien rápidamente de temperatura
tales como ductos de calefacción y acondicionadores de aire. Estas fuentes de calor pueden causar
falsas alarmas.
• Areas donde animales domésticos o el tráfico
puedan activar el control.
• Los objetos grandes cercanos y de colores resplandecientes que reflejan la luz del día pueden
hacer que el detector se apague. No apunte otras
luces hacia el detector.
Alcance Máximo
❒ Camine por el área a protegerse y dése cuenta dónde
está cuando se prende la luz.
Mueva la cabeza del detector hacia arriba, hacia abajo
o hacia los lados para cambiar el área de protección.
Mantenga al detector por
lo menos a 1 pulgada (2.5
cm) de las lámparas.
❒ Asegure la puntería de la cabeza del detector ajustando el
tornillo sujetador. No lo apriete demasiado.
Parte de abajo del detector
8 pies
(2.4 m)
Tornillo
Sujetador
❒ Fije la sensibilidad (RANGE)
como necesite. Demasiada
sensibilidad puede aumentar
las falsas alarmas.
RANGE
MIN
❒ Afloje el tornillo sujetador en la
unión esférica y gire despacio
el detector.
Lo más sensible
7
GUIA DE INVESTIGACION DE AVERIAS
SINTOMA
POSIBLE CAUSA
SINTOMA
POSIBLE CAUSA
La Luz no se enciende.
1. El interruptor de luz está apagado.
2. El faro está flojo o fundido.
3. El fusible está quemado o el
cortacircuitos está apagado.
4. La desconexión de luz del día
está en efecto. (Compruébelo cuando comience la obscuridad).
5. Alambrado incorrecto, si ésta es
una nueva instalación.
6. No está apuntando correctamente. (Apunte de nuevo el
detector para proteger el área
deseada).
La luz se
1. Un faro está colocado demasiado cerca
queda
al detector o apunta a objetos cercanos
prendida
que hace que el calor active el detector. (Reposicione la lámpara lejos del
continuamente.
detector o de los objetos cercanos).
2. El Control de Luz está apuntando
hacia una fuente de calor tal como un
conducto de aire, de secadora o hacia
una superficie con pintura brillante y
que refleja el calor. (Reposicione el
detector).
3. El control de luz está en la Modo
Manual. (Cámbiela a Automática).
La luz se prende
durante el día.
1. El Control de Luz puede estar
instalado en un lugar relativamente oscuro.
2. El Control de Luz está en fase de
Prueba. (Fije el interruptor del control a la posición de TIEMPO).
La luz se prende
sin ninguna razón
aparente.
1. El Control de Luz puede estar
detectando animales pequeños
o el trásito de automóviles. (Reapunte el detector).
2. La Sensibilidad es demasiado
alta. (Reduzca la sensibilidad).
L a l u z s e 1. El calor o la luz de las lámparas pueden estar prendiendo y apagando
prende y se
el Control de Luz. (Reposicione las
apaga.
lámparas lejos del detector).
2. El calor que se refleja de otros objetos
puede estar afectando al detector.
(Reposicione el detector).
3. El Control de Luz está en fase de
Prueba y calentándose. (El prenderse
y apagarse es normal bajo estas
condiciones).
4. La luz puede estar escapándose por los
reflectores del faro. (Cambie los faros con
nuevas lámparas de alta calidad).
SERVICIO TÉCNICO
(No enviar los productos)
Si tiene algún problema por favor siga esta guía. Lo sentimos, pero no podemos contestar preguntas en español
por teléfono. Usted puede también escribir* a:
DESA Specialty Products™
P.O. Box 90004, Bowling Green, KY 42102-9004
* Si se llama al Servicio Técnico, por favor tener lista la siguiente información: Número de Modelo, Fecha de
compra y Lugar de compra.
No hay piezas de servicio disponibles para este producto
GARANTÍA LIMITADA A 10 AÑOS
Esta es una “Garantía Limitada” que le da a Ud. derechos legales específicos. Usted puede también tener otros derechos que varían
de estado a estado o de provincia a provincia.
Por un período de 10 años desde la fecha de compra, cualquier mal funcionamiento ocasionado por partes defectuosas de fábrica o
mano de obra será corregido sin cargo para Ud.
No cubierto - Servicio de reparación, ajuste y calibración debido al mal uso, abuso o negligencia, bombillas, baterías, u otras partes
fungibles no están cubiertas por esta garantía. Los Servicios no autorizados o modificaciones del producto o de cualquier componente
que se provee invalidarán esta garantía en su totalidad. Esta garantía no incluye reembolso por inconveniencia, instalación, tiempo de
instalación, perdida de uso, servicio no autorizado, o costos de transporte de retorno.
Esta garantía cubre solamente los productos ensamblados por DESA Specialty Products™ y no se extiende a otros equipos o componentes que el consumidor usa junto con nuestros productos.
ESTA GARANTÍA ESTÁ EXPRESAMENTE EN LUGAR DE OTRAS GARANTÍAS, EXPRESADAS O SOBREENTENDIDAS, INCLUYENDO CUALQUIER GARANTÍA, REPRESENTACIÓN O CONDICIÓN DE COMERCIABILIDAD O QUE LOS PRODUCTOS SE
ADAPTEN PARA CUALQUIER PROPÓSITO O USO EN PARTICULAR, Y ESPECIFICAMENTE EN LUGAR DE TODOS LOS DAÑOS
ESPECIALES, INDIRECTOS, INCIDENTALES Y CONSECUENTES.
LA REPARACIÓN O EL REEMPLAZO DEBERÍA SER LA ÚNICA SOLUCIÓN DEL CLIENTE Y NO HABRÁ RESPONSABILIDAD
POR PARTE DE DESA SPECIALTY Products™ POR CUALQUIER DAÑO ESPECIAL, INDIRECTO, INCIDENTAL O CONSECUENTE,
INCLUIDOS PERO NO LIMITADOS A CUALQUIER PÉRDIDA DE NEGOCIO O GANACIAS SEAN O NO PREVISIBLES. Algunos
estados o provincias no permiten la exclusión o limitación de daños incidentales o consecuentes, de modo que la limitación o exclusión
arriba indicada puede que no se aplique a Ud. Para reclamos por la garantía se requiere la prueba de compra.
8
598-1158-01