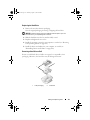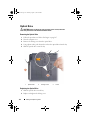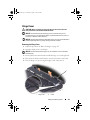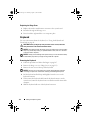
1
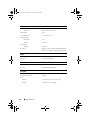
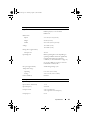
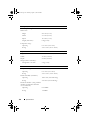
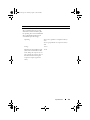
book.book Page 1 Thursday, August 7, 2008 5:00 PM
Dell™ 500 Owner’s Manual
Model PP29L
w w w. d e l l . c o m | s u p p o r t . d e l l . c o m
book.book Page 2 Thursday, August 7, 2008 5:00 PM
Notes, Notices, and Cautions
NOTE: A NOTE indicates important information that helps you make better use of
your computer.
NOTICE: A NOTICE indicates either potential damage to hardware or loss of data
and tells you how to avoid the problem.
CAUTION: A CAUTION indicates a potential for property damage, personal injury,
or death.
___________________
Information in this document is subject to change without notice.
© 2008 Dell Inc. All rights reserved.
Reproduction in any manner whatsoever without the written permission of Dell Inc. is strictly forbidden.
Trademarks used in this text: Dell, the DELL logo, and Wi-Fi Catcher are trademarks of Dell Inc.;
Intel is a registered trademark and Celeron is a trademark of Intel Corporation in United States and
other countries.; Microsoft and Windows are either trademarks or registered trademarks of Microsoft
Corporation in the United States and/or other countries; Bluetooth is a registered trademark owned by
Bluetooth SIG, Inc. and is used by Dell under license.
Other trademarks and trade names may be used in this document to refer to either the entities claiming
the marks and names or their products. Dell Inc. disclaims any proprietary interest in trademarks and
trade names other than its own.
Model PP29L
July 2008
P/N U739D
Rev. A03
book.book Page 3 Thursday, August 7, 2008 5:00 PM
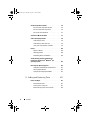
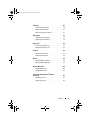
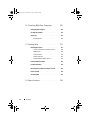
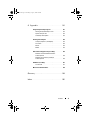
Contents
Finding Information
1
About Your Computer
Front View
19
. . . . . . . . . . . . . . . . . . . . . . . .
19
. . . . . . . . . . . . . . . . . . . . . .
Right Side View
Back View
13
. . . . . . . . . . . . . . .
Left Side View
24
. . . . . . . . . . . . . . . . . . . . .
26
. . . . . . . . . . . . . . . . . . . . . . . .
27
Bottom View
2
. . . . . . . . . . . . . . . . . . .
. . . . . . . . . . . . . . . . . . . . . . .
Setting Up Your Computer .
Connecting to the Internet
. . . . . . . . . . .
29
. . . . . . . . . . . . . . .
29
Setting Up Your Internet Connection .
. . . . . . .
30
. . . . .
31
. . . . . . . . . . . . . .
31
. . . . . . . . . . . . . . . . . . .
34
. . . . . . . . . . . . . . . . . . . .
35
Transferring Information to a New Computer
Windows Easy Transfer
Setting Up a Printer
Printer Cable
28
. . . . . . . . . . . . .
35
. . . . . . . . . . . . . . .
36
. . . . . . . . . . . . . . . . . .
36
Connecting a USB Printer
Power Protection Devices
Surge Protectors
Line Conditioners .
. . . . . . . . . . . . . . . . .
Uninterruptible Power Supplies
. . . . . . . . . .
Contents
37
37
3
book.book Page 4 Thursday, August 7, 2008 5:00 PM
3
Using the Display
. . . . . . . . . . . . . . . . . .
39
Adjusting Brightness
. . . . . . . . . . . . . . . . . .
39
Switching the Video Image From Your
Computer Display To a Projector . . .
. . . . . . . . .
Setting Display Resolution and Refresh Rate .
4
. . . . .
40
. . . .
41
. . . . . . . . . . . . . . . . . . . . .
41
Using the Keyboard and Touch Pad
Numeric Keypad
Key Combinations
. . . . . . . . . . . . . . . . . . . .
System Functions
. . . . . . . . . . . . . . . . . .
. . . . . . . . . . . . . . . . . . . . . . .
42
. . . . . . . . . . . . . . . .
® Windows® Logo Key Functions . . . .
Microsoft
42
Dell™ QuickSet Key Combinations
. . . . . . . . .
43
. . . . . . . . . . . .
43
. . . . . . . . . . . . . . . . . . . . . . . .
44
Adjusting Keyboard Settings
Touch Pad
Customizing the Touch Pad .
Using a Battery
45
. . . . . . . . . . . . . . . . . . . .
47
. . . . . . . . . . . . . . . . . .
Checking the Battery Charge
. . . . . . . . . . . . . .
Dell QuickSet Battery Meter
. . . . . . . . . . . .
Microsoft® Windows® Battery Meter
Contents
43
. . . . . . . . . . . .
Battery Performance
4
42
42
Power Management
5
42
. . . . . . . . . . . . . . . . .
Display Functions .
Battery
39
47
48
48
. . . . . . .
49
Low-Battery Warning
. . . . . . . . . . . . . . .
49
Conserving Battery Power
. . . . . . . . . . . . . . .
49
book.book Page 5 Thursday, August 7, 2008 5:00 PM
Power Management Modes
Standby Mode
. . . . . . . . . . . . . .
50
. . . . . . . . . . . . . . . . . . .
50
Hibernate Mode
. . . . . . .
51
Accessing Power Options Properties
. . . . . . .
51
Charging the Battery
. . . . . . . . . . . . . . . . . .
51
Replacing the Battery
. . . . . . . . . . . . . . . . . .
52
. . . . . . . . . . . . . . . . . . . .
53
Using Multimedia
Playing Media
. . . . . . . . . . . . . . . . . .
55
. . . . . . . . . . . . . . . . . . . . . .
55
Copying CD and DVD Media
. . . . . . . . . . . . . .
How to Copy a CD or DVD
. . . . . . . . . . . . .
Helpful Tips
57
57
. . . . . . . . . .
58
. . . . . . . . . . . . . . . . . . . . .
58
Using Blank CD and DVD Media
7
50
Configuring Power Management Settings
Storing a Battery
6
. . . . . . . . . . . . . . . . . .
Adjusting the Volume
. . . . . . . . . . . . . . . . . .
59
Adjusting the Picture
. . . . . . . . . . . . . . . . . .
60
. . . . . . . . . . . . . . . . . . . . . . .
61
Using Cards
ExpressCards
. . . . . . . . . . . . . . . . . . . . . .
ExpressCard Blanks .
. . . . . . . . . . . . . . . . . .
Installing an ExpressCard .
. . . . . . . . . . . . . . .
Removing an ExpressCard or Blank
. . . . . . . . . .
Contents
61
62
62
63
5
book.book Page 6 Thursday, August 7, 2008 5:00 PM
Memory Card Reader
. . . . . . . . . . . . . . . . . .
Memory Card Blanks
. . . . . . . . . . . . . . . .
63
Installing a Memory Card
. . . . . . . . . . . . . . . .
64
Removing a Memory Card or Blank
8
. . . . . . . . . . .
Setting Up and Using Networks
Setting Up a Network
67
. . . . . . . . . .
67
. . . . . . . . . . . . . . . . . .
68
Wireless Local Area Network
. . . . . . . . . . . . .
What You Need to Establish a WLAN
Connection . . . . . . . . . . . . . .
Checking Your Wireless Network Card
Connecting to a WLAN
68
. . . . . .
68
. . .
69
. . . . . . . . . . . . . . .
71
Securing Your Computer
. . . . . . . . . . . . .
73
. . . . . . . . . . . . . . . . . . .
73
. . . . . . . . . . . . . . . . . . . . . . . .
73
Security Cable Lock
If Your Computer Is Lost or Stolen .
10 Troubleshooting .
. . . . . . . . . . .
74
. . . . . . . . . . . . . . . . . . .
75
Dell Technical Update Service
Dell Diagnostics
6
Contents
68
. . . . . . .
Setting Up a New WLAN Using
a Wireless Router and a Broadband Modem
Passwords
65
. . . . . . .
Connecting a Network or Broadband
Modem Cable . . . . . . . . . . . .
9
63
. . . . . . . . . . . . .
75
. . . . . . . . . . . . . . . . . . . . .
75
book.book Page 7 Thursday, August 7, 2008 5:00 PM
Drive Problems
. . . . . . . . . . . . . . . . . . . . .
. . . . . . . . . . . . . . .
80
. . . . . . . . . . . . . . . .
81
Optical drive problems
Hard drive problems
E-Mail, Modem, and Internet Problems
Error Messages
79
. . . . . . . .
81
. . . . . . . . . . . . . . . . . . . . .
82
ExpressCard Problems
. . . . . . . . . . . . . . . . .
IEEE 1394 Device Problems
Keyboard Problems
87
. . . . . . . . . . . . . . .
88
. . . . . . . . . . . . . . . . . . .
88
External Keyboard problems
Unexpected characters
. . . . . . . . . . . .
89
. . . . . . . . . . . . . .
90
Lockups and Software Problems
. . . . . . . . . . . .
90
The computer does not start
. . . . . . . . . . . .
90
The computer stops responding
. . . . . . . . . .
90
A program stops responding or
crashes repeatedly . . . . . . .
. . . . . . . . . .
90
A program is designed for an earlier
Microsoft® Windows® operating system
. . . . .
91
. . . . . . . . . . . .
91
. . . . . . . . . . . . .
91
Memory Problems
. . . . . . . . . . . . . . . . . . . .
92
Network Problems
. . . . . . . . . . . . . . . . . . .
93
Power Problems .
. . . . . . . . . . . . . . . . . . . .
93
Printer Problems
. . . . . . . . . . . . . . . . . . . .
94
A solid blue screen appears
Other software problems
Scanner Problems .
. . . . . . . . . . . . . . . . . . .
Contents
95
7
book.book Page 8 Thursday, August 7, 2008 5:00 PM
Sound and Speaker Problems .
. . . . . . . . . . . . .
No sound from integrated speakers
. . . . . . . .
96
. . . . . . . . .
96
. . . . . . . . . . . .
97
. . . . . . . . . . . . .
97
. . . . . . . . . . . . . .
98
. . . . . . . . . . . . . . . .
98
No sound from external speakers
No sound from headphones
Touch Pad or Mouse Problems
Video and Display Problems
If the display is blank
If the display is difficult to read
. . . . . . . . . .
If only part of the display is readable
Drivers
99
. . . . . . . . . . . . . . . . . . . . . . . . . .
100
. . . . . . . . . . . . . . . . . .
Identifying Drivers
. . . . . . . . . . . . . . . . .
Reinstalling Drivers and Utilities
. . . . . . . . . .
Troubleshooting Software and Hardware
Problems in the Microsoft® Windows® XP
Operating System . . . . . . . . . . . . . .
Restoring Your Operating System
Starting System Restore
100
. . . . . . . . . . . .
103
. . . .
103
. . . . . . . . . . . . . .
104
11 Adding and Replacing Parts
. . . . . . . .
. . . . . . . . .
. . . . . . . . . . . . . . . . . . . .
Recommended Tools
100
103
Using the Operating System Media
Before You Begin
100
. . . . . .
Using Microsoft Windows System Restore
. . . . . . . . . . . . . . . .
Turning Off Your Computer
. . . . . . . . . . . . .
Before Working Inside Your Computer
Contents
99
. . . . . . .
What Is a Driver?
8
96
. . . . . . .
105
107
107
107
107
108
book.book Page 9 Thursday, August 7, 2008 5:00 PM
Hard Drive
. . . . . . . . . . . . . . . . . . . . . . . .
109
Removing the Hard Drive
. . . . . . . . . . . . .
110
Replacing the Hard Drive
. . . . . . . . . . . . .
111
. . . . . . . . . . .
111
. . . . . . . . . . . . . . . . . . . . . .
112
Returning a Hard Drive to Dell
Optical Drive
Removing the Optical Drive
. . . . . . . . . . . .
112
Replacing the Optical Drive
. . . . . . . . . . . .
112
. . . . . . . . . . . . . . . . . . . . . . .
113
Hinge Cover
Removing the Hinge Cover
. . . . . . . . . . . . .
. . . . . . . . . . . .
114
. . . . . . . . . . . . . . . . . . . . . . . .
114
Replacing the Hinge Cover .
Keyboard .
113
Removing the Keyboard
. . . . . . . . . . . . . .
114
Replacing the Keyboard
. . . . . . . . . . . . . .
115
. . . . . . . . . . . . . . . . . . . . . . . . .
116
Memory
Removing Memory Module
. . . . . . . . . . . .
116
Replacing Memory Module
. . . . . . . . . . . .
118
. . . . . . . . . . . . . . . . . .
120
Wireless Mini-Cards
Removing Mini-Card
. . . . . . . . . . . . . . . .
120
Replacing Mini-Card
. . . . . . . . . . . . . . . .
122
Internal Card With Bluetooth® Wireless
Technology . . . . . . . . . . . . . . .
. . . . . . . .
122
Removing the Card
. . . . . . . . . . . . . . . . .
122
Replacing the Card
. . . . . . . . . . . . . . . . .
123
Contents
9
book.book Page 10 Thursday, August 7, 2008 5:00 PM
12 Traveling With Your Computer .
Identifying Your Computer .
125
. . . . . . . . . . . . . . . . . .
125
. . . . . . . . . . . . . . . . . . . . . . . .
126
Traveling by Air
13 Getting Help .
. . . . . . . . . . . . . . . . . . .
. . . . . . . . . . . . . . . . . . . . .
Obtaining Assistance
. . . . . . . . . . . . . . . . . .
DellConnect .
127
127
128
. . . . . . . . . . . . . . . . . . . .
128
Online Services .
. . . . . . . . . . . . . . . . . .
AutoTech Service .
. . . . . . . . . . . . . . . . .
129
129
. . . . . . . . . . . . . . .
129
. . . . . . . . . . . . . . . . . . .
129
Problems With Your Order .
Product Information
128
. . . . . . . . .
Automated Order-Status Service
Returning Items for Warranty Repair or Credit
. . . . .
130
Before You Call
. . . . . . . . . . . . . . . . . . . . .
130
Contacting Dell
. . . . . . . . . . . . . . . . . . . . .
132
14 Specifications
Contents
126
. . . . .
Technical Support and Customer Service
10
125
. . . . . . . . . . . . . . .
Packing the Computer
Travel Tips
. . . . . . .
. . . . . . . . . . . . . . . . . . . .
133
book.book Page 11 Thursday, August 7, 2008 5:00 PM
A Appendix
. . . . . . . . . . . . . . . . . . . . . . . .
Using the System Setup Program
. . . . . . . . .
142
. . . . . . . . . . . . . . .
142
. . . . . . . . . . . . . .
142
. . . . . . . . . . . . . . . .
144
Commonly Used Options
Cleaning Your Computer
141
. . . . . . . . . . . .
Viewing the System Setup Screen
System Setup Screen
141
. . . . . . . . .
144
. . . . . . . . . . . . . . . . . . . . .
145
Mouse
. . . . . . . . . . . . . . . . . . . . . . .
145
Media .
. . . . . . . . . . . . . . . . . . . . . . .
145
Computer, Keyboard, and Display
Touch Pad
Dell Technical Support Policy (U.S. Only)
. . . . . . .
146
. . . . . . .
146
. . . . . . . .
146
. . . . . . . . . . . . . . . . .
147
. . . . . . . . . . . . . . . . . . . .
147
Definition of "Dell-Installed" Software
and Peripherals . . . . . . . . . . .
Definition of "Third-Party" Software
and Peripherals . . . . . . . . . .
FCC Notice (U.S. Only) .
FCC Class B .
Macrovision Product Notice
148
. . . . . . . . . . . . . .
Glossary . . . . . . . . . . . . . . . . . . . . . . . . . . . . 149
Index
. . . . . . . . . . . . . . . . . . . . . . . . . . . . . .
165
Contents
11
book.book Page 12 Thursday, August 7, 2008 5:00 PM
12
Contents
book.book Page 13 Thursday, August 7, 2008 5:00 PM
Finding Information
NOTE: Some features may be optional and may not ship with your computer. Some
features may not be available in certain countries.
NOTE: Additional information may ship with your computer.
What Are You Looking For?
Find It Here
•
•
•
•
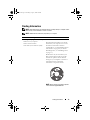
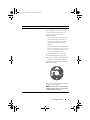
Drivers and Utilities Media
A diagnostic program for my computer
Drivers for my computer
Device documentation
Notebook System Software (NSS)
Documentation and drivers are already
installed on your computer. You can use
the Drivers and Utilities media to
reinstall drivers (see "Reinstalling Drivers
and Utilities" on page 100) or run the
Dell Diagnostics (see "Dell Diagnostics"
on page 75).
Readme files may be included on your
Drivers and Utilities media to provide
last-minute updates about technical
changes to your computer or advanced
technical-reference material for
technicians or experienced users.
NOTE: Drivers and documentation updates
can be found at support.dell.com.
Finding Information
13
book.book Page 14 Thursday, August 7, 2008 5:00 PM
What Are You Looking For?
Find It Here
•
•
•
•
•
•
Dell™ Product Information Guide
Warranty information
Terms and Conditions (U.S. only)
Safety instructions
Regulatory information
Ergonomics information
End User License Agreement
• How to set up my computer
Setup Diagram
See the setup diagram that came with
your computer.
• Service Tag and Express Service Code
• Microsoft Windows License Label
Service Tag and Microsoft® Windows®
License
These labels are located on your computer.
• Use the Service Tag to identify your
computer when you use
support.dell.com or contact support.
• Enter the Express Service Code to direct
your call when contacting support.
NOTE: As an increased security measure,
the newly designed Microsoft Windows
license label has a missing portion or "hole"
to discourage removal of the label.
14
Finding Information
book.book Page 15 Thursday, August 7, 2008 5:00 PM
What Are You Looking For?
Find It Here
• Solutions — Troubleshooting hints and
tips, articles from technicians, online
courses, and frequently asked questions
• Community — Online discussion with
other Dell customers
• Upgrades — Upgrade information for
components such as, the memory, hard
drive, and operating system
• Customer Care — Contact information,
service call and order status, and
warranty and repair information
• Service and support — Service call
status, support history, service contract,
and online discussions with support
• Dell Technical Update Service —
Proactive e-mail notification of software
and hardware updates for your computer
• Reference — Computer
documentation, details on your
computer configuration, product
specifications, and white papers
• Downloads — Certified drivers,
patches, and software updates
• Notebook System Software (NSS) — If
you reinstall the operating system on
your computer, you should also reinstall
the NSS utility. NSS automatically
detects your computer and operating
system, and installs the updates
appropriate for your configuration,
providing critical updates for your
operating system and support for Dell
3.5-inch USB floppy drives, Intel®
processors, optical drives, and USB
devices. NSS is necessary for correct
operation of your Dell computer.
Dell Support Website — support.dell.com
NOTE: Select your region or business
segment to view the appropriate support site.
To obtain documentation and software
downloads for your computer, go to
support.dell.com and select Vostro™
from the Notebooks category.
To download Notebook System Software:
1 Go to support.dell.com, select your
country/region, and then click
Drivers & Downloads.
2 Enter your Service Tag or product
model, and then click Go.
3 Select your operating system and
language, and then click Find Downloads,
or under Downloads Search, search for
the keyword Notebook System Software.
NOTE: The support.dell.com user interface
may vary depending on your selections.
Finding Information
15
book.book Page 16 Thursday, August 7, 2008 5:00 PM
What Are You Looking For?
Find It Here
• Software upgrades and troubleshooting
hints — Frequently asked questions,
hot topics, and general health of your
computing environment
Dell Support Utility
• How to use Windows XP
• How to work with programs and files
• How to personalize your desktop
Microsoft Windows XP Help and Support
Center
1 Click Start→Help and Support.
2 Type a word or phrase that describes
your problem and click the arrow icon.
3 Select the topic that describes your
problem.
4 Follow the instructions on the screen.
• Information on network activity, the
Power Management Wizard, hotkeys,
and other items controlled by Dell
QuickSet
Dell QuickSet Help
16
Finding Information
The Dell Support Utility is an automated
upgrade and notification system installed
on your computer. This support provides
real-time health scans of your computing
environment, software updates, and
relevant self-support information. Access
the Dell Support Utility from the
icon on the taskbar. For more information,
see "Drive Problems" on page 79.
To view Dell QuickSet Help, right-click
the QuickSet icon in the Microsoft®
Windows® taskbar, and select Help. The
taskbar is located in the lower-right
corner of your screen.
book.book Page 17 Thursday, August 7, 2008 5:00 PM
What Are You Looking For?
Find It Here
• How to reinstall my operating system
Operating System Media
The operating system is already installed
on your computer. To reinstall your
operating system, use one of the
following methods:
• Microsoft Windows System Restore —
Microsoft Windows System Restore
returns your computer to an earlier
operating state without affecting
data files.
• Operating System Installation Media —
If you received operating system media
with your computer, you can use it to
restore your operating system.
For more information, see "Restoring
Your Operating System" on page 103.
After you reinstall your operating system,
use the Drivers and Utilities media to
reinstall drivers for the devices that came
with your computer.
Your operating system product key label is
located on your computer.
NOTE: The color of your operating system
installation media varies according to the
operating system you ordered.
Finding Information
17
book.book Page 18 Thursday, August 7, 2008 5:00 PM
18
Finding Information
book.book Page 19 Thursday, August 7, 2008 5:00 PM
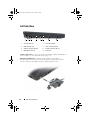
About Your Computer
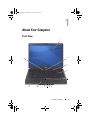
Front View
1
2
12
3
4
5
11
10
9
8
7 6
About Your Computer
19
book.book Page 20 Thursday, August 7, 2008 5:00 PM
1
display
2
power button
3
media control buttons (7)
4
keyboard
5
touch pad
6
8-in-1 media card reader
7
analog microphone
8
microphone connector
9
headphone connectors (2)
10
touch pad buttons (2)
11
device status lights
12
keyboard status lights
DISPLAY
— For more information about your display, see "Using the Display" on page 39.
POWER BUTTON
— Press the power button to turn on the computer or exit a power
management mode (see "Configuring Power Management Settings" on page 50).
NOTICE: To avoid losing data, turn off your computer by performing a Microsoft®
Windows® operating system shutdown rather than by pressing the power button.
If the computer stops responding, press and hold the power button until the
computer turns off completely (may take several seconds).
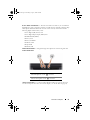
MEDIA CONTROL BUTTONS
— Control CD, DVD, and Media Player playback.
Mute the sound
Play the previous track
Turn the volume down
Play the next track
Turn the volume up
Stop
Play or pause
KEYBOARD
— For more information about the keyboard, see "Using the Keyboard and
Touchpad" on page 41.
TOUCH PAD
20
— Provides the functionality of a mouse (see "Touch Pad" on page 43).
About Your Computer
book.book Page 21 Thursday, August 7, 2008 5:00 PM
8- I N -1 M E D I A C A R D R E A D E R — Provides a fast and convenient way to view and share
digital photos, music, and videos stored on a media memory card. The computer ships
with a plastic blank installed in the slot. The 8-in-1 memory card reader reads the
following digital media memory cards:
• Secure Digital (SD) memory card
• Secure Digital Input Output (SDIO) card
• MultiMediaCard (MMC)
• Memory Stick
• Memory Stick PRO
• xD-Picture Card
• Hi Speed-SD
• Hi Density-SD
ANALOG MICROPHONE
— Integrated single microphone for conferencing and chat.
AUDIO CONNECTORS
Attach headphones to the
Attach a microphone to the
connector
connector
TOUCH PAD BUTTONS
— Use these buttons like the buttons on a mouse when you
use the touch pad to move the cursor on the display (see "Touch Pad" on page 43).
About Your Computer
21
book.book Page 22 Thursday, August 7, 2008 5:00 PM
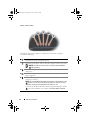
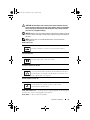
DEVICE STATUS LIGHTS
The lights located on the palm rest towards the front of the computer
indicate the following:
Power light – Turns on when you turn on the computer, and blinks when the
computer is in a power management mode.
Hard drive activity light – Turns on when the computer reads or writes data.
NOTICE: To avoid loss of data, never turn off the computer while the
light is flashing.
Battery status light – Turns on steadily or blinks to indicate battery
charge status.
WLAN status light – Turns on when wireless networking is enabled and
hotspot is located.
Bluetooth® status light – Turns on when a card with Bluetooth wireless
technology is enabled.
NOTE: The card with Bluetooth wireless technology is an optional feature. The
light turns on only if you ordered the card with your computer. For more
information, see the documentation that came with your card.
To turn off only the Bluetooth wireless technology functionality, right-click the
icon in the notification area, and then click Disable Bluetooth Radio.
22
About Your Computer
book.book Page 23 Thursday, August 7, 2008 5:00 PM
If the computer is connected to an electrical outlet, the
follows:
•
Solid blue: The battery is charging.
•
Flashing blue: The battery is almost fully charged.
•
Off: The battery is adequately charged.
If the computer is running on a battery, the
light operates as
light operates as follows:
•
Off: The battery is adequately charged (or the computer is turned off).
•
Flashing orange: The battery charge is low.
•
Solid orange: The battery charge is critically low.
KEYBOARD STATUS LIGHTS
The blue lights located above the keyboard indicate the following:
9
Turns on when the numeric keypad is enabled.
A
Turns on when the uppercase letter (caps lock) function is enabled.
Turns on when the scroll lock function is enabled.
About Your Computer
23
book.book Page 24 Thursday, August 7, 2008 5:00 PM
Left Side View
1
2
3
4
5
6
7
8
1
security cable slot
2
AC power adapter
3
USB connectors (2)
4
video connector (VGA)
5
network connector (RJ-45)
6
modem connector (RJ-11)
7
IEEE 1394a connector
8
hard drive
SECURITY CABLE SLOT
— Lets you attach a commercially available antitheft device
to the computer (see "Security Cable Lock" on page 73).
A C A D A P T E R C O N N E C T O R — Attaches an AC adapter to the computer.
The AC adapter converts AC power to the DC power required by the computer.
You can connect the AC adapter with your computer turned on or off.
24
About Your Computer
book.book Page 25 Thursday, August 7, 2008 5:00 PM
CAUTION: The AC adapter works with electrical outlets worldwide. However,
power connectors and power strips vary among countries. Using an incompatible
cable or improperly connecting the cable to the power strip or electrical outlet
may cause fire or equipment damage.
NOTICE: When you disconnect the AC adapter cable from the computer, grasp the
connector, not the cable itself, and pull firmly, but gently to help prevent damage to
the cable.
NOTE: Plug the power cord and the adapter firmly in, and ensure that the
green light is on.
USB CONNECTORS
Connect USB devices, such as a mouse, keyboard, or printer.
VIDEO CONNECTOR
Connects video devices, such as a monitor.
NETWORK CONNECTOR
(RJ-45)
Connects the computer to a network. The two lights next to the
connector indicate status and activity of wired network connections.
For information on using the network adapter, see the device user
guide supplied with your computer.
MODEM CONNECTOR
(RJ - 11 )
Connect the telephone line to the modem connector.
For information on using the modem, see the modem
documentation available online.
IEEE 1394 C O N N E C T O R — Connects devices supporting IEEE 1394a high-speed
transfer rates, such as some digital video cameras.
H A R D D R I V E — Stores software and data.
About Your Computer
25
book.book Page 26 Thursday, August 7, 2008 5:00 PM
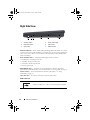
Right Side View
2
1
3
4
5
1
wireless switch
2
Wi-Fi catcher light
3
ExpressCard slot
4
optical drive
5
eject button
6
USB connector
6
WIRELESS SWITCH
— When enabled through Dell QuickSet, this switch can scan for
a wireless local area network (WLAN) in your vicinity. You can also use it to rapidly turn
off or on any wireless devices such as WLAN cards and internal cards with Bluetooth
wireless technology.
W I -F I C A T C H E R L I G H T
•
•
•
•
— The Wi-Fi catcher light operates as follows:
Flashing blue: Searching for networks
Solid blue: Strong network found
Solid yellow: Weak network found
Off: No signal found
E X P R E S S C A R D S L O T — Supports one ExpressCard. The computer ships with a
plastic blank installed in the slot. For more information, see "Using Cards" on page 85.
OPTICAL DRIVE
— For more information about the optical drive, see "Using
Multimedia" on page 55.
EJECT BUTTON
— Press the eject button to open the optical drive.
USB CONNECTOR
Connects USB devices, such as a mouse, keyboard, or printer.
26
About Your Computer
book.book Page 27 Thursday, August 7, 2008 5:00 PM
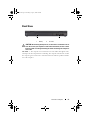
Back View
1
1
2
battery
2
air vents
CAUTION: Do not block, push objects into, or allow dust to accumulate in the air
vents. Do not store your computer in a low-airflow environment, such as a closed
briefcase, while it is running. Restricting the airflow can damage the computer or
cause a fire.
AIR VENTS
— The computer uses an internal fan to create airflow through the vents,
which prevents the computer from overheating. The computer turns the fan on when
the computer gets hot. Fan noise is normal and does not indicate a problem with the
fan or the computer.
About Your Computer
27
book.book Page 28 Thursday, August 7, 2008 5:00 PM
Bottom View
1
2
3
4
5
1
optical drive
2
battery
3
battery release latch
4
processor/memory module/mini-card compartment
5
hard drive
BATTERY
— When a battery is installed, you can use the computer without
connecting the computer to an electrical outlet (see "Using a Battery" on page 47).
BATTERY RELEASE LATCH
— Releases the battery (see "Replacing the Battery" on
page 52 for instructions).
P R O C E S S O R / M E M O R Y M O D U L E / M I N I - C A R D C O M P A R T M E N T — Compartment that
contains the memory modules and WLAN. (see "Wireless Mini-Cards" on page 120).
H A R D D R I V E — Stores software and data.
OPTICAL DRIVE
— For more information about the optical drive, see "Using
Multimedia" on page 55.
28
About Your Computer
book.book Page 29 Thursday, August 7, 2008 5:00 PM
Setting Up Your Computer
Connecting to the Internet
NOTE: Internet Service Providers (ISPs) and ISP offerings vary by country.
To connect to the Internet, you need a modem or network connection and an
Internet service provider (ISP). Your ISP will offer one or more of the
following Internet connection options:
•
DSL connections that provide high-speed Internet access through your
existing telephone line or cellular telephone service. With a DSL
connection, you can access the Internet and use your telephone on the
same line simultaneously.
•
Cable modem connections that provide high-speed Internet access
through your local cable TV line.
•
Satellite modem connections that provide high-speed Internet access
through a satellite television system.
•
Dial-up connections that provide Internet access through a telephone line.
Dial-up connections are considerably slower than DSL, cable, and satellite
modem connections.
•
Wireless Local Area Network (WLAN) connections use high-frequency
radio waves to communicate. Typically, a wireless router is connected to
the broadband cable or DSL modem that broadcasts the Internet signal to
your computer.
If you are using a dial-up connection, connect a telephone line to the modem
connector on your computer and to the telephone wall connector before you
set up your Internet connection. If you are using a DSL, cable, or satellite
modem connection, contact your ISP or cellular telephone service for setup
instructions.
NOTE: Your computer may not ship with a modem unless you have ordered one.
Setting Up Your Computer
29
book.book Page 30 Thursday, August 7, 2008 5:00 PM
Setting Up Your Internet Connection
To set up an Internet connection with a provided ISP desktop shortcut:
1 Save and close any open files, and exit any open programs.
2 Double-click the ISP icon on the Microsoft® Windows® desktop.
3 Follow the instructions on the screen to complete the setup.
NOTE: If you are having problems connecting to the Internet, see "E-Mail, Modem,
and Internet Problems" on page 81. If you cannot connect to the Internet, but have
successfully connected in the past, the ISP may have a service outage. Contact
your ISP to check the service status, or try connecting again later.
NOTE: Have your ISP information ready. If you do not have an ISP, the Connect to
the Internet wizard can help you obtain one.
If you do not have an ISP icon on your desktop or if you want to set up an
Internet connection with a different ISP:
1 Save and close any open files, and exit any open programs.
2 Click Start→Internet Explorer.
The New Connection Wizard appears.
3 Click Connect to the Internet.
4 In the next window, click the appropriate option:
•
If you do not have an ISP and want to select one, click Choose from a
list of Internet service providers (ISPs).
•
If you have already obtained setup information from your ISP but you
did not receive a setup CD, click Set up my connection manually.
•
If you have a CD, click Use the CD I got from an ISP.
5 Click Next.
If you selected Set up my connection manually, continue to step 6.
Otherwise, follow the instructions on the screen to complete the setup.
NOTE: If you do not know which type of connection to select, contact
your ISP.
6 Click the appropriate option under How do you want to connect to the
Internet?, and then click Next.
7 Use the setup information provided by your ISP to complete the setup.
30
Setting Up Your Computer
book.book Page 31 Thursday, August 7, 2008 5:00 PM
Transferring Information to a New Computer
You can transfer the following types of data from one computer to another:
•
E-mail messages
•
Toolbar settings
•
Window sizes
•
Internet bookmarks
Use one of the following methods for transferring data:
•
Windows Easy Transfer wizard, an Easy Transfer Cable, and a USB port
•
Over a network
•
Removable media, such as a writable CD
Windows Easy Transfer
The Microsoft Windows XP operating system provides the Files and Settings
Transfer Wizard to move data from a source computer to a new computer.
You can transfer data, such as:
•
E-mail messages
•
Toolbar settings
•
Window sizes
•
Internet bookmarks
You can transfer the data to the new computer over a network or serial
connection, or you can store it on removable media, such as a writable CD,
for transfer to the new computer.
NOTE: You can transfer information from an old computer to a new computer by
directly connecting a serial cable to the input/output (I/O) ports of the two
computers. To transfer data over a serial connection, you must access the Network
Connections utility from the Control Panel and perform additional configuration
steps, such as setting up an advanced connection and designating the host
computer and the guest computer.
For instructions on setting up a direct cable connection between two computers,
see Microsoft Knowledge Base Article #305621, titled How to Set Up a Direct Cable
Connection Between Two Computers in Windows XP. This information may not be
available in certain countries.
Setting Up Your Computer
31
book.book Page 32 Thursday, August 7, 2008 5:00 PM
For transferring information to a new computer, you must run the Files and
Settings Transfer Wizard. You can use the optional Operating System media
for this process or you can create a wizard disk with the Files and Settings
Transfer Wizard.
Running the Files and Settings Transfer Wizard With the Operating System Media
NOTE: This procedure requires the Operating System media. This media is optional
and may not be included with certain computers.
To prepare a new computer for the file transfer:
1 Open the Files and Settings Transfer Wizard: click Start→All Programs→
Accessories→System Tools→Files and Settings Transfer Wizard.
2 When the Files and Settings Transfer Wizard welcome screen appears,
click Next.
3 On the Which computer is this? screen, click New Computer→Next.
4 On the Do you have a Windows XP CD? screen, click I will use the wizard
from the Windows XP CD→Next.
5 When the Now go to your old computer screen appears, go to your old or
source computer. Do not click Next at this time.
To copy data from the old computer:
1 On the old computer, insert the Windows XP Operating System media.
2 On the Welcome to Microsoft Windows XP screen, click Perform
additional tasks.
3 Under What do you want to do?, click Transfer files and settings→Next.
4 On the Which computer is this? screen, click Old Computer→Next.
5 On the Select a transfer method screen, click the transfer method you
prefer.
6 On the What do you want to transfer? screen, select the items you want to
transfer and click Next.
After the information has been copied, the Completing the Collection
Phase screen appears.
7 Click Finish.
32
Setting Up Your Computer
book.book Page 33 Thursday, August 7, 2008 5:00 PM
To transfer data to the new computer:
1 On the Now go to your old computer screen on the new computer, click Next.
2 On the Where are the files and settings? screen, select the method you
chose for transferring your settings and files and click Next.
The wizard reads the collected files and settings and applies them to your
new computer.
When all of the settings and files have been applied, the Finished screen
appears.
3 Click Finished and restart the new computer.
Running the Files and Settings Transfer Wizard Without the Operating System Media
To run the Files and Settings Transfer Wizard without the Operating System
media, you must create a wizard disk that will allow you to create a backup
image file to removable media.
To create a wizard disk, use your new computer with Windows XP and
perform the following steps:
1 Open the Files and Settings Transfer Wizard: click Start→All Programs→
Accessories→System Tools→Files and Settings Transfer Wizard.
2 When the Files and Settings Transfer Wizard welcome screen appears,
click Next.
3 On the Which computer is this? screen, click New Computer→Next.
4 On the Do you have a Windows XP CD? screen, click I want to create a
Wizard Disk in the following drive→Next.
5 Insert the removable media, such as a writable CD, and click OK.
6 When the disk creation completes and the Now go to your old
computer message appears, do not click Next.
7 Go to the old computer.
To copy data from the old computer:
1 On the old computer, insert the wizard disk.
2 Click Start→Run.
3 In the Open field on the Run window, browse to the path for fastwiz (on
the appropriate removable media) and click OK.
Setting Up Your Computer
33
book.book Page 34 Thursday, August 7, 2008 5:00 PM
4 On the Files and Settings Transfer Wizard welcome screen, click Next.
5 On the Which computer is this? screen, click Old Computer→Next.
6 On the Select a transfer method screen, click the transfer method
you prefer.
7 On the What do you want to transfer? screen, select the items you want to
transfer and click Next.
After the information has been copied, the Completing the Collection
Phase screen appears.
8 Click Finish.
To transfer data to the new computer:
1 On the Now go to your old computer screen on the new computer, click
Next.
2 On the Where are the files and settings? screen, select the method you
chose for transferring your settings and files and click Next. Follow the
instructions on the screen.
The wizard reads the collected files and settings and applies them to your
new computer.
When all of the settings and files have been applied, the Finished screen
appears.
3 Click Finished and restart the new computer.
Setting Up a Printer
NOTICE: Complete the operating system setup before you connect a printer to
the computer.
See the documentation that came with the printer for setup information,
including how to:
•
Obtain and install updated drivers.
•
Connect the printer to the computer.
•
Load paper and install the toner or ink cartridge.
For technical assistance, refer to the printer owner's manual or contact the
printer manufacturer.
34
Setting Up Your Computer
book.book Page 35 Thursday, August 7, 2008 5:00 PM
Printer Cable
Your printer connects to your computer with a USB cable. Your printer may
not come with a printer cable, so if you purchase a cable separately, ensure
that it is compatible with your printer and computer. If you purchased a
printer cable at the same time you purchased your computer, the cable may
arrive in the computer’s shipping box.
Connecting a USB Printer
NOTE: You can connect USB devices while the computer is turned on.
1 Complete the operating system setup if you have not already done so.
2 Attach the USB printer cable to the USB connectors on the computer and
the printer. The USB connectors fit only one way.
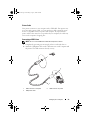
1
2
3
1
USB connector on computer
3
USB printer cable
2
USB connector on printer
Setting Up Your Computer
35
book.book Page 36 Thursday, August 7, 2008 5:00 PM
3 Turn on the printer, and then turn on the computer.
If the Add New Hardware Wizard window appears, click Cancel.
4 Click Start, and then click Printers and Faxes.
5 Click Add a printer to start the Add Printer Wizard.
NOTE: To install the printer driver, see "Reinstalling Drivers and Utilities" on
page 100 and the documentation that came with your printer.
6 Click Add a local printer or Add a network, wireless, or Bluetooth printer.
7 Follow the instructions in the Add Printer Wizard.
Power Protection Devices
Several devices are available to protect against power fluctuations and failures:
•
Surge protectors
•
Line conditioners
•
Uninterruptible power supplies (UPS)
Surge Protectors
Surge protectors and power strips equipped with surge protection help
prevent damage to your computer from voltage spikes that can occur during
electrical storms or after power interruptions. Some surge protector
manufacturers include warranty coverage for certain types of damage.
Carefully read the device warranty when choosing a surge protector. A device
with a higher joule rating offers more protection. Compare joule ratings to
determine the relative effectiveness of different devices.
NOTICE: Most surge protectors do not protect against power fluctuations or
power interruptions caused by nearby lightning strikes. When lightning occurs in
your area, disconnect the telephone line from the telephone wall connector and
disconnect your computer from the electrical outlet.
Many surge protectors have a telephone connector for modem protection. See
the surge protector documentation for modem connection instructions.
NOTICE: Not all surge protectors offer network adapter protection. Disconnect the
network cable from the network wall connector during electrical storms.
36
Setting Up Your Computer
book.book Page 37 Thursday, August 7, 2008 5:00 PM
Line Conditioners
NOTICE: Line conditioners do not protect against power interruptions.
Line conditioners are designed to maintain AC voltage at a fairly constant level.
Uninterruptible Power Supplies
NOTICE: Loss of power while data is being saved to the hard drive may result in
data loss or file damage.
NOTE: To ensure maximum battery operating time, connect only your computer to
a UPS. Connect other devices, such as a printer, to a separate power strip that
provides surge protection.
A UPS protects against power fluctuations and interruptions. UPS devices
contain a battery that provides temporary power to connected devices when
AC power is interrupted. The battery charges while AC power is available. See
the UPS manufacturer documentation, for information on battery operating
time and to ensure that the device is approved by Underwriters Laboratories (UL).
Setting Up Your Computer
37
book.book Page 38 Thursday, August 7, 2008 5:00 PM
38
Setting Up Your Computer
book.book Page 39 Thursday, August 7, 2008 5:00 PM
Using the Display
Adjusting Brightness
When a Dell™ computer is running on battery power, you can conserve power
by setting the display brightness to the lowest comfortable level.
•
Press <Fn> and the up-arrow key to increase brightness on the integrated
display only (not on an external monitor).
•
Press <Fn> and the down-arrow key to decrease brightness on the
integrated display only (not on an external monitor).
Switching the Video Image From Your Computer
Display To a Projector
When you start the computer with an external device attached (such as an
external monitor or projector) and turned on, the image may appear on either
the computer display or the external device.
Press <Fn><F8> to switch the video image between the display only, the
external device only, or the display and the external device simultaneously.
Using the Display
39
book.book Page 40 Thursday, August 7, 2008 5:00 PM
Setting Display Resolution and Refresh Rate
NOTE: If you change the display resolution from the current settings, the image
may appear blurry or text may be hard to read if you change the resolution to one
not supported by your computer and display. Before you change any of the display
settings, make a note of the current settings so you can change back to the
previous settings if needed.
You can enhance the legibility of text and change the appearance of images
on the screen by adjusting display resolution. As you increase resolution,
items appear smaller on the screen. In contrast, lower resolution causes text
and images to appear larger and can benefit people with vision impairments.
To display a program at a specific resolution, both the video card and the
display must support the program, and the necessary video drivers must be
installed.
NOTE: Use only the Dell-installed video drivers, which are designed to offer the
best performance with your Dell-installed operating system.
If you choose a resolution or color palette that is higher than the display
supports, the settings adjust automatically to the closest supported values.
To set the display resolution and refresh rate for your display:
1 Click Start →Control Panel.
2 Under Display, click Settings.
3 In the Display Settings window, under Resolution, move the slide bar to
the left or right to decrease/increase the screen resolution.
40
Using the Display
book.book Page 41 Thursday, August 7, 2008 5:00 PM
Using the Keyboard and Touch Pad
Numeric Keypad
numeric keypad
The numeric keypad functions like the numeric keypad on an external
keyboard. Each key on the keypad has multiple functions. The keypad
numbers and symbols are marked in blue on the right of the keypad keys.
To type a number or symbol, press <Fn><the desired key>.
•
To enable the keypad, press <Num Lk>. The
keypad is active.
•
To disable the keypad, press <Num Lk> again.
9
light indicates that the
Using the Keyboard and Touch Pad
41
book.book Page 42 Thursday, August 7, 2008 5:00 PM
Key Combinations
System Functions
<Ctrl><Shift><Esc>
Opens the Task Manager window.
Display Functions
<Fn><F8>
Displays icons representing all currently
available display options (display only, external
monitor or projector only, both display and
projector, etc). Highlight the desired icon to
switch the display to that option.
<Fn> and up-arrow key
Increases brightness on the integrated display
only (not on an external monitor).
<Fn> and down-arrow key
Decreases brightness on the integrated display
only (not on an external monitor).
Battery
<Fn><F3>
Displays the Dell™ QuickSet Battery Meter (see
"Dell QuickSet Battery Meter" on page 48).
Power Management
<Fn><Esc>
42
Activates a power management mode.
You can reprogram this keyboard shortcut to
activate a different power management mode
using the Advanced tab in the Power Options
Properties window (see "Configuring Power
Management Settings" on page 51).
Using the Keyboard and Touch Pad
book.book Page 43 Thursday, August 7, 2008 5:00 PM
Microsoft® Windows® Logo Key Functions
Windows logo key and <m>
Minimizes all open windows.
Windows logo key and
<Shift><m>
Restores all minimized windows. This key
combination functions as a toggle to restore
minimized windows following the use of the
Windows logo key and <m> combination.
Windows logo key and <e>
Starts Windows Explorer.
Windows logo key and <r>
Opens the Run dialog box.
Windows logo key and <f>
Opens the Search Results dialog box.
Windows logo key and
<Ctrl><f>
Opens the Search Results-Computer dialog box
(if the computer is connected to a network).
Windows logo key and <Pause> Opens the System Properties dialog box.
Dell™ QuickSet Key Combinations
If Dell QuickSet is installed, you can use other shortcut keys for functions
such as the Battery Meter or activating power management modes. For more
information about Dell QuickSet key combinations, right-click the QuickSet
icon in the notification area, and then click Help.
Adjusting Keyboard Settings
To adjust keyboard operation, such as the character repeat rate:
1 Click Start, and then click Control Panel.
2 Click Keyboard.
Using the Keyboard and Touch Pad
43
book.book Page 44 Thursday, August 7, 2008 5:00 PM
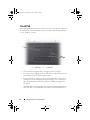
Touch Pad
The touch pad detects the pressure and movement of your finger to allow you
to move the cursor on the display. Use the touch pad and touch pad buttons
as you would use a mouse.
1
2
1
44
touch pad
2
scroll zones
•
To move the cursor, lightly slide your finger over the touch pad.
•
To select an object, lightly tap once on the surface of the touch pad or use
your thumb to press the left touch pad button.
•
To select and move (or drag) an object, position the cursor on the object
and tap twice on the touch pad. On the second tap, leave your finger on
the touch pad and move the selected object by sliding your finger over
the surface.
•
To double-click an object, position the cursor on the object and tap twice on
the touch pad or use your thumb to press the left touch pad button twice.
Using the Keyboard and Touch Pad
book.book Page 45 Thursday, August 7, 2008 5:00 PM
Customizing the Touch Pad
You can use the Mouse Properties window to disable the touch pad or adjust
the touch pad settings.
1 Click Start, and then click Control Panel.
2 Click Keyboard.
3 In the Mouse Properties window:
•
Click the Device Select tab to disable the touch pad.
•
Click the Touch Pad tab to adjust touch pad settings.
4 Click OK to save the settings and close the window.
Using the Keyboard and Touch Pad
45
book.book Page 46 Thursday, August 7, 2008 5:00 PM
46
Using the Keyboard and Touch Pad
book.book Page 47 Thursday, August 7, 2008 5:00 PM
Using a Battery
Battery Performance
NOTE: For information about the Dell warranty of your computer, see the
Product Information Guide or paper warranty document that shipped with
your computer.
For optimal computer performance and to help preserve BIOS settings,
operate your Dell™ portable computer with the main battery installed at all
times. One battery is supplied as standard equipment in the battery bay.
NOTE: Because the battery may not be fully charged, use the AC adapter to
connect your new computer to an electrical outlet the first time you use the
computer. For best results, operate the computer with the AC adapter until the
battery is fully charged. To view battery charge status, place the mouse cursor
over the battery icon in the Windows notification area.
NOTE: Battery operating time (the time the battery can hold a charge) decreases
over time. Depending on how often the battery is used and the conditions under which it
is used, you may need to purchase a new battery during the life of your computer.
NOTE: It is recommended that you connect your computer to an electrical outlet
when writing to media.
Battery operating time varies depending on operating conditions. Operating
time is significantly reduced when you perform operations including, but not
limited to, the following:
•
Using optical drives.
•
Using wireless communications devices, ExpressCards, media memory
cards, or USB devices.
•
Using high-brightness display settings, 3D screen savers, or other
power-intensive programs such as complex 3D graphics applications.
•
Running the computer in maximum performance mode (see "Configuring
Power Management Settings" on page 51 for information about accessing
Windows Power Options Properties or Dell QuickSet, which you can use
to configure power management settings).
Using a Battery
47
book.book Page 48 Thursday, August 7, 2008 5:00 PM
You can check the battery charge before you insert the battery into the
computer. You can also set power management options to alert you when the
battery charge is low.
CAUTION: Using an incompatible battery may increase the risk of fire or explosion.
Replace the battery only with a compatible battery purchased from Dell. The
battery is designed to work with your Dell computer. Do not use batteries from
other computers with your computer.
CAUTION: Do not dispose of batteries with household waste. When your battery
no longer holds a charge, call your local waste disposal or environmental agency
for advice on disposing of a lithium-ion battery (see "Battery Disposal" in the
Product Information Guide).
CAUTION: Misuse of the battery may increase the risk of fire or chemical burn.
Do not puncture, incinerate, disassemble, or expose the battery to temperatures
above 65°C (149°F). Keep the battery away from children. Handle damaged or
leaking batteries with extreme care. Damaged batteries may leak and cause
personal injury or equipment damage.
Checking the Battery Charge
You can check the battery charge on your computer using any one of the
following methods:
•
Dell QuickSet Battery Meter
•
Microsoft Windows battery meter icon
•
Low-battery warning pop-up window
located in the notification area
Dell QuickSet Battery Meter
To view the Dell QuickSet Battery Meter:
•
Double-click the Dell QuickSet icon in the taskbar, and then click
Battery Meter
or
•
Press <Fn><F3>
The Battery Meter displays the status, battery health, charge level, and charge
completion time for the battery in your computer.
For more information about QuickSet, right-click the QuickSet icon, and
then click Help.
48
Using a Battery
book.book Page 49 Thursday, August 7, 2008 5:00 PM
Microsoft® Windows® Battery Meter
The battery meter indicates the remaining battery charge. To check the
battery meter, double-click the
icon in the notification area.
Check the Battery Health
You can check battery health by using the Battery Meter in Dell QuickSet. For
information about QuickSet, right-click the QuickSet icon in the notification
area, and then click Help.
Low-Battery Warning
NOTICE: To avoid losing or corrupting data, save your work immediately after a
low-battery warning, then connect the computer to an electrical outlet. If the
battery runs completely out of power, Sleep state begins automatically.
A pop-up window warns you when the battery charge is approximately
90 percent depleted. The computer enters Sleep state when the battery
charge is at a critically low level.
You can change the settings for the battery alarms in Dell QuickSet or the
Power Options window (see "Configuring Power Management Settings" on
page 51).
Conserving Battery Power
To conserve battery power on your portable computer, do any of the following:
•
Connect the computer to an electrical outlet when possible; battery life is
largely determined by the number of times the battery is used and recharged.
•
Configure the power management settings using either Dell QuickSet or
Microsoft Windows Power Options to optimize your computer’s power
usage (see "Configuring Power Management Settings" on page 51).
•
Use the Sleep power state when you leave the computer unattended for a
long time (see "Low-Battery Warning" on page 49).
Using a Battery
49
book.book Page 50 Thursday, August 7, 2008 5:00 PM
Power Management Modes
Standby Mode
Standby mode conserves power by turning off the display and the hard drive
after a predetermined period of inactivity (a time-out). When the computer
exits standby mode, it returns to the same operating state it was in before
entering standby or sleep mode.
NOTICE: If your computer loses AC and battery power while in standby or sleep
mode, it may lose data.
To enter standby mode, click Start→Turn off computer→Stand by.
NOTE: If your computer is not responding, pressing the power button for more than
10 seconds turns it off.
Depending on how you set the power management options in the Power
Options Properties window or the QuickSet Power Management Wizard, you
may also use one of the following methods:
•
Close the display.
•
Press <Fn><Esc>.
To exit standby or sleep mode, press the power button or open the display,
depending on how you set the power management options. You cannot make the
computer exit standby or sleep mode by pressing a key or touching the touch pad.
Hibernate Mode
Hibernate mode conserves power by copying computer data to a reserved area
on the hard drive and then completely turning off the computer. When the
computer exits hibernate mode, it returns to the same operating state it was
in before entering hibernate mode.
NOTICE: You cannot remove devices or undock your computer while your
computer is in hibernate mode.
Your computer enters hibernate mode if the battery charge level becomes
critically low.
To enter hibernate mode, click the Start button, click Turn off computer,
press <Shift>, and then click Hibernate.
50
Using a Battery
book.book Page 51 Thursday, August 7, 2008 5:00 PM
Depending on how you set the power management options in the Power
Options Properties window or the QuickSet Power Management Wizard,
you may also use one of the following methods to enter hibernate mode:
•
Press the power button.
•
Close the display.
•
Press <Fn><Esc>.
NOTE: Some PC Cards or Express Cards may not operate correctly after the
computer exits hibernate mode. Remove and reinsert the card (see "Removing an
ExpressCard or Blank" on page 63), or simply restart (reboot) your computer.
To exit hibernate mode, press the power button. The computer may take a
short time to exit hibernate mode. You cannot make the computer exit
hibernate mode by pressing a key or touching the touch pad. For more
information on hibernate mode, see the documentation that came with your
operating system.
Configuring Power Management Settings
You can use the QuickSet Power Management Wizard or Windows Power
Options Properties to configure the power management settings on your
computer. For more information about QuickSet, right-click the QuickSet
icon in the taskbar and click Help.
Accessing Power Options Properties
Click Start→Control Panel→Performance and Maintenance, and then
click Power Options.
Charging the Battery
NOTE: Charge time is longer with the computer turned on. You can leave the
battery in the computer for as long as you like. The battery’s internal circuitry
prevents the battery from overcharging.
When you connect the computer to an electrical outlet or install a battery
while the computer is connected to an electrical outlet, the computer checks
the battery charge and temperature. If necessary, the AC adapter then charges
the battery and maintains the battery charge.
Using a Battery
51
book.book Page 52 Thursday, August 7, 2008 5:00 PM
If the battery is hot from being used in your computer or being in a hot
environment, the battery may not charge when you connect the computer to
an electrical outlet.
The battery is too hot to start charging if the battery light
flashes
alternately blue and amber. Disconnect the computer from the electrical outlet
and allow the computer and the battery to cool to room temperature, then
connect the computer to an electrical outlet to continue charging the battery.
For more information about resolving problems with a battery, see "Power
Problems" on page 93.
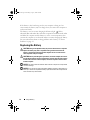
Replacing the Battery
CAUTION: Using an incompatible battery may increase the risk of fire or explosion.
Replace the battery only with a compatible battery purchased from Dell. The
battery is designed to work with your Dell computer. Do not use batteries from
other computers with your computer.
CAUTION: Before performing these procedures, turn off the computer, disconnect
the AC adapter from the electrical outlet and the computer, disconnect the modem
from the wall connector and the computer, and remove any other external cables
from the computer.
NOTICE: You must remove all external cables from the computer to avoid possible
connector damage.
NOTICE: If you choose to replace the battery with the computer in Sleep state, you
have up to 1 minute to complete the battery replacement before the computer shuts
down and loses any unsaved data.
52
Using a Battery
book.book Page 53 Thursday, August 7, 2008 5:00 PM
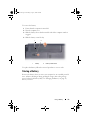
To remove the battery:
1 Ensure that the computer is turned off.
2 Turn the computer over.
3 Slide the battery release latch toward the side of the computer until it is
engaged.
4 Slide the battery out of the bay.
1
1
2
battery
2
battery release latch
To replace the battery, follow the removal procedure in reverse order.
Storing a Battery
Remove the battery when you store your computer for an extended period of
time. A battery discharges during prolonged storage. After a long storage
period, recharge the battery fully (see "Charging the Battery" on page 51)
before you use it.
Using a Battery
53
book.book Page 54 Thursday, August 7, 2008 5:00 PM
54
Using a Battery
book.book Page 55 Thursday, August 7, 2008 5:00 PM
Using Multimedia
Playing Media
NOTICE: Do not press down on the optical drive tray when you open or close it.
Keep the tray closed when you are not using the drive.
NOTICE: Do not move the computer while playing media.
NOTE: To prevent vibration and noise do not stick any additional labels or stickers
on the media.
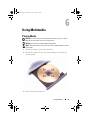
1 Press the eject button on the front of the drive.
2 Place the disc, label side up, in the center of the tray and snap the disc
onto the spindle.
3 Push the tray back into the drive.
Using Multimedia
55
book.book Page 56 Thursday, August 7, 2008 5:00 PM
To format media for storing or copying data, see the media software that
came with your computer.
NOTE: Ensure that you follow all copyright laws when copying media.
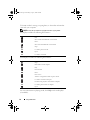
A CD player includes the following basic buttons:
Play.
Move backward within the current track.
Pause.
Move forward within the current track.
Stop.
Go to the previous track.
Eject.
Go to the next track.
A DVD player includes the following basic buttons:
Stop.
Restart the current chapter.
Play.
Fast forward.
Pause.
Fast reverse.
Advance a single frame while in pause mode.
Go to the next title or chapter.
Continuously play the current title or chapter.
Go to the previous title or chapter.
Eject.
For more information on playing media, click Help on the media player
(if available).
56
Using Multimedia
book.book Page 57 Thursday, August 7, 2008 5:00 PM
Copying CD and DVD Media
NOTE: Ensure that you observe all copyright laws while copying media.
NOTE: The types of optical drives offered by Dell may vary by country.
This section applies only to computers that have a DVD+/-RW, or
Combo drive.
The following instructions explain how to make an exact copy of a CD or DVD
using Roxio Creator. You can also use Roxio Creator for other purposes, such as
creating music CDs from audio files stored on your computer or backing up
important data. For help, open Roxio Creator, and then press <F1>.
The DVD drives installed in Dell computers do not support HD-DVD media.
For a list of supported media formats, see "Using Blank CD and DVD Media"
on page 58.
How to Copy a CD or DVD
NOTE: Most commercial DVDs have copyright protection and cannot be copied
using Roxio Creator Plus.
1 Click Start→All Programs→Roxio Creator→Projects→Copy.
2 Under the Copy tab, click Copy Disc.
3 To copy the CD or DVD:
•
If you have one optical drive, insert the source disc into the drive,
ensure that the settings are correct, and then click the Copy Disc
button to continue. The computer reads your source disc and copies
the data to a temporary folder on your computer hard drive.
When prompted, insert a blank disc into the drive and click OK.
•
If you have two optical drives, select the drive into which you have
inserted your source disc and click the Copy Disc button to continue.
The computer copies the data from the source disc to the blank disc.
Once you have finished copying the source disc, the disc that you have
created automatically ejects.
Using Multimedia
57
book.book Page 58 Thursday, August 7, 2008 5:00 PM
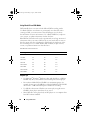
Using Blank CD and DVD Media
DVD-writable drives can write to both CD and DVD recording media.
Use blank CD-Rs to record music or permanently store data files. After
creating a CD-R, you cannot write to that CD-R again (see the Sonic
documentation for more information). Use a blank CD-RW if you plan to
erase, rewrite, or update information on that disc later.
Blank DVD+/-R media can be used to permanently store large amounts of
information. After you create a DVD+/-R, you may not be able to write to
that disc again if the disc is finalized or closed during the final stage of the
disc creation process. Use blank DVD+/-RW media if you plan to erase,
rewrite, or update information on that disc later.
DVD-Writable and Combo Drives
Media Type
Read
Write
Rewritable
CD-R
Yes
Yes
No
CD-RW
Yes
Yes
Yes
DVD+R
Yes
Yes
No
DVD-R
Yes
Yes
No
DVD+RW
Yes
Yes
Yes
DVD-RW
Yes
Yes
Yes
DVD+R DL
Yes
Yes
No
DVD-R DL
Yes
Yes
No
Helpful Tips
58
•
Use Microsoft® Windows® Explorer to drag and drop files to a CD-R or
CD-RW only after you start Roxio Creator and open a Creator project.
•
Do not burn a blank CD-R or CD-RW to its maximum capacity; for
example, do not copy a 650-MB file to a blank 650-MB CD. The CD-RW
drive needs 1–2 MB of the blank space to finalize the recording.
•
Use CD-Rs to burn music CDs that you want to play in regular stereos.
CD-RWs do not play in most home or car stereos.
•
Music MP3 files can be played only on MP3 players or on computers that
have MP3 software installed.
Using Multimedia
book.book Page 59 Thursday, August 7, 2008 5:00 PM
•
Use a blank CD-RW to practice CD recording until you are familiar with
CD recording techniques. If you make a mistake, you can erase the data on
the CD-RW and try again. You can also use blank CD-RWs to test music
file projects before you record the project permanently to a blank CD-R.
•
You cannot create audio DVDs with Roxio Creator.
•
Commercially available DVD players used in home theater systems may
not support all available DVD formats. For a list of formats supported by
your DVD player, see the documentation provided with your DVD player
or contact the manufacturer.
•
See the Roxio website at www.sonic.com.
Adjusting the Volume
NOTE: When the speakers are muted, you do not hear the media playing.
1 Right-click the volume icon in the notification area.
2 Click Open Volume Mixer.
3 Click and drag the bar to slide it up or down to increase or decrease the
volume.
For more information on volume control options, click Help in the
Volume Mixer window.
The Volume Meter displays the current volume level, including mute, on your
computer. Either click the QuickSet icon in the notification area and select or
deselect Disable On Screen Volume Meter, or press the volume control buttons
to enable or disable the Volume Meter on the screen.
Using Multimedia
59
book.book Page 60 Thursday, August 7, 2008 5:00 PM
Adjusting the Picture
If an error message notifies you that the current resolution and color depth
are using too much memory and preventing media playback, adjust the
display properties:
1 Click Start →Control Panel→Display.
2 Under Display, click Settings.
3 On Display Settings, click and drag the bar to reduce the resolution setting.
4 In the drop-down menu under Color quality, click Medium (16 bit).
5 Click OK.
60
Using Multimedia
book.book Page 61 Thursday, August 7, 2008 5:00 PM
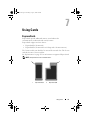
Using Cards
ExpressCards
ExpressCards provide additional memory, wired and wireless
communications, multimedia and security features.
ExpressCards support two form factors:
•
ExpressCard/34 (34 mm wide)
•
ExpressCard/54 (54 mm wide in an L-shape with a 34 mm connector)
The 34 mm card fits into both the 34 mm and 54 mm card slots. The 54 mm
card only fits into a 54 mm card slot.
See "Specifications" on page 133 for information on supported ExpressCards.
NOTE: An ExpressCard is not a bootable device.
1
2
1
ExpressCard/34
2
ExpressCard/54
Using Cards
61
book.book Page 62 Thursday, August 7, 2008 5:00 PM
ExpressCard Blanks
Your computer shipped with a plastic blank installed in the ExpressCard slot.
Blanks protect unused slots from dust and other particles. Save the blank for
use when no ExpressCard is installed in the slot; blanks from other computers
may not fit your computer.
Remove the blank before installing an ExpressCard. To remove the blank,
see "Removing an ExpressCard or Blank" on page 63.
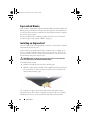
Installing an ExpressCard
You can install an ExpressCard while the computer is running. The computer
automatically detects the card.
ExpressCards are generally marked with a symbol (such as a triangle or an
arrow) or a label to indicate which end to insert into the slot. The cards are
keyed to prevent incorrect insertion. If card orientation is not clear, see the
documentation that came with the card.
CAUTION: Before you begin any of the procedures in this section, follow the
safety instructions in the Product Information Guide.
To install an ExpressCard:
1 Hold the card with the top side of the card facing up.
2 Slide the card into the slot until the card is completely seated in its connector.
If you encounter too much resistance, do not force the card. Check the
card orientation and try again.
The computer recognizes the ExpressCard and automatically loads the
appropriate device driver. If the configuration program tells you to load the
manufacturer's drivers, use the media that came with the ExpressCard.
62
Using Cards
book.book Page 63 Thursday, August 7, 2008 5:00 PM
Removing an ExpressCard or Blank
CAUTION: Before you begin any of the procedures in this section, follow the
safety instructions in the Product Information Guide.
Press the card or blank to remove it from its slot.
Save a blank to use when no ExpressCard is installed in a slot. Blanks protect
unused slots from dust and other particles.
Memory Card Reader
The memory card reader provides a fast and convenient way to view and share
digital photos, music, and videos stored on a memory card.
NOTE: A memory card is not a bootable device.
The 8-in-1 memory card reader reads the following memory cards:
•
Secure Digital (SD)
•
SDIO
•
MultiMediaCard (MMC)
•
Memory Stick
•
Memory Stick PRO
•
xD-Picture Card
•
Hi Speed-SD
•
Hi Density-SD
Memory Card Blanks
Your computer shipped with a plastic blank installed in the memory card
reader. Blanks protect unused slots from dust and other particles. Save the
blank for use when no media memory card is installed in the slot; blanks from
other computers may not fit your computer.
Remove the blank before installing a media memory card. To remove the
blank, see "Removing a Memory Card or Blank" on page 65.
Using Cards
63
book.book Page 64 Thursday, August 7, 2008 5:00 PM
Installing a Memory Card
You can install a media memory card in the computer while the computer is
running. The computer automatically detects the card.
Memory cards are generally marked with a symbol (such as a triangle or an arrow)
or a label to indicate which end to insert into the slot. The cards are keyed to
prevent incorrect insertion. If card orientation is not clear, see the
documentation that came with the card.
CAUTION: Before you begin any of the procedures in this section, follow the
safety instructions in the Product Information Guide.
To install a memory card:
1 Hold the card with the top side of the card facing up.
2 Slide the card into the slot until the card is completely seated in its connector.
If you encounter too much resistance, do not force the card. Check the
card orientation and try again.
The computer recognizes the memory card and automatically loads the
appropriate device driver. If the configuration program tells you to load the
manufacturer's drivers, use the media that came with the memory card,
if applicable.
64
Using Cards
book.book Page 65 Thursday, August 7, 2008 5:00 PM
Removing a Memory Card or Blank
CAUTION: Before you begin any of the procedures in this section, follow the
safety instructions in the Product Information Guide.
NOTICE: Click the
icon in the notification area to select a card and stop it
from functioning before you remove it from the computer. If you do not stop the
card, you could lose data.
Press the card into the slot to release it from the card reader. When it is
partially ejected, remove the card.
Using Cards
65
book.book Page 66 Thursday, August 7, 2008 5:00 PM
66
Using Cards
book.book Page 67 Thursday, August 7, 2008 5:00 PM
Setting Up and Using Networks
Setting up a computer network provides connectivity between your computer
and the Internet, another computer, or a network. For example, with a
network set up in a home or small office you can print to a shared printer,
access drives and files on another computer, browse other networks, or access
the Internet. You can set up a local area network (LAN) using a network or
broadband modem cable or set up a wireless LAN (WLAN).
The Microsoft® Windows® XP operating system provides wizards to help
guide you through the process of networking computers. For more
information about Networking, see the Windows Help and Support Center
(see "Microsoft Windows XP Help and Support Center" on page 16).
Connecting a Network or Broadband Modem Cable
Before you connect your computer to a network, the computer must have a
network adapter installed and a network cable connected to it.
1 Connect the network cable to the network adapter connector on the back
of your computer.
NOTE: Insert the cable connector until it clicks into place, and then gently
pull on the cable to ensure that it is securely attached.
2 Connect the other end of the network cable to a network connection
device or a network wall connector.
NOTE: Do not use a network cable with a telephone wall connector.
Setting Up and Using Networks
67
book.book Page 68 Thursday, August 7, 2008 5:00 PM
Setting Up a Network
1 Click Start→All Programs→Accessories→Communications→Network
Setup Wizard→Next→Checklist for creating a network.
NOTE: Selecting the connection method labeled This computer connects
directly to the Internet enables the integrated firewall provided with
Windows XP Service Pack 2 (SP2).
2 Complete the checklist.
3 Return to the Network Setup Wizard and follow the instructions in the wizard.
Wireless Local Area Network
A wireless local area network (WLAN) is a series of interconnected computers
that communicate with each other over the air waves rather than through a
network cable connected to each computer. In a WLAN, a radio
communications device called an access point or wireless router connects
network computers and provides Internet, or network access. The access
point or wireless router and the wireless network card in the computer
communicate by broadcasting data from their antennas over the air waves.
What You Need to Establish a WLAN Connection
Before you can set up a WLAN, you need:
•
High-speed (broadband) Internet access (such as cable or DSL)
•
A broadband modem that is connected and working
•
A wireless router or access point
•
A wireless network card for each computer that you want to connect to
your WLAN
•
A network cable with a network (RJ-45) connector
Checking Your Wireless Network Card
Depending on what you selected when you purchased your computer, the
computer has a variety of configurations. To confirm that your computer has
a wireless network card and to determine the type of card:
68
•
Start button and Connect To option
•
Check the order confirmation for your computer
Setting Up and Using Networks
book.book Page 69 Thursday, August 7, 2008 5:00 PM
Start Button and Connect To Option
Click Start→Connect To→Show all connections.
NOTE: If your computer is set to the Classic Start menu option, click Start→
Settings→Network Connections to view your network connections.
If Wireless Network Connection does not appear under LAN or High-Speed
Internet, you may not have a wireless network card.
If Wireless Network Connection appears, you have a wireless network card.
To view detailed information about the wireless network card:
1 Right-click Wireless Network Connection.
2 Click Properties.
The Wireless Network Connection Properties window appears.
The wireless network card’s name and model number are listed on the
General tab.
NOTE: If Wireless Network Connection does not appear, you may not have a
wireless network card.
The Order Confirmation for Your Computer
The order confirmation that you received when you ordered your computer
lists the hardware and software that shipped with your computer.
Setting Up a New WLAN Using a Wireless Router and a
Broadband Modem
1 Contact your Internet service provider (ISP) to obtain specific information
about the connection requirements for your broadband modem.
2 Ensure that you have wired Internet access through your broadband
modem before you attempt to set up a wireless Internet connection
(see "Connecting a Network or Broadband Modem Cable" on page 67).
3 Install any software required for your wireless router. Your wireless router may
have been shipped with installation media. Installation media usually
contains installation and troubleshooting information. Install the required
software according to the instructions provided by the router manufacturer.
4 Shut down your computer and any other wireless-enabled computers in
the vicinity.
5 Disconnect your broadband modem power cable from the electrical outlet.
Setting Up and Using Networks
69
book.book Page 70 Thursday, August 7, 2008 5:00 PM
6 Disconnect the network cable from the computer and the modem.
7 Disconnect the AC adapter cable from your wireless router to ensure that
there is no power connected to the router.
NOTE: Wait for a minimum of 5 minutes after disconnecting your broadband
modem before continuing with the network setup.
8 Insert a network cable into the network (RJ-45) connector on the
unpowered broadband modem.
9 Connect the other end of the network cable into the Internet network
(RJ-45) connector on the unpowered wireless router.
10 Ensure that no network or USB cables, other than the network cable
connecting the modem and the wireless router, are connected to the
broadband modem.
NOTE: Restart your wireless equipment in the order described below to
prevent a potential connection failure.
11 Turn on only your broadband modem and wait for at least 2 minutes for
the broadband modem to stabilize. After 2 minutes, proceed to step 12.
12 Turn on your wireless router and wait for at least 2 minutes for the wireless
router to stabilize. After 2 minutes, proceed to the step 13.
13 Start your computer and wait until the boot process completes.
14 See the documentation that came with your wireless router to do the
following in order to set up the wireless router:
•
Establish communication between your computer and your wireless router.
•
Configure your wireless router to communicate with your
broadband router.
•
Find out your wireless router’s broadcast name. The technical term for
the name of your router’s broadcast name is Service Set Identifier (SSID)
or network name.
15 If necessary, configure your wireless network card to connect to the wireless
network (see "Connecting to a WLAN" on page 71).
70
Setting Up and Using Networks
book.book Page 71 Thursday, August 7, 2008 5:00 PM
Connecting to a WLAN
NOTE: Before you connect to a WLAN, ensure that you have followed the
instructions in "Wireless Local Area Network" on page 68.
NOTE: The following networking instructions do not apply to internal cards with
Bluetooth® wireless technology or cellular products.
This section provides general procedures for connecting to a network using
wireless technology. Specific network names and configuration details vary.
See "Wireless Local Area Network" on page 68 for more information about
how to prepare for connecting your computer to a WLAN.
Your wireless network card requires specific software and drivers for
connecting to a network. The software is already installed.
NOTE: If the software is removed or corrupted, follow the instructions in the user
documentation for your wireless network card. Verify the type of wireless network
card installed in your computer and then search for that name on the Dell™ Support
website at support.dell.com. For information on the type of wireless network card that
is installed in your computer, see "Checking Your Wireless Network Card" on page 68.
When you turn on your computer and a network (for which your computer is
not configured) is detected in the area, a pop-up appears near the network
icon in the Windows notification area.
To connect to the network:
1 Click Start→Settings→Network Connections→Wireless Network
Connection.
2 Select the network from the list and click Connect.
NOTE: If you select a secure network, you must enter a WEP or WPA key when
prompted. Network security settings are unique to your network. Dell cannot
provide this information.
NOTE: Your computer can take up to 1 minute to connect to the network.
Once you have configured your computer for a wireless network, another
pop-up notifies you that your computer is connected to that network.
Thereafter, whenever you log on to your computer within the range of the
wireless network that you selected, the same pop-up notifies you of the
wireless network connection.
Setting Up and Using Networks
71
book.book Page 72 Thursday, August 7, 2008 5:00 PM
Determining the Wireless Network Device Manager
Depending on the software installed on your computer, different wireless
configuration utilities may manage your network devices:
•
Your wireless network card’s client utility
•
The Windows XP operating system
To determine which wireless configuration utility is managing your wireless
network card in Windows XP:
1 Click Start→Settings→Control Panel→Network Connections.
2 Right-click the Wireless Network Connection icon, and then click View
Available Wireless Networks.
If the Choose a wireless network window states Windows cannot configure
this connection, the wireless network card’s client utility is managing the
wireless network card.
If the Choose a wireless network window states Click an item in the list
below to connect to a wireless network in range or to get more information,
the Windows XP operating system is managing the wireless network card.
For specific information about the wireless configuration utility installed on
your computer, see your wireless network documentation in the Windows
Help and Support Center (see "Microsoft Windows XP Help and Support
Center" on page 16).
Monitoring the Status of the Wireless Network Card Through Dell QuickSet
The wireless activity indicator provides you with an easy way to monitor the
status of your computer’s wireless devices. To turn the wireless activity indicator
on or off, click the QuickSet icon in the taskbar and select Hotkey Popups.
If Wireless Activity Indicator Off is not checked, the indicator is on.
If Wireless Activity Indicator Off is checked, the indicator is off.
The wireless activity indicator displays whether your computer’s integrated
wireless devices are enabled or disabled. When you turn the wireless
networking function on or off, the wireless activity indicator changes to
display the status.
For more information about the Dell QuickSet wireless activity indicator,
right-click the QuickSet icon in the taskbar, and then select Help.
72
Setting Up and Using Networks
book.book Page 73 Thursday, August 7, 2008 5:00 PM
Securing Your Computer
Security Cable Lock
NOTE: Your computer does not ship with a security cable lock.
A security cable lock is a commercially available antitheft device. To use the
lock, attach it to the security cable slot on your Dell computer. For more
information, see the instructions included with the device.
NOTICE: Before you buy an antitheft device, ensure that it will work with the
security cable slot on your computer.
Passwords
Passwords prevent unauthorized access to your computer. When you first
start your computer, you must assign a primary password at the prompt. If you
do not enter a password within 2 minutes, the computer returns to its
previous operating state.
When using passwords, observe the following guidelines:
•
Choose a password that you can remember, but not one that is easy to guess.
For example, do not use the names of family members or pets for passwords.
•
It is recommended that you do not write down your password. If you do write
it down, however, ensure that the password is stored in a secure location.
•
Do not share your password with other people.
•
Ensure that people are not watching you when you type your password.
Securing Your Computer
73
book.book Page 74 Thursday, August 7, 2008 5:00 PM
NOTICE: Passwords provide a high level of security for data in your computer or
hard drive. However, they are not foolproof. If you require more security, obtain and
use additional forms of protection such as data encryption programs.
Use the User Accounts option in the Control Panel in the Microsoft®
Windows® operating system to create user accounts or to change passwords.
Once you create a user password, you must enter it each time you turn on or
unlock your computer. If you do not enter a password within 2 minutes, the
computer returns to its previous operating state. For more information, see
your Windows documentation.
If you forget any of your hardware passwords, such as the hard drive and BIOS
passwords, contact Dell (see "Contacting Dell" on page 132). For your
protection, Dell technical support staff will ask you for proof of your identity
to ensure that only an authorized person can use the computer.
If Your Computer Is Lost or Stolen
•
Call a law enforcement agency to report the lost or stolen computer.
Include the Service Tag in your description of the computer. Ask that a
case number be assigned and write down the number, along with the
name, address, and phone number of the law enforcement agency. If
possible, obtain the name of the investigating officer.
NOTE: If you know where the computer was lost or stolen, call a law
enforcement agency in that area. If you do not know, call a law enforcement
agency where you live.
•
If the computer belongs to a company, notify the security office of the company.
•
Contact Dell customer service to report the missing computer. Provide the
computer Service Tag, the case number, and the name, address, and phone
number of the law enforcement agency to which you reported the missing
computer. If possible, give the name of the investigating officer.
The Dell customer service representative will log your report under the
computer Service Tag and record the computer as missing or stolen. If someone
calls Dell for technical assistance and gives your Service Tag, the computer is
identified automatically as missing or stolen. The representative will attempt to
get the phone number and address of the caller. Dell will then contact the law
enforcement agency to which you reported the missing computer.
74
Securing Your Computer
book.book Page 75 Thursday, August 7, 2008 5:00 PM
Troubleshooting
Dell Technical Update Service
The Dell Technical Update service provides proactive e-mail notification of
software and hardware updates for your computer. The service is free and can be
customized for content, format, and how frequently you receive notifications.
To enroll for the Dell Technical Update service, go to
support.dell.com/technicalupdate.
Dell Diagnostics
CAUTION: Before you begin any of the procedures in this section, follow the
safety instructions in the Product Information Guide.
When to Use the Dell Diagnostics
If you experience a problem with your computer, perform the checks in
"Lockups and Software Problems" on page 90 and run the Dell Diagnostics
before you contact Dell for technical assistance.
It is recommended that you print these procedures before you begin.
NOTE: The Dell Diagnostics only operate on Dell computers.
Enter system setup, review your computer’s configuration information, and
ensure that the device you want to test displays in system setup and is active
(see "Using the System Setup Program" on page 141).
Start the Dell Diagnostics from your hard drive or from your Drivers and Utilities
media (see "Drivers and Utilities Media" on page 13).
Troubleshooting
75
book.book Page 76 Thursday, August 7, 2008 5:00 PM
Starting the Dell Diagnostics From Your Hard Drive
The Dell Diagnostics is located on a hidden diagnostic utility partition on
your hard drive.
NOTE: If your computer cannot display a screen image, contact Dell (see "Contacting
Dell" on page 132).
NOTE: If the computer is connected to a docking device (docked), undock it.
See the documentation that came with your docking device for instructions.
1 Ensure that the computer is connected to an electrical outlet that is
known to be working properly.
2 Turn on (or restart) your computer.
3 Start the Dell Diagnostics in one of the following two ways:
a
When the DELL™ logo appears, press <F12> immediately. Select
Diagnostics from the boot menu, and then press <Enter>.
NOTE: If you wait too long and the operating system logo appears, continue to
wait until you see the Microsoft® Windows® desktop, then shut down your
computer and try again.
NOTE: Before attempting option B, the computer must be powered down
completely.
b
Press and hold the <Fn> key while powering the computer on.
NOTE: If you see a message stating that no diagnostics utility partition has
been found, run the Dell Diagnostics from your Drivers and Utilities media.
The computer runs the Pre-boot System Assessment, a series of initial
tests of your system board, keyboard, hard drive, and display.
•
During the assessment, answer any questions that appear.
•
If a failure is detected, the computer stops and beeps. To stop the
assessment and restart the computer, press <n>; to continue to the
next test, press <y>; to retest the component that failed, press <r>.
•
If failures are detected during the Pre-boot System Assessment, write
down the error code(s) and contact Dell.
If the Pre-boot System Assessment completes successfully, you receive the
message Booting Dell Diagnostic Utility Partition.
Press any key to continue.
4 Press any key to start the Dell Diagnostics from the diagnostics utility
partition on your hard drive.
76
Troubleshooting
book.book Page 77 Thursday, August 7, 2008 5:00 PM
Starting the Dell Diagnostics From the Drivers and Utilities Media
1 Insert your Drivers and Utilities media.
2 Shut down and restart the computer.
3 When the DELL logo appears, press <F12> immediately.
NOTE: Keyboard failure may result when a key on the keyboard is held down
for extended periods of time. To avoid possible keyboard failure, press and
release <F12> in even intervals until the boot device menu appears.
4 At the boot device menu, use the up- and down-arrow keys to highlight
CD/DVD/CD-RW, and then press <Enter>.
NOTE: The Quickboot feature changes the boot sequence for the current
boot only. Upon restart, the computer boots according to the boot sequence
specified in system setup.
5 Select the Boot from CD-ROM option from the menu that appears, and
then press <Enter>.
6 Type 1 to start the Drivers and Utilities menu, and then press <Enter>.
7 Select Run the 32 Bit Dell Diagnostics from the numbered list. If multiple
versions are listed, select the version appropriate for your computer.
8 At the Dell Diagnostics Main Menu, select the test you want to run.
NOTE: Write down any error codes and problem descriptions exactly as they
appear and follow the instructions on the screen.
9 After all tests have completed, close the test window to return to the Dell
Diagnostics Main Menu.
10 Remove your Drivers and Utilities media, then close the Main Menu
window to exit the Dell Diagnostics and restart the computer.
Troubleshooting
77
book.book Page 78 Thursday, August 7, 2008 5:00 PM
Dell Diagnostics Main Menu
After the Dell Diagnostics loads and the Main Menu screen appears, click the
button for the option you want.
NOTE: It is recommended that you select Test System to run a complete test
on your computer.
Option
Function
Test Memory
Run the stand-alone memory test
Test System
Run System Diagnostics
Exit
Exit Diagnostics
After you have selected the Test System option from the main menu, the
following menu appears.
NOTE: It is recommended that you select Extended Test from the menu
below to run a more thorough check of the devices in the computer.
Option
Function
Express Test
Performs a quick test of computer devices. The test typically
takes 10 to 20 minutes and requires no interaction on your
part. Run Express Test first to increase the possibility of
tracing the problem quickly.
Extended Test Performs a thorough check of computer devices. The test
typically takes an hour or more and periodically requires your
input to answer specific questions.
Custom Test
Tests a specific device in the computer and can be used to
customize the tests you want to run.
Symptom Tree
Lists a number of common symptoms and allows you to select
a test based on the symptom of the problem you are having.
For any problem encountered during a test, a message appears with an error
code and a description of the problem. Write down the error code and problem
description exactly as it appears and follow the instructions on the screen. If you
cannot resolve the problem, contact Dell (see "Contacting Dell" on page 132).
NOTE: The Service Tag for your computer is located at the top of each test screen.
When contacting Dell support, have your Service Tag ready.
78
Troubleshooting
book.book Page 79 Thursday, August 7, 2008 5:00 PM
The following tabs provide additional information for tests run from the
Custom Test or Symptom Tree option:
Tab
Function
Results
Displays the results of the test and any error conditions
encountered.
Errors
Displays error conditions encountered, error codes, and the
problem description.
Help
Describes the test and any requirements for running the test.
Configuration
Displays your hardware configuration for the selected device.
The Dell Diagnostics obtains configuration information for
all devices from system setup, memory, and various internal
tests, and it displays the information in the device list in the
left pane of the screen. The device list may not display the
names of all the components installed on your computer or
all devices attached to your computer.
Parameters
Allows you to customize the test by changing the test settings.
Drive Problems
CAUTION: Before you begin any of the procedures in this section, follow the
safety instructions in the Product Information Guide.
Fill out the "Diagnostics Checklist" on page 131 as you complete these checks.
ENSURE THAT MICROSOFT® WINDOWS® RECOGNIZES THE DRIVE —
Click Start→My Computer.
TE S T T H E D R I V E —
•
Insert another floppy disk, CD, or DVD to eliminate the possibility that
the original media is defective.
•
Insert a bootable floppy disk and restart the computer.
C L E A N T H E D R I V E O R D I S K — See "Cleaning Your Computer" on page 144.
Troubleshooting
79
book.book Page 80 Thursday, August 7, 2008 5:00 PM
E N S U R E T H A T T H E C D O R DVD M E D I A I S S N A P P E D O N T O T H E S P I N D L E
CHECK THE CABLE CONNECTIONS
C H E C K F O R H A R D W A R E I N C O M P A T I B I L I T I E S — See "Troubleshooting Software
and Hardware Problems in the Microsoft® Windows® XP Operating System"
on page 103.
R U N T H E D E L L D I A G N O S T I C S — See "Dell Diagnostics" on page 75.
Optical drive problems
NOTE: High-speed optical drive vibration is normal and may cause noise, which
does not indicate a defect in the drive or the media.
NOTE: Because of different regions worldwide and different disc formats, not all
DVD titles work in all DVD drives.
Problems writing to a CD-RW, or DVD+/-RW drive
C L O S E O T H E R P R O G R A M S — CD-RW and DVD+/-RW drives must receive a
steady stream of data when writing. If the stream is interrupted, an error
occurs. Try closing all programs before you write to the drive.
TU R N O F F S L E E P S T A T E I N W I N D O W S B E F O R E W R I T I N G T O A C D / D V D D I S C —
See "Standby Mode" on page 50 for information on Sleep state.
C H A N G E T H E W R I T E S P E E D T O A S L O W E R R A T E — See the help files for your
CD or DVD creation software.
The drive tray cannot eject
1 Ensure that the computer is shut down.
2 Straighten a paper clip and insert one end into the eject hole at the front
of the drive, then push firmly until the tray is partially ejected.
3 Gently pull out the tray until it stops.
The drive makes an unfamiliar scraping or grinding sound
80
•
Ensure that the sound is not caused by the program that is running.
•
Ensure that the disc is inserted properly.
Troubleshooting
book.book Page 81 Thursday, August 7, 2008 5:00 PM
Hard drive problems
A L L O W T H E C O M P U T E R T O C O O L B E F O R E T U R N I N G I T O N — A hot hard drive may
prevent the operating system from starting. Try allowing the computer to
return to room temperature before turning it on.
RUN CHECK DISK —
1 Click Start and click My Computer.
2 Right-click Local Disk C:.
3 Click Properties→Tools→Check Now.
4 Click Scan for and attempt recovery of bad sectors and click Start.
E-Mail, Modem, and Internet Problems
CAUTION: Before you begin any of the procedures in this section, follow the
safety instructions in the Product Information Guide.
NOTE: Connect the modem to an analog telephone connector only. The modem
does not operate while it is connected to a digital telephone network.
CHECK THE MICROSOFT OUTLOOK® EXPRESS OR WINDOWS MAIL SECURITY
S E T T I N G S — If you cannot open your e-mail attachments:
1 In Outlook Express, click Tools, click Options, and then click Security.
2 Click Do not allow attachments to remove the checkmark.
CHECK THE TELEPHONE LINE CONNECTION
CHECK THE TELEPHONE CONNECTOR
CONNECT THE MODEM DIRECTLY TO THE TELEPHONE WALL CONNECTOR
USE A DIFFERENT TELEPHONE LINE
•
Verify that the telephone line is connected to the connector on the modem
(the connector has either a green label or a connector-shaped icon next to it).
•
Ensure that you hear a click when you insert the telephone line connector
into the modem.
•
Disconnect the telephone line from the modem and connect it to a
telephone, then listen for a dial tone.
•
If you have other telephone devices sharing the line, such as an answering
machine, fax machine, surge protector, or line splitter, then bypass them
and connect the modem directly to the telephone wall connector. If you
are using a line that is 3 m (10 ft) or more in length, try a shorter one.
Troubleshooting
81
book.book Page 82 Thursday, August 7, 2008 5:00 PM
R U N T H E M O D E M D I A G N O S T I C U T I L I T Y — Click the Start →Programs→
Modem Diagnostic Tool→Modem Diagnostic Utility. Follow the instructions
on the screen to identify and resolve modem problems (Modem Diagnostic
Utility is not available on certain computers).
VE R I F Y T H A T T H E M O D E M I S C O M M U N I C A T I N G W I T H W I N D O W S —
1 Click the Start, and then click Control Panel.
2 Click Phone and Modem Options.
3 Click the Modems tab.
4 Click the COM port for your modem.
5 Click Properties, click the Diagnostics tab, and then click Query Modem
to verify that the modem is communicating with Windows.
If all commands receive responses, the modem is operating properly.
E N S U R E T H A T Y O U A R E C O N N E C T E D T O T H E I N T E R N E T — Ensure that you have
subscribed to an Internet service provider. With the Outlook Express e-mail
program open, click File. If Work Offline has a checkmark next to it, click the
checkmark to remove it, and then connect to the Internet. For help, contact
your Internet service provider.
S C A N T H E C O M P U T E R F O R S P Y W A R E — If you are experiencing slow computer
performance, you frequently receive pop-up advertisements, or you are having
problems connecting to the Internet, your computer might be infected with
spyware. Use an anti-virus program that includes anti-spyware protection (your
program may require an upgrade) to scan the computer and remove spyware.
For more information, go to support.dell.com and search for the keyword spyware.
Error Messages
Fill out the "Diagnostics Checklist" on page 131 as you complete these checks.
CAUTION: Before you begin any of the procedures in this section, follow the
safety instructions in the Product Information Guide.
If the message is not listed, see the documentation for the operating system
or the program that was running when the message appeared.
82
Troubleshooting
book.book Page 83 Thursday, August 7, 2008 5:00 PM
A U X I L I A R Y D E V I C E F A I L U R E — The touch pad or external mouse may be faulty.
For an external mouse, check the cable connection. Enable the Pointing Device
option in the system setup program (see "Using the System Setup Program"
on page 141). If the problem persists, contact Dell (see "Contacting Dell" on
page 132).
B A D C O M M A N D O R F I L E N A M E — Ensure that you have spelled the command
correctly, put spaces in the proper place, and used the correct pathname.
C A C H E D I S A B L E D D U E T O F A I L U R E — The primary cache internal to the
microprocessor has failed. Contact Dell (see "Contacting Dell" on page 132).
CD D R I V E C O N T R O L L E R F A I L U R E — The CD drive does not respond to
commands from the computer (see "Drive Problems" on page 79).
D A T A E R R O R — The hard drive cannot read the data (see "Drive Problems" on
page 79).
D E C R E A S I N G A V A I L A B L E M E M O R Y — One or more memory modules may be
faulty or improperly seated. Reinstall the memory modules and, if necessary,
replace them (see "Memory" on page 116).
D I S K C : F A I L E D I N I T I A L I Z A T I O N — The hard drive failed initialization. Run the
hard drive tests in the Dell Diagnostics (see "Dell Diagnostics" on page 75).
D R I V E N O T R E A D Y — The operation requires a hard drive in the bay before it
can continue. Install a hard drive in the hard drive bay (see "Hard Drive" on
page 109).
E R R O R R E A D I N G P C M C I A C A R D — The computer cannot identify the
ExpressCard. Reinsert the card or try another card (see "Using Cards" on
page 61).
E X T E N D E D M E M O R Y S I Z E H A S C H A N G E D — The amount of memory recorded in
NVRAM does not match the memory installed in the computer. Restart the
computer. If the error appears again, contact Dell (see "Contacting Dell" on
page 132).
T H E F I L E B E I N G C O P I E D I S T O O L A R G E F O R T H E D E S T I N A T I O N D R I V E — The file
that you are trying to copy is too large to fit on the disk, or the disk is full. Try
copying the file to a different disk or use a larger capacity disk.
A FILENAME CANNOT CONTAIN ANY OF THE FOLLOWING CHARACTERS: \ / : * ? “ <
> | — Do not use these characters in filenames.
G A T E A 2 0 F A I L U R E — A memory module may be loose. Reinstall the memory
modules and, if necessary, replace them (see "Memory" on page 116).
Troubleshooting
83
book.book Page 84 Thursday, August 7, 2008 5:00 PM
G E N E R A L F A I L U R E — The operating system is unable to carry out the
command. The message is usually followed by specific information—for
example, Printer out of paper. Take the appropriate action.
H A R D - D I S K D R I V E C O N F I G U R A T I O N E R R O R — The computer cannot identify the
drive type. Shut down the computer, remove the hard drive (see "Hard Drive"
on page 109), and boot the computer from a CD. Then, shut down the
computer, reinstall the hard drive, and restart the computer. Run the Hard
Disk Drive tests in the Dell Diagnostics (see "Dell Diagnostics" on page 75).
H A R D - D I S K D R I V E C O N T R O L L E R F A I L U R E 0 — The hard drive does not respond
to commands from the computer. Shut down the computer, remove the hard
drive (see "Hard Drive" on page 109), and boot the computer from a CD.
Then, shut down the computer, reinstall the hard drive, and restart the
computer. If the problem persists, try another drive. Run the Hard Disk Drive
tests in the Dell Diagnostics (see "Dell Diagnostics" on page 75).
H A R D - D I S K D R I V E F A I L U R E — The hard drive does not respond to commands
from the computer. Shut down the computer, remove the hard drive (see
"Hard Drive" on page 109), and boot the computer from a CD. Then, shut
down the computer, reinstall the hard drive, and restart the computer. If the
problem persists, try another drive. Run the Hard Disk Drive tests in the Dell
Diagnostics (see "Dell Diagnostics" on page 75).
H A R D - D I S K D R I V E R E A D F A I L U R E — The hard drive may be defective. Shut
down the computer, remove the hard drive (see "Hard Drive" on page 109),
and boot the computer from a CD. Then, shut down the computer, reinstall
the hard drive, and restart the computer. If the problem persists, try another
drive. Run the Hard Disk Drive tests in the Dell Diagnostics (see "Dell
Diagnostics" on page 75).
I N S E R T B O O T A B L E M E D I A — The operating system is trying to boot to
nonbootable media, such as a floppy disk or CD. Insert bootable media.
I N V A L I D C O N F I G U R A T I O N I N F O R M A T I O N - P L E A S E R U N S YS T E M S E T U P
P R O G R A M — The system configuration information does not match the
hardware configuration. The message is most likely to occur after a memory
module is installed. Correct the appropriate options in the system setup
program (see "Using the System Setup Program" on page 141).
K E Y B O A R D C L O C K L I N E F A I L U R E — For external keyboards, check the cable
connection. Run the Keyboard Controller test in the Dell Diagnostics (see
"Dell Diagnostics" on page 75).
84
Troubleshooting
book.book Page 85 Thursday, August 7, 2008 5:00 PM
K E Y B O A R D C O N T R O L L E R F A I L U R E — For external keyboards, check the cable
connection. Restart the computer, and avoid touching the keyboard or the
mouse during the boot routine. Run the Keyboard Controller test in the Dell
Diagnostics (see "Dell Diagnostics" on page 75).
K E Y B O A R D D A T A L I N E F A I L U R E — For external keyboards, check the cable
connection. Run the Keyboard Controller test in the Dell Diagnostics (see
"Dell Diagnostics" on page 75).
K E Y B O A R D S T U C K K E Y F A I L U R E — For external keyboards or keypads, check the
cable connection. Restart the computer, and avoid touching the keyboard or
keys during the boot routine. Run the Stuck Key test in the Dell Diagnostics
(see "Dell Diagnostics" on page 75).
MEMORY ADDRESS LINE FAILURE AT ADDRESS, READ VALUE EXPECTING VALUE —
A memory module may be faulty or improperly seated. Reinstall the memory
modules and, if necessary, replace them (see "Memory" on page 116).
M E M O R Y A L L O C A T I O N E R R O R — The software you are attempting to run is
conflicting with the operating system, another program, or a utility. Shut
down the computer, wait 30 seconds, and then restart it. Try to run the
program again. If the error message still appears, see the software
documentation.
MEMORY DATA LINE FAILURE AT ADDRESS, READ VALUE EXPECTING VALUE — A
memory module may be faulty or improperly seated. Reinstall the memory
modules and, if necessary, replace them (see "Memory" on page 116).
MEMORY DOUBLE WORD LOGIC FAILURE AT ADDRESS, READ VALUE EXPECTING
V A L U E — A memory module may be faulty or improperly seated. Reinstall the
memory modules and, if necessary, replace them (see "Memory" on page 116).
MEMORY ODD/EVEN LOGIC FAILURE AT ADDRESS, READ VALUE EXPECTING
V A L U E — A memory module may be faulty or improperly seated. Reinstall the
memory modules and, if necessary, replace them (see "Memory" on page 116).
MEMORY WRITE/READ FAILURE AT ADDRESS, READ VALUE EXPECTING VALUE — A
memory module may be faulty or improperly seated. Reinstall the memory
modules and, if necessary, replace them (see "Memory" on page 116).
N O B O O T D E V I C E A V A I L A B L E — The computer cannot find the hard drive. If
the hard drive is your boot device, ensure that the drive is installed, properly
seated, and partitioned as a boot device.
N O B O O T S E C T O R O N H A R D D R I V E — The operating system may be corrupted.
Contact Dell (see "Contacting Dell" on page 132).
Troubleshooting
85
book.book Page 86 Thursday, August 7, 2008 5:00 PM
N O T I M E R T I C K I N T E R R U P T — A chip on the system board may be
malfunctioning. Run the System Set tests in the Dell Diagnostics (see "Dell
Diagnostics" on page 75).
NOT ENOUGH MEMORY OR RESOURCES. EXIT SOME PROGRAMS AND TRY AGAIN —
You have too many programs open. Close all windows and open the program
that you want to use.
O P E R A T I N G S YS T E M N O T F O U N D — Reinstall the hard drive (see "Hard Drive"
on page 109). If the problem persists, contact Dell (see "Contacting Dell" on
page 132).
O P T I O N A L R O M B A D C H E C K S U M — The optional ROM has failed. Contact
Dell (see "Contacting Dell" on page 132).
A R E Q U I R E D . D L L F I L E W A S N O T F O U N D — The program that you are trying to
open is missing an essential file. Remove and then reinstall the program.
1 Click Start→Control Panel→Add or Remove Programs→Programs and
Features.
2 Select the program you want to remove.
3 Click Uninstall.
4 See the program documentation for installation instructions.
See the program documentation for installation instructions.
S E C T O R N O T F O U N D — The operating system cannot locate a sector on the
hard drive. You may have a defective sector or corrupted FAT on the hard drive.
Run the Windows error-checking utility to check the file structure on the
hard drive. See Windows Help and Support for instructions (click Start →
Help and Support). If a large number of sectors are defective, back up the
data (if possible), and then reformat the hard drive.
S E E K E R R O R — The operating system cannot find a specific track on the
hard drive.
S H U T D O W N F A I L U R E — A chip on the system board may be malfunctioning.
Run the System Set tests in the Dell Diagnostics (see "Dell Diagnostics" on
page 75).
T I M E - O F - D A Y C L O C K L O S T P O W E R — System configuration settings are
corrupted. Connect your computer to an electrical outlet to charge the
battery. If the problem persists, try to restore the data by entering the system
86
Troubleshooting
book.book Page 87 Thursday, August 7, 2008 5:00 PM
setup program, then immediately exit the program (see "Using the System
Setup Program" on page 141). If the message reappears, contact Dell
(see "Contacting Dell" on page 132).
T I M E - O F - D A Y C L O C K S T O P P E D — The reserve battery that supports the system
configuration settings may require recharging. Connect your computer to an
electrical outlet to charge the battery. If the problem persists, contact Dell
(see "Contacting Dell" on page 132).
T I M E - O F - D A Y N O T S E T - P L E A S E R U N T H E S YS T E M S E T U P P R O G R A M — The time
or date stored in the system setup program does not match the system clock.
Correct the settings for the Date and Time options (see "Using the System
Setup Program" on page 141).
T I M E R C H I P C O U N T E R 2 F A I L E D — A chip on the system board may be
malfunctioning. Run the System Set tests in the Dell Diagnostics (see "Dell
Diagnostics" on page 75).
U N E X P E C T E D I N T E R R U P T I N P R O T E C T E D M O D E — The keyboard controller may
be malfunctioning, or a memory module may be loose. Run the System
Memory tests and the Keyboard Controller test in the Dell Diagnostics
(see "Dell Diagnostics" on page 75).
X:\ IS NOT ACCESSIBLE.
T H E D E V I C E I S N O T R E A D Y — Insert a disk into the
drive and try again.
W A R N I N G : B A T T E R Y I S C R I T I C A L L Y L O W — The battery is running out of
charge. Replace the battery, or connect the computer to an electrical outlet;
otherwise, activate hibernate mode or shut down the computer.
ExpressCard Problems
CAUTION: Before you begin any of the procedures in this section, follow the
safety instructions in the Product Information Guide.
C H E C K T H E E X P R E S S C A R D — Ensure that the ExpressCard is properly inserted
into the connector.
C H E C K T H A T T H E C A R D I S R E C O G N I Z E D B Y W I N D O W S — Double-click the Safely
Remove Hardware icon in the Windows taskbar. Some cards do not support
this feature. If the card supports this Windows feature, the card will be listed.
Troubleshooting
87
book.book Page 88 Thursday, August 7, 2008 5:00 PM
I F Y O U H A V E P R O B L E M S W I T H A D E L L - P R O V I D E D E X P R E S S C A R D — Contact Dell
(see "Contacting Dell" on page 132).
IF YOU HAVE PROBLEMS WITH AN EXPRESSCARD NOT PROVIDED BY DELL —
Contact the ExpressCard manufacturer.
IEEE 1394 Device Problems
CAUTION: Before you begin any of the procedures in this section, follow the
safety instructions in the Product Information Guide.
E N S U R E T H A T T H E IEEE 1394 D E V I C E I S R E C O G N I Z E D B Y W I N D O W S —
1 Click Start and click Control Panel.
2 Click System→System Properties→Hardware→Device Manager.
I F Y O U H A V E P R O B L E M S W I T H A D E L L - P R O V I D E D IEEE 1394 D E V I C E — Contact
Dell or the IEEE 1394a device manufacturer (see "Contacting Dell" on page 132).
I F Y O U H A V E P R O B L E M S W I T H A N IEEE 1394 D E V I C E N O T P R O V I D E D B Y D E L L —
Contact Dell or the IEEE 1394a device manufacturer (see "Contacting Dell" on
page 132).
Ensure that the IEEE 1394a device is properly inserted into the connector.
Keyboard Problems
CAUTION: Before you begin any of the procedures in this section, follow the
safety instructions in the Product Information Guide.
Fill out the "Diagnostics Checklist" on page 131 as you perform the various
checks.
NOTE: Use the integrated keyboard when running the Dell Diagnostics or the
system setup program. When you attach an external keyboard, the integrated
keyboard remains fully functional.
88
Troubleshooting
book.book Page 89 Thursday, August 7, 2008 5:00 PM
External Keyboard problems
NOTE: When you attach an external keyboard, the integrated keyboard remains
fully functional.
C H E C K T H E K E Y B O A R D C A B L E — Shut down the computer, disconnect the
keyboard cable and check it for damage, then firmly reconnect the cable.
If you are using a keyboard extension cable, disconnect it and connect the
keyboard directly to the computer.
CHECK THE EXTERNAL KEYBOARD —
1 Shut down the computer, wait 1 minute, and then turn it on again.
2 Verify that the numbers, capitals, and scroll lock lights on the keyboard
blink during the boot routine.
3 From the Windows desktop, click Start →All Programs→Accessories→
Notepad.
4 Type some characters on the external keyboard and verify that they appear
on the display.
If you cannot verify these steps, you may have a defective external
keyboard.
TO V E R I F Y T H A T T H E P R O B L E M I S W I T H T H E E X T E R N A L K E Y B O A R D , C H E C K T H E
INTEGRATED KEYBOARD —
1 Shut down the computer.
2 Disconnect the external keyboard.
3 Turn on the computer.
4 From the Windows desktop, click Start →All Programs→Accessories→
Notepad.
5 Type some characters on the internal keyboard and verify that they appear
on the display.
If the characters appear now, but did not with the external keyboard, you
may have a defective external keyboard. Contact Dell (see "Contacting
Dell" on page 132).
R U N T H E K E Y B O A R D D I A G N O S T I C S T E S T S — Run the PC-AT Compatible
Keyboards tests in the Dell Diagnostics (see "Dell Diagnostics" on page 75). If
the tests indicate a defective external keyboard, contact Dell (see "Contacting
Dell" on page 132).
Troubleshooting
89
book.book Page 90 Thursday, August 7, 2008 5:00 PM
Unexpected characters
D I S A B L E T H E N U M E R I C K E Y P A D — Press <Num Lk> to disable the numeric
keypad if numbers are displayed instead of letters. Verify that the numbers
lock light is not lit.
Lockups and Software Problems
CAUTION: Before you begin any of the procedures in this section, follow the
safety instructions in the Product Information Guide.
The computer does not start
C H E C K T H E A C A D A P T E R — Ensure that the AC adapter is firmly connected to
the computer and to the electrical outlet.
The computer stops responding
NOTICE: You might lose data if you are unable to perform an operating system
shutdown.
TU R N T H E C O M P U T E R O F F — If you are unable to get a response by pressing a key
on your keyboard or moving your mouse, press and hold the power button for at
least 8 to 10 seconds until the computer turns off, then restart your computer.
A program stops responding or crashes repeatedly
END THE PROGRAM —
1 Press <Crtl><Shift><Esc> simultaneously.
2 Click the Applications tab and select the program that is no longer responding.
3 Click End Task.
NOTE: The chkdsk program may run when you restart the computer. Follow the
instructions on the screen.
C H E C K T H E S O F T W A R E D O C U M E N T A T I O N — If necessary, uninstall and then
reinstall the program. Software usually includes installation instructions in its
documentation or on a floppy disk or CD.
90
Troubleshooting
book.book Page 91 Thursday, August 7, 2008 5:00 PM
A program is designed for an earlier Microsoft® Windows®
operating system
R U N T H E P R O G R A M C O M P A T I B I L I T Y W I Z A R D — Program compatibility is a
mode in Windows that lets you run programs written for earlier versions of
Windows. For more information, search for the keyword program compatibility
wizard in Windows Help and Support.
The Program Compatibility Wizard configures a program so that it runs in an
environment similar to non-XP operating system environments.
1 Click Start→All Programs→Accessories→Program Compatibility
Wizard→Next.
2 Follow the instructions on the screen.
A solid blue screen appears
TU R N T H E C O M P U T E R O F F — If you are unable to get a response by pressing a
key on your keyboard or moving your mouse, press and hold the power button
for at least 8 to 10 seconds until the computer turns off, then restart your
computer.
Other software problems
CHECK THE SOFTWARE DOCUMENTATION OR CONTACT THE SOFTWARE
MANUFACTURER FOR TROUBLESHOOTING INFORMATION —
•
Ensure that the program is compatible with the operating system installed
on your computer.
•
Ensure that your computer meets the minimum hardware requirements
needed to run the software. See the software documentation for information.
•
Ensure that the program is installed and configured properly.
•
Verify that the device drivers do not conflict with the program.
•
If necessary, uninstall and then reinstall the program.
Troubleshooting
91
book.book Page 92 Thursday, August 7, 2008 5:00 PM
BACK UP YOUR FILES IMMEDIATELY
U SE A VIRUS - S C A N N I N G P R O G R A M TO C H E C K THE H A R D D R I V E , FLO P P Y DISKS , OR CD S
SAVE AND CLOSE ANY OPEN FILES OR PROGRAMS AND SHUT DOWN YOUR
COMPUTER THROUGH THE START MENU
S C A N T H E C O M P U T E R F O R S P Y W A R E — If you are experiencing slow computer
performance, you frequently receive pop-up advertisements, or you are having
problems connecting to the Internet, your computer might be infected with
spyware. Use an anti-virus program that includes anti-spyware protection
(your program may require an upgrade) to scan the computer and remove
spyware. For more information, go to support.dell.com and search for the
keyword spyware.
R U N T H E D E L L D I A G N O S T I C S — If all tests run successfully, the error condition
is related to a software problem (see "Dell Diagnostics" on page 75).
Memory Problems
Fill out the "Diagnostics Checklist" on page 131 as you complete these checks.
CAUTION: Before you begin any of the procedures in this section, follow the
safety instructions in the Product Information Guide.
IF YOU RECEIVE AN INSUFFICIENT MEMORY MESSAGE —
•
Save and close any open files and exit any open programs you are not using
to see if that resolves the problem.
•
See the software documentation for minimum memory requirements.
If necessary, install additional memory (see "Memory" on page 116).
•
Reseat the memory modules to ensure that your computer is successfully
communicating with the memory (see "Memory" on page 116).
•
Run the Dell Diagnostics (see "Dell Diagnostics" on page 75).
IF YOU EXPERIENCE OTHER MEMORY PROBLEMS —
92
•
Reseat the memory modules to ensure that your computer is successfully
communicating with the memory (see "Memory" on page 116).
•
Ensure that you are following the memory installation guidelines (see
"Memory" on page 116).
•
Run the Dell Diagnostics (see "Dell Diagnostics" on page 75).
Troubleshooting
book.book Page 93 Thursday, August 7, 2008 5:00 PM
Network Problems
Fill out the "Diagnostics Checklist" on page 131 as you complete these
checks.
CAUTION: Before you begin any of the procedures in this section, follow the
safety instructions in the Product Information Guide.
C H E C K T H E N E T W O R K C A B L E C O N N E C T O R — Ensure that the network cable is
firmly inserted into both the network connector on the back of the computer
and the network connector.
C H E C K T H E N E T W O R K L I G H T S O N T H E N E T W O R K C O N N E C T O R — No light
indicates that no network communication exists. Replace the network cable.
RESTART THE COMPUTER AND LOG ON TO THE NETWORK AGAIN
C H E C K Y O U R N E T W O R K S E T T I N G S — Contact your network administrator or
the person who set up your network to verify that your network settings are
correct and that the network is functioning.
Power Problems
Fill out the "Diagnostics Checklist" on page 131 as you complete these
checks.
CAUTION: Before you begin any of the procedures in this section, follow the
safety instructions in the Product Information Guide.
C H E C K T H E P O W E R L I G H T — When the power light is lit or blinking, the
computer has power. If the power light is blinking, the computer is in Sleep
state—press the power button to exit Sleep state. If the light is off, press the
power button to turn on the computer.
NOTE: For information on Sleep power state, see "Standby Mode" on page 50.
C H A R G E T H E B A T T E R Y — The battery charge may be depleted.
1 Reinstall the battery.
2 Use the AC adapter to connect the computer to an electrical outlet.
3 Turn on the computer.
NOTE: Battery operating time (the time the battery can hold a charge) decreases over
time. Depending on how often the battery is used and the conditions under which it is
used, you may need to purchase a new battery during the life of your computer.
Troubleshooting
93
book.book Page 94 Thursday, August 7, 2008 5:00 PM
C H E C K T H E B A T T E R Y S T A T U S L I G H T — If the battery status light flashes amber
or is a steady amber, the battery charge is low or depleted. Connect the
computer to an electrical outlet.
If the battery status light flashes blue and amber, the battery is too hot to
charge. Shut down the computer, disconnect the computer from the electrical
outlet, and then let the battery and computer cool to room temperature.
If the battery status light rapidly flashes amber, the battery may be defective.
Contact Dell (see "Contacting Dell" on page 132).
C H E C K T H E B A T T E R Y T E M P E R A T U R E — If the battery temperature is
below 0°C (32°F), the computer will not start.
TE S T T H E E L E C T R I C A L O U T L E T — Ensure that the electrical outlet is working by
testing it with another device, such as a lamp.
C H E C K T H E AC A D A P T E R — Check the AC adapter cable connections. If the
AC adapter has a light, ensure that the light is on.
C O N N E C T T H E C O M P U T E R D I R E C T L Y T O A N E L E C T R I C A L O U T L E T — Bypass power
protection devices, power strips, and extension cables to verify that the
computer turns on.
E L I M I N A T E P O S S I B L E I N T E R F E R E N C E — Turn off nearby fans, fluorescent lights,
halogen lamps, or other appliances.
A D J U S T T H E P O W E R P R O P E R T I E S — See "Configuring Power Management
Settings" on page 51.
R E S E A T T H E M E M O R Y M O D U L E S — If the computer power light turns on, but
the display remains blank, reinstall the memory modules (see "Memory" on
page 116).
Printer Problems
Fill out the "Diagnostics Checklist" on page 131 as you complete these checks.
CAUTION: Before you begin any of the procedures in this section, follow the
safety instructions in the Product Information Guide.
NOTE: If you need technical assistance for your printer, contact the printer’s
manufacturer.
C H E C K T H E P R I N T E R D O C U M E N T A T I O N — See the printer documentation for
setup and troubleshooting information.
94
Troubleshooting
book.book Page 95 Thursday, August 7, 2008 5:00 PM
ENSURE THAT THE PRINTER IS TURNED ON
CHECK THE PRINTER CABLE CONNECTIONS —
•
See the printer documentation for cable connection information.
•
Ensure that the printer cables are securely connected to the printer and
the computer.
TE S T T H E E L E C T R I C A L O U T L E T — Ensure that the electrical outlet is working by
testing it with another device, such as a lamp.
VE R I F Y T H A T T H E P R I N T E R I S R E C O G N I Z E D B Y W I N D O W S —
1 Click Start→Control Panel→Printers and Other Hardware→
View installed printers or fax printers.
2 If the printer is listed, right-click the printer icon.
3 Click Properties→Ports. For a parallel printer, ensure that the Print to the
following port(s): setting is LPT1 (Printer Port). For a USB printer, ensure
that the Print to the following port(s): setting is USB.
R E I N S T A L L T H E P R I N T E R D R I V E R — See the printer documentation for
instructions.
Scanner Problems
CAUTION: Before you begin any of the procedures in this section, follow the
safety instructions in the Product Information Guide.
NOTE: If you need technical assistance for your scanner, contact the scanner’s
manufacturer.
C H E C K T H E S C A N N E R D O C U M E N T A T I O N — See the scanner documentation for
setup and troubleshooting information.
U N L O C K T H E S C A N N E R — Ensure that your scanner is unlocked.
RESTART THE COMPUTER AND TRY THE SCANNER AGAIN
CHECK THE CABLE CONNECTIONS —
•
See the scanner documentation for cable connection information.
•
Ensure that the scanner cables are securely connected to the scanner and
the computer.
Troubleshooting
95
book.book Page 96 Thursday, August 7, 2008 5:00 PM
VE R I F Y T H A T T H E S C A N N E R I S R E C O G N I Z E D B Y M I C R O S O F T W I N D O W S —
1 Click Start→Control Panel→Printers and Other Hardware→Scanners
and Cameras.
2 If your scanner is listed, Windows recognizes the scanner.
R E I N S T A L L T H E S C A N N E R D R I V E R — See the scanner documentation for
instructions.
Sound and Speaker Problems
Fill out the "Diagnostics Checklist" on page 131 as you complete these checks.
CAUTION: Before you begin any of the procedures in this section, follow the
safety instructions in the Product Information Guide.
No sound from integrated speakers
A D J U S T T H E W I N D O W S V O L U M E C O N T R O L — Double-click the speaker icon in
the lower-right corner of your screen. Ensure that the volume is turned up and
that the sound is not muted. Adjust the volume, bass, or treble controls to
eliminate distortion.
A D J U S T T H E V O L U M E U S I N G K E Y B O A R D S H O R T C U T S — Press <Fn><End> to
disable (mute) or re-enable the integrated speakers.
R E I N S T A L L T H E S O U N D ( A U D I O ) D R I V E R — See "Reinstalling Drivers and
Utilities" on page 100.
No sound from external speakers
E N S U R E T H A T T H E S U B W O O F E R A N D T H E S P E A K E R S A R E T U R N E D O N — See the
setup diagram supplied with the speakers. If your speakers have volume
controls, adjust the volume, bass, or treble to eliminate distortion.
A D J U S T T H E W I N D O W S V O L U M E C O N T R O L — Click or double-click the speaker
icon in the lower-right corner of your screen. Ensure that the volume is turned
up and that the sound is not muted.
D I S C O N N E C T H E A D P H O N E S F R O M T H E H E A D P H O N E C O N N E C T O R — Sound from
the speakers is automatically disabled when headphones are connected to the
headphone connector.
TE S T T H E E L E C T R I C A L O U T L E T — Ensure that the electrical outlet is working by
testing it with another device, such as a lamp.
96
Troubleshooting
book.book Page 97 Thursday, August 7, 2008 5:00 PM
E L I M I N A T E P O S S I B L E I N T E R F E R E N C E — Turn off nearby fans, fluorescent lights,
or halogen lamps to check for interference.
R E I N S T A L L T H E A U D I O D R I V E R — See "Reinstalling Drivers and Utilities" on
page 100.
R U N T H E D E L L D I A G N O S T I C S — See "Dell Diagnostics" on page 75.
NOTE: The volume control in some MP3 players overrides the Windows volume
setting. If you have been listening to MP3 songs, ensure that you did not turn the
player volume down or off.
No sound from headphones
C H E C K T H E H E A D P H O N E C A B L E C O N N E C T I O N — Ensure that the headphone
cable is securely inserted into the headphone connector (see "Right Side
View" on page 26).
A D J U S T T H E W I N D O W S V O L U M E C O N T R O L — Click or double-click the speaker
icon in the lower-right corner of your screen. Ensure that the volume is turned
up and that the sound is not muted.
Touch Pad or Mouse Problems
CHECK THE TOUCH PAD SETTINGS —
1 Click Start→Control Panel→Printers and Other Hardware→Mouse.
2 Try adjusting the settings.
C H E C K T H E M O U S E C A B L E — Shut down the computer, disconnect the mouse
cable and check it for damage, then firmly reconnect the cable.
If you are using a mouse extension cable, disconnect it and connect the
mouse directly to the computer.
TO V E R I F Y T H A T T H E P R O B L E M I S W I T H T H E M O U S E , C H E C K T H E T O U C H P A D —
1 Shut down the computer.
2 Disconnect the mouse.
3 Turn on the computer.
4 At the Windows desktop, use the touch pad to move the cursor around,
select an icon, and open it.
If the touch pad operates correctly, the mouse may be defective.
Troubleshooting
97
book.book Page 98 Thursday, August 7, 2008 5:00 PM
C H E C K T H E S YS T E M S E T U P P R O G R A M S E T T I N G S — Verify that the system setup
program lists the correct device for the pointing device option (the computer
automatically recognizes a USB mouse without making any setting
adjustments).
TE S T T H E M O U S E C O N T R O L L E R — To test the mouse controller (which affects
pointer movement) and the operation of the touch pad or mouse buttons,
run the Mouse test in the Pointing Devices test group in the "Dell
Diagnostics" on page 75.
R E I N S T A L L T H E T O U C H P A D D R I V E R — See "Reinstalling Drivers and Utilities"
on page 100.
Video and Display Problems
Fill out the "Diagnostics Checklist" on page 131 as you complete these checks.
CAUTION: Before you begin any of the procedures in this section, follow the
safety instructions in the Product Information Guide.
If the display is blank
NOTE: If you are using a program that requires a higher resolution than your computer
supports, it is recommended that you attach an external monitor to your computer.
C H E C K T H E B A T T E R Y — If you are using a battery to power your computer, the
battery charge may be depleted. Connect the computer to an electrical outlet
using the AC adapter, and then turn on the computer.
TE S T T H E E L E C T R I C A L O U T L E T — Ensure that the electrical outlet is working by
testing it with another device, such as a lamp.
C H E C K T H E AC A D A P T E R — Check the AC adapter cable connections. If the
AC adapter has a light, ensure that the light is on.
C O N N E C T T H E C O M P U T E R D I R E C T L Y T O A N E L E C T R I C A L O U T L E T — Bypass power
protection devices, power strips, and extension cables to verify that the
computer turns on.
A D J U S T T H E P O W E R P R O P E R T I E S — Search for the keyword sleep in Windows
Help and Support.
S W I T C H T H E V I D E O I M A G E — If your computer is attached to an external
monitor, press <Fn><F8> to switch the video image to the display.
98
Troubleshooting
book.book Page 99 Thursday, August 7, 2008 5:00 PM
If the display is difficult to read
A D J U S T T H E B R I G H T N E S S — Press <Fn> and the up- or down-arrow key.
M O V E T H E E X T E R N A L S U B W O O F E R A W A Y F R O M T H E C O M P U T E R O R M O N I T O R — If
your external speaker system includes a subwoofer, ensure that the subwoofer
is at least 60 cm (2 ft) away from the computer or external monitor.
E L I M I N A T E P O S S I B L E I N T E R F E R E N C E — Turn off nearby fans, fluorescent lights,
halogen lamps, or other appliances.
R O T A T E T H E C O M P U T E R T O F A C E A D I F F E R E N T D I R E C T I O N — Eliminate sunlight
glare, which can cause poor picture quality.
ADJUST THE WINDOWS DISPLAY SETTINGS —
1 Click Start→Control Panel→Display.
2 Click the area you want to change or click the Display icon.
3 Try different settings for Color quality and Screen resolution.
R U N T H E V I D E O D I A G N O S T I C S T E S T S — If no error message appears and you
still have a display problem, but the display is not completely blank, run the
Video device group in the "Dell Diagnostics" on page 75, then contact Dell
(see "Contacting Dell" on page 132).
S E E "E R R O R M E S S A G E S " — If an error message appears, see "Error Messages"
on page 82.
If only part of the display is readable
CONNECT AN EXTERNAL MONITOR —
1 Shut down your computer and connect an external monitor to the computer.
2 Turn on the computer and the monitor, and then adjust the monitor
brightness and contrast controls.
If the external monitor works, the computer display or video controller
may be defective. Contact Dell (see "Contacting Dell" on page 132).
Troubleshooting
99
book.book Page 100 Thursday, August 7, 2008 5:00 PM
Drivers
What Is a Driver?
A driver is a program that controls a device such as a printer, mouse, or
keyboard. All devices require a driver program.
A driver acts like a translator between the device and any other programs that
use the device. Each device has its own set of specialized commands that only
its driver recognizes.
Dell ships your computer to you with required drivers already installed—no
further installation or configuration is needed.
NOTICE: Your Drivers and Utilities media may contain drivers for operating systems
that are not on your computer. Ensure that you are installing software appropriate
for your operating system.
Many drivers, such as the keyboard driver, come with your Microsoft® Windows®
operating system. You may need to install drivers if you:
•
Upgrade your operating system.
•
Reinstall your operating system.
•
Connect or install a new device.
Identifying Drivers
If you experience a problem with any device, identify whether the driver is the
source of your problem and, if necessary, update the driver.
1 Click Start→Control Panel→System.
2 In the System Properties window, click the Hardware tab, and click
Device Manager.
Scroll down the list of devices and check for an exclamation point (a circle with
a [!]) next to the device name. If an exclamation point is next to the device
name, you may need to reinstall the driver or install a new driver (see
"Reinstalling Drivers and Utilities" on page 100).
Reinstalling Drivers and Utilities
NOTICE: The Dell Support website at support.dell.com and your Drivers and
Utilities media provide approved drivers for Dell computers. If you install drivers
obtained from other sources, your computer might not work correctly.
100
Troubleshooting
book.book Page 101 Thursday, August 7, 2008 5:00 PM
Using Windows Device Driver Rollback
If a problem occurs on your computer after you install or update a driver, use
Windows Device Driver Rollback to replace the driver with the previously
installed version.
1 Click Start→My Computer→Properties→Hardware→Device Manager.
2 Right-click the device for which the new driver was installed and click Properties.
3 Click the Drivers tab→Roll Back Driver.
If Device Driver Rollback does not resolve the problem, use System Restore
(see "Restoring Your Operating System" on page 103) to return your computer
to the operating state that existed before you installed the new driver.
Using the Drivers and Utilities Media
If using Device Driver Rollback or System Restore (see "Restoring Your
Operating System" on page 103) does not resolve the problem, reinstall the
driver from your Drivers and Utilities media.
1 With the Windows desktop displayed, insert your Drivers and Utilities
media.
If this is your first time to use your Drivers and Utilities media, continue
to step 2. If not, proceed to step 5.
2 When the Drivers and Utilities installation program starts, follow the
prompts on the screen.
NOTE: In most cases, the Drivers and Utilities program starts running
automatically. If it does not, start Windows Explorer, click your media drive
directory to display the media contents, and then double-click the autorcd.exe file.
3 When the InstallShield Wizard Complete window appears, remove the
Drivers and Utilities disc and click Finish to restart the computer.
4 When you see the Windows desktop, reinsert the Drivers and Utilities disc.
Troubleshooting
101
book.book Page 102 Thursday, August 7, 2008 5:00 PM
5 At the Welcome Dell System Owner screen, click Next.
NOTE: The Drivers and Utilities program displays drivers only for hardware
that came installed in your computer. If you installed additional hardware, the
drivers for the new hardware might not be displayed. If those drivers are not
displayed, exit the Drivers and Utilities program. For drivers information, see
the documentation that came with the device.
A message stating that the Drivers and Utilities program is detecting
hardware in your computer appears.
The drivers that are used by your computer are automatically displayed in
the My Drivers—The ResourceCD has identified these components in
your system window.
6 Click the driver that you want to reinstall and follow the instructions on
the screen.
If a particular driver is not listed, then that driver is not required by your
operating system.
Manually Reinstalling Drivers
NOTE: If your computer has a Consumer IR port and you are reinstalling a Consumer
IR driver, you must first enable the Consumer IR port in the system setup program
(see "Using the System Setup Program" on page 141) before continuing with the driver
installation (see "Reinstalling Drivers and Utilities" on page 100). For information about
components installed on your computer, see "Front View" on page 19.
After extracting the driver files to your hard drive, as described in the previous
section:
1 Click Start→My Computer→Properties→Hardware→Device Manager.
2 Double-click the type of device for which you are installing the driver (for
example, Audio or Video).
3 Double-click the name of the device for which you are installing the driver.
4 Click the Driver tab→Update Driver.
5 Click Install from a list or specific location (Advanced)→Next.
6 Click Browse and browse to the location to which you previously copied
the driver files.
7 When the name of the appropriate driver appears, click Next.
8 Click Finish and restart your computer.
102
Troubleshooting
book.book Page 103 Thursday, August 7, 2008 5:00 PM
Troubleshooting Software and Hardware
Problems in the Microsoft® Windows® XP
Operating System
If a device is either not detected during the operating system setup or is
detected but incorrectly configured, use Windows Help and Support to resolve
the incompatibility:
If a device is either not detected during the operating system setup or is
detected but incorrectly configured, you can use the Hardware
Troubleshooter to resolve the incompatibility.
To start the Hardware Troubleshooter:
1 Click Start→Help and Support.
2 Type hardware troubleshooter in the search field and press
<Enter> to start the search.
3 In the Fix a Problem section, click Hardware Troubleshooter.
4 In the Hardware Troubleshooter list, select the option that best describes
the problem and click Next to follow the remaining troubleshooting steps.
Restoring Your Operating System
If you received an Operating System CD with your computer, you can use it to
restore your operating system. However, using the Operating System CD also
deletes all data on the hard drive. Use the CD only if System Restore did not
resolve your operating system problem. For instructions, see "Using the
Operating System Media" on page 105.
Using Microsoft Windows System Restore
The Windows operating system provides System Restore to allow you to
return your computer to an earlier operating state (without affecting data
files) if changes to the hardware, software, or other system settings have left
the computer in an undesirable operating state. Any changes that System
Restore makes to your computer are completely reversible.
NOTICE: Make regular backups of your data files. System Restore does not
monitor your data files or recover them.
NOTE: The procedures in this document were written for the Windows default view,
so they may not apply if you set your Dell computer to the Windows Classic view.
Troubleshooting
103
book.book Page 104 Thursday, August 7, 2008 5:00 PM
1 Click Start →Help and Support.
2 Type System Restore in the search field, then press <Enter>.
NOTE: The User Account Control window may appear. If you are an
administrator on the computer, click Continue; otherwise, contact your
administrator to continue the desired action.
3 Click Next and follow the remaining prompts on the screen.
In the event that System Restore did not resolve the issue, you may undo the
last system restore.
Starting System Restore
NOTICE: Before you restore the computer to an earlier operating state, save and
close any open files and exit any open programs. Do not alter, open, or delete any
files or programs until the system restoration is complete.
1 Click Start→All Programs→Accessories→System Tools→System Restore.
2 Click either Restore my computer to an earlier time or Create a restore point.
3 Click Next and follow the remaining on-screen prompts.
In the event that System Restore did not resolve the issue, you may undo the
last system restore.
Undoing the Last System Restore
NOTICE: Before you undo the last system restore, save and close all open files and
exit any open programs. Do not alter, open, or delete any files or programs until the
system restoration is complete.
1 Click Start→All Programs→Accessories→System Tools→System Restore.
2 Click Undo my last restoration and click Next.
Enabling System Restore
If you reinstall Windows XP with less than 200 MB of free hard-disk space
available, System Restore is automatically disabled.
To see if System Restore is enabled:
1 Click Start→Control Panel→Performance and Maintenance→System.
2 Click the System Restore tab and ensure that Turn off System Restore is
unchecked.
104
Troubleshooting
book.book Page 105 Thursday, August 7, 2008 5:00 PM
Using the Operating System Media
Before You Begin
If you are considering reinstalling the Windows operating system to correct a
problem with a newly installed driver, first try using Windows Device Driver
Rollback (see "Using Windows Device Driver Rollback" on page 101). If
Device Driver Rollback does not resolve the problem, then use System Restore
to return your operating system to the operating state it was in before you
installed the new device driver.
NOTICE: Before performing the installation, back up all data files on your primary
hard drive. For conventional hard drive configurations, the primary hard drive is the
first drive detected by the computer.
To reinstall Windows, you need the following items:
•
Dell Operating System media
•
Dell Drivers and Utilities media
NOTE: Your Drivers and Utilities media contains drivers that were installed during
assembly of the computer. Use your Drivers and Utilities media to load any required
drivers, including the drivers required if your computer has a RAID controller.
Reinstalling Windows XP
The reinstallation process can take 1 to 2 hours to complete. After you
reinstall the operating system, you must also reinstall the device drivers, virus
protection program, and other software.
NOTICE: The Operating System media provides options for reinstalling
Windows XP. The options can overwrite files and possibly affect programs that are
installed on your hard drive. Therefore, do not reinstall Windows XP unless a Dell
technical support representative instructs you to do so.
1 Save and close any open files and exit any open programs.
2 Insert the Operating System disc.
3 Click Exit if the Install Windows message appears.
Troubleshooting
105
book.book Page 106 Thursday, August 7, 2008 5:00 PM
4 Restart the computer.
When the DELL logo appears, press <F12> immediately.
NOTE: If you wait too long and the operating system logo appears, continue
to wait until you see the Microsoft® Windows® desktop; then, shut down your
computer and try again.
NOTE: The next steps change the boot sequence for one time only. On the
next start-up, the computer boots according to the devices specified in the
system setup program.
5 When the boot device list appears, highlight CD/DVD/CD-RW Drive
and press <Enter>.
6 Press any key to Boot from CD-ROM.
7 Follow the instructions on the screen to complete the installation.
106
Troubleshooting
book.book Page 107 Thursday, August 7, 2008 5:00 PM
Adding and Replacing Parts
Before You Begin
This chapter provides procedures for removing and installing the components
in your computer. Unless otherwise noted, each procedure assumes that the
following conditions exist:
•
You have performed the steps in "Turning Off Your Computer" on page 107
and "Before Working Inside Your Computer" on page 108.
•
You have read the safety information in your Dell Product Information Guide.
•
A component can be replaced—or if purchased separately—installed by
performing the removal procedure in reverse order.
Recommended Tools
The procedures in this document may require the following tools:
•
Small flat-blade screwdriver
•
Phillips screwdriver
•
Small plastic scribe
•
Flash BIOS update (see the Dell Support website at support.dell.com)
Turning Off Your Computer
NOTICE: To avoid losing data, save and close any open files and exit any open
programs before you turn off your computer.
1 Save and close any open files and exit any open programs.
2 Shut down the operating system:
Click Start→Shut Down→Shut down.
The computer turns off after the operating system shutdown process is
complete.
Adding and Replacing Parts
107
book.book Page 108 Thursday, August 7, 2008 5:00 PM
3 Ensure that the computer and any attached devices are turned off. If your
computer and attached devices did not automatically turn off when you
shut down your operating system, press the power button for at least 8 to
10 seconds until the computer turns off.
Before Working Inside Your Computer
Use the following safety guidelines to help protect your computer from
potential damage and to help ensure your own personal safety.
CAUTION: Before you begin any of the procedures in this section, follow the
safety instructions in the Product Information Guide.
CAUTION: Handle components and cards with care. Do not touch the components
or contacts on a card. Hold a card by its edges or by its metal mounting bracket.
Hold a component such as a processor by its edges, not by its pins.
NOTICE: Only a certified service technician should perform repairs on your
computer. Damage due to servicing that is not authorized by Dell is not covered by
your warranty.
NOTICE: When you disconnect a cable, pull on its connector or on its strain-relief
loop, not on the cable itself. Some cables have a connector with locking tabs; if you
are disconnecting this type of cable, press in on the locking tabs before you
disconnect the cable. As you pull connectors apart, keep them evenly aligned to
avoid bending any connector pins. Also, before you connect a cable, ensure that
both connectors are correctly oriented and aligned.
NOTICE: To avoid electrostatic discharge, ground yourself by using a wrist
grounding strap or by periodically touching an unpainted metal surface (such as a
connector on the back of the computer).
NOTICE: To help prevent damage to the computer, perform the following steps
before you begin working inside the computer.
1 Ensure that the work surface is flat and clean to prevent the computer
cover from being scratched.
2 Turn off your computer (see "Turning Off Your Computer" on page 107).
NOTICE: To disconnect a network cable, first unplug the cable from your computer,
and then unplug it from the network wall connector.
3 Disconnect any telephone or network cables from the computer.
4 Disconnect your computer and all attached devices from their electrical outlets.
108
Adding and Replacing Parts
book.book Page 109 Thursday, August 7, 2008 5:00 PM
NOTICE: To help prevent damage to the system board, you must remove the battery
from the battery bay before you service the computer.
NOTE: To avoid damage to the computer, use only the battery designed for this
particular Dell computer. Do not use batteries designed for other Dell computers.
5 Turn the computer over.
6 Slide the battery release latch toward the side of the computer until it
is engaged.
7 Slide the battery out of the battery bay.
1
1
2
battery
2
battery release latch
8 Turn the computer top-side up, open the display, and press the power
button to ground the system board.
9 Remove any installed cards from the ExpressCard slot (see "Removing an
ExpressCard or Blank" on page 63) and the 8-in-1 memory card reader (see
"Removing a Memory Card or Blank" on page 65).
Hard Drive
CAUTION: If you remove the hard drive from the computer when the drive is hot,
do not touch the metal housing of the hard drive.
CAUTION: Before you begin any of the procedures in this section, follow the
safety instructions in the Product Information Guide.
Adding and Replacing Parts
109
book.book Page 110 Thursday, August 7, 2008 5:00 PM
NOTICE: To prevent data loss, turn off your computer (see "Turning Off Your
Computer" on page 107) before removing the hard drive. Do not remove the hard
drive while the computer is on or in Sleep state.
NOTICE: Hard drives are extremely fragile. Exercise care when handling the
hard drive.
NOTE: Dell does not guarantee compatibility or provide support for hard drives
from sources other than Dell.
NOTE: If you are installing a hard drive from a source other than Dell, you need to
install an operating system, drivers, and utilities on the new hard drive (see
"Restoring Your Operating System" on page 103 and "Reinstalling Drivers and
Utilities" on page 100).
Removing the Hard Drive
1 Follow the procedures in "Before You Begin" on page 107.
2 Turn the computer over and remove the two hard drive screws.
1
2
1
screws (2)
2
hard drive
NOTICE: When the hard drive is not in the computer, store it in protective antistatic
packaging (see "Protecting Against Electrostatic Discharge" in the
Product Information Guide).
3 Slide the hard drive out of the computer.
110
Adding and Replacing Parts
book.book Page 111 Thursday, August 7, 2008 5:00 PM
Replacing the Hard Drive
1 Remove the new drive from its packaging.
Save the original packaging for storing or shipping the hard drive.
NOTICE: Use firm and even pressure to slide the drive into place. If you use
excessive force, you may damage the connector.
2 Slide the hard drive into the bay until it is fully seated.
3 Replace and tighten the two screws.
4 Install the operating system for your computer, as needed (see "Restoring
Your Operating System" on page 103).
5 Install the drivers and utilities for your computer, as needed (see
"Reinstalling Drivers and Utilities" on page 100).
Returning a Hard Drive to Dell
Return your old hard drive to Dell in its original, or comparable, foam
packaging. Otherwise, the hard drive may be damaged in transit.
2
1
1
foam packaging
2
hard drive
Adding and Replacing Parts
111
book.book Page 112 Thursday, August 7, 2008 5:00 PM
Optical Drive
CAUTION: Before you begin any of the procedures in this section, follow the
safety instructions in the Product Information Guide.
Removing the Optical Drive
1 Follow the procedures in "Before You Begin" on page 107.
2 Turn the computer over.
3 Remove the locking screw from the optical drive.
4 Using a plastic scribe, push the notch to release the optical drive from the bay.
5 Slide the optical drive out of the bay.
2
3
1
1
optical drive
2
locking screw
Replacing the Optical Drive
1 Slide the optical drive into the bay.
2 Replace and tighten the locking screw.
112
Adding and Replacing Parts
3
notch
book.book Page 113 Thursday, August 7, 2008 5:00 PM
Hinge Cover
CAUTION: Before you begin any of the procedures in this section, follow the
safety instructions in the Product Information Guide.
NOTICE: To avoid electrostatic discharge, ground yourself by using a wrist
grounding strap or by periodically touching an unpainted metal surface (such as a
connector on the back of the computer).
NOTICE: To help prevent damage to the system board, you must remove the battery
from the battery bay before you begin working inside the computer.
Removing the Hinge Cover
1 Follow the procedures in "Before You Begin" on page 107.
2 Open the display as far as it will open.
NOTICE: To avoid damage to the hinge cover, do not lift the cover on both sides
simultaneously.
3 Insert a plastic scribe into the indent to lift the hinge cover on the right side.
4 Disconnect the media control buttons connector from the system board.
5 Ease the hinge cover up, moving from right to left, and remove it.
1
2
1
hinge cover
2
scribe
Adding and Replacing Parts
113
book.book Page 114 Thursday, August 7, 2008 5:00 PM
Replacing the Hinge Cover
1 Replace the media control buttons connector to the system board.
2 Insert the left edge of the hinge cover.
3 Press from left to right until the cover snaps into place.
Keyboard
For more information about the keyboard, see "Using the Keyboard and
Touch Pad" on page 41.
CAUTION: Before you begin any of the procedures in this section, follow the
safety instructions in the Product Information Guide.
NOTICE: To avoid electrostatic discharge, ground yourself by using a wrist grounding
strap or by periodically touching an unpainted metal surface (such as a connector
on the back of the computer).
NOTICE: To help prevent damage to the system board, you must remove the battery
from the battery bay before you begin working inside the computer.
Removing the Keyboard
1 Follow the procedures in "Before You Begin" on page 107.
2 Remove the hinge cover (see "Hinge Cover" on page 113).
3 Remove the two screws at the top of the keyboard.
NOTICE: The key caps on the keyboard are fragile, easily dislodged, and timeconsuming to replace. Be careful when removing and handling the keyboard.
4 Lift the keyboard and hold it up and slightly forward to access to the
keyboard connector.
5 To disconnect the keyboard cable from the keyboard connector on the
system board, rotate the keyboard connector latch toward the front of the
computer.
6 Slide the keyboard cable out of the keyboard connector.
114
Adding and Replacing Parts
book.book Page 115 Thursday, August 7, 2008 5:00 PM
1
2
3
4
5
1
screws (2)
2
keyboard
3
keyboard tabs (5)
4
keyboard cable
5
keyboard connector latch
Replacing the Keyboard
1 Slide the keyboard cable into the keyboard connector.
2 Rotate the keyboard connector latch to secure the cable.
3 Hook the tabs along the front edge of the keyboard into the palmrest.
4 Press on the right edge near the top to snap the keyboard into place.
5 Replace the two screws on the top of the keyboard.
Adding and Replacing Parts
115
book.book Page 116 Thursday, August 7, 2008 5:00 PM
Memory
CAUTION: Before you begin any of the procedures in this section, follow the
safety instructions in the Product Information Guide.
You can increase your computer memory by installing memory modules on
the system board. See "Specifications" on page 133 for information on the
memory supported by your computer. Install only memory modules that are
intended for your computer.
NOTE: Memory modules purchased from Dell are covered under your
computer warranty.
Your computer has two user-accessible SODIMM sockets, DIMM A and
DIMM B, accessed from the bottom of the computer.
NOTICE: If you need to install memory modules in two connectors, install a
memory module in the connector labeled “DIMMA” before you install a module in
the connector labeled “DIMMB.”
Removing Memory Module
The memory modules are located under the memory module cover on the
bottom of the computer.
1 Follow the procedures in "Before You Begin" on page 107.
2 Turn the computer upside-down, loosen the eight captive screws on the
cover (see "Bottom View" on page 28), and remove the cover.
116
Adding and Replacing Parts
book.book Page 117 Thursday, August 7, 2008 5:00 PM
1
2
1
cover
2
captive screws (8)
NOTICE: To prevent damage to the memory module connector, do not use tools to
spread the memory module securing clips.
NOTICE: To avoid electrostatic discharge, ground yourself by using a wrist
grounding strap or by periodically touching an unpainted metal surface (such as a
connector on the back of the computer).
3 Use your fingertips to carefully spread apart the securing clips on each end
of the memory module connector until the module pops up.
4 Remove the module from the connector.
Adding and Replacing Parts
117
book.book Page 118 Thursday, August 7, 2008 5:00 PM
1
1
securing clips (2)
2
2
memory module
Replacing Memory Module
NOTICE: To avoid electrostatic discharge, ground yourself by using a wrist
grounding strap or by periodically touching an unpainted metal surface (such as a
connector on the back of the computer).
1 Align the notch in the module edge connector with the tab in the
connector slot.
2 Slide the module firmly into the slot at a 45-degree angle, and rotate the
module down until it clicks into place. If you do not feel the click, remove
the module and reinstall it.
NOTE: If the memory module is not installed properly, the computer may not boot.
No error message indicates this failure.
118
Adding and Replacing Parts
book.book Page 119 Thursday, August 7, 2008 5:00 PM
1
2
1
tab
2
notch
NOTICE: If the cover is difficult to close, remove the module and reinstall it. Forcing
the cover to close may damage your computer.
3 Replace the memory module cover.
4 Insert the battery into the battery bay, or connect the AC adapter to your
computer and an electrical outlet.
5 Turn on the computer.
As the computer boots, it detects the additional memory and automatically
updates the system configuration information.
Confirm the amount of memory installed in the computer:
•
Right-click the My Computer icon on your desktop, then click
Properties→General.
Adding and Replacing Parts
119
book.book Page 120 Thursday, August 7, 2008 5:00 PM
Wireless Mini-Cards
CAUTION: Before you begin any of the procedures in this section, follow the
safety instructions in the Product Information Guide.
NOTICE: To help prevent damage to the system board, you must remove the battery
from the battery bay before you begin working inside the computer.
If you ordered a wireless Mini-Card with your computer, the card is already
installed. Your computer supports Wireless Local Area Network (WLAN)
Mini-Card.
Removing Mini-Card
1 Follow the procedures in "Before You Begin" on page 107.
2 Turn the computer over.
3 Loosen the eight captive screws securing the cover and remove the cover.
1
2
1
120
cover
Adding and Replacing Parts
2
captive screws (8)
book.book Page 121 Thursday, August 7, 2008 5:00 PM
4 Disconnect the antenna cables from the Mini-card.
NOTE: The Mini-card may have two or three connectors, depending on the
type of card you ordered.
2
1
1
antenna cable connectors
2
securing screw
5 Release the Mini-card by removing the securing screw.
6 Lift the card out of its system board connector.
1
1
Mini-Card
Adding and Replacing Parts
121
book.book Page 122 Thursday, August 7, 2008 5:00 PM
Replacing Mini-Card
NOTICE: The connectors are keyed to ensure correct insertion. If you feel resistance,
check the connectors on the card and on the system board, and realign the card.
NOTICE: To avoid damage to the Mini-card, never place cables under the card.
1 Insert the card connector into the system board connector at a 45-degree angle.
2 Press the other end of the card down into the slot on the system board
until the card clicks into place.
3 Replace the securing screw.
4 Connect the cables to the Mini-Card, ensuring that you route the cables
correctly.
NOTE: For more specific information about which cable to connect to which
connector, see the documentation that came with your Mini-Card.
5 Secure unused antenna cables in the protective mylar sleeve.
6 Replace the cover and tighten the eight captive screws.
Internal Card With Bluetooth® Wireless
Technology
CAUTION: Before you begin any of the procedures in this section, follow the
safety instructions in the Product Information Guide.
NOTICE: To avoid electrostatic discharge, ground yourself by using a wrist
grounding strap or by periodically touching an unpainted metal surface (such as a
connector on the back of the computer).
NOTICE: To help prevent damage to the system board, you must remove the battery
from the battery bay before you begin working inside the computer.
If you ordered a card with Bluetooth wireless technology with your computer,
it is already installed.
Removing the Card
1 Follow the procedures in "Before You Begin" on page 107.
2 Remove the hinge cover (see "Hinge Cover" on page 113).
3 Remove the screw securing the card.
122
Adding and Replacing Parts
book.book Page 123 Thursday, August 7, 2008 5:00 PM
4 Grasp the connector end of the card and slide it out from under the
securing tabs.
5 Disconnect the cable from the card.
1
2
1
securing screw
2
card
Replacing the Card
1 Replace the screw securing the card and insert the card at an angle to slide
it in the card compartment.
2 Connect the cable to the card.
Adding and Replacing Parts
123
book.book Page 124 Thursday, August 7, 2008 5:00 PM
124
Adding and Replacing Parts
book.book Page 125 Thursday, August 7, 2008 5:00 PM
Traveling With Your Computer
Identifying Your Computer
•
Attach a name tag or business card to the computer.
•
Write down your Service Tag and store it in a safe place away from the
computer or carrying case. Use the Service Tag if you need to report a loss
or theft to law enforcement officials and to Dell.
•
Create a file on the Microsoft® Windows® desktop called if_found.
Place information such as your name, address, and phone number in this file.
•
Contact your credit card company and ask if it offers coded
identification tags.
Packing the Computer
•
Remove any external devices attached to the computer and store them in a
safe place.
•
Fully charge the main battery and any spare batteries that you plan to carry
with you.
•
Shut down the computer.
•
Disconnect the AC adapter.
NOTICE: When the display is closed, extraneous items on the keyboard or palm
rest could damage the display.
•
Remove any extraneous items, such as paper clips, pens, and paper, from
the keyboard and palm rest and close the display.
•
Use the optional Dell carrying case to pack the computer and its
accessories together safely.
•
Avoid packing the computer with items such as shaving cream, colognes,
perfumes, or food.
NOTICE: If the computer has been exposed to extreme temperatures, allow it to
acclimate to room temperature for 1 hour before turning it on.
Traveling With Your Computer
125
book.book Page 126 Thursday, August 7, 2008 5:00 PM
•
Protect the computer, the batteries, and the hard drive from hazards such as
extreme temperatures and overexposure to sunlight, dirt, dust, or liquids.
•
Pack the computer so that it does not slide around in the trunk of your car
or in an overhead storage compartment.
Travel Tips
NOTICE: Do not move the computer while using the optical drive to prevent loss
of data.
NOTICE: Do not check the computer as baggage.
•
Consider changing your power management options to maximize battery
operating time (see "Configuring Power Management Settings" on page 51).
•
If you are traveling internationally, carry proof of ownership—or of your
right to use the computer if it is company-owned—to speed your passage
through customs. Investigate the customs regulations of the countries you
plan to visit, and consider acquiring an international carnet (also known as
a merchandise passport) from your government.
•
Find out what type of electrical outlets are used in the countries you will
visit, and have appropriate power adapters.
•
Check with your credit card company for information about the kinds of
emergency travel assistance it offers to users of portable computers.
Traveling by Air
NOTICE: Do not walk the computer through a metal detector. Send the computer
through an X-ray machine or have it hand-inspected.
126
•
Ensure that you have a charged battery available in case you are asked to
turn on the computer.
•
Prior to entering the airplane, verify that using a computer is permitted.
Some airlines forbid the use of electronic devices during flight. All airlines
forbid the use of electronic devices during takeoff and landing.
Traveling With Your Computer
book.book Page 127 Thursday, August 7, 2008 5:00 PM
Getting Help
Obtaining Assistance
CAUTION: If you need to remove the computer cover, first disconnect the
computer power and modem cables from all electrical outlets.
If you experience a problem with your computer, you can complete the
following steps to diagnose and troubleshoot the problem:
1 See "Troubleshooting" on page 75 for information and procedures that
pertain to the problem your computer is experiencing.
2 See "Dell Diagnostics" on page 75 for procedures on how to run
Dell Diagnostics.
3 Fill out the "Diagnostics Checklist" on page 131.
4 Use Dell's extensive suite of online services available at Dell Support
(support.dell.com) for help with installation and troubleshooting
procedures. See "Online Services" on page 128 for a more extensive list of
Dell Support online.
5 If the preceding steps have not resolved the problem, see "Contacting
Dell" on page 132.
NOTE: Call Dell Support from a telephone near or at the computer so that the
support staff can assist you with any necessary procedures.
NOTE: Dell's Express Service Code system may not be available in all countries.
When prompted by Dell's automated telephone system, enter your Express
Service Code to route the call directly to the proper support personnel.
For instructions on using the Dell Support, see "Technical Support and
Customer Service" on page 128.
NOTE: Some of the following services are not always available in all locations
outside the continental U.S. Call your local Dell representative for information on
availability.
Getting Help
127
book.book Page 128 Thursday, August 7, 2008 5:00 PM
Technical Support and Customer Service
Dell's support service is available to answer your questions about Dell™
hardware. Our support staff uses computer-based diagnostics to provide fast,
accurate answers.
To contact Dell's support service, see "Before You Call" on page 130, and then
see the contact information for your region or go to support.dell.com.
DellConnect
DellConnect is a simple online access tool that allows a Dell service and
support associate to access your computer through a broadband connection,
diagnose your problem and repair it all under your supervision. For more
information, go to support.dell.com and click DellConnect.
Online Services
You can learn about Dell products and services on the following websites:
www.dell.com
www.dell.com/ap (Asian/Pacific countries only)
www.dell.com/jp (Japan only)
www.euro.dell.com (Europe only)
www.dell.com/la (Latin American and Caribbean countries)
www.dell.ca (Canada only)
You can access Dell Support through the following websites and e-mail
addresses:
•
Dell Support websites
support.dell.com
support.jp.dell.com (Japan only)
support.euro.dell.com (Europe only)
•
Dell Support e-mail addresses
[email protected]
[email protected]
[email protected] (Latin America and Caribbean countries only)
[email protected] (Asian/Pacific countries only)
128
Getting Help
book.book Page 129 Thursday, August 7, 2008 5:00 PM
•
Dell Marketing and Sales e-mail addresses
[email protected] (Asian/Pacific countries only)
[email protected] (Canada only)
•
Anonymous file transfer protocol (FTP)
ftp.dell.com
Log in as user: anonymous, and use your e-mail address as your password.
AutoTech Service
Dell's automated support service—AutoTech—provides recorded answers to
the questions most frequently asked by Dell customers about their portable
and desktop computers.
When you call AutoTech, use your touch-tone telephone to select the
subjects that correspond to your questions. For the telephone number to call
for your region, see "Contacting Dell" on page 132.
Automated Order-Status Service
To check on the status of any Dell products that you have ordered, you can go
to support.dell.com, or you can call the automated order-status service. A
recording prompts you for the information needed to locate and report on
your order. For the telephone number to call for your region, see "Contacting
Dell" on page 132.
Problems With Your Order
If you have a problem with your order, such as missing parts, wrong parts, or
incorrect billing, contact Dell for customer assistance. Have your invoice or
packing slip handy when you call. For the telephone number to call for your
region, see "Contacting Dell" on page 132.
Product Information
If you need information about additional products available from Dell, or if
you would like to place an order, visit the Dell website at www.dell.com. For
the telephone number to call for your region or to speak to a sales specialist,
see the "Contacting Dell" on page 132.
Getting Help
129
book.book Page 130 Thursday, August 7, 2008 5:00 PM
Returning Items for Warranty Repair or Credit
Prepare all items being returned, whether for repair or credit, as follows:
1 Call Dell to obtain a Return Material Authorization Number, and write it
clearly and prominently on the outside of the box.
For the telephone number to call for your region, see "Contacting Dell" on
page 132.
2 Include a copy of the invoice and a letter describing the reason for the return.
3 Include a copy of the Diagnostics Checklist (see "Diagnostics Checklist" on
page 131), indicating the tests that you have run and any error messages
reported by the Dell Diagnostics (see "Dell Diagnostics" on page 75).
4 Include any accessories that belong with the item(s) being returned (power
cables, software floppy disks, guides, and so on) if the return is for credit.
5 Pack the equipment to be returned in the original (or equivalent)
packing materials.
You are responsible for paying shipping expenses. You are also responsible for
insuring any product returned, and you assume the risk of loss during
shipment to Dell. Collect On Delivery (C.O.D.) packages are not accepted.
Returns that are missing any of the preceding requirements will be refused at
Dell’s receiving dock and returned to you.
Before You Call
NOTE: Have your Express Service Code ready when you call. The code helps Dell’s
automated-support telephone system direct your call more efficiently. You may also
be asked for your Service Tag (located on the back or bottom of your computer).
Remember to fill out the Diagnostics Checklist (see "Diagnostics Checklist"
on page 131). If possible, turn on your computer before you call Dell for
assistance and call from a telephone at or near the computer. You may be
asked to type some commands at the keyboard, relay detailed information
during operations, or try other troubleshooting steps possible only at the
computer itself. Ensure that the computer documentation is available.
CAUTION: Before working inside your computer, follow the safety instructions in
your Product Information Guide.
130
Getting Help
book.book Page 131 Thursday, August 7, 2008 5:00 PM
Diagnostics Checklist
Name:
Date:
Address:
Phone number:
Service Tag (bar code on the back or bottom of the computer):
Express Service Code:
Return Material Authorization Number (if provided by Dell support technician):
Operating system and version:
Devices:
Expansion cards:
Are you connected to a network? Yes No
Network, version, and network adapter:
Programs and versions:
See your operating system documentation to determine the contents of the
system’s start-up files. If the computer is connected to a printer, print each file.
Otherwise, record the contents of each file before calling Dell.
Error message, beep code, or diagnostic code:
Description of problem and troubleshooting procedures you performed:
Getting Help
131
book.book Page 132 Thursday, August 7, 2008 5:00 PM
Contacting Dell
For customers in the United States, call 800-WWW-DELL (800-999-3355).
NOTE: If you do not have an active Internet connection, you can find contact
information on your purchase invoice, packing slip, bill, Contacting Dell techsheet,
or Dell product catalog.
Dell provides several online and telephone-based support and service options.
Availability varies by country and product, and some services may not be
available in your area. To contact Dell for sales, technical support, or
customer service issues:
1 Visit support.dell.com.
2 Verify your country or region in the Choose A Country/Region drop-down
menu at the bottom of the page.
3 Click Contact Us on the left side of the page.
4 Select the appropriate service or support link based on your need.
5 Choose the method of contacting Dell that is convenient for you.
132
Getting Help
book.book Page 133 Thursday, August 7, 2008 5:00 PM
Specifications
NOTE: Offerings may vary by region. For more information regarding the
configuration of your computer, click Start, click Help and Support, and then select
the option to view information about your computer.
Processor
Processor type
Intel® Celeron™
L1 cache
32 KB
L2 cache
1 MB
External bus frequency
667 MHz
Front Side Bus
System Information
System chipset
Mobile Intel Express GM 965
Data bus width
64 bits
DRAM bus width
dual-channel (2) 64-bit buses
Processor address bus width
36 bits
Flash EPROM
2 MB
PCI bus
32 bits
ExpressCard
NOTE: The ExpressCard slot is designed only for ExpressCards. It does NOT support
PC Cards.
ExpressCard controller
Intel ICH8M
ExpressCard connector
one ExpressCard slot (54 mm)
Cards supported
ExpressCard/34 (34 mm)
ExpressCard/54 (54 mm)
1.5 V and 3.3 V
ExpressCard connector size
26 pins
Specifications
133
book.book Page 134 Thursday, August 7, 2008 5:00 PM
8-in-1 Memory Card Reader
8-in-1 memory card controller
Ricoh R5C833
8-in-1 memory card connector
8-in-1 combo card connector
Cards supported
•
•
•
•
•
•
•
•
Secure Digital (SD)
SDIO
MultiMediaCard (MMC)
Memory Stick
Memory Stick PRO
xD-Picture Card
Hi Speed-SD
Hi Density-SD
Memory
Memory module connector
two user-accessible SODIMM connectors
Memory module capacities
512 MB, 1 GB
Memory type
533/667 MHz SODIMM DDR2
Minimum memory
512 MB
Maximum memory
2 GB
NOTE: In order to take advantage of the dual channel bandwidth capability, both
memory slots must be populated and must match in size.
NOTE: The available memory displayed does not reflect the complete maximum
memory installed because some memory is reserved for system files.
Ports and Connectors
Audio
microphone connector, stereo
headphone/speakers connector
IEEE 1394a
4-pin serial connector (optional)
Mini-Card
Type IIIA Mini-Card slot
Network adapter
RJ-45 port
USB
three 4-pin USB 2.0-compliant connectors
134
Specifications
book.book Page 135 Thursday, August 7, 2008 5:00 PM
Communications
Interface
Intel High-Definition Audio
Network adapter
10/100 Ethernet LAN on system board
Wireless
internal WLAN Mini-Card
Bluetooth® wireless technology (optional)
Video
Video type:
integrated on system board
Video controller
Intel 965 GM (Intel)
Video memory
dynamic based on system memory capacity
LCD interface
LVDS
TV support
VGA
Audio
Audio type
two-channel high-definition audio codec
Audio controller
Sigmatel STAC9228 Codec
Stereo conversion
24-bit (analog-to-digital and digital-to-analog)
Interfaces:
Internal
Intel High Definition Audio
External
microphone-in connector, stereo
headphones/speakers connector
Speaker
two 4-ohm speakers
Internal speaker amplifier
1 Watt per channel into 4 ohms
Volume controls
program menus, media control buttons
Display
Type (active-matrix TFT)
15.4-inch WXGA
Dimensions:
Height
207.0 mm (8.1 in)
Width
331.2 mm (13.0 in)
Diagonal
391.2 mm (15.4 in)
Specifications
135
book.book Page 136 Thursday, August 7, 2008 5:00 PM
Display (continued)
Maximum resolutions:
WXGA
1280 x 800 at 262 K colors
Refresh rate
60 Hz
Operating angle
0° (closed) to 155°
Viewing angles:
Horizontal
±40°
Vertical
+15°/–30°
Pixel pitch:
WXGA
Controls
0.258 mm
brightness can be controlled through keyboard
shortcuts (see "Display Functions" on page 42)
Media
Drive
DVD combo, DVD+RW
Interface
Roxio® Creator Plus®,
Keyboard
Number of keys
87 (U.S. and Canada); 88 (Europe); 91 (Japan)
Layout
QWERTY/AZERTY/Kanji
Touch Pad
X/Y position resolution
(graphics table mode)
240 cpi
Size:
136
Width
73.7-mm (2.9-in) sensor-active area
Height
34.0-mm (1.3-in) rectangle
Specifications
book.book Page 137 Thursday, August 7, 2008 5:00 PM
Battery
Type
6-cell "smart" lithium ion, 6-cell "smart"
lithium polymer, or 4-cell "smart"
lithium ion
Dimensions:
Depth
57.2 mm (2.25 in)(4/6 cell)
Height
20 mm (0.78 in)
Width
205.1 mm (8.07 in)(4/6 cell)
Voltage
11.1 VDC (6 cell)
14.8 VDC (4 cell)
Charge time (approximate):
Computer off
Operating time
4 hours
Battery operating time varies depending on
operating conditions and can be significantly
reduced under certain power-intensive
conditions (see "Power Problems" on page 93).
See "Using a Battery" on page 47 for more
information on battery life.
Life span (approximate)
300 discharge/charge cycles
Temperature range:
Operating
0° to 35°C (32° to 95°F)
Storage
–40° to 65°C (–40° to 149°F)
Coin-cell battery
CR-2032
AC Adapter
Input voltage
100–240 VAC
Input current (maximum)
1.5 A
Input frequency
50–60 Hz
Output current
3.34 A (continuous)
4.34 A (peak for 4-second pulse)
Output power
65 W
Specifications
137
book.book Page 138 Thursday, August 7, 2008 5:00 PM
AC Adapter (continued)
Rated output voltage
19.5 VDC +/– 5%
Dimensions:
Height
28.2 mm (1.11 in)
Width
57.9 mm (2.28 in)
Depth
137.2 mm (5.4 in)
Weight (with cables)
0.4 kg (0.9 lb)
Temperature range:
Operating
0° to 35°C (32° to 95°F)
Storage
–40° to 65°C (–40° to 149°F)
Physical
Height
24.1 mm to 37.5 mm (0.94 in to 1.47 in)
Width
357 mm (14.05 in)
Depth
256 mm (10.08 in)
Weight (with 4-cell battery):
Configurable to less than
2.7 kg (5.9 lb)
Environmental
Temperature range:
Operating
0° to 35°C (32° to 95°F)
Storage
–20° to 65°C (–40° to 149°F)
Relative humidity (maximum):
Operating
10% to 90% (noncondensing)
Storage
5% to 90% (noncondensing)
Maximum vibration (using a random
vibration spectrum that simulates
user environment):
138
Operating
0.66 GRMS
Storage
1.3 GRMS
Specifications
book.book Page 139 Thursday, August 7, 2008 5:00 PM
Environmental (continued)
Maximum shock (Measured with hard
drive in operating but not accessing
data status and a 3-ms half-sine pulse
for operating. Also measured with hard
drive in head-parked position and a
2-ms halfsine pulse for storage):
Operating
"X & Y axes (parallel to computer bottom):
30G
"Z axis (perpendicular to computer bottom):
40G
Storage
163 G
Maximum bench handling height 10 cm
(Measured with hard drive in idle
mode, lifting the computer by one
edge, placing the opposite edge on
the table and then releasing the
computer to impact against the
table):
Specifications
139
book.book Page 140 Thursday, August 7, 2008 5:00 PM
140
Specifications
book.book Page 141 Thursday, August 7, 2008 5:00 PM
Appendix
Using the System Setup Program
NOTE: Your operating system may automatically configure most of the options
available in system setup, thus overriding options that you set through system setup.
An exception is the External Hot Key option, which you can disable or enable only
through system setup. For more information on configuring features for your
operating system, see Windows Help and Support (see "Microsoft Windows XP
Help and Support Center" on page 16).
You can use system setup as follows:
•
To set or change user-selectable features such as your computer password
•
To verify information about the computer's current configuration such as
the amount of system memory
After you set up the computer, run system setup to familiarize yourself with
your system configuration information and optional settings. You may want
to write down the information for future reference.
The system setup screens display the current setup information and settings
for your computer, such as:
•
System configuration
•
Boot order
•
Boot (start-up) configuration
•
Basic device configuration settings
•
System security and hard drive password settings
NOTE: Unless you are an expert computer user or are directed to do so by Dell
technical support, do not change the system setup settings. Certain changes might
make your computer work incorrectly.
Appendix
141
book.book Page 142 Thursday, August 7, 2008 5:00 PM
Viewing the System Setup Screen
1 Turn on (or restart) your computer.
2 When the DELL logo appears, press <F2> immediately.
If you wait too long and the Microsoft Windows logo appears, continue to
wait until you see the Windows desktop, then shut down your computer
and try again.
System Setup Screen
NOTE: For information about a specific item on a system setup screen, highlight the
item and see the Help area on the screen.
On each screen, the system setup options are listed at the left. To the right of
each option is the setting or value for that option. You can change settings
that appear as white type on the screen. Options or values that you cannot
change (because they are determined by the computer) appear less bright.
The upper-right corner of the screen displays help information for the
currently highlighted option; the lower-right corner displays information
about the computer. System setup key functions are listed across the bottom
of the screen.
Commonly Used Options
Certain options require that you reboot the computer for new settings to take
effect.
Changing the Boot Sequence
The boot sequence, or boot order, tells the computer where to look to find the
software needed to start the operating system. You can control the boot
sequence and enable/disable devices using the Boot Order page of the system
setup program.
NOTE: To change the boot sequence on a one-time-only basis, see "Performing a
One-Time Boot" on page 143.
The Boot Order page displays a general list of the bootable devices that may
be installed in your computer, including but not limited to the following:
142
•
Diskette Drive
•
Internal HDD
Appendix
book.book Page 143 Thursday, August 7, 2008 5:00 PM
•
USB Storage Device
•
CD/DVD/CD-RW drive
•
Modular bay HDD
NOTE: Only devices that are preceded by a number are bootable.
During the boot routine, the computer starts at the top of the list and scans
each enabled device for the operating system start-up files. When the
computer finds the files, it stops searching and starts the operating system.
To control the boot devices, select (highlight) a device by pressing the
down-arrow or up-arrow key, and then enable or disable the device or change
its order in the list.
•
To enable or disable a device, highlight the item and press the space bar.
Enabled items are preceded by a number; disabled items are not preceded
by a number.
•
To reorder a device in the list, highlight the device and press <u> to move
the device up the list or <d> to move a device down the list.
Boot sequence changes take effect as soon as you save the changes and exit
the system setup program.
Performing a One-Time Boot
You can set a one-time-only boot sequence without entering the system setup
program (you can also use this procedure to boot the Dell Diagnostics on the
diagnostics utility partition on your hard drive).
1 Shut down the computer through the Start menu.
2 Connect the computer to an electrical outlet.
3 Turn on the computer. When the DELL logo appears, press <F12>
immediately.
If you wait too long and the Windows logo appears, continue to wait until
you see the Windows desktop, then shut down your computer and try again.
4 When the boot device list appears, highlight the device from which you
want to boot and press <Enter>.
The computer boots to the selected device.
The next time you reboot the computer, the previous boot order is restored.
Appendix
143
book.book Page 144 Thursday, August 7, 2008 5:00 PM
Cleaning Your Computer
CAUTION: Before you begin any of the procedures in this section, follow the
safety instructions located in the Product Information Guide.
Computer, Keyboard, and Display
CAUTION: Before you clean your computer, disconnect the computer from the
electrical outlet and remove any installed batteries. Clean your computer with a
soft cloth dampened with water. Do not use liquid or aerosol cleaners, which may
contain flammable substances.
•
Use a can of compressed air to remove dust from between the keys on the
keyboard and to remove any dirt or lint from the display.
NOTICE: To help prevent damage to the computer or display, do not spray cleaning
solution directly onto the display. Only use products specifically designed for
cleaning displays, and follow the instructions that are included with the product.
•
Moisten a soft, lint-free cloth with either water or a display cleaner. Do not
use alcohol or an ammonia-based cleaner. Wipe the display gently working
from the center to the edges until it is clean and any fingerprints are
removed. Do not use excessive pressure.
NOTICE: To prevent damage to the antiglare coating, do not wipe the display with
soap or alcohol.
•
Moisten a soft, lint-free cloth with water and wipe the computer and
keyboard. Do not allow water from the cloth to seep between the touch
pad and the surrounding palm rest.
•
To clean your monitor screen, lightly dampen a soft, clean cloth with water.
You can also use a special screen-cleaning tissue or solution suitable for the
monitor’s antistatic coating.
•
Wipe the keyboard, computer, and monitor plastics with a soft cleaning
cloth moistened with a solution of three parts water and one part
dishwashing detergent.
Do not soak the cloth or let water drip inside your computer or keyboard.
144
Appendix
book.book Page 145 Thursday, August 7, 2008 5:00 PM
Touch Pad
1 Shut down and turn off your computer (see "Turning Off Your Computer"
on page 107).
2 Disconnect any attached devices from the computer and from their
electrical outlets.
3 Remove any installed batteries (see "Battery Performance" on page 47).
4 Moisten a soft, lint-free cloth with water, and wipe it gently across the
surface of the touch pad. Do not allow water from the cloth to seep
between the touch pad and the surrounding palm rest.
Mouse
NOTICE: Disconnect the mouse from the computer before cleaning the mouse
If your screen cursor skips or moves abnormally, clean the mouse.
Cleaning an Optical Mouse
Clean the outside casing of the mouse with a cloth moistened with a mild
cleaning solution.
Media
NOTICE: Always use compressed air to clean the lens in the optical drive, and
follow the instructions that come with the compressed air product. Never touch the
lens in the drive.
If you notice problems, such as skipping, with the playback quality of your
media, try cleaning the discs.
1 Hold the disc by its outer edge. You can also touch the inside edge of the
center hole.
NOTICE: To help prevent damage to the surface, do not wipe in a circular motion
around the disc.
2 With a soft, lint-free cloth, gently wipe the bottom of the disc (the unlabeled
side) in a straight line from the center to the outer edge of the disc.
For stubborn dirt, try using water or a diluted solution of water and mild
soap. You can also purchase commercial products that clean discs and
provide some protection from dust, fingerprints, and scratches. Cleaning
products for CDs are also safe to use on DVDs.
Appendix
145
book.book Page 146 Thursday, August 7, 2008 5:00 PM
Dell Technical Support Policy (U.S. Only)
Technician assisted technical support requires the cooperation and
participation of the customer in the troubleshooting process and provides for
restoration of the operating system, software programs, and hardware drivers
to the original default configuration as shipped from Dell, as well as the
verification of appropriate functionality of the computer and all Dell-installed
hardware. In addition to this technician assisted technical support, online
technical support is available at support.dell.com. Additional technical
support options may be available for purchase.
Dell provides limited technical support for the computer and any
"Dell-installed" software and peripherals1. Support for third-party software
and peripherals is provided by the original manufacturer, including those
purchased and/or installed through Dell Software and Peripherals, Readyware,
and Custom Factory Integration2.
1
2
Repair services are provided pursuant to the terms and conditions of your limited
warranty and any optional support service contract purchased with the computer.
All Dell-standard components included in a Custom Factory Integration (CFI) project
are covered by the standard Dell limited warranty for your computer. However, Dell
also extends a parts replacement program to cover all nonstandard, third-party hardware
components integrated through CFI for the duration of the computer’s service contract.
Definition of "Dell-Installed" Software and Peripherals
Dell-installed software includes the operating system and some of the
software programs that are installed on the computer during the
manufacturing process (Microsoft Office, Norton Antivirus, etc).
Dell-installed peripherals include any internal expansion cards, or
Dell-branded module bay or ExpressCard accessories. In addition, any
Dell-branded monitors, keyboards, mice, speakers, microphones for
telephonic modems, docking stations/port replicators, networking products,
and all associated cabling are included.
Definition of "Third-Party" Software and Peripherals
Third-party software and peripherals include any peripheral, accessory, or
software program sold by Dell not under the Dell brand (printers, scanners,
cameras, games, etc). Support for all third-party software and peripherals is
provided by the original manufacturer of the product.
146
Appendix
book.book Page 147 Thursday, August 7, 2008 5:00 PM
FCC Notice (U.S. Only)
FCC Class B
This equipment generates, uses, and can radiate radio frequency energy and,
if not installed and used in accordance with the manufacturer’s instruction
manual, may cause interference with radio and television reception. This
equipment has been tested and found to comply with the limits for a Class B
digital device pursuant to Part 15 of the FCC Rules.
This device complies with Part 15 of the FCC Rules. Operation is subject to
the following two conditions:
•
This device may not cause harmful interference.
•
This device must accept any interference received, including interference
that may cause undesired operation.
NOTICE: The FCC regulations provide that changes or modifications not expressly
approved by Dell Inc. could void your authority to operate this equipment.
These limits are designed to provide reasonable protection against harmful
interference in a residential installation. However, there is no guarantee that
interference will not occur in a particular installation. If this equipment does
cause harmful interference with radio or television reception, which can be
determined by turning the equipment off and on, you are encouraged to try
to correct the interference by one or more of the following measures:
•
Reorient the receiving antenna.
•
Relocate the system with respect to the receiver.
•
Move the system away from the receiver.
•
Plug the system into a different outlet so that the system and the receiver
are on different branch circuits.
If necessary, consult a representative of Dell Inc. or an experienced
radio/television technician for additional suggestions.
Appendix
147
book.book Page 148 Thursday, August 7, 2008 5:00 PM
The following information is provided on the device or devices covered in this
document in compliance with the FCC regulations:
Product name:
Dell™ 500
Model number:
PP29L
Company name:
Dell Inc.
Worldwide Regulatory Compliance & Environmental Affairs
One Dell Way
Round Rock, TX 78682 USA
512-338-4400
Macrovision Product Notice
This product incorporates copyright protection technology that is protected
by U.S. patents and other intellectual property rights. Use of this copyright
protection technology must be authorized by Macrovision, and is intended
for home and other limited viewing uses only unless otherwise authorized by
Macrovision. Reverse engineering or disassembly is prohibited.
148
Appendix
book.book Page 149 Thursday, August 7, 2008 5:00 PM
Glossary
Terms in this Glossary are provided for informational purposes only and may
or may not describe features included with your particular computer.
A
AC — alternating current — The form of electricity that powers your computer when
you plug the AC adapter power cable in to an electrical outlet.
ACPI — advanced configuration and power interface — A power management
specification that enables Microsoft® Windows® operating systems to put a computer
in standby or hibernate mode to conserve the amount of electrical power allocated to
each device attached to the computer.
AGP — accelerated graphics port — A dedicated graphics port that allows system memory
to be used for video-related tasks. AGP delivers a smooth, true-color video image because
of the faster interface between the video circuitry and the computer memory.
AHCI — Advanced Host Controller Interface — An interface for a SATA hard drive
Host Controller which allows the storage driver to enable technologies such as Native
Command Queuing (NCQ) and hot plug.
ALS — ambient light sensor — A feature that helps to control display brightness.
AMT — Intel® Active Management Technology— Delivers more secure systems
management capabilities whether or not the computer is powered up or turned off, or
the operating system is not responding.
antivirus software — A program designed to identify, quarantine, and/or delete viruses
from your computer.
ASF — alert standards format — A standard to define a mechanism for reporting
hardware and software alerts to a management console. ASF is designed to be
platform- and operating system-independent.
B
battery life span — The length of time (years) during which a portable computer
battery is able to be depleted and recharged.
battery operating time — The length of time (minutes or hours) that a portable
computer battery powers the computer.
Glossary
149
book.book Page 150 Thursday, August 7, 2008 5:00 PM
BIOS — basic input/output system — A program (or utility) that serves as an
interface between the computer hardware and the operating system. Unless you
understand what effect these settings have on the computer, do not change them. Also
referred to as system setup.
bit — The smallest unit of data interpreted by your computer.
Bluetooth® wireless technology — A wireless technology standard for short-range
(9 m [29 feet]) networking devices that allows for enabled devices to automatically
recognize each other.
boot sequence — Specifies the order of the devices from which the computer
attempts to boot.
bootable CD — A CD that you can use to start your computer. In case your hard drive
is damaged or your computer has a virus, ensure that you always have a bootable CD
or floppy disk available. Your Drivers and Utilities media is a bootable CD.
bootable disk — A disk that you can use to start your computer. In case your hard
drive is damaged or your computer has a virus, ensure that you always have a bootable
CD or floppy disk available.
bps — bits per second — The standard unit for measuring data transmission speed.
BTU — British thermal unit — A measurement of heat output.
bus — A communication pathway between the components in your computer.
bus speed — The speed, given in MHz, that indicates how fast a bus can transfer
information.
byte — The basic data unit used by your computer. A byte is usually equal to 8 bits.
C
C — Celsius — A temperature measurement scale where 0° is the freezing point and
100° is the boiling point of water.
cache — A special high-speed storage mechanism which can be either a reserved
section of main memory or an independent high-speed storage device. The cache
enhances the efficiency of many processor operations.
L1 cache — Primary cache stored inside the processor.
L2 cache — Secondary cache which can either be external to the processor or
incorporated into the processor architecture.
carnet — An international customs document that facilitates temporary imports into
foreign countries. Also known as a merchandise passport.
150
Glossary
book.book Page 151 Thursday, August 7, 2008 5:00 PM
CD-R — CD recordable — A recordable version of a CD. Data can be recorded only
once onto a CD-R. Once recorded, the data cannot be erased or written over.
CD-RW — CD rewritable — A rewritable version of a CD. Data can be written to a
CD-RW disc, and then erased and written over (rewritten).
CD-RW drive — A drive that can read CDs and write to CD-RW (rewritable CDs)
and CD-R (recordable CDs) discs. You can write to CD-RW discs multiple times, but
you can write to CD-R discs only once.
CD-RW/DVD drive — A drive, sometimes referred to as a combo drive, that can read
CDs and DVDs and write to CD-RW (rewritable CDs) and CD-R (recordable CDs)
discs. You can write to CD-RW discs multiple times, but you can write to CD-R discs
only once.
clock speed — The speed, given in MHz, that indicates how fast computer
components that are connected to the system bus operate.
CMOS — A type of electronic circuit. Computers use a small amount of batterypowered CMOS memory to hold date, time, and system setup options.
COA — Certificate of Authenticity — The Windows alpha-numeric code located on a
sticker on your computer. Also referred to as the Product Key or Product ID.
Consumer IR — Sensor for using Dell Travel remote control.
Control Panel — A Windows utility that allows you to modify operating system and
hardware settings, such as display settings.
controller — A chip that controls the transfer of data between the processor and
memory or between the processor and devices.
CRIMM — continuity rambus in-line memory module — A special module that has
no memory chips and is used to fill unused RIMM slots.
cursor — The marker on a display or screen that shows where the next keyboard, touch
pad, or mouse action will occur. It often is a blinking solid line, an underline character,
or a small arrow.
D
DDR SDRAM — double-data-rate SDRAM — A type of SDRAM that doubles the
data burst cycle, improving system performance.
DDR2 SDRAM — double-data-rate 2 SDRAM — A type of DDR SDRAM that uses a
4-bit prefetch and other architectural changes to boost memory speed to over 400 MHz.
device — Hardware such as a disk drive, printer, or keyboard that is installed in or
connected to your computer.
device driver — See driver.
Glossary
151
book.book Page 152 Thursday, August 7, 2008 5:00 PM
DIMM — dual in-line memory module — A circuit board with memory chips that
connects to a memory module on the system board.
DIN connector — A round, six-pin connector that conforms to DIN (Deutsche
Industrie-Norm) standards; it is typically used to connect PS/2 keyboard or mouse
cable connectors.
disk striping — A technique for spreading data over multiple disk drives. Disk striping
can speed up operations that retrieve data from disk storage. Computers that use disk
striping generally allow the user to select the data unit size or stripe width.
DMA — direct memory access — A channel that allows certain types of data transfer
between RAM and a device to bypass the processor.
DMTF — Distributed Management Task Force — A consortium of hardware and
software companies who develop management standards for distributed desktop,
network, enterprise, and Internet environments.
domain — A group of computers, programs, and devices on a network that are
administered as a unit with common rules and procedures for use by a specific group
of users. A user logs on to the domain to gain access to the resources.
DRAM — dynamic random-access memory — Memory that stores information in
integrated circuits containing capacitors.
driver — Software that allows the operating system to control a device such as a
printer. Many devices do not work properly if the correct driver is not installed in the
computer.
DSL — Digital Subscriber Line — A technology that provides a constant, high-speed
Internet connection through an analog telephone line.
dual-core — An Intel® technology in which two physical computational units exist
inside a single processor package, thereby increasing computing efficiency and multitasking ability.
dual display mode — A display setting that allows you to use a second monitor as an
extension of your display. Also referred to as extended display mode.
DVD-R — DVD recordable — A recordable version of a DVD. Data can be recorded
only once onto a DVD-R. Once recorded, the data cannot be erased or written over.
DVD+RW — DVD rewritable — A rewritable version of a DVD. Data can be written
to a DVD+RW disc, and then erased and written over (rewritten). (DVD+RW
technology is different from DVD-RW technology.)
DVD+RW drive — drive that can read DVDs and most CD media and write to
DVD+RW (rewritable DVDs) discs.
DVI — digital video interface — A standard for digital transmission between a
computer and a digital video display.
152
Glossary
book.book Page 153 Thursday, August 7, 2008 5:00 PM
E
ECC — error checking and correction — A type of memory that includes special
circuitry for testing the accuracy of data as it passes in and out of memory.
ECP — extended capabilities port — A parallel connector design that provides
improved bidirectional data transmission. Similar to EPP, ECP uses direct memory
access to transfer data and often improves performance.
EIDE — enhanced integrated device electronics — An improved version of the IDE
interface for hard drives and CD drives.
EMI — electromagnetic interference — Electrical interference caused by
electromagnetic radiation.
ENERGY STAR® — Environmental Protection Agency requirements that decrease
the overall consumption of electricity.
EPP — enhanced parallel port — A parallel connector design that provides
bidirectional data transmission.
ESD — electrostatic discharge — A rapid discharge of static electricity. ESD can
damage integrated circuits found in computer and communications equipment.
expansion card — A circuit board that installs in an expansion slot on the system
board in some computers, expanding the capabilities of the computer. Examples
include video, modem, and sound cards.
expansion slot — A connector on the system board (in some computers) where you
insert an expansion card, connecting it to the system bus.
ExpressCard — A removable I/O card adhering to the PCMCIA standard. Modems
and network adapters are common types of ExpressCards. ExpressCards support both
the PCI Express and USB 2.0 standard.
Express Service Code — A numeric code located on a sticker on your
Dell™ computer. Use the Express Service Code when contacting Dell for assistance.
Express Service Code service may not be available in some countries.
extended display mode — A display setting that allows you to use a second monitor as
an extension of your display. Also referred to as dual display mode.
extended PC Card — A PC Card that extends beyond the edge of the PC Card slot
when installed.
Glossary
153
book.book Page 154 Thursday, August 7, 2008 5:00 PM
F
Fahrenheit — A temperature measurement scale where 32° is the freezing point and
212° is the boiling point of water.
FBD — fully-buffered DIMM — A DIMM with DDR2 DRAM chips and an
Advanced Memory Buffer (AMB) that speeds communication between the DDR2
SDRAM chips and the system.
FCC — Federal Communications Commission — A U.S. agency responsible for
enforcing communications-related regulations that state how much radiation
computers and other electronic equipment can emit.
fingerprint reader — A strip sensor that uses your unique fingerprint to authenticate
your user identity to help secure your computer.
folder — A term used to describe space on a disk or drive where files are organized and
grouped. Files in a folder can be viewed and ordered in various ways, such as
alphabetically, by date, and by size.
format — The process that prepares a drive or disk for file storage. When a drive or
disk is formatted, the existing information on it is lost.
FSB — front side bus — The data path and physical interface between the processor
and RAM.
FTP — file transfer protocol — A standard Internet protocol used to exchange files
between computers connected to the Internet.
G
G — gravity — A measurement of weight and force.
GB — gigabyte — A measurement of data storage that equals 1024 MB
(1,073,741,824 bytes). When used to refer to hard drive storage, the term is often
rounded to 1,000,000,000 bytes.
GHz — gigahertz — A measurement of frequency that equals one thousand million
Hz, or one thousand MHz. The speeds for computer processors, buses, and interfaces
are often measured in GHz.
graphics mode — A video mode that can be defined as x horizontal pixels by y vertical
pixels by z colors. Graphics modes can display an unlimited variety of shapes and fonts.
GUI — graphical user interface — Software that interacts with the user by means of
menus, windows, and icons. Most programs that operate on the Windows operating
systems are GUIs.
154
Glossary
book.book Page 155 Thursday, August 7, 2008 5:00 PM
H
hard drive — A drive that reads and writes data on a hard disk. The terms hard drive
and hard disk are often used interchangeably.
heat sink — A metal plate on some processors that helps dissipate heat.
hibernate mode — A power management mode that saves everything in memory to a
reserved space on the hard drive and then turns off the computer. When you restart
the computer, the memory information that was saved to the hard drive is
automatically restored.
HTTP — hypertext transfer protocol — A protocol for exchanging files between
computers connected to the Internet.
Hyper-Threading — Hyper-Threading is an Intel technology that can enhance overall
computer performance by allowing one physical processor to function as two logical
processors, capable of performing certain tasks simultaneously.
Hz — hertz — A unit of frequency measurement that equals 1 cycle per second.
Computers and electronic devices are often measured in kilohertz (kHz), megahertz
(MHz), gigahertz (GHz), or terahertz (THz).
I
IC — integrated circuit — A semiconductor wafer, or chip, on which thousands or
millions of tiny electronic components are fabricated for use in computer, audio, and
video equipment.
IDE — integrated device electronics — An interface for mass storage devices in which
the controller is integrated into the hard drive or CD drive.
IEEE 1394 — Institute of Electrical and Electronics Engineers, Inc. — A highperformance serial bus used to connect IEEE 1394-compatible devices, such as digital
cameras and DVD players, to the computer.
integrated — Usually refers to components that are physically located on the
computer’s system board. Also referred to as built-in.
I/O — input/output — An operation or device that enters and extracts data from your
computer. Keyboards and printers are I/O devices.
I/O address — An address in RAM that is associated with a specific device (such as a
serial connector, parallel connector, or expansion slot) and allows the processor to
communicate with that device.
IrDA — Infrared Data Association — The organization that creates international
standards for infrared communications.
Glossary
155
book.book Page 156 Thursday, August 7, 2008 5:00 PM
IRQ — interrupt request — An electronic pathway assigned to a specific device so
that the device can communicate with the processor. Each device connection must be
assigned an IRQ. Although two devices can share the same IRQ assignment, you
cannot operate both devices simultaneously.
ISP — Internet service provider — A company that allows you to access its host server
to connect directly to the Internet, send and receive e-mail, and access websites. The
ISP typically provides you with a software package, user name, and access phone
numbers for a fee.
K
Kb — kilobit — A unit of data that equals 1024 bits. A measurement of the capacity of
memory integrated circuits.
KB — kilobyte — A unit of data that equals 1024 bytes but is often referred to as
1000 bytes.
key combination — A command requiring you to press multiple keys at the same time.
kHz — kilohertz — A measurement of frequency that equals 1000 Hz.
L
LAN — local area network — A computer network covering a small area. A LAN
usually is confined to a building or a few nearby buildings. A LAN can be connected to
another LAN over any distance through telephone lines and radio waves to form a
wide area network (WAN).
LCD — liquid crystal display — The technology used by portable computer and
flat-panel displays.
LED — light-emitting diode — An electronic component that emits light to indicate
the status of the computer.
local bus — A data bus that provides a fast throughput for devices to the processor.
LPT — line print terminal — The designation for a parallel connection to a printer or
other parallel device.
M
Mb — megabit — A measurement of memory chip capacity that equals 1024 Kb.
Mbps — megabits per second — One million bits per second. This measurement is
typically used for transmission speeds for networks and modems.
156
Glossary
book.book Page 157 Thursday, August 7, 2008 5:00 PM
MB — megabyte — A measurement of data storage that equals 1,048,576 bytes. 1 MB
equals 1024 KB. When used to refer to hard drive storage, the term is often rounded to
1,000,000 bytes.
MB/sec — megabytes per second — One million bytes per second. This measurement
is typically used for data transfer ratings.
media bay — A bay that supports devices such as optical drives, a second battery, or a
Dell TravelLite™ module.
memory — A temporary data storage area inside your computer. Because the data in
memory is not permanent, it is recommended that you frequently save your files while
you are working on them, and always save your files before you shut down the computer.
Your computer can contain several different forms of memory, such as RAM, ROM,
and video memory. Frequently, the word memory is used as a synonym for RAM.
memory address — A specific location where data is temporarily stored in RAM.
memory mapping — The process by which the computer assigns memory addresses to
physical locations at start-up. Devices and software can then identify information that
the processor can access.
memory module — A small circuit board containing memory chips, which connects to
the system board.
MHz — megahertz — A measure of frequency that equals 1 million cycles per second.
The speeds for computer processors, buses, and interfaces are often measured in MHz.
Mini PCI — A standard for integrated peripheral devices with an emphasis on
communications such as modems and NICs. A Mini PCI card is a small external card
that is functionally equivalent to a standard PCI expansion card.
Mini-Card — A small card designed for integrated peripherals, such as
communication NICs. The Mini-Card is functionally equivalent to a standard PCI
expansion card.
Mobile Broadband network — (also known as a WWAN) is a series of interconnected
computers that communicate with each other through wireless cellular technology
and provides Internet access in the same varied locations from which cellular
telephone service is available. Your computer can maintain the Mobile Broadband
network connection regardless of its physical location, as long as the computer remains
in the service area of your cellular service provider.
modem — A device that allows your computer to communicate with other computers
over analog telephone lines. Three types of modems include: external, PC Card, and
internal. You typically use your modem to connect to the Internet and exchange e-mail.
module bay — See media bay.
Glossary
157
book.book Page 158 Thursday, August 7, 2008 5:00 PM
MP — megapixel — A measure of image resolution used for digital cameras.
ms — millisecond — A measure of time that equals one thousandth of a second.
Access times of storage devices are often measured in ms.
N
network adapter — A chip that provides network capabilities. A computer may
include a network adapter on its system board, or it may contain a PC Card with an
adapter on it. A network adapter is also referred to as a NIC (network interface
controller).
NIC — See network adapter.
notification area — The section of the Windows taskbar that contains icons for
providing quick access to programs and computer functions, such as the clock, volume
control, and print status. Also referred to as system tray.
ns — nanosecond — A measure of time that equals one billionth of a second.
NVRAM — nonvolatile random access memory — A type of memory that stores data
when the computer is turned off or loses its external power source. NVRAM is used for
maintaining computer configuration information such as date, time, and other system
setup options that you can set.
O
optical drive — A drive that uses optical technology to read or write data from CDs,
DVDs, or DVD+RWs. Example of optical drives include CD drives, DVD drives,
CD-RW drives, and CD-RW/DVD combo drives.
P
parallel connector — An I/O port often used to connect a parallel printer to your
computer. Also referred to as an LPT port.
partition — A physical storage area on a hard drive that is assigned to one or more
logical storage areas known as logical drives. Each partition can contain multiple
logical drives.
PC Card — A removable I/O card adhering to the PCMCIA standard. Modems and
network adapters are common types of PC Cards.
PCI — peripheral component interconnect — PCI is a local bus that supports 32-and
64-bit data paths, providing a high-speed data path between the processor and devices
such as video, drives, and networks.
158
Glossary
book.book Page 159 Thursday, August 7, 2008 5:00 PM
PCI Express — A modification to the PCI interface that boosts the data transfer rate
between the processor and the devices attached to it. PCI Express can transfer data at
speeds from 250 MB/sec to 4 GB/sec. If the PCI Express chip set and the device are
capable of different speeds, they will operate at the slower speed.
PCMCIA — Personal Computer Memory Card International Association — The
organization that establishes standards for PC Cards.
PIO — programmed input/output — A method of transferring data between two
devices through the processor as part of the data path.
pixel — A single point on a display screen. Pixels are arranged in rows and columns to
create an image. A video resolution, such as 800 x 600, is expressed as the number of
pixels across by the number of pixels up and down.
Plug-and-Play — The ability of the computer to automatically configure devices. Plug
and Play provides automatic installation, configuration, and compatibility with
existing hardware if the BIOS, operating system, and all devices are Plug and Play
compliant.
POST — power-on self-test — Diagnostics programs, loaded automatically by the
BIOS, that perform basic tests on the major computer components, such as memory,
hard drives, and video. If no problems are detected during POST, the computer
continues the start-up.
processor — A computer chip that interprets and executes program instructions.
Sometimes the processor is referred to as the CPU (central processing unit).
PS/2 — personal system/2 — A type of connector for attaching a PS/2-compatible
keyboard, mouse, or keypad.
PXE — pre-boot execution environment — A WfM (Wired for Management)
standard that allows networked computers that do not have an operating system to be
configured and started remotely.
R
RAID — redundant array of independent disks — A method of providing data
redundancy. Some common implementations of RAID include RAID 0, RAID 1,
RAID 5, RAID 10, and RAID 50.
RAM — random-access memory — The primary temporary storage area for program
instructions and data. Any information stored in RAM is lost when you shut down your
computer.
readme file — A text file included with a software package or hardware product.
Typically, readme files provide installation information and describe new product
enhancements or corrections that have not yet been documented.
Glossary
159
book.book Page 160 Thursday, August 7, 2008 5:00 PM
read-only — Data and/or files you can view but cannot edit or delete. A file can have
read-only status if:
• It resides on a physically write-protected floppy disk, CD, or DVD.
• It is located on a network in a directory and the system administrator has assigned
rights only to specific individuals.
refresh rate — The frequency, measured in Hz, at which your screen's horizontal lines
are recharged (sometimes also referred to as its vertical frequency). The higher the
refresh rate, the less video flicker can be seen by the human eye.
resolution — The sharpness and clarity of an image produced by a printer or displayed
on a monitor. The higher the resolution, the sharper the image.
RFI — radio frequency interference — Interference that is generated at typical radio
frequencies, in the range of 10 kHz to 100,000 MHz. Radio frequencies are at the
lower end of the electromagnetic frequency spectrum and are more likely to have
interference than the higher frequency radiations, such as infrared and light.
ROM — read-only memory — Memory that stores data and programs that cannot be
deleted or written to by the computer. ROM, unlike RAM, retains its contents after
you shut down your computer. Some programs essential to the operation of your
computer reside in ROM.
RPM — revolutions per minute — The number of rotations that occur per minute.
Hard drive speed is often measured in rpm.
RTC — real time clock — Battery-powered clock on the system board that keeps the
date and time after you shut down the computer.
RTCRST — real-time clock reset — A jumper on the system board of some computers
that can often be used for troubleshooting problems.
S
SAS — serial attached SCSI — A faster, serial version of the SCSI interface (as
opposed to the original SCSI parallel architecture).
SATA — serial ATA — A faster, serial version of the ATA (IDE) interface.
ScanDisk — A Microsoft utility that checks files, folders, and the hard disk’s surface
for errors. ScanDisk often runs when you restart the computer after it has stopped
responding.
SCSI — small computer system interface — A high-speed interface used to connect
devices to a computer, such as hard drives, CD drives, printers, and scanners. The
SCSI can connect many devices using a single controller. Each device is accessed by an
individual identification number on the SCSI controller bus.
160
Glossary
book.book Page 161 Thursday, August 7, 2008 5:00 PM
SDRAM — synchronous dynamic random-access memory — A type of DRAM that is
synchronized with the optimal clock speed of the processor.
serial connector — An I/O port often used to connect devices such as a handheld
digital device or digital camera to your computer.
Service Tag — A bar code label on your computer that identifies your computer when
you access Dell Support at support.dell.com or when you call Dell for customer service
or technical support.
setup program — A program that is used to install and configure hardware and
software. The setup.exe or install.exe program comes with most Windows software
packages. Setup program differs from system setup.
shortcut — An icon that provides quick access to frequently used programs, files,
folders, and drives. When you place a shortcut on your Windows desktop and doubleclick the icon, you can open its corresponding folder or file without having to find it
first. Shortcut icons do not change the location of files. If you delete a shortcut, the
original file is not affected. Also, you can rename a shortcut icon.
SIM — Subscriber Identity Module — A SIM card contains a microchip that encrypts
voice and data transmissions. SIM cards can be used in phones or portable computers.
smart card — A card that is embedded with a processor and a memory chip. Smart
cards can be used to authenticate a user on computers equipped for smart cards.
S/PDIF — Sony/Philips Digital Interface — An audio transfer file format that allows
the transfer of audio from one file to another without converting it to and from an
analog format, which could degrade the quality of the file.
standby mode — A power management mode that shuts down all unnecessary
computer operations to save energy.
Strike Zone™ — Reinforced area of the platform base that protects the hard drive by
acting as a dampening device when a computer experiences resonating shock or is
dropped (whether the computer is on or off).
surge protectors — Prevent voltage spikes, such as those that may occur during an
electrical storm, from entering the computer through the electrical outlet. Surge
protectors do not protect against lightning strikes or against brownouts, which occur
when the voltage drops more than 20 percent below the normal AC-line voltage level.
Network connections cannot be protected by surge protectors. Always disconnect the
network cable from the network connector during electrical storms.
Glossary
161
book.book Page 162 Thursday, August 7, 2008 5:00 PM
SVGA — super-video graphics array — A video standard for video cards and
controllers. Typical SVGA resolutions are 800 x 600 and 1024 x 768.
The number of colors and resolution that a program displays depends on the
capabilities of the monitor, the video controller and its drivers, and the amount of
video memory installed in the computer.
SXGA — super-extended graphics array — A video standard for video cards and
controllers that supports resolutions up to 1280 x 1024.
SXGA+ — super-extended graphics array plus — A video standard for video cards and
controllers that supports resolutions up to 1400 x 1050.
system board — The main circuit board in your computer. Also known as the
motherboard.
system setup — A utility that serves as an interface between the computer hardware
and the operating system. System setup allows you to configure user-selectable options
in the BIOS, such as date and time or system password. Unless you understand what
effect the settings have on the computer, do not change the settings for this program.
T
TAPI — telephony application programming interface — Enables Windows programs
to operate with a wide variety of telephony devices, including voice, data, fax, and
video.
text editor — A program used to create and edit files that contain only text; for
example, Windows Notepad uses a text editor. Text editors do not usually provide
word wrap or formatting functionality (the option to underline, change fonts, and so on).
TPM — trusted platform module — A hardware-based security feature that when
combined with security software enhances network and computer security by enabling
features such as file and e-mail protection.
travel module — A plastic device designed to fit inside the module bay of a portable
computer to reduce the weight of the computer.
U
UMA — unified memory allocation — System memory dynamically allocated to video.
UPS — uninterruptible power supply — A backup power source used when the
electrical power fails or drops to an unacceptable voltage level. A UPS keeps a
computer running for a limited amount of time when there is no electrical power. UPS
systems typically provide surge suppression and may also provide voltage regulation.
Small UPS systems provide battery power for a few minutes to enable you to shut
down your computer.
162
Glossary
book.book Page 163 Thursday, August 7, 2008 5:00 PM
USB — universal serial bus — A hardware interface for a low-speed device such as a
USB-compatible keyboard, mouse, joystick, scanner, set of speakers, printer,
broadband devices (DSL and cable modems), imaging devices, or storage devices.
Devices are plugged directly in to a 4-pin socket on your computer or in to a multi-port
hub that plugs in to your computer. USB devices can be connected and disconnected
while the computer is turned on, and they can also be daisy-chained together.
UTP — unshielded twisted pair — Describes a type of cable used in most telephone
networks and some computer networks. Pairs of unshielded wires are twisted to protect
against electromagnetic interference, rather than relying on a metal sheath around
each pair of wires to protect against interference.
UXGA — ultra extended graphics array — A video standard for video cards and
controllers that supports resolutions up to 1600 x 1200.
V
video controller — The circuitry on a video card or on the system board (in computers
with an integrated video controller) that provides the video capabilities—in
combination with the monitor—for your computer.
video memory — Memory that consists of memory chips dedicated to video functions.
Video memory is usually faster than system memory. The amount of video memory
installed primarily influences the number of colors that a program can display.
video mode — A mode that describes how text and graphics are displayed on a
monitor. Graphics-based software, such as Windows operating systems, displays in
video modes that can be defined as x horizontal pixels by y vertical pixels by z colors.
Character-based software, such as text editors, displays in video modes that can be
defined as x columns by y rows of characters.
video resolution — See resolution.
virus — A program that is designed to inconvenience you or to destroy data stored on
your computer. A virus program moves from one computer to another through an
infected disk, software downloaded from the Internet, or e-mail attachments. When
an infected program starts, its embedded virus also starts.
A common type of virus is a boot virus, which is stored in the boot sectors of a floppy
disk. If the floppy disk is left in the drive when the computer is shut down and then
turned on, the computer is infected when it reads the boot sectors of the floppy disk
expecting to find the operating system. If the computer is infected, the boot virus may
replicate itself onto all the floppy disks that are read or written in that computer until
the virus is eradicated.
V — volt — The measurement of electric potential or electromotive force. One V appears
across a resistance of 1 ohm when a current of 1 ampere flows through that resistance.
Glossary
163
book.book Page 164 Thursday, August 7, 2008 5:00 PM
W
W — watt — The measurement of electrical power. One W is 1 ampere of current
flowing at 1 volt.
WHr — watt-hour — A unit of measure commonly used to indicate the approximate
capacity of a battery. For example, a 66-WHr battery can supply 66 W of power for
1 hour or 33 W for 2 hours.
wallpaper — The background pattern or picture on the Windows desktop. Change
your wallpaper through the Windows Control Panel. You can also scan in your favorite
picture and make it wallpaper.
WLAN — wireless local area network. A series of interconnected computers that
communicate with each other over the air waves using access points or wireless routers
to provide Internet access.
write-protected — Files or media that cannot be changed. Use write-protection when
you want to protect data from being changed or destroyed. To write-protect a 3.5-inch
floppy disk, slide its write-protect tab to the open position.
WPAN — wireless personal area network. A computer network used for
communication among computer devices (including telephones and personal digital
assistants) close to one person.
WWAN — wireless wide area network. A wireless high-speed data network using
cellular technology and covering a much larger geographic area than WLAN.
WXGA — wide-aspect extended graphics array — A video standard for video cards
and controllers that supports resolutions up to 1280 x 800."
X
XGA — extended graphics array — A video standard for video cards and controllers
that supports resolutions up to 1024 x 768.
Z
ZIF — zero insertion force — A type of socket or connector that allows a computer
chip to be installed or removed with no stress applied to either the chip or its socket.
Zip — A popular data compression format. Files that have been compressed with the
Zip format are called Zip files and usually have a filename extension of .zip. A special
kind of zipped file is a self-extracting file, which has a filename extension of .exe. You
can unzip a self-extracting file by double-clicking it.
Zip drive — A high-capacity floppy drive developed by Iomega Corporation that uses
3.5-inch removable disks called Zip disks. Zip disks are slightly larger than regular
floppy disks, about twice as thick, and hold up to 100 MB of data.
164
Glossary
book.book Page 165 Thursday, August 7, 2008 5:00 PM
Index
Numerics
C
8-in-1 memory card reader, 63
carnet, 126
A
CD
blank, 58
CD-RW drive problems, 80
drive problems, 80
audio. See sound
Check Disk, 81
B
battery
charging, 51
checking the charge, 48
performance, 47
power meter, 49
removing, 52
storing, 53
blank cards
ExpressCards, 62
memory card, 63
removing, 63, 65
Bluetooth wireless technology
card
device status light, 22
installing, 122
boot sequence, 142
brightness
adjusting, 39
cleaning
touch pad, 145
computer
crashes, 90-91
slow performance, 82, 92
specifications, 133
stops responding, 90
connecting
Mobile Broadband network, 72
copying CDs
helpful tips, 58
copying DVDs
helpful tips, 58
D
Dell Diagnostics
about, 75
starting from the Drivers and
Utilities media, 77
starting from your hard drive, 76
Index
165
book.book Page 166 Thursday, August 7, 2008 5:00 PM
Dell support site, 15
DellConnect, 128
device latch release
description, 28
device status lights
description, 22
drives
problems, 79
See also hard drive
See also optical drive
DVD
blank, 58
drive problems, 80
diagnostics
Dell, 75
display
adjusting brightness, 39
description, 20
resolution, 40
switching the video image, 39
E
documentation
End User License Agreement, 14
ergonomics, 14
online, 15
Product Information Guide, 14
regulatory, 14
safety, 14
warranty, 14
ExpressCard slot
description, 26
drivers
about, 100
identifying, 100
reinstalling, 100
H
Drivers and Utilities CD
Dell Diagnostics, 75
Drivers and Utilities media, 13
about, 101
End User License Agreement, 14
ergonomics information, 14
error messages, 82
ExpressCards, 61
blanks, 62-63
installing, 62
removing, 63
hard drive
problems, 81
replacing, 109
returning to Dell, 111
hardware
Dell Diagnostics, 75
Hardware Troubleshooter, 103
hinge cover
removing, 113
166
Index
book.book Page 167 Thursday, August 7, 2008 5:00 PM
I
IEEE 1394 connector
description, 25
problems, 88
Internet connection
about, 29
options, 29
setting up, 30
K
keyboard
numeric keypad, 41
problems, 88
removing, 114
shortcuts, 42
keyboard status lights
description, 23
keypad
numeric, 41
L
labels
Microsoft Windows, 14
Service Tag, 14
lost computer, 74
media control buttons
description, 20
media memory cards, 63
installing, 64
reader, 21
types, 63
memory
installing, 116
removing, 117
memory card
blanks, 63
memory card reader, 63
memory cards
blanks, 65
removing, 65
messages
error, 82
modem connector
description, 28
monitor. See display
N
network
problems, 93
network connector
description, 25
M
media
playing, 55
Index
167
book.book Page 168 Thursday, August 7, 2008 5:00 PM
P
scanner, 95
slow computer performance, 82,
92
software, 90-91
sound and speakers, 96
speakers, 96
spyware, 82, 92
power
problems, 93
power button
description, 20
power light
conditions, 93
printer
cable, 35
connecting, 34
problems, 94
setting up, 34
USB, 35
problems
blue screen, 91
CD drive, 80
CD-RW drive, 80
computer crashes, 90-91
computer does not start up, 90
computer stops responding, 90
Dell Diagnostics, 75
drives, 79
DVD drive, 80
error messages, 82
hard drive, 81
IEEE 1394 connector, 88
keyboard, 88
lockups, 90
network, 93
power, 93
power light conditions, 93
printer, 94
program crashes repeatedly, 90
program stops responding, 90
168
Index
Product Information Guide, 14
Q
QuickSet Help, 16
R
RAM. See memory
regulatory information, 14
resolution
setting, 40
S
Safely Remove Hardware
icon, 87
safety instructions, 14
scanner
problems, 95
screen. See display
security cable slot
description, 24
Service Tag, 14
book.book Page 169 Thursday, August 7, 2008 5:00 PM
software
problems, 91
software and hardware
incompatibilities, 103
sound
problems, 96
volume, 96
speakers
problems, 96
volume, 96
specifications, 133
spyware, 82, 92
traveling with the computer
by air, 126
identification tag, 125
packing, 125
tips, 126
troubleshooting
Dell Diagnostics, 75
Hardware Troubleshooter, 103
U
uninterruptible power supply.
See UPS
stolen computer, 74
support website, 15
system setup program
commonly used options, 142
screens, 142
viewing, 142
T
taskbar
Dell Support Utility, 16
Safely Remove Hardware, 87
wireless activity indicator, 72
touch pad, 44
cleaning, 145
customizing, 45
touch pad buttons
description, 21
V
video
problems, 98
video controller
determining configuration, 19
volume
adjusting, 96
W
warranty information, 14
Windows XP
Program Compatibility wizard, 91
reinstalling, 105
track stick/touch pad buttons
description, 20
Index
169
book.book Page 170 Thursday, August 7, 2008 5:00 PM
170
Index