1
MICROWAVE OVEN
OPERATING INSTRUCTIONS
KOR-810P
Model No.:
Stage
1
2
Lock
No
Defrost
Weight Time
Auto
Start
Cups
g
AUTO COOK
Menu
1. Baked Potato
2. Fresh Vegetable
3. Soup
4. Fish Filets
5. Meat Loaf
Weight
Clock/
A.start
Auto
defrost
Speedy
Clock/Timer
1 HOUR
10 MIN
1 MIN
10
1
10
min
1000g
High
M-High
Med
Stop/Clear
Before operating this oven, please read these instructions completely.
min
100g
sec
10g
M-Low
Low
Start
EARTHING INSTRUCTIONS
PRECAUTIONS TO AVOIDE POSSIBLE
EXPOSURE TO EXCESSIVE MICROWAVE
ENERGY
(a) Do not attempt to operate this oven with the door open since open-door operation can
result in harmful exposure to microwave energy. It is important not to defeat or tamper with
the safety interlocks.
(b) Do not place any object between the oven front face and the door or allow soil or cleaner
residue to accumulate on sealing surfaces.
(c) Do not operate the oven if it is damaged. It is particularly important that the oven door
close properly and that there is no damage to the: (1) door (bent), (2) hinges and latches
(broken or loosened), (3) door seals and sealing surfaces.
(d) The oven should not be adjusted or repaired by anyone except properly qualified
service personnel.
This appliance must be earthed. In the event of an electrical short circuit, earthing reduces the risk of
electric shock by providing an escape wire for the electric current. This appliance is equipped with a cord
having a earthing wire with a earthing plug. The plug must be plugged into an outlet that is properly
installed and earthed.
WARNING: Improper use of the earthing plug can result in a risk of electric shock. Consult a
qualified electrician or serviceman if the earthing instructions are not completely
understood, or if doubt exists as to whether the appliance is properly earthed. If it is
necessary to use an extension cord, use only a 3-wire extension cord that has a 3blade earthing plug, and a 3-slot receptacle that will accept the plug on the appliance.
The marked rating of the extension cord should be equal to or greater than the
electrical rating of the appliance.
INSTALLATION
flat location
1 Steady,
This oven should be set on a steady, flat surface. This oven is designed for counter top use only.
TABLE OF CONTENTS
space behind and side
2 Leave
All air vents should be kept a clearance. If all vents are covered during operation, the oven may
overheat and, eventually, oven failure.
PRECAUTIONS TO AVOID POSSIBLE EXPOSURE TO
EXCESSIVE MICROWAVE ENERGY . . . . . . . . . . . . . . . . . . . . . . . . . . . . . . . . . . . . . . . . . . . . . . . . . . . . . . . . . 1
TABLE OF CONTENTS. . . . . . . . . . . . . . . . . . . . . . . . . . . . . . . . . . . . . . . . . . . . . . . . . . . . . . . . . . . . . . . . . . . . 1
EARTHING INSTRUCTIONS. . . . . . . . . . . . . . . . . . . . . . . . . . . . . . . . . . . . . . . . . . . . . . . . . . . . . . . . . . . . . . . . 2
INSTALLATION. . . . . . . . . . . . . . . . . . . . . . . . . . . . . . . . . . . . . . . . . . . . . . . . . . . . . . . . . . . . . . . . . . . . . . . . . . 2
SPECIFICATIONS. . . . . . . . . . . . . . . . . . . . . . . . . . . . . . . . . . . . . . . . . . . . . . . . . . . . . . . . . . . . . . . . . . . . . . . . 3
IMPORTANT. . . . . . . . . . . . . . . . . . . . . . . . . . . . . . . . . . . . . . . . . . . . . . . . . . . . . . . . . . . . . . . . . . . . . . . . . . . . 3
SAFETY INSTRUCTIONS FOR GENERAL USE . . . . . . . . . . . . . . . . . . . . . . . . . . . . . . . . . . . . . . . . . . . . . . . . . 4
FEATURES DIAGRAM . . . . . . . . . . . . . . . . . . . . . . . . . . . . . . . . . . . . . . . . . . . . . . . . . . . . . . . . . . . . . . . . . . . . 5
OPERATION PROCEDURE . . . . . . . . . . . . . . . . . . . . . . . . . . . . . . . . . . . . . . . . . . . . . . . . . . . . . . . . . . . . . . . . 6
CONTROLS . . . . . . . . . . . . . . . . . . . . . . . . . . . . . . . . . . . . . . . . . . . . . . . . . . . . . . . . . . . . . . . . . . . . . . . . . . . . 7
SETTING THE CLOCK . . . . . . . . . . . . . . . . . . . . . . . . . . . . . . . . . . . . . . . . . . . . . . . . . . . . . . . . . . . . . . . . . . 7
WEIGHT DEFROSTING . . . . . . . . . . . . . . . . . . . . . . . . . . . . . . . . . . . . . . . . . . . . . . . . . . . . . . . . . . . . . . . . . 8
TIME DEFROSTING. . . . . . . . . . . . . . . . . . . . . . . . . . . . . . . . . . . . . . . . . . . . . . . . . . . . . . . . . . . . . . . . . . . . 9
COOKING IN ONE STAGE . . . . . . . . . . . . . . . . . . . . . . . . . . . . . . . . . . . . . . . . . . . . . . . . . . . . . . . . . . . . . . 10
COOKING IN TWO STAGES . . . . . . . . . . . . . . . . . . . . . . . . . . . . . . . . . . . . . . . . . . . . . . . . . . . . . . . . . . . . 11
WEIGHT DEFROSTING AND COOKING IN TWO STAGES . . . . . . . . . . . . . . . . . . . . . . . . . . . . . . . . . . . . . 12
AUTO START. . . . . . . . . . . . . . . . . . . . . . . . . . . . . . . . . . . . . . . . . . . . . . . . . . . . . . . . . . . . . . . . . . . . . . . . 14
TO CHECK AUTO START TIME . . . . . . . . . . . . . . . . . . . . . . . . . . . . . . . . . . . . . . . . . . . . . . . . . . . . . . . . . . 15
SPEEDY COOK . . . . . . . . . . . . . . . . . . . . . . . . . . . . . . . . . . . . . . . . . . . . . . . . . . . . . . . . . . . . . . . . . . . . . . 15
ONE TOUCH COOKING. . . . . . . . . . . . . . . . . . . . . . . . . . . . . . . . . . . . . . . . . . . . . . . . . . . . . . . . . . . . . . . . 15
AUTO COOK (MENU & WEIGHT). . . . . . . . . . . . . . . . . . . . . . . . . . . . . . . . . . . . . . . . . . . . . . . . . . . . . . . . . 17
FEEDING BOTTLE . . . . . . . . . . . . . . . . . . . . . . . . . . . . . . . . . . . . . . . . . . . . . . . . . . . . . . . . . . . . . . . . . . . . 18
MORE, LESS . . . . . . . . . . . . . . . . . . . . . . . . . . . . . . . . . . . . . . . . . . . . . . . . . . . . . . . . . . . . . . . . . . . . . . . . 18
CHILD SAFETY LOCK . . . . . . . . . . . . . . . . . . . . . . . . . . . . . . . . . . . . . . . . . . . . . . . . . . . . . . . . . . . . . . . . . 18
TO STOP THE OVEN WHILE THE OVEN IS OPERATING . . . . . . . . . . . . . . . . . . . . . . . . . . . . . . . . . . . . . . 18
COOKING UTENSILS . . . . . . . . . . . . . . . . . . . . . . . . . . . . . . . . . . . . . . . . . . . . . . . . . . . . . . . . . . . . . . . . . . . . 19
CARE AND CLEANING. . . . . . . . . . . . . . . . . . . . . . . . . . . . . . . . . . . . . . . . . . . . . . . . . . . . . . . . . . . . . . . . . . . 19
BEFORE YOU CALL FOR SERVICE. . . . . . . . . . . . . . . . . . . . . . . . . . . . . . . . . . . . . . . . . . . . . . . . . . . . . . . . . 20
QUESTIONS AND ANSWERS . . . . . . . . . . . . . . . . . . . . . . . . . . . . . . . . . . . . . . . . . . . . . . . . . . . . . . . . . . . . . 20
1
from radio and TV sets
3 Away
Poor television reception and radio interference may result if the oven is located close to a TV, Radio
antenna, feeder and so on.
Position the oven, as far from them as possible.
from heating appliance and water taps
4 Away
Keep the oven away from hot air, steam or splash when choosing a place to position it, or the
insulation might be adversely affected and breakdowns occur.
supply
5 Power
• Check your local power source. This oven requires a current of approximately 6 amperes, 230V
50Hz.
• Power supply cord is about 1.1 meters long.
• The voltage used must be the same as specified on this oven. Using a higher voltage may result in a
fire or other accident causing oven damage. Using low voltage will cause slow cooking. We are not
responsible for damage resulting from use of this oven with a voltage of ampere fuse other than
those specified.
• This appliance is supplied with cable of special type, which, if damaged, must be repaired with cable
of same type. Such a cable can be purchased from DAEWOO and must be installed by a Qualified
Person.
the oven after unpacking for any damage such as:
6 Examine
A misaligned door, Broken door, A dent in cavity. If any of the above are visible, DO NOT INSTALL,
and notify dealer immediately.
not operate the oven if it is colder than room termperature.
7 Do
(This may occur during delivery in cold weather.) Allow the oven to become room temperature before
operating.
2
SAFETY INSTRUCTIONS FOR GENERAL USE
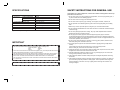
SPECIFICATIONS
POWER SUPPLY
MICROWAVE
230V~50Hz, SINGLE PHASE WITH EARTHING
Listed below are, as with all appliances, certain rules to follow and safeguards to assure top
performance from this oven:
1. Do not use the oven for any reason other than food preparation, such as for drying clothes, paper, or
any other nonfood items or for sterilizing purposes.
POWER CONSUMPTION
1350 W
OUTPUT POWER
900 W (IEC 705)
FREQUENCY
2450 MHz
2. Do not use the oven when empty, this could damage the oven.
OUTSIDE DIMENSIONS (W X H X D)
495 X 289 X 382 mm
3. Do not use the oven cavity for any type of storage, such as papers, cookbook, cookware, etc.
CAVITY DIMENSIONS (W X H X D)
320 X 225 X 330 mm
NET WEIGHT
APPROX. 15 Kg
4. Do not operate the oven without the glass tray in place. Be sure it is properly sitting on the rotating
base.
TIMER
59 min. 90 sec.
5. Make sure you remove caps or lids prior to cooking when you cook food sealed in bottles.
POWER SELECTIONS
10 LEVELS
6. Do not put foreign material between the oven surface and door. It could result in excessive leakage of
microwave energy.
* Specifications subject to change without notice.
7. Do not use recycled paper products for cooking. They may contain impurities which could cause
sparks and/or fires when used during cooking.
8. Do not pop popcorn unless popped in a microwave approved popcorn popper or unless it's
commercially packaged and recommended especially for microwave ovens. Microwave popped corn
produces a lower yield than conventional popping; there will be a number of unpopped kernels. Do not
use oil unless specified by the manufacturer.
IMPORTANT
The wires in this mains lead are coloured in accordance with the following code.
Green-and-yellow : Earth
Blue
: Neutral
Brown
: Live
As the colours of the wires in the mains lead of this appliance may not correspond with the coloured
markings identifying the terminals in your plug, proceed as follows:
The wire which is coloured green-and-yellow must be connected to the terminal in the plug which is
marked with the letter 'E' or by the earth symbol or green-and-yellow. The wire which is coloured
blue must be connected to the terminal which is marked with the letter 'N' or coloured black.
The wire which is coloured brown must be connected to the terminal which is marked with the letter
'L' or coloured red.
WARNING: This appliance must be earthed.
3
9. Do not cook any food surrounded by a membrane, such as egg yolks, potatoes, chicken livers, etc.,
without first piercing them several times with a fork.
10. Do not pop popcorn longer than the manufacturer's directions. (popping time is generally below 3
minutes).
Longer cooking does not yield more popped corn, it can cause scorchings and fire.
Also, the cooking tray can become too hot to handle or may break.
11. Should the microwave oven emit smoke in quantity to indicate a fire, keep the oven door shut, switch
the appliance off and disconnect the mains lead from the outlet.
12. When flammable food containers are used in the oven (e.g. packet popcorn) be sure to check the
cooking process periodically in case fire has occurred.
13. Always stir and/or shake the containers of baby foods prior to testing their temperature and serving
the contents.
14. Always test the temperature of food or drink which has been heated in a microwave oven before you
give it to somebody, especially to children or elderly people. This is important because things which
have been heated in a microwave oven carry on getting hotter even though the microwave oven
cooking has stopped.
4
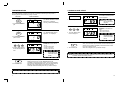
FEATURES DIAGRAM
OPERATION PROCEDURE
This section includes useful information about oven operation.
1 2
3
4
1. Plug power supply cord into a 230V 50Hz power outlet.
2. After placing the food in a suitable container, open the oven door and put it on the glass tray.
The glass tray must always be in place during cooking.
3. Shut the door. Make sure that it is firmly closed.
5
Stage
1
2
Lock
No
Defrost
Weight Time
Auto
Start
q
Stage
1
2
Lock
No
Defrost
Weight Time
e
g
AUTO COOK
1. Baked Potato
2. Fresh Vegetable
3. Soup
4. Fish Filets
5. Meat Loaf
Weight
Clock/
A.start
Auto
defrost
Speedy
Clock/Timer
1 HOUR
10 MIN
10
1
min
1000g
High
M-High
min
100g
Med
Stop/Clear
g
Auto
Start
Cups
Menu
Cups
1 MIN
10
sec
10g
M-Low
Low
Start
r
t
i
y
p
AUTO COOK
Menu
1. Baked Potato
2. Fresh Vegetable
3. Soup
4. Fish Filets
5. Meat Loaf
Weight
Auto
defrost
Clock/
A.start
o
Speedy
u
d
s
w
Clock/Timer
9
7 6
1 MIN
10
1
10
High
f
5
10 MIN
min
1000g
8
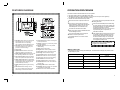
1 Door latch-When the door is closed it will
automatically lock shut. If the door is
opened while the oven is operating.
The magnetron will automatically shut off.
2 Door seal-The door seal maintains the
microwaves within the oven cavity and
prevents microwave leakage.
3 Oven cavity.
4 Spatter shield-Protects the microwave
outlet from splashes of cooked foods.
5 Safety interlock system-Prevents the oven
from operating while the door is opened.
6 Door release button-Pushing this button
stops oven operation and opens the door.
7 Glass cooking tray-Made of special heat
resistant glass. The tray must always be in
proper position before operating. Do not
cook food directly on the tray.
8 Roller guide-Supports the glass cooking
tray.
9 Door screen-Allows viewing of food.
The screen is designed so that light can
pass through, but not the microwaves.
1 HOUR
M-High
min
100g
Med
Stop/Clear
sec
10g
M-Low
Low
Start
0
a
g
0 Time set pad-Used to set the cooking time
and the present time.
q Display-Cooking time, power level, present
time are displayed.
w Speedy cook-Touch to set any desired
reheat setting.
e Menu-Used to select foods.
r Weight-Used to select quantity of foods.
t Dinner plate-Used to reheat dinner plate.
y Beverage-Used to reheat beverage.
u Frozen pizza-Used to reheat frozen pizza.
i More-Used to add on one touch cooking.
o Less-Used to remove one touch cooking.
p Auto defrost-Used to defrost foods.
a Power set pad-Used to set power level.
s Clock/A.start-Used to set clock & Used to
set auto start.
d Feeding bottle-Used to sterilize bottle.
f Stop/Clear-Used to stop the oven operation
or to delete the cooking data.
g Start-Used to start a selected operation.
1 When the oven door is opened, the turns off.
oven door can be opened at any time
2 The
during operation by touching the door release
clock returns to the present time when the
6 Time
cooking time ends.
the STOP/CLEAR pad is touched during
7 When
the oven operation, the oven stops cooking and
button on the control panel. The oven will
automatically shut off. To restart the oven,
close the door and then touch START.
all information retained. To erase all information
(except the present time), touch the
STOP/CLEAR pad once more. If the oven door
is opened during the oven operation, all
information is retained.
time a pad is touched, a BEEP will sound
3 Each
to acknowledge the touch.
oven automatically cook on full power
4 The
unless set to a lower power level.
5
START pad is touched and the oven does
8 Ifnottheoperate,
check the area between the door
and door seal for obstructions and make sure
the door is closed securely. The oven will not
start cooking until the door is completely closed
or the program has been reset.
The display will show ":0" when the oven is
plugged in.
Make sure the oven is properly installed and
plugged into the electrical outlet.
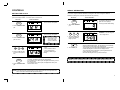
Wattage output chart
• The power-level is set by pressing the POWER pad. The chart shows the display, the power level and
the percentage of power.
Approximate Percentage
of Power
Touch Power pad
Power Level (Display)
HIGH
P-HI
100%
M-HI
P-80
80%
MED
P-60
60%
M-LOW
P-40
40%
LOW
P-20
20%
6
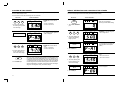
CONTROLS
WEIGHT DEFROSTING
SETTING THE CLOCK
WEIGHT DEFROST lets you easily defrost food by eliminating guesswork in determining defrosting time.
The minimum weight for WEIGHT DEFROST is 200 grams. The maximum weight for WEIGHT
DEFROST is 3000 grams. Follow the steps below for easy defrosting.
When the oven is first plugged in, the display will flash " :0" and a tone will sound. If the AC power ever
goes off, the display will flash " :0" when the power comes back on.
DO THIS...
DO THIS...
THIS HAPPENS...
THIS HAPPENS...
Clock/
A.start
STAGE
DEFROST
WEIGHT
TIME
AUTO
START
This is a 12 hour clock system.
LOCK
LOCK
NO
CUPS
STAGE
DEFROST
TIME
AUTO
START
2. Touch CLOCK/A.START
pad once more.
LOCK
NO
CUPS
g
This is a 24 hour clock system.
NOTE: This oven is multiple
clock system. If you
want 12 hour clock
system, omitted this
step.
1 HOUR
10 MIN
1 MIN
10
1
10
min
1000g
min
100g
1 MIN
10
1
10
min
1000g
min
100g
STAGE
DEFROST
WEIGHT
sec
10g
TIME
AUTO
START
3. Touch the TIME set pads
to set the correct present
time.
LOCK
Clock/
A.start
4. Touch CLOCK/A.START
pad.
AUTO
START
The WEIGHT DEFROST indicator
lights and ":0" is displayed.
And the g indicator starts blinking.
NO
CUPS
NO
CUPS
g
EXAMPLE: To set the time to
“12:30”.
• Touch 1 HOUR 12 times.
• Touch 10 MIN 3 times.
The display willl then begin
blinking.
STAGE
DEFROST
WEIGHT
TIME
AUTO
START
sec
10g
EXAMPLE: To set the 500 grams.
• Touch 100g 5 times.
2. Touch the WEIGHT set
pads for the defrosting
weight you want.
LOCK
Start
10 MIN
TIME
g
WEIGHT
1 HOUR
DEFROST
WEIGHT
1. Touch AUTO DEFROST
pad.
1. Touch CLOCK/A.START
pad.
Clock/
A.start
STAGE
Auto
defrost
3. Touch START pad.
NO
CUPS
g
WEIGHT DEFROSTING begins. The defrosting time is automatically
determined by the food category and weight entered.
The g indicator goes off and the WEIGHT DEFROST indicator blinks
and the defrosting time counts down in the display window.
The oven beeps during the defrosting cycle to signal that the food
needs to be turned or rearranged.
When the defrosting time ends, you will hear 3 beeps.
g
The display stop blinking and the colon starts blinking.
If you selected 12 hour clock system this digital clock allows you to set
from 1:00 to 12:59.
If you selected 24 hour clock system, this digital clock allows you to
set from 0:00 to 23:59.
NOTE: To prevent overdefrosting, thin areas or edges can be shielded with strips of aluminum foil.
NOTE: If you attempt to enter an incorrect time, the time will not be set and a error signal tone will
sound. Touch the CLOCK/A.START pad re-enter the time.
7
8
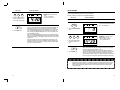
TIME DEFROSTING
COOKING IN ONE STAGE
When TIME DEFROST is selected, the automatic cycle divides the defrosting time into periods of
alternating defrost and stand times by cycling on and off.
DO THIS...
DO THIS...
M-HI
THIS HAPPENS...
Auto
defrost
STAGE
DEFROST
WEIGHT
TIME
AUTO
START
THIS HAPPENS...
The WEIGHT DEFROST indicator
lights and "0" is displayed.
And the g indicator starts blinking.
STAGE
CUPS
g
1 HOUR
10 MIN
1 MIN
10
1
10
min
1000g
Auto
defrost
STAGE
DEFROST
WEIGHT
TIME
AUTO
START
The TIME DEFROST indicator
lights and “ :0” is displayed.
min
100g
1 HOUR
10 MIN
1 MIN
10
1
10
min
1000g
min
100g
CUPS
STAGE
DEFROST
TIME
AUTO
START
sec
10g
3. Touch the TIME set pads
for the defrosting time you
want.
Start
4. Touch START pad.
NO
CUPS
The STAGE1 indicator lights and
"P-80" is displayed.
STAGE
g
DEFROST
WEIGHT
TIME
AUTO
START
NO
CUPS
g
EXAMPLE: To set the time to
“5:30”.
• Touch 1 min 5 times.
• Touch 10 sec 3 times.
NOTE: Your oven can be
programmed for 59
minutes 99 seconds.
(59:99)
g
WEIGHT
LOCK
CUPS
2. Touch the TIME set pads
for the cooking time.
2. Touch AUTO DEFROST
pad once more.
NO
NO
sec
10g
LOCK
LOCK
AUTO
START
NOTE: If step 1 is omitted,
the oven will cook at
full power.
LOCK
NO
TIME
1. Touch M-HI pad.
1. Touch AUTO DEFROST
pad.
LOCK
DEFROST
WEIGHT
g
EXAMPLE: To set the time to
“27:10”.
• Touch 10 min 2 times.
• Touch 1 min 7 times.
• Touch 10 sec 1 times.
NOTE: Your oven can be
programmed for 59
minutes 99 seconds.
(59:99)
Start
3. Touch START pad.
When you touch START pad, the STAGE1 indicator starts blinking to
show the oven is cooking. The display counts down the time to show
how much cooking time is left.
When the cooking time ends, you will hear 3 beeps.
NOTE: Using lower power levels increase the cooking time which is recommended for foods such
as cheese, milk and slow cooking of meats.
When you touch START pad, the TIME DEFROST indicator starts
blinking to show the oven is in the TIME DEFROST mode.
The display counts down the time to show you how much defrosting
time is left in the TIME DEFROST mode. The oven beeps during the
defrosting cycle to signal that the food needs to be turned or
rearranged. When the defrosting time ends, you will hear 3 beeps.
NOTE: To prevent overdefrosting, thin areas or edges can be shielded with strips of aluminum foil.
9
10
COOKING IN TWO STAGES
WEIGHT DEFROSTING AND COOKING IN TWO STAGES
For best results, some recipes call for one Power Level for a certain length of time and another power
level for a different length of time.
Your microwave oven can be set to change from one to another.
Some recipes require frozen foods to be thawed before cooking.
This oven can be programmed to automatically defrost foods before cooking.
DO THIS...
1 HOUR
10
min
1000g
10 MIN
1
min
100g
THIS HAPPENS...
1 MIN
10
STAGE
DEFROST
WEIGHT
TIME
AUTO
START
sec
10g
1. Touch number pads for
the cooking time you want
in the first stage.
LOCK
NO
CUPS
DO THIS...
EXAMPLE: To set the time to
“5:30”.
• Touch 1 min 5 times.
• Touch 10 sec 3 times.
M-HI
DEFROST
WEIGHT
TIME
AUTO
START
10 MIN
NO
CUPS
min
1000g
1
min
100g
min
1000g
10
Start
4. Touch START pad.
DEFROST
WEIGHT
TIME
AUTO
START
sec
10g
3. Touch the TIME set pads
for the cooking time you
want in the second stage.
1
min
100g
NO
CUPS
NO
CUPS
g
1 MIN
10
STAGE
DEFROST
WEIGHT
TIME
AUTO
START
EXAMPLE: To set the 500 grams.
• Touch 100g 5 times.
sec
10g
LOCK
NO
CUPS
EXAMPLE: To set the time to
“4:20”.
• Touch 1 min 4 times.
• Touch 10 sec 2 times.
STAGE
HIGH
g
DEFROST
WEIGHT
TIME
AUTO
START
"P-HI" will appear in the displayed.
This example shows full power
(100%)
3. Touch HIGH pad.
LOCK
LOCK
The WEIGHT DEFROST indicator
lights and "0" is displayed.
And the g indicator starts blinking.
g
1 MIN
STAGE
10
10
10 MIN
2. Touch the WEIGHT set
pads for the defrosting
weight you want.
LOCK
TIME
AUTO
START
1. Touch AUTO DEFROST
pad.
LOCK
The STAGE2 indicator lights and
"P-80" is displayed.
DEFROST
WEIGHT
g
2. Touch M-HI pad.
1 HOUR
STAGE
Auto
defrost
1 HOUR
STAGE
THIS HAPPENS...
NO
CUPS
g
g
When you touch START pad, both STAGE1 & 2 indicator lights come
on, STAGE1 indicator light starts blinking to show you that the oven is
cooking in the first of two cook stages. The oven will cook at the power
you selected for stage one. At the end of stage one, the oven will beep
and start stage two, the STAGE1 indicator goes off and the STAGE2
indicator starts blinking. The display counts down the time remaining in
stage two when stage two ends, you will hear 3 beeps.
1 HOUR
10 MIN
1 MIN
10
1
10
min
1000g
min
100g
STAGE
DEFROST
WEIGHT
TIME
AUTO
START
sec
10g
4. Touch the TIME set pads
for the cooking time you
want in the first stage.
LOCK
NO
CUPS
STAGE
g
DEFROST
WEIGHT
M-HI
EXAMPLE: To set the time to
“5:30”.
• Touch 1 min 5 times.
• Touch 10 sec 3 times.
TIME
AUTO
START
The STAGE2 indicator lights and
"P-80" is displayed.
5. Touch M-HI pad.
LOCK
11
NO
CUPS
g
12
DO THIS...
THIS HAPPENS...
1 HOUR
10 MIN
1 MIN
10
1
10
min
1000g
min
100g
STAGE
sec
10g
DEFROST
WEIGHT
TIME
AUTO
START
6. Touch the TIME set pads
for the cooking time you
want in the second stage.
AUTO START
EXAMPLE: To set the time to
“4:20”.
• Touch 1 min 4 times.
• Touch 10 sec 2 times.
Allows you to program cooking to start at a time you select.
The food will automatically start cooking at the desired time.
Program is able up to 2 stages (not acceptable DEFROST)
DO THIS...
THIS HAPPENS...
1. Program the desired power level and cooking time.
LOCK
NO
CUPS
g
Clock/
A.start
Start
7. Touch START pad.
When you touch START pad, the WEIGHT DEFROST, STAGE1 and
STAGE2 indicators come on to confirm the power levels selected.
The WEIGHT DEFROST indicator starts blinking to show you that the
oven is in WEIGHT DEFROST mode. The display counts down the
time remaining in WEIGHT DEFROST mode. Turn over, break a part
and redistribute at a beep.
At the end of WEIGHT DEFROST mode, the oven will beep and start
stage one. The WEIGHT DEFROST indicator goes off and the STAGE
1 indicator starts blinking. The display counts down the time remaining
in stage one.
At the end of stage one, the oven will beep and start stage two. The
STAGE1 indicator goes off and the STAGE2 indicator starts blinking.
The display counts down the time remaining in stage two when stage
two ends, you will hear 3 beeps.
STAGE
DEFROST
WEIGHT
TIME
AUTO
START
The AUTO START indicator lights
and " :0" is displayed.
2. Touch CLOCK/A.START
pad.
LOCK
1 HOUR
10 MIN
1 MIN
10
1
10
min
1000g
min
100g
4. Touch START pad.
CUPS
STAGE
g
DEFROST
WEIGHT
TIME
AUTO
START
sec
10g
3. Touch the TIME set pads
to set the desired start
time
Start
NO
LOCK
NO
CUPS
EXAMPLE: To set the AUTO
START time to “11:30”.
• Touch 1 HOUR 11 times.
• Touch 10 MIN 3 times.
g
When you touch START pad, the present time appears in the display
and the cooking program indicators come on.
The AUTO START indicator and the colon start blinking. When the
selected start time arrives the oven begins operating and the oven light
turns on. The AUTO START indicator goes off and the next stage
indicator begins to blink. When the cooking is completed you will hear 3
beeps. The oven turns off and the present time appears in the display.
NOTE: AUTO START can be used for time cooking, if clock is set. If the oven door is opened after
programming AUTO START, it is necessary to touch the START pad for the time of day to
appear in the readout so that the oven will automatically begin programmed cooking at the
chosen AUTO START time. Before setting, check to make sure the clock is showing the
correct time of day.
13
14
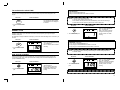
TO CHECK AUTO START TIME
Once you have correctly programmed oven for AUTO START, the present time will appear on the
display.
DO THIS...
* FROZEN PIZZA *
• 200g: Touch FROZEN PIZZA once.
• 300g: Touch FROZEN PIZZA twice within 1.5 seconds.
THIS HAPPENS...
The programmed AUTO START
time will appear on the display for
3 seconds.
Clock/
A.start
1. Touch CLOCK/A.START
pad.
NOTE: 1. Use only one frozen pizza at a time.
2. Use only frozen pizza for microwave oven.
3. If the cheese of frozen pizza does not melt sufficiently, cook a few seconds longer.
4. Some brands of frozen pizza may require more or less cooking time.
DO THIS...
THIS HAPPENS...
STAGE
SPEEDY COOK
DEFROST
WEIGHT
SPEEDY COOK allows you to reheat for 30 seconds at 100% (full power) by simply touching the
SPEEDY COOK pad.
By repeatedly touching the SPEEDY COOK pad, you caan also extend reheating time to 5 minutes by 30
seconds.
DO THIS...
TIME
AUTO
START
1. Touch BEVERAGE pad.
LOCK
NO
CUPS
When you touch BEVERAGE
pad, "1" is displayed.
After 1.5 seconds, the display
changed into cooking time of
quantity and the oven starts
cooking.
g
THIS HAPPENS...
STAGE
DEFROST
WEIGHT
TIME
AUTO
START
Speedy
When you touch SPEEDY COOK,
":30" is displayed.
After 1.5 seconds, the oven starts
reheating.
* BEVERAGE * (250ml/cup)
• 1 cup (mugs): Touch BEVERAGE once.
• 2 cups (mugs): Touch BEVERAGE twice within 1.5 seconds.
• 3 cups (mugs): Touch BEVERAGE three times within 1.5 seconds.
1. Touch SPEEDY COOK
pad.
LOCK
NO
CUPS
g
NOTE: 1. This setting is good for restoring cooled beverage to a better drinking temperature.
2. Stir after cooking.
ONE TOUCH COOKING
One touch cook allows you to cook or reheat many of your favorite foods by touching just one pad.
To increase quantity, touch chosen pad until number in display is same as desired quantity to cook.
(except for DINNER PLATE)
DO THIS...
THIS HAPPENS...
STAGE
DEFROST
WEIGHT
DO THIS...
AUTO
START
THIS HAPPENS...
STAGE
DEFROST
WEIGHT
TIME
AUTO
START
1. Touch FROZEN PIZZA
pad.
LOCK
15
TIME
NO
CUPS
g
When you touch FROZEN PIZZA
"200" is displayed.
After 1.5 seconds, the display
changed into cooking time of
quantity and the oven starts
cooking.
1. Touch DINNER PLATE
pad.
LOCK
NO
CUPS
When you touch DINNER PLATE
pad, "300" is displayed.
After the 1.5 seconds, the display
changed into cooking time of
quantity and the oven starts
cooking.
g
NOTE: For best results, consuit the cookbook.
16
AUTO COOK (MENU & WEIGHT)
FEEDING BOTTLE
Auto cook allows you to cook or reheat many of your favorite foods by repeatedly touching menu pad.
After the menu selection, touch chosen pad until number in display is same as desired quantity to cook.
This is the key of sterilizing feeding bottle function.
At first, detach the nipple from the bottle and pour the 50cc water into each bottle, arrange the bottle
symmetrically on the glass tray and operate.
DO THIS...
THIS HAPPENS...
DO THIS...
MENU
STAGE
DEFROST
WEIGHT
TIME
AUTO
START
1. Touch MENU pad.
LOCK
NO
CUPS
g
When you touch MENU pad, "AC1" is displayed.
The display will then begin
blinking. By repeatedly touching
this pad, you can select other food
category as shown in the chart
below.
FEEDING
BOTTEL
THIS HAPPENS...
STAGE
WEIGHT
FOOD
BAKED POTATO
FRESH VEGETABLE
SOUP
FISH FILLETS
MEAT LOAF
STAGE
Weight
DEFROST
WEIGHT
TIME
AUTO
START
2. Touch WEIGHT pad.
LOCK
NO
CUPS
* BAKED POTATO * (160~180g/ea.)
• 1NO (ea.) : Touch WEIGHT once.
• 2NO (ea.) : Touch WEIGHT twice within 1.5 seconds.
• 3NO (ea.) : Touch WEIGHT three times within 1.5 seconds.
• 4NO (ea.) : Touch WEIGHT four times within 1.5 seconds.
* FRESH VEGETABLE *
• 200g: Touch WEIGHT once.
• 250g: Touch WEIGHT twice within 1.5 seconds.
• 300g: Touch WEIGHT three times within 1.5 seconds.
• 350g: Touch WEIGHT four times within 1.5 seconds.
• 400g: Touch WEIGHT five times within 1.5 seconds.
* SOUP *
• 200g: Touch WEIGHT once.
• 250g: Touch WEIGHT twice within 1.5 seconds.
• 300g: Touch WEIGHT three times within 1.5 seconds.
• 350g: Touch WEIGHT four times within 1.5 seconds.
• 400g: Touch WEIGHT five times within 1.5 seconds.
17
TOUCH PAD
Touch MENU once.
Touch MENU twice.
Touch MENU three times.
Touch MENU four times.
Touch MENU five times.
"1" is displayed.
After the 1.5 seconds, the display
changed into cooking time of
quantity and the oven starts
cooking.
g
* FISH FILLETS *
• 300g: Touch WEIGHT once.
• 350g: Touch WEIGHT twice within 1.5 seconds.
• 400g: Touch WEIGHT three times within 1.5 seconds.
• 450g: Touch WEIGHT four times within 1.5 seconds.
• 500g: Touch WEIGHT five times within 1.5 seconds.
• 550g: Touch WEIGHT six times within 1.5 seconds.
• 600g: Touch WEIGHT seven times within 1.5 seconds.
• 650g: Touch WEIGHT eight times within 1.5 seconds.
• 700g: Touch WEIGHT nine times within 1.5 seconds.
* MEAT LOAF *
• 300g: Touch WEIGHT once.
• 350g: Touch WEIGHT twice within 1.5 seconds.
• 400g: Touch WEIGHT three times within 1.5 seconds.
• 450g: Touch WEIGHT four times within 1.5 seconds.
• 500g: Touch WEIGHT five times within 1.5 seconds.
• 550g: Touch WEIGHT six times within 1.5 seconds.
• 600g: Touch WEIGHT seven times within 1.5 seconds.
• 650g: Touch WEIGHT eight times within 1.5 seconds.
• 700g: Touch WEIGHT nine times within 1.5 seconds.
TIME
AUTO
START
1. Touch FEEDING
BOTTLE pad.
LOCK
CATEGORY
AC-1
AC-2
AC-3
AC-4
AC-5
DEFROST
NO
CUPS
When you press the FEEDING
BOTTLE button, “2”.
After 1.5 seconds, the display
changed into sterilizing time of
quantity and the oven starts
sterilizing.
g
* FEEDING BOTTLE *
• 2 NO (ea): Touch FEEDING BOTTLE once.
• 4 NO (ea): Touch FEEDING BOTTLE twice within 1.5 seconds.
• 6 NO (ea): Touch FEEDING BOTTLE three times within 1.5 seconds.
MORE, LESS
MORE pad: adds 10 seconds to 20 seconds.
LESS pad: removes 10 seconds to 20 seconds.
These pads only work in one touch cooking and feeding bottle mode. And always input first.
CHILD SAFETY LOCK
The safety lock prevents unwanted oven operation such as by small children.
To set, Press STOP/CLEAR for 3 seconds, LOCK indicator lights.
To cancel, press STOP/CLEAR for 3 seconds, LOCK indicator goes off.
TO STOP THE OVEN WHILE THE OVEN IS OPERATING
1. Press STOP/CLEAR pad.
• You can restart the oven by touching START pad.
• Touch STOP/CLEAR once more to erase all instructions.
• You must enter in new instructions.
2. Open the door.
• You can restart the oven by closing the door and touching START.
NOTE: Oven stops operating when door is opened.
18
COOKING UTENSILS
BEFORE YOU CALL FOR SERVICE
Microwave energy is produced by high frquency radio waves. They are reflected from metal, but will pass
through most cooking utensils without heating them.
As the waves come into contact with the food, they are converted into heat energy. Listed below are the
suggested cooking utensils for this microwave oven and when to use them.
Refer to following checklist, you may prevent an unnecessary service call.
* The oven doesn't work;
1. Check that the power cord is securely plugged in.
2. Check that the door firmly closed.
3. Check that the cooking time is set.
4. Check for a blown circuit fuse or tripped main circuit breaker in your house.
1. Dishes with metal trim of any type - should not be used. This will cause sparking.
2. Glass or ceramic heat proof dishes - excellent for microwave cooking.
3. China dishes and plates - without metal trim may by used to cook and heat individual portions of food.
4. Wood or straw - use only for short period, wood contains some moisture and the microwave energy
may cause the wood to dry out and crack.
5. Aluminum foil - may be used in very small pieces for shielding only.
Any aluminum foil used should never be closer than 2.5cm from side walls of oven.
6. Plastic - most heat resistant plastinc dinnerware may be used for heating food. However plyethylene,
melamine, phenol are unsuitable for use in the oven. They become hot in the microwave.
7. Wax paper - use as a cover to avoid spatters.
8. Metal - In general, metal utensils should not be used in microwave oven.
* Sparking in the cavity;
1. Check that utensils are metal containers or dishes with metal trim.
2. Check that metal skewers touch the interior walls.
If there is still a problem, contact the service station.
QUESTIONS AND ANSWERS
* Q : I accidentally ran my microwave oven without any food in it. Is it damaged?
* A : Running the oven empty for a short time will not damage the oven. However, it is not recommended.
CARE AND CLEANING
Although your oven is provided with safety features, it is important'to observe the following:
1. It is important not to defeat or tamper with safety interlocks.
2. Do not place any object between the oven front face and the door or allow residue to accumulate on
sealing surfaces. Wipe the sealing area frequently with a mild detergent, rinse and wipe dry. Never use
abrasive powders or pads.
3. When opened, the door must not be subjected to strain, for example, a child hanging on an opened
door or any load could cause the oven to fall forward to cause injury and also damaged to the door. Do
not operate the oven if it is damaged, until it has been repaired by a trined service technician.
It is particularly important that the oven closes properly and that there is no damage to the:
i) Door (bent)
ii) Hinges and Hookes (broken or loosened)
iii) Door seals and sealing surfaces.
4. The oven should not be adjusted or repaired by anyone except a properly trained service technician
19
* Q : Can the oven be used with the glass tray or roller guide removed?
* A : No. Both the glass tray and roller guide must always be used in the oven before cooking.
* Q : Can I open the door when the oven is operating?
* A : The door can be opened anytime during the cooking operatiion. Then microwave energy will be
instantly switched off and the time setting will maintain until the door is closed.
* Q : Why do I have moisture in my microwave oven after cooking?
* A : The moisture on the side of your microwave oven is normal. It is caused by steam from cooking food
hitting the cool oven surface.
* Q : Does microwave energy pass through the viewing screen in the door?
* A : No. The metal screen bounces back the energy to the oven cavity. The holes are made to allow light
to pass through. They do not let microwave energy pass through.
20