1
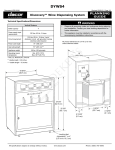
Installation Instructions Wine Dispensing System Model DYWS4 Part No. 107376 Rev. C Table of Contents Important Safety Instructions...................................... 1 Important Information About Safety Instructions.......... 1 General Safety Precautions......................................... 2 Installation Specifications............................................ 3 Technical Specifications/Dimensions........................... 3 Electrical Requirements............................................... 4 Location Requirements................................................ 4 Installation Instructions................................................ 6 Verify the Package Contents........................................ 6 Unpacking the Appliance............................................. 6 Installation.................................................................... 7 Installation Checklist...................................................11 Before You Begin... Important: • Installer: In the interest of safety and to minimize problems, read these installation instructions completely and carefully before you begin the installation process. Leave these installation instructions with the customer. • Customer: Keep these installation instructions for future reference and the local building inspector’s use. If you have questions or problems with installation, contact your Dacor ® dealer or the Dacor Customer Service Team. For repairs to Dacor appliances under warranty call the Dacor Distinctive Service line. Whenever you call, have the model and serial number of the appliance ready. The model and serial number are on the product data label. The label is located on the back of the unit. Dacor Customer Service Phone: (800) 793-0093, extension (U.S.A. and Canada) Monday — Friday 6:00 a.m. to 5:00 p.m. Pacific Time Web site: www.dacor.com Dacor Distinctive Service (repairs under warranty only) Phone: (800) 793-0093, extension 2822 (U.S.A. and Canada) Monday — Friday 6:00 a.m. to 5:00 p.m. Pacific Time Copyright © 2013 Dacor, all rights reserved. All specifications are subject to change without notice. Dacor assumes no liability for changes to specifications. Product data label Important Safety Instructions Important Information About Safety Instructions • • The Important Safety Instructions and warnings in these instructions are not meant to cover all possible problems and conditions that can occur. Use common sense and caution when installing, maintaining or operating this or any other appliance. Always contact the Dacor Customer Service Team about problems and conditions that you don’t understand. Safety Symbols and Labels danger Immediate hazards that WILL result in severe personal injury or death. warning Hazards or unsafe practices that COULD result in severe personal injury or death. caution Hazards or unsafe practices that COULD result in minor personal injury or property damage. danger danger IMPORTANT: ELECTRIC SHOCK HAZARD: • Do not store or use combustible, flammable or explosive vapors and liquids (such as gasoline) inside or in the vicinity of this or any other appliance. • Never touch the power cord with damp hands. • Use only the argon gas cylinder type specified in this manual with this appliance. Use of any other type of gas or cylinder may result in explosion, fire and personal injury. warning Failure to follow the instructions in this manual properly may result in personal injury, death or damage to the appliance. Dacor cannot be held responsible for damage to property or injury to persons caused by failure to comply with the safety and installation instructions contained in this handbook. • Make sure the electrical outlet the unit is connected to is freely accessible at all times so that the appliance can be unplugged when necessary. • NEVER unplug the appliance by pulling on the power cord. Always grip the plug firmly and pull it straight out from the electrical outlet. • If the appliance is faulty, do not attempt to repair it yourself. Turn it off, unplug it from the electrical outlet and call a qualified service technician. • Do not operate or install the appliance if the power plug or power cable is damaged or frayed. Have it replaced only by a qualified service technician. • When moving the appliance away from the wall, be careful not to roll over or damage the power cord. Read and save these instructions 1 Important Safety Instructions General Safety Precautions To reduce the risk of fire, electric shock, serious injury or death when using your appliance, follow basic safety precautions, including the following: warning • If the appliance is damaged, immediately contact the dealer. Do not install or use a damaged appliance. • This appliance must be properly installed according to these installation instructions before use. • Install this appliance only on a flat, level surface capable of supporting the appliance’s weight. Operate it only in the upright position. • Read the accompanying use and care manual completely before operating this appliance. • The installer must show the customer the location of the electrical outlet and how to disconnect power to the wine dispensing system. • Do not install, repair or replace any part of the appliance unless specifically recommended in the literature accompanying it. A qualified service technician should perform all other service. • Before installing, cleaning or performing any type of service or part removal, turn the unit off and make sure that the appliance power plug is disconnected from the electrical outlet or power is disconnected at the circuit breaker panel or fuse box. • Use only the gas cylinders designed for use with this product. They are specified in the use and care manual. • Keep all packaging materials away from children. Plastic sheets and bags can cause suffocation. • Use this appliance only for tasks expected of a home appliance as outlined in the use and care manual. This appliance is not intended for commercial or industrial use. • To prevent bursting, do not expose the argon gas cylinders to open flame. Store and use the cylinders at temperatures below 130°F (54°C). Do not dispose of the gas cylinders in fire or an incinerator. • Store and use the appliance and the argon gas cylinders only in areas with adequate ventilation. Do not directly inhale argon gas. • Do not leave children alone or unattended in the area around the appliance. Do not allow children to play with the controls, to open and close the doors or touch other parts of the appliance. Keep gas cylinders out of reach of children. 2 warning • Do not place your hands or fingers in area of moving parts. NEVER place fingers or hands into the bottle bay assembly. Personal injury may result. Call a qualified service technician to diagnose any problems in the bottle bay assembly or behind enclosed panels. • Only allow individuals to use the wine dispensing system who are able to operate it properly. • Never allow anyone, including children, to sit, stand, or climb on any part of the appliance. Doing so may cause damage, serious injury or death. Do not allow children to play with the controls or touch other parts of the appliance. • Do not tamper with the controls. • Clean this appliance only in the manner indicated in the use and care manual and use only the cleaning agents specified. • Do not use a steam or pressure cleaner to clean the wine dispensing system or any part of it. Damage caused by cleaning the unit in this manner could result in electric shock, fire or explosion. • To avoid an electric shock hazard or other personal injury, do not put body parts or any other objects into any opening, air vent, the base grille or bottom of the appliance. • Care should always be taken when handling pressurized gas. Make sure the proper tubing and shut-off valves are always used. • This appliance is not suitable for installation in an area where a water jet could be used. Installation Specifications warning • Observe all governing codes and ordinances during planning and installation. Contact your local building department for further information. • For safe and proper operation, all the requirements in the Installation Specifications section including, but not limited to, the electrical specifications, minimum clearances and cabinet specifications must be met or exceeded. Technical Specifications/Dimensions Bottle capacity All product tolerances are ±1/16” (±1.6 mm) unless otherwise stated. 4 Power supply input requirements 120 Vac, 60 Hz., 2 Amps. Circuit requirement 120 Vac, 60 Hz., 10 Amp. 3-wire* dedicated, grounded, circuit required Power cord length 74” (188 cm)** Gas tubing length 117” (297 cm)*** Appliance weight 80 lbs. (32 kg) empty Operating (room) temperature Min. 50°F (10°C) Max. 80°F (26.7°C) 16” (40.6 cm) * Hot (L1), Neutral (N1), Ground ** Usable length = 48 inches *** Usable length = 72 inches 19 9/16” (49.7 cm) 9 5/16” (23.7 cm) 24 5/8” (62.5 cm) 3 13/16” (2.1 cm) 3 13/16” (2.1 cm) Rear View 25 5/8” (65.1 cm) Front View Leveling feet Adjustable 1” to 4” (2.5 cm to 10.2 cm) * WineStation is a registered trademark of Napa Technology 3 Installation Specifications Electrical Requirements warning To prevent an electric shock hazard, the electrical outlet and supply must meet the specifications stated below. It is the owner’s responsibility to make sure that the electrical service meets electrical requirements and that the electrical outlet has been properly installed by a licensed electrician. IMPORTANT: The power supply for this appliance is equipped with a three prong grounding power plug for protection against possible electric shock hazards and fire. It must be plugged into a dedicated, grounded electrical outlet. If only a two prong electrical outlet is available, it is the responsibility of the customer to have it replaced with the proper type by a licensed electrician. Do not under any circumstances: • Cut or remove the third (ground) prong from the power cord. • Use an adapter plug. • Modify the power cord. • The electrical outlet for the wine dispensing system must be located to allow for easy access when the unit is installed for easy disconnection. • Use an electrical outlet which cannot be turned off with a switch or pull chain. • Installation of an external UPS with backup battery is recommended so that the unit does not need to be reset after a power outage. Location Requirements warning • Electric Shock Hazard: Due to the possibility of spillage during normal use, DO NOT install this appliance above or below any other appliance. • To prevent tipping, do not install this appliance in an unrestrained, free-standing cabinet. • Install this appliance only on a flat, level surface capable of supporting the appliance’s weight. Operate it only in the upright position. • This appliance is designed for indoor use. It may be used outdoors provided it is installed under cover in a dry location and operated within the required ambient (room) temperature (see page 3) • All maximum and minimum dimensions and clearances on the facing page must be met or exceeded for safe operation and for proper fit in the cabinet. • When determining the installation location, look for a location that is free of potential safety hazards that might interfere with the installation or operation of the unit or interfere with air circulation around the unit. The location needs to be clean, dry and free of any debris. • A minimum area or cabinet opening of 13” H x 9” W x 4” D (33 cm H x 23 cm W x 10 cm D) must be provided in a nearby for the gas cylinder, regulator and gas line (with fittings) that supply Argon gas to the unit. An area deeper than this is recommended to allow storage of additional gas cylinders. The unconnected gas cylinders are for 9 1/2” H x 2.5” W (24 cm H x 6.5 cm W). • The included gas supply line (with fittings) allows for the cylinder storage area to be as far as 6 feet from the wine dispensing system. Holes in adjoining cabinets between the wine dispensing system and the gas cylinder location must be 1 1/8” (2.9 cm) in diameter to allow the gas line and its fittings to pass through. • The wine dispensing system must be installed at a safe distance from sources of heat, such as home appliances, in order to avoid an excessive rise in temperature. • Connect the appliance to an extension cord. Power cord with three prong plug Grounded type electrical outlet • The three prong electrical outlet for this appliance must be located within 48” (122 cm) of the unit to make sure the power cord can reach. • The electrical outlet installation, including minimum supply wire size and grounding, must be done in accordance with National Electric Code ANSI/NFPA 70 and local codes and ordinances. A copy of this standard may be obtained from: National Fire Protection Association 1 Batterymarch Park Quincy, MA 02269-9101 • 4 The correct voltage, frequency and amperage must be supplied to the electrical outlet from a grounded, dedicated, single phase circuit that is protected by a properly sized circuit breaker or time-delay fuse. If one is not installed, call a licensed electrician. See page 3 for the circuit requirements. Installation Specifications 1” (2.5 cm) min. Allow for Proper Air Circulation All cabinet tolerances: +1/16” (+1.6 mm) -0 unless otherwise stated. 26 5/8” min. (67.6 cm) 19 11/16” min. (50.0 cm) 16” min. (40.6 cm) Minimum Clearance Requirements 5 Installation Instructions warning • If the electric outlet provided does not meet the specifications on pages 3 and 4, do not proceed with the installation. Call a licensed electrician to install the proper electrical service before proceeding. • Excessive weight hazard - Use two or more people to move and install the wine dispensing system. Failure to do so can result in back or other injury. • Protect your countertop and installation area! When moving the wine dispensing system during installation, cleaning and or service, always lift and pull the unit straight out. Do not wiggle or walk the unit, because it may damage the countertop or the product. • To avoid personal injury, use only the included gas pressure regulator or a Dacor specified replacement. • DO NOT remove the leveling feet or place the unit in the upright position without the feet attached. The feet must be adjusted so that there is a minimum of 1” (2.5 cm) below the unit for proper ventilation. Failure to attach and properly adjust the feet will void the warranty and may cause countertop damage. Unpacking the Appliance 1. Move the box to the installation location. The wine dispensing system is package with the display window facing up towards the box opening. 2. Open the box along the taped closure. 3. Remove the (4) four leveling feet from the plastic bag, taped to the top of the unit. 4. Remove the foam brace, along each side. You will find spacing to allow for a firm grip of the unit, so that you may lift it straight out of the box and onto its back on a flat counter or surface. NOTE: Resting the unit on its back will not harm the system and allow for proper attachment of the leveling feet. 5. Once the leveling feet have been firmly secured, lift the wine dispensing system into the upright position. 6. Make sure that the unit is properly leveled. If necessary, adjust the four leveling feet on the bottom of the unit by turning them in the appropriate direction. Adjust the feet so that the bottom of the unit is at least 1” (2.5 cm) above the countertop. 7. Place the unit in front of the final installation location. Verify the Package Contents Check to make sure all the parts listed below are included in the shipping box. See the use and care manual or visit www.everythingdacor.com for information about additional parts and accessories. IMPORTANT: The required argon gas cylinder is not shipped with the system and must be ordered separately. Order on-line at www.everythingdacor.com or by calling Dacor Customer Service at (800) 793-0093 ex. 2822. Your first gas argon gas cylinder is provided free of charge. • Gas regulator assembly (1) • Dispensing heads (6, equipped with red gaskets) • Extra dispensing head gaskets (3 white, 2 green) • Plastic gas tubing with fittings (1) • Leveling feet (4) • Pickup tubes (10) • Food grade silicon spray (1) • Power cord (1) • Head selection tool (1) • Keys (2) • Drip cloth (1) • Use and care manual Make sure you have all required tools for installation before proceeding. 6 1” (2.5 cm) min. Installation Instructions Installation warning • To avoid personal injury, use only the included gas pressure regulator or a Dacor specified replacement. • Do not use any power supply other than the one provided with the system or a Dacor approved replacement. Do not attempt to modify or bypass the power supply. 1. Before installation, make sure any access holes for the power cord and gas tubing have been drilled in adjoining cabinets as necessary to allow them to pass through to the electrical outlet and gas cylinder location. 2. Plug one end of the plastic gas tubing (provided) into the inert gas connector at the back of the wine dispensing system. 3. If required route the plastic gas tubing though any access holes drilled in the adjoining cabinets. These connectors used by qualified service personnel only 4. Plug the power cord (provided) into the power plug on the power supply (black rectangular box) mounted on the back of the wine dispensing system. 5. If required, route the power cord though any access holes drilled in the adjoining cabinets. 6. Make sure the cable coming from the power supply (opposite the power cord that connects to the wall) is connected to the Power Input connector on the back of the unit. Also, check to make sure that both of the micro-switches located on the back of the unit are in the up position. 7. Slowly and gently lift the unit up and back into the final location. As you do this, have someone gently pull the gas tubing and power cable through the access holes into the adjacent cabinets (if necessary). Exercise care to make sure that the wiring and tubing lines do not become damaged. Make sure the require 1” (2.5 cm) space is maintained above and below the unit. continued... Connect power supply output here Plastic gas tubing 120 Vac power cord Power supply Inert gas connector Connect to 120 Vac 60 Hz. electrical outlet 7 Installation Instructions 8. Find the gas regulator assembly shipped with the unit. Regulator adjustment knob 9. Make sure the regulator adjustment knob is turned all the way in the OFF direction. 10. Plug the end of the gas tubing leading to the wine dispensing system into the gas regulator assembly. 11. Remove the plastic cap from the top of the argon gas cylinder (must be ordered separately, see page 6). 12. Insert the top of the gas cylinder into the bottom of the gas regulator assembly and turn it clockwise until it is snug. Do not overtighten. Regulator assembly 13. Turn the regulator knob in the ON direction until it stops. 14. Open the door on the front of the unit. Swing the spout cover to the up position. 15. Make sure the power switch, located on the left side of the bottle bay, is slid all the way down, to the OFF position. 16. Plug the power cord into the electrical outlet. 17. Slide the main power switch all the way up to the ON position. Argon gas cylinder Switch Positions ON RESERVED NOT USED OFF For use by authorized service personnel only Main Power Switch (under spout cover) 18. The unit will run through a series of self-tests, which will take several seconds. Once this process is completed, the blue lights on the control panel will come on, indicating that the wine dispensing system is ready for use. IMPORTANT: When the system is powered up for the first time, LOCKED will appear on the display. See Unlocking the Control Panel in the operation section of the use and care manual for unlocking instructions. 19. Push up on the spout cover release lever on the bottom of the spout cover. Hold the lever up as you lower the cover down into place. CAUTION: Do not push down on the spout cover without pushing up on the lever. Damage to the lever will result. 20. Once the spout cover is closed, close the bottle bay door. Push in slightly just above the lock until it snaps shut. 8 Spout cover release lever (on bottom of spout cover) Gas supply line from wine dispensing system Installation Instructions Installation Checklist warning To ensure a safe and proper installation, the installer must complete the checklist below to ensure that no part of the installation has been overlooked. Proper installation is the responsibility of the homeowner. The importance of proper installation of your appliance cannot be overemphasized. Has enough space been provided around the unit to allow for proper ventilation? See page 5. Is the countertop strong enough to hold the weight of the unit? See pages 3 and 4 . Does the electrical supply meet specifications. See page 4. Is the power output cable from the power supply connected to the back of the unit? See page 7. Is the plastic gas supply tubing attached to the back of the unit? See page 7. Is the wine dispensing system connected to the dedicated, grounded, three prong electrical outlet? See page 8. Is the gas supply tubing connected to the gas regulator assembly? See page 8. Is the gas regulator assembly attached to the argon gas cylinder? See page 8. Is the gas regulator knob in the fully ON position? See page 8. Has the warranty been activated on-line or the warranty card filled out completely and mailed? Dacor ● 14425 Clark Avenue, City of Industry, CA 91745 ● Phone: (800) 793-0093 ● Fax: (626) 403-3130 ● www.dacor.com