Transcript
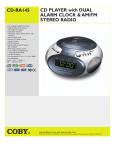
COBY
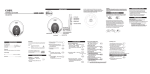
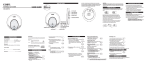
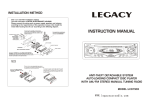
LOCATION OF CONTROLS
DIGITAL AM/FM ALARM CLOCK
RADIO/CD PLAY
88:88
IMPORTANT SAFEGUARDS
1. PUSH OPEN CLOSE Button 14. HOUR/F.FWD Button
2. ALARM1 Switch
15. Band Selector
3. Function Switch
16. STOP Button
4. CLOCK SET Button
17. PLAY/PAUSE Button
5. RANDOM Button
18. SNOOZE Button
6. PROG Button
19. FUNCTION Lights
7. REPEAT Button
20. PM Light
8. POWER/ALARM OFF Button 21. ALARM1 Light
IMPORTANT
9. CD Door
22. Display
10. ALARM2 Switch
23. ALARM2 Light
11. SLEEP Button
24. Dial
12. CD/DISPLAY Buttton
25. TUNING Rotary
13. MIN.REW Button
26. VOLUME Rotary
The CD mechanism and the sensitive circuitry may cause
interference to a radio tuner nearby. Do not operate this
unit while operating other radio devices.
Danger This product utilizes invisible laser
radiation. Avoid direct exposure
to the beam.
Caution Use of controls, adjustments or procedures
not listed in this manual may result in
hazardous radiation exposure.
MODEL NO: CD-RA145
CONCERNING COMPACT DISCS
9
1
2
3
4
5
6
7
8
10
11
12
13
14
15
18
25
20
21
CARE AND MAINTENANCE
17 16
88:88
24
Only compact discs identified with this
mark can be used with this player.
26
19
Please read instruction manual before use.
Always operate the product from a power supply of the
same voltage, frequency and rating as indicated on the
product identification plate.
Do not operate product with a damaged cord or plug.
Never install the unit where there are heat sources such as
radiators, heat registers, stoves, direct sunlight, excessive
dust or where there is mechanical vibration or shock. Switch
off and unplug from AC outlet when not in us
22
23
Handle your unit with care to extend the life of the unit.
Use a soft and clean cloth damped with plain lukewarm
water to clean the exterior of the unit.
Never use solvents such as benzene or other strong
chemical cleaners since these could damage your unit.
It is important that no liquid reaches the inside of the unit.
Do not touch the CD laser part or look directly at it.
INTRODUCTION
Please read and follow the instruction manual carefully before operating in order to avoid any damage to the unit.
POWER SUPPLY
The player operates on AC 110V/60Hz household mains
supply. Before connecting to the power supply, ensure that
the rated voltage of this unit matches your local voltage.
Warning: Disconnect the unit from the main power supply
when not in use.
To avoid the risk of electric shock, do not remove
the cover of the apparatus. To prevent fire or
shock hazard, do not expose the apparatus to
rain or moisture.
BATTERY BACK-UP
A 9V type 006P battery is to be put in the battery
compartment of the CD room for clock back-up only.
Replace the battery every six months.
Remove the battery if the player will not be in use for a
long period of time.
STANDBY MODE
Once the player is powered, it goes to the standby mode.
The system clock will display time under the standby
mode. Refer to clock setup section for time setting.
CLOCK SETUP
1. Plug power cord into power souce.
2. The flashing "12:00 " will appear on the screen.
3. Hold down CLOCK SET button by one hand while
by the other hand, press MIN.REW BUTTON to adjust
minutes and HOUR.FWD button to adjust hour.
4. Release CLOCK SET button after adjusting.
5. The clock starts with the set time.
Time will always be shown on the LCD screen except
for the period of setup execution.
ALARM
SETUP
Wake up to Radio/CD /Buzzer
Select a means of wake-up by FUNCTION switch before or
after time setting.
MODE
MEANS OF WAKE UP
Radio mode
Radio broadcasting.
CD mode
CD playback
Buzzer mode Beeping.
If you want to wake to radio or CD playback, select a radio
station or a CD disc and set the volume to a proper level.
Set Alarm1
1. Slide the ALARM1 switch to SET position.
2. Press MIN.REW button to set minutes and HOUR/F.FWD
button to set hours.
3. Slide the ALARM1 switch to ON position. The ALARM1
SET ON indicatior lights up in red.
4. The alarm will go off at the set time.
5. To interept alarming, press SNOOZE button.
6. To stop alarming, press POWER/ALARM OFF button.
6. To disable alarm setting, push the ALARM1 switch to
OFF and the ALARM1 SET ON indicator turns off.
Set Alarm 2 (Refer to alarm1 setup)
Snooze to repeat alarm
1. When alarm comes on you can temporarily turn it off by
pressing the SNOOZE button. Approximately 6 minutes
later the alarm will resume. This operation cycle will be
repeated up to five times within an hour, and then
automatically release the wake up function.
2. To cancel the snooze operation, slide the ALARM1
switch to "OFF" position
RADIO
1. Slide FUNCTION
switchOPERATION
to RADIO.
1. Slide FUNCTION switch to RADIO.
If the player is under the standby mode, press POWER
button to set the player ready for function.
2. Select AM or FM with BAND selector.
3. Get to the desired station by TUNING rotary
4. Adjust the volume with VOLUME rotary
5. Extend antenna and adjust the direction to obtain the
optimum reception.
6. Press POWER button to get to the standby mode.
Sleep Function
Radio broadcasting will last for a preset period of time and
then shut off automatically.
The system is preset with the following sleep periods :
90 minutes 60 minutes 30 minutes
1. Repeatedly press SLEEP button till desired sleep period
appears. Sleep indicator flashes red.
2. Sleep function will be activated once the sleep indicator
turns still after a few seconds flashing.
3. To quit sleep function, pess SLEEP button to select " -- ",
Sleep indicator flashes for a while and then turns off.
Sleep function can be entered under the radio-on mode
and the standby mode.
At the standby mode, press SLEEP button twice , radio will
turns on automatically.
CD OPERATION
1. Slide the FUNCTION switch to CD.
if it is in the standby mode, press POWER button to set
the player ready for function
2. Press the OPEN/CLOSE button to open the disc door.
3. Insert a CD disc.
Play/Stop/Pause
1. Press PLAY/PAUSE button once to start playback.
2. Press PLAY/PAUSE button to pause playing.
3. Press PLAY/PAUSE button to resume normal playback
from the pause mode.
4. Press STOP button to stop playback.
5. Always press STOP and wait for a complete stop to
remove CD from the player.
Listen to the desired track
1. Press F.FWD button to get to the next track.
2. Press REW button to get to the previous track.
During playback, press REW button once, it will go to the
beginning of the currently played track and press it twice, it
will get to the previous one.
Move to the desired spot
Hold down F.FWD/REW button to search through a disc
and release the button at a desired point.
View Playback Status
Press CD DISPLAY button to view playback status.
The information will show up a few seconds and then
change back to the time display.
Under the stop mode, the screen shows total tracks of a
CD disc. If there is no disc loaded, the screen shows " NO"
Under the playback mode, the screen shows currently
played track .
3
1
4
2
5
Repeat Mode
1. Press REPEAT button once to repeat currently played
track. The repeat indicator starts flashing in red.
Press it twice to repeat all tracks, the repeat indicator
lights red.
2. Keep pressing REPEAT button until repeat indicator
turns off to quit repeat mode.
Repeat mode can be entered from both the playback mode
and the stop mode. under the stop mode,press
PLAY/PAUSE button to get started.
Random Mode
SPECIFICATION
Power supply-----------------------------110V/60Hz
Back-up battery--------------------------DC 9V
FM--------------------------------------------88-108MHz
AM--------------------------------------------530-1700KHz
Power consumption--------------------5W
Output power-----------------------------1W
Speaker-------------------------------------8 Ohm
The player will start playback by an random order .
Random mode can be entered from both the playback
mode and the stop mode.
1. Press RANDOM button
2. Random indicator lights red and random play start. If it is
in the stop mode, press PLAY/PAUSE to get started.
3. To quit random mode, just press RANDOM button to
turn off indicator.
Program Mode
1. Press the PROG button at the stop mode.
P-01 appears on the screen and the PROG indicator
starts flashing in red.
2. Press MIN .REW/HOUR/F.FWD button to select track.
3. Press PROG button to confirm and P-01turns to P-02. It
is ready to make next selection.
4. Repeat step 2-3 to edit up to 20 tracks.
5. Press PROG button to view program list.
6. Press PLAY/PAUSE button to start program playback.
7. To quit program playback, press STOP button and then
press PROG button. PROG indicator starts flashing for a
a few seconds and turns off automatically. Or press
STOP button again while PROG indicator is flashing.
8. To erase memory, unplug power cord or open the CD
door.
6
7