Download Charmglow CT3402W User's Manual
Transcript
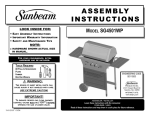
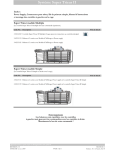
MODEL LO O K I N S I D E F O R : E A S Y A S S E M B LY I N S T R U C T I O N S I M P O R T A N T W A R R A N T Y I N F O R M AT I O N SAFETY AND MAINTENANCE TIPS C T 3 4 0 2 W *CYLINDER NOT INCLUDED NOTE: HARDWARE SHOWN ACTUAL SIZE IN MANUAL. FOR YOUR CONVENIENCE, EXTRA HARDWARE MAY BE INCLUDED. L EAVE R EAD ASSEMBLER/INSTALLER: THESE INSTRUCTIONS WITH THE CONSUMER . CONSUMER/USER: ALL THESE INSTRUCTIONS AND KEEP THEM IN A SAFE PLACE FOR FUTURE REFERENCE . TOOLS REQUIRED #2 PHILLIPS SCREWDRIVER PLIERS HAMMER BOX END WRENCH WARNING: THE EDGES OF SHEET METAL PARTS CAN CAUSE INJURY IF NOT HANDLED WITH CARE . USE EXTREME CAUTION! IMPORTANT! TO ENSURE PROPER GAS FLOW, BURNER CONTROL VALVES MUST BE “OFF” BEFORE OPENING THE GAS CYLINDER VALVE. 11412239 021802 ENGINEERING CODE CCF11244 OUTDOOR COOKING 4101 Howard Bush Dr. Neosho, Mo. 64850 INTERNET SITE: www.bbqhq.com 11412239 (Pg. 2) A WARNING: RIGHT BACK Combustion by-products produced when using this product contains chemicals known to the State of California to cause cancer, birth defects, or other reproductive harm. 4 4 LABEL A1 CK 1 BACK CK CK 4 1 LEFT 1 CK FRONT CK LEFT (4) Qty B B1 B2 RIGHT 16 18 3 FRONT TAP AXLE (3) INTO ONE HUB CAP (17) WITH A HAMMER. 17 16 17 18 18 16 3 LEFT FRONT 17 3 INSERT THE AXLE INTO THE BOTTOM HOLES IN THE LEFT LEGS. 11412239 (Pg. 3) 11412239 (Pg. 4) C JU 49 JU BACK 42 JU C1 BACK 42 JU JU KR C2 KR SOUP CAN NOT INCLUDED (2) Qty (4) Qty NOTE VALVE AND HOSE ORIENTATION D DD DD 25 JU JU 27 25 D1 DD DD FRONT D2 LEFT DD DD (4) Qty (2) Qty 11412239 (Pg. 5) 32 11412239 (Pg. 6) E 48a K K 45 48 43 NOTE: THE SPRING TAB MUST BE ON TOP AND SNAP INTO NOTCH ON ELECTRODE. E1 45 48a SPRING TAB 48 (2) Qty. NOTCH 48a ELECTRODE TIP CORRECT SPRING POSITION F IMPORTANT: POSITION THE BURNER VENTURI TUBES OVER THE VALVE ORIFICES. THE ORIFICES MUST BE VISIBLE THROUGH THE VENTURI TUBE’S AIR OPENINGS. BACK F1 43 47a VENTURI TUB ES NOTE: THE BURNER WILL HOLD THE HEAT SHIELD IN PLACE. ORIFICE SMALL HEAT SHIELD (1) Qty (2) Qty F2 F3 LB DZ DZ 47 LARGE HEAT SHIELD HEAT SHIELD NOT DZ UNDERNEATH VIEW SHOWN FOR CLARITY 11412239 (Pg. 7) LEFT 11412239 (Pg. 8) TEST THE IGNITER: A SPARK SHOULD APPEAR AT ELECTRODE TIP. IF THE SPARK DOES NOT APPEAR: - CHECK THE WIRE CONNECTION TO THE IGNITER. - CHECK THE ELECTRODE INSTALLATION IN DETAIL E. MAIN BURNER ELECTRODE WIRE G 26 THE ELECTRODE TIP IS LOCATED ON THE BURNER ASSEMBLED IN THE BOTTOM CASTING. (12) Qty H1 H BACK CK BACK CK 9 CK 9 CK CK 14 9 CK 14 RIGHT RIGHT REPEAT FOR LEFT SIDE TABLE J1 WA WA (2) Qty (2) Qty 58 60 (2) Qty 60 (2) Qty WH (2) Qty WH DZ (2) Qty DZ J J2 56 55 WO VE VE WO VE BF WO BF 11412239 (Pg. 9) 11412239 (Pg. 10) K 63 IMPORTANT: EVENLY SPACE THE CERAMIC BRIQUETTES (62) ON TOP OF THE ROCK GRATE. DO NOT USE OR SUBSTITUTE CHARCOAL IN A GAS GRILL. 62 61 L1 L 65 65 TO CENTER THE RACK, SLIGHTLY BEND THE PIVOT WIRES TO ADJUST PIVOT WIRES FOR A TIGHT FIT. M 2ND GAS CYLINDER VALVE WARNING: DURING ASSEMBLY OF OUTLET VALVE GRILL AND WHEN ATTACHING OR REPLACING THE L.P. 27 GAS CYLINDER, INSURE THAT THE GAS SUPPLY 78 HOSE IS FREE OF KINKS AND/OR DAMAGE AND IS 1ST AT LEAST 3” AWAY TYPE 1 NIPPLE FROM HOT SURFACES SUCH AS THE GRILL CASTING. M1 M2 IMPORTANT! TO ENSURE PROPER GAS FLOW, BURNER CONTROL VALVES MUST BE "OFF" BEFORE OPENING THE GAS CYLINDER VALVE. THE OUTLET VALVE MUST FACE THE GRILL FRONT. M3 11412239 (Pg. 11) 11412239 (Pg. 12) LIMITED WARRANTY Sunbeam Outdoor Cooking (“Sunbeam”) warrants that this product will be free from defects in material and workmanship. This warranty applies to the following parts for the following time periods: the aluminum castings are warranted for a LIMITED LIFETIME against burn through; the burner is warranted for three (3) years; and all other parts are warranted for one (1) year, except the propane cylinder and paint finish. We DO NOT WARRANT in any way the propane cylinder (see label on cylinder for cylinder manufacturer’s warranty) or the paint finish of the product. Sunbeam at its option, will repair or replace this product or any component of the product found to be defective during the warranty period. Replacement will be made with a new or remanufactured product or component. If the product is no longer available, replacement may be made with a similar product of equal or greater value. This is your exclusive warranty. This warranty is valid for the original retail purchaser from the date of initial retail purchase and is not transferable. Keep the original sales receipt. Proof of purchase is required to obtain warranty performance. Sunbeam dealers, service centers, or retail stores selling Sunbeam products do not have the right to alter, modify or any way change the terms and conditions of this warranty. This warranty does not cover normal wear of parts or damage resulting from any of the following: negligent use or misuse of the product, use on improper voltage or current, use contrary to the operating instructions, disassembly, repair or alteration by anyone other than Sunbeam or an authorized service center. Further, the warranty does not cover Acts of God, such as fire, flood, hurricanes and tornadoes. Sunbeam shall not be liable for any incidental or consequential damages caused by the breach of any express or implied warranty. Except to the extent prohibited by applicable law, any implied warranty of merchantability or fitness for a particular purpose is limited in duration to the duration of the above warranty. Some states, provinces or jurisdictions do not allow the exclusion or limitation of incidental or consequential damages or limitations on how long an implied warranty lasts, so the above limitations or exclusion may not apply to you. This warranty gives you specific legal rights, and you may also have other rights that vary from state to state or province to province. DO NOT RETURN THIS PRODUCT TO THE PLACE OF PURCHASE. Take the product to an authorized Sunbeam service center. You can find the nearest authorized Sunbeam service center by calling 1-800-641-2100. NOT VALID IN MEXICO. FOR WARRANTY, SERVICE AND PARTS Locate your model number and serial number on the label found on the back of your grill base. BEFORE USING YOUR GRILL READ OWNER’S USE AND CARE MANUAL: For proper filling and purging of the cylinder For leak testing all gas supply connections For correct grill lighting instructions For use and storage of the grill and cylinder WARNING! The edges of sheet metal parts can cause injury if not handled with care. USE EXTREME CAUTION! WARNING! WHEN LEAK TESTING: DO NOT smoke. DO NOT use fire to test for leaks. DANGER: NEVER store a spare LP gas supply cylinder under the grill body nor inside grill enclosure to avoid the possibility of an explosion. Refer to the Use and Care manual. IMPORTANT: Be sure to tighten up all hardware (screws, nuts, bolts, etc.) at least once a year or each grilling season. LEAK TEST AREAS (indicated by arrows) SEE OWNER’S USE AND CARE MANUAL MODELO BUSQUE ADENTRO: INSTRUCCIONES FÁCILES DE ARMADO I NFORMACIÓN I MPORTANTE DE G ARANTÍA T IPS DE S EGURIDAD Y M ANTENIMIENTO C T 3 4 0 2 W *NO SE INCLUYE EL TANQUE NOTA: LAS PIEZAS SE MUESTRAN EN TAMAÑO REAL EN EL MANUAL. PARA SU CONVENIENCIA, PUEDE HABER PARTES EXTRAS INCLUIDAS. D EJE L EA MONTADOR/INSTALADOR: ESTAS INSTRUCCIONES CON EL CONSUMIDOR . CONSUMIDOR/USUARIO: TODAS ESTAS INSTRUCCIONES Y GUÁRDELAS EN UN LUGAR SEGURO PARA CONSULTARLAS . HERRAMIENTAS: DESTORNILLADOR PHILIPS #2 PINZAS MARTILLO LLAVE COMBINADA 11412239 021802 ADVERTENCIA: LAS ORILLAS DE LAS PARTES DE METAL PUEDEN CAUSAR LESIONES SI NO SE MANEJAN CON CUIDADO. ¡USE PRECAUCIÓN EXTREMA! ¡IMPORTANTE! PARA ASEGURAR EL FLUJO ADECUADO DE GAS, LAS VÁLVULAS DE CONTROL DEL QUEMADOR DEBEN ESTAR EN “OFF” ANTES DE ABRIR LA VÁLVULA DEL TANQUE DE GAS. CÓDIGO DE INGENIERÍA CCF11244 OUTDOOR COOKING 4101 Howard Bush Dr. Neosho, Mo. 64850 PÁGINA EN INTERNET: www.bbqhq.com 11412239 (Pg. 2) A ADVERTENCIA: DERECHA La combustión producida por los productos usados con este equipo contiene químicos que el Estado de California reconoce como causantes de cáncer, defectos en el nacimiento u otros daños al sistema reproductor. ATRÁS 4 4 ETIQUETA A1 ATRÁS CK 1 CK CK 4 IZQUIERDA 1 FRENTE 1 CK CK IZQUIERDA (4) Ctd B B1 B2 DERECHA 16 18 3 FRENTE META EL EJE (3) EN UNO DE LOS TAPACUBOS (17) CON UN MARTILLO. 17 16 17 18 18 16 FRENTE 3 IZQUIERDA 17 3 INSERTE EL EJE EN LOS ORIFICIOS INFERIORES DE LAS PATAS IZQUIERDAS. 11412239 (Pg. 3) 11412239 (Pg. 4) C JU 49 JU ATRÁS 42 JU C1 42 ATRÁS JU JU KR C2 KR LATA DE SOPA NO INCLUIDA (2) Ctd (4) Ctd TOME NOTA DE LA ORIENTACIÓN DE LA D VÁLVULA Y LA MANGUERA. DD DD 25 JU JU 27 25 D1 DD DD FRENTE D2 IZQUIERDA DD DD (4) Ctd (2) Ctd 11412239 (Pg. 5) 32 11412239 (Pg. 6) E 48a K K 45 48 43 NOTA: LA LENGÜETA DEL RESORTE DEBE ESTAR ARRIBA Y ENTRAR EN LAS MUESCAS DEL ELECTRODO. E1 45 48a LENGÜETA DEL RESORTE 48 (2) Ctd MUESCA 48a PUNTA DEL ELECTRODO POSICIÓN CORRECTA DEL RESORTE IMPORTANTE: ALINEE LOS TUBOS VENTURI DEL QUEMADOR CON LOS ORIFICIOS DE LA VÁLVULA. LOS ATRÁS F F1 ORIFICIOS DEBEN ESTAR VISIBLES POR LAS ENTRADAS DE AIRE DEL TUBO VENTURI. 43 47a NOTA: EL QUEMADOR MANTENDRÁ EN SU LUGAR A LA TUBOS VENTURI PANTALLA TÉRMICA. ORIFICIO PANTALLA TÉRMICA PEQUEÑA (2)Ctd (1) Ctd F2 F3 LB DZ DZ 47 PANTALLA TÉRMICA GRANDE DZ PARA MAYOR CLARIDAD VISTA INFERIOR NO SE MUESTRA LA PANTALLA TÉRMICA 11412239 (Pg. 7) IZQUIERDA 11412239 (Pg. 8) PRUEBE EL IGNITOR: DEBE SALTAR UNA CHISPA DE LA PUNTA DEL ELECTRODO. SI LA CHISPA NO SALTA: - VERIFIQUE LA CONEXIÓN DE LOS CABLES AL IGNITOR. - VERIFIQUE LA INSTALACIÓN DE LOS ELECTRODOS EN EL DETALLE E. ALAMBRE DEL ELECTRODO DEL QUEMADOR PRINCPAL G 26 LA PUNTA DEL ELECTRODO SE UBICA EN EL QUEMADOR ARMADO EN LA PARTE INFERIOR DE LA BASE. (12) Ctd H1 CK ATRÁS H ATRÁS CK 9 CK 9 CK CK 14 9 CK 14 DERECHA DERECHA REPITA PARA LA MESA LATERAL IZQUIERDA J1 WA WA (2) Ctd (2) Ctd 58 60 (2) Ctd 60 (2) Ctd WH (2) Ctd WH DZ (2) Ctd DZ J 55 J2 56 WO VE VE WO VE WO BF BF 11412239 (Pg. 9) 11412239 (Pg. 10) K 63 IMPORTANTE: DISTRIBUYA UNIFORMEMENTE LAS BRIQUETAS DE CERÁMICA (62) ENCIMA DE LA PARRILLA. NO USE CARBÓN COMO SUSTITUTO EN UN ASADOR DE GAS. 62 61 L1 L 65 65 PARA CENTRAR LA REJILLA, DOBLE LEVEMENTE LOS ALAMBRES DE ALAMBRES DE PIVOTE PIVOTEE HASTA QUE AJUSTE. M 2DO ADVERTENCIA VÁLVULA DEL TANQUE DE GAS DURANTE EL ARMADO DEL 79 VÁLVULA DE SALIDA ASADOR Y CUANDO CONECTE O CAMBIE EL TANQUE DE GAS L.P., ASEGÚRESE DE QUE LA 27 MANGUERA DE GAS NO 78 ESTÉ TORCIDA Y/O DAÑADA Y QUE ESTÉ 1ER ALEJADA POR LO MENOS 3” DE CUALQUIER NIPLE TIPO 1 SUPERFICIE CALIENTE COMO LA BASE DEL ASADOR. M1 M2 ¡IMPORTANTE! PARA ASEGURAR EL FLUJO ADECUADO DE GAS, LAS VÁLVULAS DE CONTROL DEL QUEMADOR DEBEN ESTAR EN "OFF" ANTES DE ABRIR LA VÁLVULA DEL TANQUE DE GAS. LA VÁLVULA DE SALIDA M3 DEBE ESTAR HACIA EL FRENTE DEL ASADOR. 11412239 (Pg. 11) 11412239 (Pg. 12) GARANTÍA LIMITADA Sunbeam Outdoor Cooking (“Sunbeam”) garantiza que este producto estará libre de defectos de material y mano de obra. Esta garantía aplica a las siguientes partes por los siguientes periodos de tiempo: la base de aluminio está garantizada DE POR VIDA contra agujeros por quemaduras; el quemador está garantizado por tres (3) años; y todas las demás partes están garantizadas por un (1) año, excepto el tanque de propano y la pintura de acabado. NO GARANTIZAMOS de ningún modo el tanque de propano (vea en el tanque la etiqueta de garantía del fabricante) o la pintura de acabado del producto. Sunbeam, decidirá si repara o cambia el producto o cualquiera de sus componentes que resulte defectuoso durante el periodo de garantía. El cambio se hará con un producto o componente nuevo o reconstruído. Si el producto no está disponible, el cambio puede hacerse con un producto similar de igual o mayor valor. Esta es su garantía exclusiva. Esta garantía es válida para el comprador original a partir de la fecha de compra inicial y no es transferible. Guarde el recibo de compra original. Se requiere un comprobante de compra para hacer efectiva la garantía. Los distribuidores de Sunbeam, los centros de servicio o los almacenes que venden productos Sunbeam no tienen derecho a alterar, modificar o cambiar de ningún modo los términos y condiciones de esta garantía. Esta garantía no cubre el uso normal de partes o daños resultantes por cualquiera de los siguientes: uso negligente o mal uso del producto, uso de voltaje o corriente inadecuada, uso contrario a las instrucciones de operación, desarme, reparación o alteración por cualquier persona que no sea de Sunbeam o un centro de servicio autorizado. Además, la garantía no cubre Actos de Dios, tales como incendios, inundaciones huracanes y tornados. Sunbeam no se hará responsable por daños incidentales o consecuentes causados por la infracción de cualquier garantía expresa o implícita. Excepto para la extensión prohibida por la ley que aplica, cualquier garantía implícita de mercantibilidad o adaptación para un propósito en particular está limitada en duración hasta la duración de la garantía arriba mencionada. Algunos estados, municipios o jurisdicciones no permiten la exclusión o limitación de daños incidentales o consecuentes, o limitaciones en cuanto a la duración de la garantía implícita, de modo que las limitaciones arriba mencionadas o exlusiones no aplicarán a usted. Esta garantía le otorga derechos legales específicos y puede usted tener otros derechos que varían de un estado a otro o de un municipio a otro. NO DEVUELVA ESTE PRODUCTO AL LUGAR DE COMPRA. Lleve el producto a un centro de servicio autorizado Sunbeam. Para encontrar el centro de servicio más cercano a usted llame al 1-800-641-2100. NO ES VÁLIDA EN MÉXICO PARA GARANTÍAS, SERVICIO Y PARTES Encuentre el número del modelo y el número de serie en la etiqueta por detrás de su asador. ANTES DE USAR SU ASADOR LEA EL MANUAL DE USOS Y CUIDADOS: Llenado y purga adecuada del tanque Pruebas de fugas en todas las conexiones de gas Instrucciones de encendido correcto del asador Uso y almacenaje del asador y del tanque ¡Advertencia! Las orillas de las partes de metal pueden causar lesiones si no se manejan con cuidado. ¡USE PRECAUCIÓN EXTREMA! ¡ADVERTENCIA! CUANDO VERIFIQUE FUGAS: NO fume. NO use fuego para verificar la existencia de fugas. PELIGRO: NUNCA guarde un tanque de gas de repuesto debajo del asador ni en la misma área que el asador para evitar una posible una explosión. Consulte el Manual de Usos y Cuidados. IMPORTANTE: Asegúrese de apretar todas las partes (tornillos, tuercas, pernos, etc.) por lo menos una vez al año o en cada temporada de parrilladas. ÁREAS PARA VERIFICAR FUGAS (indicadas con las flechas) CONSULTE EL MANUAL DE USOS Y CUIDADOS
This document in other languages
- español: Charmglow CT3402W


