1
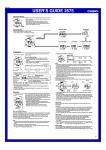
Operation Guide 2984
MA0511-EA
Modes and Display Screens
Timekeeping Mode
Day of the Week
Button
Month, Day
Button
Year
PM indicator
(no display
for AM)
Button
Button
(Light)
Button
Hour, Minute, Second
Modes
• For details about each mode, see each section of this Operation Guide.
Timekeeping Mode
Stopwatch Mode
Dual Time Mode
Recall Mode
Alarm Mode
Timer Mode
❚ Turning on Illumination with Auto Light
Illumination
An EL (electroluminescent) panel is used to illuminate the display for easy reading in the
dark. An auto light turns on illumination automatically when you angle the watch towards
your face for viewing.
With the watch on your
wrist, position it parallel
with the ground.
Auto Light Precautions
Rotate your arm so the watch
is angled at about 40 degrees,
so you can read its face.
❚ To turn on illumination manually
In any mode, press the L button.
40 degrees
minimum
This will turn on illumination for about 1.5 seconds.
• Pressing the L button turns on illumination regardless of
whether the auto light switch is on or off.
❚ To turn the auto light switch on or off
The auto light switch turns on illumination for about 1.5 seconds when you angle the watch
towards your face.
In the Timekeeping Mode, hold down the D button for
about two seconds to toggle the auto light switch on
or off.
An indicator is on the display while the auto light switch is
turned on.
Auto light switch on indicator
• You should be wearing the watch on the outside of your
wrist when using auto light.
• Make sure that a line running from the left side (9 o’clock) to
the right side (3 o’clock) of the watch is within ±15 degrees
parallel with the ground. Auto light may not operate properly
if the angle is greater than 15 degrees.
• To conserve battery power, the auto light switch can remain on for a maximum of about six
hours. After that, it will turn off automatically, and the “ ” indicator will disappear from the
display.
• If you want to continue using auto light, hold down the D button for about two seconds
again until the “ ” indicator reappears. Note, however, that frequent use of auto light
can run down the battery.
• Illumination may not turn on immediately when you angle the watch towards your face. This
does not indicate malfunction.
• Illumination remains turned on for about 1.5 seconds only, even if you leave the watch
angled towards your face.
• Illumination may turn on unintentionally when you wear the watch on the inside of your wrist,
when you shake your arm, or when you raise your arm. Be sure to turn off the auto light
switch whenever you do not need illumination.
• Keep the auto light switch turned off whenever you are wearing the watch on the inside of
your wrist.
• Electro-static charge and magnetism can interfere with auto light operation and even make
operation impossible. If this happens, lower your arm to the starting position and then raise it
again. If you still have trouble with auto light illumination, try lowering your arm down to your
side and then raise it to your face for reading.
• You may hear a faint rattling sound when you move the watch around. This sound is caused
by the movement of a metal bulb that controls operation of the auto light switch, and does
not indicate malfunction.
Important!
• Illumination may be difficult to see under bright sunlight.
• Illumination turns off automatically if an alarm sounds, etc.
• You may notice a slight sound from the watch while illumination is turned on. This is the
sound of EL panel vibration and does not indicate malfunction.
1
Operation Guide 2984
Using the Stopwatch
Whenever you perform a lap/split time operation, the stopwatch stores a record of the lap/
split time. There is enough memory to hold up to 60 lap/split time records. For each
measurement operation, the watch also creates and store a title screen (which also takes
up one record in memory) that shows the distance and the date of the measurement.
The watch calculates the distance covered using elapsed time, based on a fixed pace.
• In the Timekeeping Mode, press the C button once to enter the Stopwatch Mode.
• For the stopwatch to be able to perform distance calculations, you need to use the
procedure under “Configuring Individual Preferences” to specify your stride length and other
information.
• Stopwatch
Measurement Unit: 1/100 second (1 second from the 10th hour)
Measurement Range: 99 hours, 59 minutes, 59 seconds
• Distance
Measurement Unit: 0.1 km
Measurement Range: 99.9km
Maximum Cumulative Distance: 999.9km
• Lap/Split Count Range: 99
Button
• Start
• Stop
Button
• Lap/Split Screen Switch
Lap Times and Split Times
A lap time is the time that elapses during a specific portion of the race, such as a lap around
a track, while a split time is the time that elapses from the beginning of a race up to a
certain point.
Split Time Example
Lap Time Example
Measuring splits at the 10km, 20km, and
Measuring the lap time for each lap of a
30km points of a marathon.
track event, car race, etc.
Current Time
Lap 2
Start
Stop
Split 3
Lap 3
Reset
• Reset
(Data to memory)
Cumulative Time Measurement
Pressing the A button to restart the stopwatch without
resetting it to all zeros resumes elapsed time measurement
from where it was last stopped.
To record lap/split times
Time Range Display Switching
When you first start an elapsed time measurement, the lower part of the display shows
hours, minutes, seconds, and 1/100 second, while the upper part shows minutes, seconds,
and 1/100 seconds. When the time in the lower part of the display reaches 10 hours, it
switches to hours, minutes, and seconds. The upper part of the display switches to hours,
minutes, and seconds when its time reaches one hour.
Lap/Split Count
Stop
Whenever you press the D button to reset the stopwatch to
all zeros, the data from the last measurement operation is
stored in memory.
Stop
• Start
• Stop
• • •
Start
Lap/Split
Lap/Split
• • •
Minutes
Seconds
Hour
Stop
Seconds
1/100 second
Hour
Minutes
Start
Split 2
Start
• Lap/Split
(Data to memory)
• Reset
(Data to memory)
Split Time
• You can change the lap time
and split time positions by
pressing the B button.
• Start
• Stop
Split 1
Lap 1
Minutes 1/100 second
Remaining Memory
Records
To measure elapsed time
Hour
Reset
• The watch will exit the lap/split screen automatically after
about eight seconds.
Seconds
Minutes
Hour
Seconds 1/100 second
❚ Memory
The watch’s memory can be divided into multiple measurement logs. Each log has its own
title screen that shows the distance and date of the measurement, which takes up one
memory record. The memory’s maximum capacity is 60 lap/split time records, plus at least
one log title screen, for a total of 61 records.
• When memory becomes full, the watch automatically deletes old data to make room for
newly measured data.
Example 1: Memory usage when the current elapsed time measurement is the only
one in memory
Log Title Screen + 60 lap/split records = 61 records
• An elapsed time measurement is one that runs from when the stopwatch is
started from all zeros, until it is again reset to all zeros.
Example 2: Memory usage when there are multiple elapsed time measurements in
memory
Measurement 1: Log Title Screen + 30 lap/split records = 31 records
Measurement 2: Log Title Screen + 29 lap/split records = 30 records
(31 + 30 = 61 total)
• For information about recalling stopwatch records, see “Viewing Stopwatch Records”.
Data Save Timing
Whenever you press the D button to display a lap/split, the lap/split time and distance are
stored in memory. Stopping the elapsed time operation and pressing the D button to reset
the stopwatch to all zeros stores the final distance in memory.
Memory Full
Minutes Seconds
Viewing Stopwatch Records
❚ To search for lap/split data
Enter the Recall Mode when you want to view stopwatch records.
• In the Timekeeping Mode, press the C button twice to enter the Recall Mode.
While the title screen of the measurement log you want is displayed, use the A and D
buttons to scroll through the lap/split time records in the log.
• Holding down either button scrolls the records at high speed.
• The location (upper or lower part of the display) of the lap and split times is the same as
what you selected in the Stopwatch Mode.
Entering the Recall Mode displays a title screen showing the number of the newest
measurement log.
Title Screen
Title Screen
Lap/Split 1
Final Lap/Split
Lap time
Distance
Measurement Date
(Month/Day)
Measurement
Log Number
• • •
• • •
Split Time
❚ To search for a measurement log
Press the B button to scroll through the title screens in sequence, from the newest to the
oldest.
• Holding down the B button scrolls at high speed.
Newest Measurement
Next Older Measurement
Cumulative Data
Best Lap Screen
The “
” indicator is displayed on the screen of the best lap time.
• The “
” indicator does not appear on any screen when the best lap is cleared because
memory became full.
Storing data when memory is full automatically deletes the oldest record currently in
memory to make room for the new data.
Example 1: When the current log is the only one in memory
Recording a new lap/split record while memory is full causes the oldest lap/
split time currently in memory to be deleted to make room for the new one.
Example 2: When there are multiple records or logs in memory
All of the records of the oldest stopwatch log are cleared to make room for
the new data.
• To clear memory data manually, see “To clear measurement log data”.
• • •
1-second
Interval
Cumulative
Distance
2
Operation Guide 2984
❚ To clear measurement log data
Pace Beeper
• Note that you cannot clear log measurement data unless
the stopwatch is reset to all zeros.
• When you start elapsed time measurement with the stopwatch, the pace beeper sounds for
30 seconds in accordance with the pace that you have configured for it.
• To sound the beeper again at any time during the elapsed time measurement, press the B
button. This will cause the pace beeper to sound for 30 seconds.
• Stopping elapsed time measurement while the pace beeper is sounding will also stop the
beeper.
• Start
You can turn the pace beeper on or off, and you can specify its
• Stop
pace using the procedure under “Configuring Individual
Preferences”.
• The “ ” indicator is on the display while the pace beeper is
turned on.
• To use the pace beeper, set a pace value in the range of
100 to 200, and turn on the beeper.
1.
Use the B button to display the title screen of the
measurement log whose data you want to clear.
Display the title screen of the data.
• Holding down the B button scrolls at high speed.
2.
While holding down the A button, hold down the
D button.
2.
This will cause “CLR” to flash on the display for about two
seconds as the measurement log’s data is deleted.
100
105
• • •
• • •
195
200
––
(Increase)
Selecting “– –” for the pace setting turns off both the pace beeper and distance calculation.
Use the following procedure to specify a pace for the pace beeper, to specify your stride
length for distance calculations, and to turn the pace beeper on or off.
❚ To clear cumulative data
Use the B button to display the cumulative data
screen.
1.
• Holding down the B button scrolls at high speed.
2.
Each press increases or decreases the pace value by 5.
“– –” Pace Setting
Configuring Individual Preferences
1.
(Decrease)
Use the D (+) and A (–) buttons to change the
pace setting.
In the Stopwatch Mode, hold down the B button
for about one second until pace value (indicating
steps per minute) starts to flash. This is the setting
screen.
Pace
3.
Press the C button advance to the pace beeper
on/off setting screen.
• This causes the current pace beeper on/off setting (“On”
or “OFF”) to flash on the display.
• Note that the setting screen will not appear unless the
stopwatch is reset to all zeros.
While holding down the A button, hold down the
D button.
This causes “CLR” to flash for about two seconds, and then
resets the cumulative data to 0 km.
4.
7.
Press the D button to toggle the pace beeper on
or off.
When everything is the way you want, press the B
button to exit the setting screen.
• The watch automatically exits the stride length setting screen if you do not perform any
operation for about two or three minutes.
5.
Press the C button to advance to the stride length
setting screen.
STRIDE
Stride length
You can determine your stride length as shown below by running a known distance and
then dividing by the number of steps it took.
• The stride length setting can be configured in 5cm units, so round your calculation result off
to the nearest 5cm.
This causes the current stride length setting (cm) to flash
on the display.
• Setting Unit: 5 cm
• Setting Range: 40 to 190 cm
6.
Use the D (+) and A (–) buttons to change the
stride length setting.
Determining Your Stride Length
(Decrease)
Example 1: When you take 25 steps to run the length of a tennis court (23.77 meters)
23.77 (meters) ÷ 25 (steps)= 0.9508 (meters)
95cm
Example 2: When you take 239 steps to run one lap around a 300-meter track
300 (meters) ÷ 239 (steps) = 1.255 (meters)
126cm ➔ 125cm
Each press increases or decreases the stride length by 5
cm.
• Holding down either button changes the setting at high
speed.
(Increase)
40
45
•
•
•
•
•
•
185
190
3
Operation Guide 2984
❚ To set the timer start time
Using the Timer
The Timer Mode lets you set a start time of up to 100 hours, in 1-minute steps. The time
counts down from there, and an alarm sounds for 10 seconds when the end of the
countdown is reached. You can also use an Auto Repeat Timer that repeats the timer
operation from the same start time up to eight times when the end of the countdown is
reached.
• In the Timekeeping Mode, press the C button three times to enter the Timer Mode.
Button
• Start
• Stop
Current Time
Minutes
Hour
• Pressing the D button while the countdown is stopped will
reset the displayed time to the start time.
• Pressing the A button while a countdown is in progress will
pause it. You can resume the countdown from the currently
displayed time by pressing A again.
1.
In the Timer Mode, hold down the B button for
about one second until the hours digits of the start
time start to flash.
When everything is the way you want, press the B button to exit the setting
screen.
• To specify a start time of 100 hours, set 0:00 00.
• The watch automatically exits the start time setting screen if you do not perform any
operation for about two or three minutes.
Hours
(Decrease)
2.
Use the D (+) and A (–) buttons to change the
hours setting.
• Holding down either button changes the setting at high
speed.
Seconds
(Increase)
3.
Button
• Reset
5.
If a countdown is in progress, stop it before
performing the following steps.
Minutes
Press the C button to select the minutes setting.
This causes the minutes digits to flash.
4.
Use the D (+) and A (–) buttons to change the
minutes setting.
(Decrease)
• Holding down either button changes the setting at high
speed.
(Increase)
Selecting the Timer Type
• Repeat Timer
When Repeat Timer is selected, the timer stops and displays the start time when it
reaches the end of the countdown.
• Auto Repeat Timer
When Auto Repeat Timer is selected, the timer restores the start time and counts down
again when the end of a countdown is reached. The countdown is repeated up to eight
times.
❚ To select the timer type
Auto Repeat Timer Indicator
In the Timer Mode, with the countdown stopped and the
current start time on the display, hold down the D button for
about one second. This will toggle the timer type between
Repeat Timer and Auto Repeat Timer. The “
” indicator is
on the display while the Auto Repeat Timer is selected.
• Press the A button to stop the countdown and the D
button to display the start time.
❚ To stop the alarm beeper
Press any button.
4
Operation Guide 2984
Using the Alarms and Hourly Time Signal
• In the Timekeeping Mode, press the C button four times to enter the Alarm Mode.
About the Alarm Mode
Daily Alarms (AL 1 to AL 5)
The watch beeps for about 10 seconds when an alarm time is reached each day.
Snooze Alarm (AL 1 Only)
When the snooze alarm is turned on, the watch beeps for 10 seconds when the alarm time
is reached, and up to seven times at five-minute intervals thereafter (approximately 30
minutes total). Pressing any button stops the alarm, but the alarm will sound again after five
minutes.
❚ To set an alarm time
1.
4.
Alarm Number
Use the D button to scroll through the alarm
screens until the one you want is displayed.
• Holding down either button changes the setting at high
speed.
• When setting the hour, make sure you specify AM (no
indicator) or PM (PM) correctly when using 12-hour
timekeeping, or that you specify the correct 24-hour
time.
• If you selected 24-hour timekeeping in the Timekeeping
Mode, the time will also be displayed in 24-hour
timekeeping in the Alarm Mode.
Each press of the D button scrolls through the alarm
screens in the sequence shown below.
Alarm 1
Alarm 2
Alarm 3
Hourly Time
Signal
Alarm 5
Alarm 4
Use the D (+) and A (–) buttons to change the
currently flashing setting.
(Decrease)
(Increase)
Repeat steps 3 and 4 as required to set the alarm time you want.
Hourly Time Signal
The hourly time signal causes the watch to beep twice every hour on the hour.
2.
Hold down the B button for about one second
until the hour digits start to flash.
5.
• This will turn on the selected alarm automatically, which
is indicated by the alarm on indicator “
”.
Hour
Alarm On Indicator
3.
When the alarm time setting is the way you want,
press the B button to save it.
This exits the setting screen.
• The display also will exit the setting screen automatically if you do not perform any
operation for about two or three minutes.
• Note that the snooze alarm function of Alarm 1 is turned off automatically whenever you
change its alarm time setting.
Use the C button to move the flashing to the
setting you want to change.
Each press of the C button moves the flashing between
the hour and the minute digits.
Minute
❚ To turn an alarm on or off
❚ To stop the alarm
1.
In the Alarm Mode, use the D button to display the
screen for the alarm you want to turn on or off.
2.
Press the A button to toggle the displayed alarm
on or off, as shown below.
Pressing any button while the beeper is sounding will stop it.
• In the case of the snooze alarm the alarm will sound again in about five minutes. “SNZ”
flashes on the display while the snooze alarm is active (indicating that the alarm will sound
again).
• The snooze alarm will be canceled automatically when any one of the following occurs while
the “SNZ” indicator is flashing on the display.
• Using the Alarm Mode to turn off Alarm 1 or change its setting to a standard (non-snooze)
daily alarm
• Using the Alarm Mode to change the Alarm 1 alarm time setting
• Entering the Timekeeping Mode and then displaying the setting screen
• Alarms 2 through 5, Hourly Time Signal
• Alarm 1
Off
On
Off
On
Snooze On
Snooze Alarm
Hourly Time Signal
Snooze
Indicator
Hourly Time
Signal Indicator
❚ To test the alarm
In the Alarm Mode, hold down the D button to sound the alarm.
5
Operation Guide 2984
Using Dual Time
Resetting the Seconds Count to Zero
The Dual Time Mode lets you set a second time (in 30 minute steps), so you can keep track
of the current time in another time zone, etc.
• The Dual Time Mode seconds count is synchronized with the Timekeeping Mode seconds
count.
• The same 12-hour/24-hour format you select for the Timekeeping Mode time is also used by
the Dual Time Mode.
• In the Timekeeping Mode, press the C button five times to enter the Dual Time Mode.
3.
After resetting the seconds, press the B button to
exit the setting screen.
Resetting the zero count to zero on an accurate time signal about once a month helps to
ensure accurate timekeeping.
1.
Seconds
In the Timekeeping Mode, hold down the B button
for about one second until the seconds start to
flash.
• The watch automatically exits the setting screen if you do not perform any operation for
about two or three minutes.
❚ To configure Dual Time settings
In the Dual Time Mode, press the D (+) button or A
(–) button to change the time setting in 30-minute
steps.
Current Time
PM Indicator
(no display for AM)
Minute
• Holding down either button changes the setting at high
speed.
• Pressing the B button changes the Dual Time Mode time
to the Timekeeping Mode time.
2.
In accordance with a time signal on the TV or
radio, press the D button.
This resets the seconds to 00.
Hour
Seconds
Pressing the D button while the seconds count is in the range of 30 to 59 resets it to 00
and also adds 1 to the minutes. Pressing the D button in the range of 00 to 29 resets
the seconds count without changing the minutes.
• In Japan, you can obtain the current time by dialing 117 on the telephone.
3.
Configuring Time and Date Settings
Use the following procedure to set the current time and date after having the watch’s
battery replaced, etc.
1.
2.
Year Month, Day
Hour
12/24-hour
Timekeeping
Minute
Hour
Day
Month
• Holding down either button changes the setting at high
speed.
(Increase)
Each press of C moves the flashing around the display in
the sequence shown below.
Seconds
(Decrease)
Seconds
In the Timekeeping Mode, hold down the B button
for about one second until the seconds start to
flash.
Use the C button to move the flashing to the
setting you want to change.
Use the D (+) and A (–) buttons to select the
setting you want to change.
Use the C button to select each of the settings and the D and A buttons to change
them.
• When setting the hour, make sure you specify AM (no indicator) or PM (PM) correctly
if you are using 12-hour timekeeping, or that you specify the correct 24-hour time.
• When the 12/24-hour timekeeping setting is selected, press D to toggle between 12hour and 24-hour timekeeping.
Minute
4.
After all the settings are the way you want, press the B button to exit the setting
screen.
• The watch makes adjustments for leap years and month lengths automatically.
Year
• You can set the year within the range of 2000 to 2039.
• The day of the week is set automatically in accordance with the date you set.
6