1
Quick Start Guide
Y
P
CO
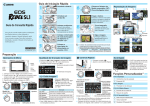
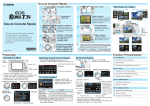
Quick Reference Guide
This quick reference guide explains the basic
function settings and how to shoot and play back
images. You can take this guide with you when
shooting. For detailed instructions, refer to the
EOS REBEL T5/EOS 1200D Instruction Manual.
E
English
CPQ-E103-000
1
Insert the battery.
2
Insert an SD card.
3
White index
Y
P
O
Red index
C
Attach the lens.
Align the lens’s white or
red index with the camera’s
index in the matching color.
4
Set the lens’s focus
mode switch to <AF>.
5
Set the power switch
to <1>.
© CANON INC. 2014
6
Set the Mode Dial to
<A> (Scene Intelligent
Auto).
7
y
Image-Recording Quality
<0>
button
LCD
monitor
8
Y
P
O
Index
Take the picture.
C
Press the shutter button
completely to take the
picture.
9
Select image
Y
P
CO
View the image.
oo The M on the right of the function indicates that the
function is available only in Creative Zone modes.
oo Number of Possible Shots (Viewfinder Shooting)
Temperature
No Flash
50% Flash Use
At 23°C / 73°F Approx. 600 shots Approx. 500 shots
Recorded pixels
<M>
button
Possible shots
1. Press the <M> button to display the menu.
2.Press the <Y> <Z> keys to select a tab, then press the
<W> <X> keys to select the desired item.
3.Press <0> to display the setting.
4.After setting the item, press <0>.
Y
P
CO
Q Quick Control
Y
P
O
Basic Zone Modes
Creative Zone Modes
A Picture StyleN
oo Select [z2: Picture Style],
then press <0>.
oo Press the <W> <X> keys to
select the Picture Style, then
press <0>.
C
Movie Shooting Mode
Shutter speed
Shooting mode
Exposure
compensation/
AEB setting
C
Picture Style
Creative Zone
odes
M
Tabs
Style
Description
D Auto
P Standard
Color tones optimized for the particular scene.
Q Portrait
R Landscape
Nice skin tones and slightly sharp images.
Vivid blue skies and greenery, and very sharp images.
Menu settings
oo For <S> (Neutral) and <U> (Faithful), refer to the
camera’s instruction manual.
Y
P
O
Aperture
Highlight tone priority
ISO speed
Flash exposure
compensation
Auto Lighting
Optimizer
AF operation
Raise built-in flash
White balance
Image-recording
quality
Vivid colors and sharp images.
V Monochrome Black-and-white images.
C.Fn I: Exposure
oo Press the <Q> button.
XX The Quick Control screen will
appear.
Drive/self-timer
Metering mode
oo In Basic Zone modes, settable functions vary depending
on the shooting mode.
oo Press the <S> cross keys to select a function, then turn
the <6> dial to set it.
Magnify
L Erase
B
Shooting
information
S
x Playback
The image just captured
will be displayed for 2 sec.
on the LCD monitor.
oo Select [z1: Image quality], then press <0>.
oo Press the <Y> <Z> keys to select a quality, then press
<0>.
Image-recording quality
<S>
cross keys
u
Focus the subject.
Custom FunctionsN
Menu Operations
Menu items
u
Aim the viewfinder center over
the subject and press the shutter
button halfway to autofocus.
Preparation
Basic Zone Modes
Image Playback
y
1
Exposure level increments
2
ISO expansion
3
Flash sync. speed in Av mode
C.Fn II: Image
4
Long exposure noise reduction
5
High ISO speed noise reduction
6
Highlight tone priority
Y
P
CO
C.Fn III: Autofocus/Drive
7
AF-assist beam firing
C.Fn IV: Operation/Others
8
Shutter/AE lock button
9
Assign SET button
10 Flash button function
11 LCD display when power ON
Shooting Operation
Nomenclature
Power switch
Shutter speed
Shooting mode
Mode Dial
Aperture
<6> Main Dial
Flash exposure
compensation
Picture Style
Shutter button
Auto Lighting
Optimizer
Raise built-in flash
White balance
Image-recording
quality
AF operation
Y
P
CO
Quick Control
icon
Battery check
zxcn
<A>AE lock button
Y
P
O
Number of
possible shots
Metering mode
C
Drive/Self-timer
Viewfinder Information
AF point activation indicator <•>
<S > AF point
selection button
AF points
<O /L>
Aperture/
Exposure
compensation
button/
Erase button
<S>
Cross
keys
<Q>
Quick Control button
<0> Setting button
Access lamp
f: AF OperationN
oo Set the lens’s focus mode
switch to <AF>.
oo Press the <Zf> button.
oo Press the <Y> <Z> keys or turn
the <6> dial to select the desired
AF operation, then press <0>.
X(One-Shot AF):
For still subjects
9(AI Focus AF):
Switches the AF operation automatically
Z(AI Servo AF):
For moving subjects
PY
S AF PointN O
C
oo Press the <S> button.
oo Press the <S> cross keys to
select the AF point.
oo While looking through the
viewfinder, you can select the
AF point by turning the <6>
dial until the desired AF point
flashes in red.
oo Pressing <0> toggles the AF
point selection between the
center AF point and automatic
AF point selection.
All the settings necessary for
shooting are set automatically.
You just press the shutter
button, and the camera does
the rest.
ISO speed
Exposure
level indicator
<D> Flash button
<A> Live View shooting/
Movie shooting button
Basic Zone Modes
Shooting Settings
AScene Intelligent Auto
7Flash Off
CCreative Auto
2 Portrait
3Landscape
4 Close-up
5Sports
6 Night Portrait
Y
P
O
D Using the Built-in Flash
C
Basic Zone Modes
If necessary, the built-in flash will be raised and fire
automatically in low-light or backlit conditions (with certain
shooting modes).
Creative Zone Modes
oo Press the <D> button to raise the
built-in flash, then shoot.
Creative Zone Modes
You can change the camera
settings as desired to shoot in
various ways.
d: Program AE
The camera automatically sets the shutter speed and
aperture in the same way as the <A> mode.
oo Set the Mode Dial to <d>.
Y
P
CO
s: Shutter-priority AE
oo Set the Mode Dial to <s>.
oo Turn the <6> dial to set the
desired shutter speed, then
focus on the subject.
XX The aperture will be set automatically.
oo If the aperture display blinks, turn
the <6> dial until it stops blinking.
f: Aperture-priority AE
oo Set the Mode Dial to <f>.
oo Turn the <6> dial to set the desired
aperture, then focus on the subject.
XX The shutter speed will be set automatically.
oo If the shutter speed display
blinks, turn the <6> dial until
it stops blinking.
Focus
confirmation light
AE lock
Flash-ready
Max. burst
Flash exposure
compensation
Shutter speed
Aperture
Monochrome shooting
ISO speed
Exposure level indicator
i: ISO SpeedN
A Live View Shooting
oo Press the <Wi> button.
oo Press the <Y> <Z> keys or turn
the <6> dial to select the ISO
speed, then press <0>.
oo When [AUTO] is selected, the
ISO speed is set automatically.
When you press the shutter
button halfway, the ISO speed
setting is displayed.
Y
P
O
i Drive/Self-timerN
C
oo Press the <Yij> button.
oo Press the <Y> <Z> keys or turn
the <6> dial to select the drive
mode, then press <0>.
u :Single shooting
i :Continuous shooting
j :Self-timer:10 sec.*
l :Self-timer:2 sec.
q :Self-timer:Continuous*
*The <j> and <q> drive
modes can be selected in all
shooting modes (except <k>).
k Movie Shooting (Autoexposure)
oo Press the <A> button to display
the Live View image.
oo Set the Mode Dial to <k>.
oo Press the shutter button
halfway to focus.
oo Press the shutter button halfway
to focus.
C
Y
P
O
oo Press the shutter button
completely to take the picture.
Y
P
CO
Recording movie
Recording movie
oo Live View shooting settings will appear under the [z2]
menu tab in Basic Zone modes and under the [z 4] menu
tab in Creative Zone modes.
oo Number of Possible Shots (Live View Shooting)
Temperature
No Flash
50% Flash Use
At 23°C / 73°F
Approx. 190 shots Approx. 180 shots
Microphone
oo Press the <A> button to start
shooting a movie.
oo To stop movie shooting, press
the <A> button again.