1
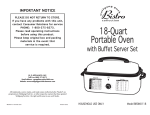
Smoker / Roaster Oven
with Buffet Server
OWNER’S MANUAL
Model KR450B
120V., 60Hz., 1450 Watts
EURO-PRO Operating LLC
Boston, MA, 02465
1 (800) 798-7398
www.euro-pro.com
Copyright © EURO-PRO Operating LLC 2008
GETTING TO KNOW YOUR SMOKER / ROASTER OVEN
IMPORTANT SAFETY INSTRUCTIONS
When using electrical appliances, basic safety precautions should always be
followed, including the following:
1.
2.
3.
4.
5.
6.
7.
8.
9.
•
Read all instructions carefully before
use.
Never cook without Removable Cooking
Pan in place.
Do not touch hot surfaces, always use
handles or knobs.
To protect against electrical shock, do
not immerse cord and plugs in water or
other liquids.
Close supervision is necessary when
any appliance is used by or near
children.
Unplug from outlet when not in use
and before cleaning. Allow to cool
before putting on or taking off parts
and before cleaning the appliance.
Do not operate any appliance with a
damaged cord or plug, or after the
appliance malfunctions, has been
dropped or damaged in any manner.
Return the appliance to EURO-PRO
Operating LLC for examination, repair
or adjustment. (See warranty.)
The use of accessory attachments not
recommended by manufacturer may
cause injuries.
Do not use outdoors.
A short power supply cord is provided to
reduce the risk resulting from becoming
entangled in or tripping over a longer
cord. An extension cord may be used
with care; however the marked
electrical rating should be at least as
great as the electrical rating of the
smoker/roaster oven. The extension
cord should not be allowed to drape
over the tabletop or counter where it
could be pulled on by children or tripped
over.
10. Do not let cord hang over edge of
table or counter. Do not let cord
touch hot surfaces, including stove.
11. Do not place on or near a hot gas or
electric burner or in a heated oven.
12. Extreme caution must be used
when moving any appliance
containing hot oil or other liquids.
13. CAUTION: Steam escaping from
under cover or food warming/ buffet
pans is hot and can cause burns..
14. Do not leave appliance unattended
while in use.
15. Use oven mitts to remove the
cooking/buffet pans,roasting
rack,cooking pan ,smoker pan, a
baking pan or cooked food from the
cooking pan.
16. Always plug into electrical outlet
before turning unit "On".To
disconnect, always turn unit "Off"
before removing plug from wall
outlet.
17. Do not use appliance for other than
intended household use.
• Do not immerse the base in water or
other liquid. Do not attempt to service
this unit.
• When opening the cover during or at
the completion of the cooking cycle,
steam could escape and cause injury.
Always open the cover away from
your face or body.
.
• To avoid a circuit overload, do not
operate another high wattage
appliance on the same circuit.
This appliance has a polarized plug (one blade is wider than the other). To reduce
the risk of electric shock, this plug is intended to fit into a polarized outlet only one
way. If the plug does not fit fully into the outlet, reverse the plug. If it still does not fit,
contact a qualified electrician. Do not attempt to modify the plug in any way.
SAVE THESE INSTRUCTIONS
FOR HOUSEHOLD USE ONLY
1
REV. 09/02D
1
5
2
6
3
10
4
7
9
8
1.
2.
3.
4.
5.
Cover
Removable Buffet Serving Pans
Buffet Serving Pans Holder
Removable Roasting Rack
Removable Smoker Pan
6. Removable Cooking Pan
7. Cover Holders
8. Base
9. Temperature Control
10. Cord
Technical Specifications
Voltage:
Power:
Capacity:
120V., 60Hz.
1450 Watts
18 Quart
2
OPERATING INSTRUCTIONS
Read all the sections of this booklet and follow all the instructions carefully.
Please read all instructions. The
Before Using Your Smoker /
Smoker / Roaster Oven cooks some
Roaster Oven
foods faster than a conventional oven.
Make sure the unit is unplugged. Wash
the Cover, Roasting Rack, Buffet Pans,
Note: Due to manufacturing processes,
some smoke and / or odor may be
Buffet Pan Holder, Smoker Pan, and
noticed during first use. This is normal
Cooking Pan in warm , soapy water.
and should disappear after the first
Wipe dry thoroughly. Wipe the unit base
heating of the Smoker / Roaster Oven.
with a damp,soapy cloth. Wipe dry
thoroughly. Do NOT use abrasive
Caution: Make sure the Temperature
cleaners on Base. Do NOT immerse
Control is “OFF” and Base is
Base in water.
unplugged .
How to Use Your Smoker/Roaster
Oven
1.
CAUTION: Never open the Cover
towards your face or body. Escaping
steam may cause burns. Always tilt the
Cover away from you to divert steam
and avoid placing your hand over the
steam vents.
2.
3.
4.
Caution: The Cooking Pan should
always be used in the Base when
cooking or baking.
5.
6.
Caution: We do not recommend the
use of plastic oven roasting bags or
plastic in the unit or cooking pan. Foil
oven roasting bags can be used.
7.
Note: Before planning to bake or roast
in the unit with pans or dishes, be sure
to check for fit in the cooking pan or on
roasting rack. Following are pan sizes
which should fit:
One 9 X 13 inch baking pan
One 10 X 14 inch roasting pan
Two 9 X 5 inch loaf pans
Two 8 X 4 inch loaf pans
One tube or bundt pan
8.
Note: Do not use the Cooking Pan as
the baking pan for cakes, breads or
casseroles. A separate pan must be
used when cooking these foods.
Place the Base on a heat resistance
surface.
Plug cord into 120 volt outlet.
Place the Cooking Pan inside the
base
Note: Cooking Pan should always
be in the base before cooking.
Turn temperature Control “ON” to
desired temperature setting.
Place Cover on unit. Preheat for 15
to 20 minutes..
Place Roasting Rack into the
Cooking Pan, Put food on rack and
replace Cover on unit.
Note: Some recipes or foods may
not require the Roasting Rack be
used.
When cooking is complete, turn the
Temperature Control to “OFF” and
unplug the unit form the wall outlet.
Note: Lifting the Cover often
during the cooking cycle will
reduce the interior heat and
prolong the cooking cycle.
Do not open Cover frequently.
Remove the Cover. Using oven
mitts or hot pads, remove the
Roasting Rack with food and serve.
Caution: Always open Cover away
from you. Steam may escape and
cause burns.
Caution: Allow base to cool
before moving or cleaning.
NOTE: When removing the Cover
during the cooking cycle, place edge
of Cover under the Cover Holders on
either side to prevent getting cooking
reside or condensation on your
counters. This is a handy feature to
the Smoker/ Roaster Oven.
Caution: Use oven mitts or hot pads to
remove any cooking pans, dishes ,
buffet pans, the cooking pan or cooked
food from the base when heated.
Cooked items will be hot and burns
could occur.
3
SMOKER PAN
How to Use the Smoker Pan
You should be able to purchase seasoned wood chips at your local supermarket or
wherever you find your barbecue charcoal.
Prepare the wood chips according to package directions before proceeding to use the
smoker .
1. Assemble your oven unit with the cooking pan .
2. Place pre-soaked wood chips around the interior sides of the Cooking Pan.
(See below)
Cooking Pan
Presoaked
wood chips
3. Place the Smoker Pan into the Cooking Pan. (See below)
Smoker Pan
4. Place the Roasting Rack into the Smoker Pan.
5. Place the food on the rack. (See below) Place Cover on unit.
Roasting Rack
with Food
6.
7.
Plug cord into wall outlet.
Turn temperature Control Setting to desired setting. Cook according to
recommended cooking guides listed per this instruction manual.
We recommend the use of a meat thermometer to ensure perfectly cooked
roasts and poultry.
8. When food is cooked, turn unit "OFF". Unplug the cord from wall outlet.
9. Open Cover.Remove food using Roasting Rack . Place food onto a serving dish
or platter.
Caution: We DO NOT recommend you slice or cut cooked food inside the
Cooking Pan. Pan will be hot and could cause burns.
10. Allow the Base to cool before cleaning. Remove the Cooking Pan and dispose of
the wood chips .
4
BUFFET PANS
BUFFET PANS (con’t)
How to Use the Buffet Server
For Best Results Using Buffet Pans
1. Wash all Buffet Pans and Pan Holder with warm, soapy water.
2. Place the Cooking Pan inside the base and fill the Cooking Pan with
6 Qts. of water. Make sure the water does not touch the bottom of
the buffet pans.
Note; NEVER add water directly in the Base. ALWAYS use the
Cooking Pan whenever cooking or warming in roaster.
3. Place the Buffet Pans Holder on top of the Cooking Pan. Make sure
the holder is secure and level.
4. Add the EMPTY Buffet pans, making sure they are secure.
5. Place Cover on unit and plug cord into 120 volt outlet. Preheat at 350°F for
30 minutes or until water is very hot.
6. Uncover and carefully add hot, cooked food into Buffet Pans.
Caution: Always open Cover away from you. Escaping steam can
cause burns.
7. Cover and turn Temperature Control setting to 250°F to keep foods warm.
If necessary, adjust temperature.
8. Stir occasionally and keep food covered to maintain temperature.
9. Periodically check and if necessary - carefully add more hot water by
removing one of Buffet Pans to add water.
• Caution: Use oven mitts to remove pan. Escaping steam will be hot
and can cause burns.
HINT: Try using a wooden spoon to help lift one end of the Buffet Pan for
easier removal.
Caution: Internal temperature of foods should be kept at 150°F or above.
•
•
•
•
•
All Buffet Pans must be in place when using the Buffet Server.
Use Buffet Pans only to keep cooked foods warm.
Buffet pans and Holder ARE NOT to be used on a stove top or in a microwave
oven. Pans may be used in a conventional oven.
When filling Buffet Pans with foods that may stick, spray the inside of pans with a
non-stick cooking spray.
If food is too dry, add broth or juice to help keep food moist while warming.
How to Clean your Buffet Server
Caution: Buffet Server is very hot. Handle carefully.
ALWAYS allow the Buffet Server to completely cool before cleaning.
• Buffet Pans and Holder may be cleaned in hot,soapy water or dishwasher.
Rinse and dry thoroughly.
Helpful Tip:
If your Cooking pan discolors from mineral deposits in the water, clean the pan
thoroughly and wipe the interior of the pan with vegetable oil or spray with a
cooking spray. Let it sit for approximately one hour and then wipe clean. This will
help renew the "shine".
• Caution: ALWAYS allow water and Smoker. Roaster to cool before
cleaning.
• ALWAYS allow water to cool before attempting to remove water from
Cooking Pan.
• If attempting to remove Buffet Pans before allowing water and unit to
cool, use oven mitts to remove pans. Escaping steam will be hot and
can cause burns.
• Buffet Pans and Holder are hot. Handle Carefully.
• Never carry the Buffet Pan and Holder Assembly. You could be injured.
CLEANING INSTRUCTIONS
• Buffet Pans and Holder are hot. Handle Carefully.
• Never carry the Buffet Pan and Holder Assembly. You could be
injured.
NEVER CARRY BUFFET
PANS AND HOLDER
NO!!!!
CAUTION: Make sure unit is unplugged from wall outlet.
Allow unit to cool before cleaning.
CAUTION: Do NOT immerse the the Smoker / Roaster Base in water or
liquid.
1. Turn Temperature Control to the “OFF” position.
2. Unplug the oven from wall outlet and allow to cool.
3. Allow oven to cool completely before cleaning.
4. Wash the Cooking Pan, Cover, Roasting Rack, Smoker Pan, Buffet
Pans and/or Buffet Pan Holder in warm, soapy water or dishwasher.
Rinse thoroughly in hot water, then towel dry.
To remove burned - on food or drippings, allow part to soak . Then scrub
with a nylon scouring pad. Rinse in warm water, then dry.
5. Wipe the inside and outside of the oven with a damp cloth.
NEVER IMMERSE THE BASE IN WATER OR OTHER LIQUIDS.
5
6
STEAMING
BAKING
You can use your oven to steam cook tasty and nutritious low calorie foods using no
fats.
1. You will need a stainless steel colander.
2. Place Cooking Pan in unit Base. Place Roasting Rack in Cooking Pan.
3. Plug in cord and pre-heat unit to 450°F.
4. Pour 1 1/2 quart boiling water into the Cooking pan.
5. Place food to be steamed in the colander. Place colander onto the Roasting Rack
inside Cooking Pan.
6. Cover and steam until desired doneness.
Steaming Guide
Food to Steam
Broccoli - 2 bunches, cut up
Min. Time(Minutes)
10
Cauliflower - 2 heads, cut up
10
Shrimp - 2 pounds
10 - 15
NOTE: Baking pans should ALWAYS be placed on the Roasting Rack. Do not
place pans on bottom of Cooking Pan. This also allows for better heat
circulation when baking.
Metal pans are recommended to use in the oven when baking as they provide a
better heat transfer and browning.
When baking, we always recommend pre-heating the oven. Allow 15 - 20
minutes for pre-heating.
When first using your oven for baking, you may wish to lower the baking
temperature by 25°F. The Smoker/Roaster Oven’s more compact interior heats
more efficiently than conventional ovens, so a lower temperature usually works
very well.
Note: Do not remove the Cover while baking. Removing the Cover allows heat
to escape and affects the temperature of the oven.
CAUTION: Use oven mitts or hot pads when removing food from oven. Rack
will be hot, allow to cool before removing.
Baking Guide
These are recommended temperature and times.
WARMING
To reheat rolls, biscuits,pancakes etc.:
You will need two (2) small ovenproof containers to hold water. Small coffee can or
food cans that have been emptied and washed will work very well.
1. Assemble oven with Cooking Pan. Plug in cord and pre-heat unit to 250°F.
2. Fill the two cans about two thirds full of hot water. Place at opposite ends of the
Cooking Pan.
3. Stack the rolls, biscuits, pancakes ,etc. in the Cooking Pan. Do not touch the sides
of the Cooking Pan with the items.
4. Cover and heat for up to one hour.
QUANTITY COOKING
The Cooking Pan can be used to cook or heat large quantities of foods about 4 gallons.
It may be used to simmer sauces, soups, stews or simply to heat or warm large
quantities.
When cooking or heating large quantities of soups, stews or sauces, be sure to stir often
to prevent sticking on the sides and quicker, more even heating. See examples below.
FOOD
Vegetable Beef Soup
TEMP
400° F
TIME
2 hours
(from refrigerated tem p.)
Soups, stews, sauces
225° F
(dependent upon the recipe)
7
4 to 8 hours
FOOD
MUFFINS
QUICK BREADS
YEAST BREADS
YEAST ROLLS
COOKIES
BROWNIES
CUPCAKES
SHEET CAKE
POUND CAKE
BUNDT CAKE
CHEESECAKE
FRUIT PIE
CUSTARD PIE
PASTRY SHELL
PIZZA ( 9 - inch)
BAKED POTATOES
SWEET POTATOES
SCALLOPED POTATOES
WINTER SQUASH
BAKES APPLES
TEMP
425° F
375° F
400° F
400° F
350° F
350° F
350° F
350° F
350° F
350° F
325° F
425° F
350° F
425° F
425° F
350° F to 400° F
350° F to 400° F
350° F
400° F
350° F
8
BAKE TIME (MINUTES)
15 to 20
65 to 75
40 to 45
18 to 20
11 to 13
25 to 30
25 to 30
40 to 45
50 to 60
50 to 60
50 to 60
45 to 50
50 to 60
10 to 13
20 to 25
50 to
55 to
75 to
45 to
35 to
60
65
90
60
45
ROASTING
ROASTING GUIDE
Roasting Meats and Poultry
Roasting Chart
Note: Use this method when a preheated oven is not required.
1. When preparing to roast, place the
Roasting Rack into the Cooking Pan.
2. Place the meat or poultry on the
rack. Place the Cover on the base.
3. Plug cord into electrical outlet. Set
Temperature Control to desired
setting .
4. When cooking is complete, turn the
Temperature Control to "OFF".
Unplug the cord from outlet.
5. Remove the Cover and using oven mitts
or hot pads, remove the Roasting Rack
with food and serve
We recommend the use of a meat thermometer when cooking meats or poultry. Insert the
meat thermometer into the thickest portion of the meat or poultry.
To avoid over cooking, cook until the meat or poultry is within 5° F of desired
temperature. Remove the meat from the Smoker / Roaster Oven. The internal
temperature will continue to rise for a short time after the meat has been removed
from the unit.
6. Allow base to cool before cleaning.
Caution: Base will be HOT. Allow to cool before moving. If moving while hot, use oven
mitts or hot pads. Your hands could strike the base sides even when lifting with handles.
Cooking Guide
Recommended Internal Meat Temperatures
Cook to desired doneness by measuring the internal temperature of the meat
using a meat thermometer.The FDA recommends meat should be a minimum
of 145° F to prevent food borne illness.
Caution: Never cook without Cooking Pan in Base.
MEAT
BEEF
PORK
LAMB
SMOKED HAM
Cook before eating
Fully cooked
POULTRY
Roasting chicken
Turkey
RARE
145° F
*
145° F
MEDIUM
160° F
160° F
160° F
WELL DONE
170° F
170° F
170° F
*
*
160° F
140° F
*
*
180° F
180° F
* Pork, ham or poultry are not recommended to be eaten at these
levels.
Hams labeled “Cook Before Eating” have been smoked or cured but NOT fully
cooked. This ham must be thoroughly cooked to an internal temperature of
155°F to 160° F.
Hams labeled “Fully Cooked” have been smoked or cured and already cooked.
The ham does not require further cooking but heating to 140° F enhances and
improves the flavor.
9
Tender cuts of meat are best suited for roasting. The roasting guide below is for use
with tender cuts such as from the rib or sirloin area . Less tender cuts of meat should
be cooked in liquid for longer periods of time to tenderize. Slow cook 1 1/2 hours for
every 30 minutes of standard cook time at 250° F. Avoid raising the Cover as this
releases heat during the cooking cycle.
Times listed below are approximate and should be used as a guideline only.
If roasting without liquid in the Cooking Pan, add 1 cup of water to the bottom of the
pan. This prevents the drippings from burning on the bottom of the pan.
MEAT
BEEF ROASTS
Standing Rib
Sirloin Tip
Tenderloin
Pot Roast
Corned Beef
LAMB
Leg
Shoulder, boneless
PORK
Loin Roast
Rolled Shoulder
Chops
Country-Style Ribs
WEIGHT / LBS.
TEMP
MINUTES PER LB.
4 to 6
3 to 5
3 1/2 to 4
4 to 6
3 to 5
325° F
350° F
450° F
300° F
300° F
20 to 25
20 to 25
8 to 12
30 to 40
15 to 20
5 to 8
3 to 4
350° F
350° F
25
25
3 to 5
4 to 6
4 to 5
8 to 10
350° F
350° F
325° F
450° F
25 to 30
35 to 40
15 to 20
to brown and …
… then decrease
SMOKED HAM
Bone-in, shankless
Boneless
Fully cooked
VEAL
Loin
Shoulder
POULTRY
Chicken, whole
Chicken, whole
Chicken, pieces
Turkey, prebasted
Turkey, prebasted
Turkey, fresh
tem p. to 250°F
15 to 20
10 to 15
8 to 12
5 to 10
325° F
325° F
325° F
20 to 25
15 to 20
13 to 28
4 to 6
3 to 5
325° F
325° F
30 to 35
30 to 35
3 1/2 to 5
6 to 8
6 to 8
10 to 14
14 to 22
10 to 14
350° F
350° F
350° F
375° F
375° F
350° F
15 to 17
18 to 20
8 to 10
12 to 17
13 to 18
15 to 20
10
RECIPES
RECIPES
ROAST TURKEY
HICKORY-SMOKED BRISKET
NOTE: The Smoker Roaster will cook a turkey in less time than a conventional oven,
but we recommend a meat thermometer to ensure turkey is thoroughly cooked.
The roaster will NOT BROWN the turkey. Due the compact design and the constant
condensation dripping from the cover prevents the turkey from browning but instead
produces a moister, juicer turkey.
3 to 4 lb. Beef brisket
1/2 teaspoon garlic salt
1/4 cup liquid smoke
14 to 18 pound turkey - fresh or thawed
1 onion, cut in quarters
2 stalks of celery, cut into 3 to 4 inch spears
3 whole dried bay leaves
1 teaspoon salt
1/2 teaspoon pepper
1/4 melted butter
2 teaspoon poultry seasoning
Remove the giblets and neck from the cavities of the turkey. Wash the turkey cavities
and the outside of the turkey with cold water. Pat dry with paper towels. Gently run
your fingers under the skin on the breast area, careful not to tear the skin. Push the
bay leaves under the skin - between the skin and meat of the bird. (putting 2 of the
leaves in the larger lower portion of the breast and one at the opening of the neck
cavity.) Place the onion and celery inside the turkey. Rub the outside with the salt,
pepper and poultry seasoning.Place on the Roasting Rack and place inside Cooking
pan of assembled roaster.Brush the outside with the melted butter. Place Cove on unit
and cook at 325° F for 2 1/2 to 3 hours or until done. If using a meat thermometer, it
should register 180° F when turkey is done.
To Brown the Turkey
For turkey to have a brown skin, try the following:
When preparing the turkey for cooking, mix:
1/2 cup melted butter or margarine
1 1/2 teaspoons browning sauce - (such as Kitchen Bouquet or Gravy master)
1 teaspoon paprika
1/2 teaspoon onion powder
1/2 teaspoon celery salt
Place brisket on large piece of aluminum foil. Sprinkle generously with the liquid
smoke and seasonings. Wrap the brisket with foil and crimp the edges. Place in
Cooking Pan. Cover and cook at 250°F for 4 hours.
LEMON GARLIC CHICKEN
3 1/2 to 4 lb. Chicken
3 cloves garlic, minced
1 teaspoon salt
2 tablespoons lemon juice
1/2 teaspoon black pepper
1/4 cup butter, softened
Rinse the chicken cold water. Combine the remaining ingredients and rub on the skin
and meat of the chicken. Place Roasting Rack inside the Cooking Pan. Place chicken
on the rack and cover. Bake at 350 °F for 1 hour 30 minutes or until chicken is done.
BEEF STEW
2 lbs beef stew meat
1/3 cup dry bread crumbs
1 teaspoon salt
1/4 teaspoon black pepper
1 can (4 oz.) sliced mushrooms un-drained
2 cans (10 1/2 oz. each)condensed tomato soup
3 potatoes, peeled and cubed
1 teaspoon basil
1/3 cup quick-cooking tapioca
1/2 pound baby carrots
1 stalk celery
1 cup beef broth
Toss stew meat with bread crumbs, salt and pepper. Place beef in Cooking Pan and
add remaining ingredients. Stir well. Cover and cook at 250°F for 4 to 5 hours or until
meat and vegetables are tender.
BAKED HAM
After washing turkey and patting dry, brush on the browning mixture and cook as
directed.
POT ROAST with VEGETABLES
2 to 3 lbs. beef chuck roast
20 baby carrots
4 medium potatoes, peeled and quartered
1 onion, quartered
2 teaspoons salt
1/2 teaspoon ground black pepper
1 cup beef broth
Place roast in bottom of Cooking Pan. Place vegetables around the sides of the
roast. Add salt, pepper and broth. Cover and cook at 250°F for 3 to 4 hours or until
tender.
12 15 pound fully -cooked smoked ham
2 cups water
1/2 cup honey
1/2 cup orange juice
1 cup brown sugar
Trim thick part of fat off of ham - down 1/4 inch. Score the remaining layer of fat into
diamond designs to help hold the glaze. Place ham on Roasting Rack . Place rack into
Cooking Pan in roaster. Pour 2 cups of water into pan. Cover and cook at 325°F for 1
hour. Combine the remaining ingredients to make the glaze. Remove the Cover and
spoon the 1/2 of the glaze over the ham. Cover and bake for another 1 hour. Remove
Cover and spoon remaining glaze over the ham. Replace Cover, increase temperature
to 400°F and bake for an additional 10 to 15 minutes to set the glaze.
BAKED POTATOES
4 to 8 baking potatoes
Wash potatoes and pierce with a fork. Place Roasting Rack in Cooking Pan. Stack
potatoes on rack, making sure they do not touch the sides of the Cooking Pan. Cover
and bake at 400°F for 1 to 1 1/2 hours. Pierce with fork to check for doneness.
11
12
RECIPES
RECIPES
CHICKEN TETRAZZINI
SPAGHETTI SAUCE
8 oz. spaghetti, broken and cooked according to package direction
2 cans (101/2 oz. each)condensed cream of mushroom soup
5 cups chicken, cut up
1 - lb. Grated American cheese
1/2 cup chopped red bell pepper
1/2 teaspoon black pepper
1 cup chicken broth
3/4 cup chopped onion
1/2 cup chopped green bell pepper
1 can (48 oz) tomato juice
4 cans (28 oz) diced tomatoes
2 cans (12 oz) tomato paste
2 tablespoons Worcestershire sauce
6 cups water
5 cloves garlic, minced
Combine all ingredients in Cooking Pan. Place in roaster and cover. Bake at 350°F
until done and heated through.
Set temperature of roaster to 350°F. Add all ingredients - adding liquids first and the
remaining ingredients. Stir well to combine. Cover and cook for 3 to 4 hours. Stir
occasionally.
CHILI
2 tablespoons oil
4 tablespoons canned, sliced hot peppers
2 lbs. beef chuck, cut into small pieces
1 lb. hot Italian sausage, (ground or
removed from casing)
1 lb. Sweet Italian sausage
28 oz. can diced tomatoes- un-drained
1 large green pepper, seeded and chopped.
1 tablespoon minced garlic
4 tablespoons chili powder
2 tablespoons ground cumin
1 teaspoon black pepper
2 16 oz. cans kidney beans
12 oz. can tomato sauce
2 15 oz. cans chicken broth
2 large onions, chopped
Set cook temperature to 400°F. Add oil to the Cooking Pan. Add the beef and
sausage. Cook for about 25 minutes. Add the onions, pepper, hot peppers and garlic.
Cook for about 5 minutes or until onions start to get tender.Stir in the remaining
ingredients. Reduce the temperature to 275°F .Cover and cook for at least 2 to 2 1/2
hours .Stir at least 2 to 3 times during cooking cycle.
PEPPER CRUSTED BRAISED SHORT RIBS
6 to 9 lbs. Beef short ribs
1/4 cup freshly cracked black pepper
2 teaspoon salt
Preheat oven to 450°F. Rub ribs with pepper and garlic, covering all sides. Sprinkle
with salt. Place ribs In Cooking Pan and cover. Cook 15 to 30 minutes, turning to
brown all sides. Pour broth over ribs. Recover, reduce heat to 300. Cook for about 2
to 2 1/2 hours or until ribs are tender.°F
PORK ROAST
1/2 teaspoon pepper
1/2 cup Italian dressing
1/4 cup Worcestershire sauce
Preheat roaster to 350°F. Place roast on Roasting Rack. Press minced garlic into
surface or the roast. Place rack inside of Cooking Pan. Combine the Italian dressing
and Worcestershire sauce. Brush onto roast. Cover. Cook for about 2 to 2 1/2 hours or
until done.
13
MEATBALLS
5 lbs. ground beef
1 cup Italian seasoned, fine, dry bread crumbs
5 eggs
1 1/2 teaspoons salt
1/2 teaspoon pepper
Preheat oven and Cooking Pan to 425°F. Combine all the ingredients - alternating dry
and then liquid with the ground beef.Form into 1 inch balls. Place meatballs in Cooking
Pan. Cover and cook 30 to 45 minutes or until done. Stir occasionally to brown all
sides.
Makes app. 75 meatballs.
If adding to Spaghetti Sauce(listed above)add meatballs to sauce during the last 1 to 1
1/2 hours of cook time for sauce.
CHEESECAKE
15 cloves of garlic
5 (14 oz. ) cans beef broth
1 cup red wine (optional)
4 to 5 lb. pork loin roast
4 cloves garlic
1 teaspoon salt
1/3 cup basil
1/4 cup oregano leaves
1 1/2 tablespoons parsley
1 tablespoon thyme
1 tablespoon salt
1 teaspoon pepper
You will need a 9 1/2 inch spring form pan .
6 8 oz packages of cream cheese, softened to room temperature
1 1/2 cups sugar
5 eggs
1 teaspoon vanilla
1 tablespoon lemon juice
Butter for the pan
1/2 cup graham cracker crumbs
Generously grease the bottom and sides of the spring form pan. Sprinkle the crumbs
over the bottom of the pan. In a large mixing bowl beat the cream cheese until smooth.
Add sugar and continue to beat until smooth.Add eggs, beating well after each
addition. Stir in vanilla and lemon juice. Pour into spring form pan. Cover the pan with
aluminum foil. (Note - be sure you cover with foil, this prevents condensation form the
roaster dripping into the cake). Pour 3 quarts of hot water into the Cooking Pan. Place
Roasting Rack into Cooking Pan. Place cake pan onto rack. Cover and bake at 325°F
for 1 1/2 hours. Carefully remove and let cool. Refrigerate thoroughly before serving.
14
Model KR450B
ONE (1) YEAR LIMITED WARRANTY
EURO-PRO OPERATING LLC warrants this product to be free from defects in material and
workmanship for a period of one (1) year from the date of purchase when utilized for normal
household use.
If your appliance fails to operate properly while in use under normal household conditions within the
warranty period, return the complete appliance and accessories, freight prepaid. For Customer
Service support, call 1 (800) 798-7398 or visit our website www.euro-pro.com. If the appliance is
found to be defective in material or workmanship, EURO-PRO Operating LLC will repair or replace
it free of charge. Proof of purchase date and $14.95 to cover the cost of return shipping and
handling must be included.*
The liability of EURO-PRO Operating LLC is limited solely to the cost of the repair or replacement
of the unit at our option. This warranty does not cover normal wear of parts and does not apply to
any unit that has been tampered with or used for commercial purposes. This limited warranty does
not cover damage caused by misuse, abuse, negligent handling or damage due to faulty packaging
or mishandling in transit.
This warranty is extended to the original purchaser of the unit and excludes all other legal and/or
conventional warranties. The responsibility of EURO-PRO Operating LLC if any, is limited to the
specific obligations expressly assumed by it under the terms of the limited warranty. In no event is
EURO-PRO Operating LLC liable for incidental or consequential damages of any nature
whatsoever. Some states do not permit the exclusion or limitation of incidental or consequential
damages, so the above may not apply to you.
This warranty gives you specific legal rights, and you may also have other rights which vary from
state to state.
*Important: Carefully pack item to avoid damage in shipping. Be sure to include proof of
purchase date and to attach tag to item before packing with your name, complete address and
phone number with a note giving purchase information, model number and what you believe is
the problem with item. We recommend you insure the package (as damage in shipping is not
covered by your warranty). Mark the outside of your package “ATTENTION CUSTOMER
SERVICE”. We are constantly striving to improve our products, therefore the specifications
contained herein are subject to change without notice.
OWNERSHIP REGISTRATION CARD
FOR CANADIAN CONSUMERS ONLY
Please fill out and mail the product registration card within ten (10) days of purchase. The
registration will enable us to contact you in the unlikely event of a product safety notification. By
returning this card you acknowledge to have read and understood the instructions for use, and
warnings set forth in the accompanying instructions.
RETURN TO EURO-PRO OPERATING LLC, 4400 Bois Franc, St-Laurent, QC, H4S 1A7
Model KR450B
______________________________________________________________________
Appliance model
______________________________________________________________________
Date purchased
Name of store
______________________________________________________________________
Owner’s name
______________________________________________________________________
Address
Printed in China
City
Prov.
Postal Code