1
North America
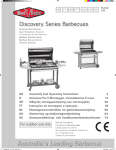
Discovery Series Barbecues
Assembly And Operating Instructions
For outdoor use only
Safety Warnings
WARNING: We want you to enjoy your barbecuing experience - Failure to follow the
instructions and observe the warnings provided in this operating manual could result in
serious bodily injury or damage to property. Please read these instructions completely
before assembly or operation of your barbecue.
NOTE TO INSTALLER: This manual must remain with the owner for future reference.
For Your Safety
For Your Safety
1. Do not store or use gasoline or other
flammable vapours or liquids in the vicinity of
this or any other appliance.
2. An LPG cylinder not connected for use shall
not be stored in the vicinity of this or any
other appliance.
If you smell gas:
1. Shut off gas to the appliance
2. Extinguish any open flame.
3. Open lid.
4. If odour continues, immediately call your gas
supplier or your fire department.
Safety Warnings
Warning: Contact your local municipality for any building
codes regulating the installation of outdoor barbecue
appliances. Outdoor installations must conform to local
codes or, in the absence of local codes, with the following:
USA: National Fuel Gas Code, ANSI Z223.1/NFPA 54
CAN/CGA: B149.1 Natural Gas & Propane Installation Code.
AUST: Australian Standards Code AS: 5601
as well as the requirements of any local council, gas,
electricity authority or other statutory regulation.
If this appliance is to be built-in, we recommend that the
installation be done in a suitable masonry structure and
carried out by a professional tradesperson. Other noncombustible material such as cement board with metal
framing may also be used.
Warning: accessible parts may be very hot. Keep young
children away. When handling hot components, the use of
protective gloves is recommended.
Do not install the gas cylinder beneath the barbecue unless
in conjunction with an approved trolley.
Keep the cylinder protected from heat.
Only one gas cylinder may be attached to the appliance at
any one time.
For built-in situations, allow adequate ventilation for the
barbecue and cylinder, and adequate protection from
adverse weather. Allow clear access to the entire gas
supply hose and regulator.
When using an LPG supply system in an enclosure,
ventilation must be provided. Keep ventilation opening of
any cylinder enclosure clear and free of any debris. Gas
vapour is highly explosive and can cause serious bodily
injury or damage to property if allowed to accumulate in a
confined space and ignited.
2
This is an outdoor cooking appliance. It must only be used
outdoors, and must not be used in a building, garage or
any other enclosed area.
Keep the barbecue area clear and free of combustible
materials, gasoline, and other flammable vapors and
liquids.
Keep the barbecue and cylinder well ventilated. Do not
obstruct the flow of air around the barbecue, as this is
required for proper combustion.
Caution: Electrical Warning
If your barbecue incorporates an electrical component,
such as a rotisserie, then it must be electrically grounded
in accordance with local codes. The electric cord must
be equipped with a three-prong (grounding) plug for your
protection against shock hazard and should be plugged
directly into a properly grounded three-prong receptacle.
Do not cut or remove the grounding prong from this plug.
Keep any electrical supply cord and the fuel supply hose
away from any heated surfaces.
If an external electrical source is utilised, this outdoor
cooking appliance, when installed, must be electrically
grounded in accordance with the local codes or, in the
absence of local codes with the following:
USA: National Electrical Code, ANSI/NFPA 70
CAN: Canadian Electrical Code, CSA C22.1
AUS: Aust Standards Code AS:5601
USA
Fuels used in gas or oil-fired appliances, and the products
of combustion of such fuels, contain chemicals known
to the state of California to cause cancer, birth defects
and / or other reproductive harm. This warning is issued
pursuant to the California Health & Safety Code Sec.
25249.6.
DO NOT
DO
•
•
•
•
• Spanner tighten all gas fittings as per instructions.
• Check all gas hoses and line connections for
damage, cuts or cracks each time the appliance is
to be used.
• Always leak-test with a solution of soapy water.
• Check main opening, throat and venturi to each
burner and pilot flame tube regularly for insect
nests (eg. wasp, ants or spiders). Nests are
dangerous and must be cleaned out thoroughly.
• Visually check burner flames to confirm lighting.
• Clean glass window of roasting hood model
regularly.
• Use your barbecue only on a level surface.
• Attend barbecue while cooking food.
• Preheat the barbecue for up to 10 minutes.
• After cooking turn barbecue to high for up to 10
minutes to burn off excess grease.
• Let the barbecue cool before replacing any lid or
cover.
• Regularly empty and clean grease receptacle.
• Keep children away from barbecue at all times.
Accessible parts may be hot.
• Have the gas cylinder filled by an authorised LPG
supplier.
• Refer to this instruction manual if in doubt
concerning assembly, installation, or operation.
• Use protective gloves when handling hot
components.
• Close the gas cylinder valve after each use.
• Clean the Grease/Drip tray regularly and clean the
appliance at least twice annually.
• Always fully open the roasting hood or remove the
metal lid of the appliance before lighting.
• Carefully follow the instructions relating to the
hose/regulator connection.
• Keep the barbecue and cylinder well ventilated.
• Do not use water on grease fires.
• DO NOT wear loose garments or sleeves when
using the barbecue.
• While cooking DO NOT leave children alone near
the appliance.
•
•
•
•
•
•
•
•
•
•
•
•
•
•
•
•
•
•
•
•
Lean over barbecue when lighting.
Leave cooking food unattended.
Delay lighting burners after turning gas on.
Spray or store aerosols in vicinity of barbecue
while in operation.
Store combustible materials, gasoline or
flammable liquids or vapours within 45 cm
(18”) of barbecue.
Use caustic based cleaning agents on the
barbecue.
Operate barbecue with any cover on.
Use plastic or glass utensils on the barbecue.
Operate barbecue in strong winds.
Attempt to dismantle or adjust control valves
or regulator.
Test for gas leaks with a naked flame.
Store gas cylinder indoors, or in any enclosed
area.
Lay the gas cylinder down.
Use barbecue indoors.
Move the appliance during use.
Allow the flexible gas supply hose or any
electrical cord to come in contact with any
heated surface of the appliance.
Allow children to operate this appliance.
Operate Window-Roasting Hoods in the rain.
Use charcoal or any other solid fuel in this
appliance.
Disconnect any gas fittings while the
appliance is operating.
Use a rusty or dented gas cylinder or cylinder
with a damaged gas valve.
Fill the gas cylinder beyond 80% capacity.
Smoke or use a naked flame near the gas
cylinder while disconnecting the gas line
between the appliance and gas cylinder.
Attempt to modify the appliance. Any
modification to this appliance may be
dangerous.
• Should the appliance go out for any reason, turn off all control knobs and the cylinder gas valve. Wait 5
minutes before attempting to relight the appliance.
• Some foods produce flammable fats and juices. Attend an operating barbecue at all times. Damage
caused by fat & grease fires is not covered by warranty. If a grease or fat fire should occur, immediately
turn off all control knobs and the gas cylinder valve until the fire is out. Remove all food from the
appliance.
• A leak test must be carried out prior to using the appliance for the first time and whenever the gas
cylinder is refilled or whenever the gas hose and regulator have been disconnected from the gas cylinder
or appliance.
3
Assembly Instructions
Before You Start
Note the tools you will need before you begin.
Remove any packaging material or protective plastic from
components.
Check for damaged or missing parts, and consult your retailer if
necessary.
adjustable spanner/
wrench
Phillips Head
Screwdriver
Mobile trolleys are optional. You should follow the separate instructions that came with the trolley
before assembling and installing your barbecue.
Check The Cross Lighting Channels
The cross lighting channels should already be in place. If they are not, or if they moved
during shipping, they need to be replaced as follows: place each cross-lighting channel
onto the back support panel. The keyed tabs on the bottom of each cross-light channel
fits into the slots on the burner support rail. The cross lighting channels are required for
all models.
Check The Burners
The burners should already be fitted to the
barbecue. If they are not, or if they moved
during shipping, they need to be replaced as
follows:
Remove the retaining clip from the burners.
Fit the burners, open end first, over the stem of the control
valves at the front of the barbecue. Lower the other end of
the burner so the lug locates into the corresponding hole at
the rear of the barbecue.
Replace the retaining clips into the burner lugs so the
burners stay in position. You need to do this from behind the
barbecue, underneath the back panel.
4
REFER TO LOCAL
NATURAL
GAS
REFER TO LOCAL
GAS AUTHORITY FOR CONFIRMATION OF GAS
LPG
PROPANE
GAS
TYPE IF IN DOUBT
Check that the gas type is correct for your type of gas. You will find the gas type label
on the side of your barbecue. If your barbecue is of the incorrect gas type, or if you
are unsure, consult your dealer before going any further.
GAS AUTHORITY FOR CONFIRMATION OF GAS
TYPE IF IN DOUBT
Check Gas Type
Assembly Instructions
Fit The Vaporizers
The Vaporizers are designed to vaporise fats and juices from
your food. The Vaporizers reduce flare-ups and help to add
that great barbecue flavour.
To install the Vaporizer(s), remove all plastic and/or cardboard
packaging material and place the Vaporizer into position on
the right hand side of the barbecue. The Vaporizers must be
fitted to the same side of the barbecue as the grill. They will
not work if fitted under the solid plate.
Note: Vaporizer grid style may
vary between barbecues.
Fit The Cooking Plates And Grills
We recommend fitting the solid plate to the left-hand side of
the barbecue frame (with the drain hole to the extreme left).
The grills can be fitted to any side of the barbecue frame.
IMPORTANT: the grills must always be positioned over the
Vaporizers.
This appliance is designed to ventilate air through the
barbecue while it is operating. Do not fit additional cooking
plates to the top of the barbecue. Doing so will prevent the
unit from ventilating and will cause serious damage to the
barbecue.
Set Up The Grease Tray
Assemble the grease tray as shown in the diagram
below. Attach the waste tray brackets to the grease
tray using the screws, nuts and washers provided.
Slide the smaller waste tray into place.
You may line the grease tray with a sheet of aluminium
foil if you wish. Remember to place a hole in the
centre so the grease can flow into the smaller waste
tray.
5
Connection to Barbecue & Gas Supply
Before You Begin
If you have not done so already, check the gas type label as described on page 4.
This appliance must not be installed under or on any combustible material. Minimum clearance from
combustible materials to all sides of the appliance is 45 cm (18”).
The appliance must be tested for safe and proper operation on completion of installation.
The flexible PVC hose assembly supplied must not be exposed to temperatures in excess of 60°C (140°F). DO
NOT expose to the sun’s direct heat and DO NOT allow the hose to come in contact with the hot surface of
the barbecue body.
This barbecue is not approved for use on recreational vehicles or marine craft.
Check with your local gas supplier to ensure that your barbecue gas category, and information on the
appliance data plate is correct for the gas supply in your country. You will find the gas type label on the side of
your barbecue. You should also refer to the technical information on the back of this manual. If your barbecue
is of the incorrect gas type or pressure, or if you are unsure, consult your dealer before going any further.
Mobile Installation - Portable LPG
Recommended minimum LPG cylinder capacity for use with this appliance
is 4kg / 9 lb. Maximum portable LPG cylinder capacity for use with this
appliance is 9 kg / 20 lb. Ensure the cylinder valve and barbecue control
knobs are all off. Remove the protective cap from the cylinder if present.
The hose must not exceed 1.50m in length.
Connect the hose and regulator to the gas inlet adaptor supplied. This adaptor
is then fitted to the inlet of the barbecue, located on the right hand side of
the unit. Ensure the hose does not twist or kink.
Secure all joints spanner (wrench) tight but do not over-tighten. Proceed to
leak test.
Gas Cylinder Safety Information
The Gas cylinder must be constructed and marked in accordance with specifications for LP Gas Cylinders of
the:(USA) U.S. Dept. of Transportation (DOT) or the National Standard of Canada, CAN/CSA - B339, Cylinders,
Spheres or Tubes for the transportation of dangerous goods.
The gas cylinder must be provided with a listed overfilling prevention device. The cylinder must be provided
with a cylinder connection device compatible with the connection for outdoor cooking appliances.
The gas cylinder used must incorporate a safety collar to protect the valve assembly.
Gas cylinders must be stored outdoors, out of reach of children, and must not be stored in a building, garage
or any other enclosed area.
IMPORTANT:
• The cylinder supply system must be arranged for vapour withdrawal. This normally means the cylinder
must be upright.
• Do not store a spare LP-gas cylinder under or near this appliance.
• Never fill the cylinder beyond 80% full.
If these directions are not followed exactly, a fire causing death or serious injury may occur.
The gas cylinder supply valve must be turned off when the appliance is not in use.
6
Connection to Barbecue & Gas Supply
Disconnecting The Gas Supply
Always ensure that all gas controls on the appliance and on the cylinder are off before disconnecting.or
removing the gas cylinder. Do not smoke or use a naked flame near the appliance or gas cylinder while
connecting or disconnecting the gas line.
If installed in an enclosure, remove the gas cylinder from the enclosure before disconnecting the gas line from
the appliance. Tighten all connections before placing the gas cylinder back in its enclosure.
Fixed Installation - Portable LP Gas/Propane.
Connect the gas supply line to the barbecue inlet located on the right side of the appliance using either hard
plumbing, or a flexible hose connected to a bayonet point. Refer to your local installation code for pipe sizing
details. Secure all joints spanner tight but do not over-tighten. Proceed to leak test.
Test gas pressure by removing the last burner from the left hand side of the barbecue and attaching a hose
and pressure gauge to the end of the gas valve. Turn on 2 burners and check the pressure.
For mobile trolley installations that use flexible hosing to connect to a static propane supply, a chain or similar
restraining device must be fitted to prevent strain on the gas supply line. One end of the chain should attach
to the barbecue; the other end should attach to a fixed structural point close to where the hose connects to
the gas piping. The chain must be at least 30% shorter than the gas supply line. In this way, if the barbecue
is accidentally moved, the chain stops the barbecue from stretching the hose.
Secure All Joints And Leak Test
The gas leak testing procedure should be conducted every time a gas cylinder is refilled and
reconnected to the appliance, or after any new gas connection is made. Never use a naked
flame to check for gas leaks.
In a small container, mix up a solution of water and detergent or soap. Mix the solution well.
Make sure that the gas supply valve on the gas cylinder or the shut off valve on the supply line is
turned on.
Make sure that the gas control valves on the appliance are all turned off.
Using a brush or spray bottle apply the solution to the gas line and each joint in
the gas line, including the hose and regulator.
Bubbling of the solution will indicate that there is a leak present.
Re-tighten or re-seal any joints that are leaking.
If a leak persists contact your distributor or the manufacturer for assistance.
Check Proper Burner Operation
Following operating instructions light each burner and
check for a clear blue flame with just a tip of yellow.
Excess yellow tipping can be adjusted using the screw
on the side of the burner. Turn the screw in an anticlockwise rotation to remove the yellow. If you are unable
to achieve correct operation, consult your dealer.
x
7
Using Your Barbecue
Before You Light The Barbecue
Perform the following checks
• Make sure all gas connections are tight and leak tested. Gas regulators that are fitted with a handtightening wheel should be checked to ensure that the connection is secure. Some regulators do not have
a hand-tightening wheel: these must be tightened with a spanner or wrench.
• Ensure the cooking surfaces are clean and hygienic
• Check the control knobs are in the off position
• Check that the gas supply is turned on
• Ensure the hood of the barbecue and the lid of any side burner are up. If you do not, gases can build up
inside the hood and create a dangerous situation.
• The hose and regulator supplied with this barbecue must be used at all times whilst operating this
barbecue. Inspect the hose and regulator for cracks or any sign of wear or damage. If there is excessive
abrasion or wear, replace only with a genuine BeefEater hose and regulator.
Lighting The Barbecue
Your barbecue is equipped with a safety feature that prevents the burners from being
accidentally turned on. You must push the knob inwards to disengage the lock and allow
the knob to rotate.
1. Push in and hold the far right control knob down while turning slowly in a counterclockwise direction until the starter mechanism engages at the two o’clock position.
At this time the gas will start to flow.
2. Hold the control knob in while continuing to turn the knob toward the High or twelve
o’clock position.
3. The starter mechanism will click and the main burner will now light. Continue turning
the knob slowly until it rests in the twelve o’clock position.
If the burner is alight, release the knob.
The other burners can now be lit successively, from right to left
If the burner does not light
Keep the control knob pushed in and turn the control knob in a clockwise
direction to return to the Off position. Wait 5 minutes for the gas to disperse
and then repeat steps 1-3. If you cannot light the burners, call your retailer
before proceeding.
Manual Lighting
Press and turn the right hand control knob anti-clockwise to the High position,
then light the right hand burner immediately through the gap between the
front of the drip tray and the barbecue body.
Controlling The Burners
The control knob can now be turned to the desired heat
setting, Low, Medium or High. The control knob does not
need to be pushed in while selecting the heat setting.
8
Using Your Barbecue
Preparing The Plates And Grills
The porcelain enamel coated grills supplied with your barbecue do not require seasoning before they are
used: simply wash them thoroughly with soapy water, dry, and place on the barbecue.
To Turn Off The Burner
Push in and hold the control knob while turning in a clockwise direction until the off
position is reached.
After Use
It is a good idea to leave the barbecue on for about 10 minutes after you have finished cooking. This helps
to burn away any excess food residues and oil, and makes cleaning easier.
1. Be sure to turn off all control knobs as well as the cylinder valve.
2. Allow barbecue to cool.
3. Clean the drip tray and cooking surfaces.
Direct Cooking Method
Commonly used for traditional barbecuing. Place food over the lit grill section. Excess flaring may
occur so care must be taken while cooking. Check inside the roasting hood regularly. The direct cooking
method is recommended for steaks, chops, sausages, and hamburgers.
Indirect Cooking
This method of cooking applies only if you have a roasting hood.
Indirect cooking involves little or no heat directly underneath the food. Instead, the food is placed on the
grill, the burners below the food are turned off, and burners on either side are used. The hood is closed
to trap heat and moisture. With this method, heat circulates around the food, cooking by convection. By
trapping the vapour inside your “outdoor oven”, the cooking vapour will fall back on the food on all sides,
not just from underneath. The food cooks more evenly, and stays moist in the process.
Indirect cooking is similar to using a conventional oven and is recommended for rotisserie cooking, roasts,
poultry, casseroles, vegetables and whole fish.
If you are cooking a roast, it is always a good idea to use a roast holder and baking dish. Always use a
baking dish with a depth greater than 35mm. Shallower trays may fill quickly and overflow, which may
cause a fat fire.
9
Getting The Most From Your Barbecue
Preheating Your Barbecue
Like an oven, preheating your barbecue before cooking produces better results. Because your hood retains
heat so efficiently, preheating your barbecue is quicker with the hood down.
Turn the outside two burners to high. Close the hood, and allow to preheat for about 8 minutes, Then reduce
the burner settings to achieve and maintain the required temperature, by following these guidelines.
Maintaining The Right Cooking Temperature
Do not exceed the temperature warning on the
temperature gauge. Operating the barbecue
above this temperature may cause damage to
the appliance. Your hood is designed to keep
the heat in, so requires constant monitoring.
These two charts tell you how hot and how
long to cook various types of meat, and the
approximate burner settings to help you achieve
these results.
Type of Meat
Two burner
Both burners slightly below medium
Three burner
Middle burner off
Two outside burners to medium
Four burner
Two inside burners off
Two outside burners to medium
Five burner
Three inside burners off
One outside burner to high
Other outside burner to medium
Cooking Temperature
Approximate Cooking Times
Beef
180°C / 355°F
45-55 min per kg
20-25 min per lb
Lamb
180°C / 355°F
45-55 min per kg
20-25 min per lb
Pork
170°C / 340°F
55-60 min per kg
25-30 min per lb
Veal
160°C / 320°F
40-50 min per kg
18-23 min per lb
Poultry
180°C / 355°F
40-50 min per kg
18-23 min per lb
Seafood
150°C / 300°F
20-30 min per kg
9-15 min per lb
You may find it useful to purchase a meat thermometer to help take the guess work out of cooking.
Meats such as beef, lamb, veal and pork should be about 70ºC / 160ºF when medium. Chicken and Turkey
should be 85-90ºC / 185-195ºF.
Do not use more than 2 burners on high at any one time. As a
guide, for a 4 burner barbecue in moderate weather:
Two burners on low produces
150°C / 300°F
Two burners on medium produces
195°C / 385°F
Two burners on high produces
240°C / 460°F
During cold or windy conditions, more heat is required.
Finally, resist the temptation to keep opening the hood while
cooking. This will help to maintain a constant temperature, and
minimise cooking time.
10
Do not allow your barbecue
to overheat, as this may
damage some components.
Cleaning Your Barbecue
Vitreous Enamel Surfaces and Barbecue Control Panel
Although porcelain enamel will keep its lustrous finish even under adverse conditions, it still needs regular
cleaning. After the appliance has been used, wash down the surfaces with hot soapy water. Caustic cleaners
should be avoided. For barbecues near the ocean or salt-water environment, more frequent cleaning and
servicing should be conducted. Wash regularly, rinse and then dry before covering. (In a salt water or marine
environment, more rapid deterioration can be expected which is not covered by warranty).
Plates and Grills
Many food acids, marinades, juices and sauces contain highly acidic elements that will slowly attack the
surface of the plates and grills if not removed after cooking.
• After use, remove all solid material from the cooking surfaces using a brass bristle brush or plastic scourer.
Brushes specifically designed for this purpose can be purchased from your BeefEater retailer. Wipe off
remaining residue with a paper towel.
• Gently wash the surface of the grills with a soft sponge and a solution of hot water and a mild dishwashing
liquid. Do not use highly caustic, harsh or abrasive chemical cleaners to clean the cooking grills. Always
check the manufacturer’s recommendations for the cleaner prior to use.
• Coat the grills with a layer of cooking oil. This will help protect the surfaces between uses.
• For porcelain enamel coated cooking surfaces, do not use any metal tools to clean the surface. Use only a
brass bristle wire brush to remove hard deposits.
Do not clean the cooking surfaces in a dishwashing machine. For hard deposits and heavy grease, do not use
steel wool or metal scrapers. Use concentrated detergent or domestic cleaning powders.
Drip Tray
Replace aluminium foil on main drip tray (if used) and clean both waste trays at regular intervals to prevent
grease build-up, which could result in a grease fire and void the barbecue warranty.
Never remove the grease tray while the barbecue is hot. Always remove and clean the grease tray after the
unit has cooled down.
Burners
burner ports
throat
• Check main opening, throat and venturi to each
burner regularly for insect nests (eg. wasp,
main opening
g
ants or spiders). Nests are dangerous and
must be cleaned out thoroughly.
• Remove burners periodically and scrub clean
with soapy water and a wire brush making
sure that the ports are free of obstructions. Replace burners in the correct position and dry by lighting each
one to avoid subsequent corrosion.
A clogged burner can lead to a fire beneath the grill.
Storing Your Barbecue
When storing barbecue for extended periods, be certain all controls and cylinder valves are turned off.
If storing the barbecue indoors remove gas cylinder and store the cylinder in a ventilated area outdoors.
Gas cylinders must be stored outdoors, out of reach of children and must not be stored in a building, garage
or any other enclosed area.
The barbecue should be covered when not in use. eg a polyester or vinyl barbecue cover.
Frequently check and tighten all nuts and bolts on the barbecue and trolley
11
Service And Maintenance
This appliance should be checked and serviced by an authorised service person every 2 years to ensure the
appliance remains in a safe operating condition. (These services are not covered by warranty). Replacement
parts are available from your authorised BeefEater Dealer
Each use
Every 6
months
By authorised service
agent every 2 years
Check all hoses for cracks and leaks
Check that all gas connections are tight
Clean entire barbecue thoroughly
Check and tighten all bolts on barbecue and trolley
Clean and inspect Vaporizers
Clean and inspect barbecue burners
Clean and inspect gas injectors and control valves
Check working of ignition system
Trouble Shooting Guide
Problem
Barbecue will not light
Cause
Ignition system not working
Check
Check to see visible spark at starter probe - if no
spark is present when control knob is turned then
the unit may need to be serviced or replaced.
Contact your BeefEater dealer.
Check that there is a visible flame coming from
the pilot ignition tube.
Turning on gas control too
quickly
No gas flow
Check that the pilot ignition tube is not blocked by
spider webs or insect nests.
Allow at least 5 seconds for gas to flow through
burner before ignition
Check that valve on gas cylinder is turned on.
Check that burner ports are free of obstructions
Burners not assembled
correctly
Burner ports or throat
blocked
Barbecue lights but goes Fuel supply turned off
out soon after starting
Gas cylinder low or empty
Kink in gas hose
Wind or breeze affecting
operation
Burners will not cross
light from one to the
other
Low flame level or low
heat output
12
Check that all gas injectors are clean and free of
obstructions
Check that burners are correctly positioned in the
barbecue frame.
Check that the burner ports are not blocked by
spider webs or insect nests. Clean out as required
Turn on gas valve at cylinder
Refill cylinder with gas
Check that the gas line is not kinked or twisted
Ensure that the appliance is located out of the
way of wind
Check that cross light channel is in place
Check that burner ports are free of obstructions.
Check you are running on correct gas
Check gas injector size is correct
Technical Specifications
Barbecue Dimensions
1.30 cm
A
245mm
A
x2
19 3/8”
493mm
x3
26”
660mm
x4
32 1/8”
816mm
x5
38 1/4”
973mm
Built-in Dimensions
x2
20 5/8”
B
523mm
x3
27 1/8”
690mm
x4
33 1/4”
846mm
x5
39 1/2”
1003mm
Gas Consumption
BTU/hr
MJ/hr
kW
g/hr
x2
30 400
32
8.9
640
x3
45 600
48
13.3
960
x4
60 800
64
17.8
1,280
x5
76 000
80
22.2
1,600
13
Accessories Available
Your retailer can advise on the range of BeefEater accessories available to help
you take full advantage of the barbecue cooking opportunities available with
your roasting hood.
Apron and Mitt Set
Chef Set
Polyester/Vinyl Cover
Baking Dish
Meat Thermometer
Motorised Rotisserie
BeefEater Sales International
Camco Inc.
P.O. Box 450, Chester Hill, NSW, Australia 2162
Phone: +61 2 9755 7912 Facsimile: +61 2 9755 7913
E-mail: [email protected]
Website: www.beefeaterbbq.com
Service: 1-800-361-3400
Parts: 1-800-261-3055
Customer Service: 1-800-561-7253
1 Factory Lane,
Moncton, New Brunswick, Canada
EIC9M3
4.5 DISBBQINS_F/E 1.0