1
EIR208 Series Quick Start
Guide
QUICK START GUIDE
Package Contents
•
•
•
•
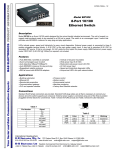
EIR208 Series Industrial, Unmanaged, Ethernet Switch
Quick Start Guide (One per shipment)
Power Terminal Block (installed)
Fiber Optic Dust Covers (installed on fiber optic models)
If any item is missing or damaged, contact B&B Electronics
for a replacement
1. Slide and hold the DIN clip toward the bottom of the
switch. Angle the top portion of the DIN mount over the
top of DIN Rail.
2. Move the switch so that it is parallel with the DIN Rail.
3. Let go of the DIN Clip. The spring should return it to its
original position.
Attach Power Leads
External Supply Required
Warning: Work Safe – Equipment
damage or electrical shock hazard
exists. DO NOT ATTACH OR REMOVE
LEADS WITH THE POWER SUPPLY
ENERGIZED!
Front Panel
EIR208 (3 Fiber, 4 RJ45)
B&B ELECTRONICS
EIR208 1308qsg-1/2
© 2008 by B&B Electronics. All rights reserved.
EIR208 (8 RJ45)
1
2
3
3
4
Power Terminal Block
PWR LED
Fiber Optic SPD LED
Fiber Optic LINK LED
RJ45 LINK LED
4
5
6
RJ45 SPD LED
RJ45 Ports
Fiber Ports
2 Position, Removable
ON When Power Applied
Normally OFF (100BaseFx)
ON when Fiber Port Linked
ON when RJ45 Port Linked
Flashes When Data Transmitted
ON if 100 mbps
Number depends on model
Number and type depends on Model
1. Loosen the screw to open the terminal block lead clamp.
2. Insert the power lead. TB will accept 12-28 AWG wire.
3. Tighten the screw to close the terminal block lead clamp.
Ensure the clamp holds the lead securely. However, do not
over tighten.
NOTE: For Replacement Terminal Block OrderPart #7444.
Attach RJ45 Cable
DIN Rail Mounting
Female RJ45
1. Auto MDI/MDI-x is
supported. A straight
through or cross-over
cable may be used.
2. 10/100BaseT auto
negotiation and full/halfduplex are supported.
MDI Cable Pinout
Pin
Signal
1
Tx+
2
Tx3
Rx+
6
RxMDI-X Cable Pinout
Pin
Signal
1
Rx+
2
Rx3
Tx+
6
Tx-
International Headquarters: 707 Dayton Road PO Box 1040 Ottawa, IL 61350 USA
815-433-5100 Fax 433-5104 www.bb-elec.com [email protected] [email protected]
European Headquarters: Westlink Commercial Park Oranmore Co. Galway Ireland
+353 91 792444 Fax +353 91 792445 www.bb-europe.com [email protected] [email protected]
EIR208 1308qsg-2/2
© 2008 by B&B Electronics. All rights reserved.
QUICK START GUIDE
Attach Fiber Optic Cable
(if equipped)
Warning: Work Safe – Fiber Optic
equipped models are Class I
Laser/LED devices. To avoid causing
serious damage to your eyes, DO NOT
STARE DIRECTLY INTO THE LIGHT.
1. Slider Guide
2. Slider Ridges
3. Slider
1.
2.
3.
B&B ELECTRONICS
Mechanical Diagram
Ensure your fiber optic cable is terminated with
the correct connector type. EIR208 switches use
SC or ST connectors.
Fiber optic type for each port is located on the
product’s side label. When connecting the cable
to the switch, be sure to line up the slider guide
on the cable and switch connectors.
Connect the fiber optic transmitter to the
downstream device’s receiver and vice-versa.
Fiber Optic Cable Information
Mode and Distance
Type
Wavelength
Multi-mode (2 km)
62.5/125 µm
1310 nm
Single-mode (15 km)
9/125 µm
1310 nm
Single-mode (40 km)
9/125 µm
1310 nm
Single-mode (80 km)
9/125 µm
1550 nm
Multi-mode (2 km)
Single-mode (15 km)
Single-mode (40 km)
Single-mode (80 km)
Output Power
-19 to -14 dBm
-15 to -8 dBm
-5 to 0 dBm
-5 to 0 dBm
RCVR Sensitivity
≤ -32 dBm
≤ -32 dBm
≤ -34 dBm
≤ -34 dBm
Installation Complete
1. When the network cables are attached and power
is applied, installation is complete.
2. The switch will automatically discover network
devices, populate its MAC address table, and
pass traffic to the appropriate ports.
International Headquarters: 707 Dayton Road PO Box 1040 Ottawa, IL 61350 USA
815-433-5100 Fax 433-5104 www.bb-elec.com [email protected] [email protected]
European Headquarters: Westlink Commercial Park Oranmore Co. Galway Ireland
+353 91 792444 Fax +353 91 792445 www.bb-europe.com [email protected] [email protected]