1
2675 SERIES
WHIRLPOOL/BATHING POOL
INSTALLATION INSTRUCTIONS
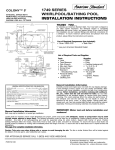
COLONY™ 5'
HIGH GLOSS ACRYLIC
SHOWN LESS ALL FITTINGS
305 mm
(12)
216 mm
(8-1/2)
THANK YOU...
PROVIDE ACCESS TO PUMP FOR
SERVICING ON ALL INSTALLATIONS
1524 mm
(60)
for selecting an American Standard bath. Your new
bath is shipped to you after careful inspection. The
whirlpool version is completely assembled with pump,
motor, and system piping. All you need to finish the
installation are your selected fittings and electrical
connections for a whirlpool.
OUTLINE OF CUTOUT
1486 mm x 794 mm
(58-1/2 X 31-1/4 )
19 mm
(3/4)
FINISHED
WALL
SEE FITTING
SPECS FOR
DIMENSIONS
To insure maximum performance and pleasure from
this product, please follow the instructions and
cautions.
(1) AIR VALVE
229 mm
(9)
832 mm
(32-3/4)
416 mm
(16-3/8)
C/L OF
SUPPLIES
ON/OFF
SWITCH
PUMP
CUTOUT IN FLOOR FOR DRAIN
List of Required Components (not included):
• Drain 1583.470*
• Bath Filler*
* see your American Standard Distributor
(6) JETS
38 mm
(1-1/2)
C/L OF
SHOWER ARM
OPTIONAL TO
FINISHED FLOOR
USUALLY BETWEEN
1651 & 1981mm
(65 & 78)
C/L OF
OVERFLOW
79 mm
(3-1/8)
305 mm
(12)
102 mm
(4)
C/L OF
SPOUT
■ LEVELING STRINGER
NOT FOR SUPPORT
502 mm
(19-3/4)
464 mm
(18-1/4)
ROUGH
FLOOR
BATH
SUPPORT
MATERIAL
List of Required Tools and Supplies:
C/L OF
VALVES
38 mm
(1-1/2)
List of Optional Components (not included):
• Tile Bead Kit 751755-100*
• Apron Kit*
Tools
• Level
• Tape Measure
• Pipe Wrench
• Slip Joint Pliers
• Screw Driver
• Standard
Woodworking Tools
• Personal Safety
Equipment
• Caulking Gun
Supplies
• Nails
• Putty
• Caulking (waterproof)
• 2 x 3 or 2 x 4
Stringers
• Drop Cloth
• 15 amp GFI
Outlet
• Cement, Plaster,
Grout
GENERAL INSTALLATION INFORMATION
1-1/2 N.P.T.M.
THREADS
1-1/2 O.D.TAILPIECE
70 mm
(2-3/4)
117 mm
(4-5/8)
GENERAL SPECIFICATIONS FOR 2675 WHIRLPOOL
INSTALLED SIZE
60 x 32-3/4 x 19-3/4 In.(1524 x832 x 502mm)
95 Lbs. (43 Kg.)
WEIGHT
604 Lbs. (275 Kg.)
WEIGHT w/WATER
61 Gal. (230 L.)
GAL. TO OVERFLOW
42 Gal. (159 L.)
WHIRLPOOL MIN. OPERATING VOL.
20 x 39 In. (508 x 991mm)
BATHING WELL AT SUMP
27-1/2 x 56 In.(699 x 1422mm)
BATHING WELL AT RIM
14-1/4 In. (362mm)
WATER DEPTH TO OVERFLOW
44 Lbs./Sq. Ft. (213 Kgs/Sq. m.)
FLOOR LOADING
(PROJECTED AREA)
15.6
PTS.
CUBE (FT 3 )
29.6
Carefully uncrate, peel-out protective film and
inspect your new bath for any shipping damage. If
such damage is found, report it to your vendor
immediately.
After inspection and during installation, protect the bath
from construction damage. After installation, and before
enclosing with wallboard, tile, etc., water test the unit
and check for leaks.
If a whirlpool, do not make modifications to the whirlpool
system or remove pump from factory mounting. This
could adversely affect the safety and performance of the
whirlpool and void the warranty. Do not handle or move
the whirlpool by the pump, motor, or piping system.
1.1 HP, 9.9 AMPS, 120V.
Fittings (bath filler, shower arm, etc.) are not provided
with the bath and must be ordered separately. Framing
and enclosing materials are provided by others. Check
for availability of optional American Standard wall tiling
bead (required for recess installations).
NOTE: Deck-mounted fittings are not recommended.
Protect all finished surfaces of the whirlpool during
construction and installation using a drop cloth.
WHIRLPOOL ELECTRICAL SPECIFICATIONS
PUMP
FOR AFTER-SALES SERVICE CALL 1 (800) 442-1902 WEEKDAYS.
752445-100 Rev. E
WARNING! Do not lift whirlpool by the piping harness at any time.
© American Standard Inc. 2003
All product names listed herein are trademarks
of American Standard Inc. unless otherwise noted.
INSTALLATION AND FRAMING INSTRUCTIONS
The variety of installations possible for this whirlpool may require framing procedures other than those shown. Locate studs
as required. Ensure roughing-in dimensions are proper, plumb and square. Provisions must be made in all installations for an
access opening for servicing the pump and controls. It is strongly recommended that an additional opening be provided for
access to the drain components.
NOTE: The apron should not be used as the primary access opening.
1. As shown in Fig. 1, mark the position of the underside of the deck by tracing a line onto the studs at the height indicated,
using a level or other suitable straight edge.
2. With the top of the 2 x 4 stringer touching the traced line, attach the stringer to the studs.
3. Install drain components to the whirlpool following the manufacturers instructions. Before replacing your whirlpool for final
installation, be certain that an opening has been provided in the sub-floor for the drain. See the roughing-in drawing for
suggested opening size and location dimensions.
4. This bath must be supported along its entire bottom in all types of installations. We recommend the use of mortar or
plaster as bedding material (sand is not recommended). Apply enough bedding to support the complete bottom of the
bath. After the bedding has been poured, and before it sets, lower the bath into place until the rim is leveled against the
leveling stringers (see "Typical Installation Methods"). The rim of the bath MUST NOT support weight. Allow the bedding
material to completey harden before applying weight to the rim or bottom of the bath. Any finish material such as tile or
wall board must be self-supporting if it contacts the deck of the bath.
FIG. 1
TILE
WALLBOARD
SEALANT
TILE
BEAD
STRIP
BATH
ADHESIVE
464mm
(18-1/4)
LEVELING
STRINGER
NOTE: Tile bead kit not included and must be
purchased separately.
TYPICAL RECESS INSTALLATION
TYPICAL PIER TYPE INSTALLATION
AS DESIRED
794mm
(31-1/4)
CUTOUT
1486mm
(58-1/2)
CUTOUT
464mm
(18-1/4)
464mm
(18-1/4)
1527mm
(60-1/8)
m
9m )
81 -1/4
m
2
3
2m )
(
83 -3/4 H
T
2
( 3 WID
B
TU
305mm
(12)
305mm
(12)
AS DESIRED
LEVELING
SURFACE
WATERPROOF
SEALANT
L E V E L ING
S TRING E RS
610mm
(24)
610mm
(24)
BATH
ACCESS PANEL
WHIRLPOOL ONLY:
UNLESS AN ACCESS OPENING OF AT LEAST
12" X 24" (305 X 610MM) IS PROVIDED,
WARRANTY SERVICE WILL NOT BE PERFORMED.
WHIRLPOOL ONLY:
UNLESS AN ACCESS OPENING OF AT LEAST
12" X 24" (305 X 610MM) IS PROVIDED,
WARRANTY SERVICE WILL NOT BE PERFORMED.
752445-100 Rev. E
(2)
ELECTRICAL INSTALLATION INSTRUCTIONS
All wiring must be performed by a licensed electrician in accordance with the national electrical code and all other
applicable codes.
WARNING:
When using electrical products, basic precautions should always be observed, including the following:
1. DANGER: RISK OF ELECTRIC SHOCK
Connect only to a circuit protected by a ground-fault circuit interrupter.
2. Grounding is required. The unit should be installed by a licensed electrician and grounded.
3. Install to permit access for servicing.
4. All building materials and wiring should be routed away from the pump body and heater (if equipped).
The whirlpool should be installed on a 120 vac, 15 amp dedicated circuit. The circuit should be hard-wired from the
electrical power supply panel. The circuit must be a three (3) wire circuit from the electrical supply panel. A grounded
neutral wire and a third wire, earth ground, are essential.
ELECTRICAL INSTALLATION
15 AMP
GFCI
OUTLET
WHIRLPOOL MOUNTED
AIR SWITCH OR
WALL TIMER
BLACK
WHITE
120 VAC
PUMP/MOTOR
GND.
ELECTRICAL DIAGRAM
READ AND FOLLOW ALL INSTRUCTIONS
752445-100 Rev. E
(3)
WIRE SELECTION GUIDE
Maximum distance from
fusebox to motor
Motor
Hi-Performance
Rating
50'
1.1
12
100'
150'
200'
115V Power Line
12
10
8
The sizes shown on this
chart are recommendations
for copper conductors
only. Always follow
local and nation al
electrical codes
DRAIN CONNECTION AND SYSTEM TEST
Using recommended drain opening, connect whirlpool drain to waste line. Tighten all drain joints securely. Check the
pump couplings and make sure they are hand-tight. Clean the whirlpool and fill with water to a point 2" above the top of
the highest jet. Recheck the pump couplings and make certain that they are not leaking. (Although the pump couplings
are factory tightened and inspected, some loosening may have occured during transit.) Make sure the whirlpool is
connected to the electrical supply and turn the whirlpool on. Check for leaks around all piping connections while the
whirlpool is running.
POST INSTALLATION CLEAN-UP
Remove all construction debris from bath. Tile grout can be removed with a wooden popsicle stick or tongue depressor.
Do not use wire brushes or any other metal implement on bath surface.
Post installation clean-up generally can be completed using warm water and liquid dishwashing detergent. Stubborn dirt or
stains may be removed using granular Spic and Span® mixed with water.
Painter's naphtha can be used to remove excess adhesives and/or wet oil-base paint.
HARSH CHEMICALS SHOULD NEVER BE USED ON ACRYLIC SURFACES.
Abrasive cleaners must not be used since they will scratch and dull the surface. Dulled areas can be restored by rubbing
with a white automotive-type polishing compound and waxing with a liquid wax.
752445-100 Rev. E
(4)
SPIC AND SPAN® IS A REGISTERED TRADEMARK OF PROCTER & GAMBLE