1
1
Connect the Modem to a Computer
4 Plug the larger end of the
Power
Outlet
Step
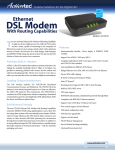
1 Get the DSL Modem from
Step
Power Cord into a Power Outlet.
your DSL Quick Start Kit and take
it out of the bag.
Power
Cord
12 Plug the other end of the
Step
computer is turned on. Then, plug
the other end of the Yellow Cable
into the Ethernet Port on the
back of the computer.
DSL Cable into the Phone Jack closest
to your computer.
An Ethernet Port looks similar to
a regular Phone Jack, but is
slightly larger.
5 Make sure the Power Light on
Step
2 Get the Power Cord
8 Make sure that your
Step
13
from your DSL Quick Start Kit.
Make sure All Devices with
the same phone number as your DSL
Line have Phone Filters. This includes
telephones, fax machines, caller ID
boxes, satellite TV receivers,TiVo devices,
and answering machines.
9 Make sure that the Ethernet
Step
light on the Modem is Green. This may
take a few moments.
Note: The DSL light may blink.
example of a typical inline
phone filter
14 Make sure that the Power
Step
Note: Your Power Cord may look different.
6 Get the Yellow Cable.
Step7 Plug one end of the Yellow
Note: If the Ethernet Light does NOT turn green, make sure the Yellow Cable is
properly connected on both ends.
Step
3 Plug the smaller end of
Step
the Power Cord into the Black
Port on the back of the Modem.
Black
Cable
Step
the Modem is SOLID Green.
Step
Phone
Port
Cable into the Yellow Port on the
back of the DSL Modem.
Power
Cord
Black
Port
Yellow Port
and DSL Lights are solid Green. This
may take up to 30 seconds.
Yellow
Cable
10 Get the Black or Gray DSL
Step
Gray Port
Note: If the DSL Light continues to blink, make sure you received notification
from your DSL Internet Service Provider that your DSL service has been activated.
Cable from your DSL Quick Start Kit.
11 Plug one end of the DSL
Step
Black
Cable
Cable into the Gray Port located on
the back of the Modem.
Flip this Quick Start Guide over to continue
NEXT
2
Configure the Modem
4
Step
The Modem is now
detecting your Internet provider’s
settings.This process can take up
to 3 minutes.
1 Open a Web browser
Step
(Netscape Navigator or Internet
Explorer, for example). In the address
bar, enter http://192.168.0.1
then press Enter on the keyboard.
DSL
Modem
5 In the next window, enter
Step
Note: When you open your web browser you may get a page cannot be displayed
error. This is normal and will not effect the instructions in step 1.
Model# GT701D
the User Name and Password
provided by the ISP. Click Next.
Quick Start Guide
2 The “Main Menu” screen
Step
Note: Compatible with Macintosh,Linux and Windows.
appears.Select Auto ConfigureYour
Modem.
Congratulations!
Hint: Your Username may be your main e-mail address. For more details
please refer to the “Please Read This First” insert included with this product.
Note: If this screen does not appear, make sure your Ethernet port is configured
for Dynamic IP.
3 The “Welcome”screen
Step
appears. Click Next.
6 The “Congratulations”
Step
screen appears. The Power Light
flashes rapidly while the Modem
restarts, then glows SOLID Green
when fully operational. The DSL
Light will glow SOLID Green and
the Internet Light will flicker
Green indicating Internet activity.
If you have any problems connecting or configuring
this device please contact our Tech Support at
You have successfully installed your DSL Modem.
You can now access the Internet.
This Quick Start Guide will walk you through the
easy steps to set up your DSL Modem. During this
process, we’ll show you how to:
1 Connect the Modem to a Computer
2 Configure the Modem
You will need the following items from your Actiontec
Quick Start Kit:
• DSL Modem
• Black Power Cord
• Black or Gray DSL Cable
• Yellow Cable
You will also need to know your DSL Username and
Password provided by your Internet Service Provider.
1-888-436-0657
Part No: 0530-0593-000
QS973/0808
NEXT