1
802.11n/b/g Wireless
Broadband Router
Quick Installation Guide
2
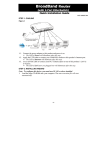
Connect your DSL/Cable Modem to the Internet port on the
Wireless Router using a standard RJ-45 Ethernet cable.
3
Connect an Ethernet cable to one of the LAN ports on the
Wireless Router to the Ethernet port on your PC.
4
Turn on the DSL/Cable modem first.
5
Then turn on your Wireless Router.
6
Check the LEDs:
The Power, Internet, and WLAN LEDs should be ON.
For each active LAN (PC) connection, the LAN Activity
LEDs (1-4) should be ON.
7
Turn on your PC.
1. One Wireless n/b/g Broadband Router.
2. One Power Adapter.
3. One Ethernet Network Cable.
4. One Set-up CD-ROM with User Manual.
5. One Quick Installation Guide.
1
Application Diagram
Notes
Before setting up the Wireless Router, make sure your PCs
are configured to "Obtain an IP (or TCP/IP) address
automatically."
2
1
Click Start
Click Control Panel
Network and
Internet Connections
(Right-click on) Local Area
Connection
Properties.
Connect the 802.11n / b / g
Wireless Router
Make sure the box next to Internet Protocol (TCP/IP) is
checked. Click the Internet Protocol (TCP/IP) and click
the Properties button.
Before you begin, ensure that the Wireless Router, the
DSL/Cable modem supplied by your IP Provider, and PC are
turned off.
To PCs
le
ADSL/Caobdem
M
Power
To Internet
Subscribed line
Existing Connection
Select "Obtain an IP address automatically." Select
"Obtain DNS server address automatically." Then click
OK to complete the PC configuration.
3
8
Router Configuration
For Windows 2000 and XP users, your computer should
obtain an IP address automatically from the Wireless
Router's DHCP server, after you've done the above steps.
9
Start your WEB browser. In the address box, enter the following:
http://10.10.10.254
10
Please enter the username “admin” and password
“admin” for login.
11
The Setup Wizard provides primary configuration of this device,
you may enter each screen to change the default settings. Simply
click on“ Setup Wizard ”and follow the on screen instructions
to complete the installation process.
M73-APO11-470