1
61286c01.qxd:WroxPro
1/21/08
3:43 PM
Page 1
Part I: XNA Framework Basics
RI
Chapter 2: Creating Your First Game: Pong
TE
Chapter 3: Helper Classes
PY
R
IG
HT
ED
MA
Chapter 4: Game Components
CO
AL
Chapter 1: Introducing XNA
61286c01.qxd:WroxPro
1/21/08
3:44 PM
Page 2
61286c01.qxd:WroxPro
1/21/08
3:44 PM
Page 3
Introducing XNA
Welcome to the world of XNA. As a game programmer you probably know about DirectX and
maybe even the basics of the XNA Framework. This chapter explains how to install XNA Game
Studio Express and how to use it in a productive way. It also contains quite a lot of tips that might
even be useful for anyone who already knows the basics.
In the next few chapters you start developing some cool smaller games. Part I contains the basic
foundation and information about the helper classes you will use later in this book to develop a
full-blown graphics engine for more advanced game projects. To keep things simple you start with
2D programming in Part I and then advance to 3D in Part II.
Let’s get started.
Introduction to the XNA Framewor k
XNA, developed by Microsoft, was started a few years ago, but kept very secret. At the GDC (the
biggest annual Game Developers Conference) in 2004, Microsoft announced XNA for the first time.
XNA is not just a framework like DirectX; it also contains a lot of tools and even a custom IDE
derived from Visual Studio to make the game programmer’s life easier. Because no tools or bits
were released until 2006, DirectX developers saw only the “XNA” logo in the upper-right corner
of the DirectX SDK documentation from 2004 to 2006 (see Figure 1-1). (XNA just means “XNAs
Not Acronymed.”)
Figure 1-1
61286c01.qxd:WroxPro
1/21/08
3:44 PM
Page 4
Part I: XNA Framework Basics
This means Microsoft was working on the XNA Framework for quite a while, but the developers did not
really know what to expect. It could be a successor to the DirectX Framework, they thought, but when
Direct3D 10 Beta for Windows Vista was released in the end of 2005, it seemed that DirectX was still the
preferred graphics framework even for this new operating system. Then early in 2006, at the GDC, the
Microsoft XNA Build March 2006 CTP was released. XNA Build is a tool that allows you to manage complex build processes, similar to Ms-build and tools like Ants, but more complex and powerful. Because
Microsoft’s MechCommander 2 was also released as a Shared Source Release, a lot of people downloaded it and tried to rebuild the MechCommander 2 game. But after a while, not much happened, and
small to mid-sized teams, in particular, don’t really need a complex build management tool.
Then it was quiet for a while and only Microsoft personnel and DirectX MVPs (I am lucky to be one)
received information about the upcoming XNA Framework and XNA Game Studio releases. The rest of
the world found out about that at the Gamefest conference in August (a new game developer conference
by Microsoft), where Microsoft announced the XNA Game Studio Express beta 1 release on August 30,
2006. The first beta contained only one starter kit, “Space Wars,” and XNA did not include much 3D
functionality. Many developers and hobbyists tried out XNA and wrote many small 2D games with the
help of the Sprite classes in XNA. Although you could quickly create your Pong clone or some simple
shoot-’em-up game, it was very hard to write your own 3D model importer and render code.
XNA Game Studio Express was initially targeted at beginners, hobbyists, and students to allow them to
quickly develop their own games for the Windows and Xbox 360 platform. But this does not mean professional game studios cannot use XNA. A special XNA Game Studio Professional version targeted to
professional game studios was planned to be released in 2007, but plans have changed quite a lot.
Instead of having two separate versions, one for professional game developers and one for hobbyists,
Microsoft’s XNA team decided that it made more sense to have only one version, namely XNA 2.0, that
can do everything. To publish a game on the Xbox 360, even if using the Xbox Live Arcade system, you
need a publishing deal anyway and have to submit your game to Xbox Live. New with XNA 2.0 comes
the support of Visual Studio 2005 Professional, but if you want to develop with XNA 1.0 (first four parts
of the book) and want to use Visual Studio 2005 or 2008, follow the tricks I describe later in this chapter
on how to work with VS and XNA productively.
Microsoft released another beta of XNA 1.0 a few months later in November 2006, before the final release
of XNA Game Studio Express in December 2006. The final version included the content pipeline and
many new features you will learn about in Chapters 2 and 3.
XNA is completely free and, for the first time, allows developers to create games for both the Windows
platform and for the Xbox 360 platform simultaneously. But if you want to run your XNA game on the
Xbox 360 console, you have to join the “Creators Club” for an annual fee of $99.
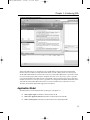
XNA Game Studio Express
Figure 1-2 shows you XNA Game Studio Express. The information provided here is for XNA Game
Studio Express 1.0, but installing version 2.0 should be identical.
The screen does not just look similar to Visual C# 2005 Express; it actually is Visual C# 2005. There are
only some minor changes to your project settings if you create an XNA project. Also, an extra option in
Tools ➪ Options allows you to select your Xbox 360 device and enter the encryption key. Additionally,
there are some new features inside the IDE — for example, the content pipeline that allows you to
import textures, models, and shaders very quickly into your project. More about all that in a little bit.
4
61286c01.qxd:WroxPro
1/21/08
3:44 PM
Page 5
Chapter 1: Introducing XNA
Figure 1-2
XNA Game Studio Express is currently the only available IDE for developing games with the XNA
Framework, but once Microsoft ships XNA Game Studio 2.0 (end of 2007) you can also develop with
Visual Studio 2005 Standard or Professional. If you have Visual Studio 2005, but try to use XNA 1.0 with
it to create an XNA project, there will be no templates in it. Even worse: If you try to open a .csproj file
you created with XNA Game Studio Express, Visual Studio cannot open the project. It is not supported
in XNA 1.0. Read on for a few tips on how to get XNA 1.0 working with Visual Studio 2005 in the section
“What About Visual Studio 2005 Professional?” If you start with XNA 2.0, you don’t have to worry
about this; Visual Studio 2005 will be supported out-of-the-box.
Application Model
The XNA Framework is divided into three essential parts (see Figure 1-3):
❑
XNA Graphic Engine in the Microsoft.Xna.Framework.dll
❑
XNA Game Application Model in the Microsoft.Xna.Framework.Game.dll
❑
XNA Content Pipeline in the Microsoft.Xna.Framework.Content.Pipeline.dll
5
61286c01.qxd:WroxPro
1/21/08
3:44 PM
Page 6
Part I: XNA Framework Basics
Figure 1-3
All of these dlls are written in C# and are completely managed. This means you can open them up with
a tool like Reflector (available from www.aisto.com/roeder/dotnet/) and see directly how they work
(see Figure 1-4). Most internal functionality just calls to the DirectX dlls and simplifies things a little bit.
The content pipeline is discussed shortly.
Figure 1-4
Take a look at the Application Model. Each XNA project uses a Game class, which contains all the important game components, the graphics device, the window settings, and the content manager. You can also
add the input and sound handling here. Basically everything that your game does on a very high level
somehow roots in the game class or at least is in some component that can be accessed from the game class.
6
61286c01.qxd:WroxPro
1/21/08
3:44 PM
Page 7
Chapter 1: Introducing XNA
The following are the three most important methods in the game class (see Figure 1-5). For the final
release, Microsoft also added the LoadGraphicsContent and UnloadGraphicsContent helper methods by default to the Game1.cs class, which is created automatically for you when you create a new
XNA project, but in most samples of this book these methods are not used because it is much simpler
to have all initialization and loading code at one place in the Initialize function.
❑
Initialize ()
❑
Update (GameTime time)
❑
Draw (GameTime time)
Figure 1-5
You can probably already guess what all these do. Initialize loads all your game content, sets all your
startup settings, and initializes everything you need. If you want to follow the design patterns Microsoft
provides for XNA, you would do all the loading in the LoadGraphicsContent method. Update is called
before each frame is drawn to update your game time, input, sound, and everything else that is not visible
on the screen. If your game is GPU-limited, it can very well happen that Update is called more often than
Draw, but your update code should run independent of the drawing code anyway. None of the samples
in this book will need special care for the number of times Update and Draw are called. And finally, Draw is
called each frame to draw everything to the screen. The separation of Update and Draw might not always
be important and can almost always be ignored for unit tests, but for the final game it is important to make
sure the game logic runs independent of the draw code. For example, on the Windows platform, the user
could press Alt and Tab or minimize the game, in which case Draw does not need to be called anymore. Even
with Draw not called anymore you may still want the game to continue to run in the background via the
Update method. This is especially important for network games to make sure the player is still synchronized.
Additionally, you can add GameComponent classes to your game class, which again have an Update and
a Draw method. Both of these methods are automatically called from your game Update and Draw methods. The initialization can happen directly in the constructor there. Initially Microsoft wanted the developers to create and add game components with the designer of Visual Studio, which can be seen in the
first beta of XNA Game Studio Express (released August 30, 2006). The designer feature was later removed
because it did not work well, was not supported for the Xbox 360 platform, and because not many developers used it anyway.
The idea with the game components is to reuse parts of your code and make it very easy to just plug
them into your games. Examples of game components include a frame counter or maybe a sky cube
mapping renderer for the 3D background. In my opinion, there are two major drawbacks: No standard
game components are shipped with XNA, and it is not really hard to code such an application model
yourself and even extend it. I do not use many GameComponent classes in this book, but feel free to plug
them in on your own. Read Chapter 4 for more details of the GameComponent class and learn about its
advantages and disadvantages. Because the game class has a Components property, it is very easy to
add more components.
7
61286c01.qxd:WroxPro
1/21/08
3:44 PM
Page 8
Part I: XNA Framework Basics
Don’t get me wrong — the basic idea of game components is really great. There was a small webcast
from Mitch Walker, the Program Manager of the XNA Framework at Microsoft, at the time the first XNA
beta was released about the game components and how to combine them. At first I was not very sure what
to think of the content pipeline and the game components idea; it looked cool in the webcasts, but when
I started coding my first game projects in XNA I did not find it very useful to work with the designer that
was presented in the first beta. In the second beta and the final release, most of the initial game component
code was removed as well as the graphical designer component in XNA Game Studio. This happened
because Microsoft was not able to find a way to implement the designer and game components idea in a
useful way for the Xbox 360 console. (It had only worked on the Windows platform before.) See Chapter
4 for more details about game components..
While it can be a hassle to implement the UI and menu logic yourself, it makes game menus more
unique. Almost every game implements its own UI. But if you think about it, a standard menu system,
as Windows uses for every app, is boring; it is always nice to see the ways in which menus are presented
in new games. You can still extract code very easily and create your own game components if you want
to create a new game, and then you can just reuse the code (for example, the SkyCubeMapping class).
Some game components, such as the camera and screenshot capturer classes from Chapter 4, are good
examples for components that can be reused in many other games, but almost everything else in the
games from this book is implemented without using game components.
One of Microsoft’s goals with this application model is for the community of game developers to create
and share their game components quite easily and improve the community aspect of XNA. As you
can see from the many XNA game development sites and the projects on open source sites such as
www.codeplex.com, the community is very active and willing to share, but it might not have much
to do with the application model. Check out the links later in this chapter for more information.
Content Pipeline
The content pipeline is used to import, compile, and load game assets such as textures, 3D models,
shaders, and sound files to your game project (see Figure 1-6). It greatly reduces the amount of custom
code you have to do to get graphics, 3D data, and shaders into your game. For example, if you drop a
model file into your project and it uses two textures and a specific shader, the content pipeline will
process your model file and automatically find and add the required textures and shaders. You don’t
have to do this for yourself; the content importer “compiles” the data into a binary format and, in the
process, it picks up everything you need.
Say the shader you added through the model you dropped into your project contains an error. In the
past you would have to start your game project, and then get an exception telling you that the shader
could not be compiled and the game would crash. Now the shader is compiled in the build process and
you don’t have to start your game to see that it does not work yet. You can quickly fix the error through
the line and error message from the build output in XNA Game Studio Express and then rebuild.
The content pipeline does not just consist of one dll; there are five different dlls:
8
❑
Microsoft.Xna.Framework.Content.Pipeline.dll contains the basic functions for the content
pipeline.
❑
Microsoft.Xna.Framework.Content.Pipeline.EffectImporter.dll is used to compile and import
shaders.
61286c01.qxd:WroxPro
1/21/08
3:44 PM
Page 9
Chapter 1: Introducing XNA
❑
Microsoft.Xna.Framework.Content.Pipeline.FBXImporter.dll is the biggest of all dlls and contains a lot of code to import .fbx 3D model files and supports many features — for example,
skinning and bones.
❑
Microsoft.Xna.Framework.Content.Pipeline.TextureImporter.dll is used to import texture files
to your game. These files can be .dds files already in the DirectX format (which is the best format
for textures and supports hardware compression), but .png, .jpg, .bmp, and .tga files are also
supported. 2D sprites are just textures, too, and usually use the uncompressed 32-bit format.
❑
Microsoft.Xna.Framework.Content.Pipeline.XImporter.dll allows you to import .x 3D model
files, a format that was used by many DirectX applications and samples.
Custom
3D Models
?
(e.g., XML)
Textures
XNA Content Pipeline
Sound
Shaders
Figure 1-6
Your game itself will never require any of these dlls; they are just used to build and compile the content
into .xnb (XNA Binary) files in your build process. This makes the distribution easier because you don’t
have to worry about the game content files anymore; it is easier to make sure all the content files are there
when you start your game. Don’t modify the .xnb files; they are just the output format (such as .exe) and
should not be modified directly. You also can’t convert the data back to textures, models, or shaders (well
it might be possible, but it is hard to find working tools for that). The .xnb files are also very different on
the Windows platform and the Xbox 360 platform, whereas the game source code and the content files
might be exactly the same.
Additionally, you can create your own custom content processors, which allow you to compile any other
game asset you have (for example, another model format) into .xnb files. You explore that in Part II
when you have to make sure all your 3D models have tangent data for the normal mapping shaders.
Okay, that’s all the basics you need for now. It is time to get going and code your first game.
Get the Free XNA Game Studio Express
To start coding right away, you have to make sure that you have the correct tools installed; the IDE is an
especially important tool to get started quickly. If you already have XNA Game Studio Express installed
and configured, you can skip this chapter. This part was written just in case anyone needs additional tips
9
61286c01.qxd:WroxPro
1/21/08
3:44 PM
Page 10
Part I: XNA Framework Basics
and tricks, such as how to get XNA running in Visual Studio 2005 Professional, which is not supported
out of the box, but quite useful if you use Visual Studio plug-ins or tools such as SourceSafe or Team
Foundation (to work better in a team, for example).
Requirements
XNA Game Studio Express targets Windows XP SP2 (SP means Service Pack) and Windows Vista. SP2 is
important because of the requirements of the .NET 2.0 Framework. Other platforms such as Windows 2003
or older Windows platforms that support .NET 2.0 are not officially supported, but run fine, too. XNA is
also tested only on 32-bit platforms, but it works fine on Windows XP x64 and Windows Vista, too, even
as a development platform.
Because XNA Game Studio Express is based on Visual C# Express, it has the same basic requirements.
You basically need a computer, nothing fancy. But for game development, you have much higher basic
requirements anyway, which I discuss shortly. Visual C# Express runs on Windows 2000 SP4, Windows XP
SP2, Windows 2003 SP1, Windows XP x64, and Windows Vista. As you can see, the older the operating
system, the more service packs you need.
And finally, you also need the most current DirectX runtimes, and if you are serious about game development, better get the full DirectX SDK. The DirectX SDK is not required by XNA Game Studio Express
because the dlls just call the underlying DirectX dlls, but it is always useful to have some more documentation on your system, and DirectX contains many samples and tutorials, which are useful if you
run into trouble. For example, the DirectX SDK contains tools to help you generate DDS texture files,
which are optimized for the best graphic card texture formats available today.
Because XNA does not support the fixed function pipeline anymore, as DirectX or Managed DirectX do,
it is important that you have a graphic card that supports at least Shader Model 1.1 or even better, Shader
Model 2.0. The first graphic cards with shader support were shipped back in 2001 (GeForce 3 and ATI 7000);
the next generation with Shader Model 2.0 (GeForce 5x, ATI 9x00 Series) was introduced in 2003 and made
popular by the many games in 2004 that made good use of shaders (Far Cry, Doom 3, Half-Life 2). Shader
Model 3.0 (GeForce 6x, ATI x1000 Series) was the standard in 2006 and new cards with Shader Model 4.0
(GeForce 8x) were shipped late 2006/early 2007. The Xbox 360 uses an extended version of Shader Model 3.0.
So this is what you need at a minimum before attempting to install XNA Game Studio Express:
❑
Windows XP SP2 or Windows Vista
❑
512MB RAM, but better to have more — 1 or 2 GB
❑
1 GHz CPU, the faster the better, using the IDE and compiling your projects is faster and more fun
❑
Shader Model 1.1 graphic card (Nvidia GeForce 3 or 4, ATI Radeon 7x) or Shader Model 2.0
(GeForce 5/FX or ATI Radeon 9x00)
Installing
Get the latest version of XNA Game Studio Express for free at http://msdn.microsoft.com/
directx/xna/.
10
61286c01.qxd:WroxPro
1/21/08
3:44 PM
Page 11
Chapter 1: Introducing XNA
The beta versions and XNA 1.0 still required that you install Visual C# Express and the latest version
of DirectX 9.0c first; maybe this will change when the final version of XNA 2.0 is shipped. All of these
downloads are completely free and it is really a nice thing to have all these tools available without any
costs involved. This enables many more people, especially students, hobbyists, and normal players, to
check out the development environment and maybe get even more excited about game development
than they already are.
Start with installing XNA Game Studio Express (see Figure 1-7). There are no special options you have to
select; the installer will do everything for you (for example, adding firewall rules for Xbox 360 testing).
The installer also adds the XNA help, the starter kits, and the project templates to get you started.
Figure 1-7
You will not really need the DirectX SDK, but I recommend that you install it. You will have additional
documentation available and a great repertoire of tutorials and samples in case you need more information about common techniques for your graphic engine.
You can download DirectX from the Microsoft DirectX Developer Center page on http://msdn.microsoft
.com/directx/.
When installing it, you should select to install the Redistributable in the custom setup step, too. You will
need it if you want to install your game on other computers. When DirectX is installed, you can check
out the newest features by taking a look at the samples with the DirectX Sample Browser. If you haven’t
worked much with Managed DirectX before and are interested, check out the documentation and tutorials.
If you want to use an Xbox 360 controller on your Windows machine (which works just fine thanks to the
fact that the controller uses USB) you can just plug it into your PC and it should work fine on Windows XP
and Vista after it automatically installs all required drivers. If that does not work automatically, you can
11
61286c01.qxd:WroxPro
1/21/08
3:44 PM
Page 12
Part I: XNA Framework Basics
also download the drivers yourself and follow the instructions from the official hardware site of Microsoft
products at www.microsoft.com/hardware/gaming/download.mspx.
Last but not least, you will do a lot of unit testing in this book, and for that I usually recommend NUnit
and TestDriven.NET (and later even xUnit, a newer unit testing framework released in late 2007). NUnit
is an external dll and TestDriven.NET is not supported in the Visual Studio Express Editions anymore. It
does not matter for this book because all source code will use its own kind of unit testing with a special
class later on.
If you use Visual Studio 2005, I suggest using TestDriven.NET, and if you are using Visual Studio 2005
Team System, you can also use the Unit Testing features implemented directly in VS there. Alternatively
there are also other Unit Testing Frameworks around (for example, MbUnit, csUnit, and so on). Most of
the samples in this book keep things simple and use only very basic features of unit testing and make it
look like many little test programs.
You can certainly do all your work inside the XNA Game Studio Express IDE, and Microsoft encourages
you to do so. All samples in this book work fine with the Express editions and I did not use any external
dlls (which was also one of the requirements for the XNA Starter Kits). However, some people already have
Visual Studio 2005 and may feel more comfortable doing their coding over there. Read on for a couple of
tricks on how to get XNA working with Visual Studio 2005 Professional.
What About Visual Studio 2005 Professional?
XNA Game Studio Express 1.0 is fine and a nice environment to work in. However, if you are used to
tools like SourceSafe or any other CMS (Content Management System) or plug-ins like CodeRush,
TestDriven.NET, and other productivity tools, you will run into a bunch of problems. As I said earlier, it
is not even possible to open your XNA 1.0 projects from Visual Studio 2005. If you are using XNA 2.0
where Visual Studio 2005 is supported out-of-the-box or do not care about Visual Studio 2005 or Visual
Studio 2008, you can skip this section.
The XNA Framework uses the .NET 2.0 Framework and DirectX 9.0c. To run games on any Windows
PC, it needs the .NET 2.0 Framework, DirectX 9.0c, and the XNA dlls. If you are a game developer you
will have the latest DirectX SDK anyway and if you have Visual Studio 2005, you will have the .NET 2.0
Framework, too, so the only thing you need for running and even compiling XNA applications are the
two XNA dlls:
❑
Microsoft.Xna.Framework.dll
❑
Microsoft.Xna.Framework.Game.dll
These dlls are referenced in all XNA projects, so if you just add them to a project in Visual Studio 2005,
you can directly start coding. To get started, just copy over the Game1.cs and Program.cs files from an
empty XNA project you created with XNA Game Studio Express.
Another problem could arise if you work on a 64-bit operating system such as Windows XP x64 or Windows
Vista x64. Although DirectX 9.0c has had 64-bit dlls for some time now and the .NET Framework runs
fine on 64 bit, too, the problem lies in the XNA Framework, which is available only in a 32-bit version
12
61286c01.qxd:WroxPro
1/21/08
3:44 PM
Page 13
Chapter 1: Introducing XNA
(called x86, by the way). People using the 64-bit operating systems of Windows had the same problem in
the past with Managed DirectX, which is available only for 32 bit, too. Using a 64-bit operating system does
not mean you cannot use 32-bit applications anymore; quite the contrary. Almost all applications that exist
today are written for 32-bit operating systems, but they run fine in the 32-bit mode of Windows XP x64
or Windows Vista x64.
Why do I even bring this up if you can run 32-bit and 64-bit applications on 64-bit operating systems?
Well, you cannot use 64-bit assemblies (dlls) from 32-bit applications or vice versa. The reason for that is
that a Windows process has to be run either in 64 bit or 32 bit; emulating 32 bit from 64 bit would be too
slow and is not even supported. Now how do you get XNA working in 64-bit mode? You don’t, it is just
not supported. Instead, you have to make sure that the .NET Framework and your application run in 32bit mode; then Windows will start the whole process in 32-bit mode and you can load the XNA dlls just
fine. If you don’t do that, your game cannot even be started on any x64-bit platform.
In Visual Studio 2005, you can just select x86 platform instead of All CPUs in the Project Properties Build
screen. In XNA Game Studio Express there is no such option and if you want the same setting you have
to add a line to your .csproj file in each PropertyGroup section:
<PlatformTarget>x86</PlatformTarget>
I also wrote a little tool that converts XNA Game Studio Express projects to Visual Studio 2005 projects
and back, and it handles the x64-bit issue. The newest version of the tool also supports Visual Studio
2008. You can download it from my blog at http://exdream.no-ip.info/blog/2007/07/19/
XnaProjectChangerToolWithVS2008Support.aspx.
Configuring Your Xbox 360
To connect your Xbox 360 to your PC, you have to install the XNA Framework on your Xbox 360 first via
the Xbox Live Service. Unlike the Windows platform, the download of the XNA Framework for the Xbox
360 is not free. You will have to join the “Creator’s Club” subscription on the Xbox 360 through the Xbox
Live Marketplace for $99 a year or $49 for four months. Microsoft does this to have a little control over
the developers. Console development is usually very closed off and there is no open source thinking as
in the Windows or Linux world. We can all just hope this is going to change.
First of all, make sure your PC and the Xbox 360 are connected to the same network. You don’t have to
connect the Xbox 360 directly to your PC; just plug it into the same network (router or modem). It is
important that you always have access to the Internet from the console and not just to your PC because
XNA requires an Xbox Live connection on your console. Once you have installed the XNA Framework
on the Xbox 360, which also includes a custom version of the .NET 2.0 Compact Framework to make it
run on the console, you can start the XNA Game Launcher (see Figure 1-8).
In the XNA Game Launcher you can now start your game projects or copy over XNA games from your
friends or the Internet and start them on your console. Before you can connect to the PC, you will have
to make an encryption key first by clicking Settings and then “Create Encryption Key.” You will now see
the encryption key; don’t close this window. On your PC, open XNA Game Studio Express and go to
ToolsOptions and scroll down. You will see the new XNA Game Studio option. Here you can add your
Xbox 360 and enter your encryption key; then just click Add (see Figure 1-9).
13
61286c01.qxd:WroxPro
1/21/08
3:44 PM
Page 14
Part I: XNA Framework Basics
Figure 1-8
Figure 1-9
After you have successfully entered the encryption key, you can click OK on both the PC and the console. If
this fails or you reinstall XNA Game Studio, you can always get a new encryption key and enter it again here.
14
61286c01.qxd:WroxPro
1/21/08
3:44 PM
Page 15
Chapter 1: Introducing XNA
From now on you can create Xbox 360 projects and deploy them to your console, which can be done in
the XNA Studio build menu. If you start to debug a project with F5 it will get deployed, too, and you can
directly debug it on your console, which is pretty cool because you can step through code on your PC
and immediately see the results on your Xbox 360 (kind of multi-monitor developing for free). Read
more about running your first game in Chapter 2.
Getting Star ted
You have everything set up now and it is time to finally do some coding and get your hands dirty. In this
chapter you will just create a simple project with the help of the XNA Studio templates. Then you will
change the code a little and add a little functionality to the Update and Draw methods. In the next chapter, you create your first game after you learn about the SpriteBatch class.
Your First Project
Create a new XNA project in XNA Studio by clicking File ➪ New Project. Now select Windows Game and
enter a name for your first project — for example, “Hello World” — or just leave it as “WindowsGame1” (see
Figure 1-10). As you can see, you can also create games based on the starter kits quite easily from here, too.
You can see now that a new project was created and it contains two source files: Game1.cs and
Program.cs. The Program file basically just contains the following three lines of code:
using (Game1 game = new Game1())
{
..game.Run();
} // using
Figure 1-10
15
61286c01.qxd:WroxPro
1/21/08
3:44 PM
Page 16
Part I: XNA Framework Basics
The Game1 class contains the Initialize, Update, and Draw methods mentioned a little bit earlier.
Initialize does nothing for now and Update just checks if the Back button on the first connected
gamepad was pressed.
For now you are just interested in the Draw method, which basically just executes the following line to
clear the background to a specific color:
graphics.GraphicsDevice.Clear(Color.CornflowerBlue);
F5 and Go
If you press F5, the project starts (same as Debug-Start Debugging) and you see the screen shown in
Figure 1-11, which shows the blue color on a blank boring window that is specified in the Draw method.
To feel like you are actually doing something, change the Color to Color.Green and press F5 again.
The window now has a green background. The Clear method of the graphics device has other overloads that can be used to clear the depth and stencil buffers, which will be done automatically if you just
set the color. For example, later in this book you will just need to clear the depth buffer, but not the color
of the background. To do that you just write the following line:
graphics.GraphicsDevice.Clear(ClearOptions.DepthBuffer,
Color.Green, 1, 0);
By default, the ClearOptions are set to ClearOptions.Target | ClearOptions.DepthBuffer,
which means both the background color and the depth buffer are cleared. By the way, if you don’t know
it already, the | operator between the ClearOptions flags will combine both settings.
Figure 1-11
16
61286c01.qxd:WroxPro
1/21/08
3:44 PM
Page 17
Chapter 1: Introducing XNA
Changing the Code
Instead of giving up here, think about some ways you can modify the code in a useful manner. First of all,
you should be able to quit your program by pressing Esc. By default, XNA just adds the following lines to
the Update method, which quits the program when the Xbox 360 controller’s Back button is being pressed:
// Allows the default game to exit on Xbox 360 and Windows
if (GamePad.GetState(PlayerIndex.One).Buttons.Back ==
ButtonState.Pressed)
this.Exit();
To learn more about the Input classes, see Chapter 3, “Helper Classes.” For now, you will just use a
quick and dirty way to access the keyboard. If you modify the code in the following way, you can also
press Escape now to quit the application:
// Get current gamepad and keyboard states
GamePadState gamePad = GamePad.GetState(PlayerIndex.One);
KeyboardState keyboard = Keyboard.GetState();
// Back or Escape exits our game on Xbox 360 and Windows
if (gamePad.Buttons.Back == ButtonState.Pressed ||
keyboard.IsKeyDown(Keys.Escape))
this.Exit();
As you can see, you put the gamepad and keyboard states in extra variables to have easier access. If you
press F5 again, you can quit the game with Escape now.
Next you are going to jump a little bit ahead and load a graphic into your game. More details about
sprites are discussed in Chapter 2. The idea is to display a small background texture and tile it over the
whole screen. Then you implement some simple keyboard and gamepad controls to move the background as in a top-down racing game or a tile engine, which is often used in 2D role playing games. For
a more complex tile engine you would need more textures like stones, grass, water, mud, and so on, and
then even transition textures you can put between grass and water, for example. This requires more textures and custom code, but overall this is not a very hard topic. You can also find a lot of information
about this topic on the Internet if you are really interested in tile engines.
For your simple first project, you just add the texture shown in Figure 1-12.
Figure 1-12
17
61286c01.qxd:WroxPro
1/21/08
3:44 PM
Page 18
Part I: XNA Framework Basics
To load this texture (CityGroundSmall.jpg) into your game, just drag it into your project on the
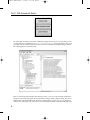
Solution Explorer. Then click the file in the project and select Properties. You should now see the screen
shown in Figure 1-13.
Normally you would just see the build action and some options for copying the content file to the output
directory (e.g., if you want to include a .dll or .xml file). But if XNA Studio detects one of the supported
content file formats, you will see the advanced XNA properties. There are three important new settings:
Asset Name, Content Importer, and Content Processor. The Asset Name is used to load the content later;
each content file must have a unique Asset Name. For the Content Importer you can select a Texture, as
in this case, or a Model Importer for .x files or an Effect Importer for .fx files.
The Content Processor contains more options; for example, you could select DXT, DXT mip-mapped, or
Sprite 32bpp for your texture here. DXT is a compression format, which is also used in .dds files and it is
very good for textures in games because they get compressed down in a 1:6 ratio (or 1:4 if they contain
transparent pixels). This means you can have up to six times as many textures for the same space on the
hard disk and graphic memory. For 2D sprites it is usually better not to compress them, because you see
them in their full size, and using 32 bpp (bits per pixel) guarantees the best possible sprite quality. For
more information about the content pipeline, read the next part of this chapter.
Figure 1-13
If you press F5 or build the project (F6) the content is processed and a new file, CityGroundSmall.xnb,
will be created in your output directory. The build output window also shows the following new line:
Building CityGroundSmall.jpg -> bin\x86\Debug\CityGroundSmall.xnb
The final thing you have to do is load the imported texture. You do that in the Initialize method and
use a new variable, backgroundTexture, in your class. To load the texture, you use the asset name you
specified earlier (it was actually generated automatically from the filename of the file you dragged into
your project). To render the texture on the screen, you need a SpriteBatch, which is discussed in the
next chapter. Basically it sets up the alpha blending, then draws textures into the sprite and finally draws
everything on the screen:
Texture2D backgroundTexture;
SpriteBatch sprites;
18
61286c01.qxd:WroxPro
1/21/08
3:44 PM
Page 19
Chapter 1: Introducing XNA
protected override void Initialize()
{
backgroundTexture = content.Load<Texture2D>(“CityGroundSmall”);
sprites = new SpriteBatch(graphics.GraphicsDevice);
base.Initialize();
} // Initialize()
To display the background texture, you have to start the sprite batch and render the texture to your
sprites in the Draw method:
protected override void Draw(GameTime gameTime)
{
graphics.GraphicsDevice.Clear(Color.Green);
sprites.Begin();
sprites.Draw(backgroundTexture, Vector2.Zero, Color.White);
sprites.End();
base.Draw(gameTime);
} // Draw(gameTime)
This renders the background texture at the location (0, 0) on top of your green background. With the
color parameter, you can also recolor a sprite, but for now this is not important.
If you press F5, you will now see the result shown in Figure 1-14.
Figure 1-14
19
61286c01.qxd:WroxPro
1/21/08
3:44 PM
Page 20
Part I: XNA Framework Basics
One final thing you are going to add for this first project is the capability to scroll the background with
the cursor keys or a gamepad, and then you render the scrollable tiles to the whole background. To capture the gamepad and keyboard input, you modify the Update method a little:
float scrollPosition = 0;
protected override void Update(GameTime gameTime)
{
// Get current gamepad and keyboard states
GamePadState gamePad = GamePad.GetState(PlayerIndex.One);
KeyboardState keyboard = Keyboard.GetState();
// Back or Escape exits our game on Xbox 360 and Windows
if (gamePad.Buttons.Back == ButtonState.Pressed ||
keyboard.IsKeyDown(Keys.Escape))
this.Exit();
// Move 400 pixels each second
float moveFactorPerSecond = 400 *
(float)gameTime.ElapsedRealTime.TotalMilliseconds / 1000.0f;
// Move up and down if we press the cursor or gamepad keys.
if (gamePad.DPad.Up == ButtonState.Pressed ||
keyboard.IsKeyDown(Keys.Up))
scrollPosition += moveFactorPerSecond;
if (gamePad.DPad.Down == ButtonState.Pressed ||
keyboard.IsKeyDown(Keys.Down))
scrollPosition -= moveFactorPerSecond;
base.Update(gameTime);
} // Update(gameTime)
The first few lines are the same as before. Then you calculate how many pixels you would move this
frame. If a frame would take 1 second, moveFactorPerSecond would be 400; for 60 frames it would be
400/60. Because you use floats here instead of just integers, you can have a couple of thousand frames
and the movement is still 400 pixels per second if you press up or down.
The variable scrollPosition is changed if the user presses up or down. In your draw method, you
can now render each tile and add the scrollPosition to the y position to move the background up
and down:
protected override void Draw(GameTime gameTime)
{
graphics.GraphicsDevice.Clear(Color.Green);
sprites.Begin();
int resolutionWidth = graphics.GraphicsDevice.Viewport.Width;
int resolutionHeight = graphics.GraphicsDevice.Viewport.Height;
for (int x = 0; x <= resolutionWidth / backgroundTexture.Width;
x++)
for (int y = -1; y <= resolutionHeight / backgroundTexture.Height;
y++)
{
Vector2 position = new Vector2(
x * backgroundTexture.Width,
y * backgroundTexture.Height +
((int)scrollPosition) % backgroundTexture.Height);
sprites.Draw(backgroundTexture, position, Color.White);
20
61286c01.qxd:WroxPro
1/21/08
3:44 PM
Page 21
Chapter 1: Introducing XNA
} // for for
sprites.End();
base.Draw(gameTime);
} // Draw(gameTime)
Now you can start your project and move around with up and down. This is pretty good for your first
little application, isn’t it?
Notes about XNA
To finish this chapter, here are some additional tips and tricks about the XNA Framework and XNA
Game Studio Express 1.0 and 2.0. As you saw, you can just start coding and it works great, but it is
always good to have a couple of bookmarks for your browser you can rely on when you run into problems or don’t know how to solve a specific issue. Additionally, this section discusses the advantages of
.NET and C# a little and checks out the differences between XNA and Managed DirectX.
Important Links
Here are a few links for your bookmarks:
❑
http://msdn.microsoft.com/directx/xna/ — XNA Developer Center on Microsoft’s
MSDN page with the XNA Game Studio Forum and the XNA Framework Forum, which are the
most active XNA forums you will find on the Internet. You can also download the latest XNA
version here, read the FAQ, and see what’s new.
❑
http://en.wikipedia.org/wiki/Microsoft_XNA — Entry on Wikipedia about XNA, constantly updated and contains many links to other topics. A few useful external links are listed on
the bottom of the page.
❑
www.thezbuffer.com — One of the first Managed DirectX sites with a lot of articles, links to
blogs and people. Andy Dunn, the creator of the site, always keeps it up-to-date, shows you the
newest XNA projects, and knows a lot about Managed DirectX and XNA.
❑
www.ziggyware.com — An XNA community website founded by Michael “Ziggy” Morton. It
has grown a lot in the last years and contains hundreds of articles and news posts, and has a
very active community behind it. Make sure to check out the active discussion forum; the site
also features XNA Image of the day, polls, and other cool stuff.
❑
www.riemers.net — A very old and solid DirectX site with tons of information about DirectX.
Recently switched to XNA and has great information on that, too. There is also an active forum
on this site.
❑
http://xnadevelopment.com — One of the first XNA sites with many links, tutorials, and
tips to get you started in the XNA world, Not many updates here, however.
❑
http://xnaresources.com — Another site that had a lot of news and some really useful tuto-
rials on tile engines for XNA 1.0, but not much updates recently either.
❑
http://abi.exdream.com — Official website of the author. You can find more games I made
here, as well as Rocket Commander XNA, the XNA Shooter, or the Racing Game from this book,
and all the documentation and video tutorials I made for them. Additionally I suggest checking
out the Rocket Commander Video Tutorials, which were pretty popular on Coding4Fun.
21
61286c01.qxd:WroxPro
1/21/08
3:44 PM
Page 22
Part I: XNA Framework Basics
❑
http://XnaProjects.net — Another website created by the author just for hosting XNA
games like the ones in this book. It is a completely open website for everyone to use, upload games,
and to add your own links to, but there are no articles or tutorials on this site, just the games with
installers, source code, screenshots, and videos.
Is C# Good for Game Development?
There are constantly forum threads on sites like www.GameDev.net discussing the differences between
C++ and C#. Usually after a few posts, they all end in a senseless language war. Back in the early days of
.NET (2002) I discussed quite a lot in those threads, but it was way too depressing when 99.9 percent of
the programmers were on the C++ side and there was no way to convince anyone because they didn’t
even take you seriously. The language war does not really have anything to do with C# as a language,
but the constant language battles gave newer languages like Java or C# a bad start. For example Java
failed as a game programming platform except for cell phone games. But if you think about it, the same
kind of wars happened in the days when C replaced Assembler and C++ replaced C. Even to this day,
more than 20 years after C++ was developed by Bjarne Stroustrup, some game programmers still use C
and do not really take full advantage of C++. If you take a look at the source code for popular game
engines such as Quake or Half-Life, it looks more like C than C++.
This is something really strange in the game programming world; everyone is afraid of losing too much
performance by switching to a new language, and additionally, they fear that they might also lose their
old code base or have a lot of work converting it to a new language. However, game programmers
quickly adopt new techniques and scripting languages, and are always on the very latest hardware
developments. One year before Shader Model 4 cards were even available, we game developers had
Direct3D 10 available and many people checked this out without even having the hardware to run it.
I adopted .NET and C# pretty quickly in the beginning of 2002 after checking out the early betas at the
end of 2001. I had just started a new game engine and our team had a new project we wanted to do.
There were absolutely no graphic engines or anything but some simple 2D games around in the early
years of .NET. This made it very hard to use OpenGL or DirectX directly in C#. It required a lot of calls to
unmanaged dlls and involved a lot of nasty pointer logic, which is available only in the unsafe mode of
C#. In 2003, Microsoft finally released the first beta of Managed DirectX, which made it possible to program new DirectX applications quite easily in .NET. It proved that using Managed DirectX instead
of the native DirectX dlls has only a performance impact of 1–2 percent, which is really not important
if you think about it (just the CPU has a little more work; most games are GPU bound anyway).
However, this did not mean that game developers were jumping on C#; everyone was still very skeptical
and even after I released the first commercial .NET game ever, Arena Wars, in 2004, it took another year
until more and more developers finally gave .NET another chance. Students and beginners especially really
appreciate the simplicity of C#, and more and more people started to develop games in .NET. C++ versus
C# discussions still exist and the discussion points are still the same, but the result is more balanced right
now. (I stopped looking at any topic that has “vs” in the name a long time ago; it is just a waste of time
reading the same arguments over and over again.)
Always remember this when you run into someone who tells you that C++ is superior and that C# is
only for newbies. The same thing happened with Assembler and C++ a few years ago. In the future, there
will be new languages that make our life easier and there will still be people hesitant to adopt them right
22
61286c01.qxd:WroxPro
1/21/08
3:44 PM
Page 23
Chapter 1: Introducing XNA
away. Most big game studios also can’t just adopt every new technology right away. The studio might
be in the middle of a big project and also might have a very big code base, which is not easy to port. In
the long run, however, code will get converted and we will move up the ladder of high-level languages.
Figure 1-15 is an old picture I did to show the differences between DirectX with C++ and Managed
DirectX in C#. As you can see, MDX code can be half the size of unmanaged code. For XNA, the code
would even be shorter and it gets much easier to load textures and show them on the screen, but the
comparison to MDX gets harder because the concepts are different.
C++
c#
Figure 1-15
Getting Used to the Content Pipeline
As you saw earlier with your first XNA project, it is quite easy to just drag and drop a texture into your
game project inside XNA Studio. Although it is nice to have all your game content in one place and side
by side with the code, there are a couple of things you have to remember. Most of the projects I have seen
throughout my career have not put the textures, models, or shaders directly in the Visual Studio project.
The reason for that is that it is much easier to just copy a few files over and then let the game load them
directly. By default, Visual Studio will also not copy any content files to your output directory; you have
to change the Build Action from None to Content and set the Copy to Output Directory setting to Copy
if newer. This is quite a hassle and XNA makes it a little easier.
23
61286c01.qxd:WroxPro
1/21/08
3:44 PM
Page 24
Part I: XNA Framework Basics
You might even ask why you should change the way you loaded textures before. If you just want your
game to run on the Windows platform, you can certainly load textures and shaders dynamically and
without importing them first into your project as XNA content files. This has the advantage that you can
change textures or shaders while the game is running (a feature that is not supported by the XNA content pipeline). However, for model files this will not work because there are no load methods other than
from the ContentManager class, which only loads compiled .xnb content files.
On the Xbox 360, you can load content files only; there is no support to load textures or shaders directly.
If you use direct texture or shader loading, make sure you exclude that code from the Xbox 360 platform;
the dlls for the Xbox will not support loading anything but the content files.
For more details about important model files, read the chapters in Part II of this book. Handling 3D
models is not as easy as just using textures for 2D games. For that reason this part of the book sticks with
sprites and 2D textures and keeps things simple. For simple 2D games it is nice and easy, but to write a
serious game you will need 3D models and many cool shader effects. I also suggest that you get an artist
to do the textures and 3D models for you. It is a quite complex topic and you might waste a lot of time
doing all this yourself. Other people might also be more talented doing textures and 3D models; take
advantage of your coding skills and let other people do the painting. If you don’t have any artists available, try to use some of the models and textures from this book and the XNA starter kits.
Differences with MDX
If you are coming from MDX (Managed DirectX) and want to migrate your game to the XNA
Framework, there is a great guide on the official XNA pages at http://msdn2.microsoft.com/
en-us/directx/Aa937797.aspx.
You can find the same help in the XNA documentation. I won’t repeat all that here, but basically you
have to remember that XNA uses right-handed matrices and MDX was left handed by default. Also,
there are some new classes and structures to make sure you don’t need the Windows.Forms namespace
anymore. Because there is no fixed-function pipeline support, the old way of working with Windows
Forms and handles and thinking of supporting older PC configurations is no longer necessary. Graphics
and shaders are discussed in Part II of this book.
Additional Tools and Tips
Additionally you should take a look at the Getting Started help topics in the XNA documentation, which
can be accessed from XNA Studio-Help-Contents-XNA Game Studio Express. You can find more information about connecting to your Xbox 360, writing your first project, and using all the starter kits.
As I mentioned before, TestDriven.NET is a nice tool for Visual Studio, and test-driven development is a
very important methodology in this book (see Chapter 3). Another great tool for .NET development is
the Ants Profiler. Unlike all other tools and programs I mentioned so far, it is not free, but there are alternatives available on the Internet, which might help you as well. The Ants Profiler can be used to directly
see how much time every single line of your project takes. In my opinion, this is much more useful than
using some high-level application performance tool such as NvPerf from Nvidia, PIX from the DirectX
SDK, or the Performance Counters of Windows. You can quickly figure out why parts of your render code
get slow, and you can detect bugs that call slow methods way too often. By using a profiler tool and by
investigating you and others source code, you not only get a lot of interesting information, but you also
24
61286c01.qxd:WroxPro
1/21/08
3:44 PM
Page 25
Chapter 1: Introducing XNA
learn more about the structure of an application and why some things work so well and others take so much
time.
For more links on the Internet, check out the great collection of XNA links at http://xnadevelopment
.com/links.shtml.
There are many more sites about XNA and it seems every day you see a couple of new community sites
and more resources. Do a Google search to find out which site is the most popular.
Changes in XNA 2.0
This book was originally written with XNA Game Studio Express (1.0) in mind. While Parts I through IV
were originally written when only XNA 1.0 was available, Part V , “Writing Multiplayer Games,” focuses
more on XNA 2.0 and the added networking capabilities. But all changes required to make the older
code run on XNA 2.0 were implemented and additions were made to the chapters where something new
happened in XNA 2.0. Please note that if you just want to develop on the Windows platform, you can
already write network games in XNA 1.0 with help of the System.Net namespace.
This section states the changes that are coming in XNA 2.0 and known at the time of this writing. Most
information about XNA 2.0 was first announced on the Gamefest in August 2007.
First and foremost, XNA 2.0 supports Visual Studio 2005 out-of-the-box, both the standard editions and
the professional editions, including the Team System version. In XNA 1.0, you could only use Visual C#
Express, and while C# is still the only officially supported language for XNA you can use other languages such as Visual Basic, IronPython, F#, or even C++, which will work on Windows, but might not
work on the Xbox 360 because of some restrictions. Only the Compact .NET 2.0 Framework runs on the
Xbox 360 and some languages such as IronPython make use of language features such as Reflect.Emit,
which are just not available on the Xbox 360 at this time.
Aside from other improvements to the project management and framework, the most important addition to XNA is the new networking API, which allows you to write multiplayer games and using Xbox
Live on the Xbox 360 and Windows System Link on Windows XP and Vista. All the new networking
capabilities will be discussed in Part V of this book. These are the key points about XNA networking in
XNA 2.0:
❑
Enables you to write networked multiplayer games on the Xbox 360 and Windows.
❑
Matchmaking system via Xbox LIVE on the Xbox 360 and System Link on Windows.
❑
No need to create or host your own servers, which really makes creating multiplayer games a
lot easier than it used to be. All the server management will be hosted for you on the Xbox Live
and Windows for Games Live services.
❑
Easy to create game sessions and search for them.
❑
Game flow management, Host Migration, and an integrated messaging system keeps you
focused on developing the game, not the networking APIs required.
As described in more detail in Chapter 14, all data in the XNA 2.0 networking APIs is transmitted
through UDP, which is normally unreliable, but the XNA team has built a reliable framework on top
of it, similar to DirectPlay. You basically just use the SendData and ReceiveData methods to send and
receive network messages. You can implement client-server–style games as first person shooters usually
25
61286c01.qxd:WroxPro
1/21/08
3:44 PM
Page 26
Part I: XNA Framework Basics
use, or peer-to-peer games as role playing or strategy games usually use. It is totally up to you; you
could even use a hybrid approach.
Because XNA makes great use of the Xbox Live system, you get all the features in there for free, which
includes your gamer card, friend management, and chat system (you can even show the keyboard and
messages boxes on the Xbox 360 now). You can even enable voice support for your games. There are also
nice tools to support the development of multiplayer games on the Xbox 360 and the built-in latency and
packet loss simulation tools help you prepare for problems that can occur when playing your game over
the Internet.
This all sounds similar to DirectPlay of the DirectX Framework, which was not very successful and was
depreciated a few years ago because game developers would not use it. Instead, most games would just
use Windows sockets directly or use another networking API. But in XNA, it will be the only way to
write network games (at least on the Xbox 360), which gives me hope that XNA networking will be a lot
more successful than DirectPlay was.
It is very easy to enable multiplayer support in XNA with just one single line of code:
Components.Add(new GamerServicesComponent(this));
But writing network games themselves is not that easy. It is great to have all that built-in support and,
as you will see in Chapter 14, it gets you up and running quickly — but to write a full-blown network
game and to understand all multiplayer components, you have a long road ahead. For this reason, the
networking APIs are discussed at the end of this book with the most complex game Dungeon Quest,
which is a full-blown multiplayer role playing game that has a great replay value and allows users to
create new worlds easily.
Other new features of XNA 2.0 include simplified model rendering such as helping you to render models
quickly via the new EnableDefaultLighting method in the BasicEffect class. There were also
improvements made to the game components classes; not only are more game components available,
but you can also nest game components now. You can learn more about game components in Chapter 4.
Most of the XNA 2.0 Framework has not changed and is still compatible with XNA 1.0 code. Even in
parts where performance improvements were made, the calling code is still the same. You will just enjoy
the new capabilities and you can extend your game easier or add one of the new features in the rendering engine. For example, occlusion querying and multiple render targets are now supported. Another
improvement is the project templates for content importers and processors to help you writing content
processors, which was very hard to do previously. Working on your own content processors is still hard
work, but at least there is some help to get you started now.
I also want to mention the many samples that are available on the XNA Creators Club. When the first
edition of this book was written, the website was non-existent, but now, only 9 months later, many more
community sites are available, and you can find many very active XNA forums. On XNA Creators Club
at http://creators.xna.com, you can find a lot of useful samples beyond the scope of this book such
as Generated Geometry, Aiming, 3d Audio, 3D Picking, Billboards and 3D particles, Distortion Effects,
Normal Mapping, Non Photorealistic rendering, Bloom post process, and other samples. Several minigames and the very popular XNA Starter kits can also be found on the XNA Creators club, including
Space Wars (Asteroids clone), Marblets (puzzle game), Ship Game (Descent-style game), and the Racing
Game (see Part IV of this book).
26
61286c01.qxd:WroxPro
1/21/08
3:44 PM
Page 27
Chapter 1: Introducing XNA
Another notable feature in XNA 2.0 is the ability to use XNA inside a window control, which is useful
for level editors such as the Dungeon Quest Editor discussed at the very end of this book. The Input
classes in XNA now support more devices like the Chatpad, the Big button pad, guitars, drums, or flight
sticks. See Chapter 10 for more information.
Last but not least, there are improvements to the Audio framework, too, which are discussed in Chapter 9.
XNA 2.0 features better cue management and a new and easier XACT editor, which is important to create
and manage sound effect files in XNA.
Other changes to the XNA Framework will be mentioned when they are relevant to the discussion in the
book, such as the Content Pipeline, which is a little bit simpler to use in XNA 2.0. You can more easily
load and unload assets, and you no longer have to handle device loss or device reset events. To get the
most recent version of the source codes for the samples in this book go to the official book site or
XnaProjects.net.
Troubleshooting
You have now read everything you need to know to get started with your first XNA project. If you just
read through this chapter, I highly recommend that you at least open up the project for this chapter
(download it from www.wrox.com/WileyCDA/WroxTitle/productCd-0470126779.html) and run it.
If you run into problems installing DirectX, .NET 2.0, or XNA, try to search for help on the XNA Forums
at http://forums.xna.com/. If the tips in this book do not help you with a particular problem you
should always do a Google search and check out the XNA Forums. This way you can get more current
help about some problems. For .NET 2.0 it is important that you have the most recent service pack for
your operating system. For DirectX make sure you have the most recent graphics driver and a decent
graphics card to even work on 3D graphics. Finally, for XNA, make sure you have everything correctly
installed before starting the XNA setup.
Getting XNA to work on Windows isn’t very hard. On the Xbox 360, a lot of things can go wrong. Here
are a couple of tips to make sure you meet the requirements for running XNA games on your 360:
❑
You need an Xbox 360 Live Account on your Xbox 360, which must be connected at all times
when you develop and test your XNA games.
❑
Make sure your PC and the Xbox 360 are on the same network and that they can “see” each
other. You can test ping-ing the Xbox 360 IP from your PC or connecting to your PC as a media
center from the Xbox 360.
❑
If the Xbox 360 XNA Framework could not be installed, search for more help on the Internet to
see if your Xbox 360 meets the minimum requirements (you need a hard disk, for example).
❑
When you create an encryption key in Settings of the XNA Game Launcher and it is not
accepted by your PC because you maybe mistyped it or it contained 0 (the number zero) and
O letters, which almost look the same, just try it again; you can always create a new encryption
key. See the section “Configuring Your Xbox 360” earlier in this chapter for details.
❑
If the XNA Game Launcher does not start, or all buttons are grayed out, or if you receive some
error like 0xffffffff, it means that your profile is not connected to Xbox Live or it has some wrong
settings. If you had an older version of the XNA Framework installed before, uninstall it, delete
your profile, and create a new profile and reinstall the XNA Framework again.
27
61286c01.qxd:WroxPro
1/21/08
3:44 PM
Page 28
Part I: XNA Framework Basics
Chapter 2 provides more detailed coverage of the steps required to get a game running on the Xbox 360,
but the sample in this chapter also works on the console out-of-the-box. Just start the project, switch to
the Xbox 360 output, and press F5. If you have set up everything correctly, you can see the same output
on the Xbox 360. Congratulations, you just started your first Xbox 360 game!
Last but not least, if you run into compiler errors from the code in this chapter, here are some final tips:
❑
Make sure you have all required variables defined: graphics, content, backgroundTexture,
sprites, and scrollingPosition.
❑
Read the compiler error message and change the code accordingly. Maybe you are trying to use
an obsolete method; either replace it with the new method or just comment it out to see how the
rest of the code behaves.
❑
If the compiling works, but the program crashes or throws an exception, it is most likely that
you have some content file missing (the CityGroundSmall.jpg texture in this project) or that
your graphic hardware does not support at least Shader Model 1.1.
Summar y
This chapter covered a lot about the background of XNA and how to get XNA Game Studio Express
working on your PC, and even how to install XNA on your Xbox 360 if available. You also wrote your
first little project — I wouldn’t really call it a game, but it has a texture, the Xbox 360 controller input and
keyboard input is handled, and you have a response on the screen by scrolling the background texture
up and down.
The following chapters focus more on programming cool little games. Here’s a recap of what you have
learned so far:
28
❑
Background of the XNA Framework
❑
Installing XNA Game Studio Express
❑
Tips and tricks on how to get XNA running on Visual Studio 2005
❑
Additional tools that might be useful such as TestDriven.NET, SourceSafe, and Ants Profiler
❑
Writing your first XNA project
❑
Concept of the Application Model and the Initialize, Update, and Draw methods
❑
Clearing the background
❑
Drawing a texture with help of a sprite batch
❑
Handling gamepad and keyboard input
❑
Drawing a tiled background based on your input
❑
Changes in XNA 2.0