1
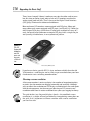
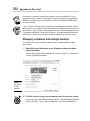
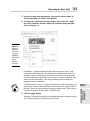
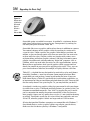
Chapter 1: Finding and Installing
the Hardware You Need
AL
In This Chapter
✓ Discovering what upgrades will improve your Windows 7 experience
RI
✓ Making basic hardware upgrades
✓ Choosing a new monitor
TE
✓ Troubleshooting new hardware installations
MA
L
D
et’s face facts: You don’t need all the fastest, most expensive gadgets to
get value out of your computer. On the other hand, equipment that fits
your needs can help you do more and better work in less time.
GH
TE
You can spend a whole lot of money on toys and gewgaws that, ultimately,
end up collecting dust. You can spend a pittance on items that you’ll use
every day. Unfortunately, it’s hard to tell in advance whether a specific,
fancy new WhipperSnapper II belongs to the former group or the latter.
RI
This chapter reviews the common computer thingies now available to help
you decide whether any of them would be valuable to you. I take a special
look at the hardware that’s supposed to make Windows 7 work faster.
CO
PY
I’ve had a great deal of luck in upgrading three- or four-year-old Windows XP
PCs to Windows 7: In many cases, a little more memory (goose it up to 1GB)
and a decent video card (widely available for, say, $50 or less) provide all
the oomph necessary to get Windows 7 humming, on hardware that’s more
than a little past its prime.
In subsequent chapters, I take a specific look at hard drives, and printers
and multifunction devices (you know, copier/scanner/faxer/coffee-warmer/
foot-massager appliances). I also discuss Device Stage, a feature that
debuted in Windows 7, which may make using hardware less, uh, hard.
774
Knowing What Windows 7 Wants
Knowing What Windows 7 Wants
Do you have an old PC sitting in a corner, doing an uninspiring job of running Windows XP or (worse) Vista? Does your friendly local computer store
advertise a pile of unsold computers, reduced in price because they’re past
their prime?
Not to worry, mate. That old hunk of iron may be usable yet.
In the course of writing this book, I tried running Windows 7 on all sorts of
odd pieces of hardware. Here’s what I found:
✦ Many systems that run like slugs under Vista perform significantly —
noticeably — better with Windows 7.
✦ Fairly recent Windows XP desktop systems, when fed a little extra
memory and a video card worthy of the name, can handle Windows 7
quite well.
✦ Old Windows XP laptops, on the other hand, don’t do well with
Windows 7. The primary culprit: lack of oomph in the video department.
✦ Almost any new system — even one that’s been discounted heavily —
runs Windows 7 very well. Get the memory up to 1GB or more and install
a better video card, and you’re done.
Let me tell you a story: Last month, I hopped down to my friendly local PC
dealer, looking for a dirt-cheap PC to run Windows 7. I found a discontinued
HP Pavilion — dozens of them — that the retailer had marked down to $225.
Very basic stuff: Dual core Pentium, 1GB of memory, 160GB hard drive, integrated Intel GMA 3100 video driver, PCI Express slots.
Bravely pursuing Windows 7 enlightenment, I tore open the case and
installed a used video card that I had lying around the office. It sports an
NVIDIA GeForce 8600 GT chip with 256MB of memory. You can buy the same
card at many discount shops for $50 or less.
I installed Windows 7 on the machine, and it proved positively snappy.
The Windows Experience Index (see Book II, Chapter 4) came in at 5.3 (see
Figure 1-1). That’s a mighty good showing for a $300 PC.
A 5.3 score makes this discount Pavilion almost as fast as my (ridiculously
expensive) two-year-old production machine. If anything, it feels faster.
Upgrading the Basic Stuff
775
Moral of the story: You don’t need to spend a fortune to improve your PC’s
performance. As you work through the nitty-gritty details in this chapter,
keep that simple fact in mind.
Figure 1-1:
The
Windows
Experience
Index score
for a superdiscounted
$300 PC.
Upgrading the Basic Stuff
You probably have a printer, but it may not suit your needs — heck,
photo-quality printers are so good and cheap nowadays that I’m frequently
tempted to throw my old printer out the window. Your monitor may have
died — or you might’ve noticed that gorgeous 29-inch flat-panel monitor
winking at you across the aisle at your local Comput-O-Rama. Perhaps that
giant 120GB hard drive you bought two years ago doesn’t look so gigantic
any more — particularly because the kids discovered how easy it is to transfer pictures taken on digital cameras.
A few popular upgrades, such as adding a second (or third) hard drive and
choosing a new printer, are beyond the scope of this book. You can find tips
and basics for choosing and installing new hard drives (both internal ones
and external ones) and printers at Dummies.com. Or check out Upgrading
and Fixing PCs For Dummies, 7th Edition, by Andy Rathbone (Wiley) for more
in-depth coverage.
Book VIII
Chapter 1
Finding and
Installing the
Hardware You Need
Be of good cheer. For the most part, basic upgrades under Windows 7 are as
slick as can be.
776
Upgrading the Basic Stuff
Dealing with drivers
Most types of devices raise the question
of compatibility: Will this gadget work with
Windows 7? You can dissect that question a
thousand different ways, but the real acid test
is a simple one: Is a good driver available for the
hardware? (A driver is a program that allows
Windows 7 to interact with the hardware.)
In most cases, the answer is yes, simply
because Microsoft now hounds hardware
manufacturers who have the temerity to distribute bad drivers. Because Windows 7 is
almost identical to Vista where the driver
rubber meets the road, almost any driver that
works for Vista is good for Windows 7, too. The
same cannot be said for Windows XP drivers. If
you’re looking at a piece of hardware that has
Windows XP support but no Vista support, pass
it by. Windows 7 won’t like it.
has to answer deal with bad drivers. That’s
powerful incentive — and the main reason
why Windows 7 wants to “phone home” when
it crashes.
Most Windows 7 crashes, and a big part of the
Microsoft Product Support team’s workload,
stem from bad device drivers — that Microsoft
didn’t write!
As hard as it may be to believe, that new piece
of hardware you just bought may require no
driver because its interface to the computer
is completely standardized so that Windows
7 can operate any device of the same type.
Most (but not all!) keyboards, monitors, and
mice work like that. Any such device may have
unique features that are available only with an
appropriate driver, though.
A high-level ’Softie I know once told me that 50
percent of all the tech support calls Microsoft
Choosing a new monitor
Once upon a time, cathode ray tube (CRT) screens ruled the roost: They
were hot enough to fry an egg and were prone to flicker and have wavy lines;
the big ones weighed as much as an elephant — a big elephant. Nowadays,
liquid crystal displays (LCDs) have taken over, and even newer technology
appears just around the corner.
Before you buy a new monitor, make sure that you read an unbiased review
(or ten) written by people who sit down in front of a bunch of monitors and
compare them all side by side. I tend to look at CNET Reviews (reviews.
cnet.com). You might also want to use Google.
If you opt for an LCD monitor — and most people do — consider the following information:
Upgrading the Basic Stuff
777
✦ If you play games or work with fast-moving images, make sure that
you can put up with a specific LCD’s response time before you buy it.
LCDs are notorious for not keeping pace with some games, turning crisp
images of, oh, smashing taxi cabs into mushy blobs of smashing taxi
cabs. Come to think of it, maybe there isn’t all that much difference.
An LCD’s response time is the amount of time it takes for a pixel to
change from black to white and back to black, although some manufacturers measure the (much faster) time necessary to change colors. If
you spend your working day, uh, working, a 10 or even 12 millisecond
(ms) response time suffices. If you watch video or play games, look for
5 ms or better. Some people say that they can see a difference with 2 ms
response times. If you think you might want 2 ms, make sure that you
compare fast and (relatively) slow monitors side-by-side and see
whether it’s worth the difference in price.
✦ The manufacturing process occasionally produces screens with dead
pixels. A dead pixel shows up as a black spot (or some other nonmatching color) in the image. Most manufacturers consider an LCD display
functional if it has no more than three dead pixels, but a single dead
pixel may drive you crazy, especially if it sits near the middle of the
screen. If you look at a screen and immediately notice its dead pixel or
pixels, pass it by or return it.
Go to gdargaud.net/Hack/DeadPixels.html for a useful dead-pixel
detector.
✦ An LCD can be difficult to read from certain angles, particularly far
from the screen’s centerline. This situation can be a problem if several
people at a time have to watch the computer screen.
For more information on what to look for in a monitor, read on.
Eliminating the video card middleman
CRT monitors live in an analog world: They’re controlled by signals that vary
in strength, much as a television attached to a Nintendo gets driven by three
cables controlling the red, green, and blue colors.
The video card was invented specifically because the bits inside your computer needed to drive an analog monitor. The video card translated 1s and
0s inside the computer into varying-intensity red, green, and blue dots on
the screen. In short, video cards served as digital-to-analog converters, feeding signals to CRT monitors.
Finding and
Installing the
Hardware You Need
LCD monitors, on the other hand, are all digital, all the time. Internally,
they control each dot on the screen with 1s and 0s, on and off, just like
your computer.
Book VIII
Chapter 1
778
Upgrading the Basic Stuff
Times have changed. It doesn’t make any sense for the video card to translate bits into an analog signal, only to have an LCD monitor translate the
analog signal back into bits. That’s the crux of the Digital Visual Interface
(DVI) plugs: Eliminate the video-card middleman.
More and more LCD monitors come equipped with DVI plugs. More and
more video cards come equipped with DVI ports (see Figure 1-2). Unlike the
old D-shaped VGA plugs, which have 15 round pins arranged in 3 rows of 5
each, the much larger and more rectangular DVI plugs have a single flat pin
and (usually) 24 round ones, in an asymmetrical pattern.
Figure 1-2:
The ATI
Radeon HD
4890 offers
two DVI
ports and
occupies
a PCIe x16
slot.
Photo courtesy AMD Corporation.
If you have a choice, go with DVI. It’s faster and more reliable than the old
VGA interface — and the pins are less likely to get crunched when your hamfisted cousin starts switching around monitors.
Choosing a screen resolution
A flat-screen monitor’s native resolution is the number of image-forming dots,
or pixels, that the monitor can display horizontally and vertically. Although
you can adjust the resolution on CRT displays to infinitesimal sizes and squint
with the consequences, for the most part, adjusting an LCD screen to any
resolution other than its native resolution leaves your eyes begging for mercy.
The grid of dots in a flat-panel display is fixed — the modified screen
resolution is a sleight of hand, performed by interpolating among dots on
the grid. So it’s important to choose a monitor with a native resolution
you can live with.
Upgrading the Basic Stuff
779
Smaller and older screens conform to the 4:3 aspect ratio: 800 x 600 and
1024 x 768 resolutions are both 4:3 aspect ratios. (See the nearby sidebar,
“Taking a look at aspect ratio,” for more on aspect ratios.) Typical standard
format (non-wide-screen) 17-inch and 19-inch screens run at 1280 x 1024,
which isn’t exactly 4:3 (it’s actually 5:4), but you don’t notice much distortion when viewing material meant to be seen at 4:3. For wide-screen measurements, see Table 1-1.
Table 1-1
Typical Wide-Screen Resolutions
Diagonal Measurement
(Inches)
Resolution
Aspect Ratio
19
1440 x 900
16:10
22
1680 x 1050
16:10
23
2048 x 1152
16:9
24
1920 x 1080 (high-definition
TV resolution)
16:9
24
1920 x 1200
16:10
27
1920 x 1200
16:10
30
2560 x 1600
16:10
I think the easiest way to understand the effect of changing screen resolution is to consider the effect of screen resolution on a plain-vanilla Excel
2007 spreadsheet:
✦ At 800 x 600 resolution, you can see cells A1 through L19 — or 228
cells — on a virgin spreadsheet.
✦ At 1024 x 768, you can see cells A1 through O27, or a total of 405 cells.
That’s 78 percent more usable cells than the 800 x 600 resolution offers.
✦ Jump to 1920 x 1200, and you see A1 through AC49, for a whopping
25,921 cells — 33 times as many as with a 1280 x 1024 screen, and very
nearly 100 times as many as a spreadsheet at 800 x 600.
Book VIII
Chapter 1
Finding and
Installing the
Hardware You Need
✦ At 1280 x 1024, Excel 2007 shows cells A1 through S40, for a grand total
of 760 cells. That’s 88 percent more cells than at 1024 x 768 and more
than three times as many as 800 x 600 offers.
780
Upgrading the Basic Stuff
Taking a look at aspect ratio
If you’ve ever wondered why movies appear
onscreen with a black band at the top and
bottom, or why your photos get cut off a little
differently on 8-by-10 prints as opposed to
6-by-9s, you’ve bumped into the effects of the
aspect ratio.
televisions and (almost) all computer screens
used the 4:3 aspect ratio, where the ratio of a
screen’s width to height is 4 to 3. In the following figure, you see a photo taken with a typical
electronic camera. It produces pictures in a 4:3
aspect ratio.
The aspect ratio of a picture is the ratio of the
picture’s width to its height. For many years,
The earliest movies were shot at 4:3, but
Hollywood quickly found that wider screens
led to more spectacular films. Over time, the
aspect ratio for movies changed, but TV stayed
the same — and computer screens aped TV.
Nowadays, Hollywood movies use several
different aspect ratios, but home theaters all
over the world have mostly settled on the 16:9
aspect ratio (shown in the following figure),
which has become the standard for highdefinition TV (HDTV).
Upgrading the Basic Stuff
781
Although you probably won’t spend most of your time sweating over 25,000cell spreadsheets, this little comparison combined with a lot of experience
leads me to a few simple generalizations:
✦ Any modern monitor you buy can handle 1280 x 1024 resolution just
fine. If you’re staring at a screen that has 1280 x 1024 resolution, you
can see most of a page in Word or Excel. For most Windows users, that’s
good enough.
✦ Really big screens make an enormous difference if you have less-thanstellar eyesight, suffer from eyestrain, or commonly work with full pages
in Word or big spreadsheets in Excel. They’re also quite handy if you
want to let other people look at what you’re doing.
You can also look into the possibility of running two monitors side by side —
doubling the amount of screen you can see at the expense of exercising some
neck muscles. Windows 7 makes setting up two monitors easy (see the next
section), and most video cards these days will play along.
Book VIII
Chapter 1
Finding and
Installing the
Hardware You Need
✦ If you go with a wide-screen monitor, you can put two spreadsheets on
the monitor side-by-side, or see at least half of two different pages in
Word, even at the lowest common resolution of 1440 x 900. Because of
that, wide-screens make sense for most people who use a monitor all
day long. They’re also good for watching movies, but I digress.
782
Upgrading the Basic Stuff
Do you own a monitor but you don’t know its native resolution? As in so
many other areas, Google is your friend. If you have a Samsung SyncMaster
226BW, for example, just run a Google search for SyncMaster 226BW native
resolution. Bingo.
I use a 27-inch Dell wide-screen monitor on my production machine. I love it.
My eyes love it. I consider it to be one of the best computer investments I’ve
ever made — right up there with a good chair and an ancient keyboard (see
“Upgrading keyboards,” later in this chapter). You may not need that much
real estate — and, yes, it’s hard to justify the expense. But, oh, the views!
Changing resolutions and multiple monitors
To change your screen resolution (and set up a second monitor), follow
these steps:
1. Right-click in any blank place on the Windows desktop and choose
Screen Resolution.
You see the Display Settings dialog box, shown in Figure 1-3, where you
can set up multiple monitors.
Figure 1-3:
Set up one
or more
monitors.
2. Click the 1 box to set up your first monitor and 2 to set up the second.
If you can’t figure out which monitor is which, click the Identify Monitors
button. Windows 7 puts a big 1 on Monitor 1 and a big 2 on Monitor 2.
Upgrading the Basic Stuff
783
3. If you have more than one monitor, you can also choose where to
show the desktop (see Table 1-2 for details).
4. To change the resolution on either display, click either the 1 monitor or the 2 monitor, and then adjust the resolution using the slider
shown in Figure 1-4.
Figure 1-4:
Adjusting
the resolution on a
correctly
identified
LCD monitor
always
results in
fuzzy text.
If Windows 7 properly identified your monitor and you have a sufficiently powerful video card, this dialog box should already show the
monitor’s native resolution. Be intensely aware of the fact that lowering the resolution of your LCD screen, below its native resolution, only
makes the text look worse. (See the preceding section to find your
monitor’s native resolution.)
5. Click the Apply button.
Windows 7 changes the display’s resolution and opens a dialog box that
asks whether you want to keep the new settings.
Book VIII
Chapter 1
Finding and
Installing the
Hardware You Need
If Windows doesn’t let you set your monitor to its native resolution, you
need to get a better video card. Some video cards can’t support odd resolutions, and very high resolutions require capable cards. You’re trying
to pump 10 pounds of video from a 5-pound card.
784
Upgrading the Basic Stuff
6. Click the Keep Changes button to keep the new settings or click
Revert to return to the old ones.
If the display disappears or becomes unreadable, press Esc to return to
the old settings. (Or, if you wait 15 seconds, Windows 7 returns to the
old settings automatically.) If you can’t read the screen, you chose a
resolution that your monitor can’t display.
7. When you’re done, click the OK button to close the Display Settings
dialog box.
Table 1-2
Multiple-Monitor Desktop Settings
Setting Name
Shown on Monitor 1
Shown on Monitor 2
Duplicate
These Displays
The usual Windows
desktop
Exactly the same as Monitor 1
Extend These
Displays
The usual Windows
desktop
A blank area where you can drag
and drop anything you like; behaves
as though it’s to the right of Monitor 1
Show Desktop
Only on 1
The usual Windows
desktop
Nothing
Show Desktop
Only on 2
Nothing
The usual Windows desktop
Picking a video adapter
Windows 7 places high demands on your video card. Many people find that
upgrading their video cards delivers more noticeable punch than almost any
other hardware improvement.
The best way to judge whether you need a new video card? Look at your
Windows Experience Index (see Book II, Chapter 4). My score is shown at
the beginning of this chapter (refer to Figure 1-1). If you don’t play many
games and your Graphics score falls much more than a point below all the
other scores — or if you’re a gamer and the Gaming Graphics score sits
more than a point below the others — you’re a good candidate for a video
card upgrade.
To check out the latest in video card technology, offerings, and prices, I
trust the reviews at Tom’s Hardware (tomshardware.com).
When you choose a new video adapter, consider these points:
Upgrading the Basic Stuff
785
✦ Superfast and superexpensive video cards don’t do squat for most
people. Unless you’re a fanatic gamer, look for video cards in the
$100-and-under range.
✦ If your monitor has a Digital Visual Interface, get a video card with a DVI
port. It’s worth paying extra. Trust me. (For more on DVI, check out the
“Eliminating the video card middleman” section, earlier in this chapter.)
✦ Buy a card with a good fan. Video cards generate a lot of heat.
Dissipate, dissipate, dissipate.
Heat has become a major problem with video cards: hot cards get reliability problems. The generated heat can swirl around inside your PC
and mess up other components. Some cards produce as much heat as
the main computer chip on your motherboard. Most Windows 7–class
video cards come with a built-in fan and heat sink, which draws away
heat from the processing unit and video memory and dumps it into your
computer’s main case. If your computer is having heat problems —
random screen freezes for no apparent reason or spontaneous reboots,
for example — consider buying a dual-slot video card, with an oversize
fan that forces air from the case, by way of openings in the second slot’s
mounting bracket.
If you’re feeling handy, you can also buy and install a video card cooler,
complete with its own heat sink, fan, and exhaust mounting bracket. For
an example, see driverheaven.net/guides/videocooling.
In my experience, the single greatest source of frustration with Windows
since its inception has been lousy video drivers. I’ve seen it happen year in
and year out, in every version of Windows, with every video card manufacturer. Windows 7 is no exception. Video card manufacturers take a long time
to produce decent drivers for their wares — and when they have stable drivers, the pressure to incorporate new features frequently leads to unstable
newer versions. If you buy a new video card, make sure that you check the
manufacturer’s Web site for the latest Windows 7 driver before installing the
card. And, always keep your old video card, just in case the new one simply
doesn’t work.
Upgrading keyboards
Face it: The keyboard that came with your computer wouldn’t even make a
decent boat anchor. Don’t get me wrong. Those mushy, squishy, Tinkertoy
keyboards would make fine Cracker Jack prizes, and casual computer users
can get by with them for years. I wouldn’t look down my nose at your flimsy,
somnambulant, ludicrous excuse for a keyboard. Sniff.
Finding and
Installing the
Hardware You Need
You can take solace in the fact that video drivers these days are as big and
complex as Windows 98. Hard to believe, but true.
Book VIII
Chapter 1
786
Upgrading the Basic Stuff
Seriously, if you spend more than a few hours a day at the computer, you’re
probably wondering why your fingers hurt and why you make so many mistakes typing. There’s a good reason: That keyboard you’re using probably
cost a dollar. Maybe less. Getting a new one can make a big difference in how
well you type and can speed your computing enormously. You know — so
that you can get a life. . . .
Several companies now make ergonomic keyboards, which are contoured
to let you type with your hands in a position that (supposedly) reduces the
stress on them; these keyboards take some getting used to, but some users
swear by them. (Personally, I swear at them.)
If you’ve been using a “straight” keyboard, make sure that you can adjust to
a split ergonomic keyboard before you buy one. I know a lot of people who
have given up in disgust when their fingers couldn’t adapt to the ergonomic
split.
You can get a wireless keyboard. Keep in mind, though, that wireless keyboards have batteries that wear out. And, with regular wired keyboards, you
don’t have to worry about interference or blocked sensors. Sure, cables are
ugly, but they’re quite reliable.
You can also get a keyboard with a built-in pointing device to replace the
mouse. Heck, you can probably get one that looks like Mickey Mouse.
If you’re serious about replacing your tin-can keyboard, keep these points
in mind:
✦ Look for a keyboard that feels right. Some folks like quiet keys. I like
’em loud. Some people prefer keys with short throws — ones you don’t
have to push very far. I like long throws. Some prefer minimal tactile
feedback — when you push the key, it doesn’t push back. I like lots of
tactile feedback. Most current keyboards have a row of function keys
across the top. I like mine on the left. Everybody’s different, and the only
way you’re going to find a keyboard you like is to try dozens of them.
✦ Expensive keyboards aren’t necessarily better than cheap ones. And,
big-name keyboards aren’t necessarily better than generics.
✦ Heavy keyboards are better than light ones, unless you’re going to
schlep your keyboard with you on your travels through Asia. Heavy
keyboards with rubber feet stay put.
Benj Edwards at PC World has an excellent review and slide show of the
inner workings of the IBM Model M keyboard — likely the best keyboard of
all time — at tinyurl.com/6hj6e4.
Upgrading the Basic Stuff
787
Which keyboard do I use? An old Northgate OmniKey Ultra (see Figure 1-5),
which is surely the Sherman tank of the keyboard biz. The beast weighs
almost as much as a portable computer, and it costs just under $200. You
can’t find new ones any more — you have to buy them refurbished. It’s ugly,
it’s retro, and it’s decidedly unhip. But it keeps goin’ and goin’. It’s available
from northgate-keyboard-repair.com, one of the few places that sell
the classics.
For the brave of heart, eBay is full of good old clickity-clack ancient AT/
IBM-PC style keyboards for less than half the price of the Northgate. Most of
them require only an AT-to-PS/2 adapter (available at most computer stores)
to plug into a modern computer.
Figure 1-5:
Refurbished
Northgate
OmniKey
Ultra.
Choosing a mouse — or alternatives
Mice are probably available in more varieties than any other computer
accessory. You can find mice with special ergonomic profiles, colored mice,
transparent mice, special mice designed for kids, and on and on.
Right now, my favorite mouse is a Microsoft Natural Wireless Laser Mouse
(see Figure 1-6). I never thought I’d convert to a wireless mouse, but this
funny-looking critter fits my hand precisely, and the laser tracking works
remarkably well.
Book VIII
Chapter 1
Finding and
Installing the
Hardware You Need
Laser and optical mice now rule the roost. An optical mouse uses a lightemitting diode (LED) light source and sensor to detect movement over a
flat surface. It has no rolling ball to slip or stick, and it rarely needs to be
cleaned. You may find this model particularly helpful if you have furry pets
and your mouse tends to get clogged by their hair. Laser mice use an infrared laser diode, but otherwise function in much the same way. They’re significantly more sensitive than optical mice.
788
Upgrading the Basic Stuff
Figure 1-6:
My personal
favorite: the
Microsoft
Natural
Wireless
Laser
Mouse 6000.
Photo courtesy Microsoft Corporation.
Some folks prefer a trackball to a mouse. A trackball is a stationary device
with a large ball resting in a cup on the top. You operate it by turning the
ball with your palm or thumb. I hate ’em.
Some folks like to use a graphics tablet rather than or in addition to a mouse.
You control software with a graphics tablet by touching its surface with
a special stylus. Unlike a mouse, the graphics tablet detects position, not
motion, so you can literally point at the item you want. You can even write
or draw with the stylus. Graphics tablets are popular with serious users
of photo editors and other graphics software, and they’re becoming more
popular since Microsoft started producing “digital ink” programs such as
OneNote, which can read what you write, to a first approximation, anyway.
Many of these applications have special graphics tablet support and can
detect the amount of pressure you’re applying to the stylus. Thus, you can
press hard to draw a wide line, for example, or lightly to draw a thin line.
Tablet PCs — the kind that are designed to be used with a stylus and (almost
invariably) OneNote — aren’t for everyone. Some people love them. Most
people don’t get used to them. I count myself among the latter. If you ever
think about buying a Tablet PC specifically for its note-taking capabilities, try
to borrow one for a day or two before you plunk down the cash. You may find
that the reality doesn’t live up to the glitz. Or, you may find that you love it!
A touchpad is similar to a graphics tablet, but you control it with your fingertip rather than a stylus. Touchpads and belly buttons (er, pointer sticks) are
common on notebook computers. You “click” by tapping the pad. A touchpad is convenient for moving the pointer around the screen, but because
most people’s fingers are less pointy than a stylus, it’s not useful for drawing
or writing. Touchpads usually are just a few inches long and wide, and cost
$20 to $50, whereas graphics tablets are larger and cost $100 or more.
All mice designed for Windows computers are compatible with Windows 7.
Specialized devices such as graphics tablets may require special drivers;
make sure that the device you buy is Windows 7 compatible.
Upgrading the Basic Stuff
789
Key drives and ReadyBoost
Although Windows has been prefetching
data — going out to the hard drive and loading
certain files that the system feels are likely to
be needed — since the days of Windows XP,
Vista brought a new capability to the table.
Windows 7 SuperFetch, like the Vista version,
keeps track of the data and programs you commonly use on your machine and tries to load
that data before it’s used.
and stick them in main memory before they’re
needed, Windows 7 can retrieve the files and
store them on a dedicated chunk of real estate
on a key drive. Because grabbing data from a
key drive is about 10 or 20 times faster than pulling it in off a rotating platter, this ReadyBoost,
as it’s called, can make fetching work better.
ReadyBoost also works independently of
SuperFetch, as kind of a superfast cache.
Prefetching doesn’t help much if you don’t
have a lot of system memory: The stuff that’s
prefetched has a nasty habit of turning stale
and getting shuffled off to Buffalo, er, sent back
to the hard drive, thus negating any benefit of
prefetching it. Windows 7 lets you use a USB key
drive as kind of a scratch pad for prefetching:
Rather than prefetch files from the hard drive
The simple fact is that ReadyBoost doesn’t
help most PCs. After playing with it a bit, I’ve
come up with a simple rule of thumb: If your
computer has less than 512MB of memory and
it would cost a fortune to add more memory,
use a 512MB or 1GB key drive for ReadyBoost.
Otherwise, fuhgeddaboutit.
Getting more out of USB
Your Windows computer probably has two, four, or six USB ports, but you
can attach many more USB devices to it than that. In theory, you can attach
127 USB devices to one computer. If you keep that many devices, you probably have no space left to sit down!
To attach additional devices, you need the USB equivalent of a power strip
to turn one connector into several. That device is a USB hub.
If you run out of USB ports, get a powered USB hub — one that draws electricity from a wall plug (like the one shown in Figure 1-7). That way, you protect against power drains on your computer’s motherboard. If possible, plug
your USB hub into an uninterruptible power supply (UPS) so that a sudden
loss of power doesn’t cause a surge down the USB hub’s power supply.
Book VIII
Chapter 1
Finding and
Installing the
Hardware You Need
A USB hub has one USB connector to attach it to a computer and several
connectors to attach it to devices. Hubs most often have either four or seven
device connectors.
790
Upgrading the Basic Stuff
Figure 1-7:
The Belkin
In-Desk
USB Hub fits
into the hole
in your desk,
leaving
room for
cables.
Photo courtesy Belkin International.
You can plug one USB hub into another — daisy-chain them — to attach
more devices than a single hub can support.
You can string USB cable forever and a day, but if you go much more than 16
feet (5 meters) with a single cable, you’re stretching things thin. If you daisychain powered hubs, you can probably get away with a total run of 80 feet
(25 meters) between the PC and the farthest-out USB-connected peripheral.
Understanding flash memory and USB key drives
Regular computer memory — random access memory (RAM) — needs a
constant supply of power to keep going. Flash memory is a special kind
of computer memory that doesn’t self-destruct when the power goes out.
Technically a type of Electronically Erasable Programmable Read-Only
Memory (EEPROM), flash memory comes in many different kinds of packages.
If you spend any time using electronic cameras, you probably know all about
memory cards — Secure Digital (SD), Compact Flash (CF), and Smart Media
(SM) cards — and if you’ve been around Sony equipment, you also know
about memory sticks. All of them rely on flash memory.
For us unrepentant computer types, flash memory also comes in a little
package — frequently the size and shape of a pack of gum — with a USB
connector on the end. You can call it a USB flash memory stick, a key drive,
a USB drive, a key-chain drive (people really use them as key chains? I
dunno — my favorite key chain looks like Watto from Star Wars), a pocket
drive, a pen drive, a USB key, or a USB stick (that’s what my cables do
when they get old).
Upgrading the Basic Stuff
791
Here’s how hard it is to use a USB drive in Windows 7:
1. Plug the USB drive into a USB slot.
If the USB drive you stick in a USB slot has an AutoRun autostarting
program on it, you see an AutoPlay notification, like the one shown in
Figure 1-8.
Figure 1-8:
Your
AutoRun
options.
2. Click one of the AutoPlay options.
You’re done.
Some parts of the AutoPlay notification (refer to Figure 1-8) can be controlled by settings in files sitting on the USB drive itself. The Conficker worm,
for example, takes advantage of AutoPlay programmability and tries to trick
you into running the worm by using some clever wording. Figure 1-9 shows
the AutoPlay notification that appears when you stick a Conficker-infected
USB drive into a USB slot.
Book VIII
Chapter 1
Finding and
Installing the
Hardware You Need
Figure 1-9:
The entry
marked
Install
or Run
Program
is bogus,
generated
by
Conficker.
792
Installing New Hardware
If you look closely at Figure 1-9, you see how Conficker can paste a folder
icon in the Install or Run Program area. Conficker tries to trick you into running an infectious program by clicking the Open Folder to View Files link
in the middle. I have details on how Conficker jimmies Windows into showing bogus AutoPlay entries in my Windows Secrets Newsletter article at
tinyurl.com/dbgndc with further details at tinyurl.com/mck9ys.
When it comes to buying a USB drive, the salespeople would have you
believe that it’s cool to have color-coded sticks (I just put a sticker on mine),
fancy encrypted memory (so that if somebody steals the stick, it takes him
ten minutes, rather than ten seconds, to look at the data), designer outsides,
and on and on. Here’s what I say:
✦ Buy twice the amount of memory you think you need — you’ll use it
someday.
✦ Go for the lowest price.
If you need to read the other kinds of flash memory — memory cards, the
kind normally used in cameras and MP3 players — buy a cheap, generic, USB
multiformat memory card reader. It shouldn’t set you back more than $10,
and it can come in quite handy.
Installing New Hardware
If you have a USB device — a printer, hard drive, scanner, camera, flash
memory card, foot massager, water desalination plant, or demolition
machine for a new intergalactic highway — just plug the device into a USB
port, and you’re ready to go.
Okay. I exaggerated a little bit.
Two fundamentally different approaches to installing new hardware exist. It
amazes me that some people never even consider the possibility of doing it
themselves, whereas other people wouldn’t have the store install new hardware for them on a bet!
Having the store do it
When you buy a new hard drive or video card, or anything else that goes
inside your computer, why sweat the installation? For a few extra bucks,
most stores can install what they sell. This is the easy, safe way. Rather than
mess around with unfamiliar gadgets, which may be complicated and delicate, let somebody with experience do the work for you.
Different types of hardware present different levels of difficulty. It may make
plenty of sense for you to install one type of device but not another.
Installing New Hardware
793
At one end of the scale, installing a new video card or hard drive can be
rather difficult and is best done by an expert. At the other end, speakers
don’t need any installation; you just plug them in and they work. The store
can show you where the connectors go, but you have to plug them in yourself when you get home.
Here are some guidelines to help you judge how difficult an installation is
likely to be:
✦ Any device that goes inside your computer is best left to the store unless
you have experience with that specific kind of computer hardware.
✦ A device with a USB interface is usually easy; nine times out of ten, you
just plug it in and it works.
✦ Most modern wireless networking systems are inserted with nary a
hiccup.
A cable modem should be installed by the communication carrier’s technician, if at all possible. Digital subscriber line (DSL) modems are easier to
install, but you have to know whether your phone line is ready. The modem
just plugs in, but the telephone line or cable may require configuration or
rewiring to deliver the signal properly.
If you’re unsure whether to install something yourself, ask the store which
steps are involved. If you decide to try it but the instructions confuse you or
scare you when you read them, don’t be embarrassed to go back and ask for
help. I do.
Doing it yourself
If you decide to install a device yourself, the job is more likely to go
smoothly if you observe these guidelines:
Having said that, I readily admit that I never install the software for a
camera or a mobile phone. I just use the built-in Windows utilities, in
Windows Live Photo Gallery and Windows Media Player. For my iPod, I
follow the advice in Book IV, Chapter 2, and for other MP3 players, I just
use Windows Media Player.
✦ Back up your system before you start. It’s unlikely that your attempt to
install a new device will disturb your system if it fails, but a backup is a
good insurance policy in case something bad happens. You need to back
up your data files. Windows 7 can create a system checkpoint and back
up all the internal stuff.
Book VIII
Chapter 1
Finding and
Installing the
Hardware You Need
✦ Don’t just dive in — read the instructions first! Pay attention to any
warnings they give. Look for steps where you may have trouble. Are any
of the instructions unclear? Does the procedure require any software or
parts that appear to be missing? Try to resolve these potential problems
ahead of time.
794
Installing New Hardware
✦ Write down everything you do in case you need to undo it or ask for
help. This advice is particularly important if you’re opening your computer to install an internal device!
✦ If the device comes with a Windows 7 (or Vista) driver, check the
manufacturer’s Web site to see whether you have the latest version. A
company usually keeps drivers on one or more Web pages that you can
find by clicking a Drivers, Downloads, or Support link. If you discover a
version that’s newer than the one packaged with the device, download it
and install it instead.
If you can’t tell whether the version on the Web site is newer because
you can’t tell which version came with the device, you have two choices:
• Download and install the Web site’s version just in case. It’s unlikely to
be older than the one that came with the device!
• Install the one that came with the device. Then check its date and
version number. (See the next section). If the one on the Web site
proves to be newer, download the newer one and install it. Read the
instructions; you may need to uninstall the original driver first.
Checking a driver’s version
To check the version number of a driver, follow these steps:
1. Click the Start button. Right-click Computer and choose Properties.
On the left, click the Device Manager link.
Windows 7 opens the Device Manager window, shown in Figure 1-10.
2. Click the plus sign next to the heading that contains the device you
want to check.
In Figure 1-10, I click the heading Display Adapters, and Windows shows
me which display adapters are installed and recognized.
You may have to try several headings to find the right one. If you guess
wrong, just click again to collapse the heading you expanded.
3. Double-click the device to open the Device Properties dialog box.
Click the Driver tab to display details about the driver, as shown in
Figure 1-11.
You should be able to identify the latest driver by its date or version
number or both.
4. Click the Update Driver button. When Windows asks, click to Search
Automatically for Updated Driver Software.
Windows goes out to the big Microsoft driver database in the sky and
retrieves and installs the latest driver.
Installing New Hardware
795
Figure 1-10:
The Device
Manager
window.
Figure 1-11:
The driver
date and
version are
easy to see.
Book VIII
Chapter 1
If you continue to have driver problems, go directly to the manufacturer’s
Web site and follow its instructions to download and install the latest.
Finding and
Installing the
Hardware You Need
Note that Windows does not automatically check the manufacturer’s
site for the latest drivers. Instead, it relies on the drivers that have
been checked in to its driver database — and many of those drivers are
weeks, months, or years out of date.
796
Installing New Hardware
Knowing what to do if anything goes wrong
If your driver installation goes belly-up, try these strategies in any order that
makes sense to you:
✦ Review the instructions. Look for a section with a title such as
“Troubleshooting” for suggestions on how to proceed.
✦ Call or e-mail the manufacturer’s technical support service for help.
The manual or the Web site can tell you how.
✦ Call the store, or pack up everything and take it in. If you happen to
have a 7-foot-tall friend named Guido who drags his hairy knuckles on
the ground, take him along with you. Moral support, eh?
If your computer no longer works correctly, restart Windows 7 with the last
known good configuration. (See the instructions in the next section.)
Restarting with the last known good configuration
When you install a new device driver, you change the Windows 7 configuration. The next time you restart your computer, Windows 7 tries to use the
new configuration. If it succeeds, it discards the old configuration and makes
the new one current.
The whole process involves some smoke, a few mirrors, and the Windows
Registry.
Sometimes, you install a new device driver and everything goes to heck in a
handbasket. If that happens to you, restart Windows 7 and tell it to use the
last known good configuration — which is to say, Windows should ignore
the changes you made that screwed everything up and return to the state it
was in the last time it started. That action effectively removes the new driver
from Windows 7.
To start Windows with the last known good configuration, follow these
steps:
1. If your computer is working, click the Start button, click the rightfacing arrow to the right of the little lock, and choose Restart.
Windows 7 restarts. Skip to Step 3.
2. If your computer isn’t operating, press the power button to turn it off.
Wait a minute or so. Press the power button again to turn the computer back on.
If that doesn’t work, try pressing the button again and holding it in for
several seconds. If that doesn’t work either, pull the power cord out of
the back of the computer; wait a few seconds, and then plug it in again. If
you’re working with a laptop, you may have to remove the battery. Yes,
it happens.
Installing New Hardware
797
3. As soon as the computer starts to come back to life, press and hold
down F8.
Windows 7 displays a menu of special startup options you can choose.
4. Use the up-arrow and down-arrow keys to move the menu’s highlight
to the option Last Known Good Configuration (Advanced), and then
press Enter.
5. Finish the startup procedure as usual.
If this procedure restarts your computer successfully, Windows 7 discards
the “new” screwed-up configuration and returns permanently to the last
known good configuration.
Installing USB hardware
Nine times out of ten, when you install a new USB device in a Windows 7
computer that has all the latest fixes, everything works easily. The general
procedure works this way:
1. Read the manual.
Some hardware installs automatically: Plug it in and it works. Most hardware needs a little help: You have to put a CD in the CD drive shortly
after you plug it in and let Windows pull the driver off the CD. Some
hardware, though, takes a little extra help, and you have to run an installation program from the product’s CD before you plug it in.
The only way to know for sure which approach works for the specific
piece of hardware you bought is to read the furshlinger manual! Look for
the section with instructions on installing the hardware on a Windows 7
computer. Failing that, look for Vista support. Follow the instructions.
2. After you read the manual and do what it says, plug the USB device
into any handy USB slot.
3. Select the Yes, This Time Only link to let Microsoft see whether it has
a new driver for the hardware.
4. Follow the rest of the steps in the wizard, and most times, you’ll end
up with a functioning device.
5. If you can’t make the device work, check the Microsoft Knowledge
Base articles for troubleshooting USB devices.
A good place to start: the old Vista tips for solving problems with USB
devices, at tinyurl.com/2vkuqv.
Book VIII
Chapter 1
Finding and
Installing the
Hardware You Need
Windows realizes that you just installed a new USB device. Most of the
time, Windows has a driver handy that will work and then installs it and
notifies you that your new device is ready. In some cases, though, it
brings up the Found New Hardware Wizard.
798
Installing New Hardware
Using Device Stage
If you’re extremely lucky and you’re installing
a newer piece of hardware, you might have a
gizmo that supports the Windows 7 standard
known as Device Stage. If that’s the case, pat
yourself on the back, rub your lucky rabbit’s
foot (it won’t do the rabbit any good), and move
to the head of the class.
For more details about Device Stage, see Book
VIII, Chapter 2.