1
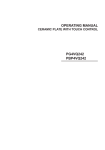
P*4ES11 OPERATING MANUAL ELECTRIC COOKER WITH CONTROL SYSTEM Read this Manual before using the cooker for the first time. IOAA-587 (02.2013/1) DEAR USER, By reading this Manual you will become a conscious user of cooking plate, a technologically advanced cooking appliance. The plate has been designed by a team of engineers and technicians from Research and Construction Department using the latest technical knowledge and modern electronic tools. The plate responds to the market demand for reliability, functionality, easy operation and design of cooking appliances. Before packing each produced plate is thoroughly tested for safety and performance on our testing stations. Please read this Operating Manual carefully before using the appliance for the first time. Observe all instructions and suggestions as only thus you will ensure proper operation and safe use of your plate. Keep this Manual in a safe place within reach for further consultation. Observe all instructions and suggestions given in this Instruction Manual to avoid accidents. Note! Operate the appliance only after reading and understanding this Manual. The appliance has been designed only for cooking. Any other use (for example for heating) does not comply with its operating profile and may cause danger. The producer reserves a right to implement changes having no impact on the operation of the appliance. Certificate of compliance CE The Manufacturer hereby declares that this product complies with the general requirements pursuant to the following European Directives: l The Low Voltage Directive 2006/95/EC, l Electromagnetic Compatibility Directive 2004/108/EC, ErP Directive 2009/125/EC, and therefore the product has been marked with the symbol and the Declaration of Conformity has been issued to the manufacturer and is available to the competent authorities regulating the market. 2 TABLE OF CONTENTS Basic information..................................................................................................2 Safety instructions................................................................................................4 Saving energy........................................................................................................6 Description of the appliance................................................................................8 Installation..............................................................................................................9 Operation.............................................................................................................13 Cleaning and routine maintenance...................................................................16 Warranty ............................................................................................................16 3 SAFETY INSTRUCTIONS Warning: The appliance and its accessible parts become hot during use. Care should be taken to avoid touching heating elements. Children less than 8 years of age shall be kept away unless continuously supervised. This appliance can be used by children aged from 8 years and above and persons with reduced physical, sensory or mental capabilities or lack of experience and knowledge if they have been given supervision or instruction concerning use of the appliance in a safe way and understand the hazards involved. Children shall not play with the appliance. Cleaning and user maintenance shall not be made by children without supervision. Warning: Unattended cooking on a hob with fat or oil can be dangerous and may result in fire. NEVER try to extinguish a fire with water, but switch off the appliance and then cover flame e.g. with a lid or a fire blanket. Warning: Danger of fire: do not store items on the cooking surfaces. 4 SAFETY INSTRUCTIONS The appliance is not intended to be operated by means of an external timer or separate remote-control system. You should not use steam cleaning devices to clean the appliance. ● ● ● ● ● ● ● ● ● ● Ensure that children do not play with the appliance. Make sure that the power cords of other equipment do not touch any hot surfaces of the appliance. Plug of the power cord should be accessible after appliance has been installed. Do not install the appliance near the cooling equipment. Do not leave the appliance unattended while cooking. Oils and fats may catch fire due to overheating. If there is damage to the appliance it can be reused after the defect is repaired by a trained professional. Persons without proper qualifications and training must not make any alterations or repairs of the appliance. In case of any technical defect, immediately unplug the appliance and refer the defect to service to be repaired. Using the appliance for cooking and baking results in the emission of heat and moisture in the room in which it is installed. Make sure that kitchen is well ventilated. Natural ventilation openings or forced mechanical ventilation (exhaust hood) should be available. Prolonged intensive use of the appliance may require additional ventilation, for example, opening a window or a more effective ventilation, such as increasing efficiency of mechanical ventilation, if applicable. 5 SAVING ENERGY Everybody who properly uses energy not only saves money but also consciously acts in aid of the natural environment. So let’s save electric energy by: ● Using proper cookware. Pots and pans with flat and thick bottoms will let you save up to one-third of electric energy. Remember about the lid as otherwise the consumption of energy quadruples! ● Matching cookware to the size of the hotplate. A cooking pot should never be smaller than the used hotplate. ● Maintaining hotplates and pot bottoms clean. Dirt obstructs the transfer of heat – heavily burnt food residuals can often be cleaned only with chemicals harmful to the natural environment. ● Avoiding necessary “peeping into pots”. ● Switching off hotplates at the right moment and using the residual heat. When cooking for a long time, switch off the hotplate 5 to 10 minutes before the end of cooking as thus you can save up to 20% of electric energy. ● Not using the plate near refrigerators / freezers. As the consumption of energy unnecessary rises. 6 UNPACKING The appliance is protected from damage during transportation by its packaging. After unpacking please dispose of the packing materials in a manner creating no risk to the environment. All materials used for packing are harmless to the natural environment, can be recycled in 100% and have been identified with appropriate symbol. Note! Packing materials (polyethylene bags, pieces of polystyrene etc.) should be kept away from children during unpacking. Disposing of the device When disposing of the device, do not bring it to regular munici pal waste containers. Instead, bring it to electrical and elec tronic waste recycling and reuse center. A relevant label has been put on the device, its instructions manual, or on the package. The device has been manufactured of recy clable materials. By bringing old device to recycling collection center, you show that you care about nature. Ask your local environmental care authority for information on location of such facilities. 7 DESCRIPTION OF THE APPLIANCE Electric cooker P*4ES11 1,2,3,4 - hotplates 5 - control knobs 6 - signalling diode Fig.1 Technical data - rated voltage 230 V, 50 Hz - overall dimensions 580 x 510 x 45mm - weight 10,9 kg The cooker is provided with: - hotplates - normal Ø 180 - 1500 W Ø 145 - 1000 W quick-heating Ø 145 - 1500 W - varies depending on the model. Ø 180 - 2000 W 8 INSTALLATION Making the worktop recess ● Worktop thickness should be 28 - 40 mm, while its width at least 600 mm. The worktop must be flat and level. Edge of the worktop near the wall must be sealed to prevent ingress of water or other liquids. ● There should be sufficient spacing around the opening, in particular, at least 50 mm distance to the wall and 60 mm distance to the front edge of worktop. ● Worktop must be made of materials, including veneer and adhesives, resistant to a temperature of 100°C. Otherwise, veneer could come off or surface of the worktop become deformed. ● Edge of the opening should be sealed with suitable materials to prevent ingress of water. ● Worktop opening must cut to dimensions as shown on figure 1. ● Ensure minimum clearance of 80 mm below the hob to allow proper air circulation and prevent overheating. 1 min 60 490 min 50 560 9 INSTALLATION Installing the hob in worktop opening P*4E** ● Use four “A” brackets for 38 mm thick worktops. Fit the hob into worktop opening as shown on figure 2 and 3. To properly secure hob in 28 mm thick worktop, use four 15x15x50 mm wooden blocks in addition to “A” brackets. Fit the hob into worktop opening as shown on figure 4 and 5. ● Check if adhesive seal is properly applied to the hob‘s flange. ● Loosely attach fixing brackets to the bottom of the hob ● Remove dust from the worktop, insert hob into the opening and press in firmly, ● Position fixing brackets perpendicularly to the hob‘s edge and tighten firmly. 2 4 4 5 15 5 1 1. 2. 3. 4. 5. 2 3 1 worktop screw fixing bracket hob seal 1. 2. 3. 4. 5. 6. 3 4 15 2 6 worktop screw fixing bracket hob seal wooden block 5 560 120 260 95 490 490 260 min 50 min 50 560 520 min 60 min 60 520 10 50 3 INSTALLATION Connecting the plate to the electrical system Note! The plate can be connected to the mains only by a qualified certified installer. Wilful adaptations or modifications to the electrical system are prohibited. Guidelines for the installer The plate is factory-set for three-phase alternating current power supply (400 V 3N~50 Hz). It may be adapted for one-phase current power supply (230 V) by adequate bridging on the connection strip, in accordance with the attached wiring diagram. The wiring diagram is also provided in the bottom part of the lower cover. The connection strip can be accessed once the lid on the bottom cover is removed. Please remember to match the mains connection cable to the type of connection and the rated power of the plate. Fix the mains connection cable in a stay wire. Note! Do not forget to connect the protective circuit to a terminal of the connection strip marked with sign. The plate power supply system should be protected by appropriately selected safety device or after the power supply protection, by appropriate safety switch cutting off the power in case of emergency. Before connecting the plate to the electrical system read information provided on the rating plate and wiring diagram. NOTE! The installer is obliged to complete and leave with the user a “certificate of connecting the plate to the mains” (attached to the warranty card). Methods of connection other than those indicated on the diagram can damage the plate. 11 INSTALLATION Wiring diagram Important! Heating elements operate at 230V. Important! For each connection the protective conductor must be connected to the terminal marked . 1 L1 2 L2 3 L3 4 N 5 N Recommended connection lead 6 PE 1 230 V single phase connection with a OWY 3X 4 mm2 neutral lead, terminals 1-2-3 and 4-5 are 1N~ bridged, protective conductor to 2 400/230 V two phase connection with a neutral lead, terminals 2-3 and 4-5 are 2N~ bridged, protective conductor to 3 400/230 V three phase connection with a neutral lead, terminals 4-5 are bridged, individual phases are connected to terminals 1, 2, 3 respectively, neutral lead to bridged terminals 4-5, and the 1 2 3 L1 L2 3N~ 1 2 4 N 3 L1 L2 L3 OWY 4X 2,5 mm2 5 4 PE OWY 5X 1,5 mm2 5 N PE protective conductor to Phase conductors L1=R, L2=S, L3=T, N- neutral lead; 12 - protective earth OPERATION NOTE! Please read the contents of this Operating Manual carefully and observe its instructions. Information about your cooker is specified on the rating plate – according to the below example. Switching on the appliance: Turn the appropriate knob (5) to switch on the selected hotplate (1,2,3,4). The signalling diode (6) lights up and the heating power can now be adjusted by setting the knob to a desired position. The heating elements are controlled by energy switches allowing step power adjustment. The system effectively uses the set power depending on the needs of the user and does not cause its losses. Before first use Before first use the hotplates should be heated without pots for 4 minutes. When used for the first time the plate can give off a bit of a smell so switch on the ventilation system or open the window. Using the hotplates How to save energy? A Fig. 4 B Fig. 5 13 C OPERATION Good pots save energy. The bottom of the appropriately selected cooking pot should be thick and flat and have approximately the same diameter as the used hotplate as only then the optimal transfer of heat can be achieved (Fig. 4). How is the energy lost? Fig. 5 A. The pot is too small for the selected hotplate. Fig. 5 B. The bottom of the pot is not flat (concave). Fig. 5 C. The lid has been put improperly. Please pay attention to the following: • do not switch the hotplate on if you have not put a pot on it, • only use pots with clean and dry bottoms, • never cook food in plastic pots or containers, • do not put plastic objects (teaspoons, forks etc.) on a hot hotplate, • always use pots with lids but remember that the lid should not protrude out of the edge of the pot and the condensate should not drip on the cooker, • protect the plate against corrosion, • switch off the plate 5 -10 minutes before taking the pot off. Fig.6 switched switched switched off on on The symbols above the knobs assign the knob to the hotplate it controls. A hotplate is switched off if: — digit “0” on the knob is under the vertical line on the working plate – in case of using descriptions on the ridge of the knob, — indicator on the knob is under digit “0” on the working plate – in case of using descriptions on the working plate. The heating power is adjusted gradually, by turning the knob to the right or to the left. Switching on a hotplate lights up the signalling diode. 14 OPERATION Knob setting Exemplary cooking activity 3 boiling, quick heating, frying ● roasting meat, fish 2 slow roasting or frying ● cooking soups and larger amounts of food 1 boiling potatoes ● stewing vegetables 0 switching off General comments to the use of hotplates. Depending on the type, the plate can be equipped with normal or quick-heating hotplates. Cooking and frying on normal and quick-heating hotplates The quick-heating hotplate has higher power than the normal hotplate and is marked with a red circle enabling easy recognition. The circle can gradually become burnt away with use. Cooking To boil the food set the knob to position 3 and then return to position 1 to maintain the process; increase or decrease the power of the hotplate depending on the needs (see the table). Frying Set the knob to position 3 to heat up the fat, put in the meat and turn the power down to 2, increase or decrease the power depending on the needs. 15 CLEANING AND ROUTINE MAINTENANCE Daily cleaning and proper maintenance have crucial impact on the durability of your plate. Switch off the cooker (set all the knobs to “0”) and allow it to cool down before cleaning. Wipe the cooker with a soft cloth using a bit of washing liquid. Never use abrasive or scrubbing cleaning agents. Hotplates ● Dirt (i.e. burnt residuals of food) should be removed from the surface of the hotplates using a soft cloth (the black surface of the hotplates should never be washed or scrubbed). The stainless ornamental rings can be cleaned using washing liquids or gentle liquid scrubbing agents and wiped dry. The surface of the hotplates should be regularly polished with white mineral oil or silicone oil. Never use animal or vegetable fats like butter, lard, oil etc. for the purpose. Working plate ● The enamel working plate should be cleaned using warm water with a bit of washing liquid. Larger stains can be removed using gentle scrubbing liquids. Routine maintenance Besides daily operations aimed at keeping the plate clean you should: ● arrange regular inspections to verify the operation of the control components and working assemblies. After the warranty period the plate should be inspected at least once every two years in a Customer Service Centre, ● remove all the found operational faults, ● arrange regular conservation of the working assemblies of the plate WARRANTY Warranty Warranty services according to the warranty card. The producer shall not be held liable for any damages caused by improper operation of the product. Please enter the type and factory number of the plate from the rating plate Type.................................................. Factory number............................................ 16 17 18 19