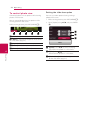
1
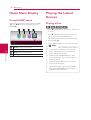
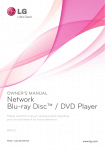
OWNER’S MANUAL
Blu-ray Disc™/
DVD Player
Please read this manual carefully before operating
your set and retain it for future reference.
BP250
www.lg.com
P/NO : MFL***
2
Getting Started
Safety Information
1
CAUTION
Getting Started
RISK OF ELECTRIC SHOCK
DO NOT OPEN
CAUTION: TO REDUCE THE RISK OF ELECTRIC
SHOCK DO NOT REMOVE COVER (OR BACK) NO
USER-SERVICEABLE PARTS INSIDE REFER SERVICING
TO QUALIFIED SERVICE PERSONNEL.
This lightning flash with arrowhead
symbol within an equilateral triangle
is intended to alert the user to the
presence of uninsulated dangerous
voltage within the product’s
enclosure that may be of sufficient magnitude to
constitute a risk of electric shock to persons.
The exclamation point within an
equilateral triangle is intended
to alert the user to the presence
of important operating and
maintenance (servicing)
instructions in the literature accompanying the
product.
WARNING: TO PREVENT FIRE OR ELECTRIC SHOCK
HAZARD, DO NOT EXPOSE THIS PRODUCT TO RAIN
OR MOISTURE.
CAUTION: The apparatus shall not be exposed to
water (dripping or splashing) and no objects filled
with liquids, such as vases, shall be placed on the
apparatus.
WARNING: Do not install this equipment in a
confined space such as a book case or similar unit.
CAUTION: Do not use high voltage products
around this product(ex. Electrical swatter). This
product may malfunction due to electrical shock.
CAUTION: Do not block any ventilation openings.
Install in accordance with the manufacturer’s
instructions.
Slots and openings in the cabinet are provided for
ventilation and to ensure reliable operation of the
product and to protect it from over heating. The
openings shall be never be blocked by placing
the product on a bed, sofa, rug or other similar
surface. This product shall not be placed in a builtin installation such as a bookcase or rack unless
proper ventilation is provided or the manufacturer’s
instruction has been adhered to.
CAUTION: This product employs a Laser System.
To ensure proper use of this product, please read
this owner’s manual carefully and retain it for future
reference. Shall the unit require maintenance,
contact an authorized service center.
Use of controls, adjustments or the performance of
procedures other than those specified herein may
result in hazardous radiation exposure. To prevent
direct exposure to laser beam, do not try to open
the enclosure.
CAUTION concerning the Power Cord
Most appliances recommend they be placed upon
a dedicated circuit;
That is, a single outlet circuit which powers only
that appliance and has no additional outlets or
branch circuits. Check the specification page of this
owner’s manual to be certain. Do not overload wall
outlets. Overloaded wall outlets, loose or damaged
wall outlets, extension cords, frayed power cords, or
damaged or cracked wire insulation are dangerous.
Any of these conditions could result in electric
shock or fire. Periodically examine the cord of your
appliance, and if its appearance indicates damage
or deterioration, unplug it, discontinue use of the
appliance, and have the cord replaced with an
exact replacement part by an authorized service
center. Protect the power cord from physical or
mechanical abuse, such as being twisted, kinked,
pinched, closed in a door, or walked upon. Pay
particular attention to plugs, wall outlets, and the
point where the cord exits the appliance.
The Power Plug is the disconnecting device. In
case of an emergency, the Power Plug must remain
readily accessible.
NOTICE: For safety marking information including
product identification and supply ratings, please
refer to the main label on the bottom or rear of the
apparatus.
CAUTION: Only use the AC adapter supplied
with this device. Do not use a power supply from
another device or another manufacturer. Using
any other power cable or power supply may cause
damage to the device and void your warranty.
Getting Started
This device is equipped with a portable battery or
accumulator.
Disposal of your old appliance
1. When this crossed-out wheeled bin
symbol is attached to a product it
means the product is covered by the
European Directive 2002/96/EC.
2. All electrical and electronic products
shall be disposed of separately
from the municipal waste stream
via designated collection facilities
appointed by the government or the
local authorities.
3. The correct disposal of your old
appliance will help prevent potential
negative consequences for the
environment and human health.
4. For more detailed information about
disposal of your old appliance, please
contact your city office, waste disposal
service or the shop where you
purchased the product.
Disposal of waste batteries/accumulators
1. When this crossed-out wheeled
bin symbol is attached to batteries/
accumulators of Your product it means
they are covered by European Directive
2006/66/EC.
2. This symbol may be combined with
chemical symbols for mercury(Hg),
cadmium(Cd) or lead(Pb) if the
battery Contains more that 0.0005%
of mercury, 0.002% of cadmium or
0.004% of lead.
3. All batteries/accumulators should be
disposed separately from the municipal
waste stream via designated collection
facilities appointed by the government
or the local authorities.
4. The correct disposal of Your old
batteries/ accumulators will help
to prevent potential negative
consequences for the environment,
animal and human health.
5. For more detailed information
about disposal of Your old batteries/
accumulators, please contact Your
city office, waste disposal service or
the shop where You purchased the
product.
Contact office for compliance of this product:
LG Electronics European Shared Service Center B.V.
European Standard Team
Krijgsman 1
1186 DM Amstelveen
The Netherlands
1
Getting Started
Safety way to remove the battery or the
battery from the equipment: Remove the
old battery or battery pack, follow the steps
in reverse order than the assembly. To prevent
contamination of the environment and bring on
possible threat to human and animal health, the
old battery or the battery put it in the appropriate
container at designated collection points. Do
not dispose of batteries or battery together with
other waste. It is recommended that you use
local, free reimbursement systems batteries and
accumulators. The battery shall not be exposed to
excessive heat such as sunshine, fire or the like.
3
4
1
Getting Started
Getting Started
Notes on Copyrights
Important Notice for TV color system
yy Because AACS (Advanced Access Content
System) is approved as content protection
system for Blu-ray Disc format, similar to use of
CSS (Content Scramble System) for DVD format,
certain restrictions are imposed on playback,
analog signal output, etc., of AACS protected
contents. The operation of this product and
restrictions on this product may vary depending
on your time of purchase as those restrictions
may be adopted and/or changed by AACS after
the production of this product.
The color system of this player differs according to
currently playing discs.
yy Furthermore, BD-ROM Mark and BD+ are
additionally used as content protection systems
for Blu-ray Disc format, which imposes certain
restrictions including playback restrictions for
BD-ROM Mark and/or BD+ protected contents.
To obtain additional information on AACS, BDROM Mark, BD+, or this product, please contact
an authorized Customer Service Center.
yy The multi system color TV changes the color
system automatically according to input signals.
In case that the color system is not changed
automatically, turn it off and then on to see
normal images on screen.
yy Many BD-ROM/DVD discs are encoded with
copy protection. Because of this, you should only
connect your player directly to your TV, not to a
VCR. Connecting to a VCR results in a distorted
picture from copy-protected discs.
yy This product incorporates copyright protection
technology that is protected by U.S. patents
and other intellectual property rights. Use of
this copyright protection technology must be
authorized by Rovi Corporation, and is intended
for home and other limited viewing uses only
unless otherwise authorized by Rovi Corporation.
Reverse engineering or disassembly is prohibited.
yy Under the U.S. Copyright laws and Copyright
laws of other countries, unauthorized recording,
use, display, distribution, or revision of television
programs, videotapes, BD-ROM discs, DVDs, CDs
and other materials may subject you to civil and/
or criminal liability.
For example, when the player plays the disc
recorded in the NTSC color system, the image is
output as an NTSC signal.
Only the multi system color TV can receive all
signals output from the player.
yy If you have a PAL color system TV, you will see
just distorted images when using discs or video
contents recorded in NTSC.
yy Even if the disc recorded in NTSC color system
are well displayed on your TV, these may not be
recorded correctly on your recorder.
5
Table of Contents
Table of Contents
1
Getting Started
2
Safety Information
8Introduction
8
– Playable discs and symbols used in
this manual
9
– About the “7” symbol display
9
– Regional code
9
– System Select
10 Remote Control
11 Front Panel
11 Rear Panel
2Connecting
12
12
13
14
15
15
Connecting the AC Adapter
Connecting to your TV
– What is SIMPLINK?
– Resolution setting
Connecting to an Amplifier
– Connecting to an amplifier via HDMI
output
3 System Setting
16 Initial Setup
16Settings
16 – Adjust the setup settings
17 – [DISPLAY] menu
18 – [LANGUAGE] menu
19 – [AUDIO] menu
20 – [LOCK] menu
21 – [OTHERS] menu
4Operating
22
22
22
22
23
24
25
25
25
25
26
26
27
27
28
29
29
29
29
30
30
30
30
31
31
32
32
32
33
Home Menu Display
– Using [HOME] menu
Playing the Linked Devices
– Playing a Disc
– Playing a file on disc/USB device
– Playing a file on Android device
General Playback
– Basic operations for video and audio
content
– Basic operations for photo content
– Using the disc menu
– Resume playback
– Last scene memory
On-Screen Display
– To control video playback
– To control photo view
Advanced Playback
– Repeat playback
– Repeating a specific portion
– Playing from selected time
– Selecting a subtitle language
– Hearing a different audio
– Watching from a different angle
– Changing the TV Aspect Ratio
– Changing subtitle Code Page
– Changing the Picture Mode
– Viewing content information
– Changing content list view
– Selecting a subtitle file
– Listening to music during slide show
5Troubleshooting
34Troubleshooting
34 – General
35 – Picture
35 – Customer support
35 – Open source software notice
Table of Contents
6
6Appendix
36 Controlling a TV with the Supplied
Remote Control
36 – Setting up the remote to control your
TV
37 Additional Information
37 – File requirement
38 – AVCHD (Advanced Video Codec High
Definition)
39 – Certain system requirements
39 – Compatibility notes
40 Audio Output Specifications
41 Area Code List
42 Language Code List
43 Trademarks and Licenses
45Specifications
46Maintenance
46 – Handling the unit
46 – Notes on discs
1
2
3
4
5
6
Some of contents in this manual may differ from your player depending on the software of the
player or your service provider.
7
Getting Started
Introduction
1
Playable discs and symbols used in this manual
Getting Started
Media/Term
Logo
Symbol
e
Blu-ray
y
u
i
r
DVD-ROM
Description
yy Discs such as movies that can be purchased or
rented.
yy BD-R/RE discs that are recorded in BDAV format.
yy BD-R/RE discs that contain Video, Audio or
Photo files.
yy ISO 9660+JOLIET, UDF and UDF Bridge format
yy Discs such as movies that can be purchased or
rented.
yy Video mode and finalized only
yy Supports the dual layer disc also
DVD-R
DVD-RW
DVD+R
DVD+RW
o
Finalized AVCHD format
y
u
i
yy DVD±R/RW discs that contain Video, Audio or
Photo files.
yy ISO 9660+JOLIET, UDF and UDF Bridge format
DVD-RW (VR)
r
VR mode and finalized only
Audio CD
t
Audio CD
CD-R/RW
y
u
i
yy CD-R/RW discs that contain Video, Audio or
Photo files.
,
>
Indicates special notes and operating features.
Note
–
Caution
–
yy ISO 9660+JOLIET, UDF and UDF Bridge format
Indicates cautions for preventing possible damages
from abuse.
Getting Started
,,Note
yy Depending on the recording software & the
finalization, some recorded discs (CD-R/RW,
DVD±R/RW, BD-R/RE) may not be playable.
yy BD-R/RE, DVD±R/RW and CD-R/RW discs
recorded using a personal computer or a
DVD or CD Recorder may not play if the
disc is damaged or dirty, or if there is dirt or
condensation on the player’s lens.
yy If you record a disc using a personal
computer, even if it is recorded in a
compatible format, there are cases in which
it may not play because of the settings of
the application software used to create the
disc. (Check with the software publisher for
more detailed information.)
yy This player requires discs and recordings to
meet certain technical standards in order to
achieve optimal playback quality.
yy Pre-recorded DVDs are automatically set to
these standards. There are many different
types of recordable disc formats (including
CD-R containing MP3 or WMA files) and
these require certain pre-existing conditions
to ensure compatible playback.
yy Customers should note that permission
is required in order to download MP3 /
WMA files and music from the Internet.
Our company has no right to grant such
permission. Permission should always be
sought from the copyright owner.
yy You have to set the disc format option
to [Mastered] in order to make the discs
compatible with the LG players when
formatting rewritable discs. When setting
the option to Live System, you cannot use
it on LG player. (Mastered/Live File System :
Disc format system for windows Vista)
About the “7” symbol display
“7” may appear on your TV display during
operation and indicates that the function explained
in this owner’s manual is not available on that
specific media.
Regional code
This unit has a regional code printed on the rear of
the unit. This unit can play only BD-ROM or DVD
discs labeled same as the rear of the unit or “ALL”.
System Select
Open the disc tray using the B (OPEN/CLOSE)
button and then, press and hold M (PAUSE) for
more than five seconds to change the color system
(PAL /NTSC /AUTO).
1
Getting Started
yy Depending on the conditions of the
recording equipment or the CD-R/RW (or
DVD±R/RW) disc itself, some CD-R/RW (or
DVD±R/RW) discs cannot be played on the
unit.
8
9
Getting Started
Remote Control
1
Getting Started
• • • • • • • a• • • • • • • • • • • • • • d• • • • • • •
1 (POWER): Switches the player
ON or OFF.
Colored (R, G, Y, B) buttons: Use
to navigate BD-ROM menus. They
are also used for [MOVIE], [PHOTO]
and [MUSIC] menu.
B (OPEN/CLOSE): Opens and
closes the disc tray.
0-9 numerical buttons: Selects
numbered options in a menu.
TITLE/POP-UP: Displays the DVD
title menu or BD-ROM’s pop-up
menu, if available.
REPEAT (h): Repeats a desired
section or sequence.
• • • • • • • b• • • • • • •
c/v (SCAN): Searches
backward or forward.
C/V (SKIP): Goes to the
next or previous chapter / track /
file.
M (PAUSE): Pauses playback.
Battery Installation
z (PLAY): Starts playback.
Z (STOP): Stops playback.
• • • • • • • c• • • • • • •
HOME (1): Displays or exits the
[Home Menu].
Remove the battery cover on the
rear of the Remote Control, and
insert the R03 (size AAA) battery
with 4 and 5 matched correctly.
INFO/MENU (m): Displays or
exits On-Screen Display.
Direction buttons(w/s/a/d)
: Selects an option in the menu.
ENTER (b): Acknowledges menu
selection.
BACK (1): Exits the menu or
returns to the previous screen.
DISC MENU: Accesses menu on a
disc.
TV Control Buttons: See page
35.
Getting Started
10
Front Panel
1
Getting Started
a Disc Tray
d R (OPEN / CLOSE)
b Power Indicator
e 1/! (POWER)
c Remote Sensor
f USB Port
Rear Panel
a DC IN 12V (AC adapter input)
b HDMI OUT
11
Connecting
Connecting the AC
Adapter
Connect the unit to the power supply with the
supplied AC adapter.
Rear of the unit
Connecting to your TV
If you have an HDMI TV or monitor, you can
connect it to this player using an HDMI cable (Type
A, High Speed HDMI™ Cable). Connect the HDMI
jack on the player to the HDMI jack on an HDMI
compatible TV or monitor.
Rear of the unit
2
Connecting
HDMI cable
Plug into a power
source.
yy Contact an electrical parts distributor for
assistance in selecting a suitable AC plug adapter
or AC cord set.
TV
Set the TV’s source to HDMI (refer to TV’s Owner’s
manual).
,,Note
Please refer to the manuals of your TV, Stereo
system or other devices as necessary to make
the best connections.
Connecting
Additional information for HDMI
12
What is SIMPLINK?
yy When you connect an HDMI or DVI compatible
device make sure of the following:
-- Try switching off the HDMI/DVI device and
this player. Next, switch on the HDMI/DVI
device and leave it for around 30 seconds,
then switch on this player.
-- The connected device’s video input is set
correctly for this unit.
yy Not all HDCP-compatible HDMI or DVI devices
will work with this player.
-- The picture will not be displayed properly
with non-HDCP device.
,,Note
yy If a connected HDMI device does not accept
the audio output of the player, the HDMI
device’s audio sound may be distorted or
may not output.
yy When you use HDMI connection, you can
change the resolution for the HDMI output.
(Refer to “Resolution Setting” on page 13)
yy Select the type of video output from the
HDMI OUT jack using [HDMI Color Setting]
option on the [Settings] menu (page 17).
yy Changing the resolution when the
connection has already been established
may result in malfunctions. To solve the
problem, turn off the player and then turn it
on again.
yy When the HDMI connection with HDCP
is not verified, TV screen is changed to
black screen. In this case, check the HDMI
connection, or disconnect the HDMI cable.
yy If there are noises or lines on the screen,
please check the HDMI cable (length is
generally limited to 4.5 m(15 ft.)).
Controllable functions by LG TV’s remote control;
Play, Pause, Scan, Skip, Stop, Power Off, etc.
Refer to the TV owner’s manual for the details of
SIMPLINK function.
LG TV’s with SIMPLINK function has the logo as
shown above.
,,Note
Depending on the disc type or playing status,
some SIMPLINK operation may differ from your
purpose or not work.
2
Connecting
-- The connected device is compatible with
720x576p, 1280x720p, 1920x1080i or
1920x1080p video input.
Some functions of this unit are controlled by the
TV’s remote control when this unit and LG TV’s with
SIMPLINK are connected through HDMI connection.
13
Connecting
Resolution setting
The player provides several output resolutions for
HDMI OUT jack. You can change the resolution
using [Settings] menu.
1. Press HOME (1).
2. Use a/d to select the [Settings] and press
ENTER (b). The [Settings] menu appears.
2
3. Use w/s to select [DISPLAY] option then press
d to move to the second level.
Connecting
4. Use w/s to select the [Resolution] option then
press ENTER (b) to move to the third level.
5.Use w/s to select the desired resolution then
press ENTER (b) to confirm your selection.
,,Note
yy If your TV does not accept the resolution
you have set on the player, you can set
resolution to 576p as follows:
1.Press B to open the disc tray.
2Press Z (STOP) for more than 5 seconds.
yy If you select a resolution manually and then
connect the HDMI jack to TV and your TV
does not accept it, the resolution setting is
set to [Auto].
yy If you select a resolution that your TV
does not accept, the warning message
will appear. After resolution change,
if you cannot see the screen, please
wait 20 seconds and the resolution will
automatically revert back to the previous
resolution.
yy The 1080p video output frame rate may
be automatically set to either 24 Hz or
50 Hz depending both on the capability
and preference of the connected TV and
based on the native video frame rate of the
content on the BD-ROM disc.
Connecting
Connecting to an
Amplifier
Since many factors affect the type of audio output,
see “Audio output specifications” for details (page
39).
14
Connecting to an amplifier via
HDMI output
Connect the player’s HDMI OUT jack to the
corresponding in jack on your amplifier using an
HDMI cable.
Rear of the unit
About Digital Multi-channel sound
2
Connecting
A digital multi-channel connection provides the
best sound quality. For this, you need a multichannel Audio/Video Receiver that supports one
or more of the audio formats supported by your
player. Check the logos on the front of the Audio/
Video receiver and the manual. (PCM Stereo, PCM
Multi-Ch, Dolby Digital, Dolby Digital Plus, Dolby
TrueHD, DTS and/or DTS-HD)
HDMI cable
Receiver/Amplifier
HDMI
cable
TV
Connect the amplifier’s HDMI output jack to HDMI
input jack on your TV using an HDMI cable if your
amplifier has HDMI output jack.
You will need to activate the player’s digital output.
(See “[AUDIO] Menu” on page 18)
15
System Setting
Initial Setup
Settings
When you turn on the unit for the first time, the
initial setup wizard appears on the screen. Set the
display language on the initial setup wizard.
Adjust the setup settings
1.Press 1 (POWER).
The initial setup wizard appears on the screen.
2.Use w/s/a/d to select a display language
and press ENTER (b).
3
You can change the settings of the player in the
[Settings] menu.
1. Press HOME (1).
System Setting
2.Use a/d to select the [Settings] and press
ENTER (b). The [Settings] menu appears.
3. Check the setting that you have set in the
previous step.
3.Use w/s to select the first setup option, and
press d to move to the second level.
Press ENTER (b) while [Finish] is highlighted
to finish the initial setup setting. If you want to
change the setting, use w/s/a/d to select
1 and press ENTER (b).
4.Use w/s to select a second setup option, and
press ENTER (b) to move to the third level.
5.Use w/s to select a desired setting, and press
ENTER (b) to confirm your selection.
System Setting
16
[DISPLAY] menu
Resolution
TV Aspect Ratio
Sets the output resolution of the HDMI video signal.
Refer to page 13 for details about the resolution
setting.
Select a TV aspect ratio option according to your TV
type.
[Auto]
Select when a standard 4:3 TV is connected.
Displays theatrical images with masking bars
above and below the picture.
If the HDMI OUT jack is connected to
TVs providing display information (EDID),
automatically selects the resolution best suited
to the connected TV.
[4:3 Pan Scan]
[576p]
Select when a standard 4:3 TV is connected.
Displays pictures cropped to fill your TV screen.
Both sides of the picture are cut off.
[720p]
[4:3 Letter Box]
Select when a 16:9 wide TV is connected. The
4:3 picture is displayed with an original 4:3
aspect ratio, with black bars appearing at the
left and right sides.
[16:9 Full]
Select when a 16:9 wide TV is connected. The
4:3 picture is adjusted horizontally (in a linear
proportion) to fill the entire screen.
,,Note
You cannot select [4:3 Letter Box] and
[4:3 Pan Scan] option when the resolution is
set to higher than 720p.
Outputs 720 lines of progressive video.
3
[1080i]
System Setting
[16:9 Original]
Outputs 576 lines of progressive video.
Outputs 1080 lines of interlaced video.
[1080p]
Outputs 1080 lines of progressive video.
1080p Display Mode
When the resolution is set to 1080p, select
[24 Hz] for smooth presentation of film material
(1080p/24 Hz) with an HDMI-equipped display
compatible with 1080p/24 Hz input.
,,Note
yy When you select [24 Hz], you may
experience some picture disturbance when
the video switches video and film material.
In this case, select [50 Hz].
yy Even when [1080p Display Mode] is set to
[24 Hz], if your TV is not compatible with
1080p/24 Hz, the actual frame frequency of
the video output will be 50 Hz to match the
video source format.
17
System Setting
HDMI Color Setting
[LANGUAGE] menu
Select the type of output from the HDMI OUT jack.
For this setting, please refer to the manuals of your
display device.
Display Menu
[YCbCr]
Select when connecting to an HDMI display
device.
[RGB]
Select when connecting to a DVI display
device.
Home Menu Guide
3
System Setting
This function allows you to display or delete the
guide bubble on the Home Menu. Set this option
to [On] for displaying guide.
Select a language for the [Settings] menu and onscreen display.
Disc Menu/Disc Audio/
Disc Subtitle
Select the language you prefer for the audio track
(disc audio), subtitles, and the disc menu.
[Original]
Refers to the original language in which the
disc was recorded.
[Other]
Press ENTER (b) to select another language.
Use number buttons then press ENTER (b)
to enter the corresponding 4-digit number
according to the language code list on page
41.
[Off] (Disc Subtitle only)
Turn off Subtitle.
,,Note
Depending on the disc, your language setting
may not work.
System Setting
[AUDIO] menu
Each disc has a variety of audio output options. Set
the player’s Audio options according to the type of
audio system you use.
,,Note
Since many factors affect the type of audio
output, see “Audio Output Specifications” on
page 39 for details.
Digital Output
[Auto]
[PCM]
Select if you connect this unit’s HDMI OUT jack
to a device with digital decoder.
Sampling Freq.
(Digital Audio Output)
[48 kHz]
Select this if your A/V Receiver or Amplifier is
not capable of handling 192 kHz and 96 kHz
signal. When this choice is made, this unit
automatically converts any 192 kHz and 96 kHz
signals to 48 kHz so your system can decode
them.
[96 kHz]
Select this if your A/V Receiver or Amplifier is
not capable of handling 192 kHz signals. When
this choice is made, this unit automatically
converts any 192 kHz signals to 96 kHz so your
system can decode them.
[192 kHz]
Select this if your A/V Receiver or Amplifier is
capable of handling 192 kHz signals.
[DTS Re-Encode]
Check the documentation for your A/V Receiver or
Amplifier to verify its capabilities.
Select if you connect this unit’s HDMI OUT jack
to a device with DTS decoder.
DRC (Dynamic Range Control)
,,Note
This function allows you to listen to a movie at a
lower volume without losing clarity of sound.
yy When [Digital Output] option is set to
[Auto], the audio may output as bitstream.
If the bitstream information is not detected
from HDMI device with EDID, the audio may
output as PCM.
yy If the [Digital Output] option is set to [DTS
Re-Encode], the DTS Re-Encode audio is
outputted for BD-ROM discs with secondary
audio and the original audio is outputted
for the other discs (like [Auto]).
[Auto]
The dynamic range of the Dolby TrueHD audio
output is specified by itself.
And the dynamic range of the Dolby Digital
and Dolby Digital Plus are operated as same as
the [On] mode.
[On]
Compress the dynamic range of the Dolby
Digital, Dolby Digital Plus or Dolby TrueHD
audio output.
[Off]
Turns off this function.
,,Note
The DRC setting can be changed only when a
disc is not inserted or the unit is in complete
stop mode.
3
System Setting
Select if you connect this unit’s HDMI OUT jack
to a device with LPCM, Dolby Digital, Dolby
Digital Plus, Dolby TrueHD, DTS and DTS-HD
decoder.
18
19
System Setting
[LOCK] menu
DVD Rating
The [LOCK] settings affect only Blu-ray Disc and
DVD playback.
Blocks playback of rated DVD based on their
content. (Not all discs are rated.)
To access the any features in [LOCK] settings, you
must enter the 4-digit security code you have
created.
If you have not entered a password yet, you are
prompted to do so. Enter a 4-digit password twice,
and press ENTER (b) to create a new password.
Password
You can create or change the password.
3
[None]
System Setting
Enter a 4-digit password twice, and press
ENTER (b) to create a new password.
[Change]
Enter the current password and press ENTER
(b). Enter a 4-digit password twice, and press
ENTER (b) to create a new password.
If you forget your password
If you forget your password, you can clear it using
the following steps:
1. Remove any disc that might be in the player.
2. Highlight [Password] option in the [Settings]
menu.
3. Use number buttons to enter “210499”. The
password is cleared.
,,Note
If you make a mistake before pressing ENTER
(b), press a. Then input the correct password.
[Unlock]
If you select [Unlock], parental control is not
active and the disc plays in full.
[Rating 1-8]
Rating one (1) has the most restrictions and
rating eight (8) is the least restrictive.
Blu-ray Disc Rating
Set an age limit of BD-ROM play. Use number
buttons to input an age limit for BD-ROM viewing.
[255]
All BD-ROM can be played.
[0-254]
Prohibits play of BD-ROM with corresponding
ratings recorded on them.
,,Note
The [Blu-ray Disc Rating] will be applied
only for the Blu-ray disc that containing the
Advanced Rating Control.
Area Code
Enter the code of the area whose standards were
used to rate the DVD video disc, based on the list
on page 40.
System Setting 20
[OTHERS] menu
Auto Power Off
The screen saver appears when you leave the
player in Stop mode for about five minutes. If
you set this option to [On], the unit automatically
turns off within 15 minutes since the Screen Saver
is displayed. Set this option to [Off ] to leave the
screen saver until the unit is operated by the user.
Initialize
[Factory Set]
You can reset the player to its original factory
settings.
Initializes the Blu-ray contents from the
connected USB storage.
,,Note
If you reset the player to its original factory
settings using [Factory Set] option, you have to
set the display language again.
Software
[Information]
Displays the current software version.
[OSS Notice]
LGE Open Source Software Notice is displayed.
3
System Setting
[Blu-ray Storage Clear]
21
Operating
Home Menu Display
Playing the Linked
Devices
Using [HOME] menu
The home menu appears when you press HOME
(1). Use a/d to select a category and press
ENTER (b).
Playing a Disc
erot
1.Press B (OPEN/CLOSE), and place a disc on the
disc tray.
2.Press B (OPEN/CLOSE) to close the disc tray.
For the most Audio CD, BD-ROM and
DVD-ROM discs, playback starts automatically.
3.Press HOME (1).
4. Select [Movie] or [Music], and select disc icon.
a [Movie] - Plays video content.
4
b [Photo] - Plays photo content.
c [Music] - Plays audio content.
Operating
d [Settings] - Adjusts the system settings.
,,Note
yy Playback functions described in this manual
are not always available in every files and
media. Some functions can be restricted
depending on many factors.
yy Depending on the BD-ROM titles, a USB
device connection may be needed for the
proper playback.
yy Unfinalized DVD-VR format discs may not
be played in this player.
yy Some DVD-VR discs are made with CPRM
data by DVD RECORDER. This unit cannot
support these kinds of discs.
Operating 22
Playing a file on disc/USB
device
yui
This player can play video, audio and photo files
contained in the disc or USB device.
1. Insert a data disc on the tray or connect a USB
device.
Notes on USB device
yy This player supports USB flash drive/external
HDD formatted in FAT32 and NTFS when
accessing files (music, photo, movie). However,
for Blu-ray contents, only FAT32 format is
supported. Use the USB flash drive/external HDD
formatted in either FAT32 or NTFS when enjoying
Blu-ray contents.
yy This unit can support up to 4 partitions of the
USB device.
yy Do not extract the USB device during operation
(play, etc.).
yy A USB device which requires additional program
installation when you have connected it to a
computer, is not supported.
yy USB device: USB device that supports USB1.1
and USB2.0.
File loading may take few minutes depending on
the number of content stored in the USB storage
device. Press ENTER (b) while [Cancel] is selected
to stop loading.
yy Regular back up is recommended to prevent
data loss.
2.Press HOME (1).
3. Select [Movie], [Photo] or [Music] using a/d,
and press s.
4. Select Disc or USB and press ENTER (b).
yy Video, audio and photo files can be played. For
details of playing each file type, refer to the
relevant pages.
yy If you use a USB extension cable, USB HUB or
USB Multi-reader, the USB device may not be
recognized.
yy Some USB device may not work with this unit.
yy Some digital cameras and mobile phones are
not supported.
yy USB Port of the unit cannot be connected to PC.
The unit cannot be used as a storage device.
a Displays all linked devices.
b Displays video, photo or audio content.
c Displays the file or folder on linked device.
5. Select a file using w/s/a/d, and press z
(PLAY) or ENTER (b) to play the file.
4
Operating
When you connect the USB device on the HOME
menu, the player plays an audio file contained in
the USB storage device automatically. If the USB
storage device is containing various types of files, a
menu for the file type selection will appear.
23 Operating
Playing a file on Android
device
yui
Notes on Connecting Android device
This player can play video, audio and photo files
contained in Android device.
yy Do not extract Android device during operation
(play, etc.).
1. Connect Android device to the unit with USB
cable. Make sure that MTP is activated on
Android device.
yy Video, audio and photo files can be played. For
details of playing each file type, refer to the
relevant pages.
yy This unit can support only MTP (Media Transfer
Protocol) Android (4.0 or later is recommended)
devices.
yy Regular back up is recommended to prevent
data loss.
yy If you use a USB extension cable, USB HUB or
USB Multi-reader, Android device may not be
recognized.
yy Some Android devices may not work with this
unit.
2.Press HOME (1).
4
3. Select [Movie], [Photo] or [Music] using a/d,
and press s.
4. Select [MTP] using a/d and press ENTER (b).
Operating
File loading may take few minutes depending on
the number of content stored in Android device.
5. Select a file using w/s/a/d, and press z
(PLAY) or ENTER (b) to play the file.
yy When you use MTP, playing some music, photo,
movie, or subtitle files may not work depending
on Android device.
Operating 24
General Playback
Basic operations for photo
content
Basic operations for video and
audio content
To play a slide show
To stop playback
To stop a slide show
Press Z (STOP) during playback.
To pause playback
Press M (PAUSE) during playback.
Press z (PLAY) to resume playback.
To play frame-by-frame (Video)
Press M (PAUSE) during movie playback.
Press M (PAUSE) repeatedly to play Frame-by-Frame
playback.
To scan forward or backward
You can change the various playback speeds by
pressing c or v repeatedly.
To slow down the playing speed
(Video)
While the playback is paused, press v repeatedly
to play various speeds of slow motion.
To skip to the next/previous
chapter/track/file
During playback, press C or V to go to the
next chapter/track/file or to return to the beginning
of the current chapter/track/file.
Press C twice briefly to step back to the previous
chapter/track/file.
Press Z (STOP) during slide show.
To pause a slide show
Press M (PAUSE) during slide show.
Press z (PLAY) to re-start the slide show.
To skip to the next/previous photo
While viewing a photo in full screen, press a or d
to go to the previous or next photo.
Using the disc menu
ero
To display the disc menu
The menu screen may be displayed first after
loading a disc which contains a menu. If you want
to display the disc menu during playback, press
DISC MENU.
Use w/s/a/d buttons to navigate through
menu items.
To display the Pop-up menu
Some BD-ROM discs contain Pop-up menu that
appears during playback.
Press TITLE/POP-UP during playback, and use w/
s/a/d buttons to navigate through menu
items.
4
Operating
Press c or v to play fast forward or fast reverse
during playback.
Press z (PLAY) to start slide show.
25 Operating
Resume playback
eroyt
u
The unit records the point where you pressed the
Z (STOP) depending on the disc.
If “MZ (Resume Stop)” appears on the screen
briefly, press z (PLAY) to resume playback (from
the scene point).
If you press Z (STOP) twice or unload the disc,
“Z(Complete Stop)” appears on the screen. The unit
will clear the stopped point.
,,Note
yy The resume point may be cleared when a
button is pressed (for example; 1 (POWER),
B (OPEN/CLOSE), etc).
yy On BD-ROM discs with BD-J, the resume
playback function does not work.
4
Operating
yy If you press Z (STOP) once during BD-ROM
interactive title playback, the unit will be in
Complete Stop mode .
Last scene memory
er
This unit memorizes the last scene from the last disc
that is viewed. The last scene remains in memory
even if you remove the disc from the unit or switch
off the unit. If you load a disc that has the scene
memorized, the scene is automatically recalled.
,,Note
yy Last Scene Memory function for a previous
disc is erased once a different disc is played.
yy This function may not work depending on
the disc.
yy On BD-ROM discs with BD-J, the last scene
memory function does not work.
yy This unit does not memorize settings of
a disc if you switch off the unit before
commencing to play it.
Operating 26
On-Screen Display
Displaying content information onscreen
You can display and adjust various information and
settings about the content.
eroy
To control video playback
eroy
2. Select [Option] using a/d , and press ENTER
(b).
1. During playback, press INFO/MENU (m).
You can control playback and set options while
watching videos.
During playback, press INFO/MENU (m).
a Progress bar - Displays the current position
and total playing time.
4
c [Title/Popup] - Displays the DVD title menu
or BD-ROM’s pop-up menu, if available.
a Title – Current title number/total number of
titles.
d [Option] - Displays playback information.
b Chapter – Current chapter number/total
number of chapters.
e [Repeat] - Repeats a desired section or
sequence. (page 28)
c Time – Elapsed playing time/total playback
time.
d Audio – Selected audio language or channel.
e Subtitle – Selected subtitle.
f Angle – Selected angle/total number of
angles.
g TV Aspect Ratio – Selected TV aspect ratio.
h Picture Mode – Selected picture mode.
,,Note
yy If no button is pressed for a few seconds,
the on-screen display disappears.
yy A title number cannot be selected on some
discs.
yy Available items may differ depending on
discs or titles.
yy If an interactive Blu-ray Disc is playing back,
some setting information is displayed on
the screen but prohibited to be changed.
Operating
b [Disc Menu] - Accesses menu on a disc.
27 Operating
To control photo view
Setting the slide show option
Controls playback and sets options while viewing
pictures in full screen.
You can use various options during viewing a
photo in full screen.
You can control playback and set options while
viewing pictures in full screen.
1. While viewing pictures, press INFO/MENU (m).
While viewing pictures, press INFO/MENU (m).
2. Select [Option] using a/d, and press ENTER
(b)
a [Slide show] - Starts or pause slide show.
b [Music] - Select the background music for the
slide show (page 32).
c [Option] - Displays slide show options.
d [Rotate] - Rotates the photo clockwise.
e [Zoom] - Displays the [Zoom] menu.
4
a [Speed] - Use a/d to select a delaying
speed between photos in a slide show.
Operating
b [Effect] - Use a/d to select a transition
effect between photos in a slide show.
c [Music Select] – Select the background music
for the slide show (page 32).
Operating 28
Advanced Playback
Repeating a specific portion
eroy
Repeat playback
erotu
y
This player can repeat a portion you have selected.
Blu-ray Disc / DVD / Video files
During playback, press REPEAT (h) to select a
desired repeat mode.
A-B – Selected portion will be repeated continually.
Chapter – The current chapter will be played back
repeatedly. (BD / DVD only)
Title – The current title will be played back
repeatedly.
All – All the titles or files will be played back
repeatedly. (Movie file only)
1. During playback, press REPEAT (h).
2. Select [A-B] using w/s, and press ENTER (b).
3.Press ENTER (b) at the beginning of the portion
you wish to repeat.
4.Press ENTER (b) at the end of the portion. Your
selected portion will be repeated continually.
,,Note
yy You cannot select a portion less than 3
seconds.
yy This function may not work on some disc or
title.
Playing from selected time
eroy
Audio CDs/Audio files
1. During playback, press INFO/MENU (m).
During playback, press REPEAT (h) repeatedly to
select a desired repeat mode.
2. Select [Option] using a/d, and press ENTER
(b).
5 – Selected portion will be repeated continually.
(Audio CD only)
3. Select the [Time] option and then input the
required start time in hours, minutes, and
seconds from left to right.
6Track – The current track or file will be played
back repeatedly.
7All – All the tracks or files will be played back
repeatedly.
78All – All the tracks or files will be played back
repeatedly in random order.
8 – The tracks or files will be played back in
random order.
,,Note
This function may not work on some disc or
title.
For example, to find a scene at 2 hours, 10
minutes, and 20 seconds, enter “21020”.
Press a/d to skip the playback 60 seconds
forward or backward.
4.Press ENTER (b) to start playback from selected
time.
,,Note
This function may not work on some disc or
titles.
4
Operating
Off – Returns to normal playback.
29 Operating
Selecting a subtitle language
eroy
1. During playback, press INFO/MENU (m).
2. Select [Option] using a/d, and press ENTER
(b).
3.Use w/s to select the [Subtitle] option.
If the disc contains scenes recorded at different
camera angles, you can change to a different
camera angle during playback.
4.Press a/d to select desired subtitle language.
1. During playback, press INFO/MENU (m).
2. Select [Option] using a/d, and press ENTER
(b).
By pressing ENTER (b), you can set various
subtitle options.
5. Press BACK (1) to exit the On-Screen display.
,,Note
Some discs allow you to change subtitle
selections only via the disc menu. If this is the
case, press TITLE/POP-UP or DISC MENU button
and choose the appropriate subtitle from the
selections on the disc menu.
4
Watching from a different
angle
er
Operating
Hearing a different audio
eroy
1. During playback, press INFO/MENU (m).
2. Select [Option] using a/d, and press ENTER
(b).
3.Use w/s to select the [Audio] option.
4.Use a/d to select desired audio language,
audio track or audio channel.
5. Press BACK (1) to exit the On-Screen display.
,,Note
yy Some discs allow you to change audio
selections only via the disc menu. In this
case, press TITLE/POP-UP or DISC MENU
button and choose the appropriate audio
from the selections on the disc menu.
yy Immediately after you have switched sound,
there may be a temporary discrepancy
between the display and actual sound.
yy On BD-ROM disc, the multi audio format
(5.1CH or 7.1CH) is displayed with [MultiCH]
in the on-screen display.
3.Use w/s to select the [Angle] option.
4.Use a/d to select desired angle.
5. Press BACK (1) to exit the On-Screen display.
Changing the TV Aspect Ratio
eoy
You can change the TV aspect ratio setting during
playback.
1. During playback, press INFO/MENU (m).
2. Select [Option] using a/d, and press ENTER
(b).
3.Use w/s to select the [TV Aspect Ratio]
option.
4.Use a/d to select desired option.
5. Press BACK (1) to exit the On-Screen display.
,,Note
Even if you change the value of the [TV Aspect
Ratio] option in On-Screen display, the [TV
Aspect Ratio] option in the [Settings] menu is
not changed.
Operating 30
Changing subtitle Code Page
y
Changing the Picture Mode
eroy
If the subtitle is displayed in broken letter, you can
change the subtitle code page to view the subtitle
file properly.
You can change the [Picture mode] option during
playback.
1. During playback, press INFO/MENU (m).
2. Select [Option] using a/d, and press ENTER
(b).
2. Select [Option] using a/d, and press ENTER
(b).
3.Use w/s to select the [Code Page] option.
4.Use a/d to select desired code option.
1. During playback, press INFO/MENU (m).
3.Use w/s to select the [Picture Mode] option.
4.Use a/d to select desired option.
5. Press BACK (1) to exit the On-Screen display.
Setting the [User setting] option
1. During playback, press INFO/MENU (m).
2. Select [Option] using a/d, and press ENTER
(b).
3.Use w/s to select the [Picture Mode] option.
4.Use a/d to select the [User setting] option,
and press ENTER (b).
4
Operating
5. Press BACK (1) to exit the On-Screen display.
5.Use w/s/a/d to adjust the [Picture Mode]
options.
Select [Default] option then press ENTER (b) to
reset the all video adjustments.
6.Use w/s/a/d to select the [Close] option,
and press ENTER (b) to finish setting.
31
Operating
Viewing content information
y
Selecting a subtitle file
y
The player can display the content information.
If the subtitle file name is different from the video
file name, you need to select the subtitle file in the
[Movie] menu before playing the movie.
1. Select a file using w/s/a/d.
2. Press INFO/MENU (m). The file information
appears on the screen.
During video playback, you can display the file
information by pressing TITLE/POP-UP.
1.Use w/s/a/d to select the subtitle file you
wish to play in the [Movie] menu.
2.Press ENTER (b).
,,Note
The information displayed on the screen
may not correct comparing actual content
information.
Changing content list view
yui
4
Operating
In the [Movie], [Photo] or [Music] menu, you can
change the content list view.
Press red (R) colored button repeatedly.
Press ENTER (b) again to deselect the subtitle
file. Selected subtitle file will be displayed when
you play the video file.
,,Note
If you press Z (STOP) during playback, the
subtitle selection is cancelled.
Operating 32
Listening to music during slide
show
i
You can display photo files while listening to audio
files.
1. While viewing a photo in full screen, press INFO/
MENU (m) to display the option menu.
2. Select [Option] using a/d, and press ENTER
(b).
3.Use w/s to select [Music Select] option, and
press ENTER (b) to display the [Music Select]
menu.
4.Use w/s to select a device, and press ENTER
(b).
Available device may differ depending on the
location of the current photo file.
Available Device
Disc, USB
Disc, USB
MTP
MTP
5.Use w/s to select a file or a folder you wish to
play.
Select g and press ENTER (b) to display the
upper directory.
6.Use d to select [OK], and press ENTER (b) to
complete music selection.
4
Operating
Photo location
33 Troubleshooting
Troubleshooting
General
Issue
Cause & Solution
The unit does not work
properly.
yy Turn off the power of this unit and the connected external device (TV,
Woofer, DVD-player, Amplifier, etc.) and turn it on again.
yy Disconnect the power cord of this unit and the connected external
device (TV, Woofer, DVD-player, Amplifier, etc.) and then try
connecting again.
The power does not turn on.
yy Plug the power cord into the wall outlet securely.
yy Be sure that the AC adaptor is connected to the unit securely.
The unit does not start
playback.
yy Insert a playable disc. (Check the disc type, color system, and regional
code.)
yy Place the disc with the playback side down.
yy Place the disc on the disc tray correctly inside the guide.
yy Clean the disc.
yy Cancel the Rating function or change the rating level.
5
The connected USB storage
device is not recognized.
yy Try using a different USB cable, some USB cables may not support
enough current for normal USB operation.
Troubleshooting
yy If you use a USB extension cable or USB HUB, the USB devices may
not be recognized.
yy A USB device which requires additional program installation when
you have connected it to a computer is not supported.
yy This unit supports only USB Flash Drive and USB External HDD with
FAT32 or NTFS format.
The angle cannot be changed.
yy Multi-angles are not recorded on the DVD Video being played.
Cannot play video, photo or
audio files.
yy The files are not recorded in a format that the unit can play.
The remote control does not
work properly.
yy The remote control is not pointed at the remote sensor of the unit.
yy The unit does not support the codec of the video file.
yy The remote control is too far from the unit.
yy There is an obstacle in the path of the remote control and the unit.
yy The batteries in the remote control are exhausted.
The unit is plugged in, but the
power will not turn on or off.
The unit is not operating
normally.
You can reset the unit as follows.
yy Unplug the power cord, wait at least five seconds, and then plug it in
again.
Troubleshooting 34
Picture
Issue
Cause & Solution
There is no picture.
yy Select the appropriate video input mode on the TV so the picture
from the unit appears on the TV screen.
yy Connect the video connection securely.
yy Check the [HDMI Color Setting] in the [Settings] menu is set to the
appropriate item that conforms to your video connection.
yy Your TV may not support the resolution you have set on the player.
Change the resolution that your TV accepts.
yy The player’s HDMI OUT jack is connected to a DVI device that does
not support copyright protection.
Picture noise appears
yy You are playing a disc recorded in a color system that is different from
your TV.
yy Set the resolution which your TV accepts.
Customer support
You can update the Player using the latest software to enhance the products operation and/or add new
features. To obtain the latest software for this player (if updates have been made), please visit
http://www.lg.com or contact LG Electronics customer care center.
Open source software notice
5
Troubleshooting
To obtain the source code under GPL, LGPL, MPL and other open source licenses, that is contained in this
product, please visit http://opensource.lge.com.
In addition to the source code, all referred license terms, warranty disclaimers and copyright notices are
available for download.
LG Electronics will also provide open source code to you on CD-ROM for a charge covering the cost of performing such distribution (such as the cost of media, shipping and handling) upon email request to [email protected]. This offer is valid for three (3) years from the date on which you purchased the product.
35 Appendix
Controlling a TV with
the Supplied Remote
Control
You can control your TV using the buttons below.
You can operate your TV with the supplied remote
control.
If your TV is listed in the table below, set the
appropriate manufacturer code.
1. While holding down 1 (TV POWER) button, and
press the manufacturer code for your TV with
the numerical buttons (see the table below).
Manufacturer
Code Number
LG
1(Default), 2
Zenith
1, 3, 4
GoldStar
1, 2
Samsung
6, 7
8, 9
4
By pressing
You can
Sony
1 (TV POWER)
Turn the TV on or off.
Hitachi
INPUT
Switch the TV’s input source
between the TV and other
input sources.
VOL +/–
,,Note
6
Setting up the remote to
control your TV
Adjust the volume of the TV
Depending on the unit being connected, you
may not be able to control your TV using some
of the buttons.
2. Release the 1 (TV POWER) button to complete
setting.
Depending on your TV, some or all buttons may not
function on the TV, even after entering the correct
manufacturer code. When you replace the battery
of the remote, the code number you have set may
be reset to the default setting. Set the appropriate
code number again.
Appendix
Appendix 36
Additional Information
File requirement
Video files
File
Location
File
Extension
Disc,
USB
“.avi”, “.mpg”, “.mpeg”,
“.mkv”, “.mp4”, “.asf”,
“.wmv”, “.m4v” (DRM
free), “.vob”, “.3gp”,
“.mov”, “.trp”, “.m2t”,
“.mpe”, “.m1v”, “.m2v”,
“.wm”, ”.flv”, “.ts”, “.dat”
Codec Format
XVID, MPEG1 SS,
H.264/MPEG-4
AVC, MPEG2 PS,
MPEG2 TS, VC-1
SM (WMV3)
Audio Format
Dolby Digital,
DTS, MP3,
WMA, AC3,
AAC
Subtitle
SubRip (.srt / .txt), SAMI (.smi),
SubStation Alpha (.ssa/.txt),
MicroDVD (.sub/.txt), VobSub
(.sub), SubViewer 1.0 (.sub),
SubViewer 2.0 (.sub/.txt), TMPlayer
(.txt), DVD Subtitle System (.txt)
Audio files
File
Location
File
Extension
Disc,
USB
“mp3”, “.wma”,
“.wav”, “.m4a”
(DRM free),
“.flac”, “.ogg”,
“.aiff”
Sampling Frequency
Bitrate
within 32 - 48 kHz
(WMA), within 16 - 48
kHz (MP3)
within 32 - 192 kbps
(WMA), within 32 - 320
kbps (MP3)
Note
Some wav files are
not supported on
this player.
Photo files
Disc,
USB
6
File
Extension
“.jpg”, “.jpeg”,
“.png”, “.gif”
Recommended
Size
Note
Less than 4,000 x 3,000 x 24 bit/pixel Progressive and lossless
Less than 3,000 x 3,000 x 32 bit/pixel compression photo image files
are not supported.
Appendix
File
Location
37 Appendix
,,Note
yy The file name is limited to 180 characters.
yy Maximum files/Folder: Less than 2000 (total
number of files and folders)
yy Depending on the size and number of the
files, it may take several minutes to read the
content on the media.
yy The file requirements on page 36 are not
always compatible. There may have some
restrictions by file features.
yy The total playback time of audio file
indicated on the screen may not correct for
VBR files.
yy HD video files contained on the CD/DVD or
USB 1.0/1.1 may not played properly.
Blu-ray Disc or USB 2.0 are recommended to
play back HD video files.
yy This player supports H.264/MPEG-4 AVC
profile Main, High at Level 4.1. For a file
with higher level, the warning message will
appear on the screen.
yy This player does not support files that are
recorded with GMC*1 or Qpel*2.
*1 GMC – Global Motion Compensation
*2 Qpel – Quarter pixel
6
,,Note
yy A “.avi” file which is encoded “WMV 9 codec”
is not supported.
yy This player supports UTF-8 files even it
contains Unicode subtitle content. This
player can not support the pure Unicode
subtitle files.
yy Depending on the types of file or ways of
recording, it may not play back.
yy A disc which was recorded by multi-session
on normal PC is not supported on this
player.
yy To playback a video file, video file name and
Subtitle file name must be the same.
yy When you play a video file with a extension
such as “.ts”, “.m2ts”, “.mts”, “.tp”, “.Trp” or “.m2t”,
your player may not support subtitle files.
yy The total playback time of audio file
indicated on the screen may not be correct
for VBR files.
yy Video / Audio codec compatibility may
differ depending on video file.
AVCHD (Advanced Video
Codec High Definition)
yy This player can playback AVCHD format discs.
These discs are normally recorded and used in
camcorders.
Appendix
yy The AVCHD format is a high definition digital
video camera format.
yy The MPEG-4 AVC/H.264 format is capable of
compressing images at higher efficiency than
that of the conventional image compressing
format.
yy This player can playback AVCHD discs using
“x.v.Color” format.
yy Some AVCHD format discs may not play
depending on the recording condition.
yy AVCHD format discs need to be finalized.
yy “x.v.Color” offers a wider color range than normal
DVD camcorder discs.
Appendix 38
Certain system requirements
Compatibility notes
For high definition video playback:
yy Because BD-ROM is a new format, certain disc,
digital connection and other compatibility issues
are possible. If you experience compatibility
problems, please contact an authorized
Customer Service Center.
yy High definition display that has HDMI input jack.
yy BD-ROM disc with high definition content.
yy HDMI or HDCP capable DVI input on your display
device is required for some content (as specified
by disc authors).
For Dolby® Digital Plus, Dolby TrueHD and DTS-HD
multi-channel audio playback:
yy An amplifier/receiver with a built-in (Dolby
Digital, Dolby Digital Plus, Dolby TrueHD, DTS or
DTS-HD) decoder.
Main, center, surround speakers and subwoofer as
necessary for chosen format.
yy This unit allows you to enjoy functions such
as picture-in-picture, secondary audio and
Virtual packages, etc., with BD-ROM supporting
BONUSVIEW (BD-ROM version 2 Profile 1 version
1.1). Secondary video and audio can be played
from a disc compatible with the picture-inpicture function. For the playback method, refer
to the instructions in the disc.
yy Viewing high-definition content and upconverting standard DVD content may require
an HDMI-capable input or HDCP-capable DVI
input on your display device.
yy Some BD-ROM and DVD discs may restrict the
use of some operation commands or features.
yy Dolby TrueHD, Dolby Digital Plus and DTS-HD are
supported with maximum 7.1 channels if you
use HDMI connection for the audio output of the
unit.
yy You can use a USB device to store some disc
related information. The disc you are using will
control how long this information is retained.
6
Appendix
39 Appendix
Audio Output Specifications
Jack/Setting
Source
HDMI OUT
DTS Re-encode *3
Dolby Digital
PCM 2ch
DTS
Dolby Digital
Dolby Digital Plus
PCM 2ch
DTS
Dolby Digital Plus
Dolby TrueHD
PCM 2ch
DTS 2ch
Dolby TrueHD
DTS
PCM 2ch
DTS
DTS
DTS-HD
PCM 2ch
DTS
DTS-HD
Linear PCM 2ch
PCM 2ch
DTS 2ch
Linear PCM 2ch
Linear PCM 5.1ch
PCM 5.1ch
DTS
Linear PCM 5.1ch
Linear PCM 7.1ch
PCM 7.1ch
DTS
Linear PCM 7.1ch
*1 The secondary and interactive audio may not
be included in the output bitstream if [Digital
Output] option is set to [Auto]. (Except LPCM
Codec : the output always include interactive
and secondary audio.)
*2 This player automatically selects the HDMI audio
according to the decoding capability of the
connected HDMI device even though [Digital
Output] option is set to [Auto].
6
Auto *1 *2
PCM
Appendix
*3 If the [Digital Output] option is set to [DTS reencode], the audio output is limited to 48 kHz
and 5.1Ch. If the [Digital Output] option is set
to [DTS re-encode], the DTS Re-encode audio
is outputted for BD-ROM discs, and the original
audio is outputted for the other discs (like
[Auto]).
yy The audio is outputted up to PCM 48 kHz/16 bit
for MP3/WMA file and PCM 44.1kHz/16 bit for
Audio CD during playback.
yy You must select a digital audio output and
a maximum sampling frequency that your
Amplifier (or AV receiver) accepts using [Digital
Output] and [Sampling Freq.] options on the
[Settings] menu (page 18).
yy With digital audio connection (HDMI OUT),
Disc Menu button sounds of BD-ROM may not
be heard if the [Digital Output] option is set to
[Auto].
yy If the audio format of the digital output does
not match the capabilities of your receiver, the
receiver will produce a strong, distorted sound
or no sound at all.
yy Multi-channel Digital Surround Sound via digital
connection can only be obtained if your receiver
is equipped with a Digital Multi-channel decoder.
Appendix 40
Area Code List
Choose an area code from this list.
AreaCode AreaCode AreaCode AreaCode
Afghanistan AF Fiji FJ Monaco MC Singapore SG
Argentina AR Finland FI Mongolia MN Slovak Republic SK
Australia AU France FR Morocco MA Slovenia Austria AT Germany DE Nepal NP South Africa ZA
Belgium BE Great Britain GB Netherlands NL South Korea KR
Bhutan BT Greece GR Antilles AN Spain ES
Bolivia BO Greenland GL New Zealand NZ Sri Lanka LK
Brazil BR Hong Kong HK Nigeria NG Sweden SE
Cambodia KH Hungary HU Norway Canada CA India IN Oman Chile CL Indonesia ID Pakistan PK Thailand China CN Israel IL Panama PA Turkey TR
Colombia CO Italy IT Paraguay PY Uganda UG
Congo CG Jamaica JM Philippines PH Ukraine UA
Costa Rica CR Japan JP Poland PL United States US
Croatia HR Kenya KE Portugal PT Uruguay UY
Czech Republic CZ Kuwait KW Romania RO Uzbekistan UZ
Denmark DK Libya Ecuador EC Luxembourg EG Malaysia Vietnam RU Zimbabwe SA
ZW
Egypt LY Russian
LU Federation MY Saudi Arabia El Salvador SV Maldives MV Senegal SN
Ethiopia ET Mexico MX
SI
NO Switzerland CH
OM Taiwan TW
TH
VN
6
Appendix
41
Appendix
Language Code List
Use this list to input your desired language for the following initial settings: [Disc Audio], [Disc Subtitle] and
[Disc Menu].
6
Appendix
LanguageCode
LanguageCode
LanguageCode
LanguageCode
Afar 6565
French 7082
Lithuanian 7684
Sindhi 8368
Afrikaans 6570
Frisian 7089
Macedonian 7775
Singhalese 8373
Albanian 8381
Galician 7176
Malagasy 7771
Slovak 8375
Amharic 6577
Georgian 7565
Malay 7783
Slovenian 8376
Arabic 6582
German 6869
Malayalam 7776
Spanish 6983
Armenian 7289
Greek 6976
Maori 7773
Sudanese 8385
Assamese 6583
Greenlandic 7576
Marathi 7782
Swahili 8387
Aymara 6588
Guarani 7178
Moldavian 7779
Swedish 8386
Azerbaijani 6590
Gujarati 7185
Mongolian 7778
Tagalog 8476
Bashkir 6665
Hausa 7265
Nauru7865
Tajik 8471
Basque 6985
Hebrew 7387
Nepali 7869
Tamil 8465
Bengali; Bangla 6678
Hindi 7273
Norwegian 7879
Telugu 8469
Bhutani 6890
Hungarian 7285
Oriya 7982
Thai 8472
Bihari 6672
Icelandic 7383
Panjabi 8065
Tonga 8479
Breton 6682
Indonesian 7378
Pashto, Pushto 8083
Turkish 8482
Bulgarian 6671
Interlingua 7365
Persian 7065
Turkmen 8475
Burmese 7789
Irish 7165
Polish 8076
Twi 8487
Byelorussian 6669
Italian 7384
Portuguese 8084
Ukrainian 8575
Chinese 9072
Japanese 7465
Quechua 8185
Urdu 8582
Croatian 7282
Kannada 7578
Rhaeto-Romance 8277
Uzbek 8590
Czech 6783
Kashmiri 7583
Rumanian 8279
Vietnamese 8673
Danish 6865
Kazakh 7575
Russian 8285
Volapük 8679
Dutch 7876
Kirghiz 7589
Samoan 8377
Welsh 6789
English 6978
Korean 7579
Sanskrit 8365
Wolof 8779
Esperanto 6979
Kurdish 7585
Scots Gaelic 7168
Xhosa 8872
Estonian 6984
Laotian 7679
Serbian 8382
Yiddish 7473
Faroese 7079
Latin 7665
Serbo-Croatian 8372
Yoruba 8979
Fiji 7074
Latvian, Lettish 7686
Shona 8378
Zulu 9085
Finnish 7073
Lingala 7678
Appendix 42
Trademarks and
Licenses
All other trademarks are trademarks of their
respective owners.
Blu-ray Disc™, Blu-ray™, BONUSVIEW™ and
the logos are trademarks of the Blu-ray Disc
Association.
For DTS patents, see http://patents.dts.com.
Manufactured under license from DTS Licensing
Limited. DTS, the Symbol, & DTS and the Symbol
together are registered trademarks, and DTS
2.0+Digital Out is a trademark of DTS, Inc. © DTS,
Inc. All Rights Reserved.
“AVCHD” and the “AVCHD” logo are trademarks of
Panasonic Corporation and Sony Corporation.
“DVD Logo” is a trademark of DVD Format/Logo
Licensing Corporation.
Java is a trademark of Oracle and/or its affiliates.
“x.v.Color” is a trademark of Sony Corporation.
Manufactured under license from Dolby
Laboratories. Dolby and the double-D symbol
are trademarks of Dolby Laboratories.v
6
Appendix
The terms HDMI and HDMI High-Definition
Multimedia Interface, and the HDMI logo are
trademarks or registered trademarks of HDMI
Licensing LLC in the United States and other
countries.
43 Appendix
Cinavia Notice
This product uses Cinavia technology to limit the
use of unauthorized copies of some commerciallyproduced film and videos and their soundtracks.
When a prohibited use of an unauthorized copy is
detected, a message will be displayed and playback
or copying will be interrupted.
More information about Cinavia technology
is provided at the Cinavia Online Consumer
Information Center at http://www.cinavia.com. To
request additional information about Cinavia by
mail, send a postcard with your mailing address
to: Cinavia Consumer Information Center, P.O. Box
86851, San Diego, CA, 92138, USA.
This product incorporates proprietary technology
under license from Verance Corporation and is
protected by U.S. Patent 7,369,677 and other U.S.
and worldwide patents issued and pending as well
as copyright and trade secret protection for certain
aspects of such technology. Cinavia is a trademark
of Verance Corporation. Copyright 2004-2013
Verance Corporation. All rights reserved by Verance.
Reverse engineering or disassembly is prohibited.
6
Appendix
Appendix 44
Specifications
General
AC adapter
- Model : WA-12M12FG
- Manufacturer : Asian Power Devices Inc.
- Input : 100-240 V~ 50-60 Hz, 0.5 A Max.
- Output : 12 V 0 1 A
Networked standby power
consumption
0.5 W (If all network ports are activated.)
Dimensions (W x H x D)
Approx. 270 mm x 43 mm x 195 mm
Net Weight (Approx.)
0.83 kg
Operating temperature
5 °C to 35 °C
Operating humidity
5 % to 90 %
Outputs
HDMI OUT (video/audio)
19 pin (Type A, HDMI™ Connector)
System
Laser
Semiconductor laser
wavelength
405 nm / 650 nm
Signal system
Standard PAL/NTSC color TV system
Bus Power Supply (USB)
5 V 0 500 mA
yy Design and specifications are subject to change without notice.
6
Appendix
45 Appendix
Maintenance
Notes on discs
Handling discs
Handling the unit
When shipping the unit
Please save the original shipping carton and
packing materials. If you need to ship the unit, for
maximum protection, re-pack the unit as it was
originally packed at the factory.
Cleaning the unit
To clean the player, use a soft, dry cloth. If the
surfaces are extremely dirty, use a soft cloth lightly
moistened with a mild detergent solution. Do not
use strong solvents such as alcohol, benzine, or
thinner, as these might damage the surface of the
unit.
Keeping the exterior surfaces clean
yy Do not use volatile liquids such as insecticide
spray near the unit.
yy Wiping with strong pressure may damage the
surface.
yy Do not leave rubber or plastic products in
contact with the unit for a long period of time.
Maintaining the unit
6
Appendix
The unit is a high-tech, precision device. If the
optical pick-up lens and disc drive parts are dirty
or worn, the picture quality could be diminished.
For details, please contact your nearest authorized
service center.
Do not touch the playback side of the disc. Hold
the disc by the edges so that fingerprints do not
get on the surface. Never stick paper or tape on the
disc.
Storing discs
After playing, store the disc in its case. Do not
expose the disc to direct sunlight or sources of heat
and never leave it in a parked car exposed to direct
sunlight.
Cleaning discs
Fingerprints and dust on the disc can cause poor
picture quality and sound distortion. Before playing,
clean the disc with a clean cloth. Wipe the disc from
the center to out.
Do not use strong solvents such as alcohol,
benzine, thinner, commercially available cleaners,
or anti-static spray intended for older vinyl records.