1
Controls
Controles
Commandes
Comandi
Kontrollknappar
Ohjaukset
Tough Sounds
Quickstart Guide
ionaudio.com/support
Manual Version 1.1
For technical support
Para soporte técnico
Pour obtenir de l’assistance technique
Per assistenza tecnica
Für technischen Support
Voor technische ondersteuning
1
ionaudio.com/warranty
For complete warranty information
Para información completa sobre la garantía
Pour obtenir toutes les informations relatives à la garantie
Per informazioni complete in merito alla garanzia
Für komplette Garantieinformationen
Voor volledige informatie over de garantie
2
10
The Bluetooth word mark and logo are owned by the Bluetooth SIG, Inc. and any
use of such marks by ION Audio is under license.
8
7
9
4
3
5
6
Box Contents: Tough Sounds, Mini USB Charging Cable, 3.5 mm (1/8”) Stereo Aux
Cable, Quickstart Guide.
Contenuti della confezione: Tough Sounds, cavo di ricarica Mini USB, cavo stereo
aux da 3,5 mm (1/8”), Guida rapida.
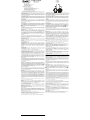
Controls: (1) Antenna, (2) Select Down Button, (3) Select Up Button, (4) LCD, (5)
Source Button, (6) Auxiliary Jack, (7) Volume/On-Off Knob, (8) Microphone, (9) Mini USB
Charge Port, (10) Charge LED.
Charging Tough Sounds: Use the included mini-USB charging cable to connect Tough
Sounds to (A) a USB power adapter connected to a power outlet or (B) your computer
(powered on) for approximately 2 hours. The charge LED is illuminated when Tough
Sounds is currently charging. You will know Tough Sounds is fully charged when this
LED has gone out.
Comandi: (1) Antenna, (2) Tasto Select Down, (3) Tasto Select Up, (4) LCD, (5) Tasto
Source, (6) Jack Aux, (7) Manopola volume/On-Off , (8) Microphone, (9) Porta di
ricarica mini USB, (10) LED di ricarica.
Ricarica del Tough Sounds: Servirsi del cavo mini-USB in dotazione per collegare il
Tough Sounds a (A) un adattatore di alimentazione USB collegato a una presa elettrica
o (B) al computer (acceso) per circa 2 ore. Durante la ricarica del Tough Sounds il LED
di ricarica è illuminato. Quando il LED si spegne, la ricarica del Tough Sounds è
completa.
Getting Started:
(1) Turn the Volume/On-Off knob clockwise to power on Tough Sounds. (2) Adjust the
volume as needed on Tough Sounds. (3) Select the source by tapping the SRC button
between FM/ AM/ BT modes. (4) Turn the Volume/On-Off knob counter-clockwise until it
clicks to power off Tough Sounds.
Primi passi:
(1) Girare la manopola Volume/On-Off knob in senso orario per accendere il Tough
Sounds. (2) Regolare il volume come necessario sul Tough Sounds. (3) Selezionare la
fonte toccando il pulsante SRC tra le modalità FM/ AM/ BT. (4) Girare la manopola
Volume/On-Off knob in senso antiorario fino a quando non scatta per spegnere il
Tough Sounds.
Bluetooth Mode:
(1) Tap the SRC button to toggle between AM/FM/BT modes. (2) Select ---- (blinking) to
activate Bluetooth mode and begin pairing. (3) In your Bluetooth device settings, find
Tough Sounds and connect. (4) Once paired, the Bluetooth logo will change from to
(5) Tap Play/Pause to play or pause the music. (6) If you're having trouble with your
Bluetooth connection, press and hold the SRC button for 2 seconds to reset the current
Bluetooth connection (this is disabled during a phone call).
Aux-In Mode:
(1) Turn the Volume/On-Off knob clockwise to power on Tough Sounds. (2) To use the
Aux input, plug a 3.5mm (1/8") cable into the Aux-In port on Tough Sounds. (3) Adjust
the volume using the Volume/On-Off knob.
Radio Mode:
(1) Tap the SRC button to toggle AM//FM/BT and set to AM or FM to listen to the radio.
(2) Tap ▲ or ▼ until you reach your desired station. (3) To seek through stations, press
and hold ▲ or ▼ for 2 seconds, then release the button when seeking starts. Seek will
stop on clear radio stations. (4) To save a preset station, hold the Play/Pause button.
Release Play/Pause when “M” and the preset station number are flashing. (5) Tap ▲ or
▼ to save the station to your desired position. (6) Tap the Play/Pause button to confirm
your preset number setting.
Note: The FM antenna works best when set at a 90 degree angle and not put under the
headband.
To select between 9 kHz (Europe) and 10 kHz (US) AM reception setting:
(1) Keep Tough Sounds in the OFF position. (2) Press the SRC button for 2 seconds. 9
kHz will be shown on the display. (3) Press ▲ or ▼ to select 10 kHz. (4) Press the SRC
button again to save the setting.
Receiving phone calls:
When Bluetooth-paired with a smartphone, answer an incoming call by tapping
Play/Pause. Tap Play/Pause to end the current call. To reject an incoming call, tap the
SRC button.
Note: If you are paired to a Bluetooth source, you can still receive and answer calls while
using FM/AM and Aux modes.
Setting the Time:
(1) Turn the Volume/On-Off knob counter-clockwise to power off Tough Sounds. (2) Tap
the Play/Pause button once to set the hours or tap Play/Pause again to set the minutes.
(3) When the selected time is flashing, tap ▲ or ▼ to adjust the time, then tap
Play/Pause to confirm the setting. To change your unit to display military time (24 hour
time), press the Tune Up or Down button when the power is off. If AM or PM is
displayed, then you are in 12 Hour time. If AM or PM is not displayed, then you are in 24
Hour time.
Troubleshooting:
Windows 7 and Windows 8 Users: When Tough Sounds is connected to your computer
through USB, select Headphones – Tough Sounds Stereo as the playback device for
best sound quality.
For the Safety and Warranty manual, visit ionaudio.com/warranty.
Contenido de la caja: Tough Sounds, Cable de carga mini USB, Cable auxiliar estéreo
de 3,5 mm (1/8 pulg.), Guía de inicio rápido.
Controles: (1) Antena, (2) Botón de selección hacia abajo, (3) Botón de selección hacia
arriba, (4) LCD, (5) Botón de fuente, (6) Conector auxiliar, (7) Perilla de volumen y
encendido-apagado, (8) Micrófono, (9) Puerto de carga Mini USB, (10) LED de carga.
Carga del Tough Sounds: Utilice el cable mini USB incluido para conectar el Tough
Sounds a (A) un adaptador de corriente USB conectado a una toma de corriente o (B)
su ordenador (encendido) durante aproximadamente 2 horas. El LED de carga se
ilumina cuando Tough Sounds se está cargando. Sabrá cuando el Tough Sounds esté
totalmente cargado cuando se apague este LED.
Para comenzar:
(1) Gire la perilla de volumen y encendido-apagado en sentido horario para encender el
Tough Sounds. (2) Ajuste el volumen del Tough Sounds como sea necesario. (3)
Seleccione la fuente pulsando levemente el botón SRC entre los modos FM/ AM/ BT. (4)
Gire la perilla de volumen y encendido-apagado en sentido antihorario hasta que haga
clic para apagar el Tough Sounds.
Modo Bluetooth:
(1) Pulse levemente el botón SRC para alternar entre los modos AM/FM/BT. (2)
Seleccione ---- (parpadeando) para activar el modo Bluetooth y comenzar el
apareamiento. (3) En la configuración de dispositivo Bluetooth, busque Tough Sounds y
a (5)
establezca la conexión. (4) Una vez apareado, el logo Bluetooth cambiará de
Pulse ligeramente Play/Pause (Reproducir/Pausa) para reproducir la música o hacer
una pausa. (6) Si está teniendo problemas con su conexión Bluetooth, mantenga
pulsado el botón SRC durante 2 segundos para reiniciar la conexión Bluetooth actual (la
cual se deshabilita durante una llamada telefónica).
Modo de entrada auxiliar:
(1) Gire la perilla de volumen y encendido-apagado para encender el Tough
Sounds. (2) Para utilizar la entrada auxiliar, conecte un cable de 3,5 mm (1/8 pulg.) en el
puerto de entrada auxiliar del Tough Sounds. (3) Ajuste el volumen utilizando la perilla
de volumen y encendido-apagado.
Modo radio:
(1) Pulse ligeramente el botón SRC para alternar entre AM//FM/BT y ajústelo en AM o
FM para escuchar radio. (2) Pulse ligeramente ▲ o ▼ hasta encontrar la estación
deseada. (3) Para buscar estaciones, mantenga pulsado ▲ o ▼ durante 2 segundos,
luego suelte el botón cuando comienza la búsqueda. La búsqueda se detendrá en
estaciones de radio con señal clara. (4) Para guardar una estación preseleccionada,
mantenga pulsado el botón Play/Pause. Suelte Play/Pause cuando parpadeen la "M" y
el número de estación preseleccionada. (5) Toque ligeramente ▲ o ▼ para guardar la
estación en la posición deseada. (6) Toque ligeramente el botón Play/Pause para
confirmar el número de estación preseleccionada. Para que su unidad muestre la hora
en formato de 24 horas, pulse el botón Tune Up (Sintonizar hacia arriba) o Down
(Sintonizar hacia abajo) cuando la alimentación esté apagada. Si se muestra AM o PM,
la hora está en formato de 12 horas. Si no se muestra AM o PM, la hora está en formato
de 24 horas.
Modalità Bluetooth:
(1) Toccare il pulsante SRC per commutare tra le modalità AM/FM/BT. (2) Selezionare
---- (lampeggiante) per attivare la modalità Bluetooth e iniziare il collegamento. (3)
Sotto le impostazioni del proprio dispositivo Bluetooth, trovare il Tough Sounds e
collegarlo. (4) Una volta collegato, il logo Bluetooth cambierà da a (5) Toccare
Play/Pause per far riprodurre o mettere in pausa la musica. (6) In caso di problemi con
il collegamento Bluetooth, tenere premuto il tasto SRC per 2 secondi per azzerare
l’attuale collegamento Bluetooth (disabilitato durante una telefonata).
Modalità Aux-in (ingresso ausiliario):
(1) Girare la manopola Volume/On-Off knob in senso orario per accendere il Tough
Sounds. (2) Per utilizzare l'ingresso Aux, collegare un cavo da 3,5mm (1/8") alla porta
Aux-In del Tough Sounds. (3) Regolare il volume utilizzando la manopola Volume/OnOff.
Modalità radio:
(1) Toccare il tasto SRC per commutare tra AM//FM/BT e impostare AM o FM per
ascoltare la radio. (2) Toccare ▲ o ▼ fino a quando non si raggiunge la stazione
desiderata. (3) Per cercare tra le stazioni, tenere premuto ▲ o ▼ per 2 secondi, quindi
rilasciare il tasto quando la ricerca viene avviata. La ricerca si fermerà sulle stazioni dal
segnale limpido. (4) Per salvare una stazione preset, tenere premuto il tasto
Play/Pause. Lasciare Play/Pause quando “M” e il numero di stazione preset
lampeggiano. (5) Toccare ▲ o ▼ per salvare la stazione alla posizione desiderata. (6)
Toccare il tasto Play/Pause per confermare l'impostazione del numero di preset. Per
modificare l’apparcchio in modo che mostri l’ora militare (24 ore), premere il tasto Tune
Up o Down ad alimentazione spenta. Se AM o PM compaiono a display, ci si trova in
un orario a 12 ore. Se AM o PM non compaiono a display, l’orario sarà a 24 ore.
Nota bene: l'antenna FM funziona al meglio quando posizionata a un angolo di 90
gradi e non inserita sotto l'archetto.
Per selezionare tra le impostazioni di ricezione AM da 9 kHz (Europa) e 10 kHz
(US):
(1) Mantenere il Tough Sounds in posizione OFF. (2) Premere il tasto SRC per 2
secondi. A display comparirà la scritta "9 kHz". (3) Premere ▲ o ▼ per selezionare 10
kHz. (4) Premere nuovamente il tasto SRC per salvare l'impostazione.
Ricezione di telefonate:
Quando si è collegati in Bluetooth con uno smartphone, è possibile rispondere a una
chiamata in arrivo toccando Play/Pause. Toccare Play/Pause per concludere la
chiamata corrente. Per respingere una chiamata in arrivo, toccare il tasto SRC.
Nota bene: se si è collegati a una fonte Bluetooth è comunque possibile ricevere
telefonate e rispondere alle chiamate utilizzando le modalità FM/AM e Aux.
Impostazione dell'ora:
(1) Girare la manopola Volume/On-Off knob in senso antiorario per spegnere il Tough
Sounds. (2) Toccare il tasto Play/Pause una volta per impostare le ore o toccare
nuovamente Play/Pause per impostare i minuti. (3) Quando l'ora selezionata
lampeggia, toccare ▲ o ▼ per regolare l'ora, quindi toccare Play/Pause per
confermare l'impostazione.
Risoluzione di problemi:
Utenti Windows 7 e Windows 8: Quando il Tough Sounds è collegato al computer
tramite USB, selezionare Headphones – Tough Sounds Stereo come dispositivo di
riproduzione predefinito per ottenere la migliore qualità sonora.
Per ottenere il manuale
ionaudio.com/warranty.
di
sicurezza
e
garanzia,
recarsi
alla
pagina
Lieferumfang: Tough Sounds, Mini-USB-Ladekabel, 3,5mm (1/8") Stereo-Aux-Kabel, SchnellstartAnleitung.
Bedienelemente: (1) Antenne, (2) Wahltaste Abwärts, (3) Wahltaste Aufwärts, (4) LCD, (5)
Quellentaste, (6) Aux-Buchse, (7 ) Regler Lautstärke/Ein/Aus, (8) Mikrofon, (9) Mini-USBLadebuchse, (10) Lade-LED.
Aufladen des Tough Sounds: Verwenden Sie das mitgelieferte Mini-USB-Ladekabel, um Tough
Sounds mit (A) einem USB-Netzteil zu verbinden, das in einer Steckdose steckt oder (B) mit Ihrem
(eingeschalteten) Computer zu verbinden und etwa 2 Stunden lang aufzuladen. Die Lade-LED
leuchtet, wenn Tough Sounds gerade aufgeladen wird. Wenn die LED erloschen ist, zeigt dies an,
dass Tough Sounds vollständig geladen ist.
Erste Schritte:
(1) Drehen Sie den Regler Lautstärke/Ein/Aus im Uhrzeigersinn, um Tough Sounds einzuschalten.
(2) Stellen Sie die Lautstärke am Tough Sounds nach Wunsch ein. (3) Wählen Sie die Quelle, indem
Sie auf die SRC-Taste tippen, um zwischen FM/AM/BT-Modi auszuwählen. (4) Drehen Sie den
Regler Lautstärke/Ein/Aus bis er einrastet gegen den Uhrzeigersinn, um Tough Sounds
abzuschalten.
Bluetooth-Modus:
(1) Tippen Sie auf die SRC-Taste, um zwischen den AM/FM/BT-Modi umzuschalten.
(2) Auswählen ---- (blinkt), um den Bluetooth-Modus zu aktivieren und mit dem Koppeln zu
beginnen. (3) In den Einstellungen Ihres Bluetooth-Geräts wählen Sie Tough Sounds und stellen
eine Verbindung her. (4) Sind die Geräte einmal gekoppelt, wechselt das Bluetooth-Logo von auf
(5) Tippen Sie auf Wiedergabe/Pause, um die Musik abzuspielen oder zu pausieren. (6) Als u
problemen met uw Bluetooth-verbinding ondervindt, houd de SRC-knop voor 2 seconden ingedrukt
om de huidige Bluetooth-verbinding te resetten (dit wordt tijdens een telefoongesprek
uitgeschakeld).
Aux-In-Modus:
(1) Drehen Sie den Regler Lautstärke/Ein/Aus im Uhrzeigersinn, um Tough Sounds einzuschalten.
(2) Um den Aux-Eingang zu verwenden, stecken Sie ein 3,5mm (1/8") Kabel in den Aux-InAnschluss am Tough Sounds. (3) Passen Sie die Lautstärke mit dem Regler Lautstärke/Ein/Aus an.
Radio-Modus:
(1) Tippen Sie auf die SRC-Taste, um zwischen AM/FM und BT zu wechseln und um AM oder FM
einzustellen, um Radio zu hören. (2) Tippen Sie auf ▲ oder ▼ bis Sie den gewünschten Sender
erreichen. (3) Um durch die Sender zu suchen, halten Sie ▲ oder ▼ 2 Sekunden lang gedrückt und
lassen die Taste los sobald die Suche beginnt. Die Suche wird bei Radiostationen, die gut
empfangen werden können, stoppen. (4) Um einen voreingestellten Sender zu speichern, halten Sie
die Taste Wiedergabe/Pause gedrückt. Lassen Sie die Taste Wiedergabe/Pause los, wenn "M"
und die Sendernummer blinken. (5) Tippen Sie auf ▲ oder ▼, um den Sender auf die gewünschte
Position zu speichern. (6) Tippen Sie auf die Taste Wiedergabe/Pause, um Ihre eingestellte PresetNummer zu bestätigen. Um die Zeitanzeige am Gerät auf Militärzeit (24-Stunden) zu ändern,
drücken Sie auf die Taste Tune-Up oder Down, wenn das Gerät ausgeschaltet ist. Wenn AM oder
PM angezeigt wird, dann befinden Sie sich im 12-Stunden-Modus. Wenn AM oder PM nicht
angezeigt wird, dann befinden Sie sich im 24-Stunden-Modus.
Nota: La antena de FM funciona mejor cuando se ajusta en un ángulo de 90 grados y
se coloca por fuera de la banda de sujeción.
Hinweis: Die FM-Antenne funktioniert am besten, wenn sie in einem 90-Grad-Winkel positioniert ist
und sich nicht unter dem Kopfbügel befindet.
Para seleccionar el ajuste de recepción AM entre 9 kHz (Europa) y 10 kHz
(EE.UU.):
(1) Mantenga el Tough Sounds en la posición OFF (apagado). (2) Pulse el botón SRC
durante 2 segundos. Se mostrará 9 kHz en la pantalla. (3) Pulse ▲ o ▼ para
seleccionar 10 kHz. (4) Pulse el botón SRC para guardar el ajuste.
So wechseln Sie zwischen 9 kHz (Europa) und 10 kHz (US) AM-Empfang:
Recepción de llamadas telefónicas:
Una vez apareado mediante Bluetooth con un smartphone (teléfono inteligente),
responda las llamadas pulsando ligeramente Play/Pause. Pulse ligeramente
Play/Pause para terminar la llamada en curso. Para rechazar las llamadas entrantes,
pulse ligeramente el botón SRC.
Nota: Si está apareado con una fuente Bluetooth, aún puede recibir y contestar
llamadas estando en modo FM/AM o Aux.
Ajuste de la hora:
(1) Gire la perilla de volumen y encendido-apagado en sentido antihorario para
apagar el Tough Sounds. (2) Pulse ligeramente el botón Play/Pause una vez para
ajustar la hora o dos veces para ajustar los minutos. (3) Cuando parpadea el tiempo
seleccionado, pulse ligeramente ▲ o ▼ para ajustar el tiempo, luego pulse ligeramente
Play/Pause para confirmar el ajuste.
Solución de problemas: Usuarios de Windows 7 y Windows 8:
Cuando Tough Sounds está conectado a su ordenador mediante USB, seleccione
Headphones – Tough Sounds Stereo (Auriculares - Tough Sounds estéreo) como el
dispositivo de reproducción para una mejor calidad de sonido.
Para obtener el manual sobre la seguridad y garantía visite ionaudio.com/warranty.
(1) Halten Sie Tough Sounds in der Position AUS. (2) Halten Sie die SRC-Taste 2 Sekunden lang
gedrückt. Am Display wird 9 kHz angezeigt. (3) Drücken Sie ▲ oder ▼, um 10 kHz auszuwählen. (4)
Drücken Sie die SRC-Taste erneut, um die Einstellung zu speichern.
Annahme von Telefonanrufen:
Wenn ein Smartphone via Bluetooth verbunden ist, können Sie einen eingehenden Anruf annehmen,
indem Sie auf die Taste Wiedergabe/Pause tippen. Tippen Sie auf Wiedergabe/Pause, um das
aktuelle Gespräch zu beenden. Um einen eingehenden Anruf abzuweisen, tippen Sie auf die SRCTaste.
Hinweis: Wenn Sie mit einer Bluetooth-Quelle verbunden sind, können Sie immer noch Anrufe
empfangen und annehmen, auch wenn Sie sich in den FM/AM und Aux-Modi befinden.
Uhrzeit einstellen:
(1) Drehen Sie den Regler Lautstärke/Ein/Aus gegen den Uhrzeigersinn, bis er einrastet, um
Tough Sounds abzuschalten. (2) Tippen Sie einmal auf die Taste Wiedergabe/Pause, um die
Stunden einzustellen oder tippen Sie erneut auf Wiedergabe/Pause, um die Minuten einzustellen. (3)
Wenn die gewählte Zeit blinkt, tippen Sie auf ▲ oder ▼, um die Zeit einzustellen. Tippen Sie dann
auf Wiedergabe/Pause, um die Einstellung zu bestätigen.
Fehlerbehebung:
Windows 7 und Windows 8 Benutzer:
Wenn Tough Sounds über USB mit Ihrem Computer verbunden ist, wählen Sie Headphones Tough Sounds Stereo als Wiedergabegerät, um die beste Klangqualität zu erreichen.
Für die Sicherheits- und Garantieinformationen besuchen Sie ionaudio.com/warranty.
Contenu de la boîte : Tough Sounds, câble de rechargement mini USB, câble stéréo
auxiliaire 3,5 mm (1/8 po), guide d’utilisation simplifié.
Inhoud van de doos: Tough Sounds, mini USB-oplaadkabel, stereo Aux-kabel van
3,5 mm (1/8”), snelstartgids.
Commandes : (1) antenne, (2) touche de sélection du haut, (3) touche de sélection du
bas, (4) écran ACL, (5) touche source, (6) prise auxiliaire, (7) bouton volume/marchearrêt, (8) microphone, (9) port de rechargement mini USB, (10) DEL de rechargement.
Rechargement du Tough Sounds : Utilisez le câble mini USB inclus afin de brancher
le Tough Sounds à (A) un adaptateur d’alimentation USB branché à une prise secteur,
ou (B) à un ordinateur (sous tension) pendant environ 2 heures. La DEL de
rechargement s’allume lorsque la batterie du Tough Sounds se recharge. La batterie
du Tough Sounds est entièrement rechargée lorsque la DEL s’éteint.
Bediening: (1) antenne, (2) selectieknop omlaag, (3) selectieknop omhoog, (4) LCD,
(5) bronknop, (6) Aux-ingang, (7) volume-/aan- en uitknop, (8) microfoon, (9) mini
USB-oplaadpoort, (10) oplaad-LED.
Tough Sounds opladen: Gebruik de meegeleverde mini USB-kabel om Tough
Sounds gedurende ongeveer 2 uur te verbinden met (A) een USB-stroomadapter,
aangesloten op een stopcontact, of (B) uw pc (ingeschakeld). De oplaad-LED gaat
branden wanneer Tough Sounds aan het opladen is. Wanneer de LED uitgaat, weet u
dat Tough Sounds volledig is opgeladen.
Mise en route :
(1) Tournez le bouton volume/marche-arrêt dans le sens horaire afin de mettre le
Tough Sounds sous tension. (2) Réglez le volume du Tough Sounds au besoin. (3)
Tapez la touche SRC afin de sélectionner la source entre les modes FM/AM/BT. (4)
Tournez le bouton volume/marche-arrêt dans le sens antihoraire jusqu’à ce qu’un clic
se fasse entendre afin de mettre le Tough Sounds hors tension.
Aan de slag:
(1) Draai de volume-/aan- en uitknop rechtsom om Tough Sounds aan te zetten. (2)
Zet het volume op Tough Sounds op de nodige stand. (3) Selecteer de bron door te
tikken op de SRC-knop en te kiezen tussen de modi FM/AM/BT. (4) Om Tough
Sounds uit te zetten: draai de volume-/aan- en uitknop linksom tot deze klikt.
Mode Bluetooth :
(1) Tapez la touche SRC afin de basculer entre les modes FM/AM/BT. (2) Sélectionnez
---- (clignotement) afin d’activer le mode de Bluetooth et lancer le jumelage. (3) Dans
les paramètres Bluetooth de votre appareil, sélectionnez Tough Sounds et lancez la
à . (5)
connexion. (4) Une fois le jumelage réussi, le logo Bluetooth passe de
Tapez sur la touche de lecture afin de lancer ou d'interrompre la musique. (6) Si la
connexion Bluetooth ne réussie pas, maintenez la touche SRC enfoncée pendant 2
secondes afin de supprimer la connexion Bluetooth (cette fonction est désactivée lors
d’un appel téléphonique).
Mode entrée auxiliaire :
(1) Tournez le bouton volume/marche-arrêt dans le sens horaire afin de mettre le
Tough Sounds sous tension. (2) Pour utiliser l'entrée auxiliaire, branchez un câble de
3,5 mm (1/8 po) au port d’entrée auxiliaire du Tough Sounds. (3) Utilisez le bouton
volume/marche-arrêt afin de régler le volume.
Mode Radio :
(1) Tapez la touche SRC afin de basculer entre les modes AM//FM/BT pour écouter la
radio AM ou FM. (2) Tapez ▲ ou ▼ jusqu'à ce que vous atteigniez la station désirée.
(3) Pour rechercher parmi les stations, maintenez la touche ▲ ou ▼ enfoncée pendant
2 secondes, puis relâchez la touche lorsque la recherche est lancée. La recherche
s'arrête sur les stations radio avec un signal clair. (4) Pour mémoriser une station,
maintenez la touche de lecture enfoncée. Relâchez la touche de lecture lorsque
« M » et le poste de la station clignotent. (5) Tapez ▲ ou ▼ afin de mémoriser la
station sur la position désirée. (6) Tapez la touche de lecture afin de confirmer le
numéro de préréglage. Pour modifier le format d’affichage de l’heure (24 heures),
appuyez sur la touche Tune Up ou Down lorsque l'appareil est hors tension. Si AM ou
PM est affiché, l’appareil affiche le format sur 12 heures. Si AM ou PM n’est pas
affiché, l’appareil affiche le format sur 24 heures.
Remarque : L'antenne FM fonctionne mieux lorsque réglée à un angle de 90 degrés et
non placée sous le bandeau.
Pour sélectionner entre la réception AM 9 kHz (Europe) et 10 kHz (Amérique du
Nord) :
(1) Gardez le Tough Sounds hors tension. (2) Appuyez sur la touche SRC pendant 2
secondes. 9 kHz devrait s’afficher. (3) Appuyez sur▲ ou ▼ pour sélectionner 10 kHz.
(4) Appuyez à nouveau sur la touche SRC afin de sauvegarder le réglage.
Répondre à un appel :
Afin de répondre à un appel entrant lorsqu’un téléphone Bluetooth est jumelé, tapez
sur la touche de lecture.Tapez la touche de lecture afin de mettre fin à l’appel. Pour
rejeter un appel entrant, tapez la touche SRC.
Remarque : Lorsqu’une source Bluetooth est jumelée, vous pouvez toujours recevoir
et répondre à des appels en utilisant les modes FM/AM et auxiliaire.
Réglage de l’heure :
(1) Tournez le bouton volume/marche-arrêt dans le sens antihoraire afin de mettre le
Tough Sounds hors tension. (2) Tapez la touche de lecture une fois pour régler
l’heure et une autre fois pour régler les minutes. (3) Lorsque l’heure clignote, tapez ▲
ou ▼ pour régler l’heure, puis tapez la touche de lecture afin de confirmer le réglage.
Bluetooth-modus:
(1) Tik op de SRC-knop om de modi AM/FM/BT te doorbladeren.
(2) Selecteer ---- (knippert) om de Bluetooth-modus te activeren en te beginnen
koppelen. (3) Zoek in de instellingen van uw Bluetooth-apparaat Tough Sounds en
maak verbinding. (4) Eens de verbinding is gemaakt, verandert het Bluetooth-logo van
in
(5) Tik op Afspelen/Pauzeren om de muziek af te spelen of te pauzeren. (6)
Houd de SRC-knop gedurende 2 seconden ingedrukt om de huidige Bluetoothverbinding te verbreken (tijdens een telefoongesprek is deze mogelijkheid
gedeactiveerd).
Aux-modus:
(1) Draai de volume/aan- en uitknop rechtsom om Tough Sounds aan te zetten.
(2) Sluit een kabel van 3,5 mm (1/8”) aan op de Aux-ingang van Tough Sounds om de
Aux-ingang te gebruiken. (3) Regel het volume met behulp van de volume/aan- en
uitknop.
Radiomodus:
(1) Tik op de SRC-knop om AM/FM/BT te selecteren en selecteer AM of FM om naar
de radio te luisteren. (2) Tik ▲ of ▼ tot u de gewenste zender bereikt. (3) Om zenders
te zoeken: houd ▲ of ▼ 2 seconden lang ingedrukt en laat vervolgens, wanneer het
zoeken start, de knop los. Bij heldere ontvangst van een radiostation wordt het zoeken
stopgezet. (4) Om een zender te programmeren: de knop Afspelen/Pauzeren
ingedrukt houden. Laat de knop Afspelen/Pauzeren los wanneer “M” en het
programmanummer beginnen knipperen. (5) Tik op ▲ of ▼ om de zender in de
gewenste positie op te slaan. (6) Tik op de knop Afspelen/Pauzeren om de instelling
van het programmanummer te bevestigen.
Opmerking: De FM-antenne werkt het beste wanneer geplaatst onder een hoek van
90 graden, niet onder de hoofdband.
Kiezen tussen 9 kHz (Europa) en 10 kHz (VS) voor AM-ontvangst:
(1) Zet Tough Sounds in UIT-positie. (2) Druk gedurende 2 seconden op de SRCknop. Op het scherm verschijnt 9 kHz. (3) Druk ▲ of ▼ om 10 kHz te selecteren. (4)
Druk nogmaals op de SRC-knop om de instelling op te slaan.
Telefoongesprekken beantwoorden:
Beantwoord een inkomende oproep door op Afspelen/Pauzeren te drukken wanneer
via Bluetooth een smartphone is aangesloten. Tik op Afspelen/Pauzeren om het
lopende gesprek te beëindigen. Tik op de SRC-knop om een binnenkomende oproep
te weigeren.
Opmerking: Als u gekoppeld bent aan een Bluetooth-bron kunt u ook tijdens het
gebruik van de de FM/AM- en de Aux-modi oproepen ontvangen en beantwoorden.
De tijd instellen:
(1) Draai de volume-/aan- en uitknop linksom om de Tough Sounds uit te zetten. (2)
Tik eerst op de knop Afspelen/Pauzeren om de uren in te stellen en vervolgens op
Afspelen/Pauzeren om de minuten in te stellen. (3) Wanneer de geselecteerde tijd
begint te knipperen, tikt u op ▲ of ▼ om de tijd in te stellen, en vervolgens op
Afspelen/Pauzeren om de instellingen te bevestigen. Als u uw tijdseenheid wilt
wijzigen om militaire tijd (24-uursnotatie) weer te geven, druk op de Tune Up of Down
toets wanneer de stroom uitgeschakeld is. Als AM of PM wordt weergegeven, dan
bent u in 12-uursnotatie. Als AM of PM niet weergegeven wordt, dan bent u in 24uursnotatie.
Dépannage :
Utilisateurs Windows 7 et Windows 8 : Lorsque le Tough Sounds est connecté à votre
ordinateur par connexion USB, sélectionnez Headphones – Tough Sounds Stereo
comme appareil de lecture afin d’obtenir une qualité audio optimale.
Problemen oplossen:
Gebruikers van Windows 7 en Windows 8:
Wanneer Tough Sounds verbonden is met uw pc via USB, selecteer dan Koptelefoon
- Tough Sounds Stereo als het afspeelapparaat voor een optimale geluidskwaliteit.
Pour consulter les Consignes de sécurité et informations concernant la garantie,
Bezoek voor de Veiligheids- en Garantiehandleiding ionaudio.com/warranty.
veuillez visiter ionaudio.com/warranty.
Notice Concerning FCC Regulations: You are cautioned that changes or modifications not
expressly approved by the part responsible for compliance could void the user's authority to
operate the equipment. This equipment has been tested and found to comply with the limits for a
Class B digital device, pursuant to part 15 of the FCC rules. These limits are designed to provide
reasonable protection against harmful interference in a residential installation. This equipment
generates uses and can radiate radio frequency energy and, if not installed and used in
accordance with the instructions, may cause harmful interference to radio communications.
However, there is no guarantee that interference will not occur in a particular installation. If this
equipment does cause harmful interference to radio or television reception, which can be
determined by turning the equipment off and on, the user is encouraged to try to correct the
interference by one or more of the following measures: (a) reorient or relocate the receiving
antenna; (b) move this unit; (c) increase the separation between the equipment and receiver; (d)
connect the equipment into an outlet on a circuit different from that to which the receiver is
connected; (e) be sure that all cables are properly shielded, using a choke or ferrite where
appropriate; (f) consult the dealer or an experienced radio/television technician for help.
This device complies with part 15 of the FCC rules. Operation is subject to the
following two conditions: (1) this device may not cause harmful interference, and
(2) this device must accept any interference received, including interference that
may cause undesired operation.
FCC RF Radiation Exposure Statement: This equipment complies with FCC radiation exposure
limits set forth for an uncontrolled environment. End users must follow the specific operating
instructions for satisfying RF exposure compliance. This transmitter must not be co-located or
operating in conjunction with any other antenna or transmitter.
ESD / EFT Warning: This unit may contain a microcomputer for signal processing
and control functions. In very rare situations, severe interference, noise from an
external source, or static electricity may cause it to lock up. In the unlikely event that
this should happen, turn off the unit, wait at least five seconds, and then turn it back
on again.
In an environment with radio frequency interference, the unit may malfunction and resume normal
operation after removal of the interference. For best audio quality, avoid using this device in a
high RF-radiated environment. This unit does not exceed the Class B limits for radio noise
emission from digital apparatus set out in the radio interference regulations of the Canadian
Department of Communications.
The Bluetooth word mark and logo are owned by the Bluetooth SIG, Inc. and any use of such
marks by ION Audio is under license.
Allgemeinhinweis zur Konformitätserklärung: Hiermit erklären wir, daß sich
das Gerät Tough Sounds in Übereinstimmung mit den grundlegenden
Anforderungen der europäischen Richtlinie 1999/5/EG befindet. Die vollständige
EG Konformitätserklärung kann unter folgender Adresse angefordert werden:
inMusic GmbH
Halskestrasse 16-18
D – 47877 Willich
GERMANY